|
It always seemed weird to me to give my dad something golf-related (he doesn't play), or sports-related (he has no interest) or even tie-related (he wore a tie to work, but shed it happily as soon as he returned home) for Father's Day. Here's an idea for something that's actually useful and appropriate for pretty much everyone: a small, collapsable, travel-ready box he can use to hold keys, pocket change, iPhone chargers, etc. It's fairly easy to make, and there's no sewing — not even a little!
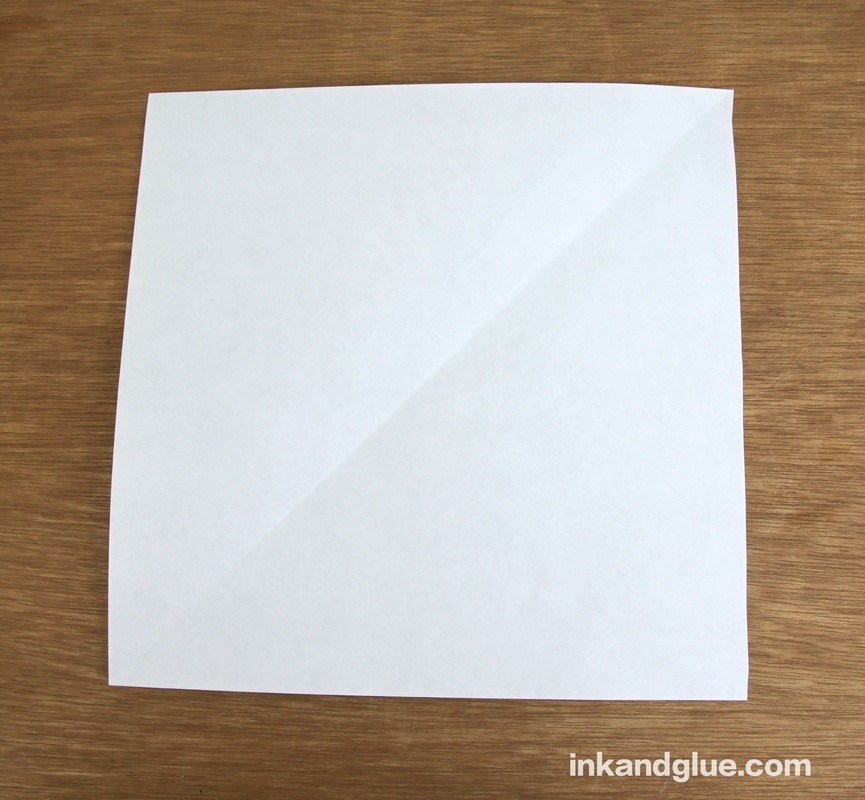
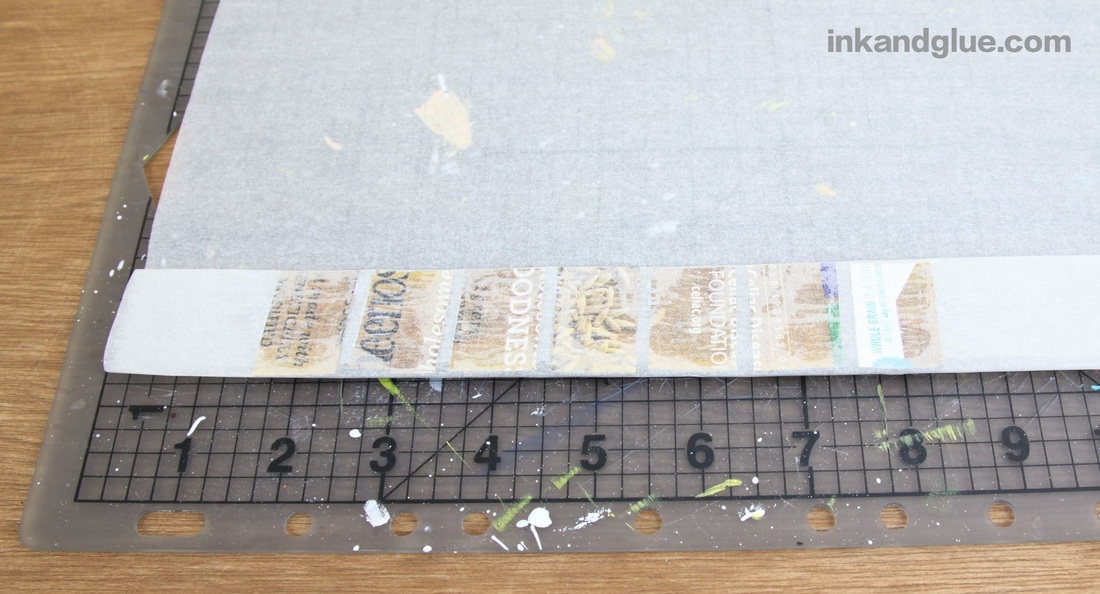
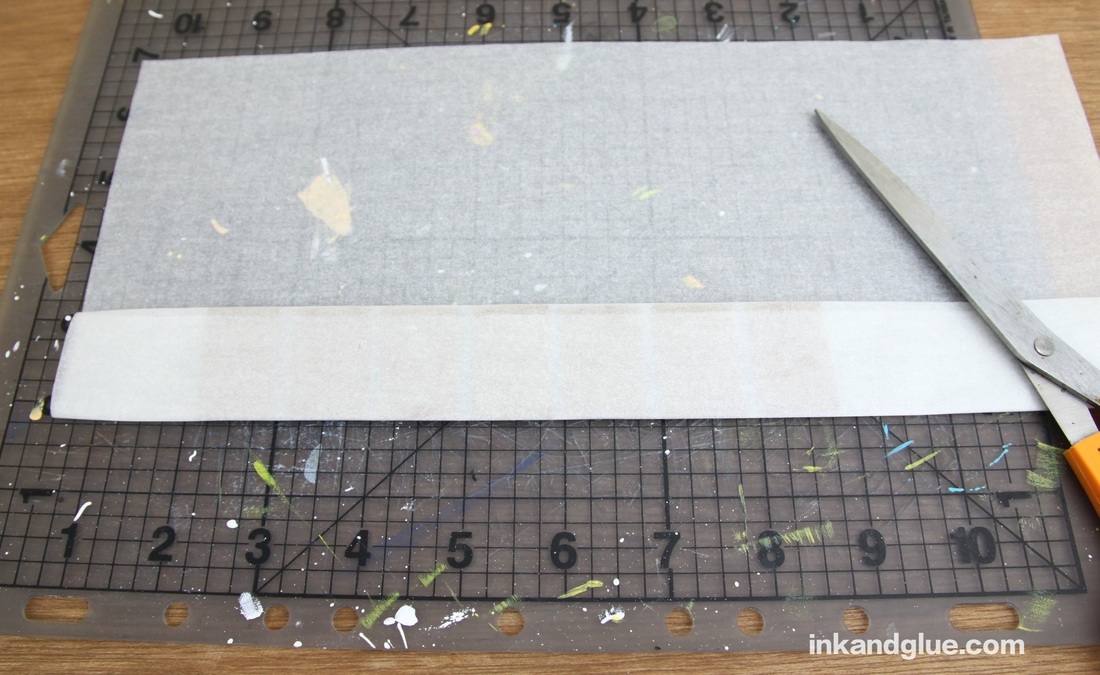
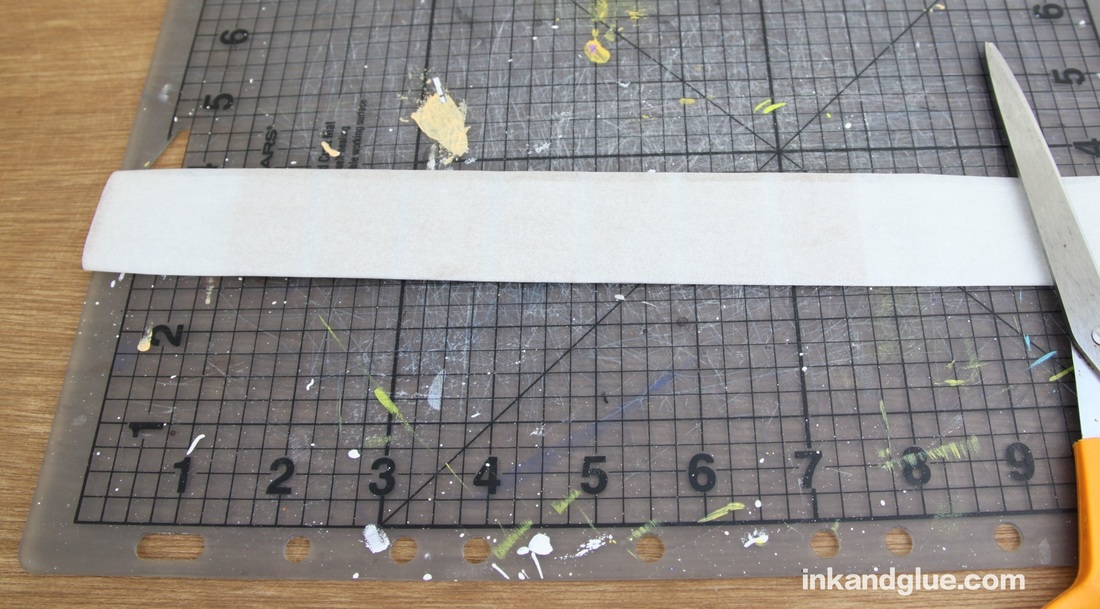
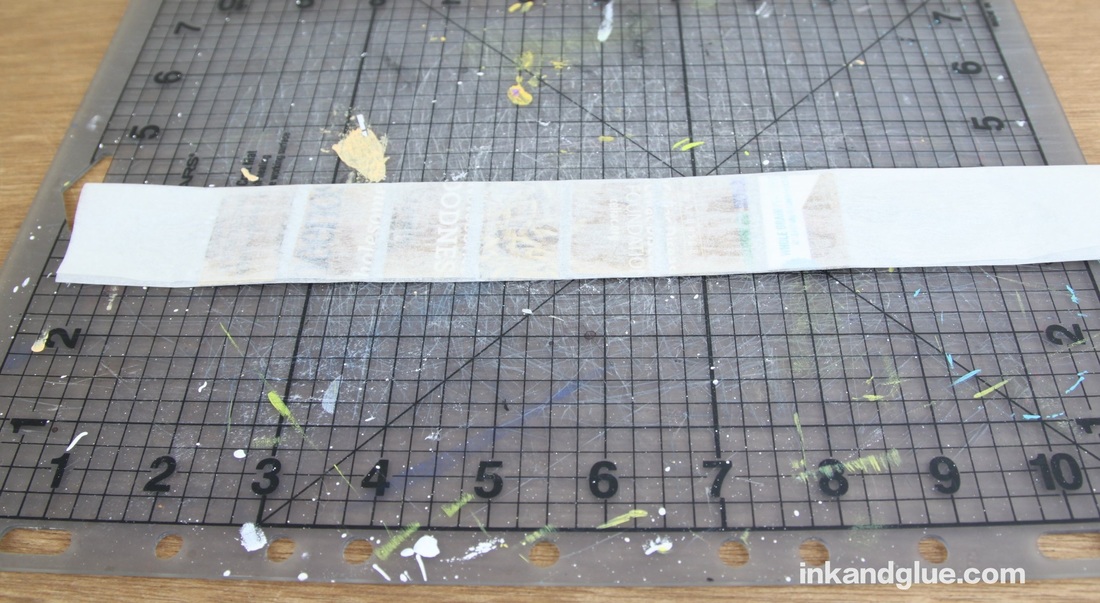
To make one, you'll want to make a template first. Besides being a handy pattern for cutting out the shape, it'll help you see how it all comes together. Do the "cut a square" trick on a regular-sized sheet of copy paper. You know, where you fold one corner to the side, aligning the edges? Then you cut off the skinny rectangle at the end? If I am the first person to teach you this trick, welcome to your new, much easier life.
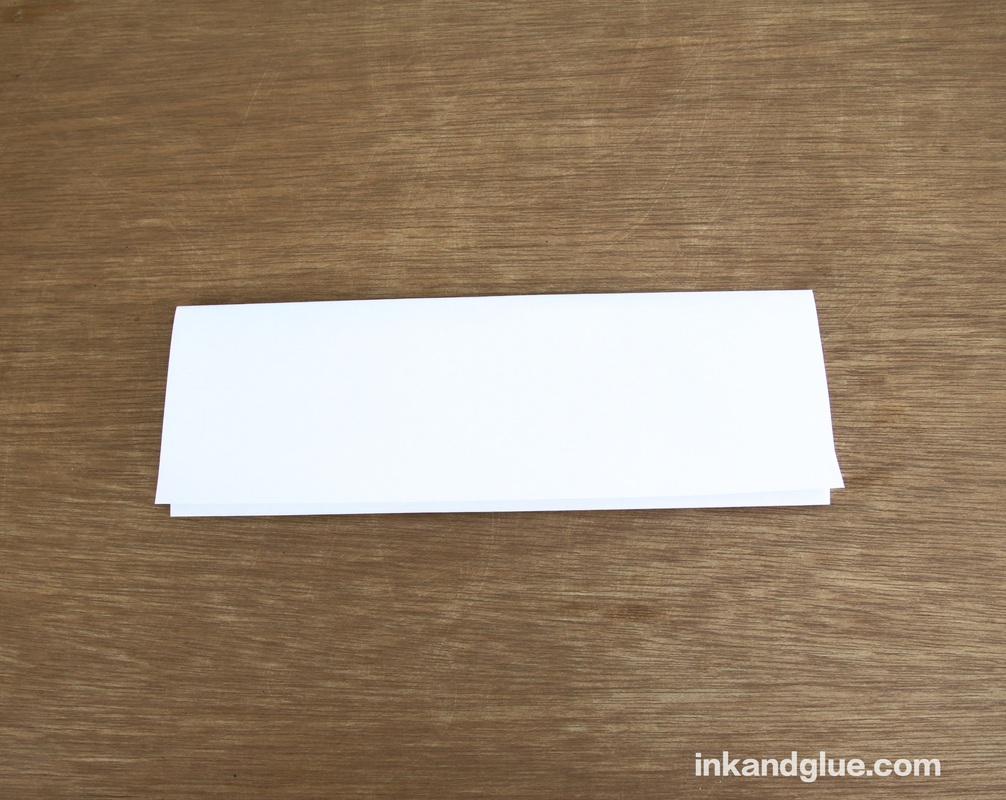
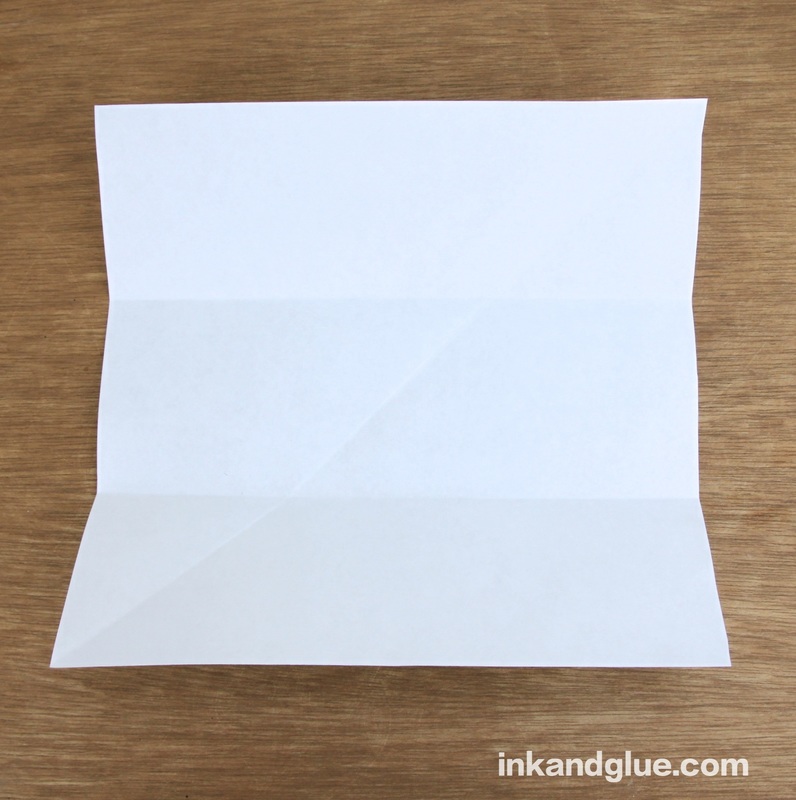
Now fold the square into thirds, like you would a fancy letter. Unfold it.
Turn the square 90 degrees, fold it into thirds again, and unfold. Voila, you have marked a grid of nine equally-sized squares on your paper! 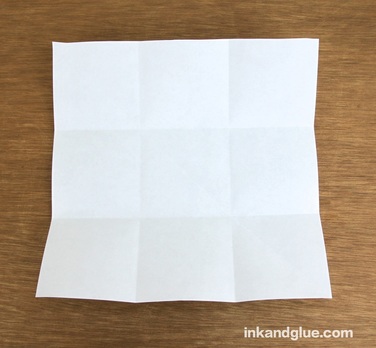
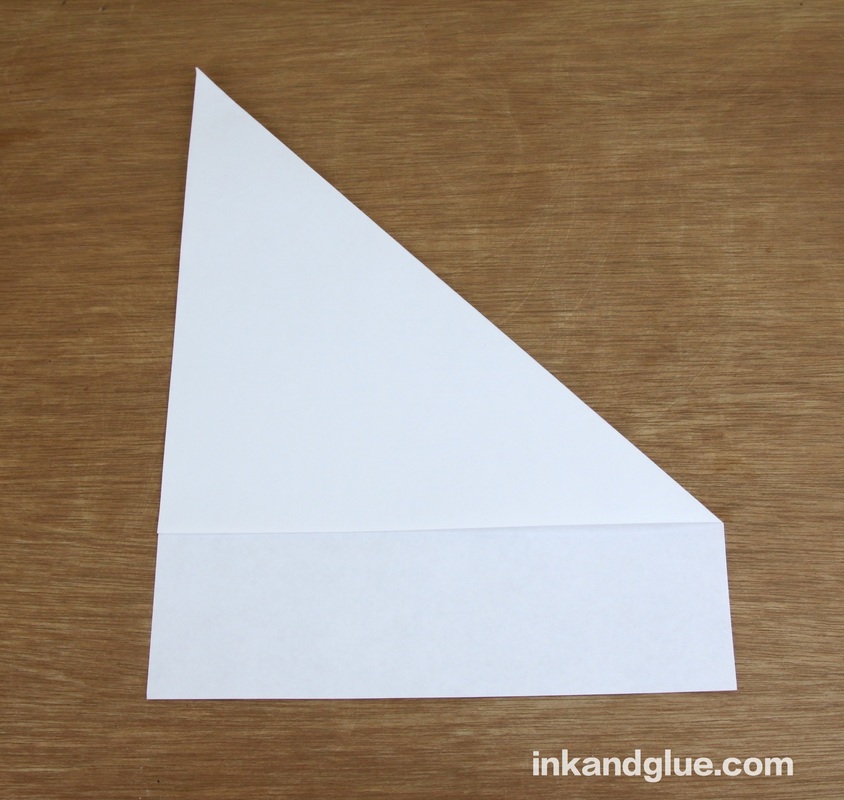
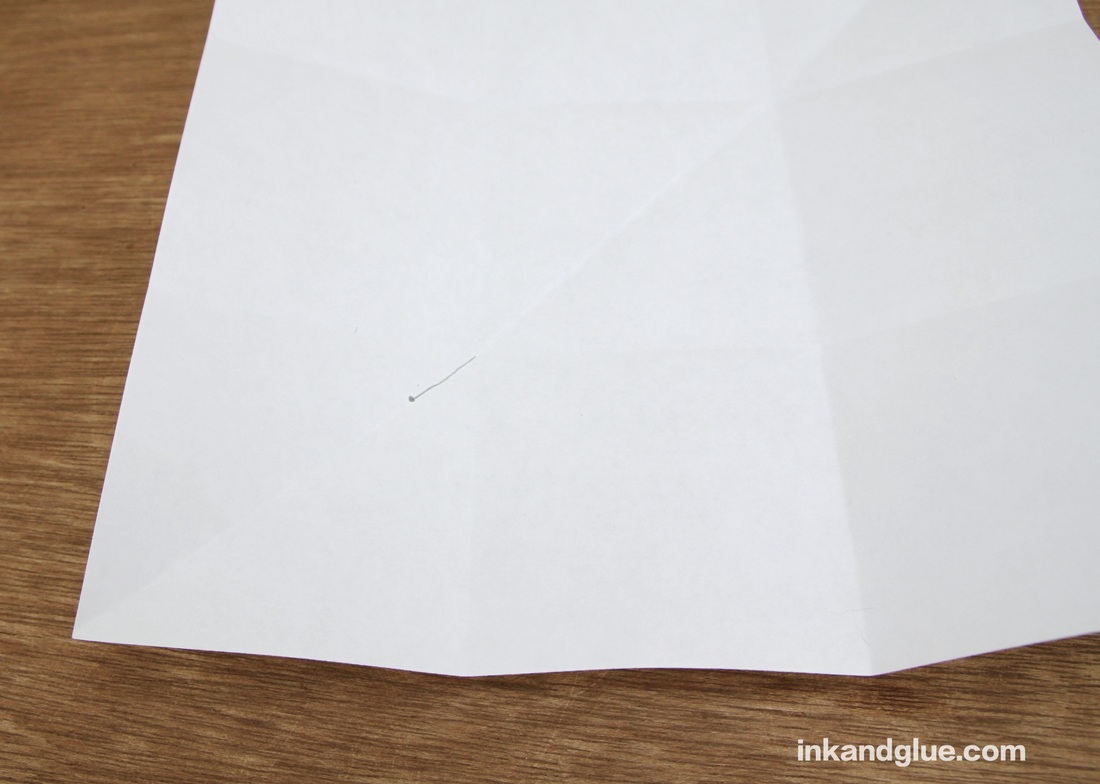
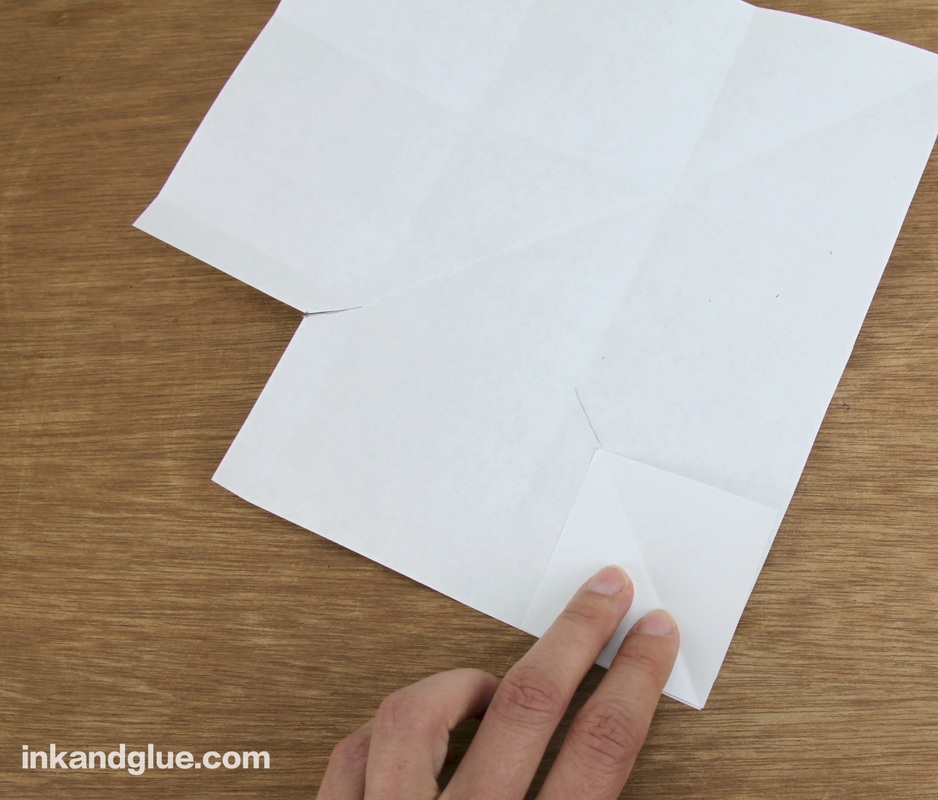
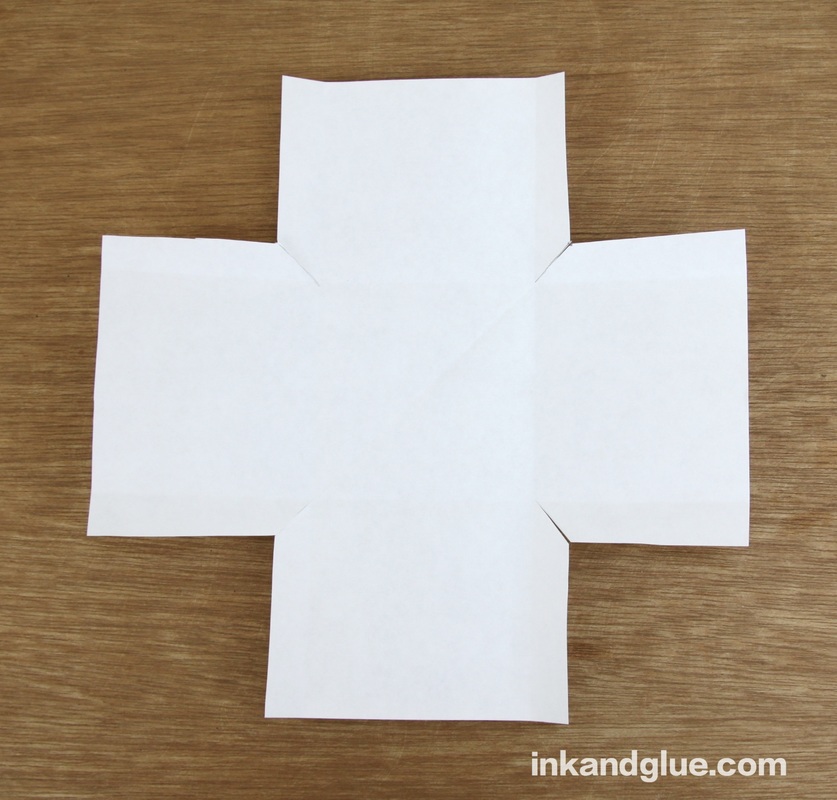
Use that line as the new corner for the square you're gonna cut out. If you want to get precise, use a ruler to draw lines parallel to the square folds (ignore the diagonal fold), from the dot at the end of the line you just drew out to the edge of the paper. Cut along the line you drew, too. 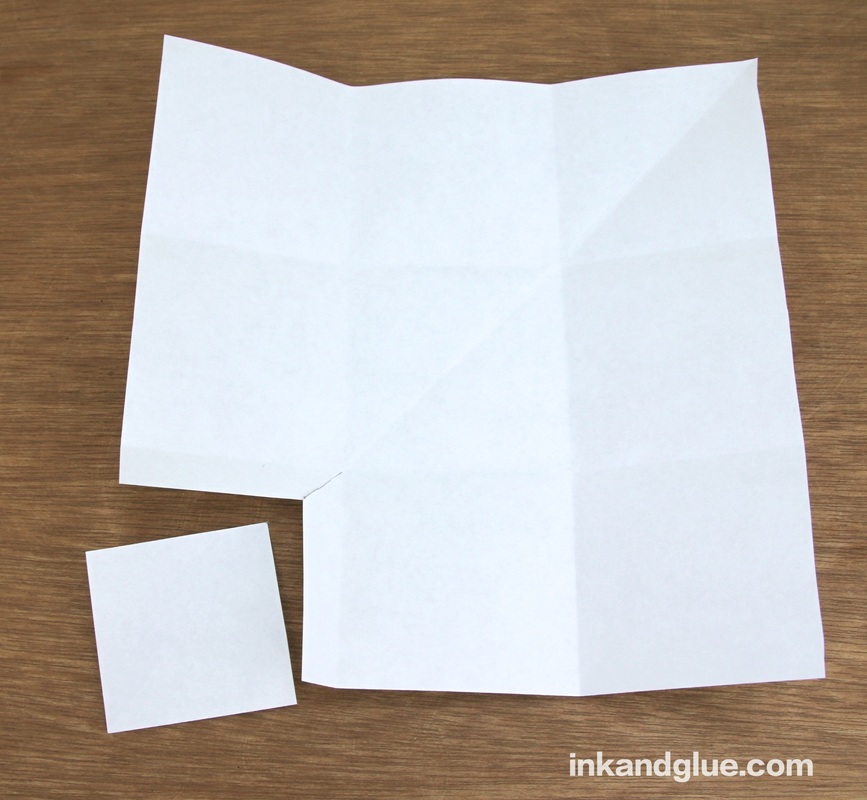 You can now use the square you just cut out as a guide or template to cut out the squares from the other three corners. Don't forget to make the diagonal snip to each inner corner.
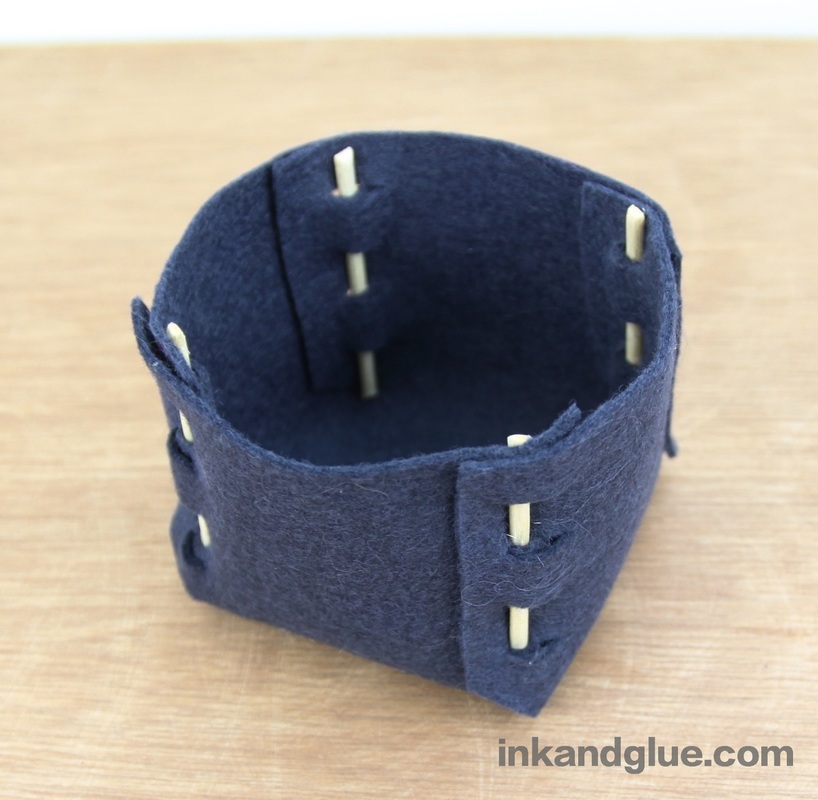
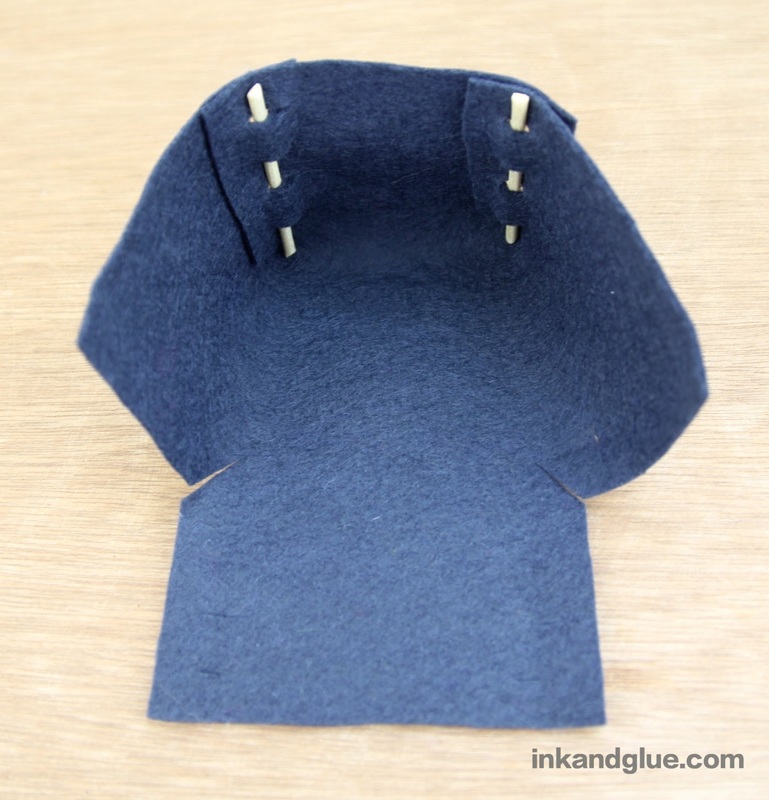
That's your template-slash-pattern! Lay it on top of a nice piece of felt; I strongly recommend a wool-blend felt, which you can get at any major fabric store, nowadays. It's possible even craft stores have nicer felt for sale, but I admit that I haven't looked recently. 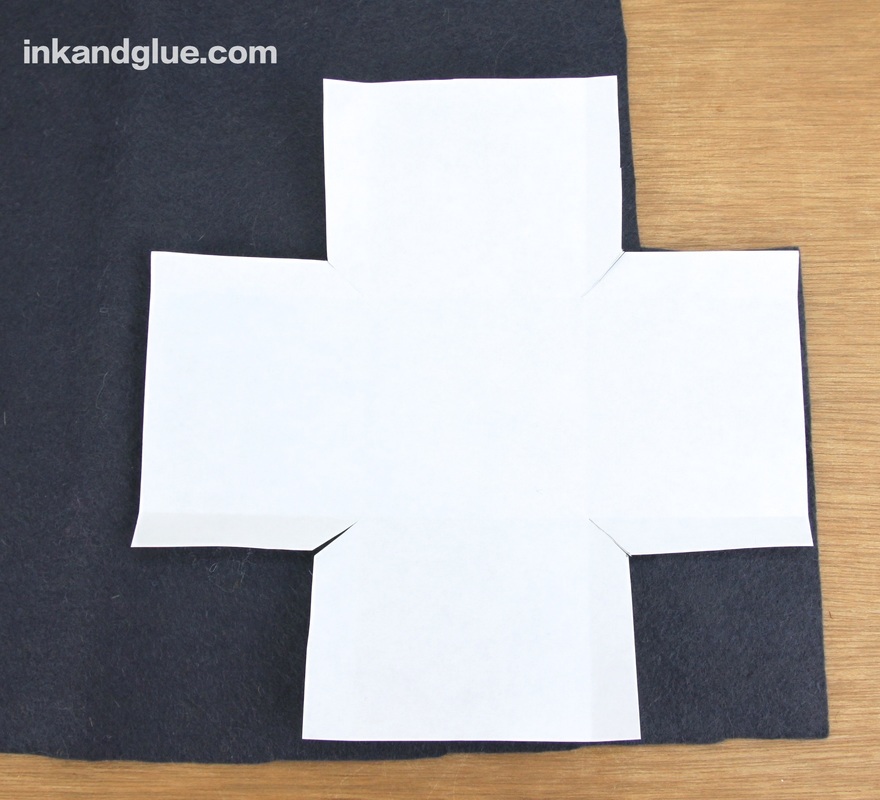 Pin the paper to the felt, and cut out the shape, including the corner slits. 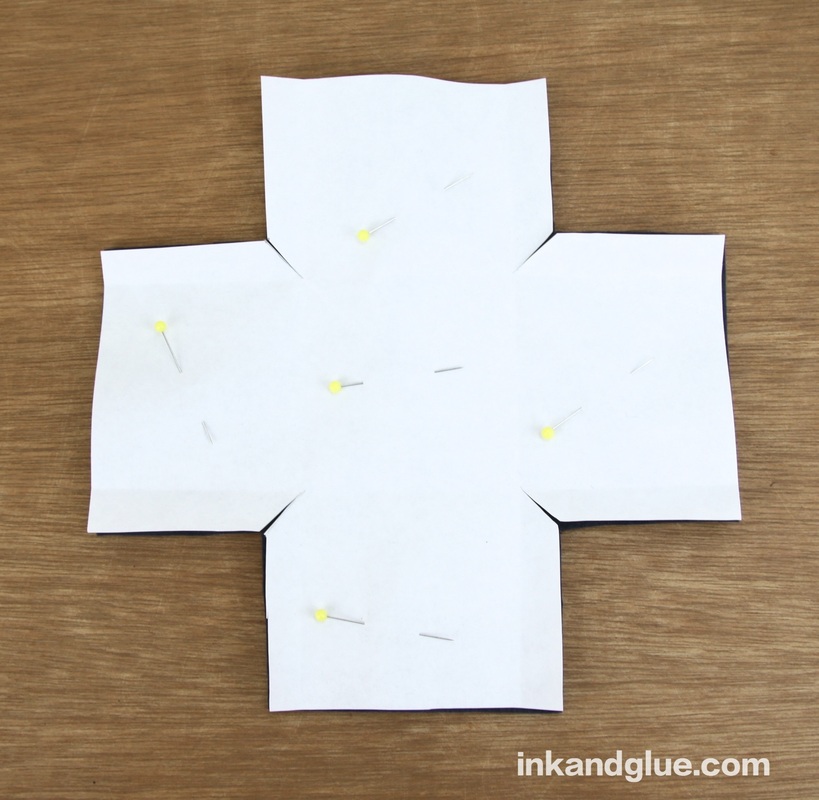 OK, this is the only part that's a bit tricky to explain: You're going to be making a guide for cutting slits along each edge of the four walls of the felt box you're making. On the paper pattern, fold one of the tabs you cut, and draw four (or so) lines along the fold. See here: 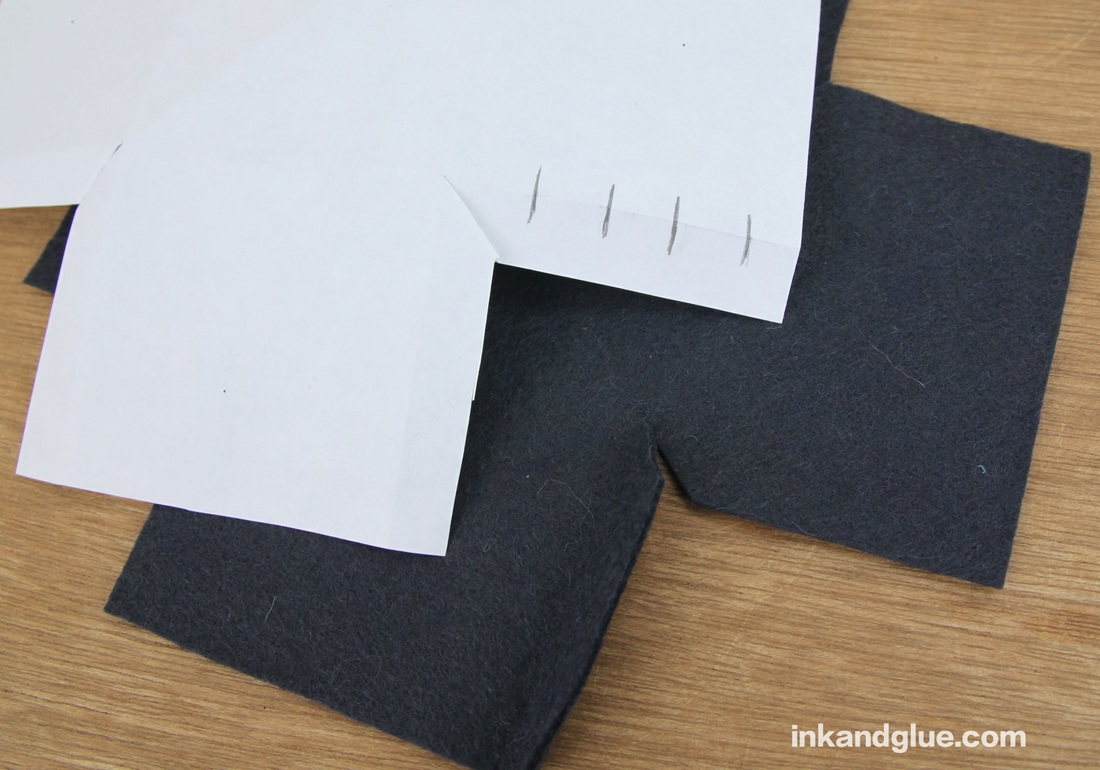 Fold the paper tab back, and fold its felt counterpart. Align the paper on top of the felt, and hold them with one hand while you snip slits in the folded felt. Don't cut all the way through the tab! Just make a half- or third-inch long slit. Use fabric scissors and this'll be a piece of cake. 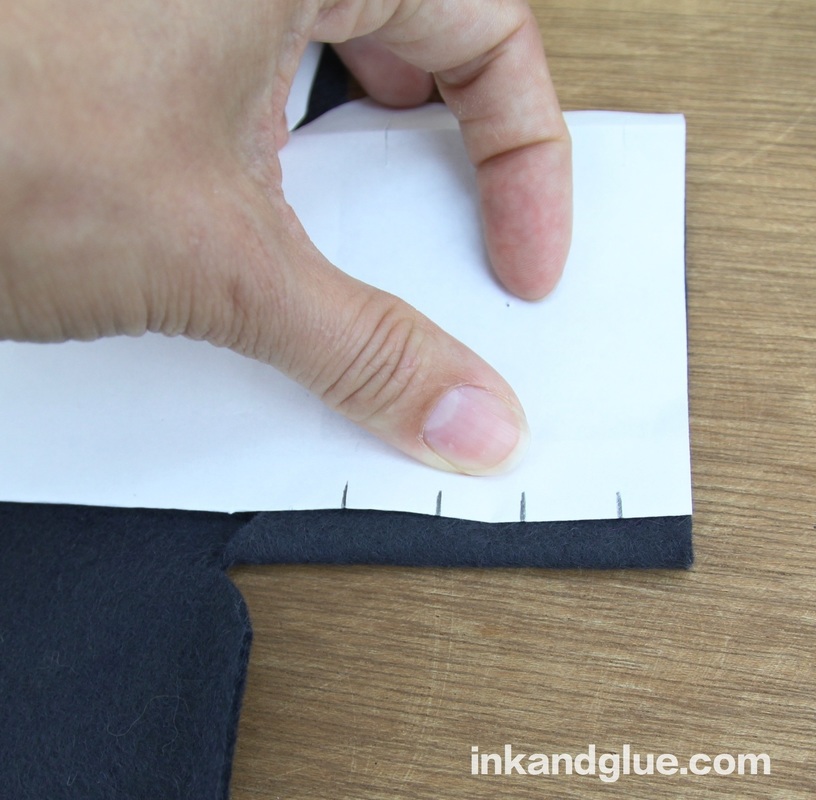 Here's what it will look like with all of the corner edges be-slitted. 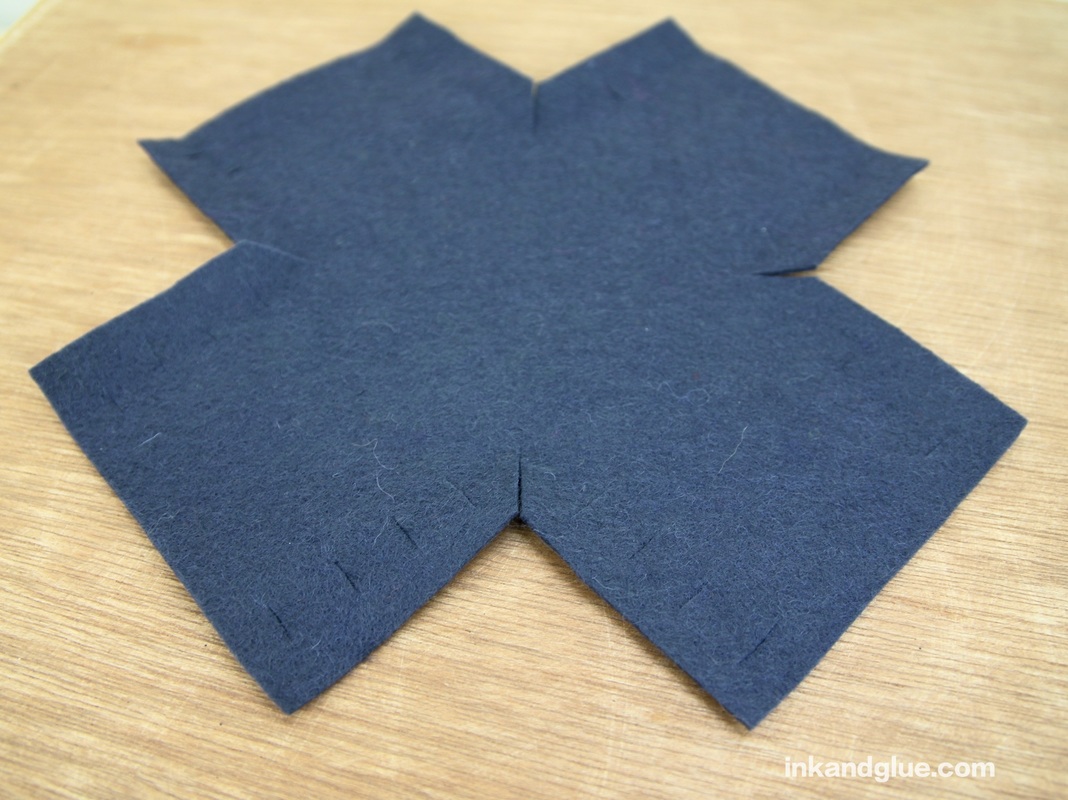 For the posts that make it all come together, I used a skinny dowel — a bamboo skewer will work ok, too, but watch out for splintering. I cut mine into four equal lengths (each a little over two and a half inches) with a wire cutter. 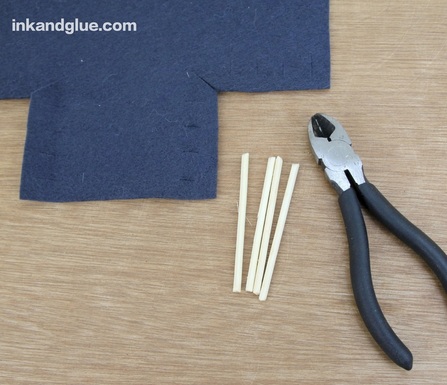 Fold up and overlap the neighboring edges of one corner, aligning the slits. Weave a post through the slits in both felt layers. I wove mine so the bottom of the post is inside, because I think it looks neater. 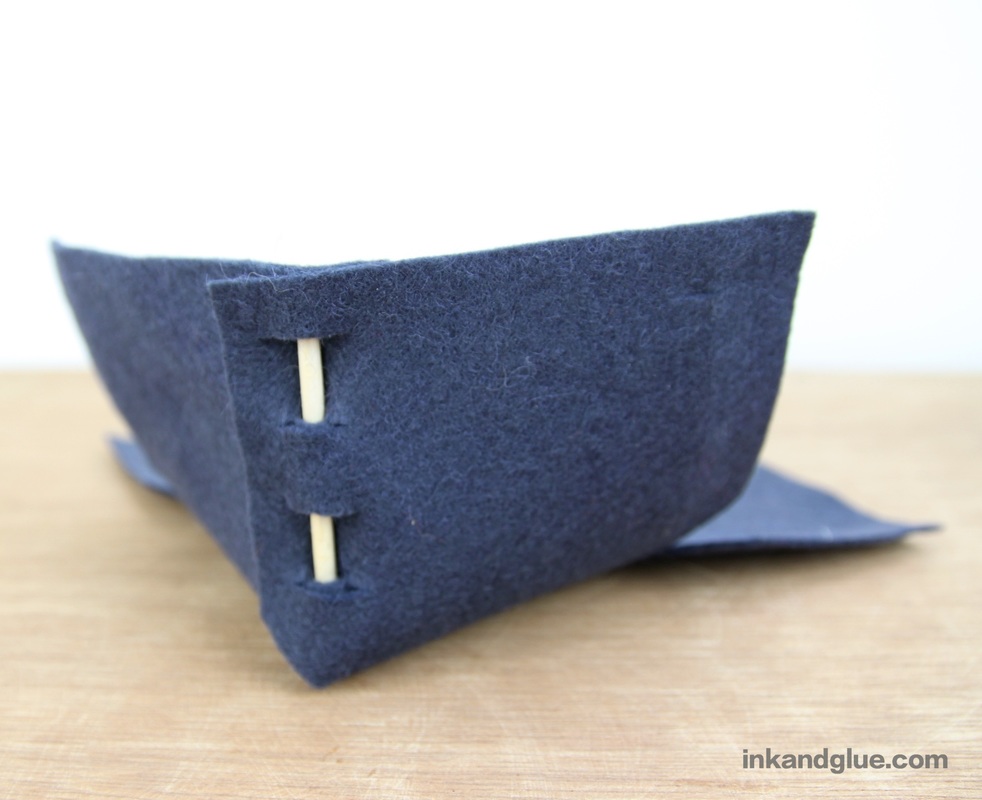 Here's a top view:  Do the same with a second corner and post. Here's an exterior and interior view:
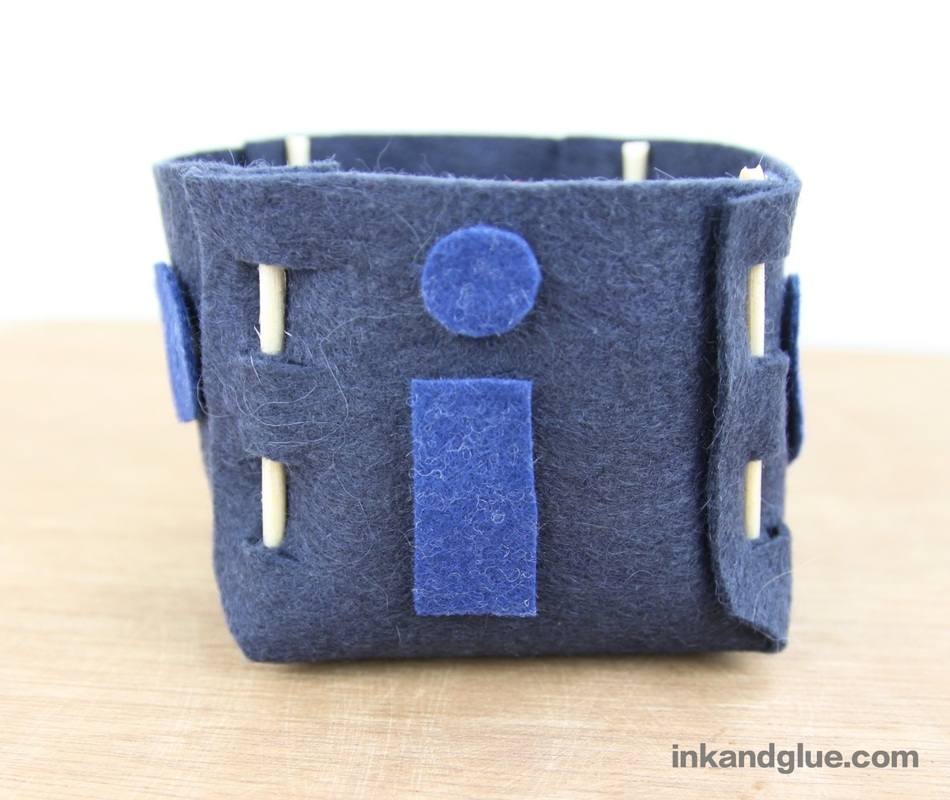
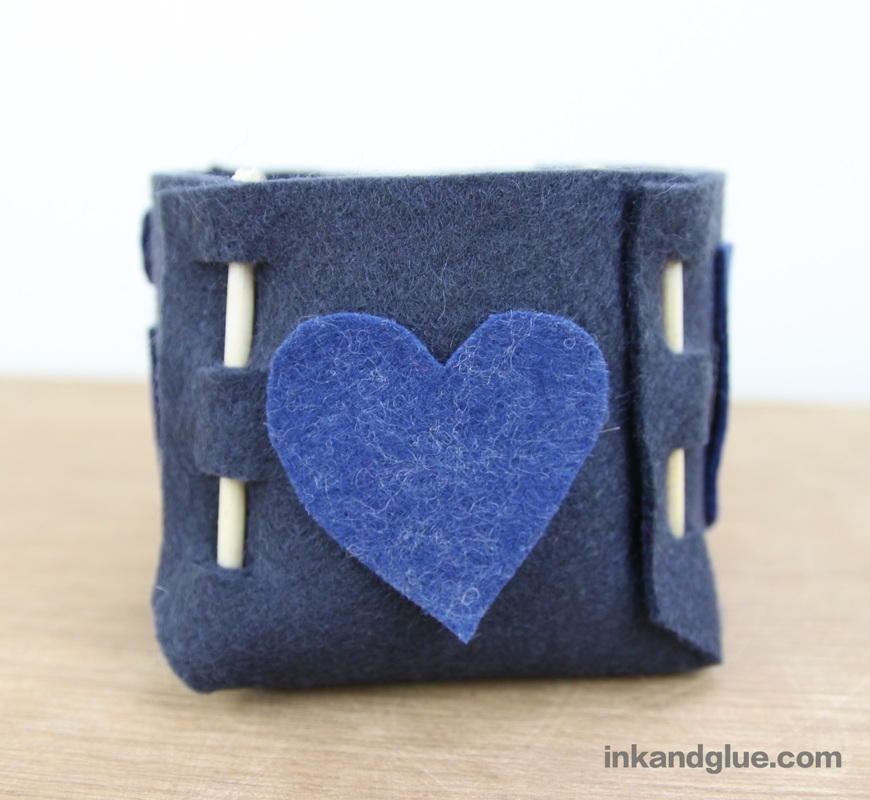
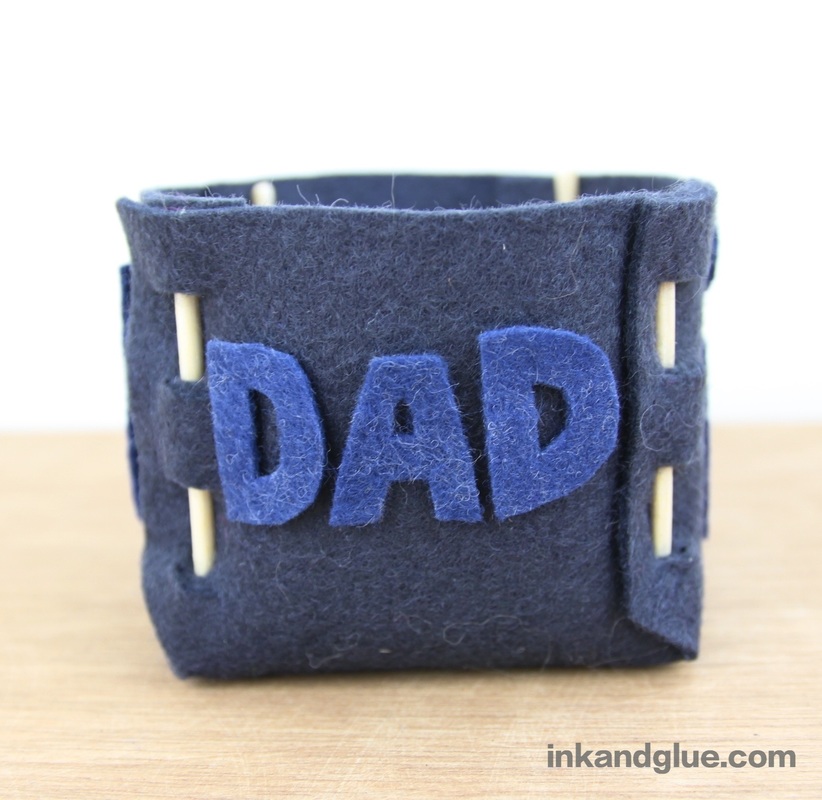
And naturally, do the other two corners as well. And you're done! 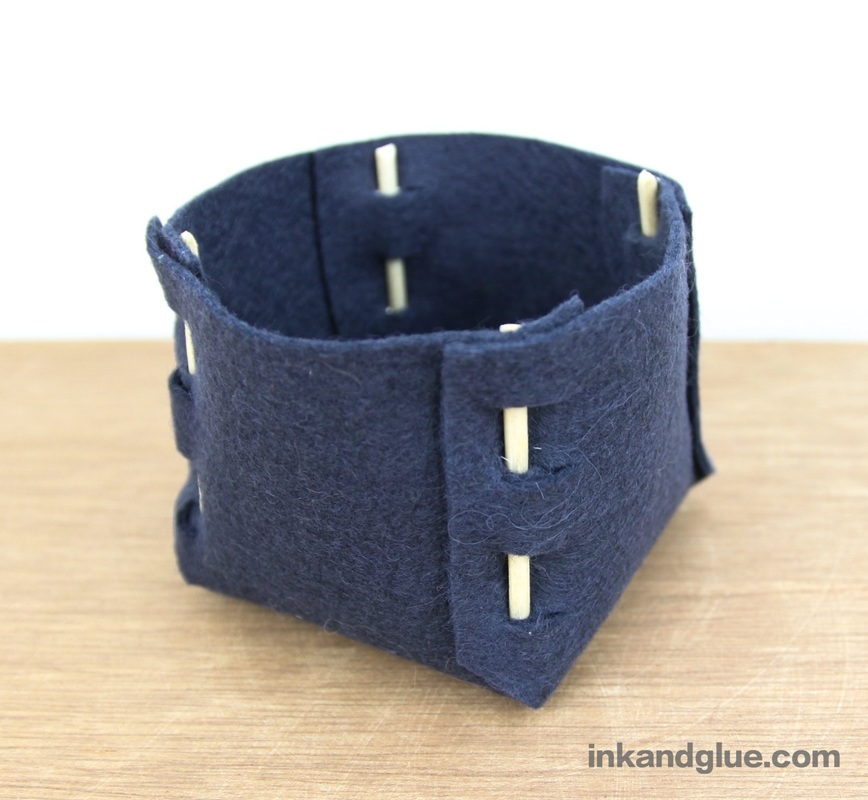 Add extra cuteness by embellishing the sides, either with dimensional fabric paint (the kind in those squeezy tubes), or cut out felt letters and shapes and glue them to the sides. Here's my take:
This is, of course, fully collapsable: Just slide out the posts, and the box goes flat. Sweet!
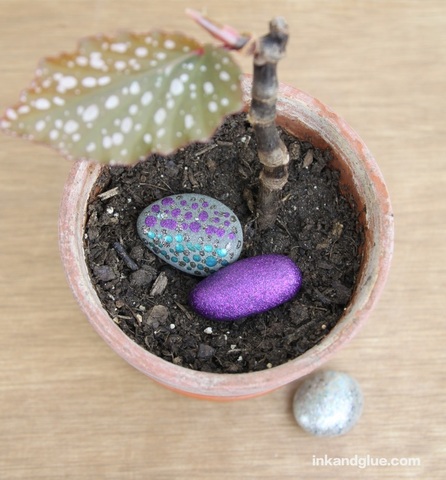
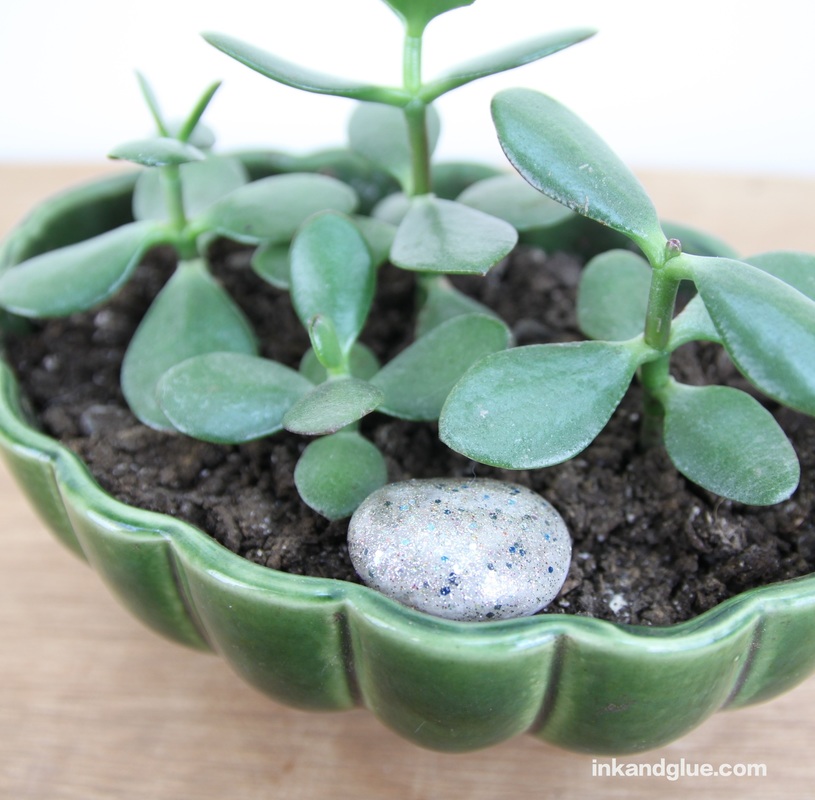
xo OK, these rocks may not magic, per se, but they're certainly fanciful and sparkly, like something from the fairy-folk. Nestle them in house plants or in a tiny garden outside, or treat them like talismans, or faux gemstone.
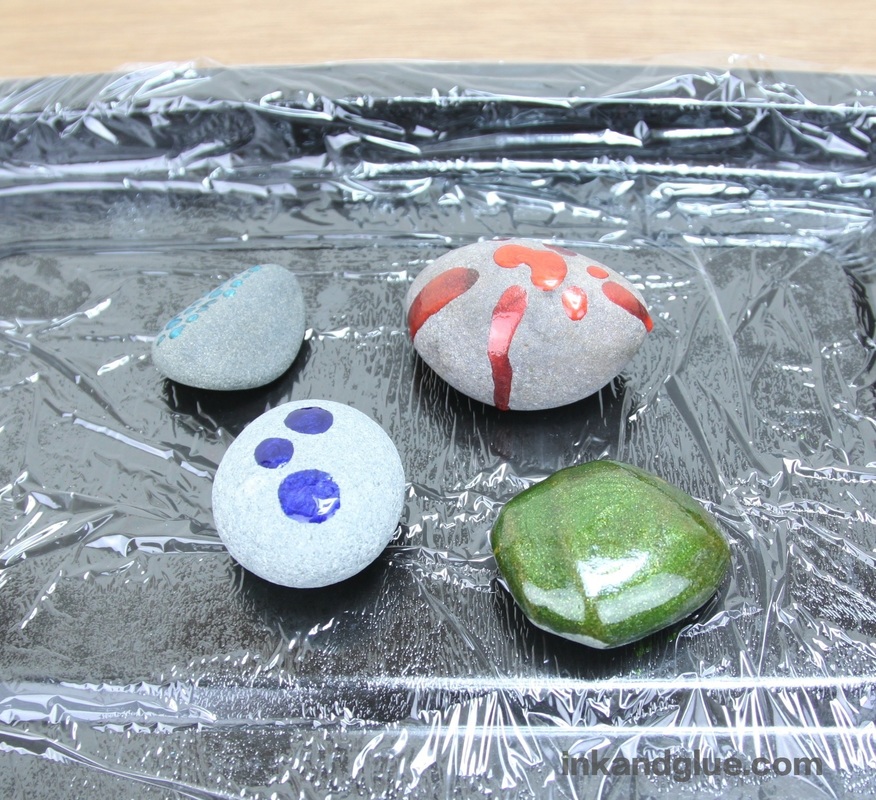
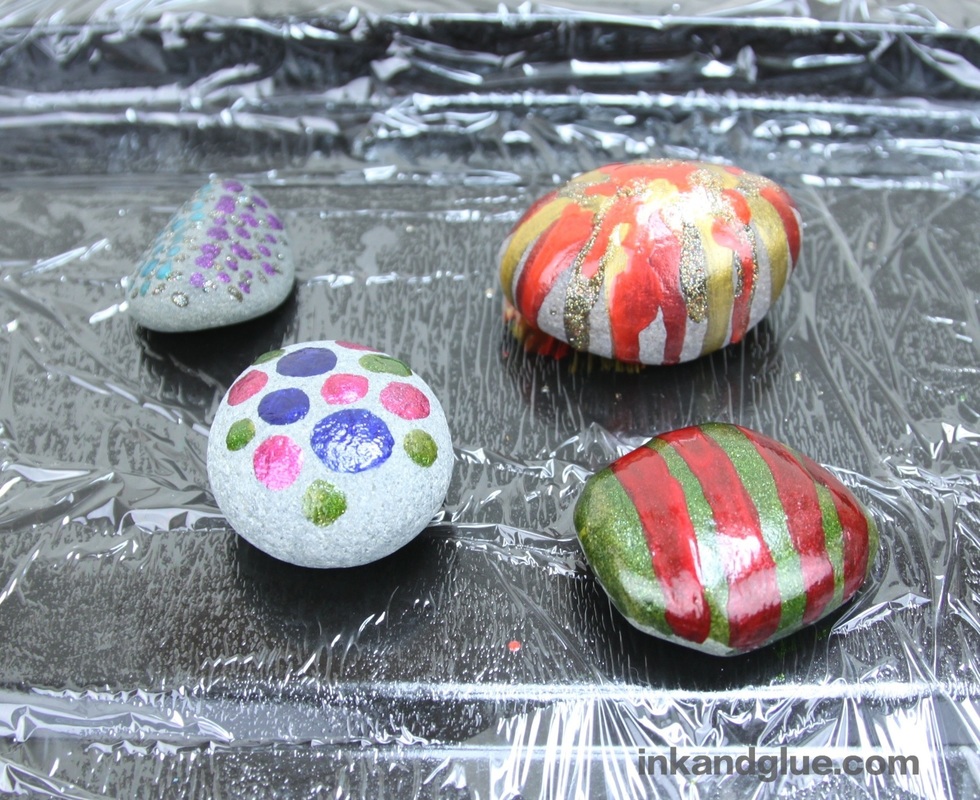
They are easy as pie to make, and basically free, if you or your child is already a nail polish hoarder like I am. If not, you'll want to hit the dollar store for a few sparkly, glittery shades. You will also definitely want to do this project OUTSIDE. This is a fair-weather project, due to the nail polish fumes. Collect a few rocks, and wash them if they need it. Place them on a plate or a pan that's been covered with a sheet of plastic wrap. 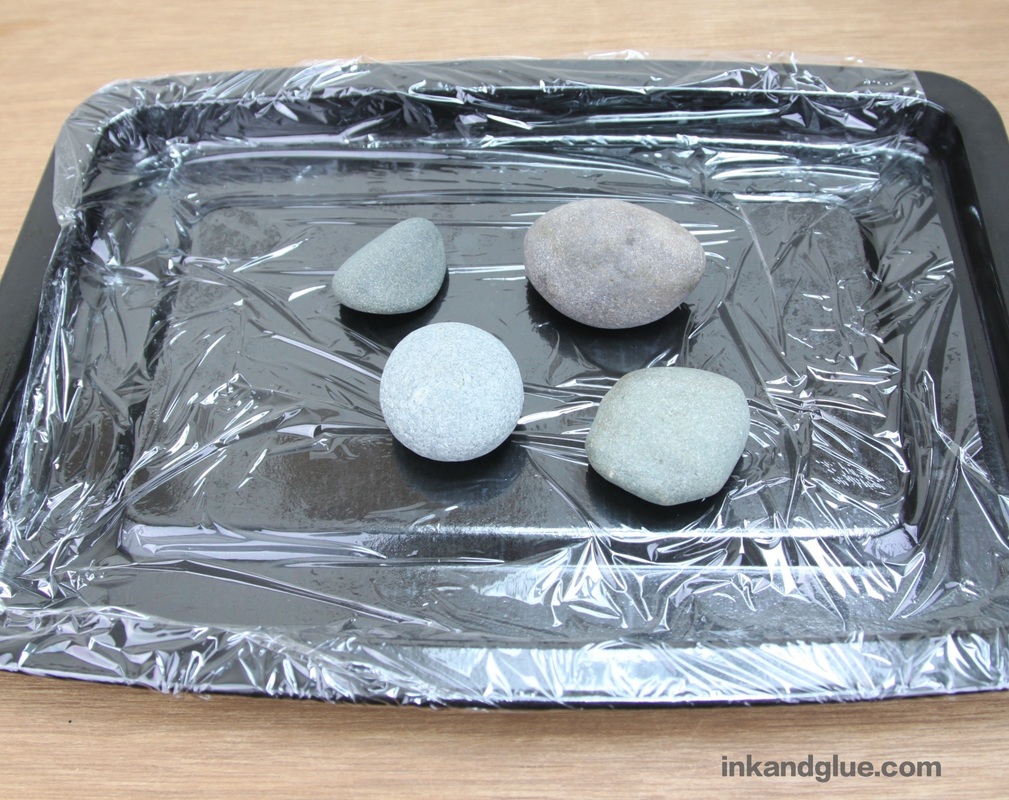 Now, paint the rocks with nail polish! I tried a few different techniques, with varying results. I'll take you through my steps, layer/color by layer/color. Below, I dripped the orange polish, dabbed big blue dots and tiny aqua dots, and covered one with a solid coat of green.
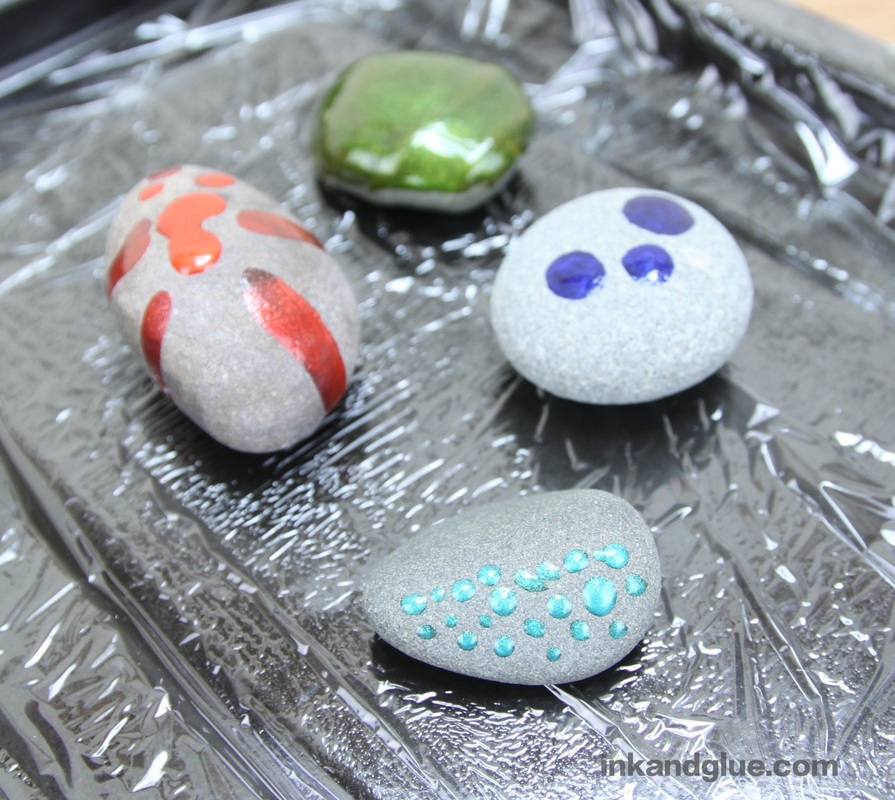
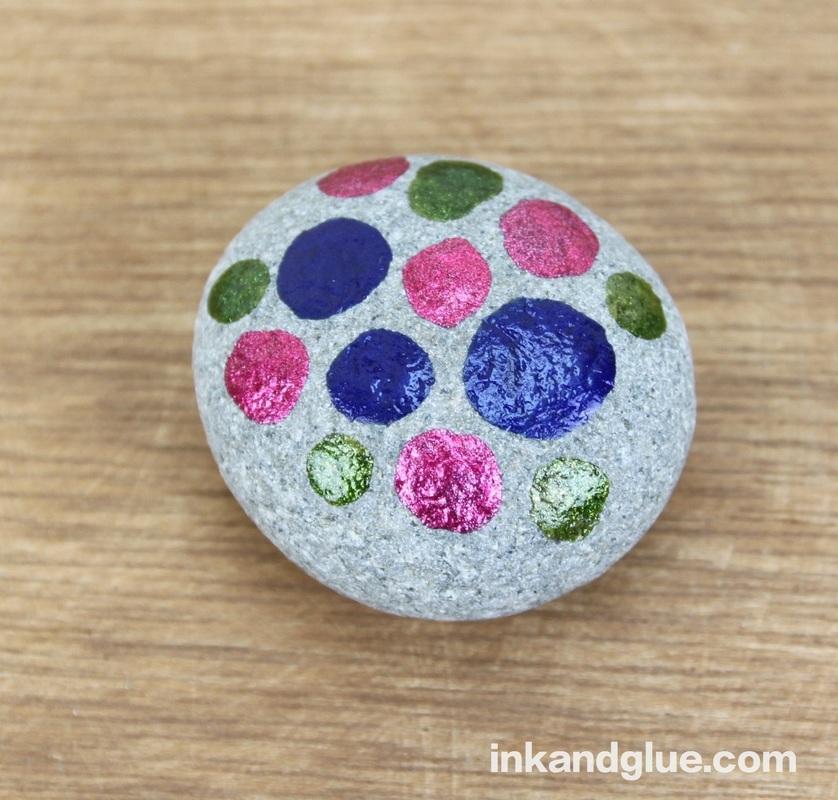
The polish dries pretty quickly, so you can continue with the second color just a minute or two after the first. I added yellow-gold drips to the orange, big fuscia dots to the blue, tiny purple dots to the aqua, and red stripes to the green. I regretted the red stripes almost instantly. 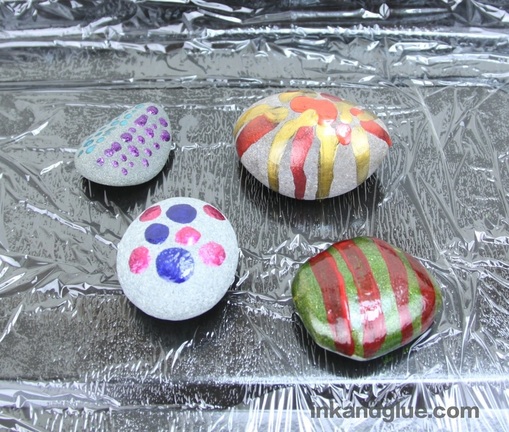 I added a third color to each rock, and did a second coat to the red stripes, which did not improve matters. For the drippy one, I added a foil-glitter gold, and added more drips of the previous two colors for better coverage.
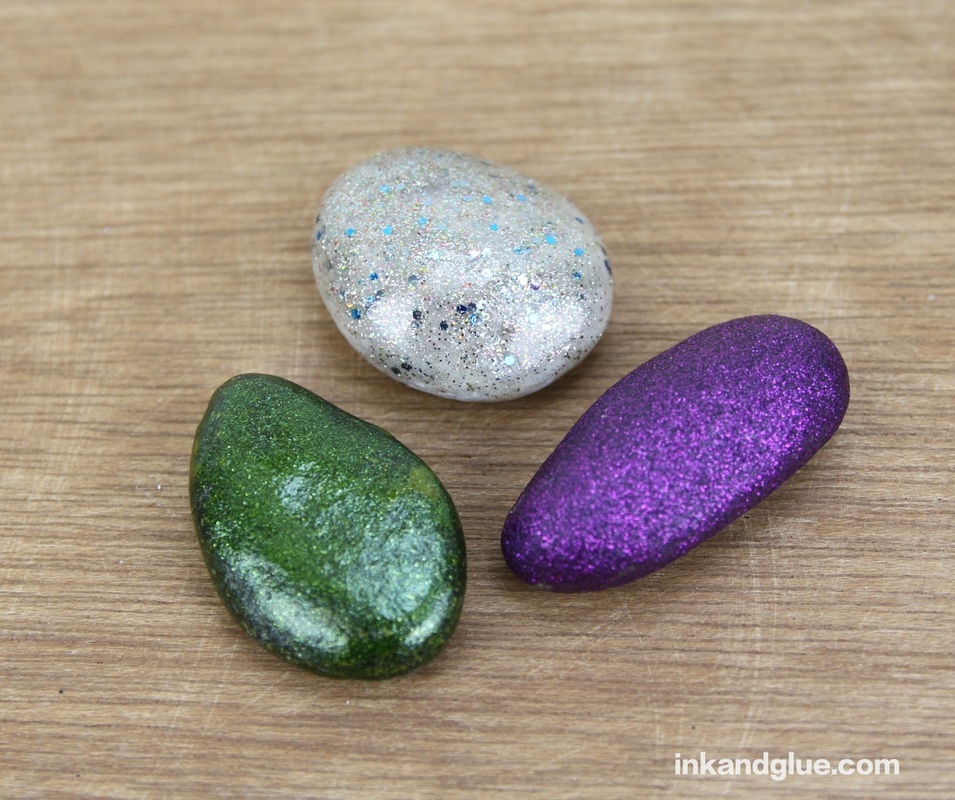
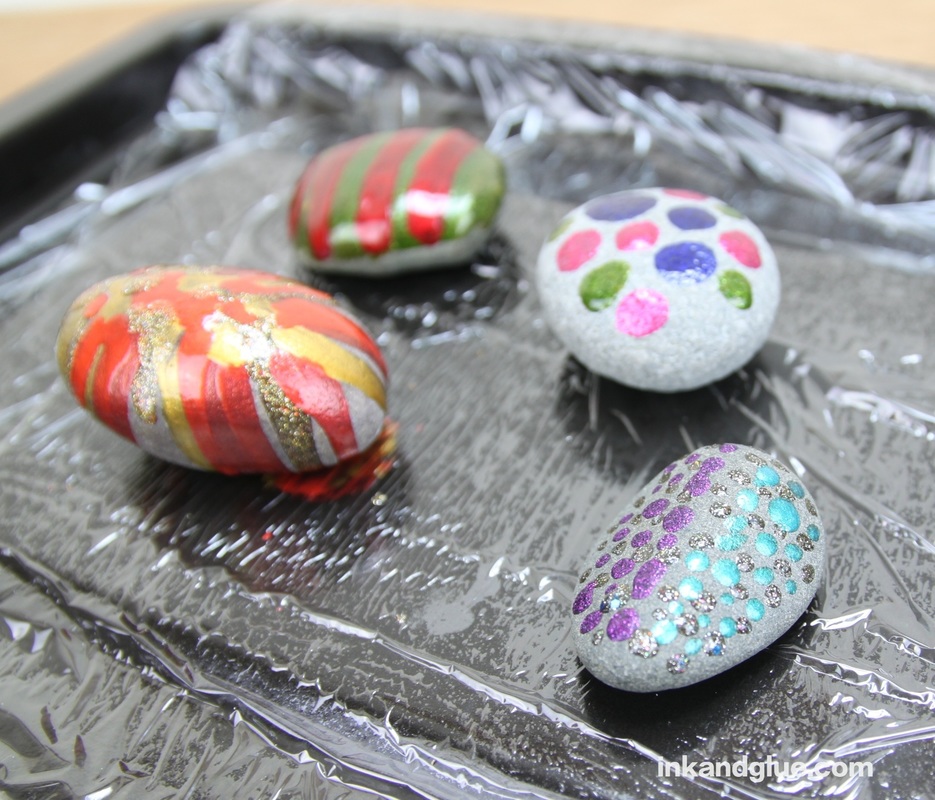
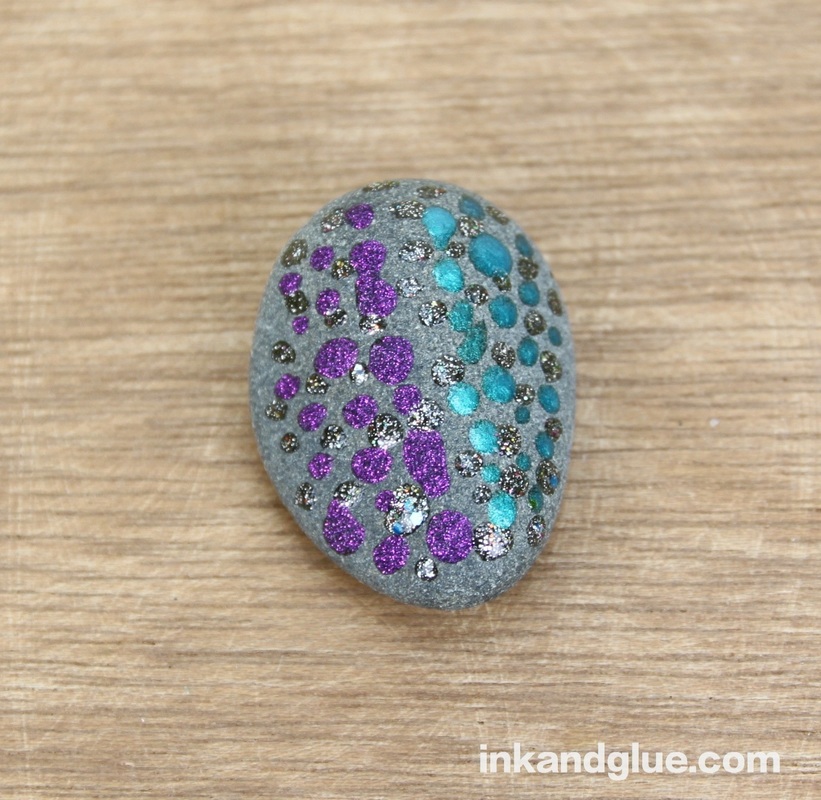
And, besides the green and red one, these are pretty neat. I was missing the perfection of the green one unmarred by stripes. So, I picked out three more rocks and covered each with a single color. Look at how luscious they are! 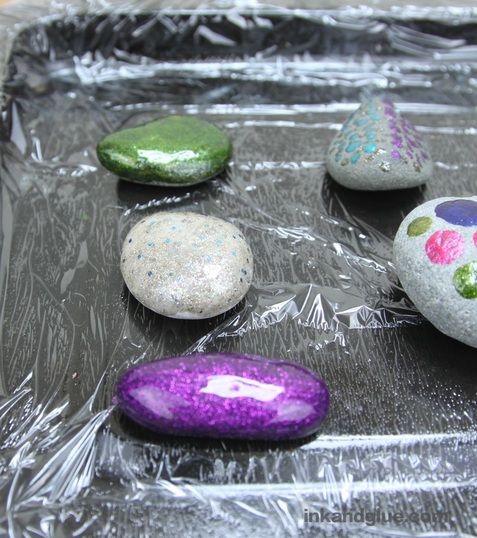 Let 'em dry for an hour or two before attempting to handle them. The drippy one had some polish pooled at the bottom that was still wet, so I flipped it over and let it dry a bit longer. The rest were ready to admire. The purple I have dries matte, which gives it a cool effect.
 xo!
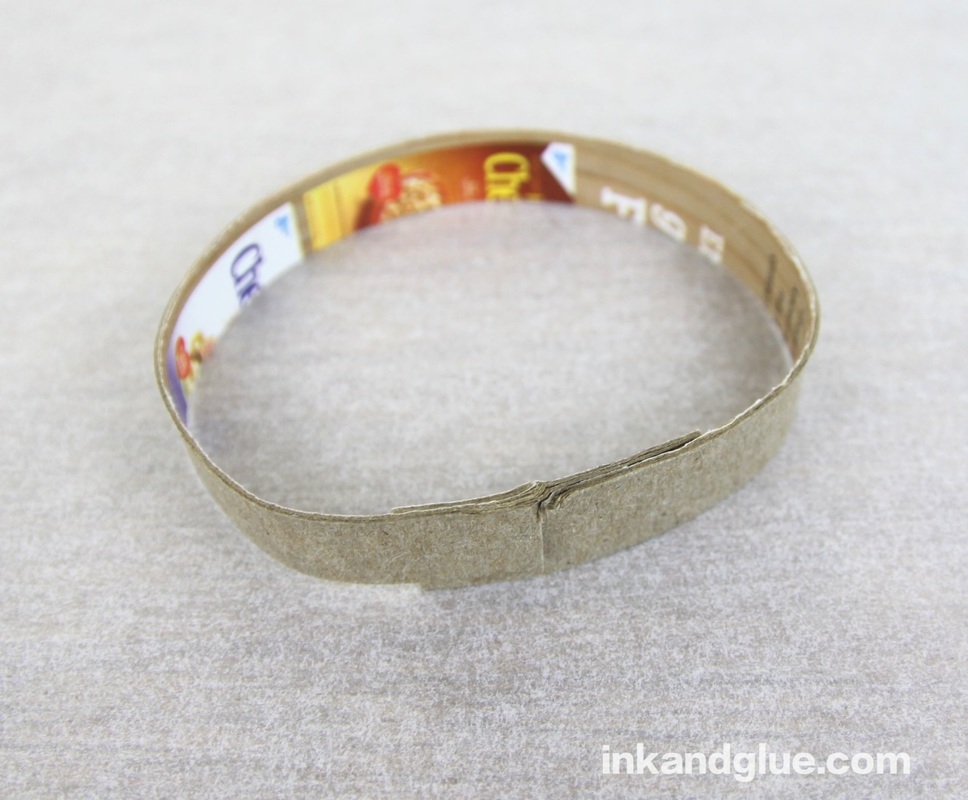
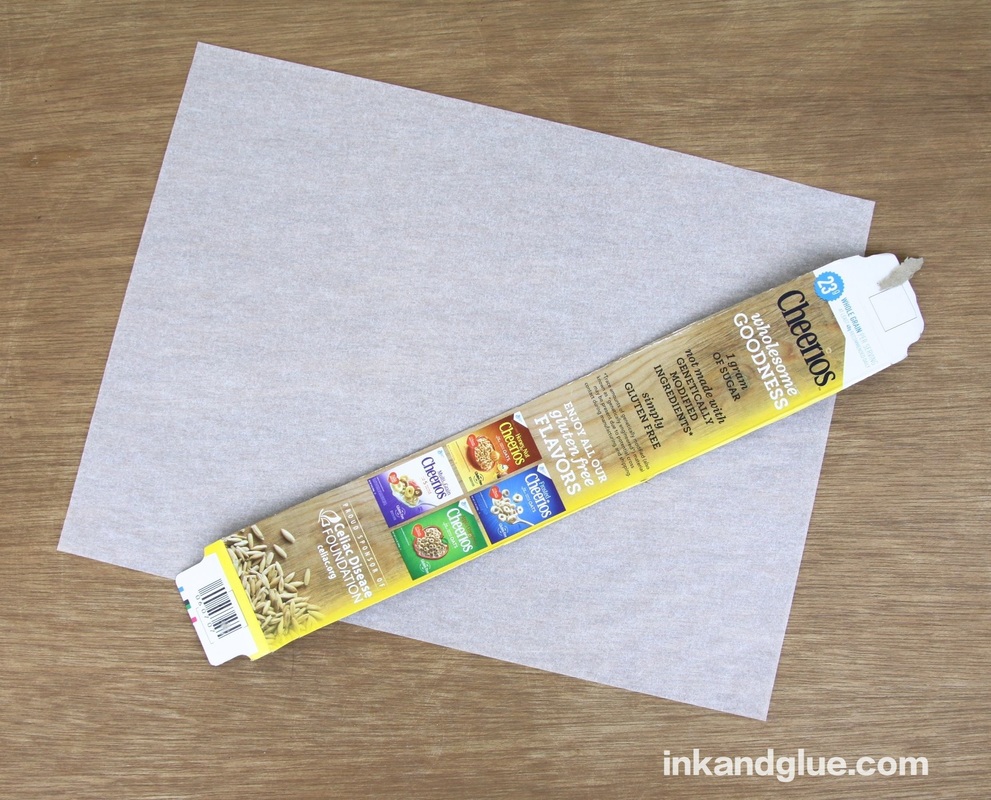
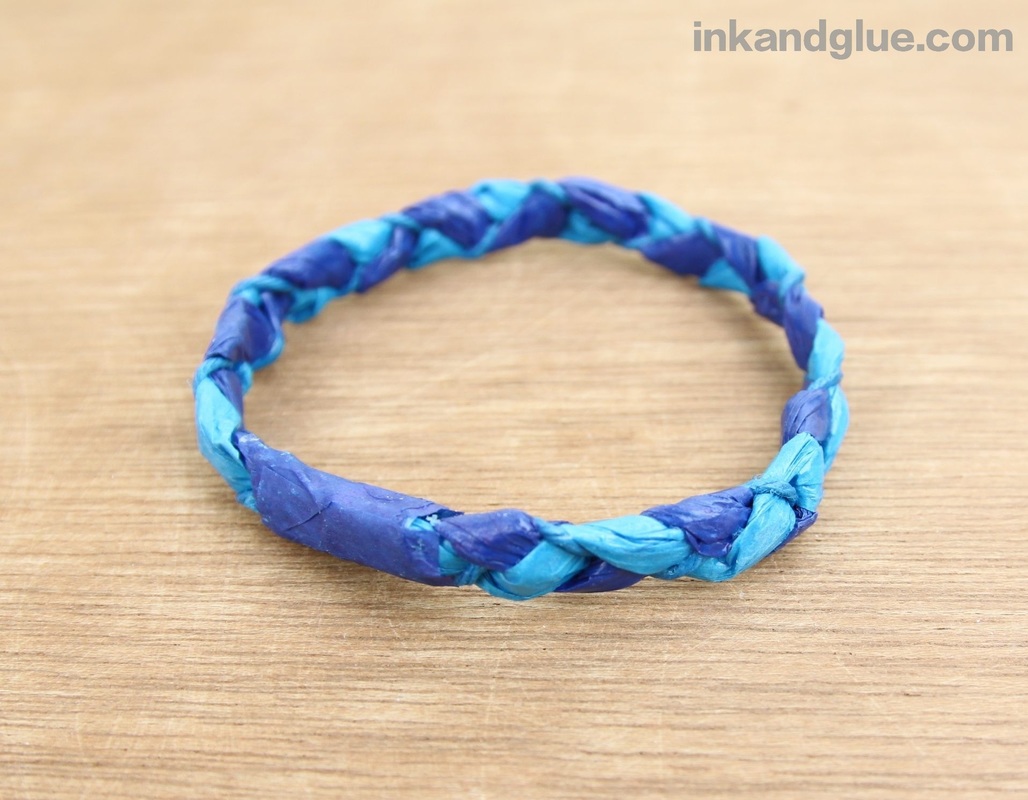
Bracelet week concludes with this project that's totally different from the previous three. It's kind of a faceted chunky bangle that I made with plain paper to act as a blank canvas for paints, markers, collage, or whatever you'd like. 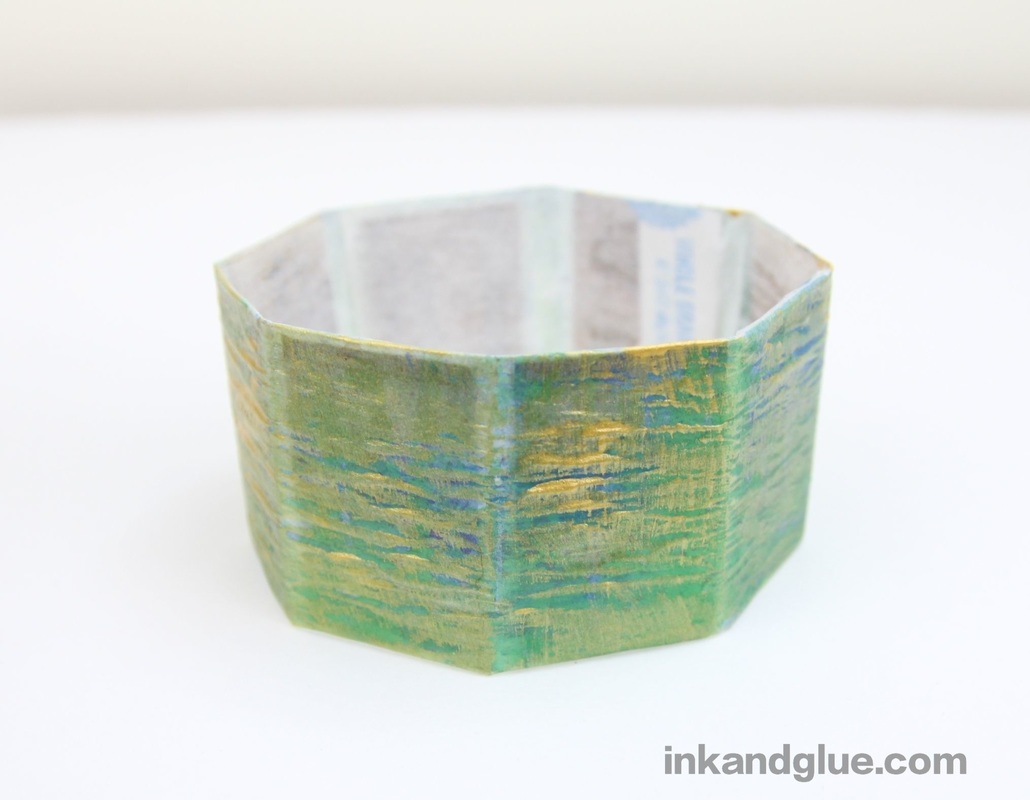
To decorate mine, I painted it all over with green and blue watercolor paint. After that dried, I lightly brushed on some metallic gold acrylic craft paint. It ended up with kind of a patina'd look. Neat! 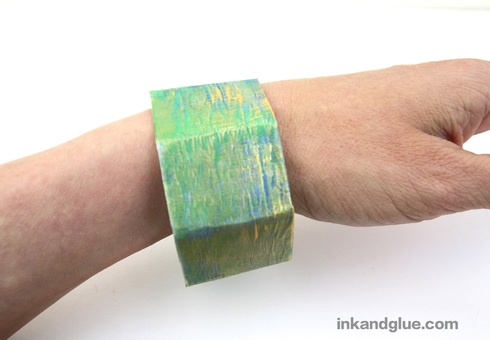 xo!
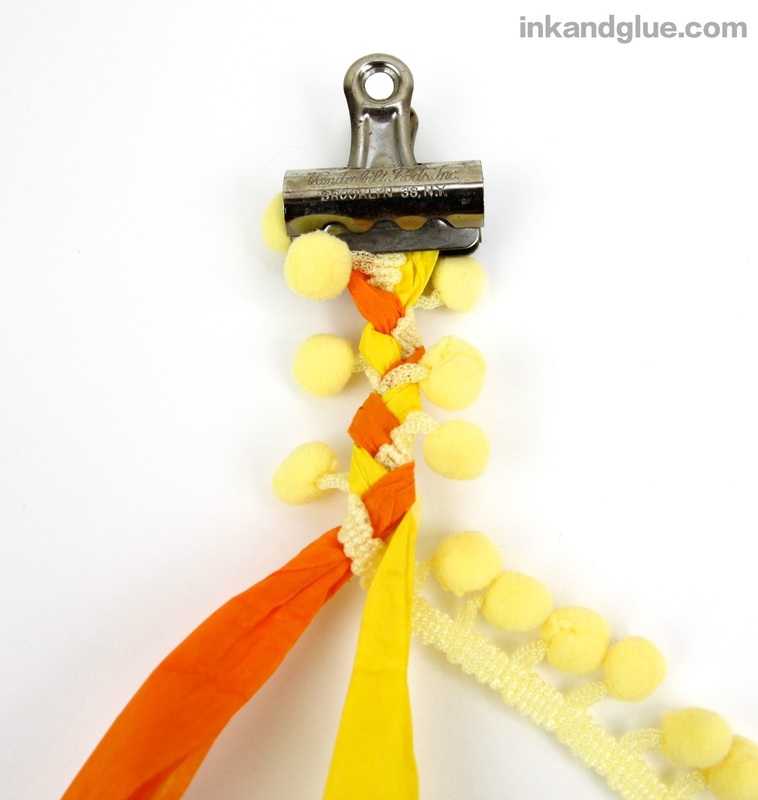
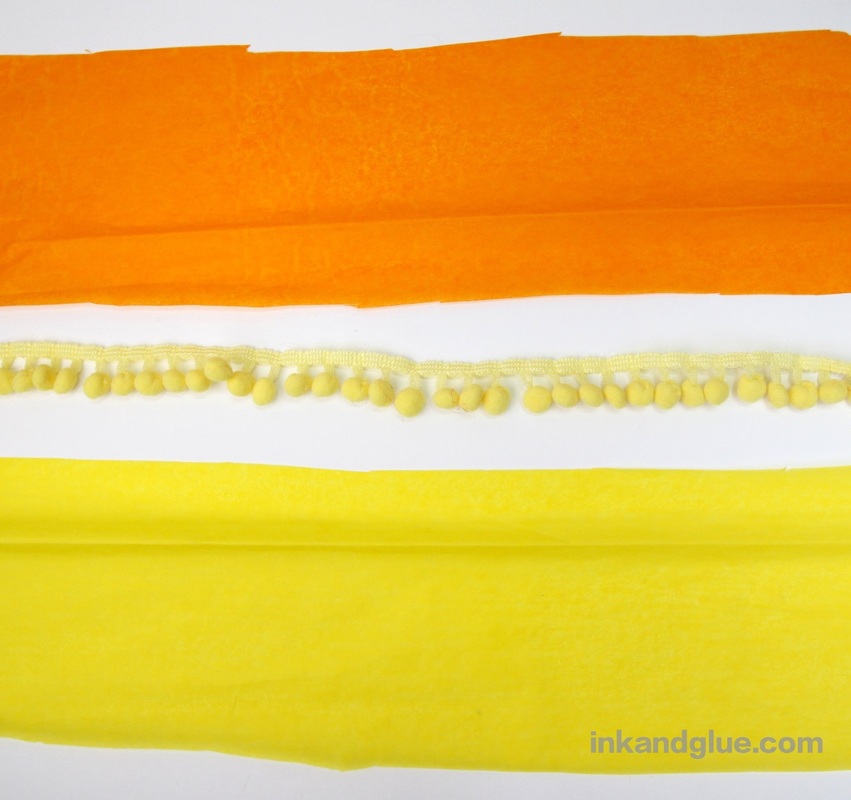
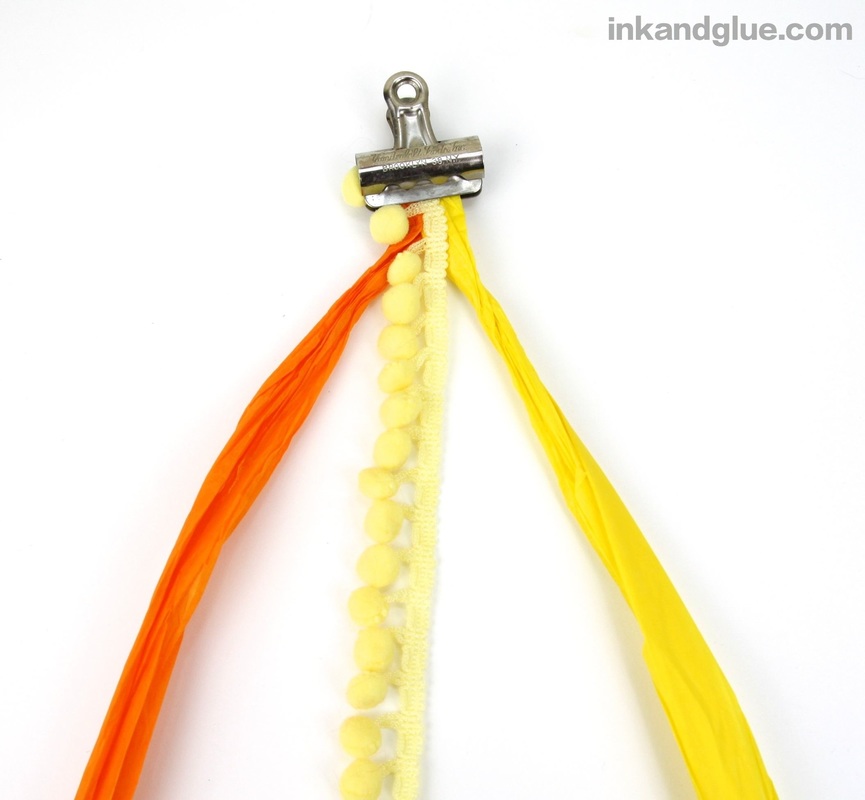
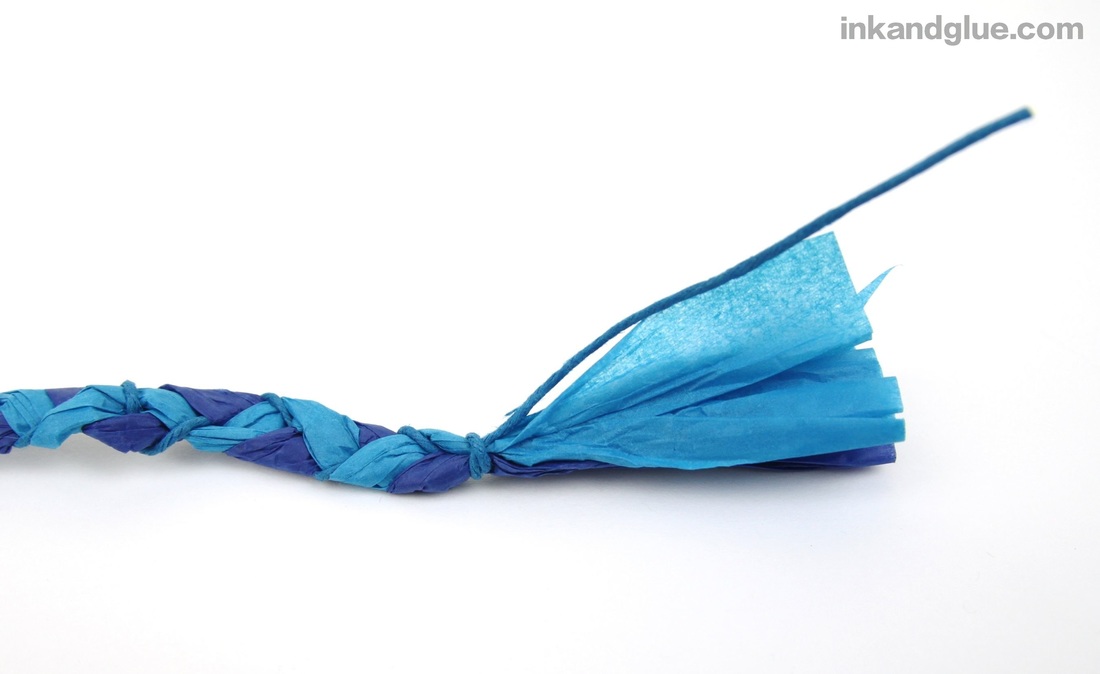
(Check out Part 1 and Part 2, if you missed 'em.) This time we've got pom-pom bobbles! Yes. You need to be a certain type of person to wear this bangle: Confident, playful, and ready to shimmy their wrist in the air at any moment that needs a festive flourish. Directions for making one are below. 
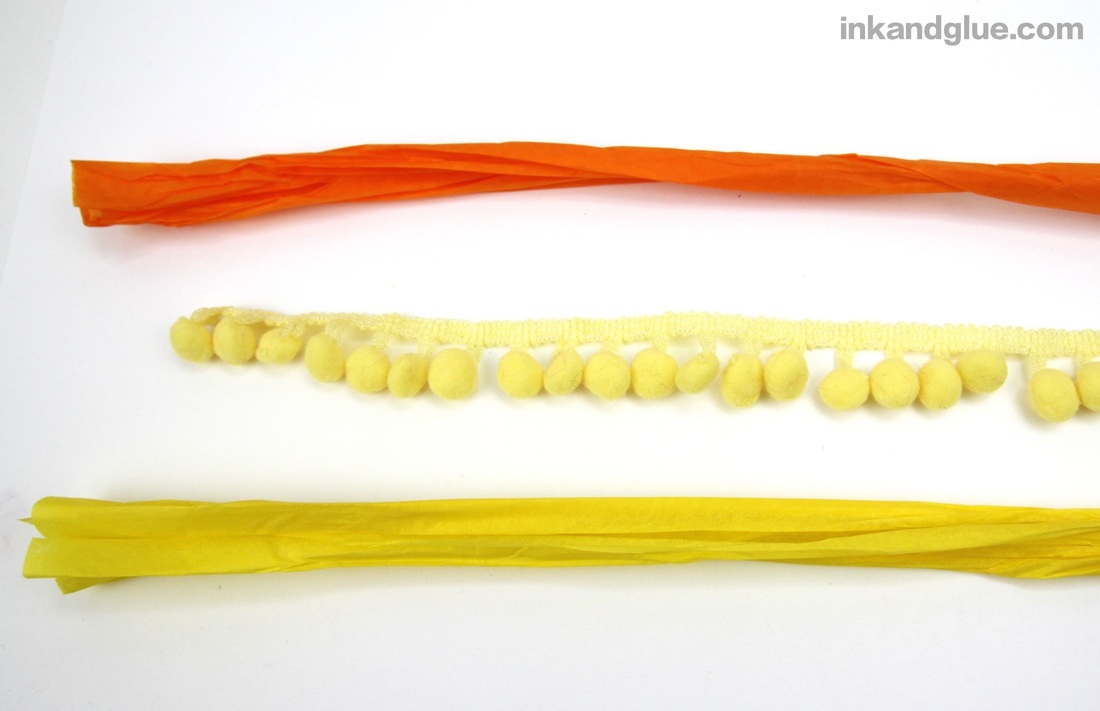
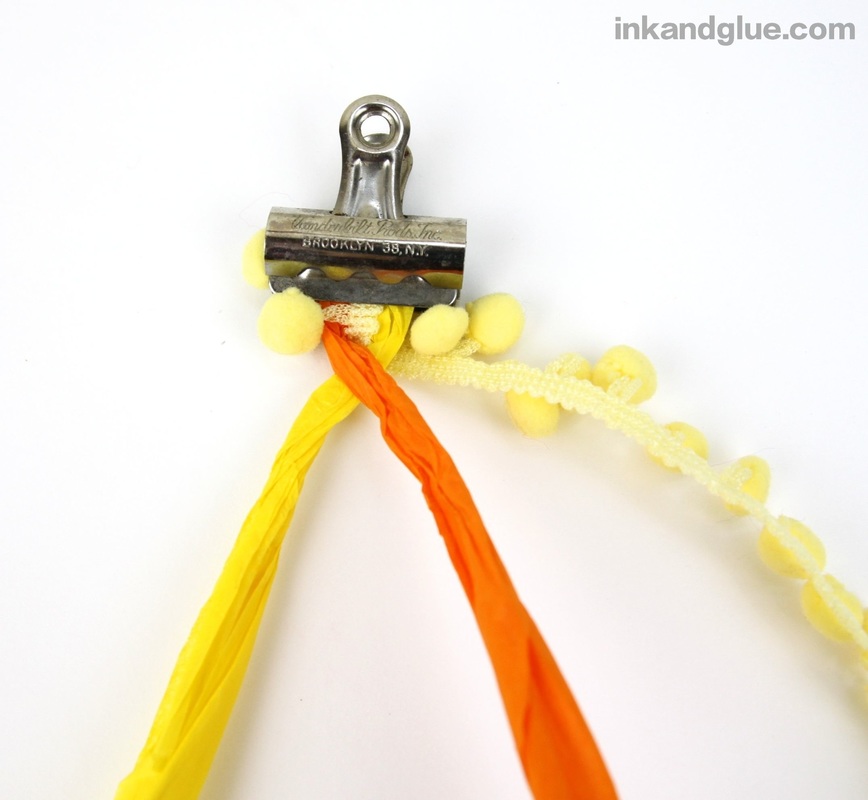
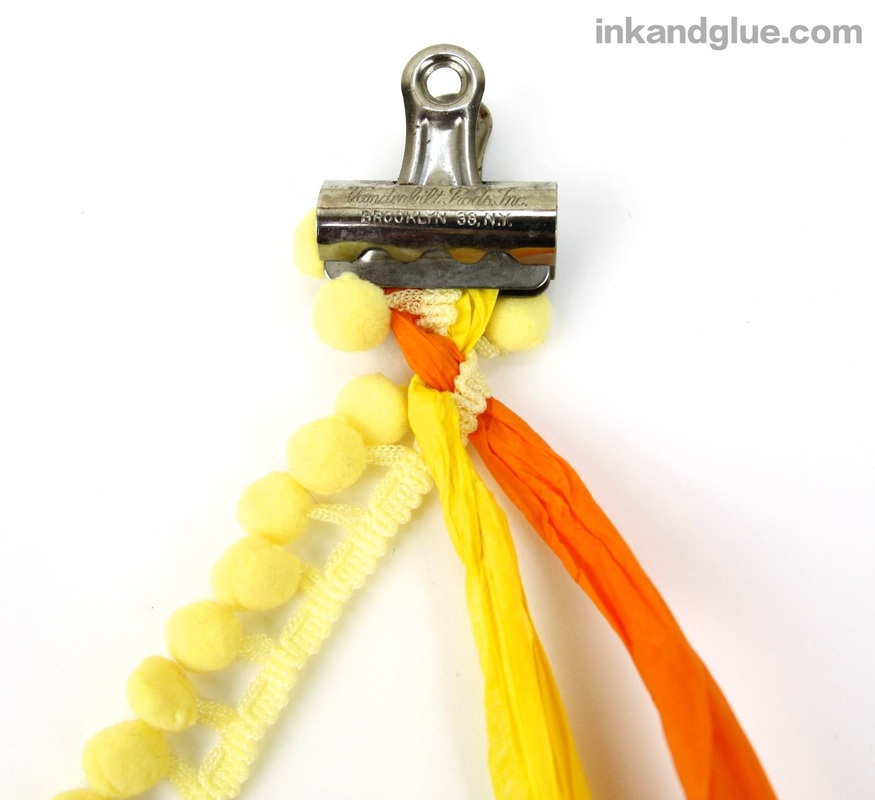
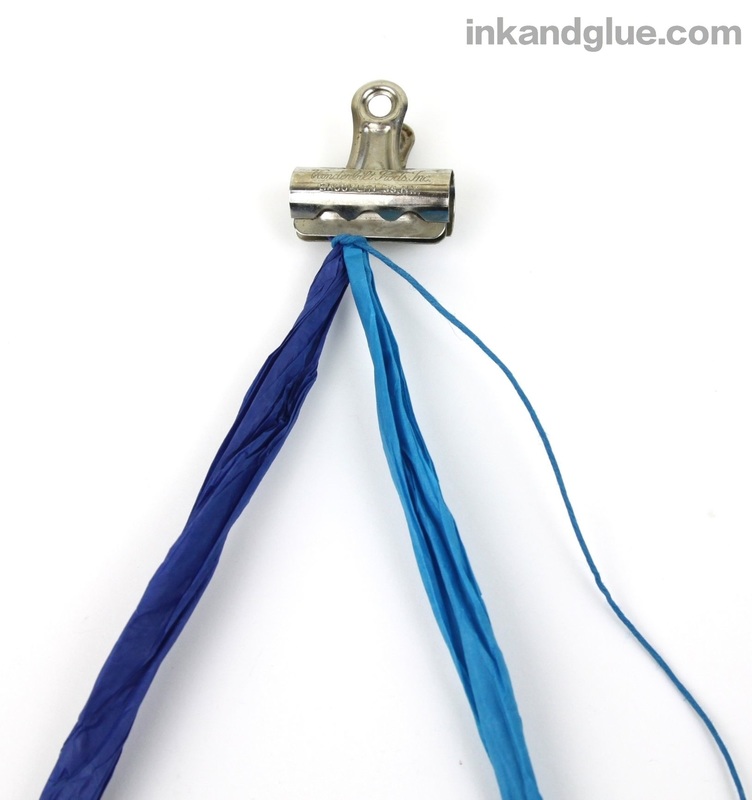
Now carefully braid the three strands together, pulling the pom-poms out of the braid as you go.
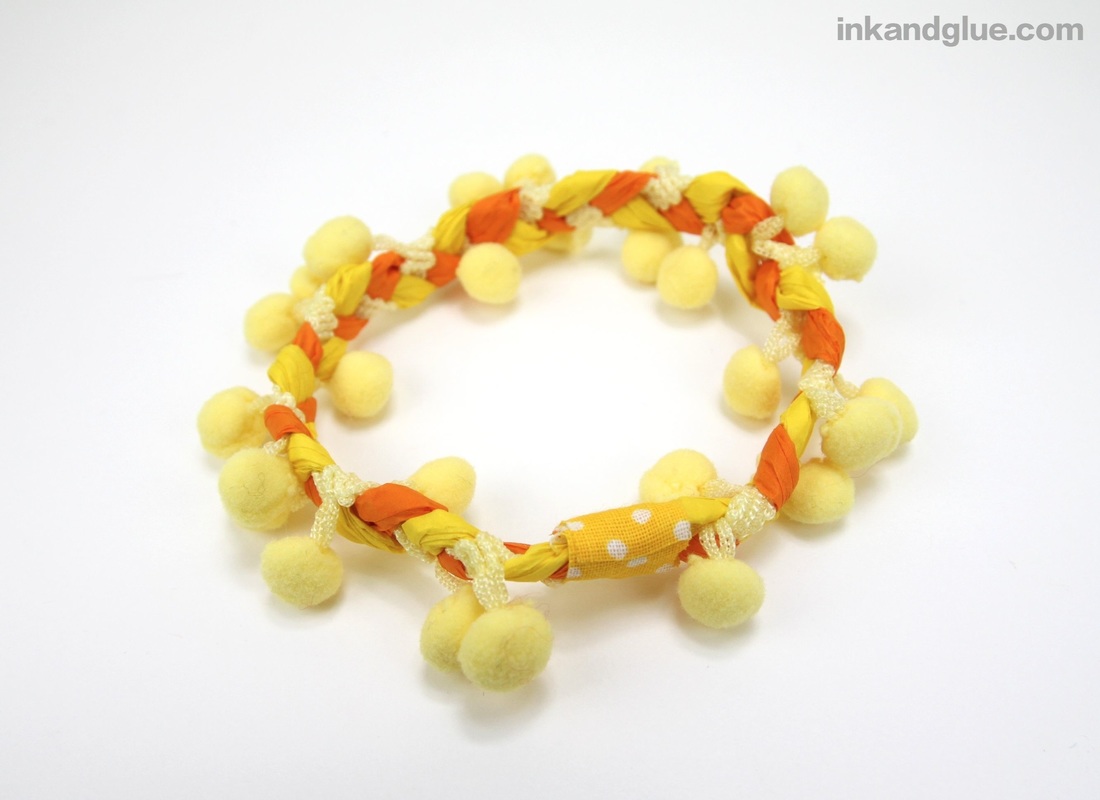
 Once your braid is the correct length (long enough to slip over your hand and onto your wrist), trim the end, leaving about a half- or three-quarter inch of excess. Trim the pom-poms from this excess section, and from the other end of the braid, as well. 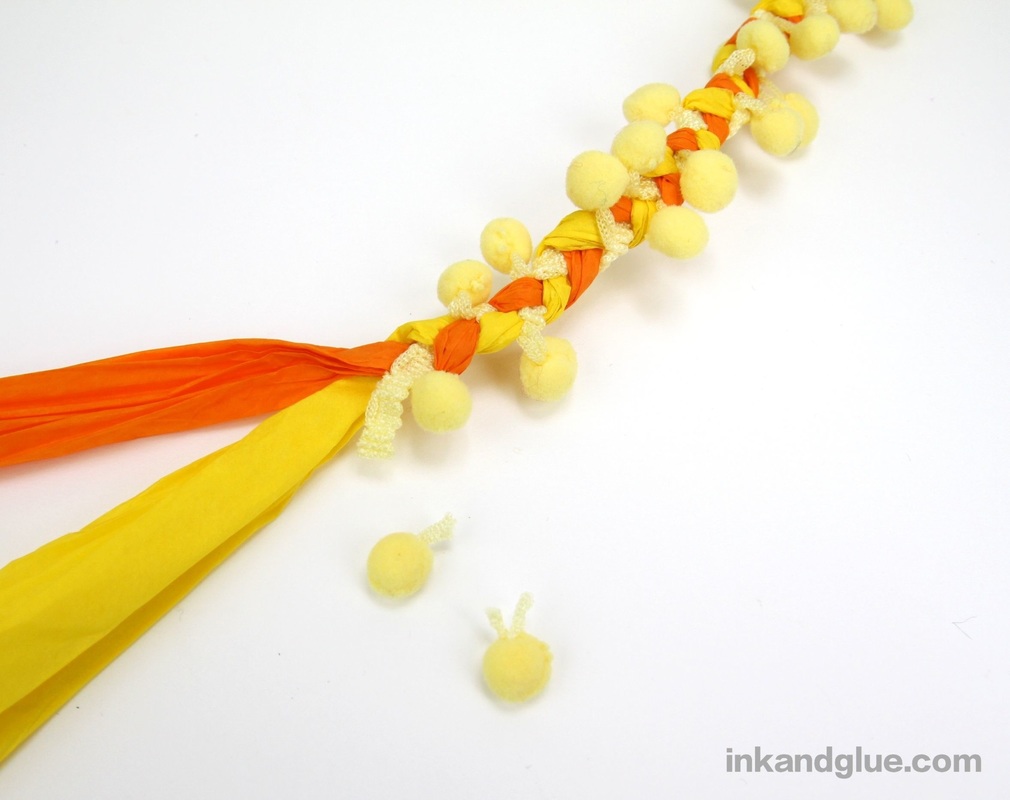
Tomorrow I've got one more bracelet for you, and this one doesn't involve tissue paper (though it is paper-based). It might be the coolest one yet! Stay tuned...
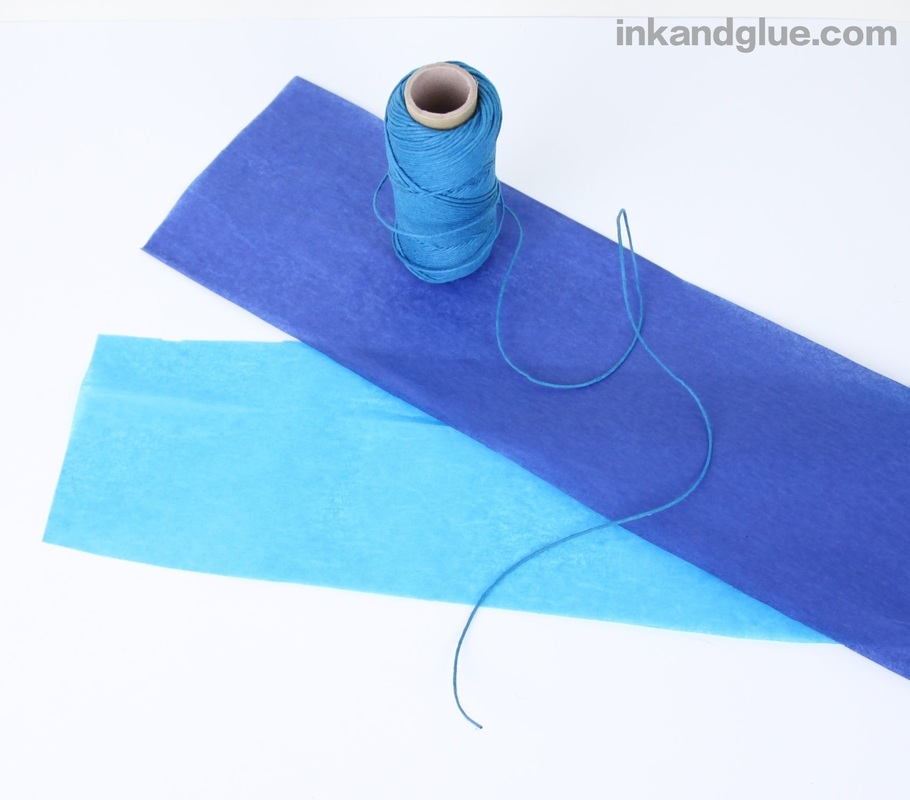
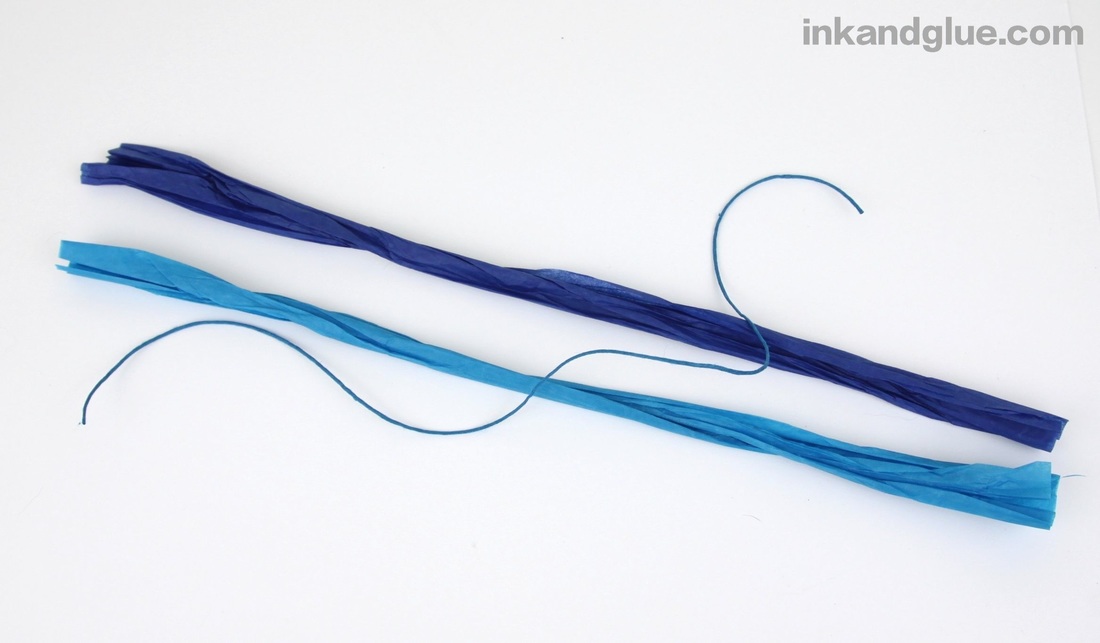
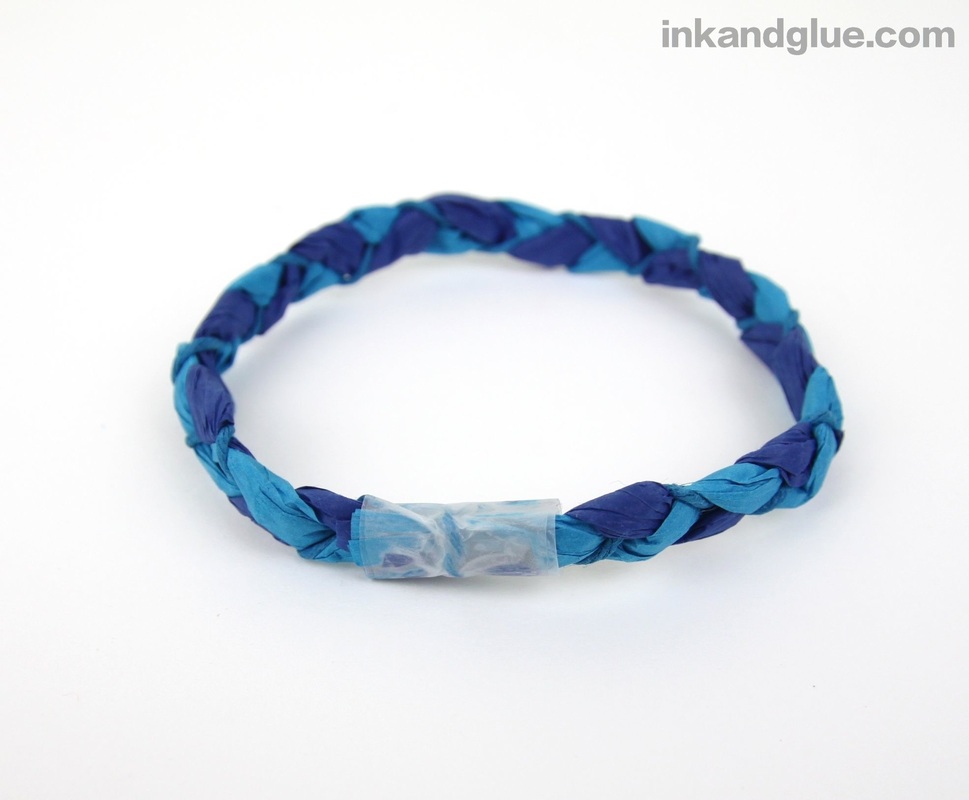
xo (If you missed it, here's the first bangle.) Bracelet week continues! This one's a thinner, more sedately-colored variation of the first. I swapped out one strand of paper for a length of hemp cord, and I covered the finished bangle with Mod Podge. Read on for complete directions. 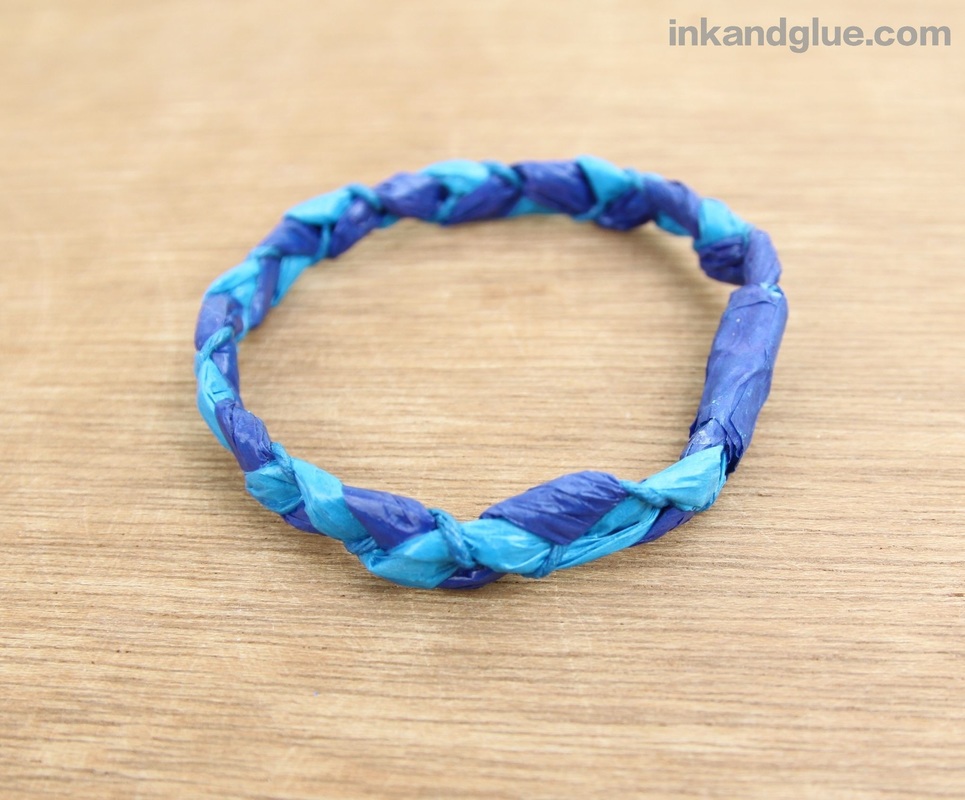
Come back tomorrow for a third tissue-paper bangle variant that's the most radical yet!
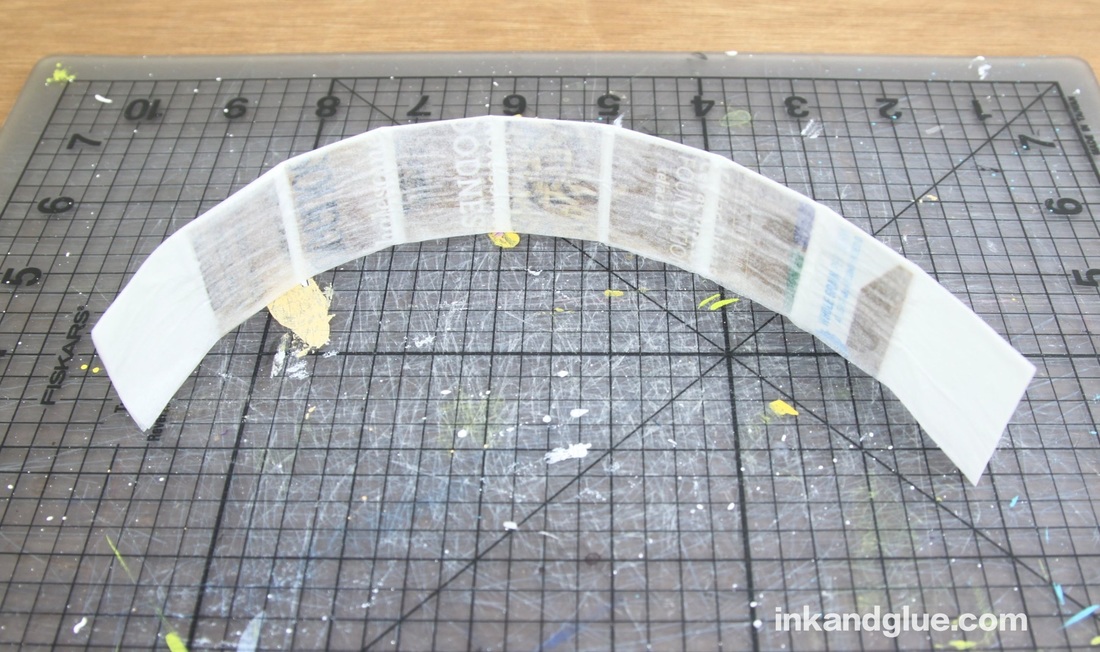
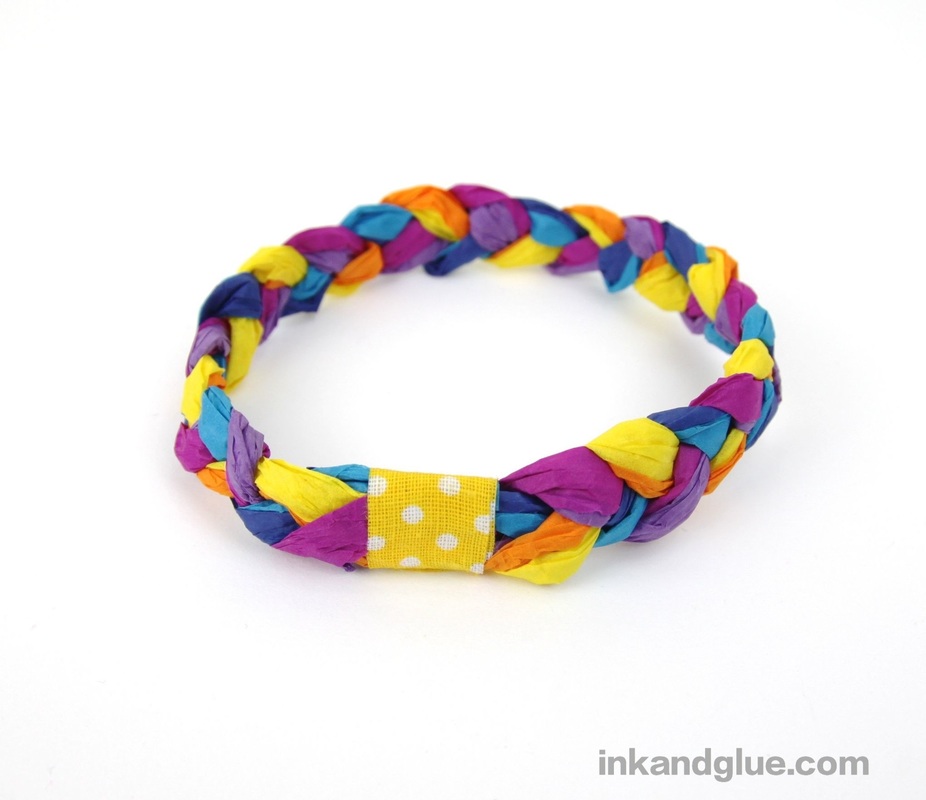
xo  The weather has finally turned warm enough to wear short sleeves, so in honor of that, it's bracelet week at Ink and Glue! I have a few variations on today's basic tissue paper bangle in the works, so stay tuned. The design of this one relies entirely on the bright, cheery colors of craft tissue paper, so choose your colors carefully. (As you can see, I went all crazy-festive with mine.) If you know how to braid, you can make one in just a few minutes.
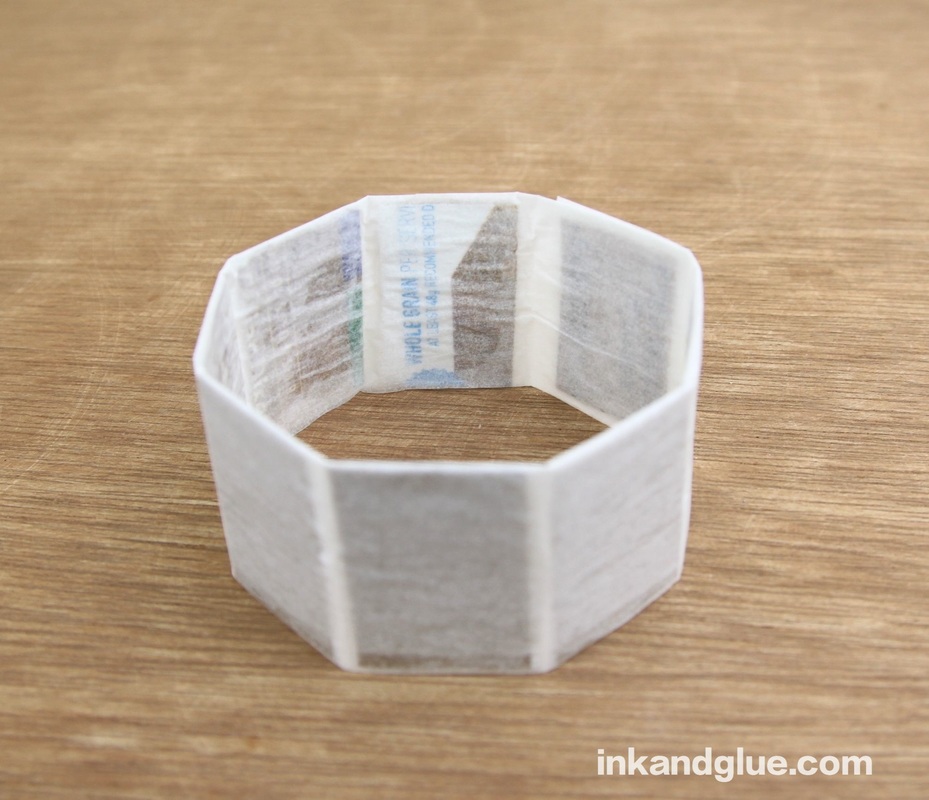
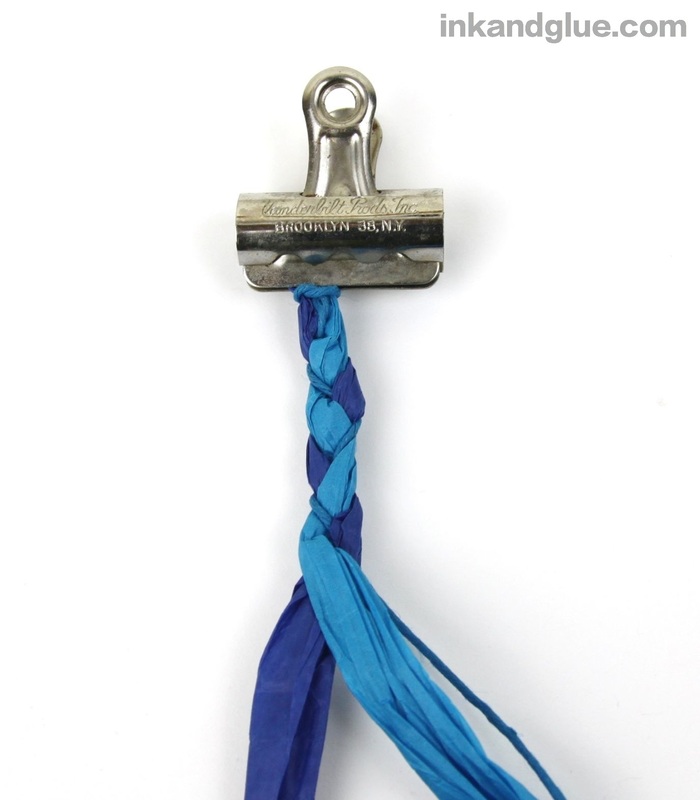
You should end up with a braided cord, like so. Measure the length around the wearer's wrist, and trim the ends so there's about an inch of overlap, and making sure to keep the bangle wide enough to slide on and off the hand. 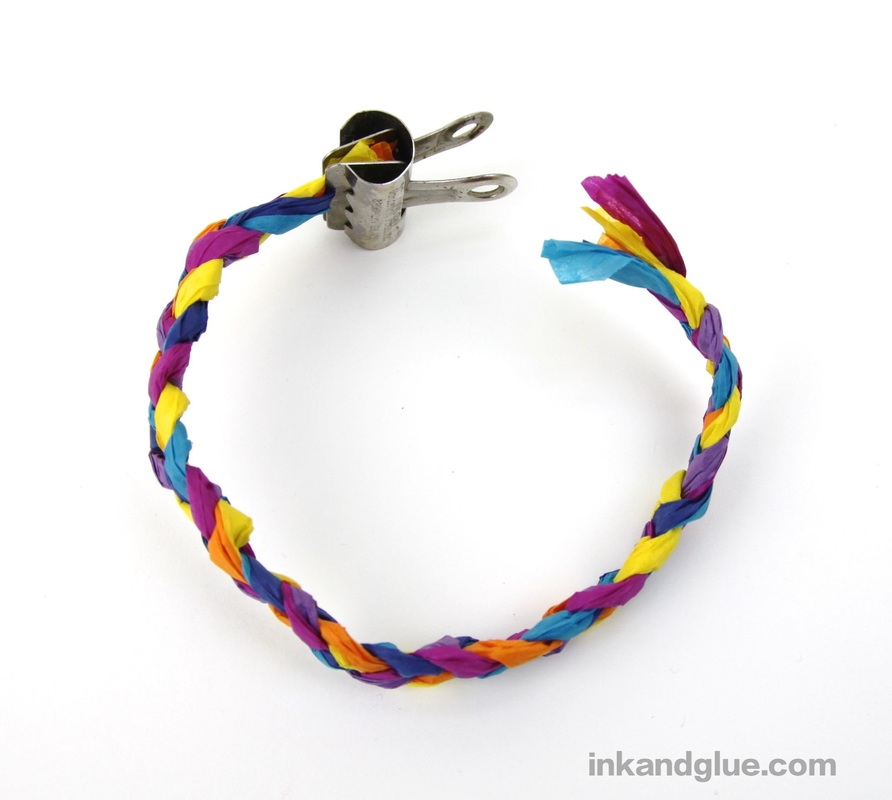
If you want a longer-lasting bracelet, dab the bangle (don't brush, unless you're sure your tissue paper won't bleed) all over with Outdoor Mod Podge and let it dry. Add a second coat over the first for extra strength. There's also Hard Coat Mod Podge, which claims to be extra durable, but it doesn't say it's water-resistant, so assume that it isn't.
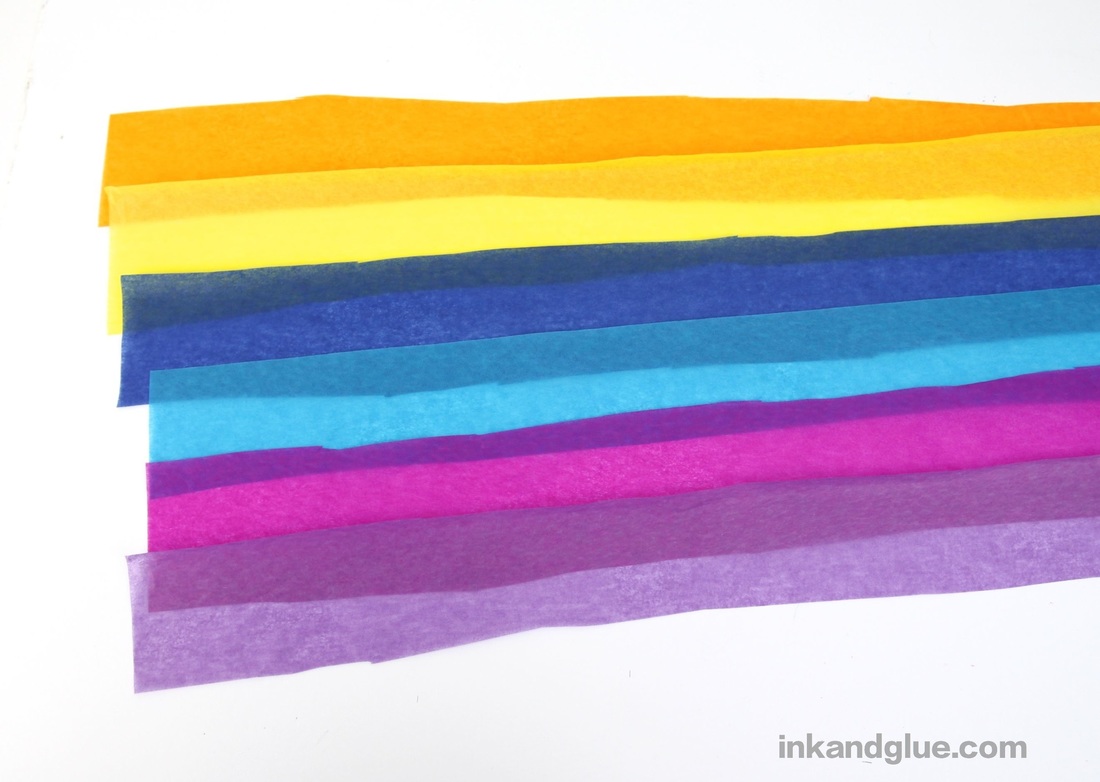
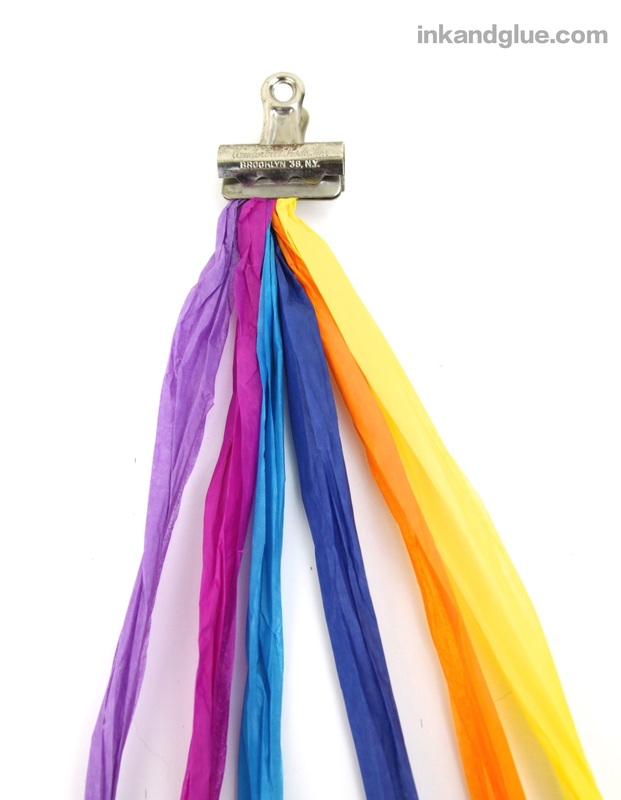
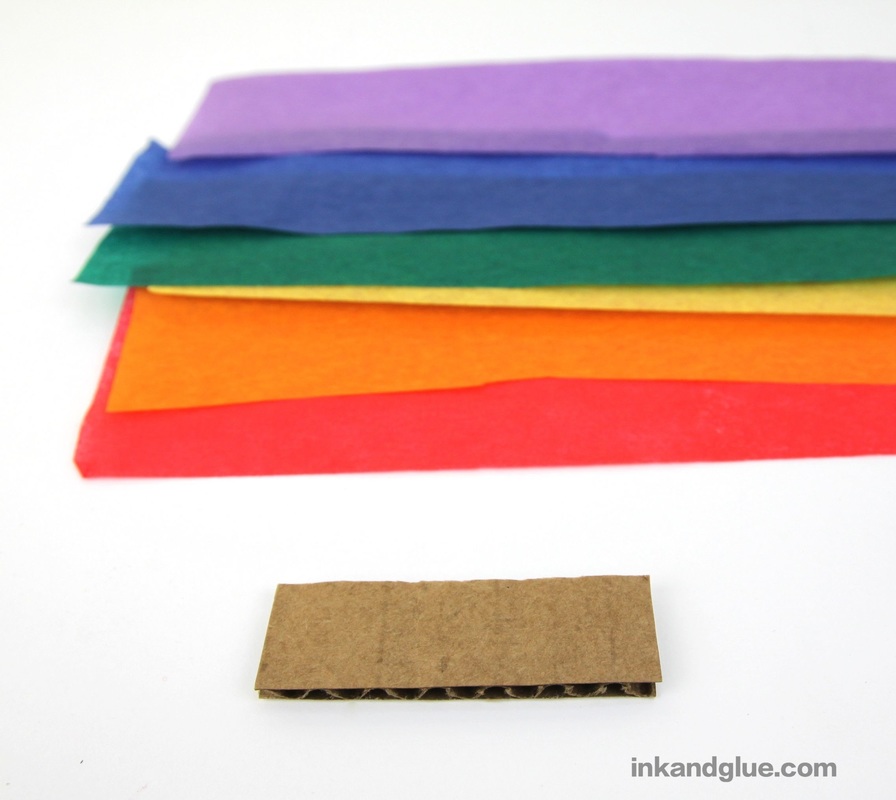
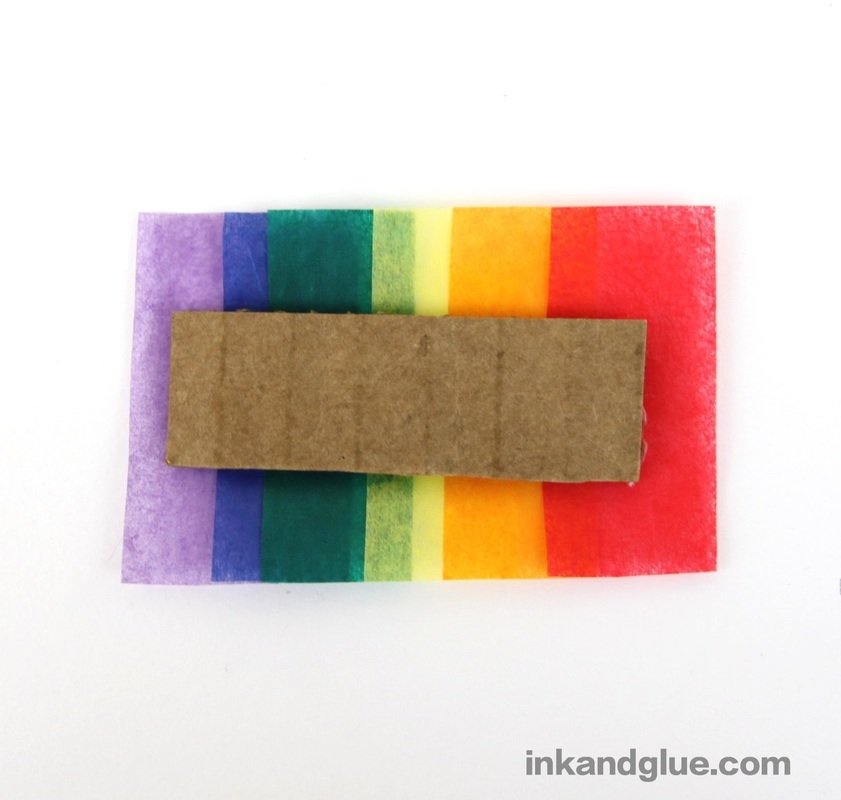
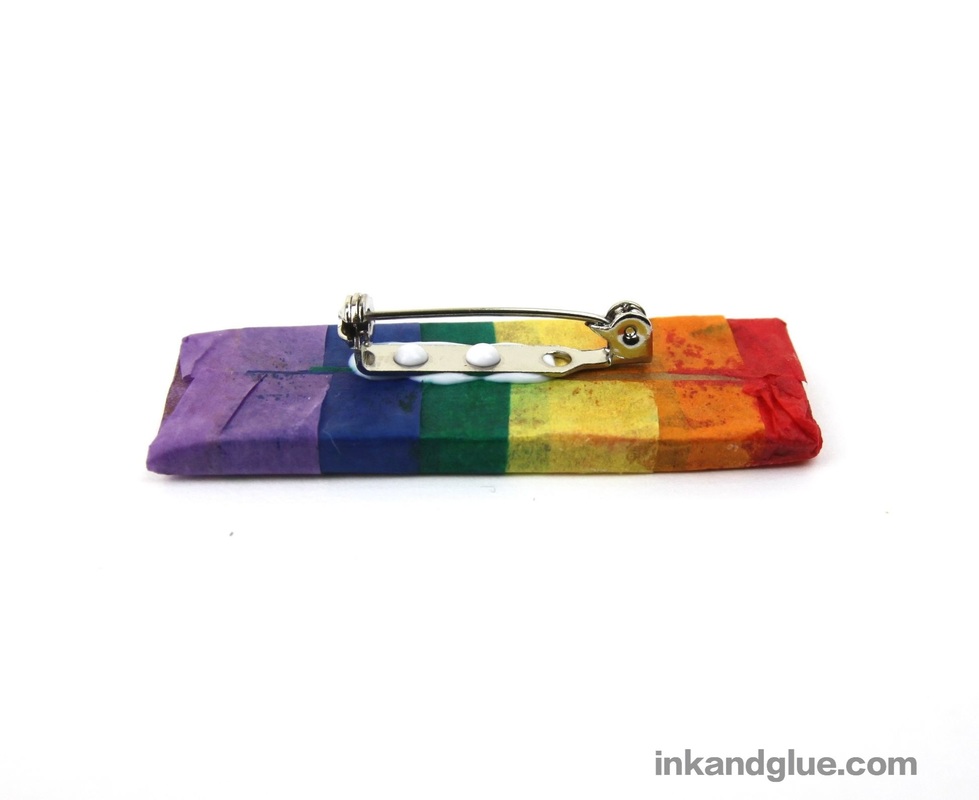
Or, just enjoy your bangle as an ephemeral object! xo 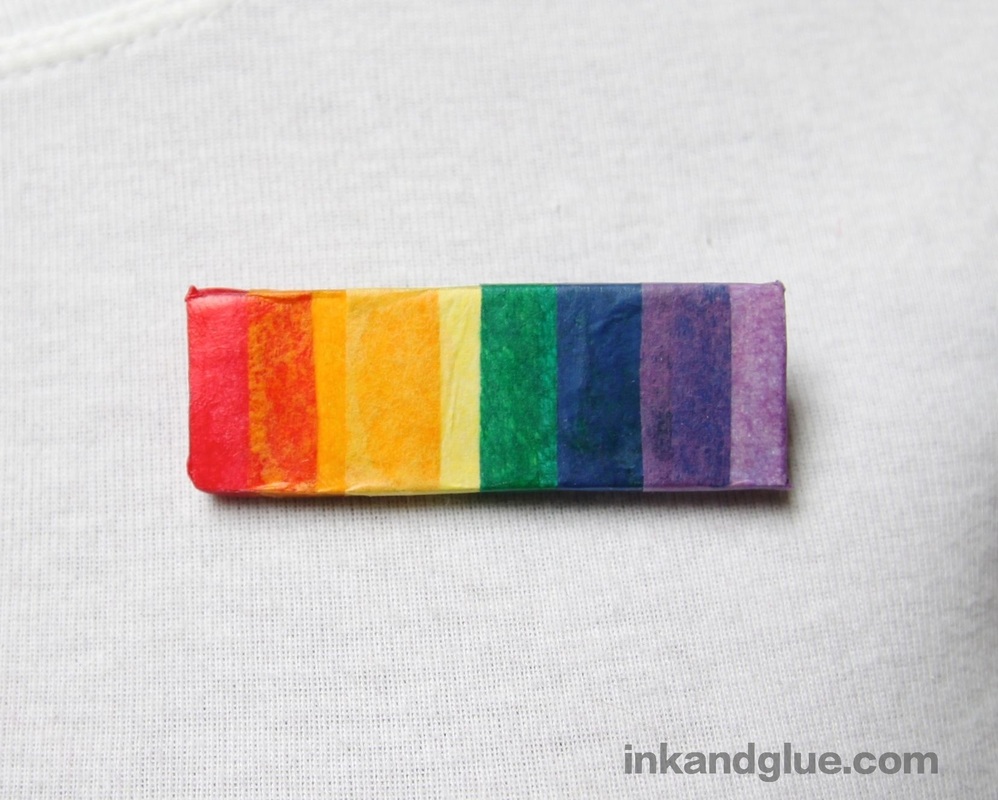 Our local Pride march is this Saturday, and it's always a celebratory, life-affirming occasion. I made this pin with thoughts of wearing it on the day, but naturally, any fan of rainbows — or whatever color combo you fancy — can make this pin too. I loosely modeled it after those iconic military bar pins, so you can pretend you're a major general in the army of love and equality. (Aww!) To make one, or many, start by cutting strips of tissue paper in your chosen colors. I went for the classic ROY G. BIV, without the indigo, because I think blue and purple pretty well cover that end of the spectrum; no need to get all medieval with the coloring. 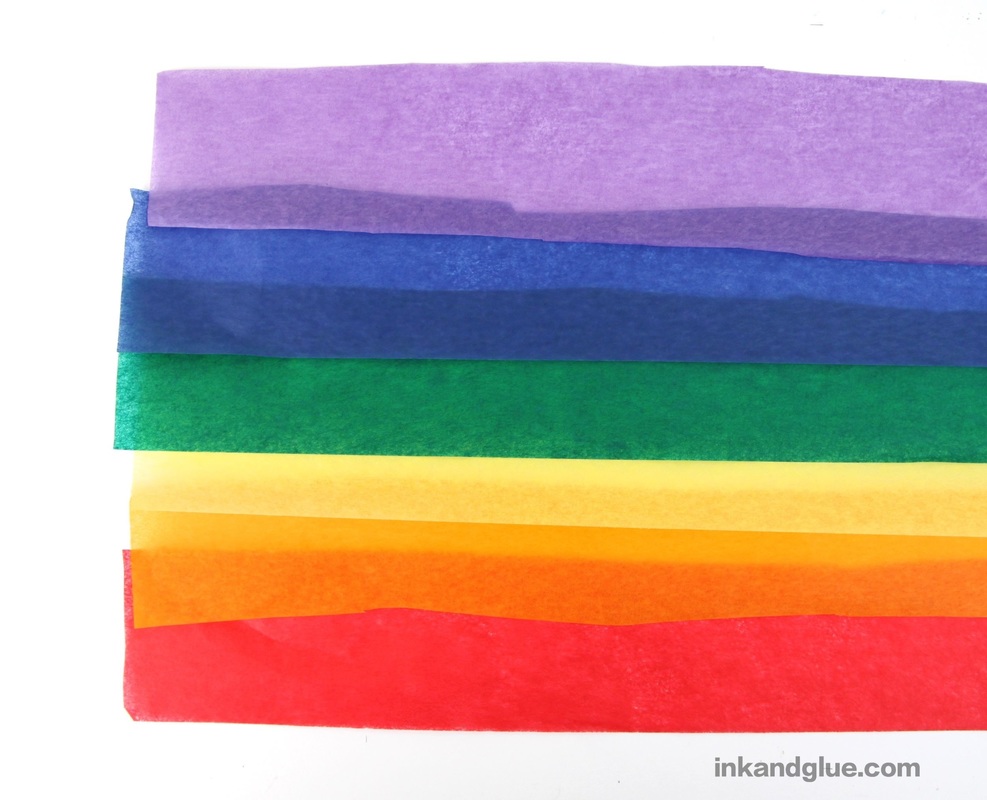
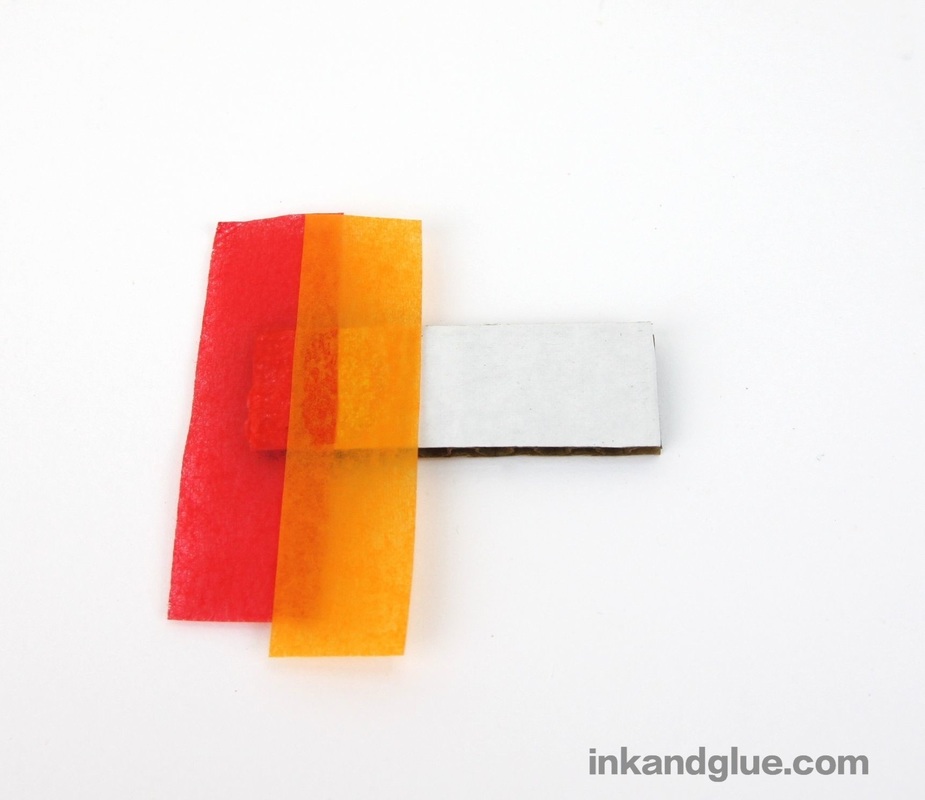
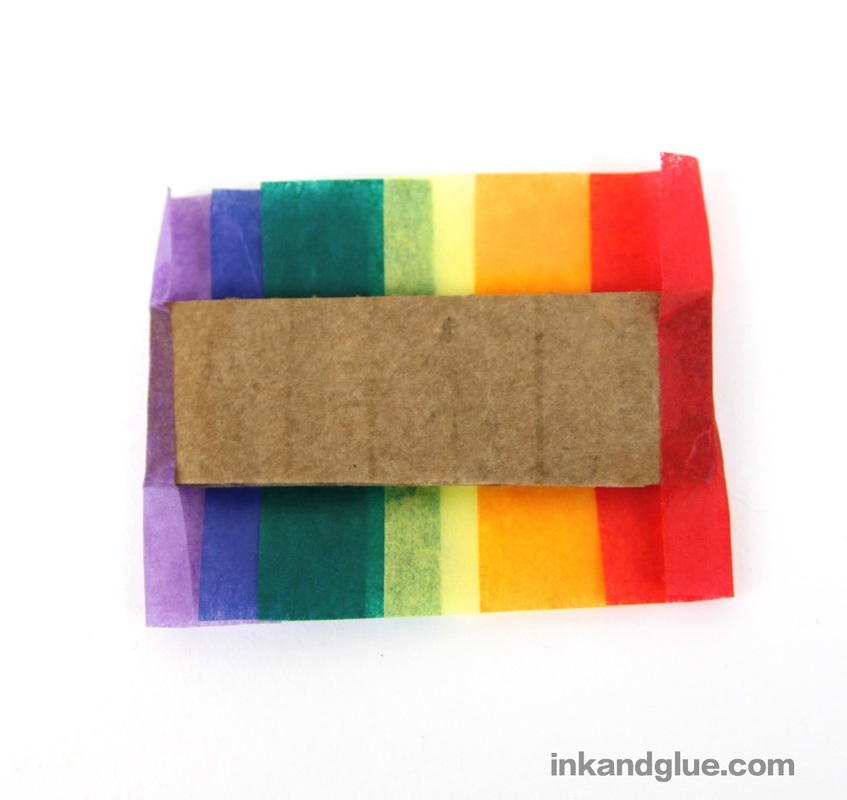
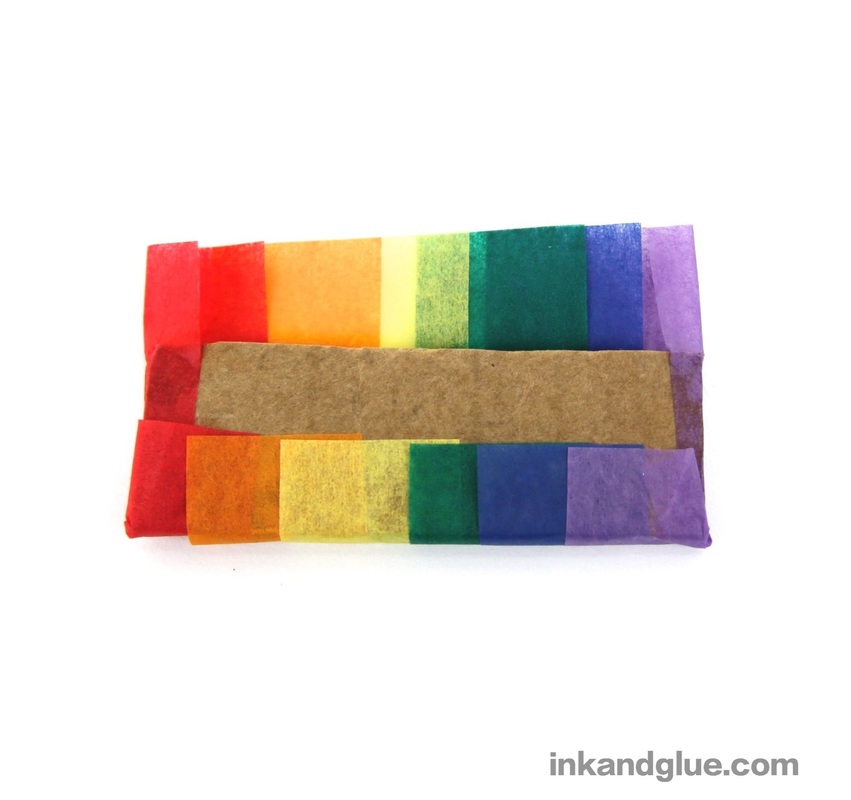
Keep adding Mod Podge and overlapping strips until you've covered the rectangle with all six colors. Note: Some colors of my tissue paper — the green and blue — bled quite a bit. Just brush the Mod Podge only on those colors, then rinse the brush before continuing. If you don't rinse it, you'll smear greeny blueness all over your rainbow. It's no biggie to rinse, I swear. 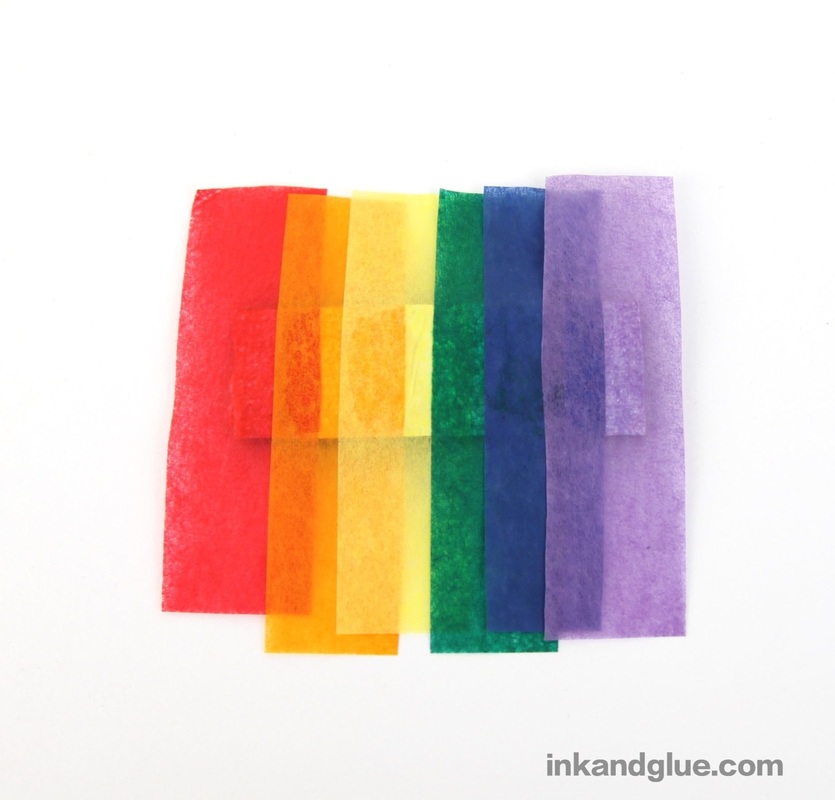
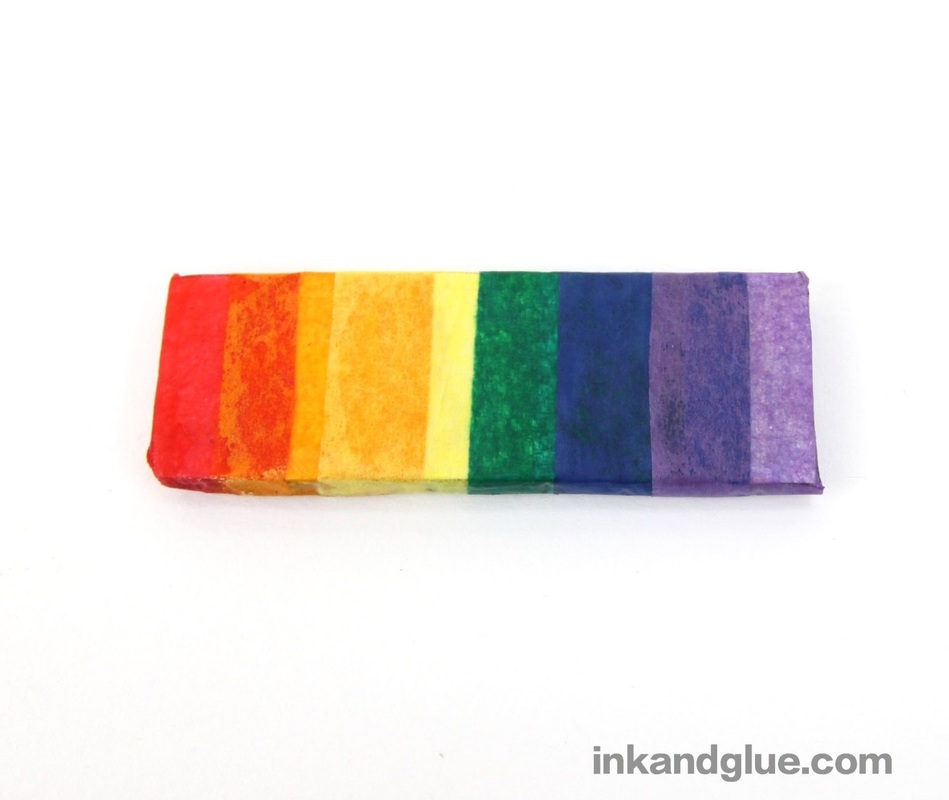
Now you've got a nice color-bar rectangle! All that's left to do is to glue a pin back to the back. Or, make it into a barrette by gluing a (you guessed it) barrette to the back.
Happy pride day, or rainbow season, or whatever makes you feel happy today!
xo As described by an admin at a local college's art department, "Mail art is simply art that has been sent through the mail, but generally is made knowing that the piece will journey via the post. Painting, drawing, collage, photography, and writing can all easily be mail art. Stamps, how the piece is addressed, and the marks made by the post office all add to the final art that arrives at its destination." I'm mailing this postcard to that college in order to be part of a big Mail Art show. I hope it makes it there in good shape, but if it doesn't, that's part of the randomness of the process. 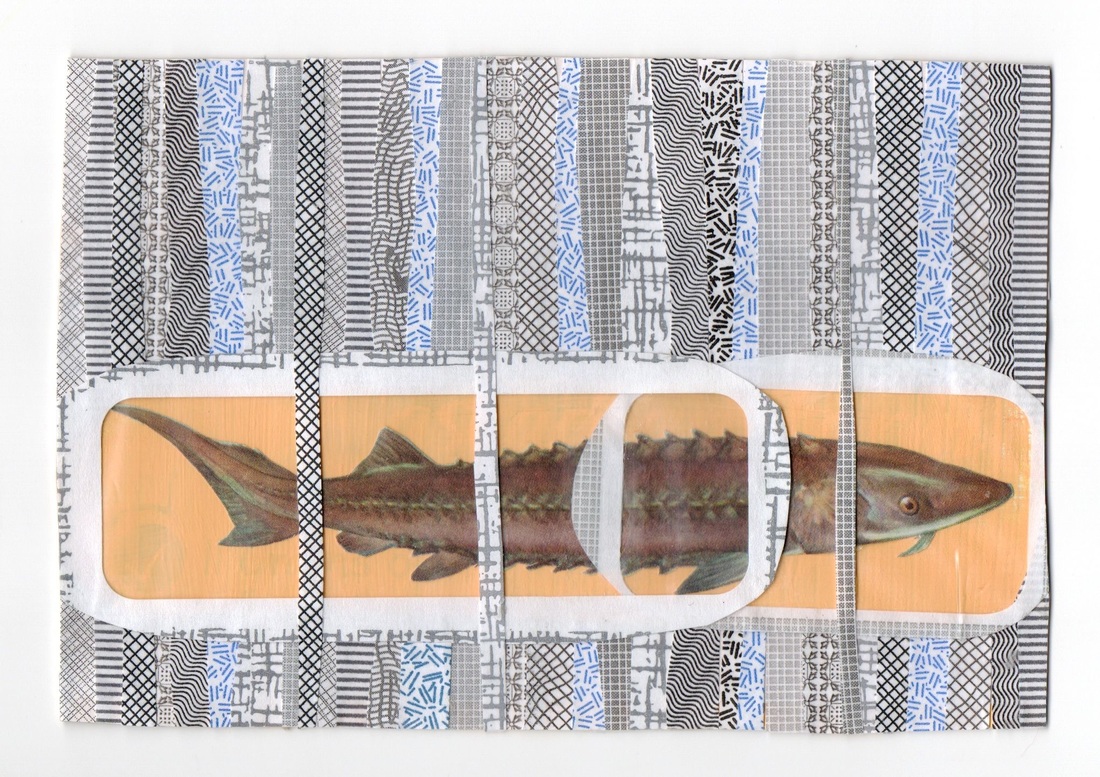 You'll notice that I've used both paper and plastic windows from my security envelope stash to make this. The fish is from an old guide to salt-water fish of Florida. The backing is a painted piece of cereal box cardboard.
You don't need an art show for a reason to send out mail art; you just need a willing partner who lives at a different address. (Or, I suppose you could mail something to your child, and your child to you, if you drop off the art at a mailbox... just make and mail it secretly, so your recipient will be surprised.) Now that almost all correspondence is done online, it is truly a thrill to get something nice (not a bill, not junk) in the mail. Pick a cousin or an aunt or a camp friend, and say you'll send them art if they'll send you some back. It's a visuals-based version of a pen pal. An art pal! I know I find it easier to draw or paint something than write a small-talky letter. xo! Mother's Day is coming up soon, and May Day even sooner, so I was trying to think of a new and exciting flower-based project. As I was looking around the studio, considering different materials to try, it suddenly occurred to me: Why not use all of them? Well, not exactly all, but a bunch. I present to you the flower sampler card! I call it a card even though it's a full-sized, unfolded 8.5 by 11-inch piece of construction paper. Leave off the message for an any-day art piece. 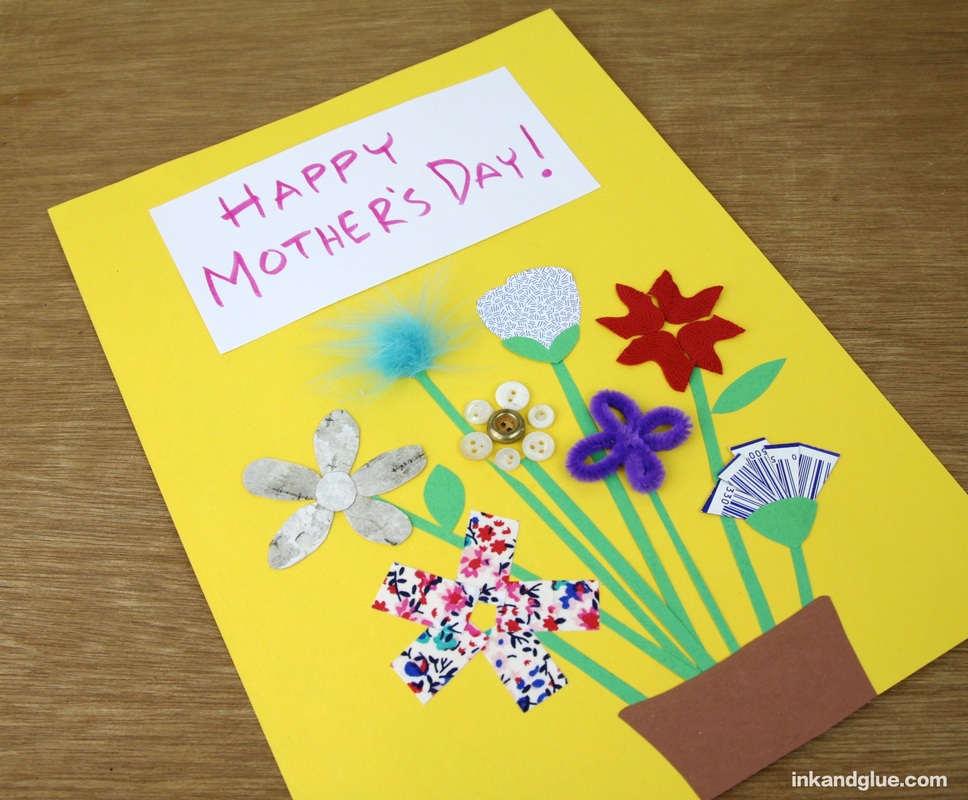 Here's how you make one, or how you trick your child into making one for you, or how to explain to your child how to make one for Grandma. First, get a piece of paper. Then, look through your art and crafting supplies and recycling box, and gather up any and all stuffs that could potentially be turned into flower shapes and glued onto paper. Cut and/or shape any pieces that need cutting and shaping, then glue them down. Try for a wide variety of materials, both 2D and 3D, smooth, textured, or furry... 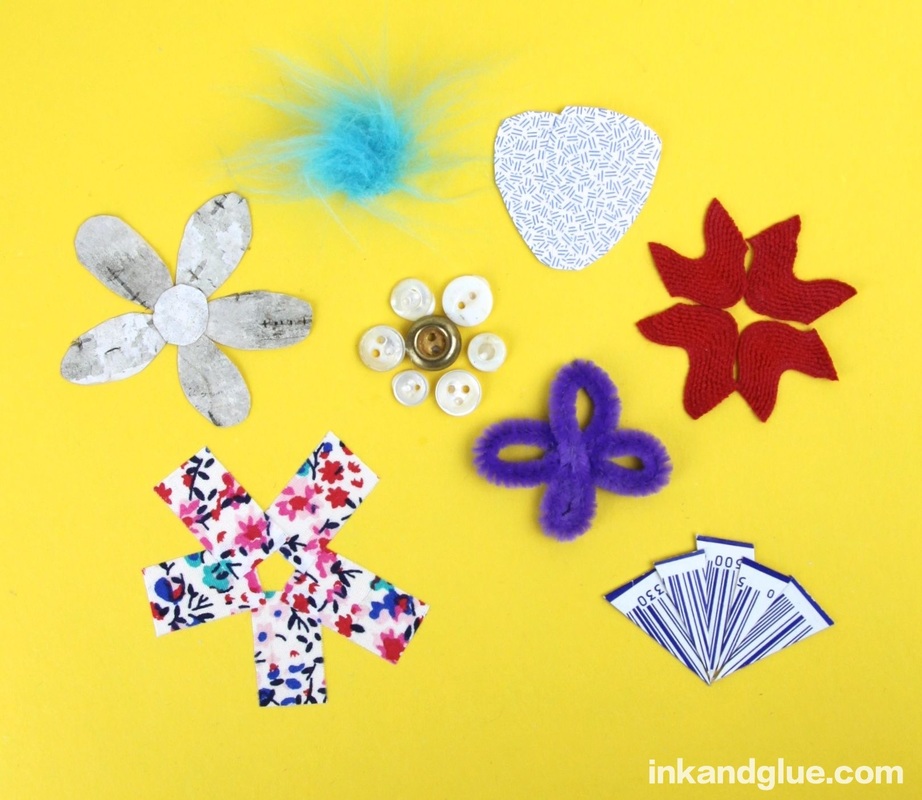 From left to right (roughly) I used: Birch bark cut into petal shapes with regular scissors Fabric tape that I got on clearance at JoAnn's A small piece of faux fur Old buttons Half a purple pipe cleaner A security envelope UPC code from a cereal box Sections from red rickrack At this point you can call it a day, and just have a nice scattering of abstract blooms. I wanted to put my flowers in a vase, so I added some stems. It would have been smarter to have put stems on the top/back flowers before gluing down the bottom/front flowers, but I was going with the flow, and the flow is not great with project management. 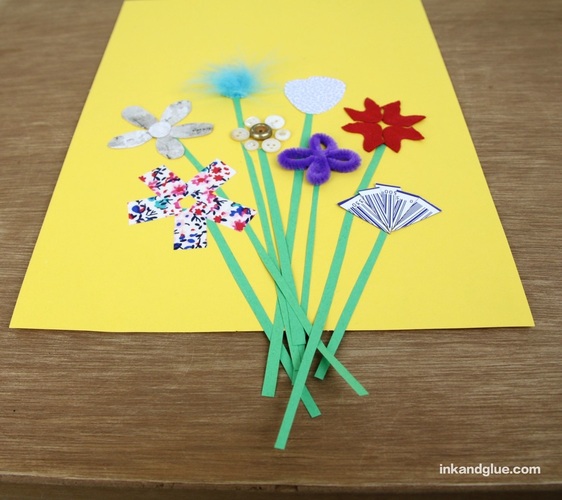 I trimmed off the excess stem lengths, and then added a few small leaves. I cut out a simple vase-top shape — a simple rectangle would do just as well — and glued that over the bottom of the stems. 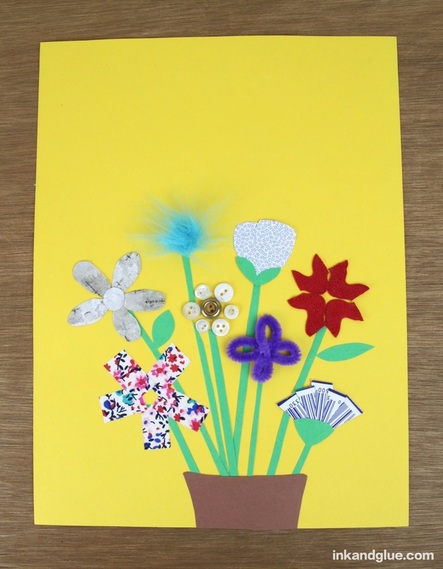 See how I left some space at the top? It's a good idea to think about leaving a place to write a message, if you're making a card. 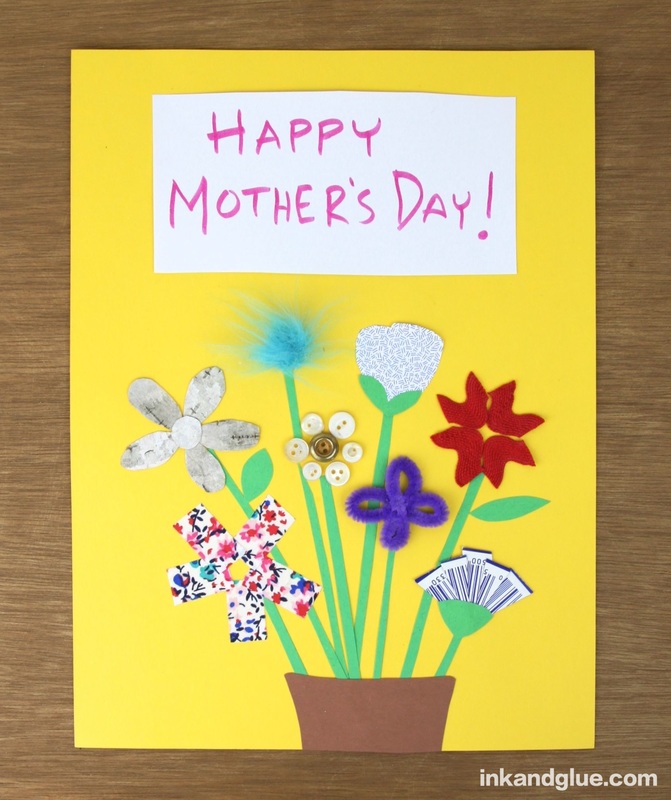 Happy flowering!
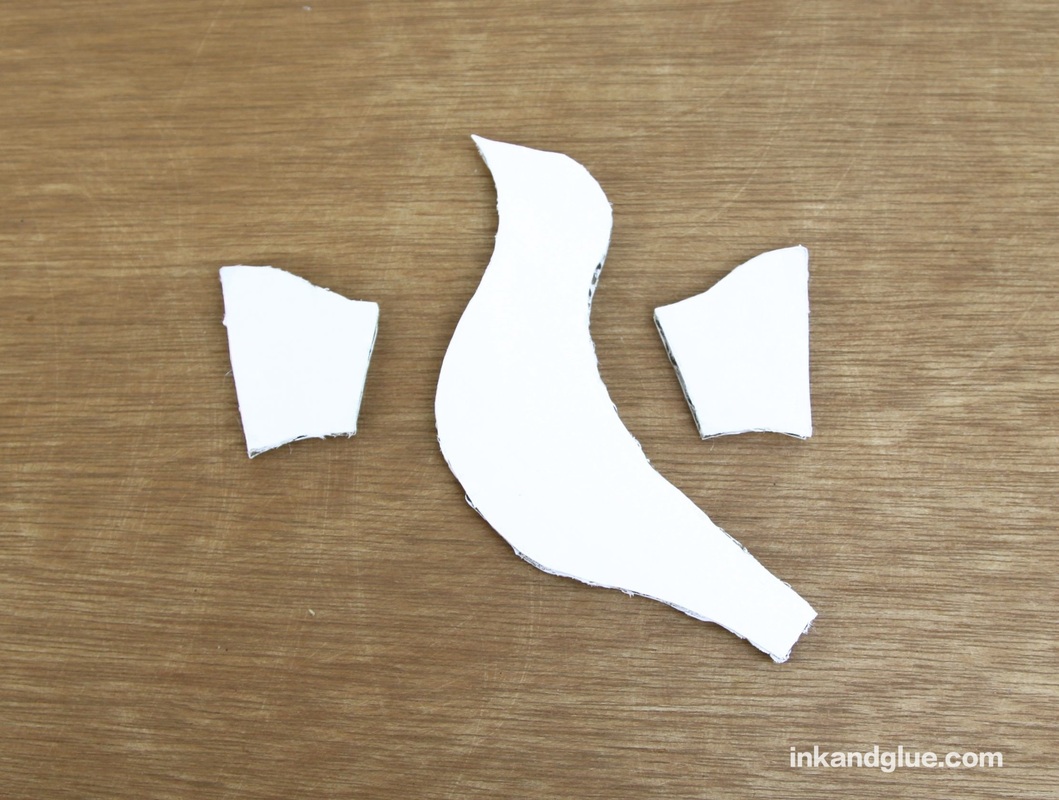
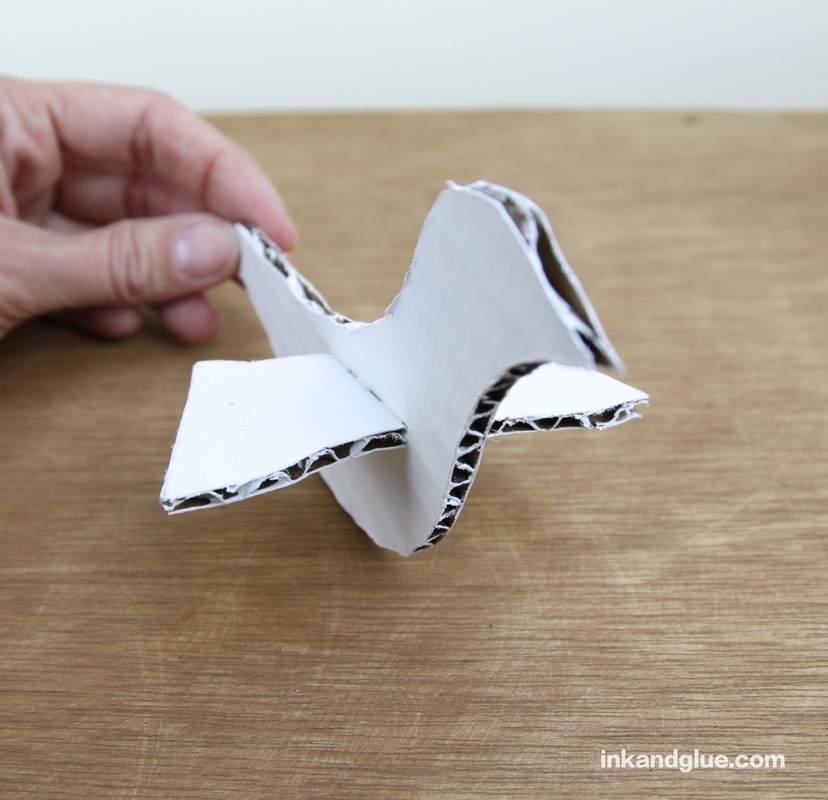
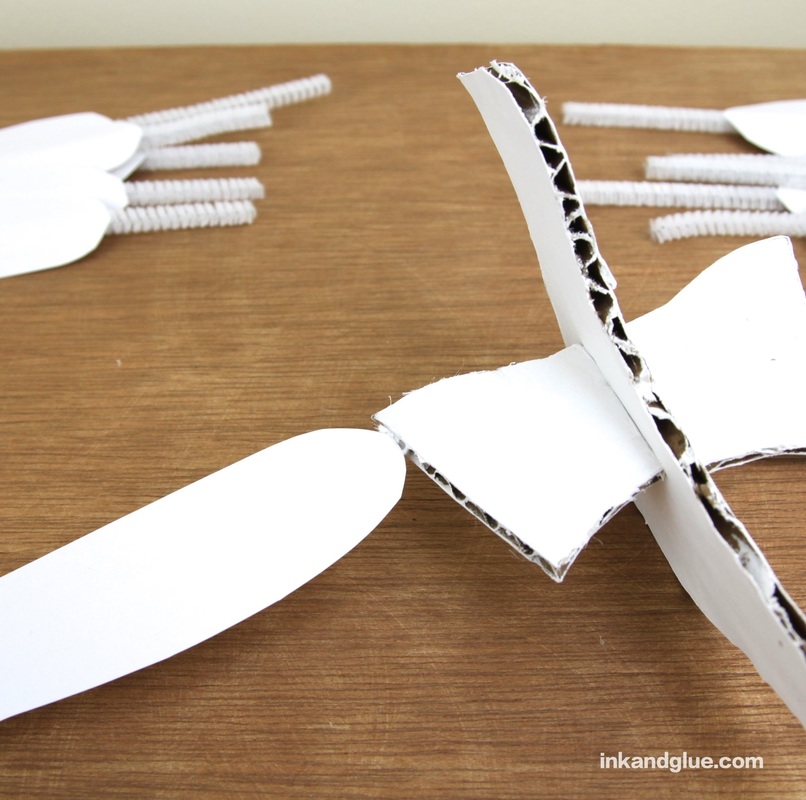
xo As promised, I developed a less-earthy/crunchy version of the winter garden bird I posted not long ago. 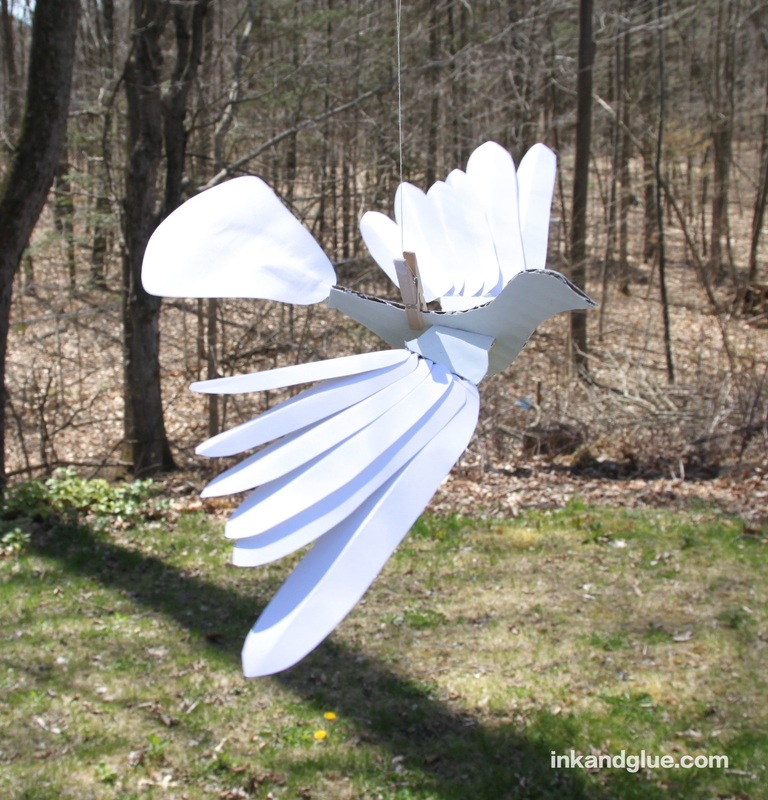 I made this bird all white because it seemed like an appropriate symbol for Earth Day, which is tomorrow. Of course, you and your kids can experiment with all sorts of colors, textures, and patterns. Try weird and wild feather shapes, too. To start, use the template (below) to cut the three pieces from corrugated cardboard, being careful to align the corrugations with the arrows on the template. Paint the pieces, then glue them together.
Now it's feather-making time! Cut out some feathers of various sizes from paper (I used construction paper). Fold each feather in half, short-ways, and then unfold it. You just want to crease it and give it some backbone. Cut a pipe cleaner into quarters or thirds, and attach it to the base of the feather with a piece of white or clear tape, allowing two or three inches to extend from the feather's base.
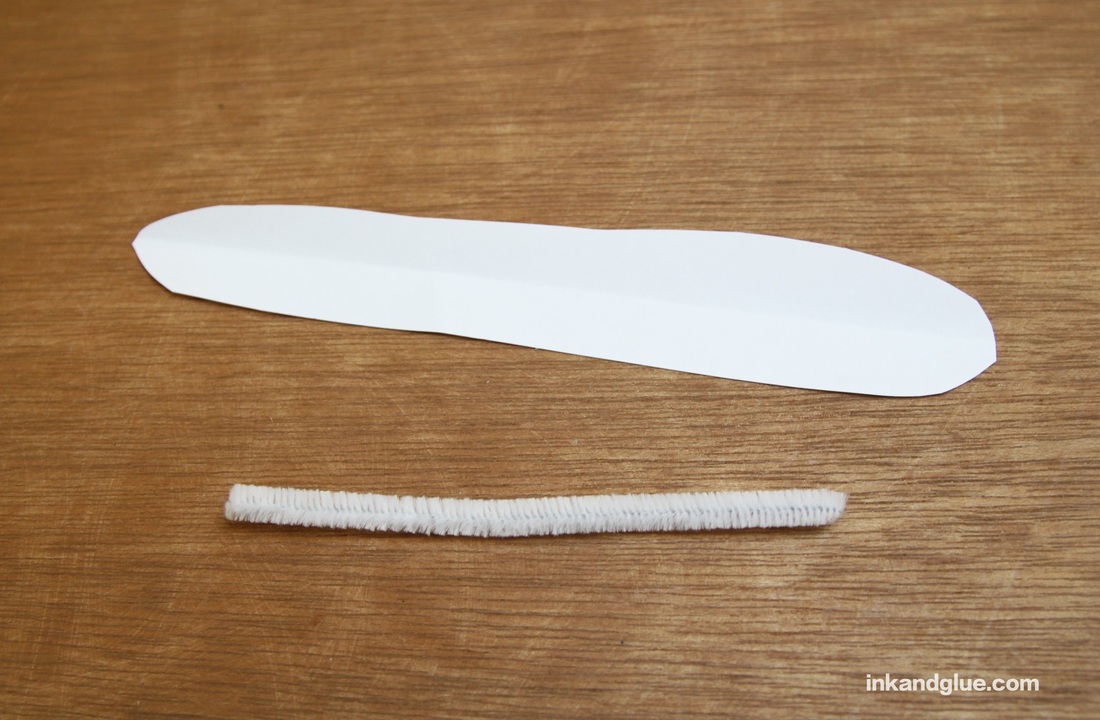
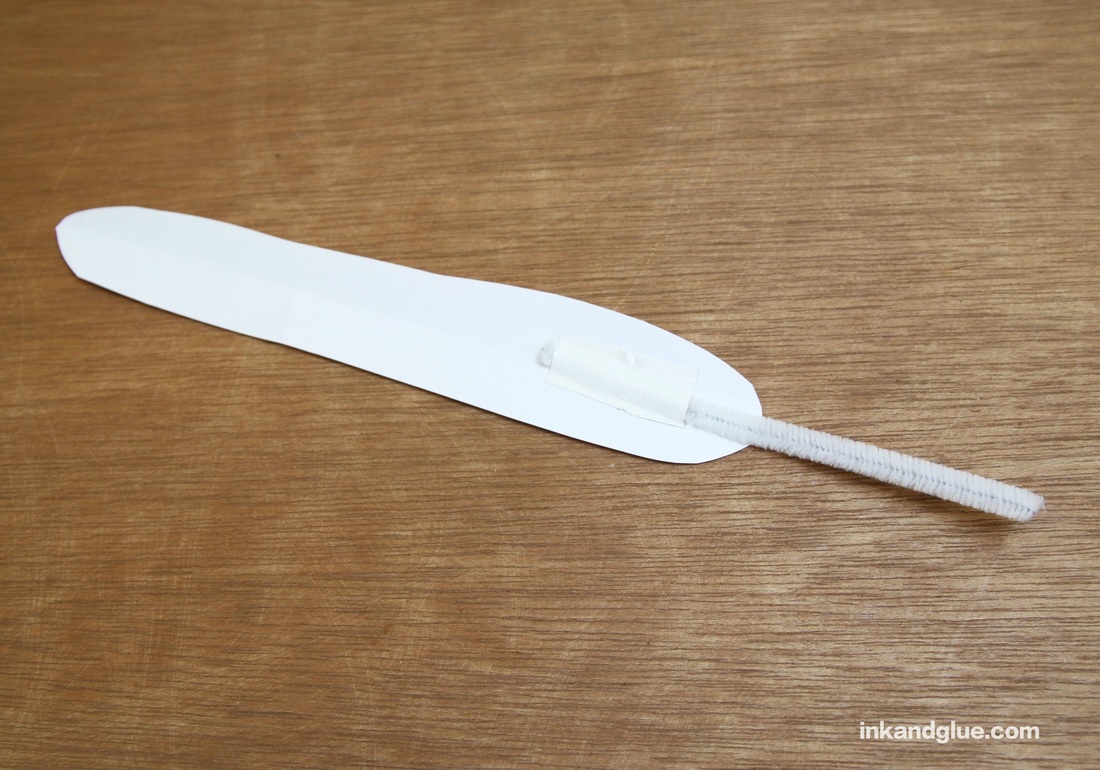
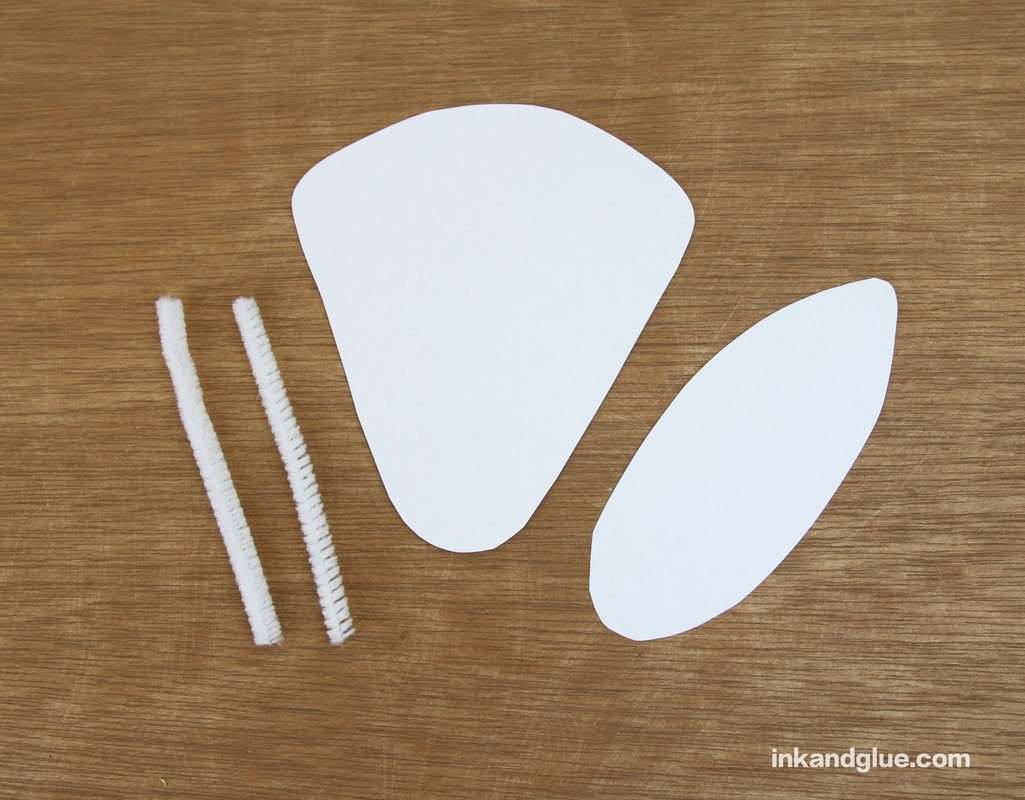
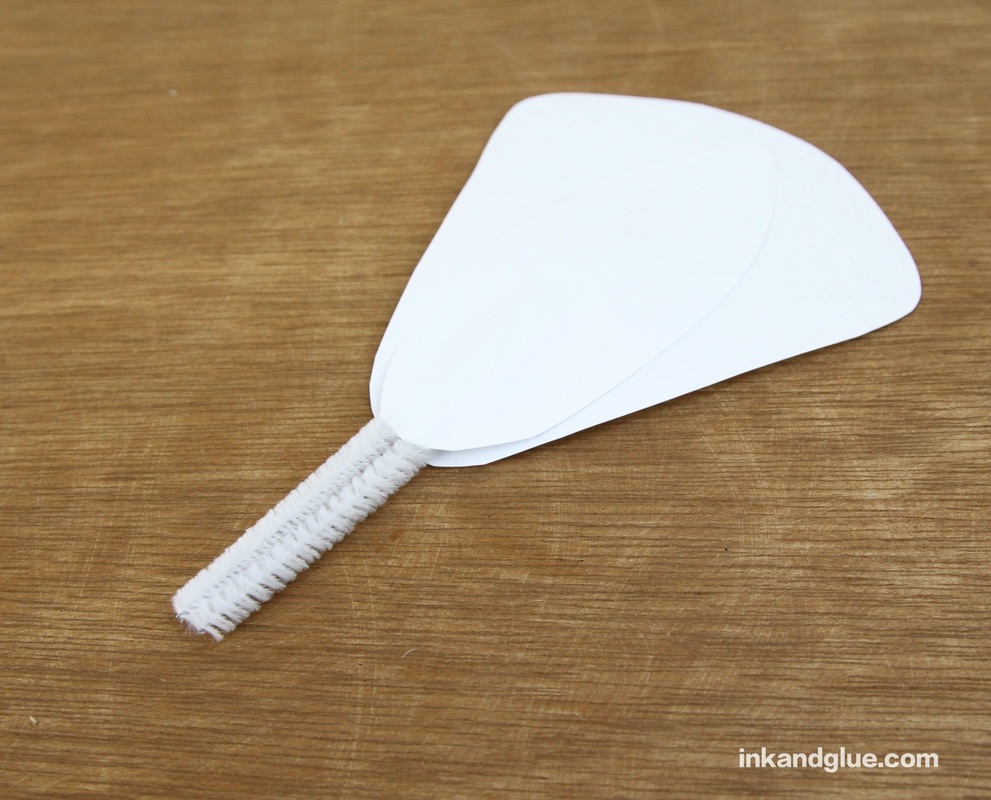
For the tail, draw and cut out a wide paddle-ish shape, and a smaller inset shape, from your paper. Use tacky glue to sandwich two pipe cleaner sections between the two pieces, centering them and leaving a few inches protruding, as shown.
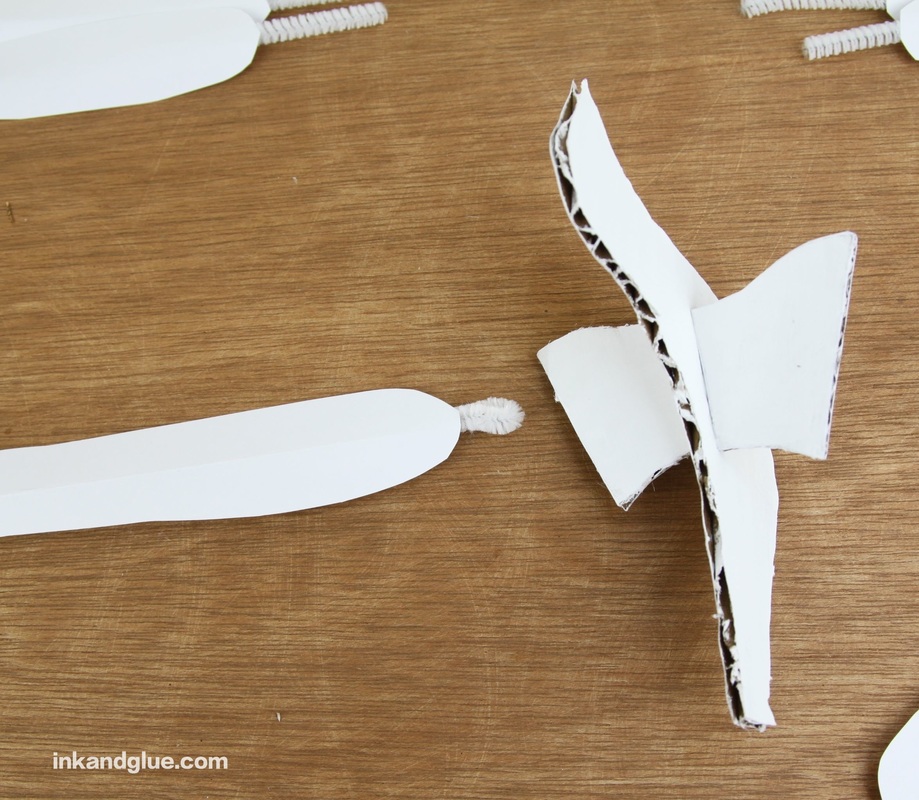
Create a bunch of feathers of varying sizes. I made 12 in all. 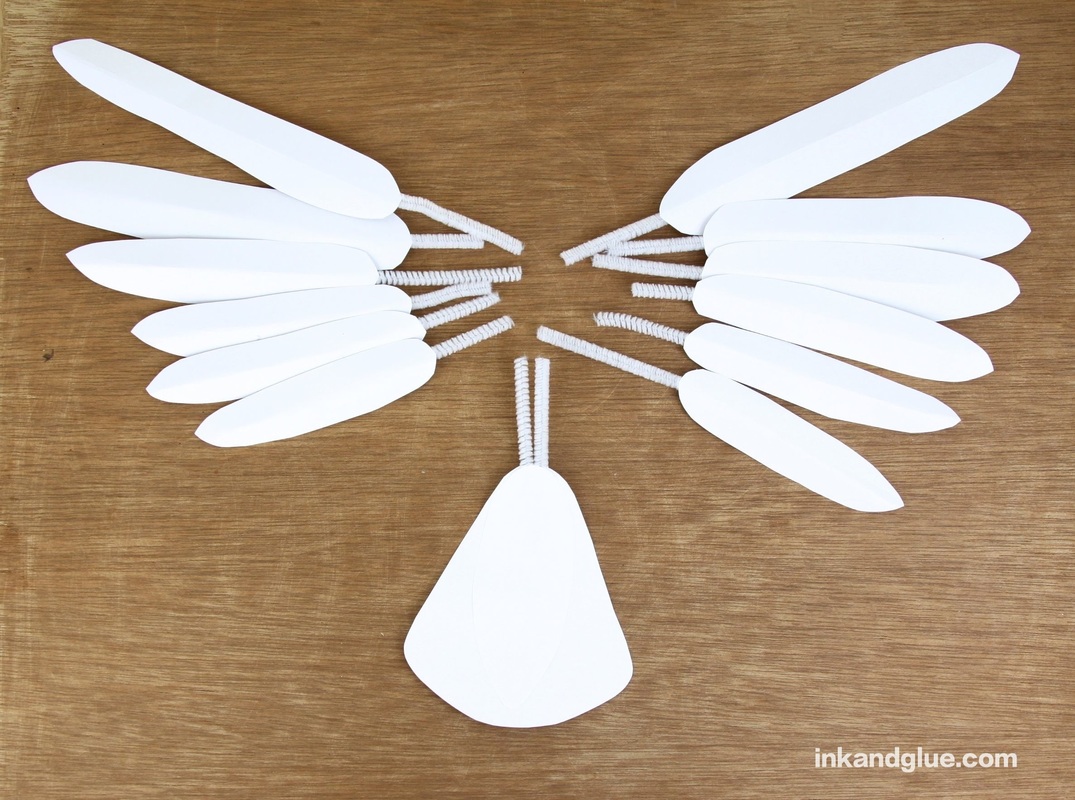 Now, to attach them to the cardboard base. For each feather, fold over the end of the pipe cleaner and insert it into a channel in a wing base. You will need to trim some of the pipe cleaners so they don't extend out of the other end of the base. Cover the folded-over end with glue, and slide it into place.
Repeat with the rest of the feathers. You may find you don't need to glue some of the feathers that are further back in the base. Nice. 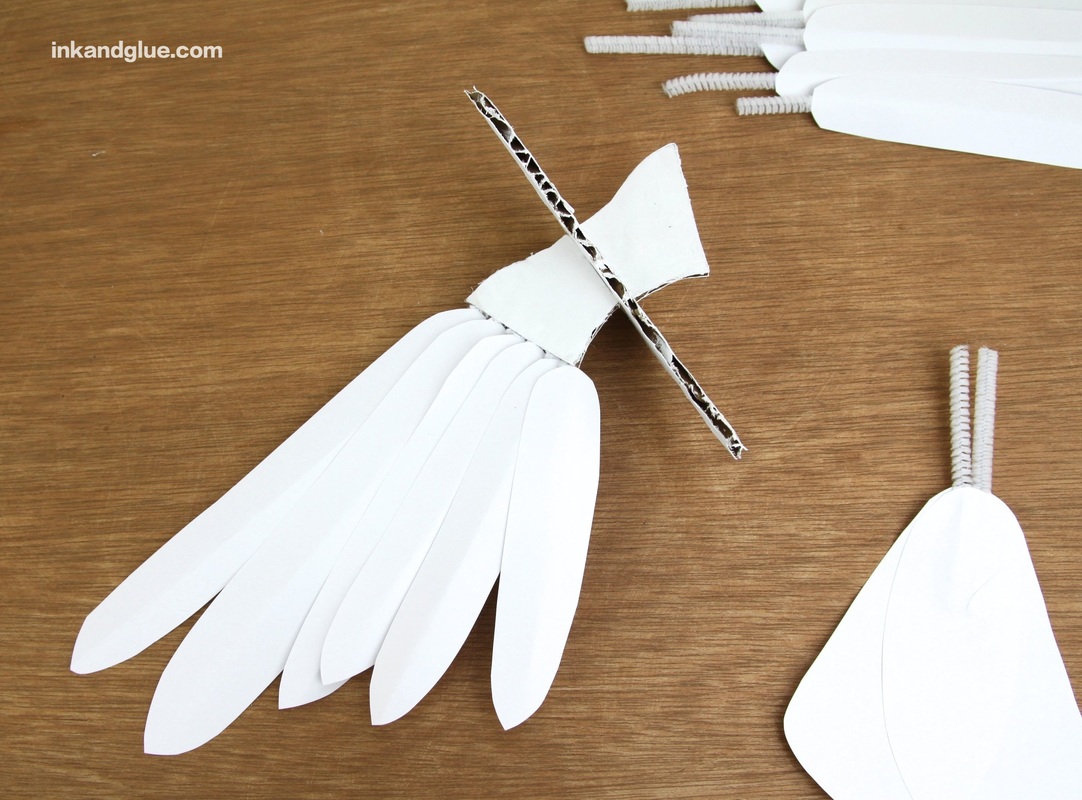 For the tail, insert the two pipe cleaners into the end of the bird base, then gently twist the tail 90 degrees. 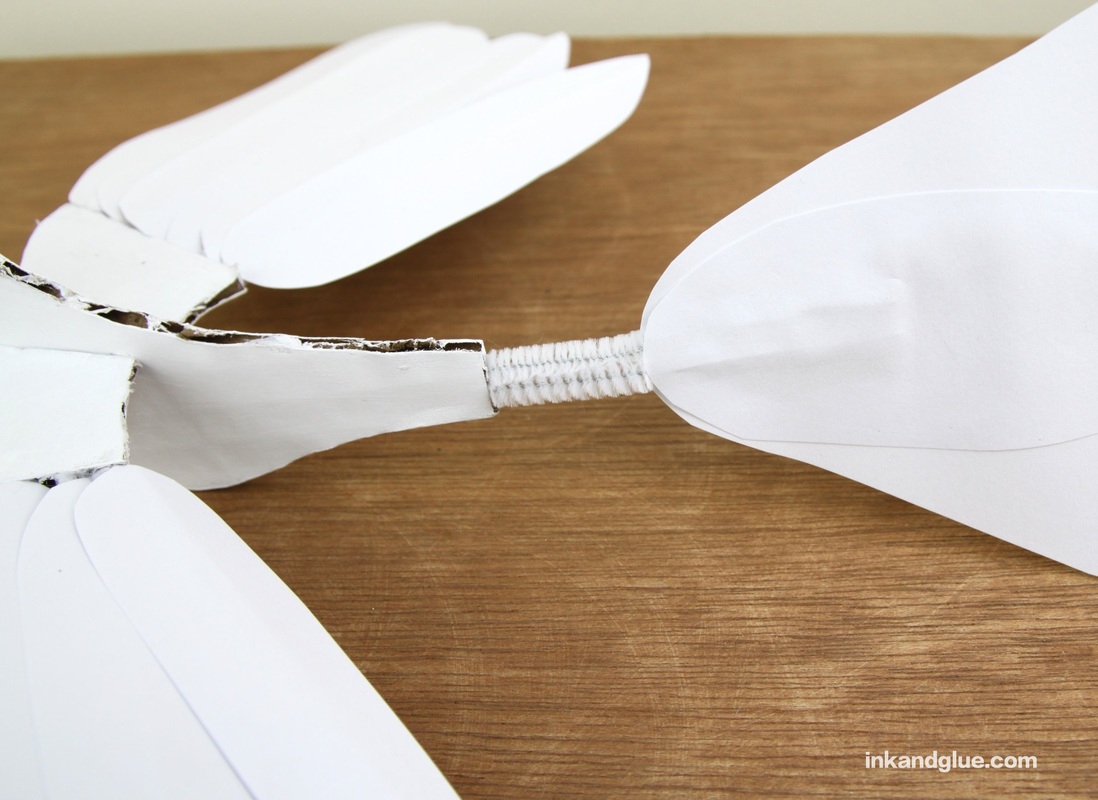 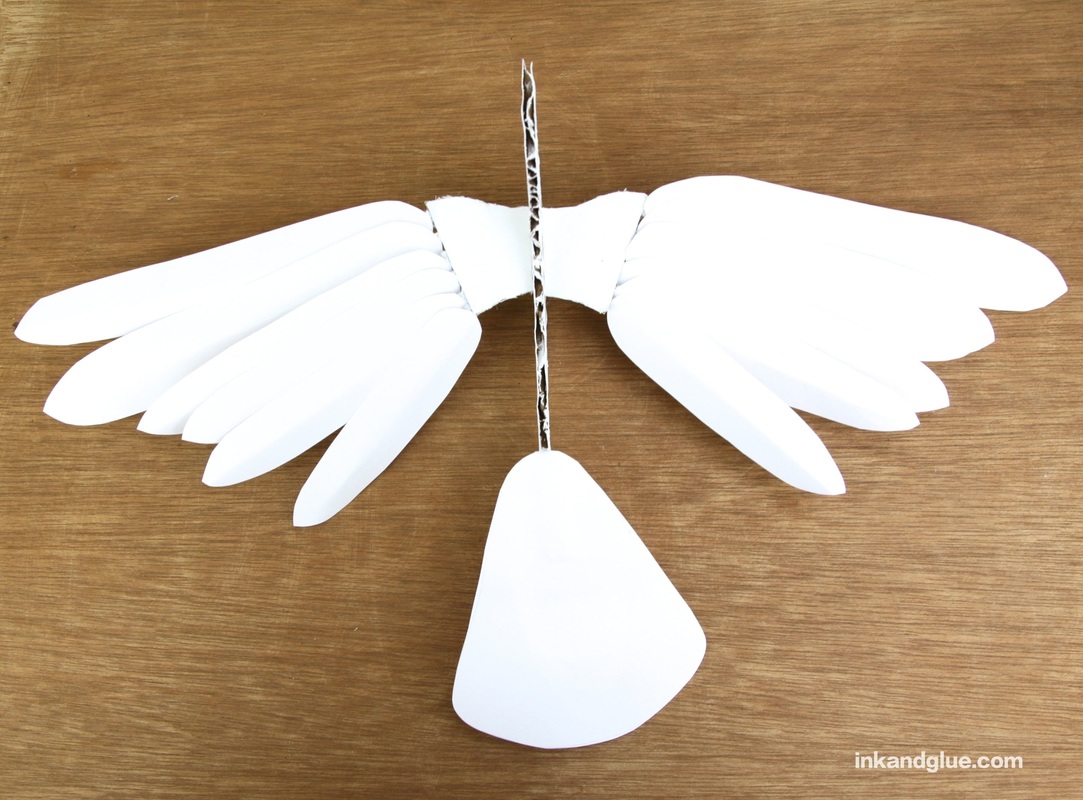 You're cleared to fly! I recommend clipping the back with a clothespin, and tying string or thread to the clip. It's not the most beautiful choice, but it is infinitely easier and more adjustable than anything I've tried. And this is supposed to be fun, you know? 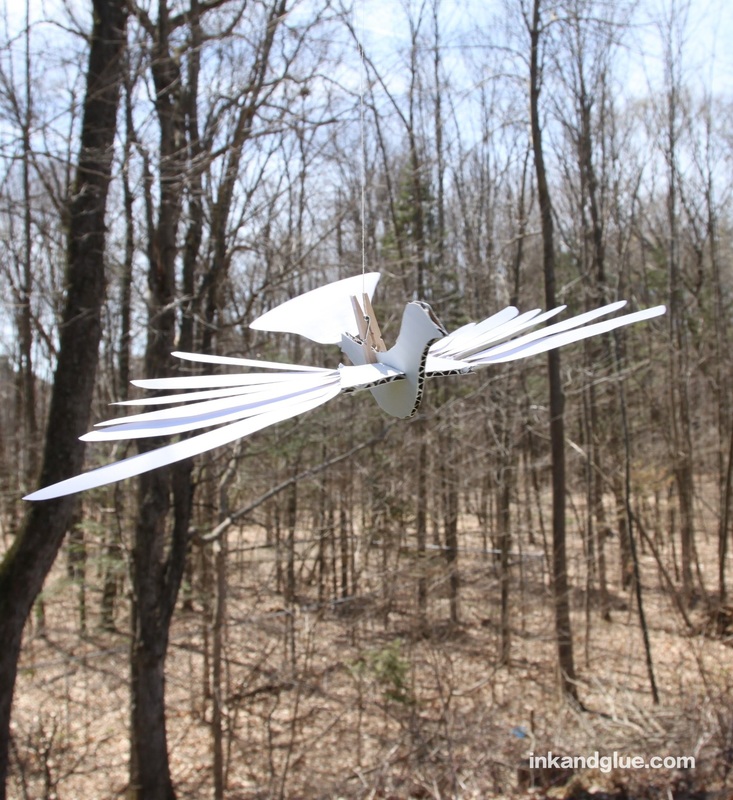 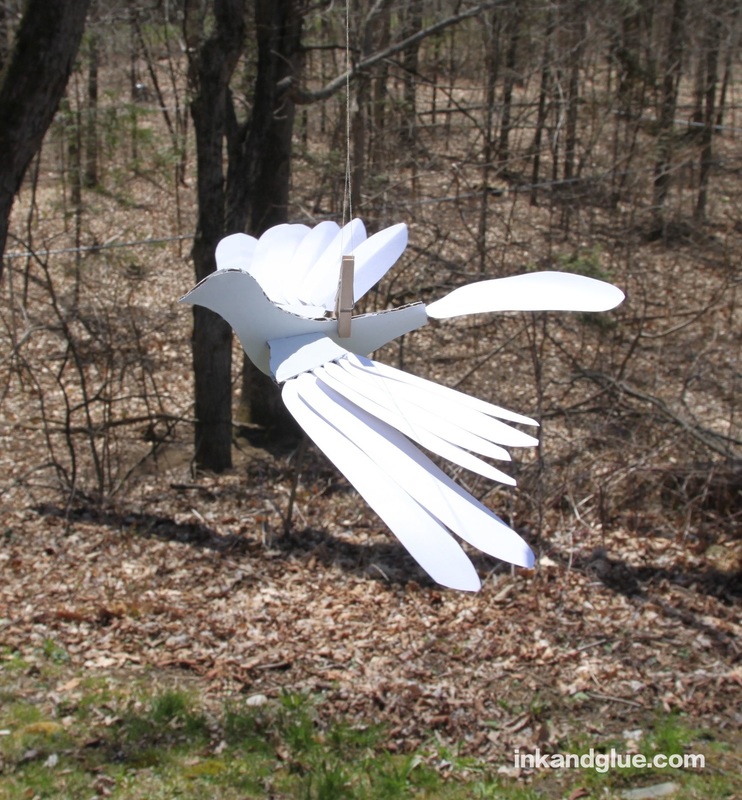 Peace to you and yours! Happy Earth Day!
xo |
Categories
All
Archives
March 2017
AuthorI'm Debbie Way, an artist and writer who enjoys making things. |
||||||||||||||||||||||||||||||||||||||||||||||||||||||||||||||||||||||||||||||||||||||||||||||||||||


 RSS Feed