|
More eco-friendly-ish goodness from the 1960s! Would you believe these character caddies are made from empty detergent bottles? (Ok, yes, I would.) 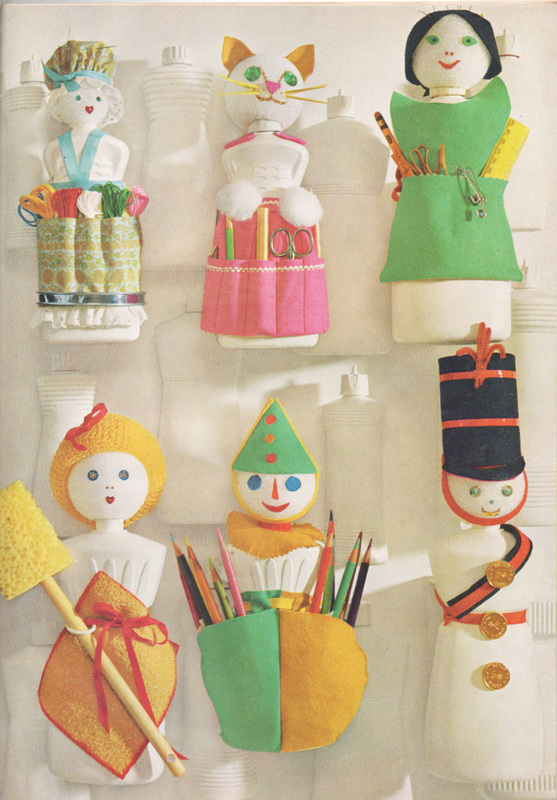 Here are some directions to help you make them. Note: The Styrofoam-ball heads take away some eco-friendliness from these crafts.  If you're not in the market for a caddy, and would rather have some fun, turn your containers into fun cut-ups!  Need directions? And a nice pic of those owl and pussycat wind bells? I got 'em. 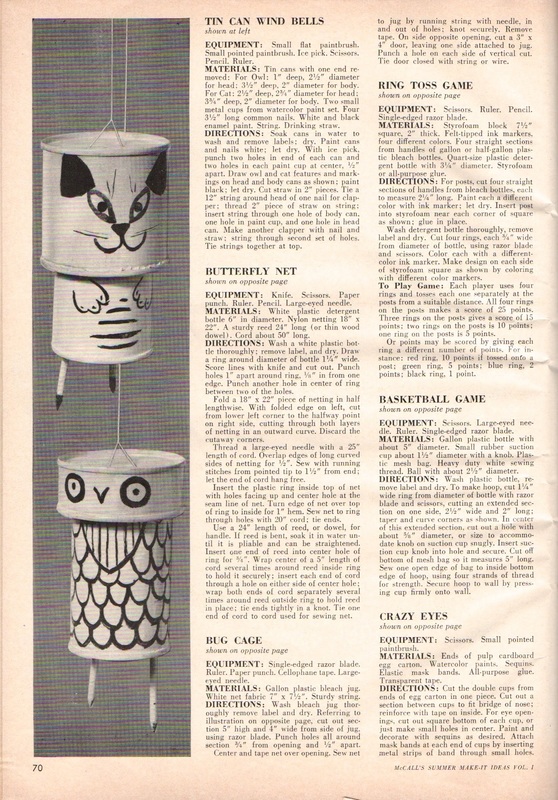 xo!
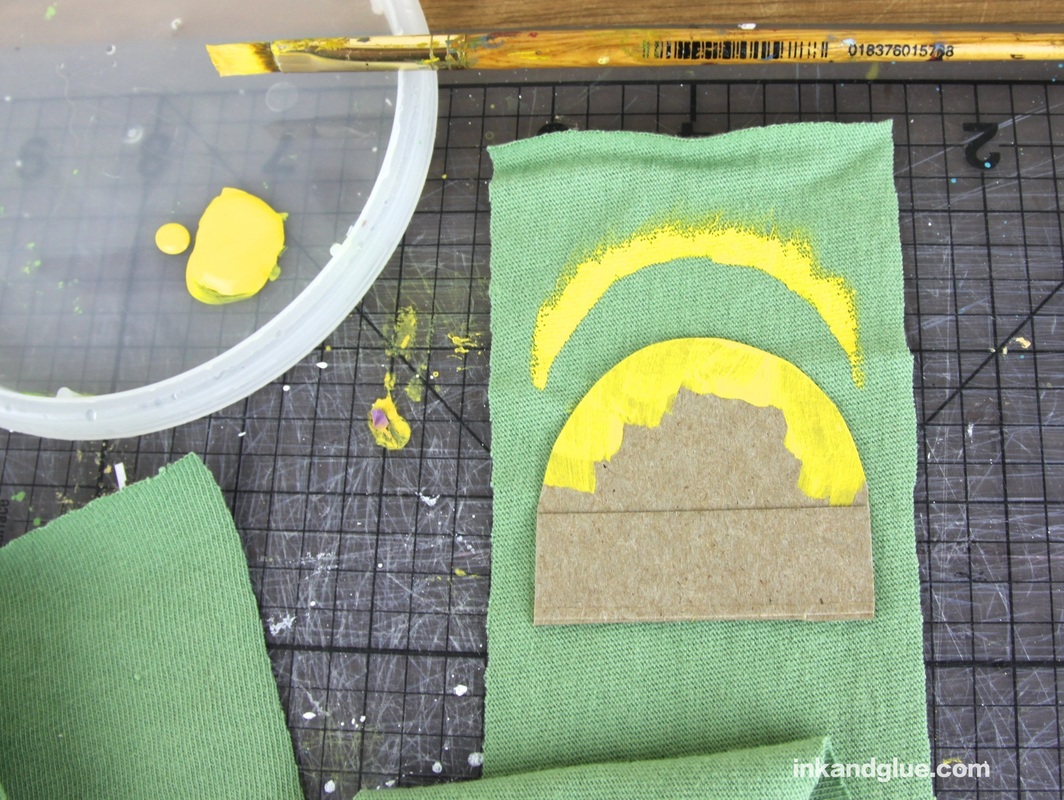
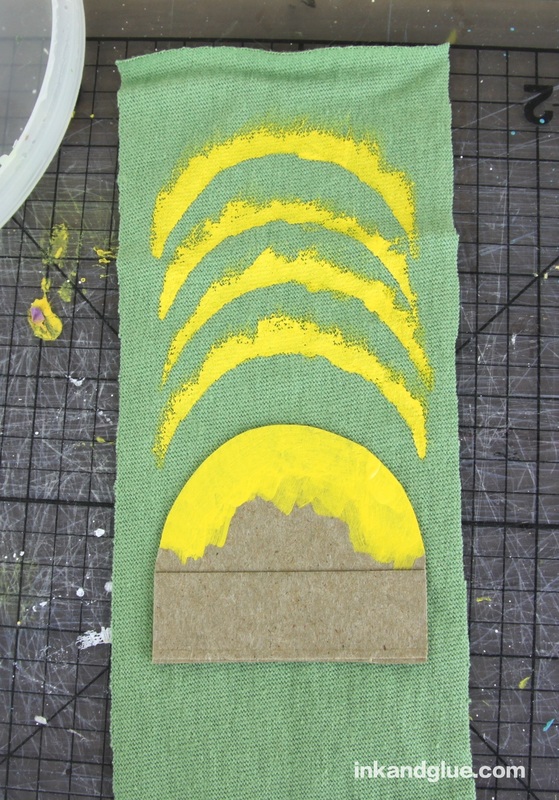
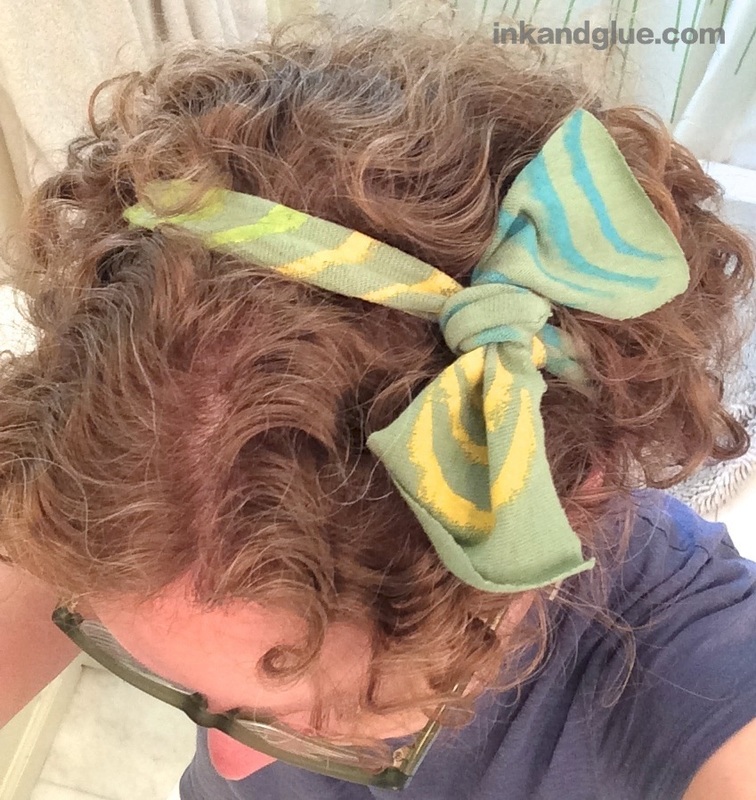
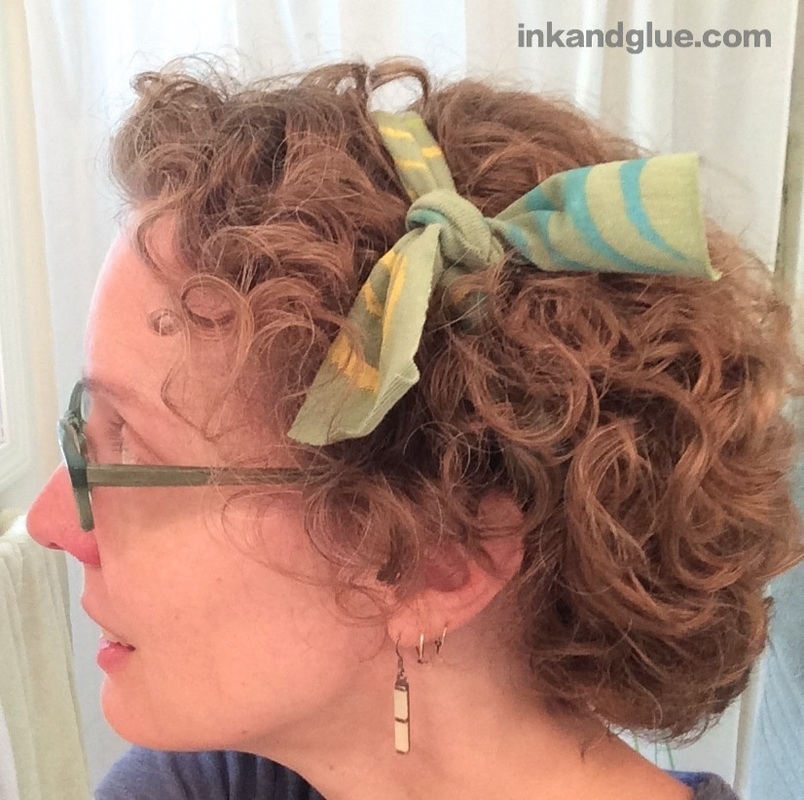
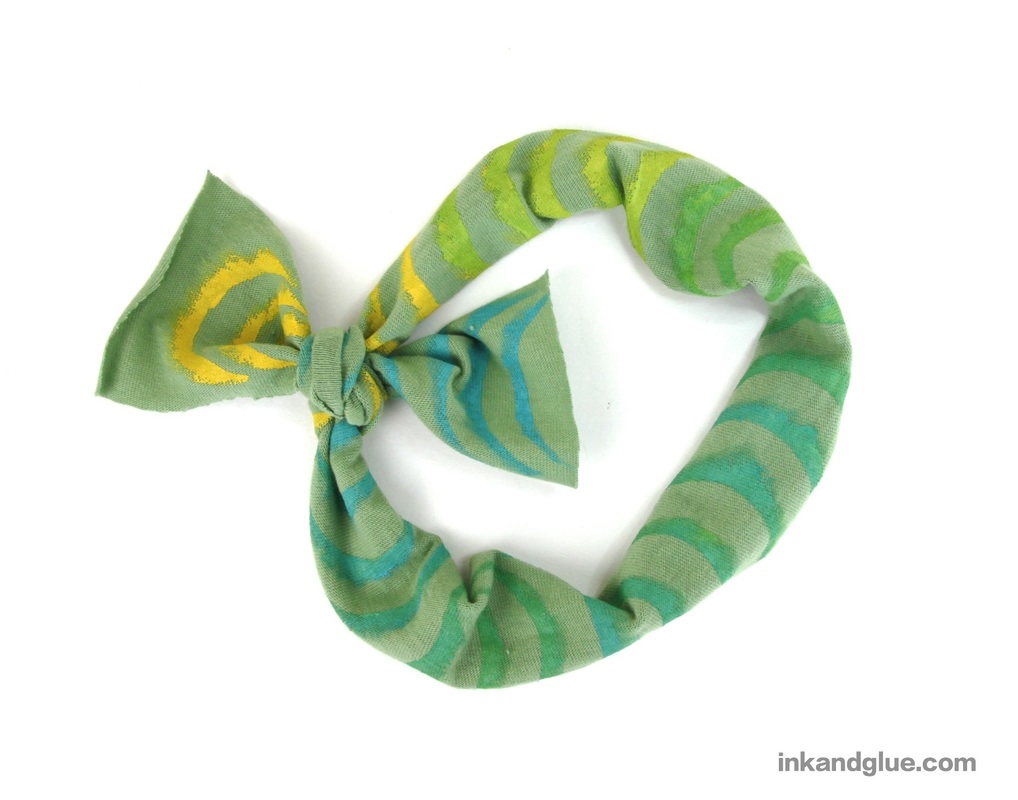 This project is both super cheap and very customizable. It uses a sort of a half-stencil to create a simple pattern on your fabric of choice — here I've used cotton jersey, which doesn't need to be hemmed, and is stretchy enough to make a comfortable headband or headscarf. To make one, cut a 3-inch strip from an old t-shirt (I bought an XL men's t-shirt for a dollar at the local Goodwill). Tie the strip around your head, and trim the ends to the length you want. 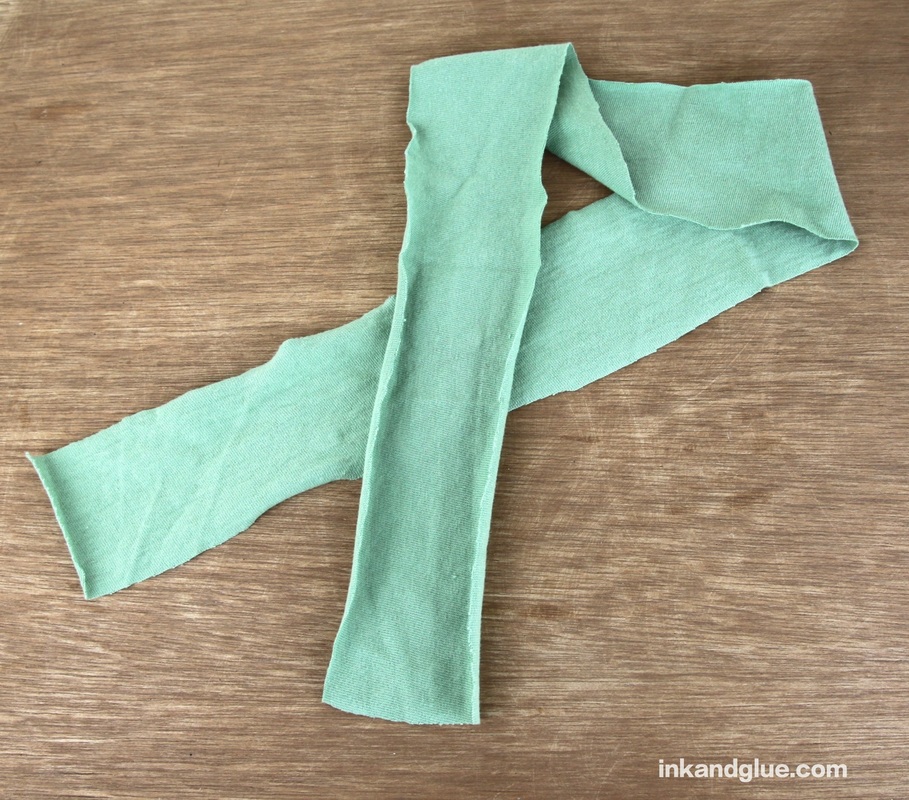 You'll notice that one side of the fabric curls up; you'll want to print on the convex side of the knit (at right, below). If you print on the side shown at left, it'll get all rolled up and you won't see it!
Cut a roughly rectangular shape from a piece of cereal box cardboard. Trim one edge into the shape you want to print. I wanted a simple half-circle for a vaguely fish-scale kind of a look; you could try a zig-zag, or multiple half-circles, or just a straight line. Just keep the shape simple, for the best results.  Grab some fabric paint and a brush. Hold the cardboard onto the fabric, near one end of the strip. Brush paint on the shape and onto the fabric. All of your brush strokes should go from cardboard-to-fabric, never fabric-to-cardboard, or you'll get bleeding along the edge. But this is a loose, sketchy design, so if your edge isn't clean, whatever. It's part of the handmade charm!  Move the shape down an inch or so and repeat.
About a third of the way down the strip, I added some aqua blue to my yellow paint and swirled it around. By the time I reached the end of the strip, I was using almost all aqua blue. You could choose to alternate colors, too, though you should use a second cardboard shape and brush to avoid cross-contamination.
Let the paint dry, and that's it — you're done! 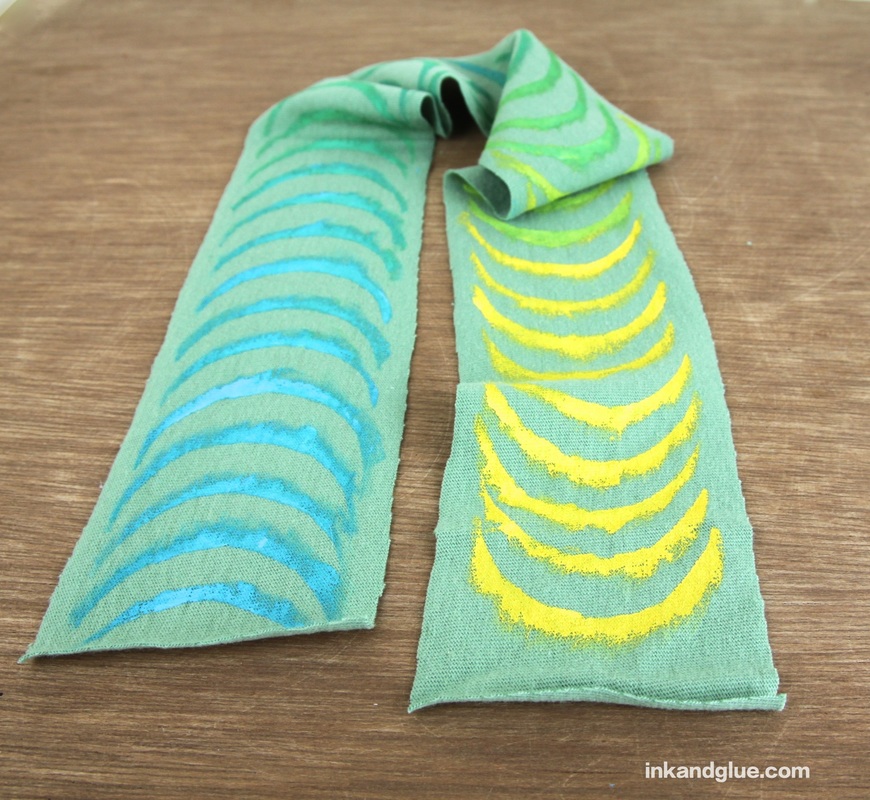
If you don't mind a little clean-up work, this project would be great for a playdate or even a summer birthday party. You gotta love an activity that creates its own party favors!
xo!
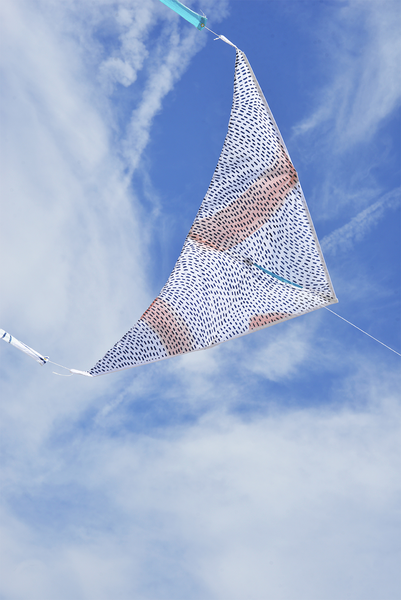
These kites are made by Haptic Labs. They screen-print the fabric by hand in Brooklyn, NY, then send it to Pennsylvania to be sewn and assembled. I hear a sentence like that and I think, great, just what the world doesn't need: a $350 artisanal kite. But no: both kites shown above cost a reasonable $42. (Click on each image to go to Haptic Labs' shop.) Not as cheap as the plastic doohickies you get at the pharmacy, but these puppies are built to last.  They also have a line of sailng ship kites, which are just what you'd imagine (or daydream). They would look so magical in the sky! 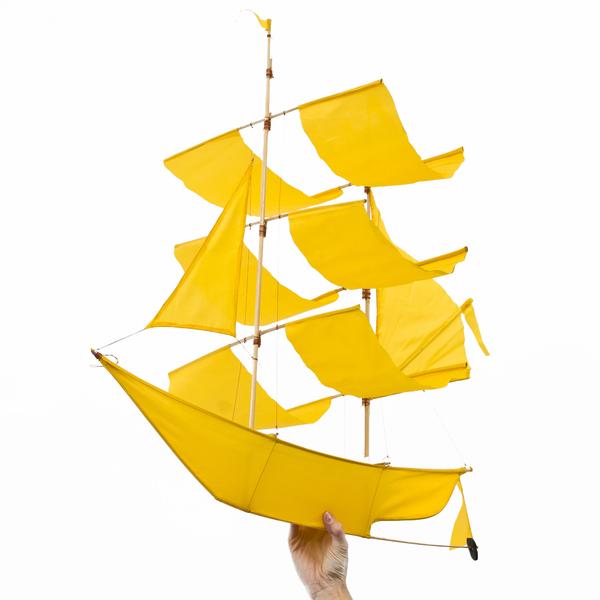 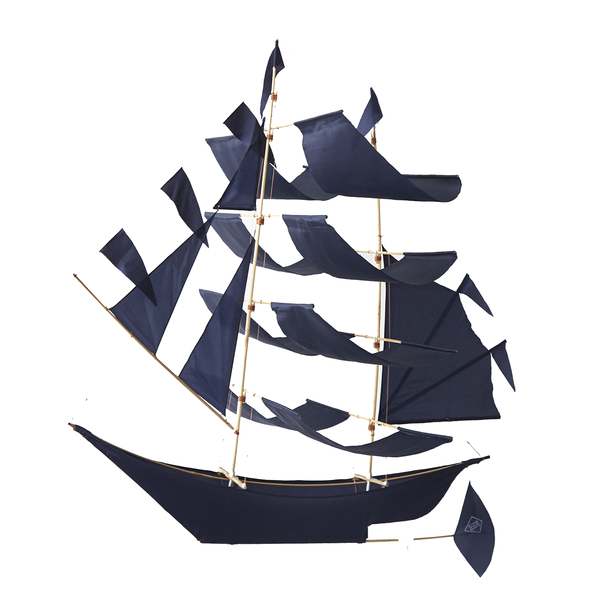 Franklin is not afraid of hopping up into the hammock and sometimes taking a little snooze. We are alike in that way. 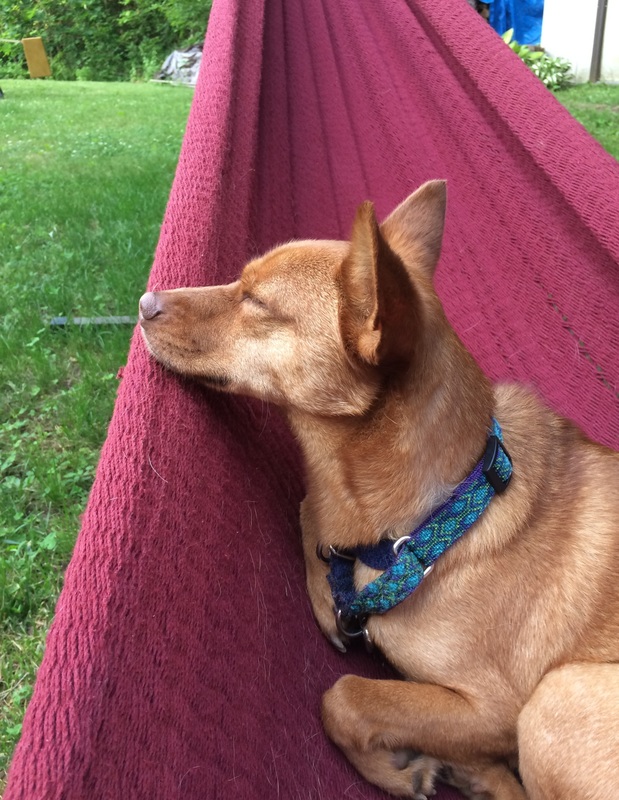 xo!
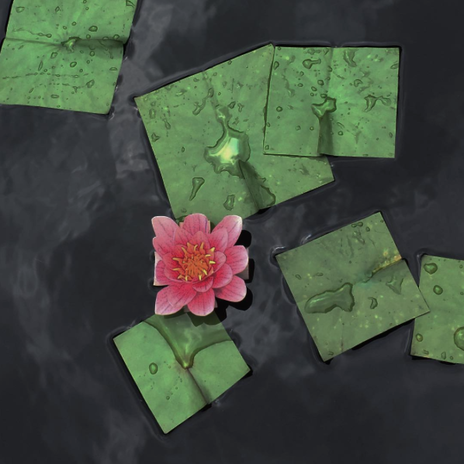
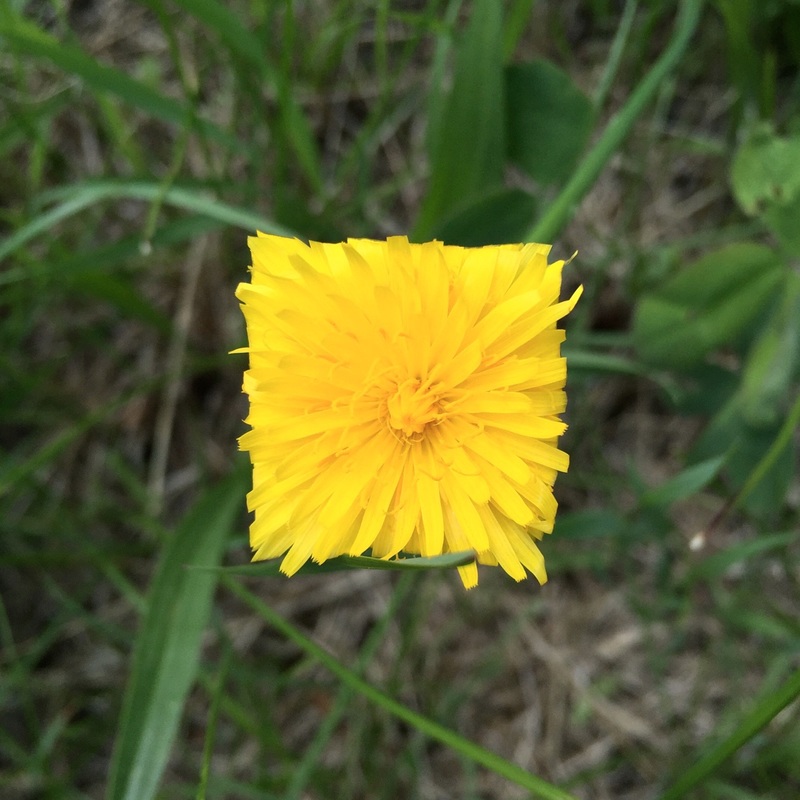
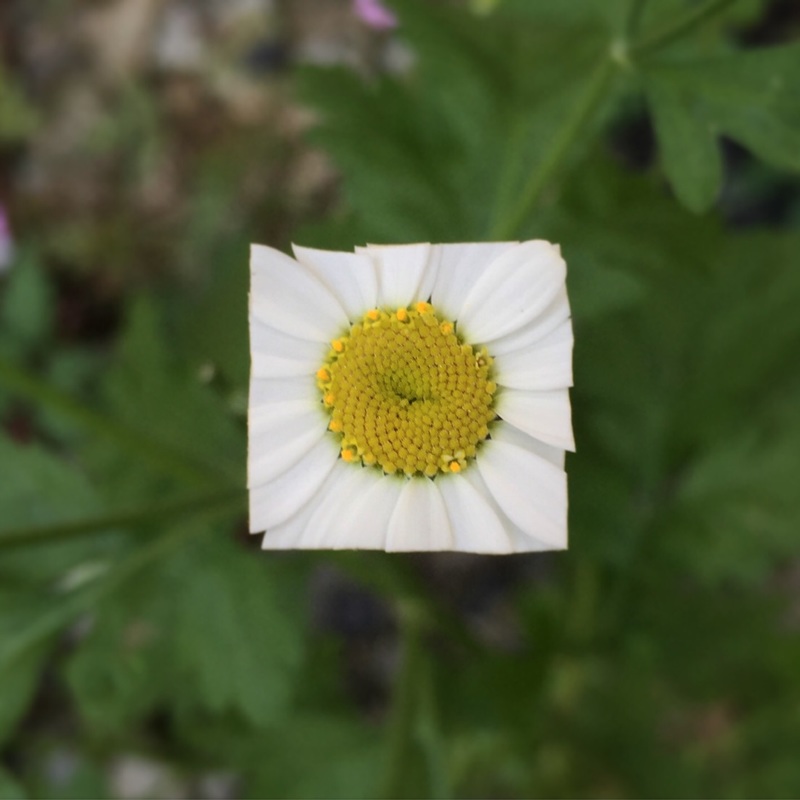
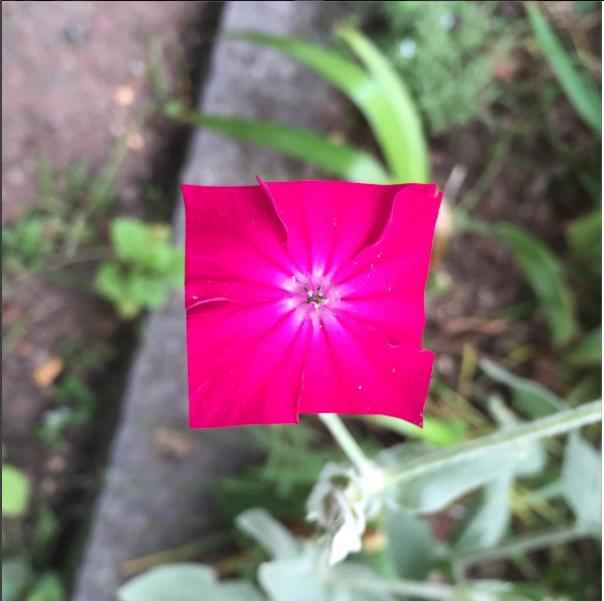
Have you met Baku Maeda? He's an artist who transforms the everyday into the unexpected. Recently (as you can see on his Tumblr and Instagram), he's been squaring up flora for a series called '1bit' (also 'bitleaf' and 'bitflower').
 From another McCall's Summer Make-It Ideas mag! I do love a mod, pop-py tissue paper collage project. Excuse me: not collage, "tissue painting." I like the blue lady, the sun, and the small flowered boxes the best.  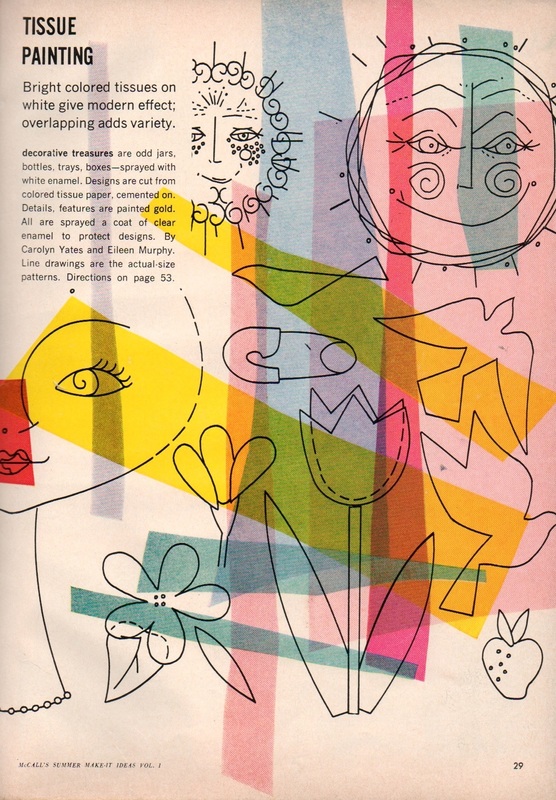 The instructions call for generous amounts of rubber cement and aerosol sprays of various kinds, none of which are kid-friendly. You can skip all of that and use Mod Podge. If you want to seal the surface, however, I do think a spray sealant would be best—brushing on a top coat could make the tissue paper dye bleed and get smeared around. 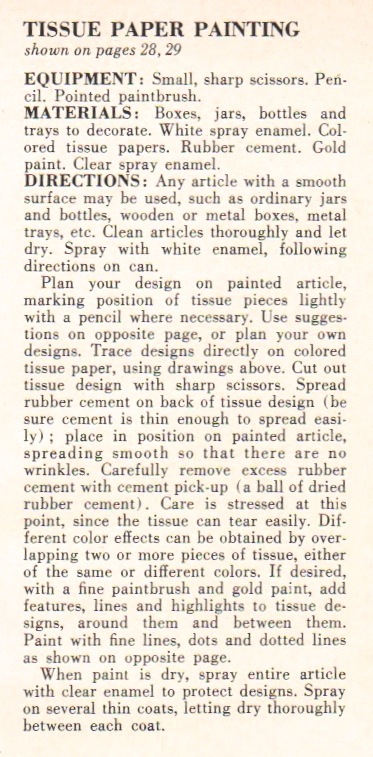 Happy tissue painting! xo
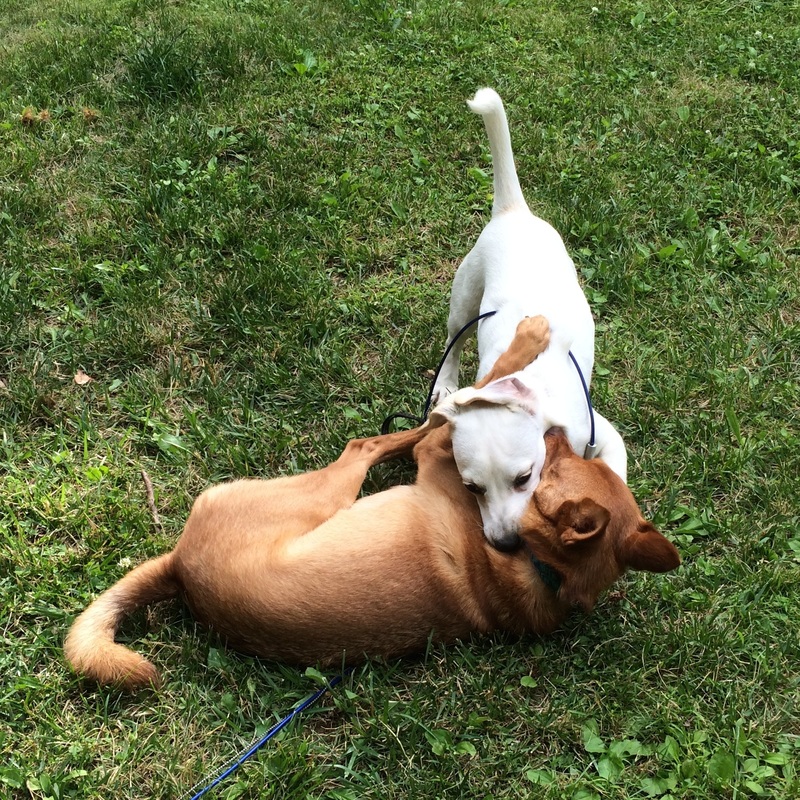
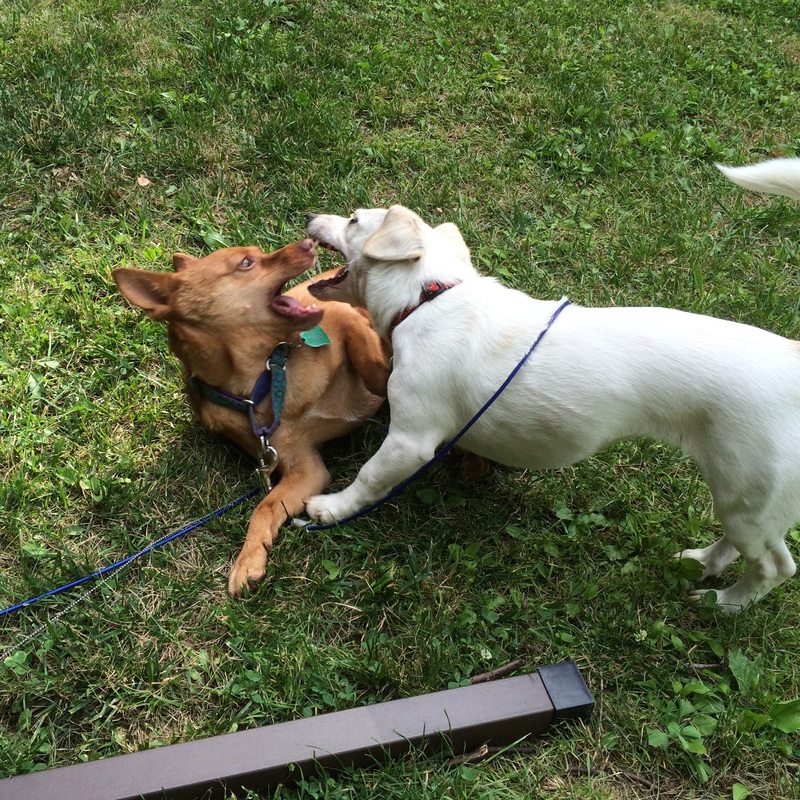
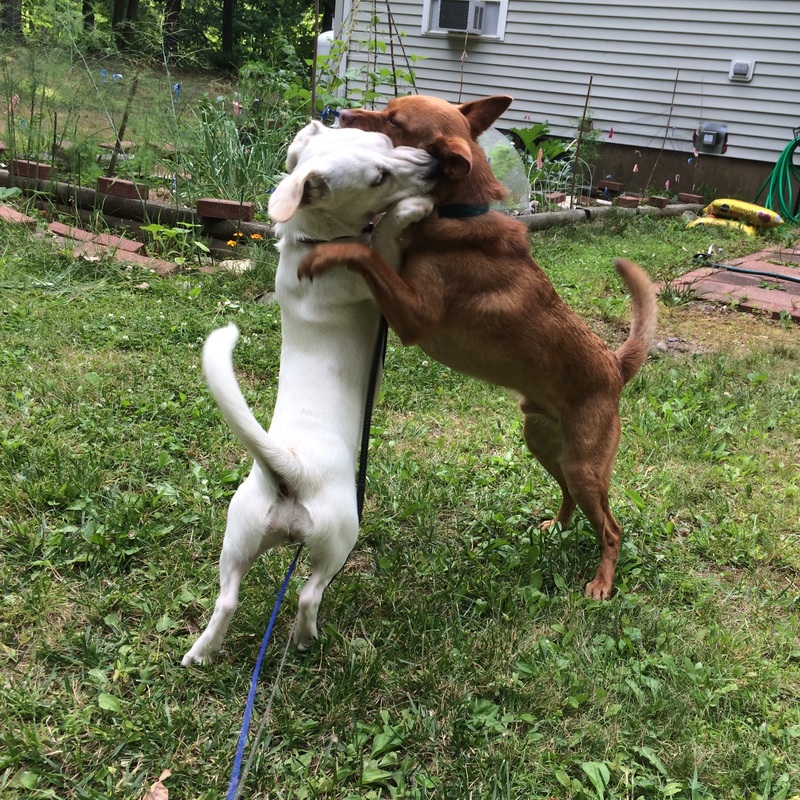
We have a guest dog staying with us for a couple of weeks, and she is a delight! Her name is Bbo Bbo, and she's about six months old. And she and old-man Franklin (he's two) love, love, LOVE to wrassle and play.
Almost nothing brings me as much pure happiness as watching dogs playing together, and these two are tops at it.
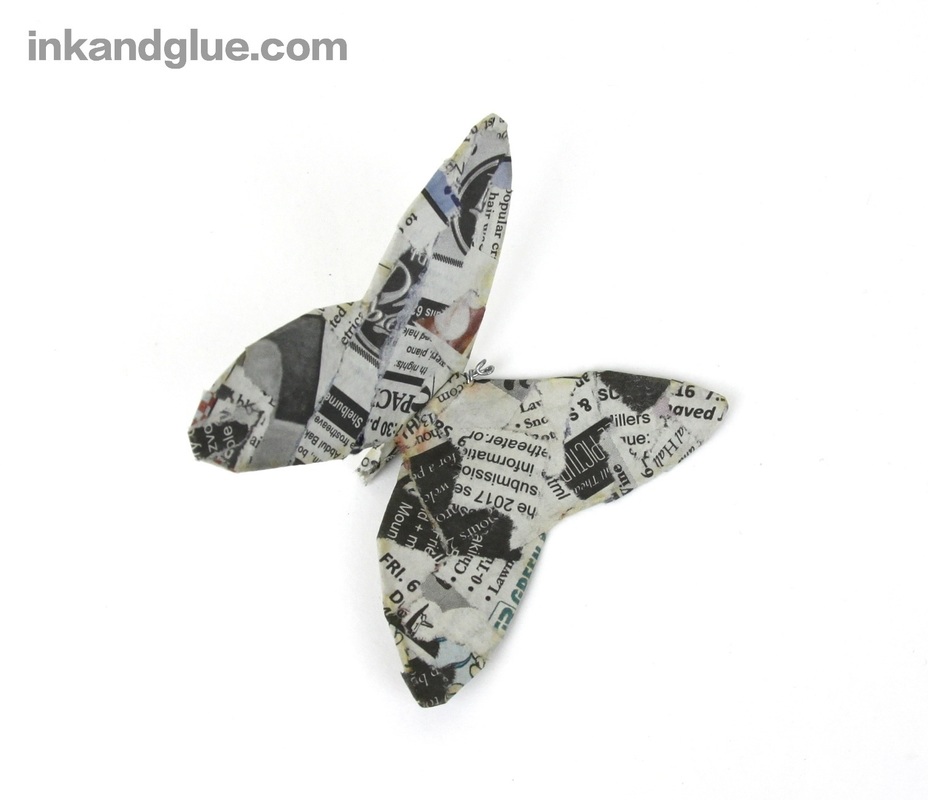
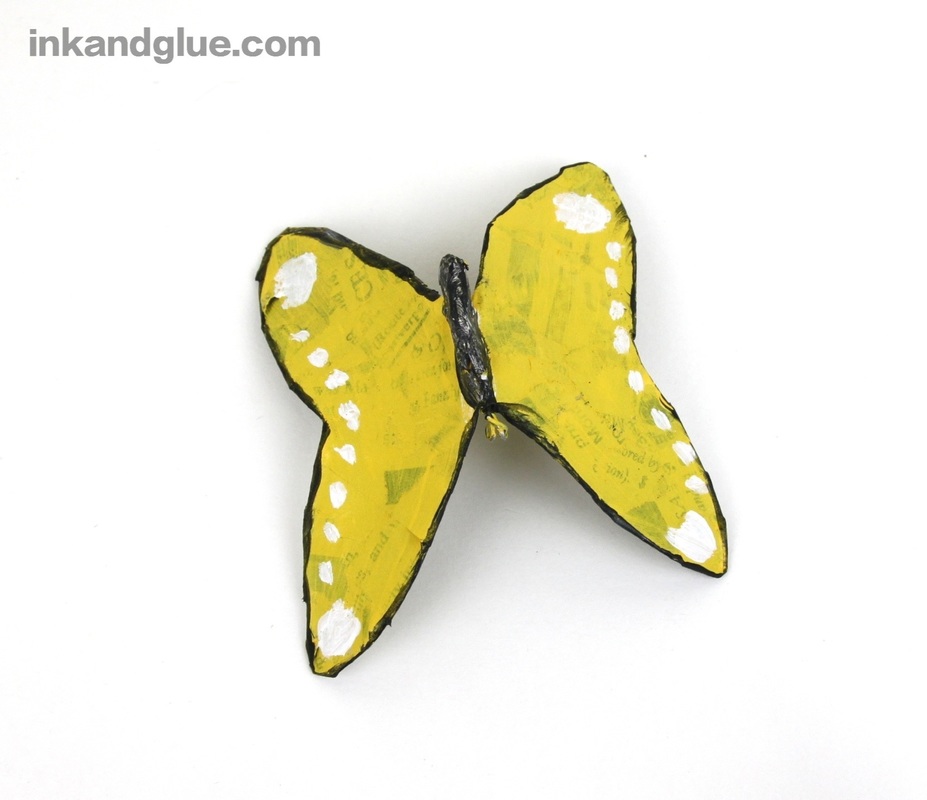
xo! Yes! There is one more. Take a look at the two previous butterfly crafts (one that's directly from Alkema's Scrap Magic, and a variation) if you're unfamiliar. 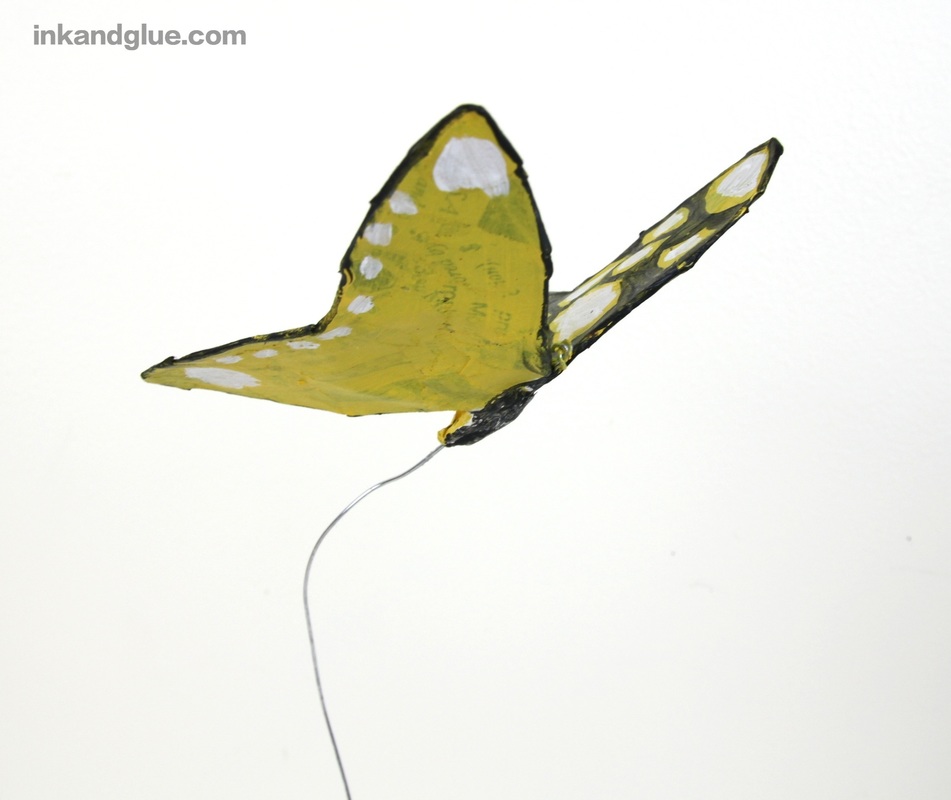 This one is probably the trickiest of the three, but how difficult it feels depends on where your skills lie. The shaping of the butterfly all happens in the first step, and you end up with basically a single-piece object, which can be less frustrating than having to put together four separate wing pieces. However, the papier mache-ing is a bit more difficult (I think it's still fun, though). Here's how you make this butterfly. Shape a piece of sturdy craft wire (I used 22-gauge steel wire) into a butterfly. (I made two equally-sized loops and a skinny loop in the center and then wrapped the ends around the center to make the body. Then I bent the wings into shape.)  Next, tear pieces of newspaper into strips of various widths, none more than an inch or so wide. Prepare a small bowl of wallpaper paste or papier mache goop. Dip strips into the paste/goop, smooth the excess off with your fingers, and wrap the strip around the wire armature. Keep covering until the wing and body surfaces are complete. Lay the end of a foot-long length of wire against the body, and smooth a couple of layers of paper over it to seal it to the body. Let everything dry. 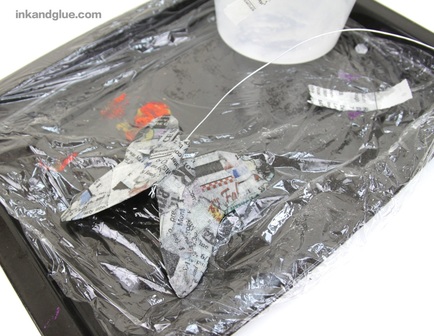 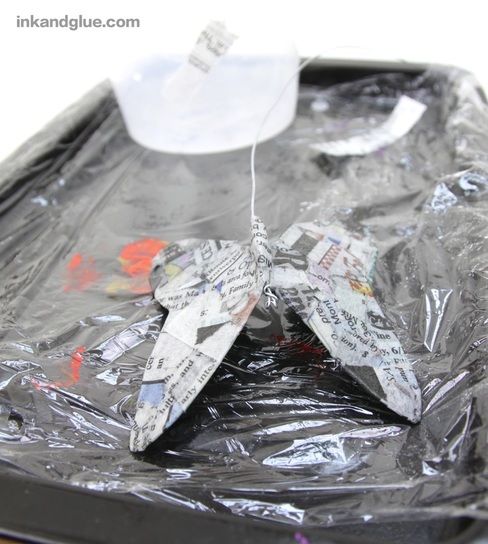 You may find that when you handle the dry butterfly that the wire stem you attached at the end slides right out Don't worry about that right now; it's time to paint! Use acrylic or tempera.
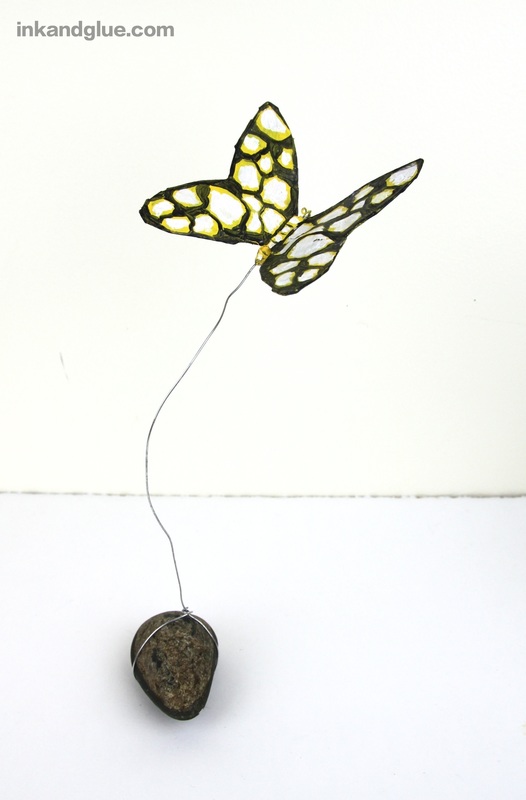
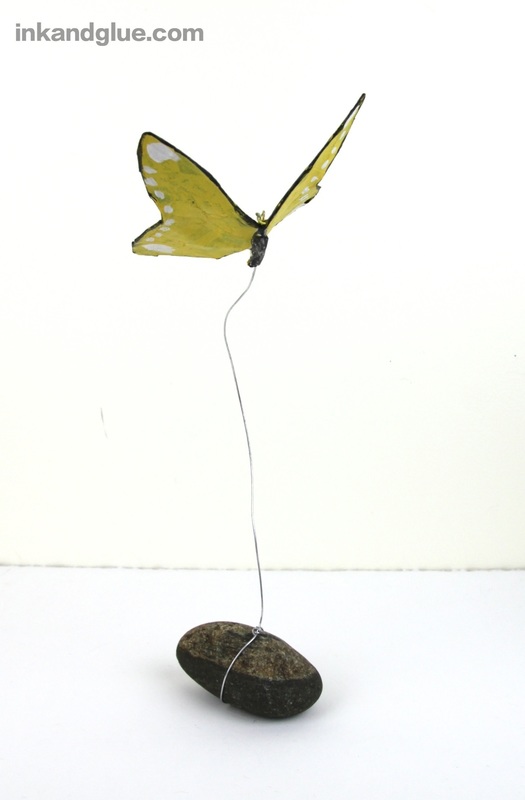
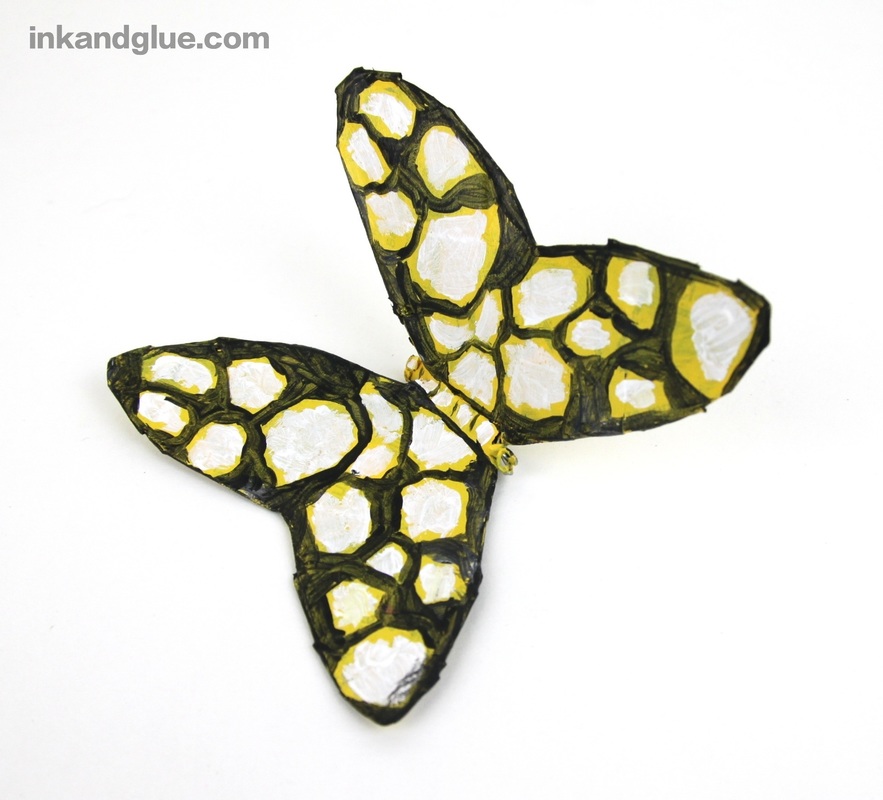 I did multiple coats to get a more realistic-ish effect, though I think the pattern turned out a little weird. Ah well. Now, reinsert the stem wire, along with a dab of glue, and let that dry. If the wire still won't stay in, poke holes in the papier mache near the sides of the body, thread the wire through, and twist it around the body securely. Either keep the other end of the wire straight, so you can place it anywhere — or, wrap the end tightly around a rock that's heavy enough to hold up the butterfly.
You're good!
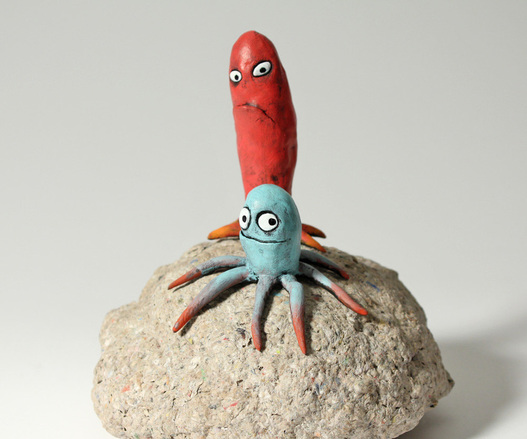
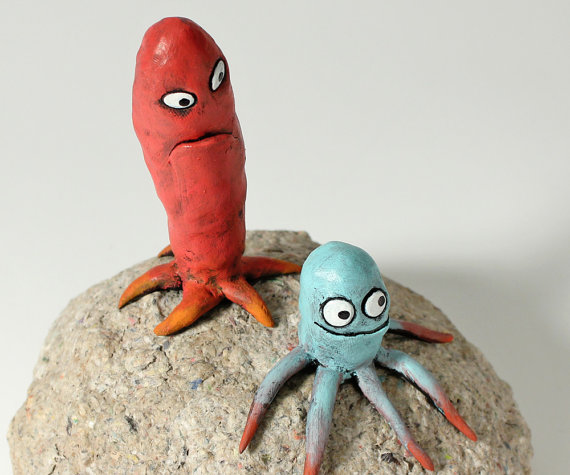
This concludes the trio of Alkema's Scrap Magic-inspired butterflies. I hope it was somewhat enjoyable. xo! I saw Finding Dory over the weekend, and really enjoyed it. (I'd say it was very good but not great. Worth seeing, though! And fun. I cried, predictably.) Anyway, it got me to searching for octopus/pi on etsy, which is how I ended up on Blob House's shop page. As always, click on the image to be sent to that item's shop page.
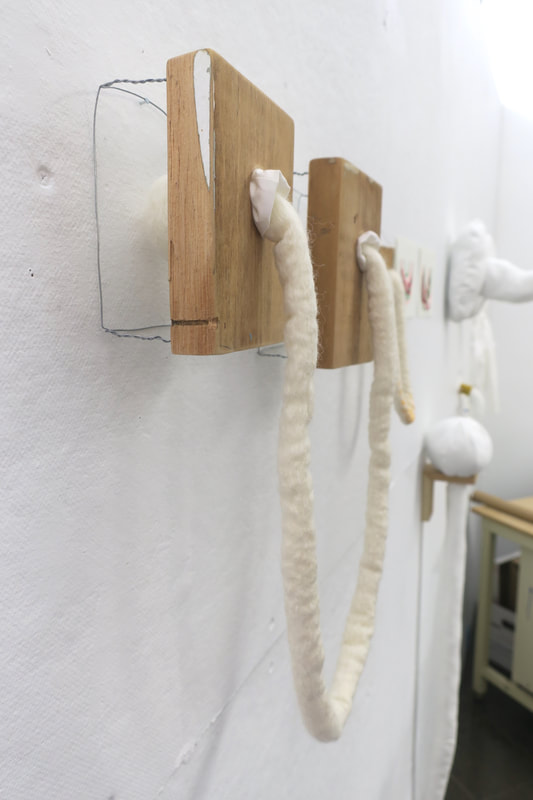
Most of Blob House's pieces are miniatures made of epoxy clay and polymer clay, and some have wire armatures for strength. This happy doggo seems to be enjoying his hand-knit sweater. 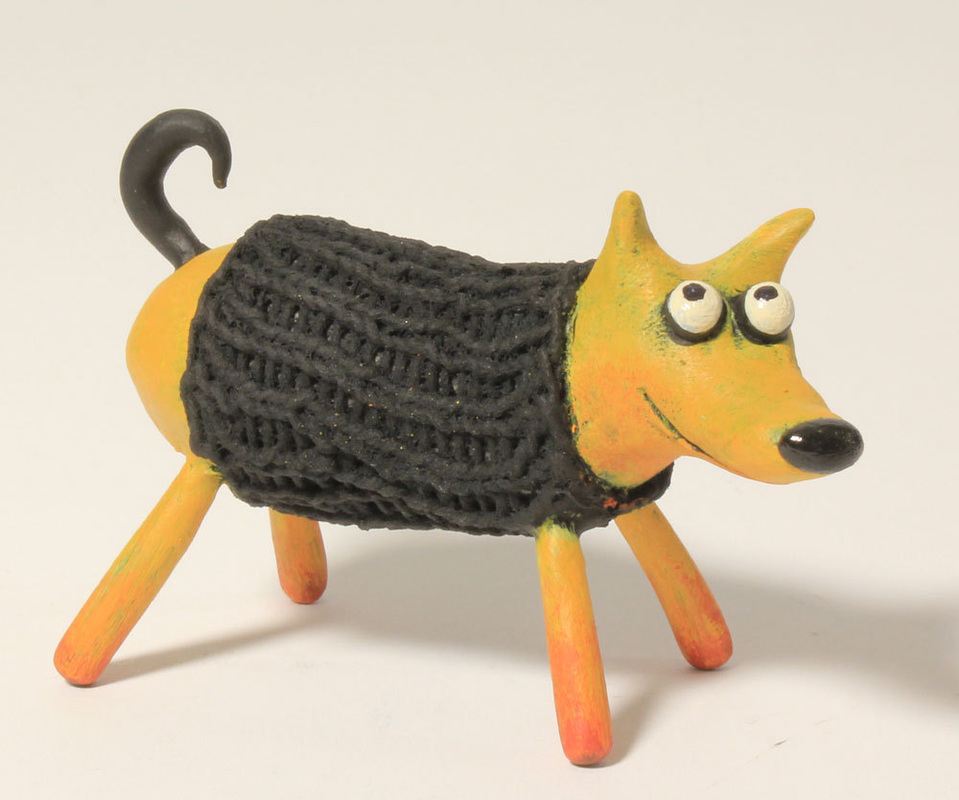 Not all are miniatures: this cat is life-sized (cat-sized, to be specific). It's made chiefly of papier mache, but looks more like cement or resin. 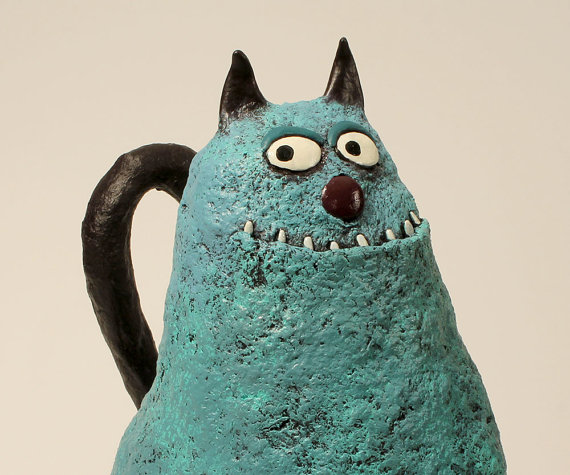 This bad squid is another miniature. I wouldn't want to meet him in a dark alley, that's for sure. 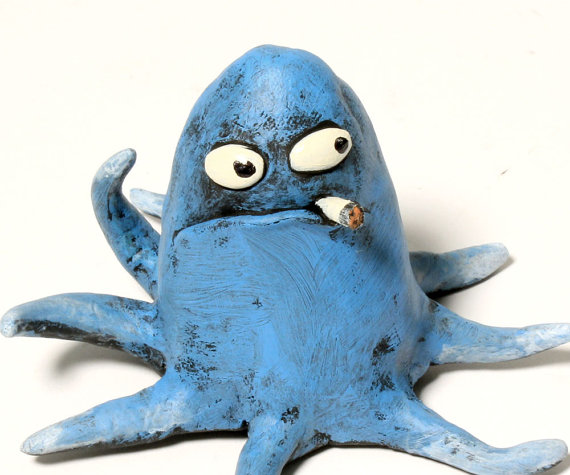 And these are little worry warts. Don't worry, little guys! It'll be ok!  As promised on Friday, I made a couple of butterfly variations of the project found in Alkema's Scrap Magic. Here's one of them. It's similar to the first in that you make four wing sections separately, out of papier mache and wire, and put them all together at the end. But here, instead of using scissors to trim the wing pieces at the end, you start by bending wire into the wing pieces. 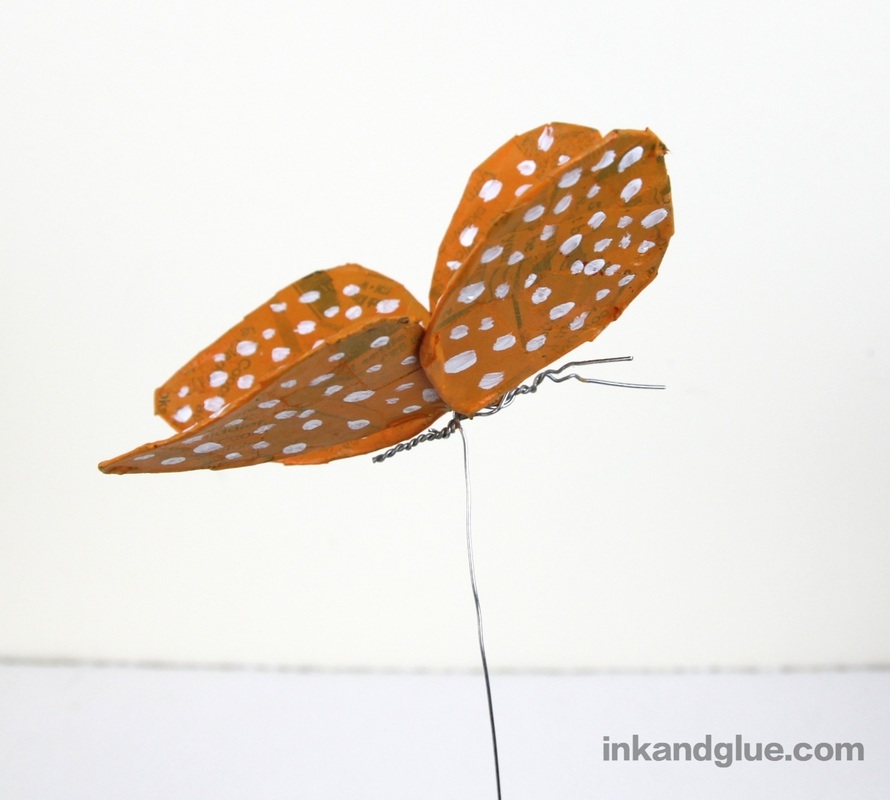 To make this butterfly, start by making four roughly-equal sized loops of wire, as shown. I used a fairly sturdy (but still easy to bend) 22-gauge steel wire from the hardware store. 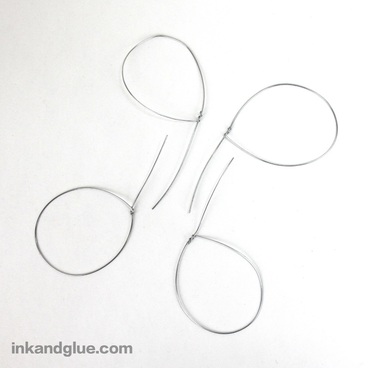 Bend the wing sections into more realistic butterfly-wing shapes, if you like. Prepare wallpaper paste or a flour and water solution, and tear up some strips and bits of newspaper. Working over a protected surface (plastic wrap or wax paper), dip strips into the paste, smooth the strips between your fingers, and wrap them tautly around the wire loops. Aim for complete coverage of the wire and the inside of the loop. Prop up the wing sections so both sides can dry evenly. 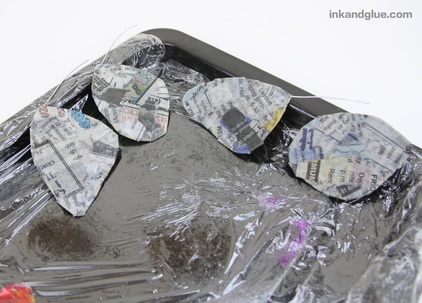 Here's what they look like dry and ready for the next step. 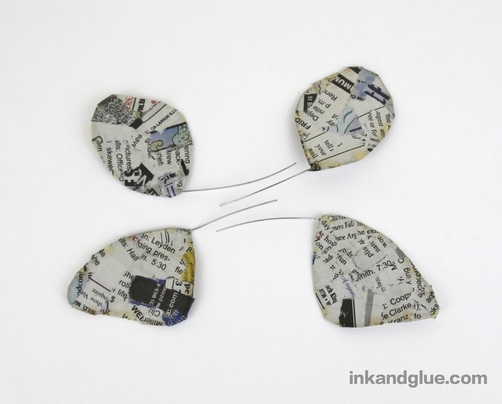 When everything is dry, paint both sides of the papier mache sections with acrylic or tempera paint. If you don't want the newsprint to show through, I recommend painting the sections white before adding the final coat or two. I liked the look of it showing, though — I think it looks more organic and natural. 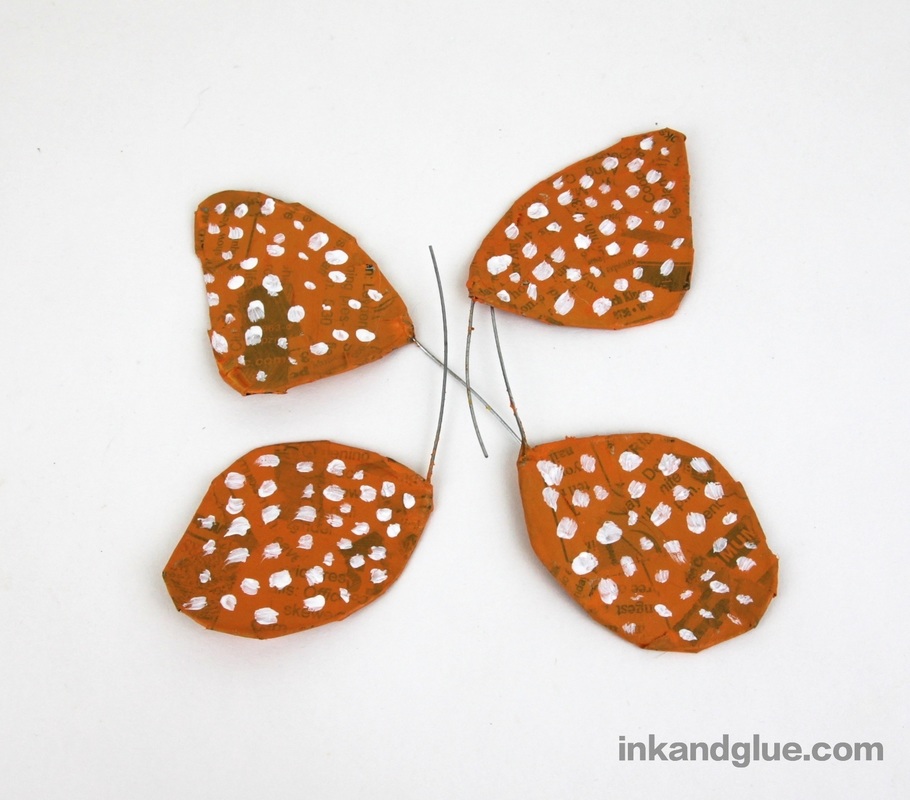 Pair up the wing sections and twist each pair together, close to where the wire meets the paper.  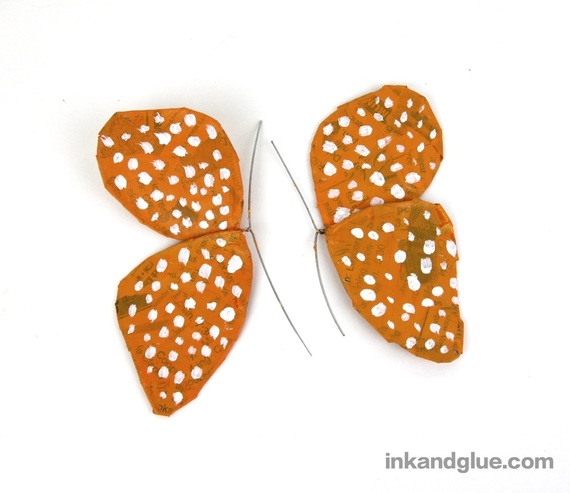 Match up the two halves of the butterfly, wire-to-wire, and twist those wires together. Trim one end of this twisted wire, and leave the other end's excess to act as antennae. 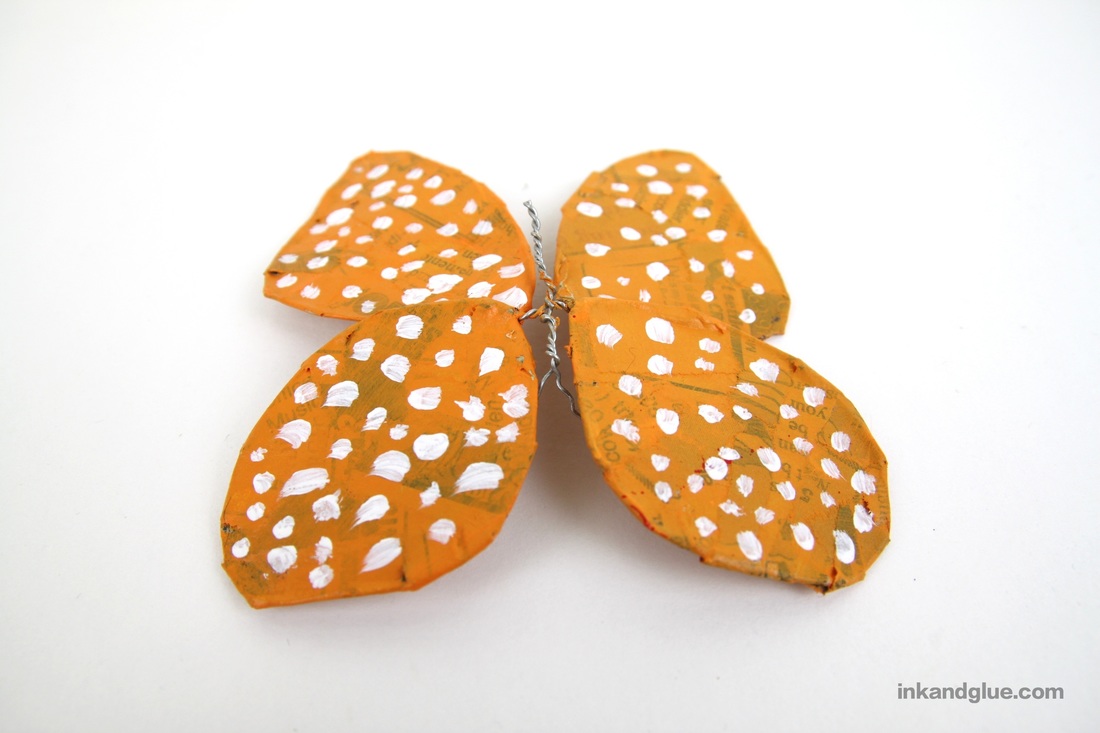 Wrap a new piece of wire around the body, to both add bulk and to act as a "stem" for the butterfly. 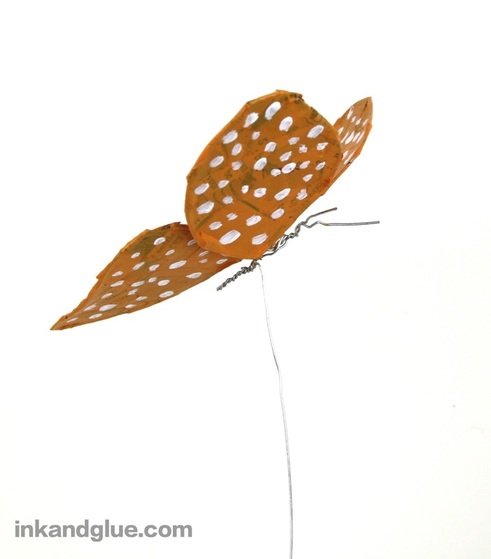 That's it! 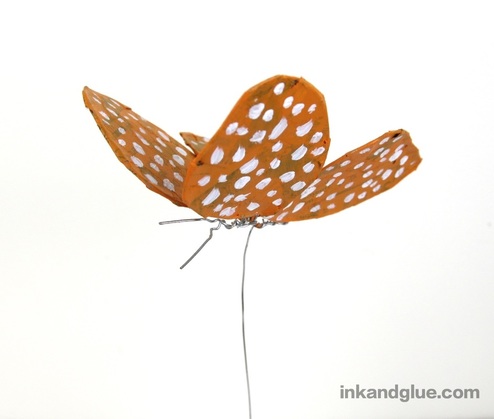 This method produces a sturdier finished item, but it's definitely more labor-intensive. Wrapping the open wire loops with strips of paper can take some getting used to. But, again, it ends up being a more substantial object, less delicate than Alkema's book's version. Easier to paint, too.
I'll share the third butterfly later this week! xo |
Categories
All
Archives
March 2017
AuthorI'm Debbie Way, an artist and writer who enjoys making things. |


 RSS Feed