Ink and Glue
  • Home
  • About I&G
  • Contact
  • Home
  • About I&G
  • Contact

10 Best DIY Advent Calendars

11/10/2015

 
Picture
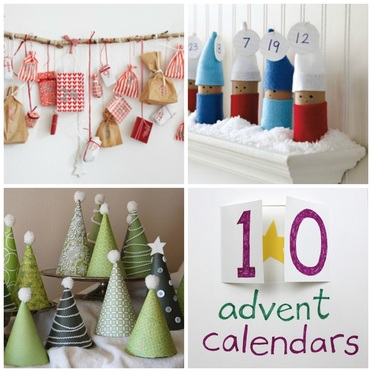
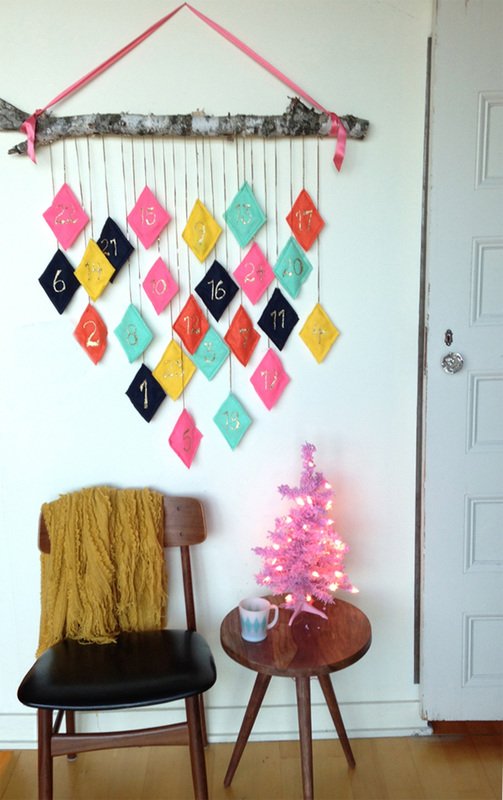
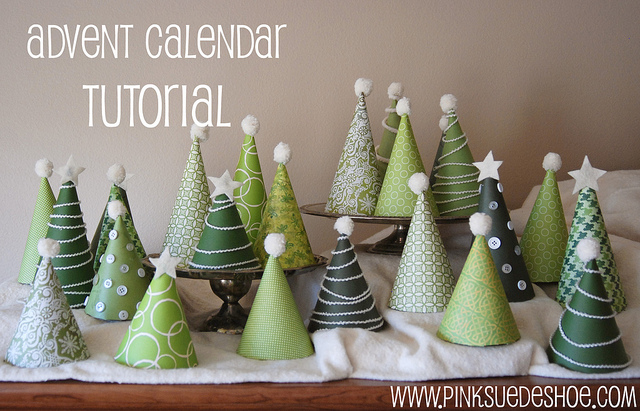
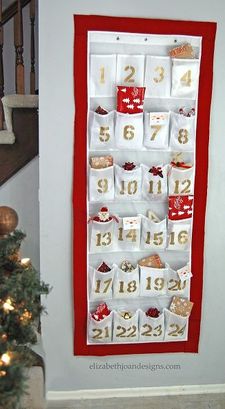
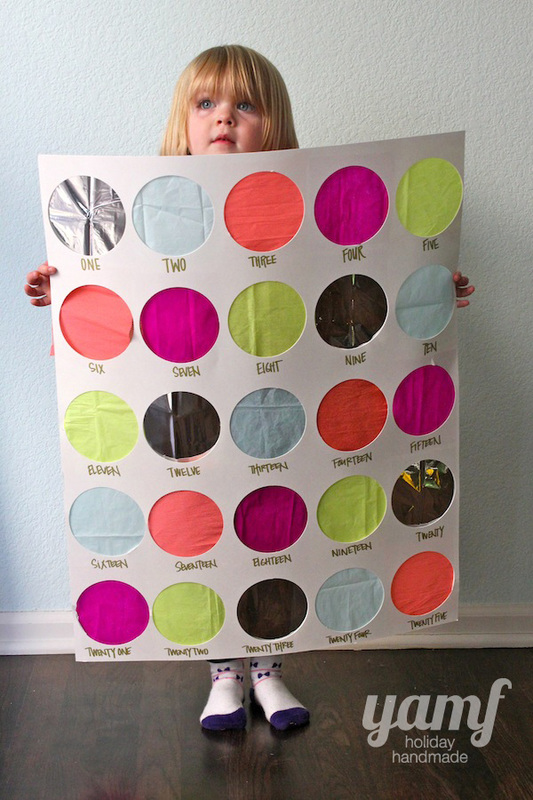
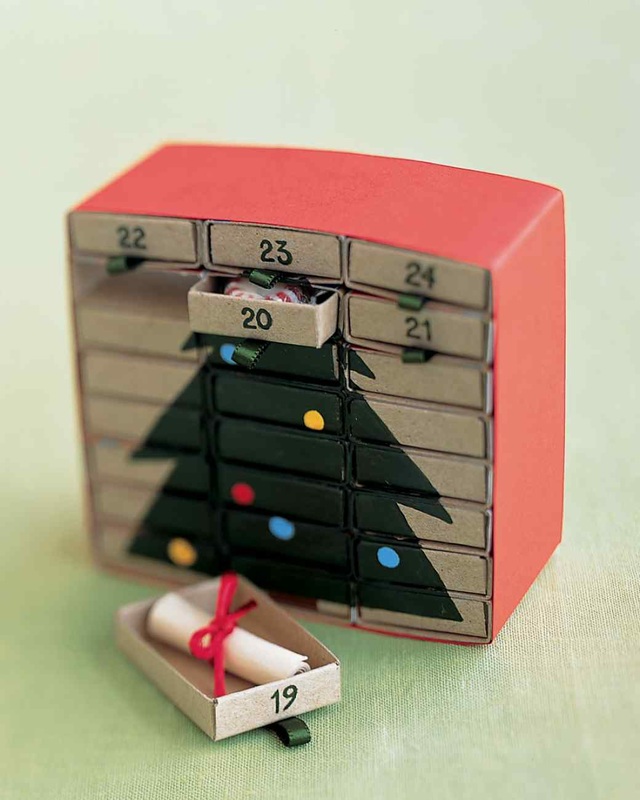
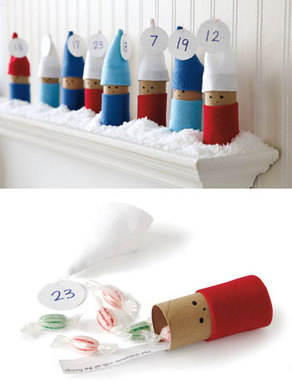
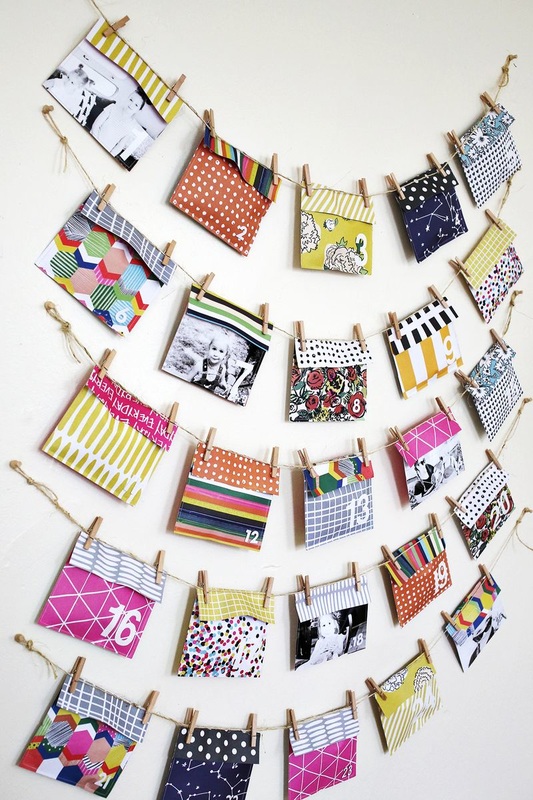
I love an advent calendar that gives a small surprise each day. It really makes the season feel special, and sates, temporarily, the growing hunger for presents. If you don't want to give small toys or candy, try a joke written on a slip of paper, or a coupon for something ephemeral, such as, "you choose the next family movie," or "it's time to decorate cookies!" These ten DIY advent calendars are the best (IMHO) I've found online. They are in no particular order. As you will see, none require a tremendous amount of time, money, or skill.
(Want to make a traditional, all-paper advent calendar with windows to open? There's a template for that, thanks to the wonderful Small Object.)
​Let's count 'em up!
Picture

1. The Sweet Escape created this modern felt advent. Each colorful diamond actually has a pocket on the back where you can hide small treats. I love the combo of the earthy, rough-barked branch and the vibrant felt. 

2. I actually have enough toilet paper tubes (or, as Mamas Kram would call them, toiletten papier rollen) to make this right now. They are just so useful for craft-making. I love that they're allowed to stay their natural color, here.
Picture
Picture

3. ​Pink Suede Shoe's advent calendar is a forest of evergreens, each one hiding a gift inside. Lovely!

4. This clever count-down can be used year after year. It's simply a shoe organizer with a few crafty additions. The pockets are plenty big enough for some fun surprises! 
Picture
Picture

5. Ever seen the Price is Right game where the contestant gets to punch through paper to find out what she's won? You Are My Fave came up with this advent calendar version! So much fun. 

6. These are a few of my favorite things: random bags and packages, tied up with string to a hanging branch. The idea is from La Petite Cuisine, and it's in German, but it's pretty clear how it's made.  Simple, cheerful, warm — I love it. 
Picture
Picture

7. This might be my first Martha Stewart craft in a round-up. Sometimes she is just too good to pass up. This calendar is made of a stack of matchboxes. When each "drawer" is pulled out, flipped around, and put back, it helps complete a picture. Clever, Martha!

8. What's this? More toilet paper tubes! This time they form the hollow, goodie-filled bodies of two dozen Nordic elves. This is another reuseable calendar, which makes the effort even more worth your while.
Picture
Picture
​
9. I dig these paper envelopes from A Beautiful Mess. They're sewn together, but you could use staples instead. I love how it's a cheerful jumble of patterns and colors. 

10. If you already have a big enough jar for this, it may be the quickest advent calendar of the bunch. Simply wrap each item in white paper and seal with colorful washi tape. Silly Old Suitcase (which is in Dutch, and worth translating) has two other advent ideas accompanying this one, so be sure to click on over.  
Picture
Enjoy these numbered days! 
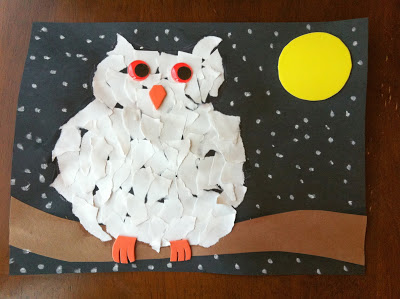
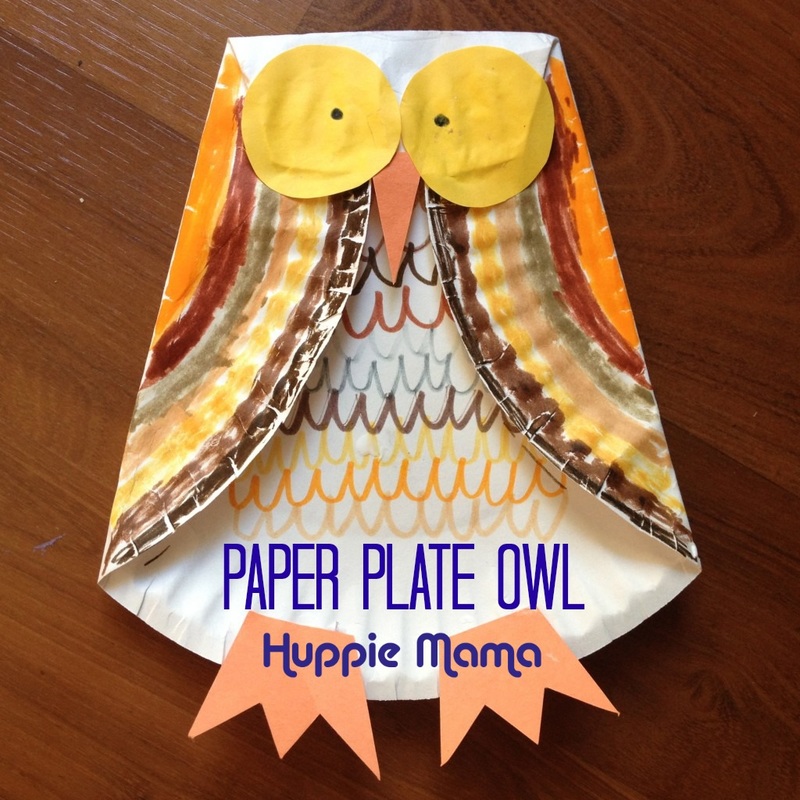
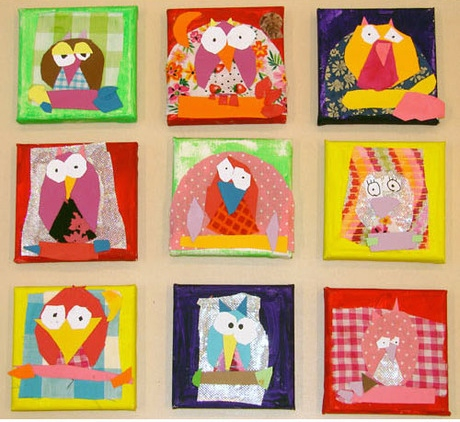
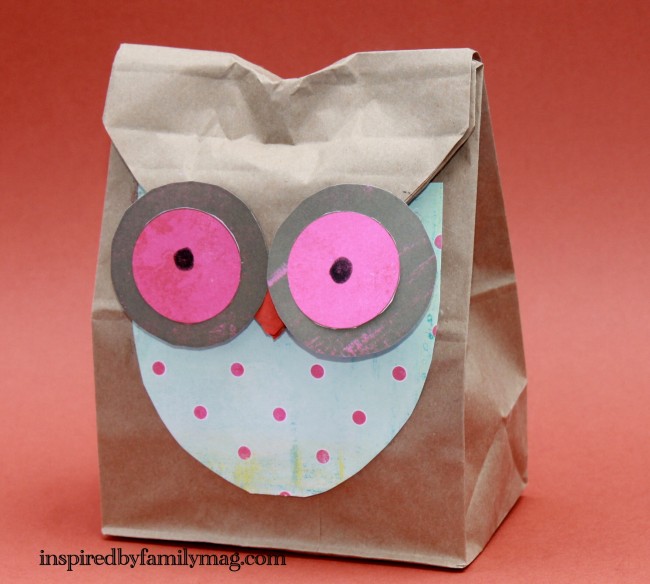
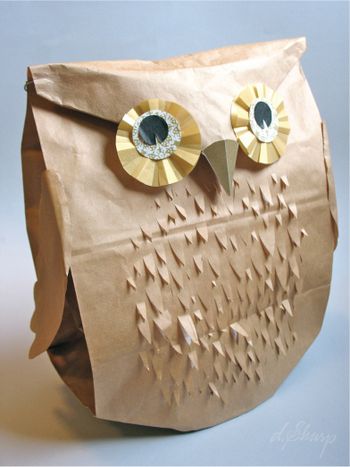
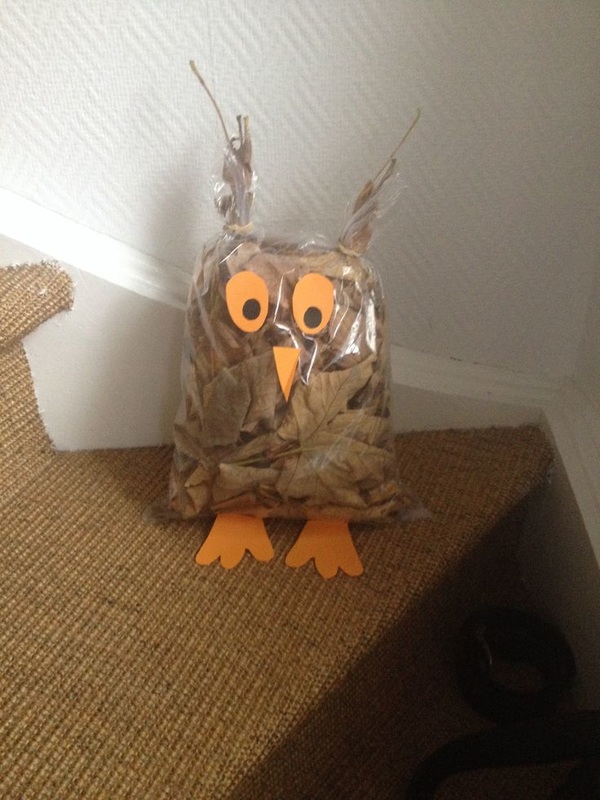
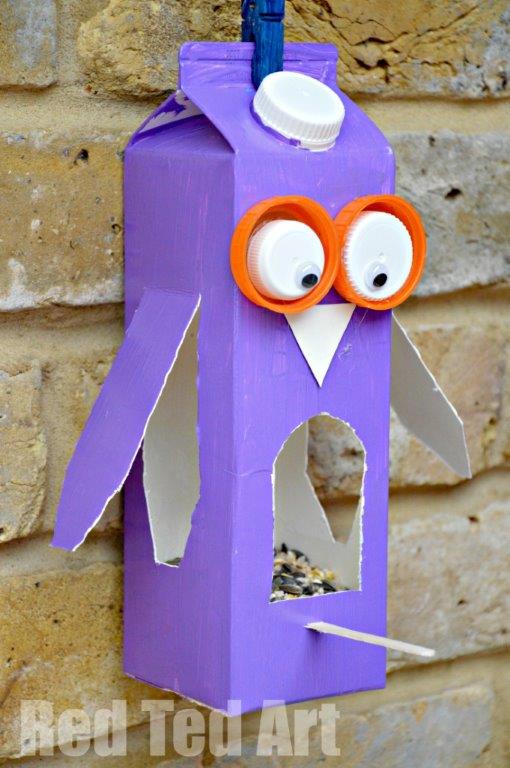
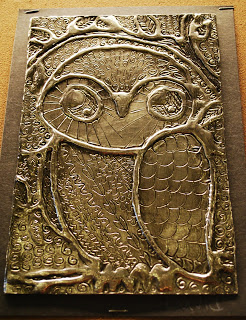
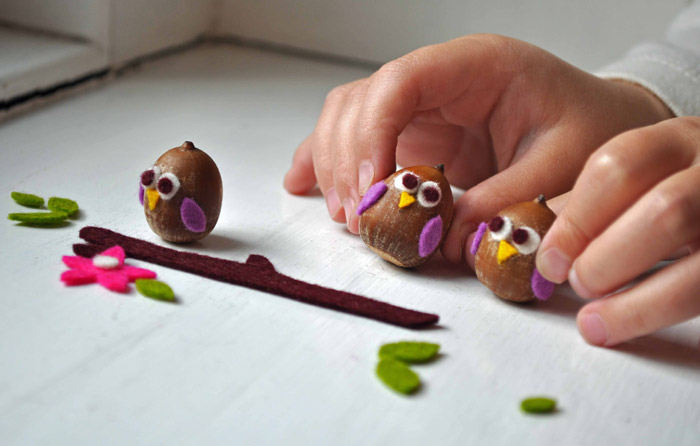
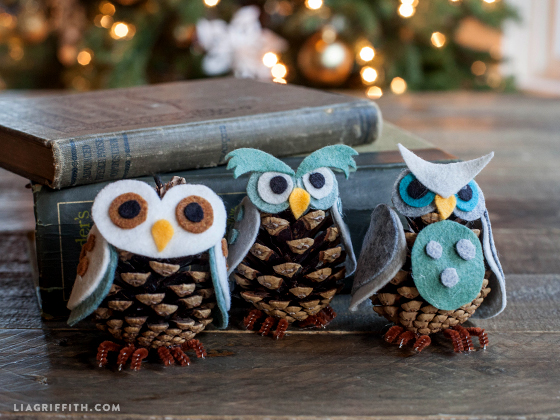
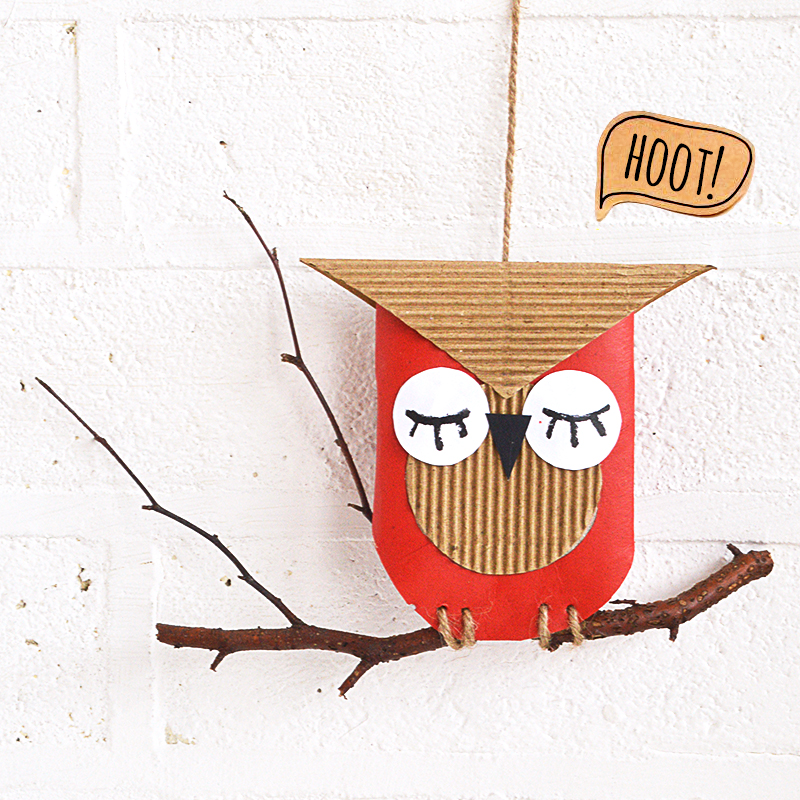
​xo

Owl crafts!

11/2/2015

 
Picture
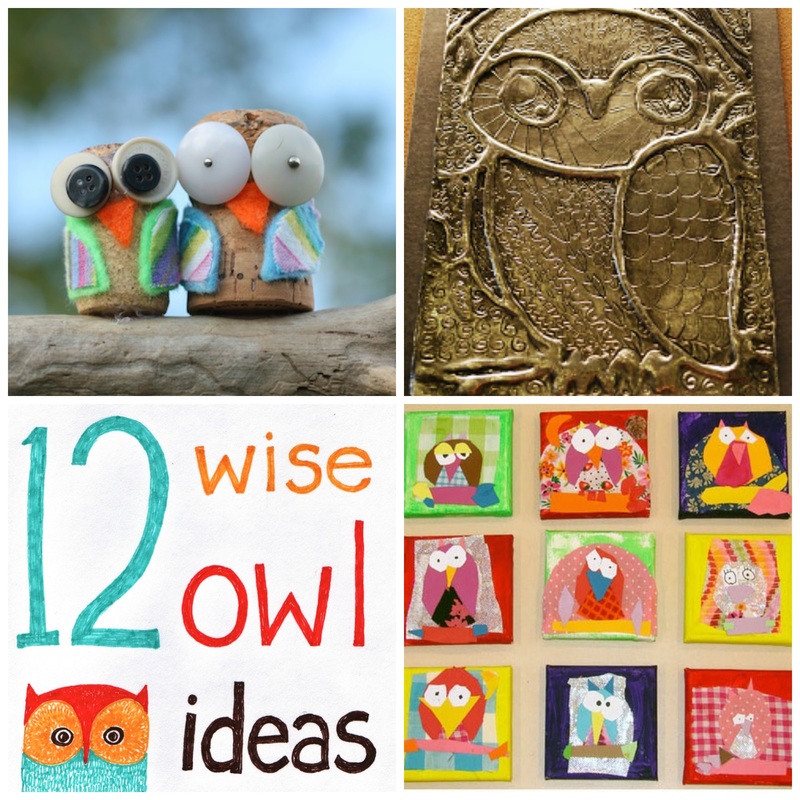
Today I've rounded up some cool owl projects! Owls are a popular kids' craft motif, and here's my theory why: You can simplify an owl's form into a few basic shapes and still recognize it as an owl. There are no other birds that look quite like them. Plus, they are simply majestic, intriguing animals. I encountered a barred owl on a walk a couple of weeks ago, and though apparently it had been perched in a tree very close to the path, I didn't see it until it was flying away. It was incredible to watch this huge bird fly without making any sound, no rustling of feathers or whoosh of wings.

Celebrate the owl with these twelve crafts, hand-plucked from the internet! I choose these crafts carefully for ease of making, accessibility of materials, and overall design. I present them in order from easiest/youngest crafter to harder/older crafter, very roughly.

​On with the owls!
Picture

Rockabye Butterfly created this torn-paper snowy owl. I like the rough, organic texture created by tearing the paper into random shapes. Click on the pic to see her excellent how-to!

​I've seen a few different ways of turning a paper plate into an owl, but this one by Huppie Mama is my favorite. The patterns and color choices are top-notch, and the eyes are hilarious. And it's easy as pie to make! 
Picture
Picture

These creative collaged owls were made by kids in Switzerland. The website is in French, but from what I can gather, a teacher was inspired by the illustrations of Clemence G., and after reaching out to the artist, she sent the class a bag of fabric scraps in order to do this project! Love it. I like that this art idea gets kids thinking about colors and patterns and how they interact with each other. Go to the site to see several related art projects that accompany this one nicely.

Like paper plates, brown paper bags are also a popular owl-depicting material. I chose Inspired by Family's owl paper bag because of the simple shapes and the clever folding of the top. You could wrap a gift inside this bag, or make a bunch and fill them with treats for party favor sacks. 
Picture
Picture

Here's another paper-bag owl, and it's as complex as the previous one is simple.  d.Sharp Journal's gift bag owl should probably go at the end of the list, but I wanted to pair it with the one above. A savvy kid could incorporate some of its design ideas — like the snipped feather front, or the folded medallion eyes — into a simpler version, and really make their owl stand out from the sack pack.

Hey look, this little guy is also made with a bag! Fall leaves provide the color and texture of the owl's feathers in this plastic-bag craft. It's made by cinching the two top corners of the bag with string, then gluing or taping on paper eyes, beak, and feet. Or, as Google Translate's version of the blog's French text says, "Autumn leaves imprisoned ... string and a piece of paper ... little owl was born ..." 

(Side note, the blog's name is "
c'est pas moi qui l'ai fait" which in English, roughly, is "I didn't do it!" If your family is planning a trip to Europe, that sounds like a handy phrase for the kids to learn.)
Picture
Picture

I always enjoy a cute variation on the classic milk-carton bird feeder! Note that the eyes seem to be looking down (hungrily, perhaps?) at the snacking birds, which is a nice touch. This owl carton feeder is from the always-inspiring Red Ted Art.

I love this art-making technique, and the owl, with its big, expressive features and a variety-pack of patterns to choose from, is an excellent choice of subject for it. Go to Make it a Wonderful Life for the multi-step process, which involves glue, foil, and shoe polish (seriously!). 
Picture
Picture

Oh my gosh, look at these cuties!  Happy Hooligans made these owls from corks, buttons, and fabric scraps.  She used a hot glue gun, but tacky glue should work fine. If you're not a wine drinker, or if your wine tastes lean more towards the boxed or screw-top variety (guilty as charged), you can buy bags of corks at chain craft stores. 

These wee acorn owls were made by the talented Helen (from Curly Birds) for Bloesem Kids. (If you don't know Bloesem Kids, get ready to want to throw away everything you own and rebuild your life in a minimalist yet warm Scandinavian style.) As you can see, the owls are made with a few simple felt shapes glued onto acorn bodies. Very sweet!
Picture
Picture

These pinecone owls are like the elder relatives of the acorn-based birds above. Lia Griffith created them using gorgeous felt from Benzie Design. (Unrelated, I just placed an order at Prairie Woolens, and will let you know how I like their felt.) Lia offers a template for the felt owl shapes, but downloading it requires a subscription. However, I think you should be able to wing it (pun intended) just using her excellent directions and how-to photos.

What a cute hoot! The base of Molly Moo's owl is a painted cardboard tube, cleverly embellished by corrugated paper. The twine loops attaching the tube to the branch look like the toes of the owl. Very wise.
Picture
Owl be looking forward to hearing about any wonderful crafts I missed! 
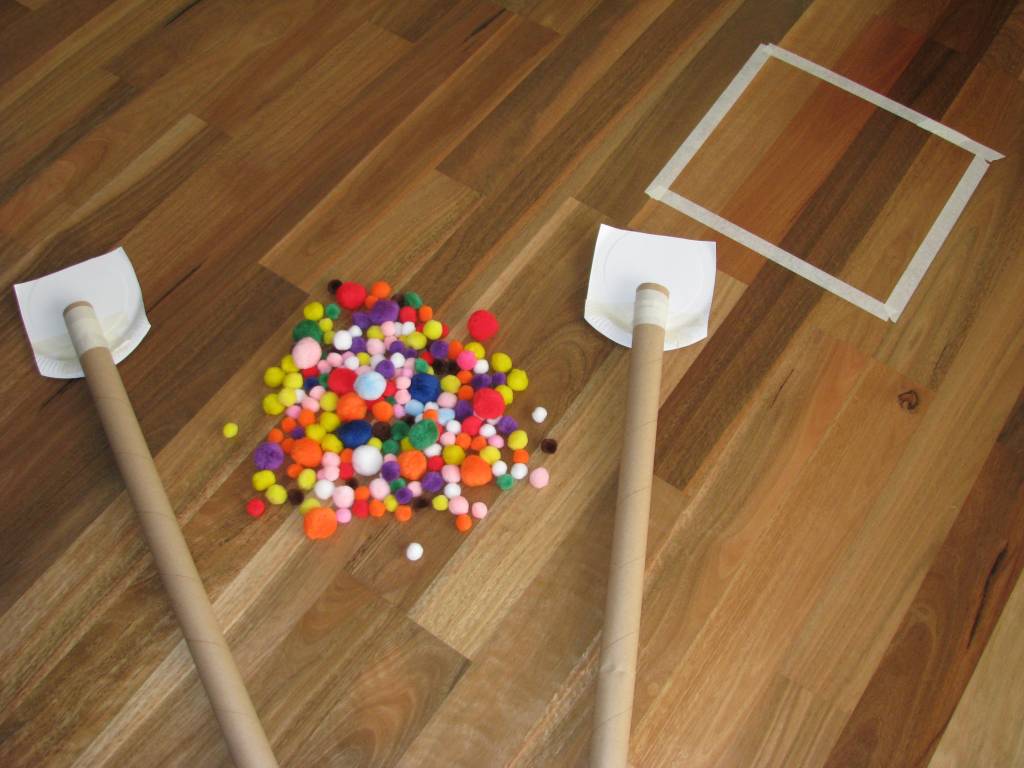
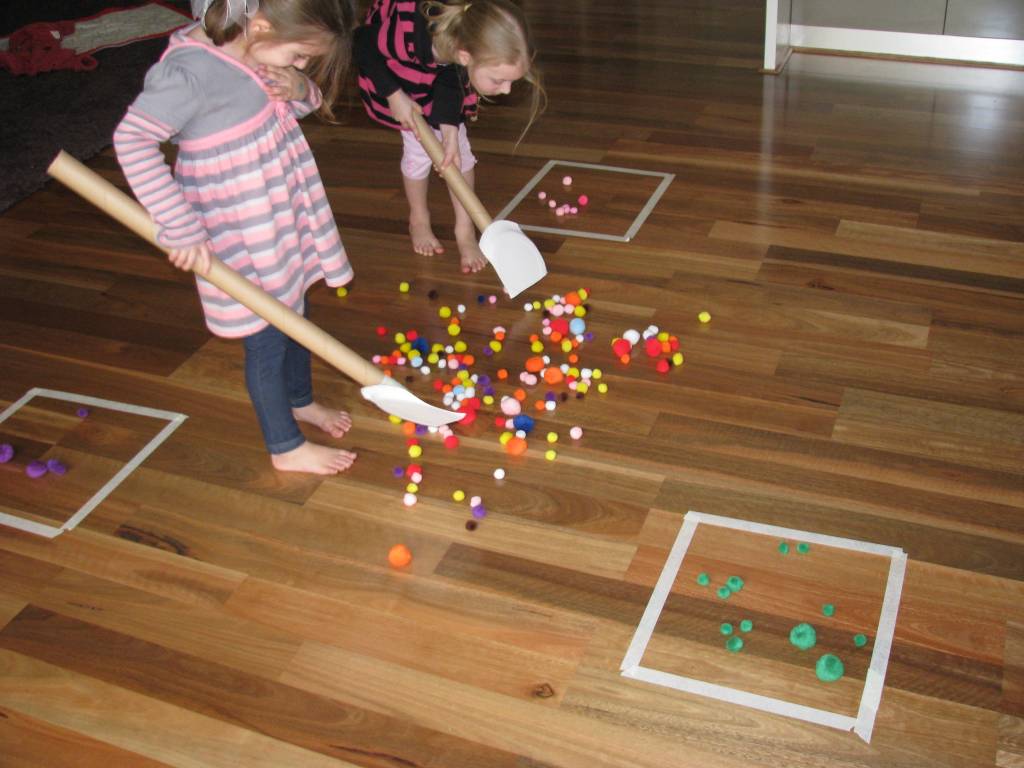
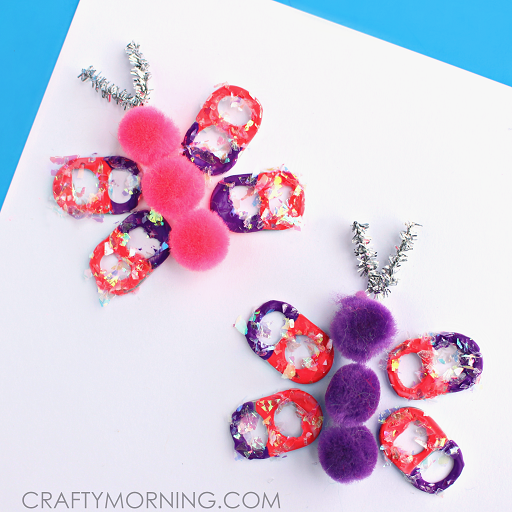
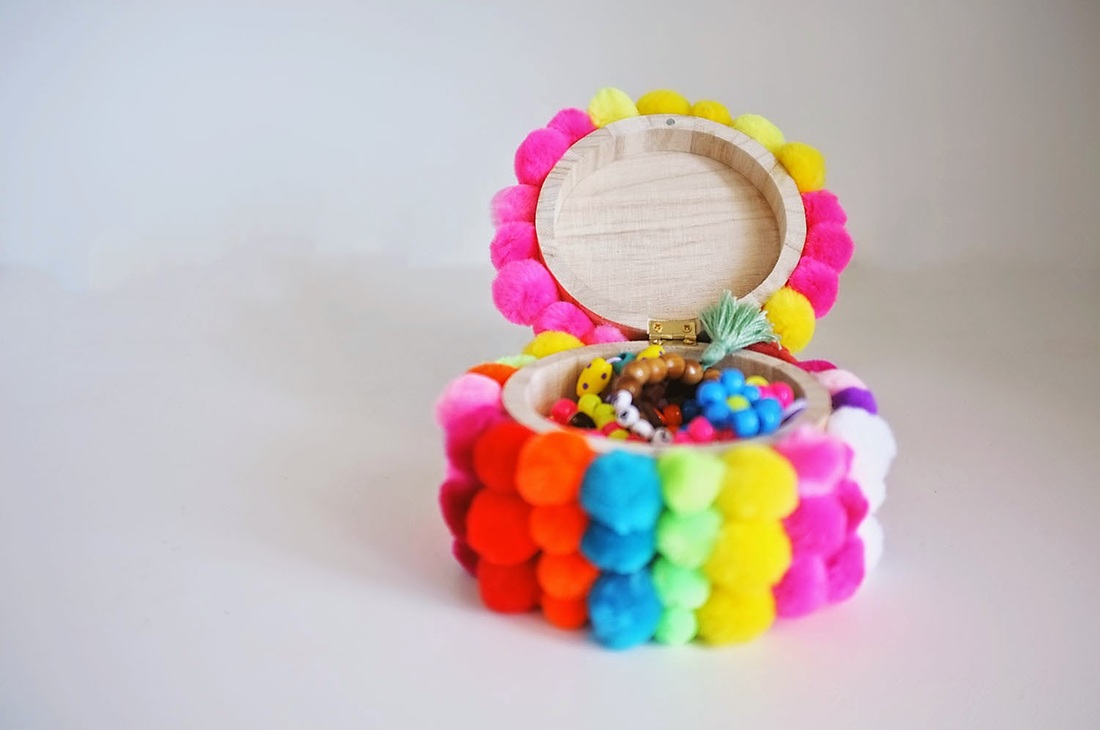
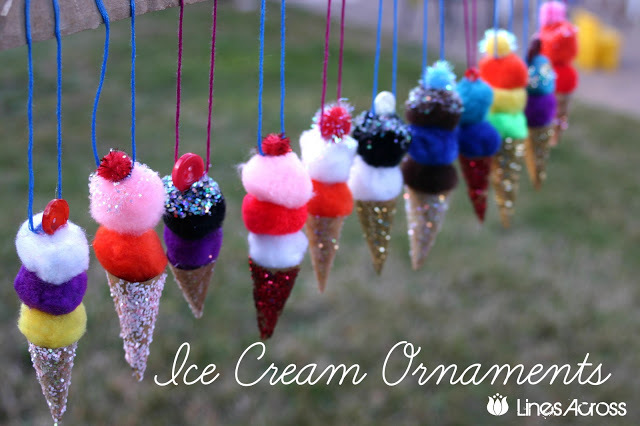
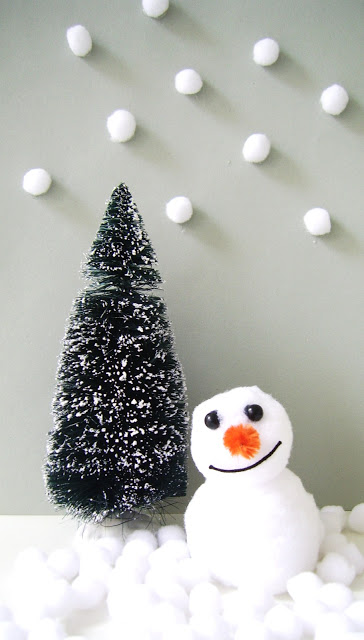
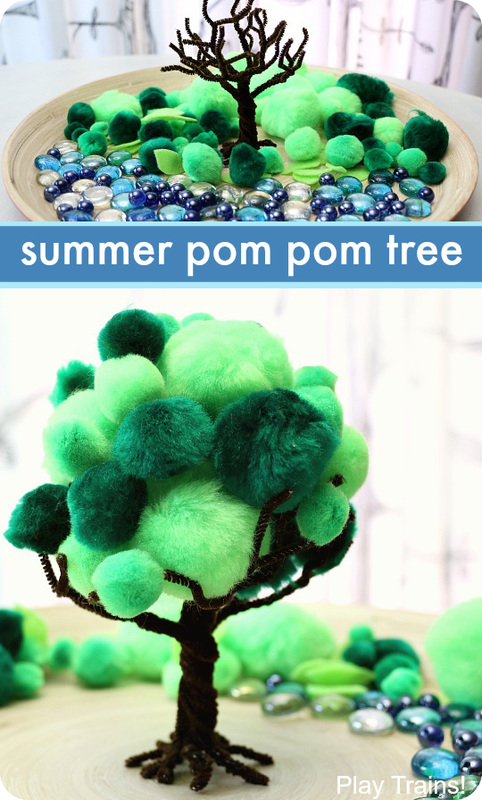
​xo

10 delightful pompom projects

10/20/2015

 
Picture
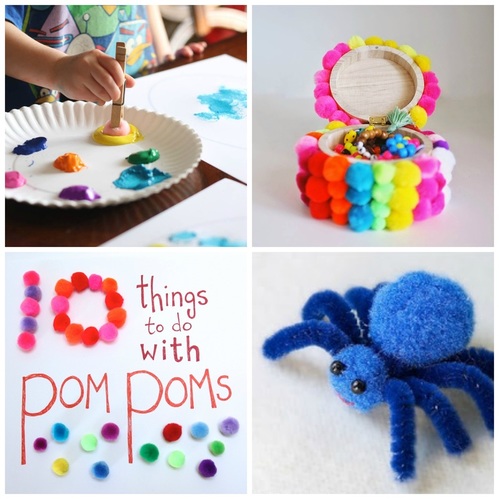
I love pompoms. When I was a kid, I anthropomorphized them, as-is — no eyes or anything added, just the little fluffy ball was cute enough for me to treat it as a tiny, tribble-like pet. Although I enjoy having a big bowl of pompoms around so I can play with them as I please, it turns out you can also utilize them for crafts! It's true. Here are the 10 best ideas I found on the web. 

​Asia over at Fun at Home with Kids is the queen of slime, and I say that with complete reverence and respect. She figured out how to incorporate pompoms into one of her concoctions, which is something I'd never think to try. Just look at the results! So cool.
Picture
Picture
Picture

This next idea is perfect for little kids who'd rather be moving than sitting quietly and crafting: Indoor pompom hockey! Learning 4 Kids gives instructions for making the scoop-like sticks. There are several ways to play, from a free-for-all "get as many pompoms in your square as you can" competition, to a slower fine-motor activity of separating the poms by color.

This pompom craft is also a recycling project! Crafty Morning gives us the how-to deets, which include the painting and glitter-ing of pop can tabs. Simple, colorful, sweet.
Picture
Picture

Have you ever tried painting with pompoms? Polly at Thriving Home has. Just clip a clothespin to one as a handle, then dab it into a puddle of paint. Kids can use it as a stamp to make polka dots, or swipe it onto the paper like a sponge brush. Pompom brushes work well with stencils, too.

Oh Dear Drea made this incredibly cute trinkets box with her toddler. Impressive work! 
Picture
Picture

I know it feels too early to think of Christmas, so just think of these teeny ice-cream-cone ornaments as anytime charms you can hang from a lampshade or a window latch or even a little nail in the wall. (These are all places I have little thingies like this one hanging. Don't judge me.) I've seen other pompom cones, but Lines Across's are the nicest. 

We're entering major cuteness territory here, so get ready. First, meet this happy, wistful (?) snowman from Silly Old Suitcase, a blog from the Netherlands. I find his wide smile very charming. Maartje used hot glue to build hers, but regular ol' tacky should work just fine. 
Picture
Picture

Next, a little bee! Vellum paper makes for nicely translucent wings. This is actually part of a larger project, a beehive pinata, at Country Living. 
And the third in the Trio of Cute, a fuzzy little spider. This is the antithesis of the spooky, long-legged Halloween spider I posted not long ago. Inna from InCreations gives instructions for making him, along with other pom-based insects. 
Picture
Picture

​Projects that both adults and kids and everywhere in between can do, and enjoy, are the magical unicorns of the craft world. This tree from Play Trains is one of them. This green summer tree is just one of a series of seasonal trees you can find on Play Trains, including spooky, pompom-free Halloween trunks.
Happy pompomery! xo

12 great ghost crafts!

10/9/2015

 
Picture
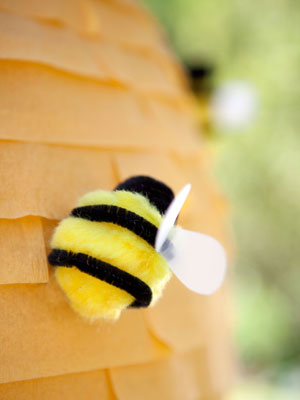
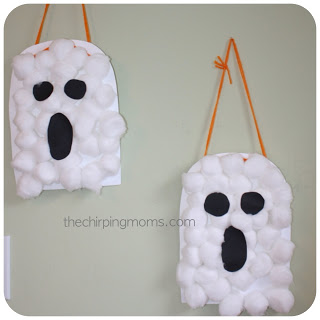
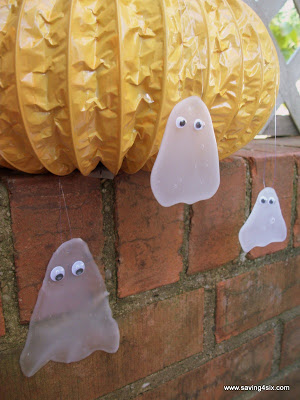
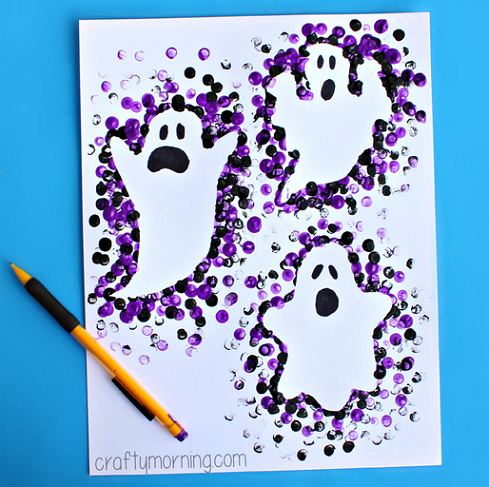
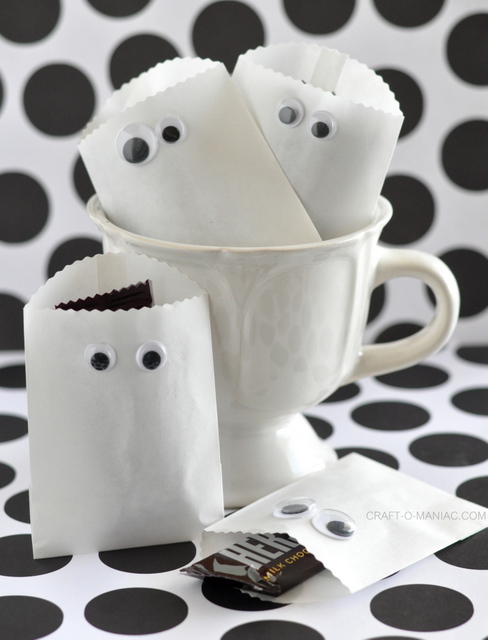
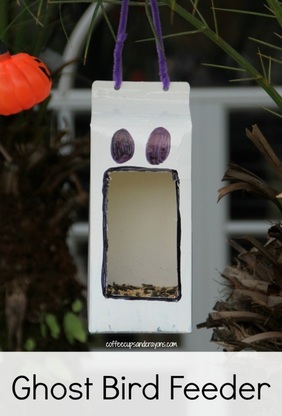
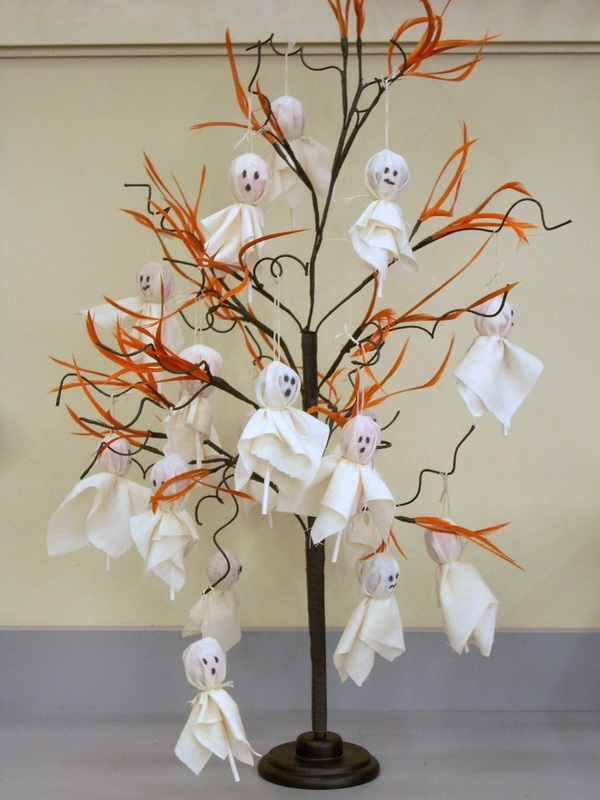
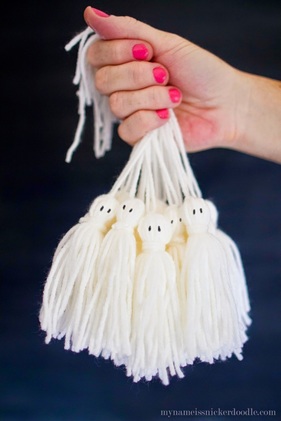
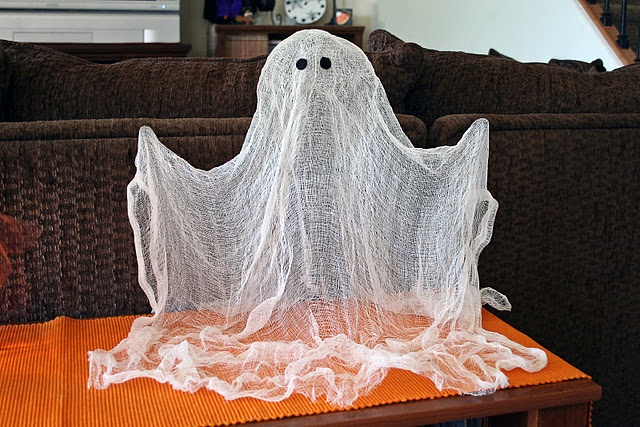
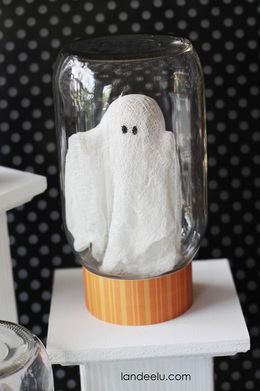
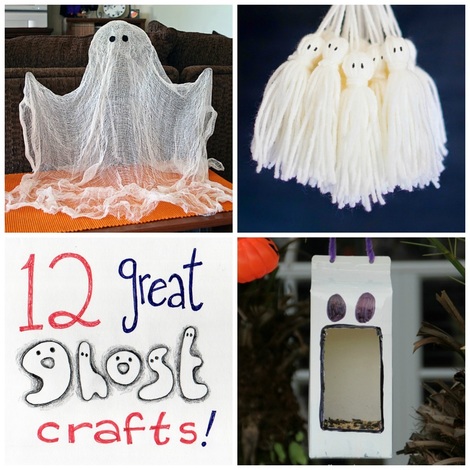
Like monsters, ghosts can come in many different shapes and in varying levels of scariness, making them a wise choice for a kids' craft. In fact, I found so many fun spectral projects that I couldn't narrow them down to just ten. Here's my not-so-dreadful dozen, arranged very roughly from easiest to most complex (though none are particularly difficult — don't be afraid of these ghosts). 
The Chirping Moms blog brings us these soft and puffy floating cotton ghosts which are simple enough for preschoolers to conjure up. 
Picture
Picture

As the caption says, these cute no-sew puppets are from kids activities blog. The kids draw on the faces, the adults hot-glue the sides of the felt ghost together. These puppets are cute and fun, and would make a great party craft for a younger crowd.

Love these translucent glue ghosts from saving 4 six! They're super easy to make; the only challenging part is waiting for the glue to dry overnight. 
Picture
Picture

Crafty Morning presents this eerie example of a reverse stencil: cut out ghost shapes, place them on paper, then use a pencil eraser to stamp overlapping dots all around the edges. If you're not feeling confident in your ghost-shape-cutting abilities, CM offers a free downloadable template.

The nice thing about ghosts is that they can be pretty much any shape, as long as they're white. Craft-o-maniac's favor bags are literally just white paper bags with googly eyes, and yet they "read" as cute little ghosts. It's amazing what googly eyes can do!
Picture
Picture

Something about this one cracks me up. I just picture an adorable little chickadee flitting into this ghoul's gaping mouth and I chuckle. Coffee Cups and Crayons brought this ghost bird feeder to life. 

I've seen ghost lollipops before, but I particularly like the display idea on Vicki O'Dell's site. If you don't have a store-bought Halloween tree like hers, a dead tree branch set in a heavy vase would also look cool. 
Picture
Picture

This ghost-cloche is incredibly quick and simple, if you already have a nice glass item like Chic on a Shoestring's. (The filling inside the glass is fluffed-up pillow stuffing!) If you don't, you can DIY one with a 2-liter soda bottle; cut off the bottom portion, and cover the cap part with clay. Here's a trickier, but more professional-looking, way to make one, from Our Peaceful Planet: soda-bottle cloche. 

These fabric ghosts are made by BHG to be weather-resistant so they can hang from a porch and sway with the passing breeze. They get their head shape via cheap plastic bowls.
Picture
Picture

Tassels are apparently the new hotness, so to be on trend, better make a passel of these adorbs ghost tassels. My Name is Snickerdoodle teaches us how. 

The ultimate in ghostitude: An empty, see-through fabric form that appears to be holding itself up by supernatural means (a.k.a. spray starch). Allow me to present my favorite spectral project, The cheesecloth ghost. There are many to be found, but I like Every Day is a Crafting Day's shape the best. Bravo.
Picture
Picture

Of course, I like this miniature version very much, too. I love the idea of a little terrarium for a tiny pet ghost. The spirit itself is made much like the large version above, but has a hidden base that attach to the inside of the jar's lid. Go to Landee See Landee Do to find out how to capture your very own ghost in a jar.
Will any crafty ghosts be haunting your home this Halloween?
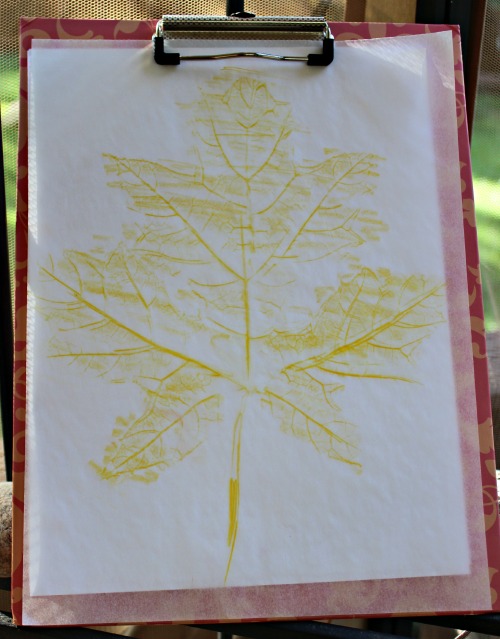
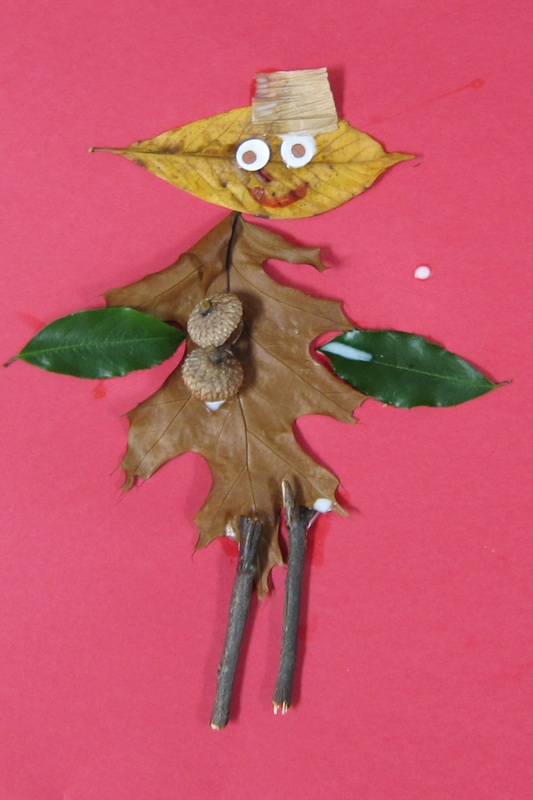
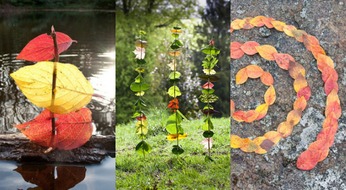
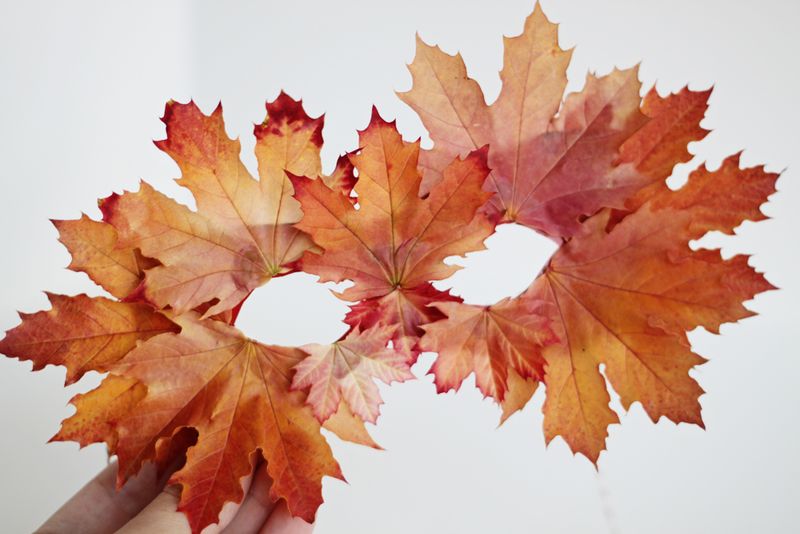
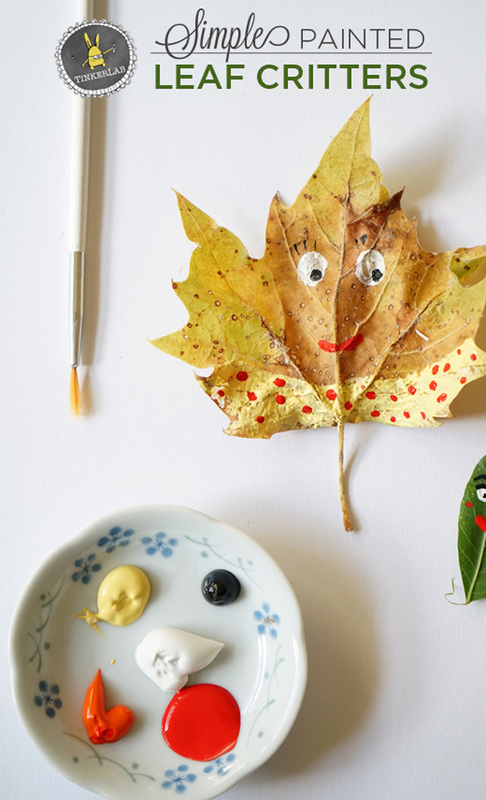
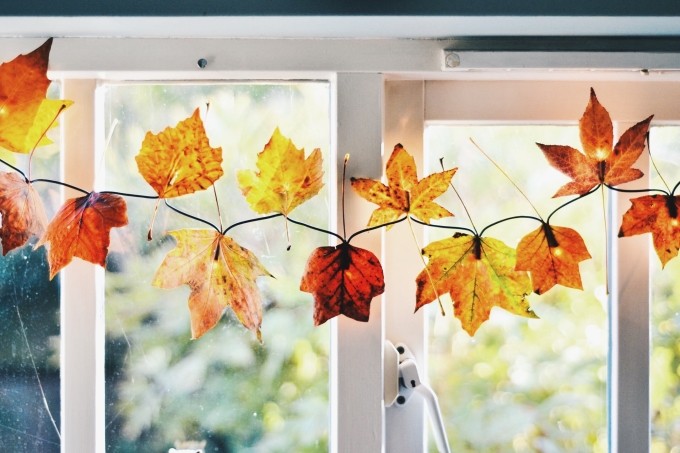
xo

10 craft projects made with real leaves

9/17/2015

 
Picture
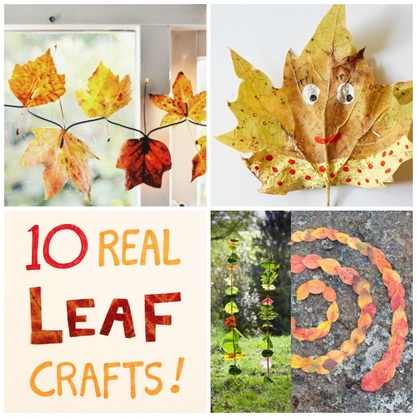
Up here in the northeast U.S., the leaves are just starting to turn. And if you or your kids are like me, you can't help but pick up the finest, most beautifully hued specimens. If you want to make projects with your leaves, and you want them to last more than a day, you need to preserve them somehow. I like to preserve leaves by placing them in between the pages of a heavy book, placing another heavy book on top, and semi-purposefully forgetting about them for months. (It only takes about a week until they're ready to be used.) If you are more careful than I, and have nicer books, sandwich the leaves between two pieces of copy paper before inserting them into the book. This link has 6 ways of preserving autumn leaves, and it seems accurate from my experience, although my book-pressed leaves are still pretty colorful. (The letters spelling "LEAF" in the graphic above were cut, via a craft knife, from a leaf I placed in a book two years ago.)

Don't wanna make crafts with your leaves? I love this simple display idea for your finished leaves, from Art Bar Blog. The post I link to is about the Thanksgiving Day craft on the table, but check out the leaves above — they're just affixed to the wall with bits of washi tape.
Picture
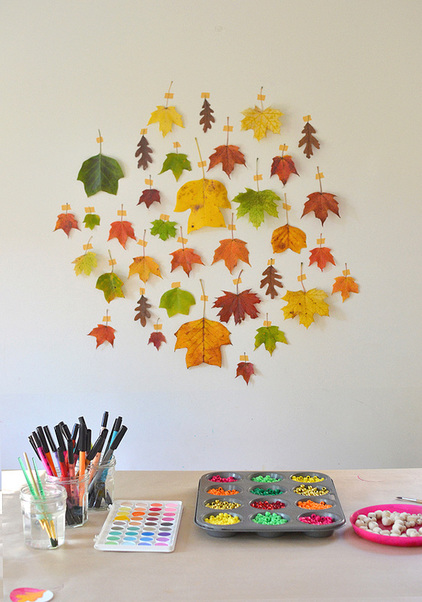
Anyway, on with the list! Easiest/youngest-age-suitable crafts first, harder/older kid or teen crafts last, all according to me; your mileage, as they say, may vary.
Picture

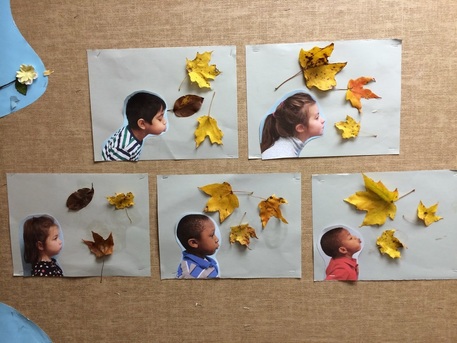
I like a project that forces you to finally print out a picture from your computer, dammit! (Just me?) Jennifer at Teach Them To Fly photographed her students as they pretended they were the wind blowing the leaves through the air. She printed out the portraits, and had them add real leaves to the scene. Cute!


Leaf-rubbing is a classic children's craft, and you can do it anywhere, even where the leaves stay green year-round. This photo is from Edventure's exploration of the art of leaf rubbing using different materials. The post includes some handy science facts, too, so you can lay some knowledge on your young subjects as they rub.
Picture
Picture

This leaf guy from Mrs. Karen's preschool class is the greatest, except for the other ones on her blog, which are also the greatest. (Kid art, man. It just rules.) Pretty self-explanatory idea, here: Glue leaves and other nature-walk bits and bobs to a piece of sturdy paper to form a person.
Look at these sweet leafy hedgehogs from Crafty Morning! Cut out a basic hedgehog body shape, and have kids glue leaves in layers, with the pointy tips all facing up like the spines of a hedgie. Cute!
Picture
Picture

Hands On As We Grow's sun-chimes are made using summery materials, but they would also look beautiful with colorful autumn leaves.

There are lots of variations of reverse-print leaf artwork to be found online, but this one has a few unique touches — and the finished product looks great. Kids Craft Room made this fall window art using contact paper, leaves and paint. There's a handy how-to, with video, on her blog.
Picture
Picture

The Artful Parent has a wonderful, inspiring interview with land artist Richard Shilling. It will make you want to go outside right now and make some ephemeral artwork, with kids or without.

Small + Friendly's leaf mask is the autumnal answer to spring's crown of daisies. Make one to discover what transformative effects it might have on its wearer.
Picture
Picture

I am a huge TinkerLab fan. Here, she sets out an invitation to paint leaves with charming characters. The idea is simple and quick to set up, but you can take as long (or as short) as you want with it.

Wallflower Girl makes fall leaves glow by attaching them to fairy lights (what I usually call Christmas lights) with glue. She preserves her leaves using the waxed paper/ironing method, and they look great. (She doesn't mention it, but always put paper between your iron and the waxed paper, or you'll wreck your iron.) I like projects that involve illumination during the time of year in which the days are getting shorter. 
Picture
Will you and your family collect leaves this year? Let me know what you end up doing with them! Me, I've got my eye on another book to fill...
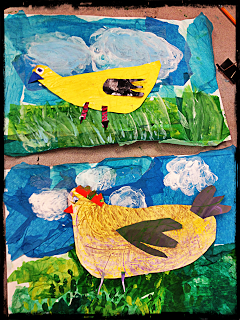
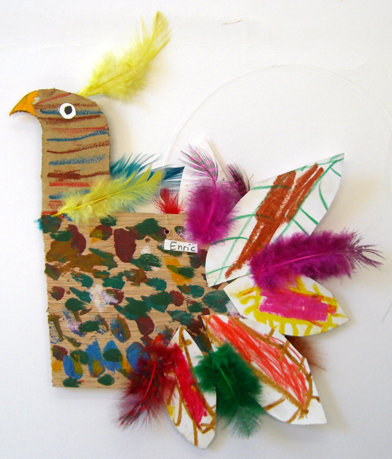
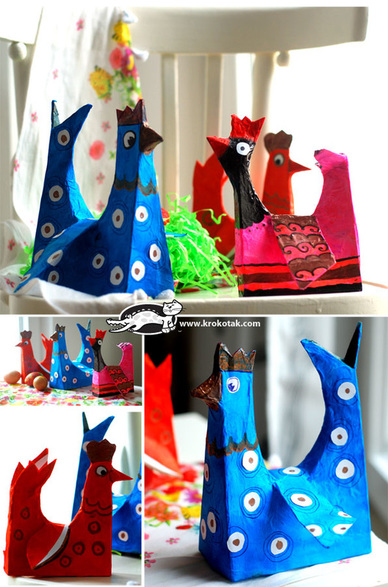
xo

10 charming chicken crafts

9/8/2015

 
Picture
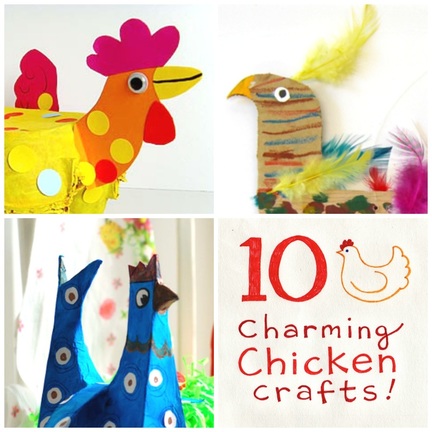
I spent Monday afternoon at the local fair, at which I ate pierogis and ice cream, watched a steam-powered corn-sheller, and saw many farm animals, including a selection of adorable and unusual chickens. Unless it's near Easter time, chickens get short shrift in the crafting world. But there's no need to save up your chicken-making ideas for March. I hereby give you permission to create a beautiful or funny or even fierce chicken, any time of the year.
As always, I've listed these ten in order from roughly easiest/youngest kid level, to hardest/oldest kid (or teen, or adult) level. Your mileage may vary.
First off is a kindergarden-friendly craft from Kids Artists. I like that these hens get their own nesting boxes, and that their wings are made of the children's hand tracings. Super simple and cute.
Picture

The collages created by the HSES art class are amazing! The blog takes you through the multi-step process. I always appreciate a class project that allows students the freedom to make their project unique.
Picture
Picture

Speaking of class projects, this rooster is made entirely from the kids' traced hands. The multiple fingers give the bird a nice, feathery look.  This photo is from a Russian art teacher's blog, and this post is titled "Teamwork".

I love an interactive piece of art. Powerful Mothering's mama hen keeps her chicks nestled underneath her when it's time to rest.  Little kids can use this craft to work on counting skills. (How many chicks haven't come to bed yet because they are still hoping for another episode of Adventure Time?)
Picture
Picture

Today's round-up has a number of international, non-English-text blogs. It must mean that chicken admiration is a worldwide phenomenon. These paper plate chickies are from Creativity Attack, an Italian kids' craft blog. Translated, the directions are pretty open-ended, but this is another WYSIWYG craft (What You See is What You Get, meaning, it's a cinch to figure out how to make it just by looking at the photo).

I adore this chicken. At first it seemed to be an orphaned Pinterest images, but I tracked it down at Fem Manuals, a blog from Barcelona. I still haven't found a how-to, but using my observational skills, it appears this chicken is made with a balsa-wood body, a cardboard head and neck, paper and real feathers, and everything has been decorated further with pastels, markers, and paint.
Picture
Picture
This splendid pasta rooster was made by artist Noëlle Lavaivre. The image is another mysterious internet find, but I think it came from A Book of Ideas from 1970. This craft is on my list for inspiration only; looking at some of the curves in those pasta pieces, I think she may have cooked them until they were pliable and then let them dry in the shapes she wanted. And that is a level of difficulty and nit-pickery I would not ask you to take on. However, I do endorse the art method of gluing pieces of pasta, beans, and other dried foodstuffs to heavy paper.
OK, back to a more traditional, and make-able, craft: This happy egg-carton chicken from Aux Petites Mains. The site is in French, but has handy how-to photos. You can also use Google Translate to read how it's made.
Picture
Picture

Oh my, these are some seriously odd and fluffy birds from the notebooks of Josephine (another French site). No how-to shots, but the simple directions (via Google Translate) make the process very clear.

And finally, we have these vibrantly-colored folk-art chickens from Krokotak, a site I adore. This project comes with a template, and involves cutting up a cereal box, taping it shut, adding various parts, then decoupaging the whole shebang, and finally adding more details with paper scraps and markers. So, it is last on my list, as it is clearly the most complex — but so unique and beautiful!
Picture
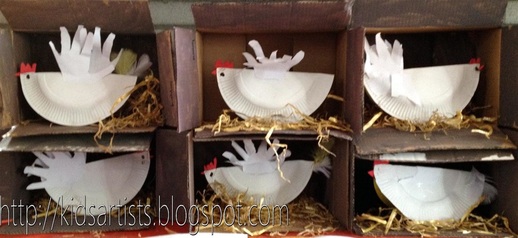
Do you have a chicken craft you love? Share in the comments!
xo

10 rock crafts that rock!

8/28/2015

 
Picture
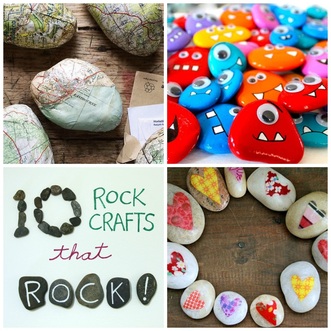
I love nature-based crafts because they give you a reason to take the kids outside, slow down, and focus on the world around them. Rocks are one of my favorite "materials." They come in near-infinite varieties, shapes, sizes, and colors, and of course, they're free. (Though, of course you can also buy them. If you want a collection of perfectly smooth, uniform rocks, larger craft stores sell them by the bag, usually in the floral section.) I searched the web for the best rock crafts, selecting them for do-ability, variety, and uniqueness of idea. No impossibly-detailed, tiny mandala paintings here, I promise, though those are gorgeous. As always, click on the link or the photo itself to get directions at the original sites.
Picture
I love the simplicity of childcareland's dominos. The brightly-painted rocks can be used in a matching game, but they also look beautiful grouped in a bowl.

Picture
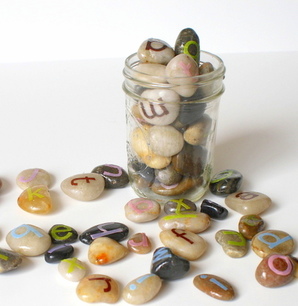
Another easy idea that's great for younger kids, from Buggy and Buddy:  letter stones. These are made using letter stickers from a craft store, so they're fairly difficult to mess up. Yay! Use them to play spelling games with young readers, or to leave love notes for your sweetie. Or both!

Picture
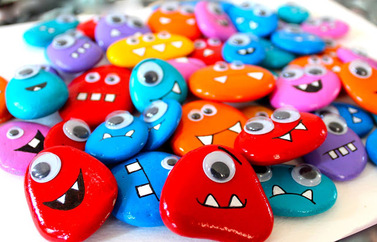
Coastalways brings us the next choice: Monster rocks! I love "monster" crafts because they can look however you like, so kids are free to design a creature as weird and wild as they like.

Picture
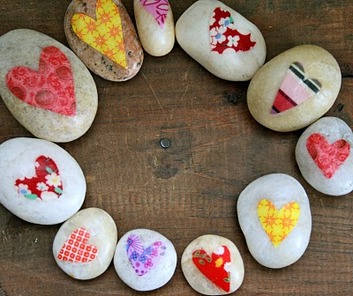
Yes, you can decoupage onto a rock! This photo of sweet stones is from Emily Neuburger. If you click though to her site, you'll see that the flip-side of each stone has a message of affection stamped onto it. Her hearts are made of both fabric or paper; either will work.

Picture
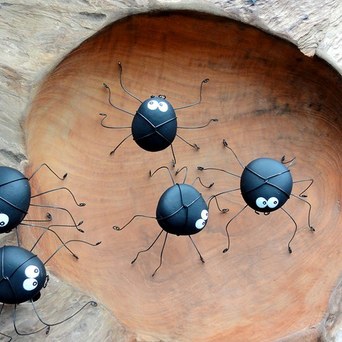
I love these  spiders. They are, of course, excellent Halloween decorations, but I would keep them out year-round. I'm not afraid of being a little goth-y. The site that they're from is in Czech (!) and Google Translate tells me that these little guys are for sale, so there's no how-to. Treat this photo as inspiration! I will also post a how-to on a variation of this craft in the days/weeks to come.

Picture
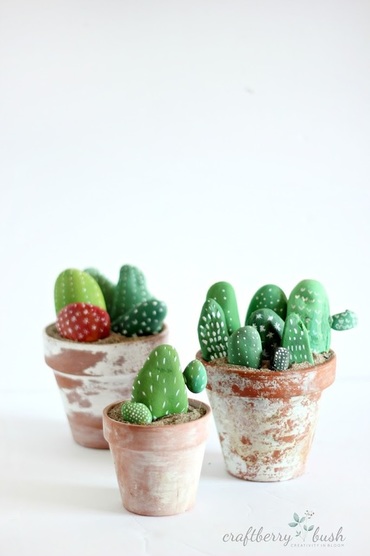
I actually ran this very craft in the magazine I worked for, but I'm repeating it here because I love it so much: Everlasting house plants! Supposedly, cacti are difficult to kill, but I've managed to do it. These painted stone versions, however, will never rot from over-watering! Plus they are charming as heck. Click on over to Craftberry Bush for directions.

Picture
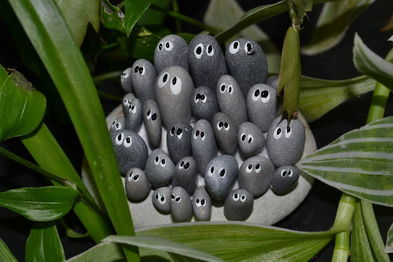
This little chorus of cutely-worried stones is simply called a "garden thing" on Instructables, and sure, good enough. I think the poster missed an opportunity by not calling it a rock group, though. I would change two things about this. One, make the eyes a little happier (by keeping them as round as possible). Two, use a more serious, permanent glue, such as E6000, especially if you'll be setting this in a plant pot where it might get wet.

Picture
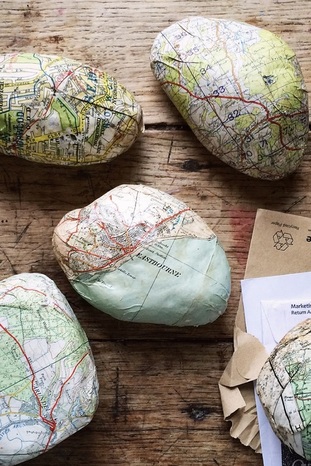
Here's a craft that's perfect for the person who can't seem to go anywhere without pocketing a stone or two for a souvenir: Cover one with a map of the place where you found it. Simple and lovely.

Picture
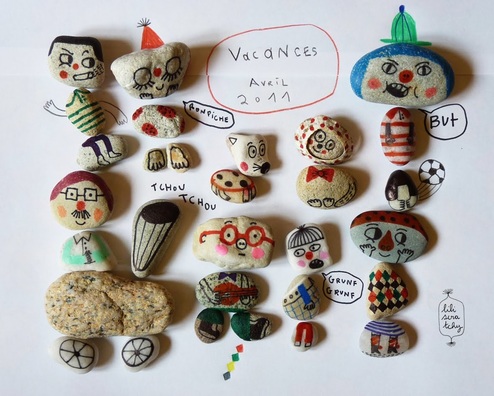
I've seen variations of this pieced-together-people idea, but this one is my favorite, because it reflects the style of the illustrator, lili scratchy. And, it's in French, which is still a cool thing, in my book.

Picture
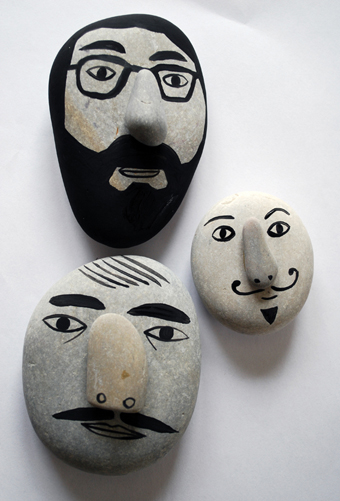
My tenth selection is by another illustrator, Ingela Arrhenius. I love how simple these faces are, and yet they are so specific! I feel I could pick the  flesh-and-blood versions of these men out of a lineup. I like the idea of adding dimension with an extra stone for the nose.

Are you a rock fan? Do you have any favorite stone-based crafts that I missed? Let me know in the comments!
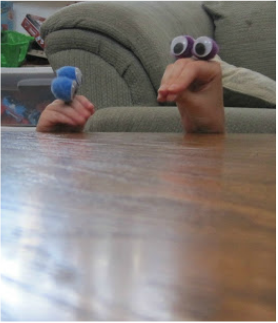
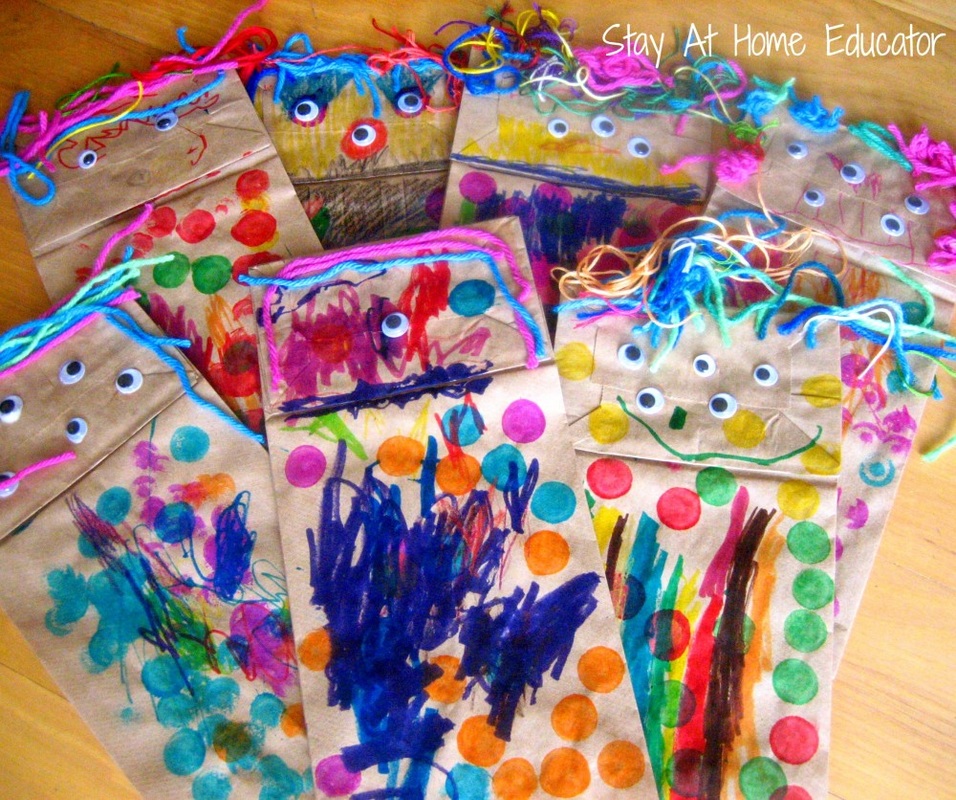
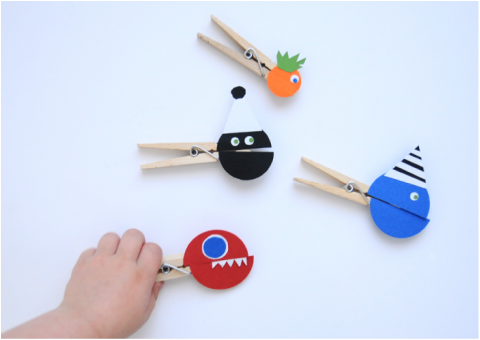
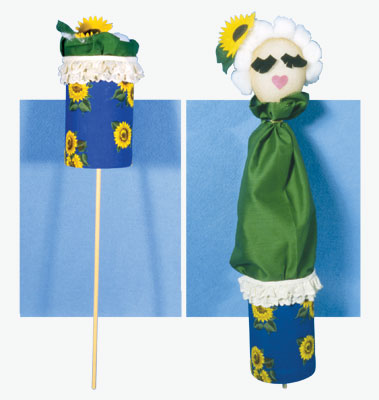
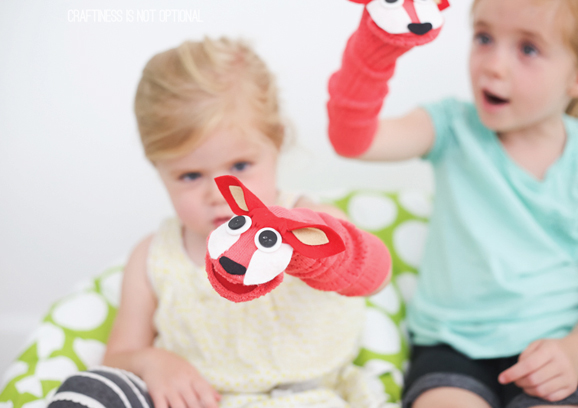
xo

10 great puppet ideas

8/18/2015

 
Picture
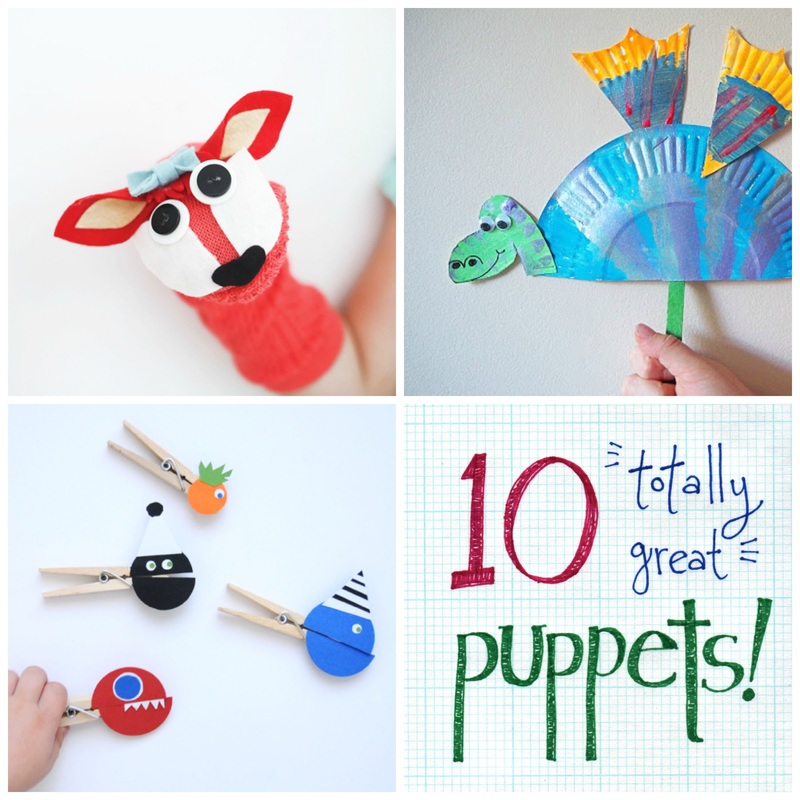
When I was a kid, my twin sister and I would hide ourselves behind the sofa, raise up our puppet-covered arms, and put on shows for our patient parents. We had several store-bought characters, but for our wilder screenplays, we'd build our own puppets from paper, tape, and popsicle sticks -- pretty crude stuff compared to these ten projects from ten great blogs. I've posted them in order of skill level, from easy to more advanced. Of course, this is my subjective ranking: you can always choose to spend a couple of hours perfecting your paper bag persona, or make a simpler sock puppet with just buttons and fabric glue.  Click on each image for complete directions.
P. S. If a behind-the-sofa setup doesn't work for your production, make a simple theater from a cardboard box (see a charming example here.)

Doesn't get much easier than La-de-la-de-da's big-eye rings, which turn your hand into the "puppet." Tons of silliness are sure to ensue.
Picture
Picture
These friendly monsters, made by preschoolers, are an appealingly vibrant example of the classic paper bag puppet. This set is from Sarah Punkoney at Stay at Home Educator.
I have a niece who is into all things dragonish, so she'd be totally into these scaly subjects by Learn with Play at Home. Each one is made from a single paper plate.
Picture
Picture
OM NOM NOM NOM! I can picture these mischievous creatures from Small Fry doing a lot of talking, but even more biting and eating (just be sure to keep them on a finger-free diet).
Pop-up puppets are a classic children's toy. This version from Highlights has a vintage feel (those eyelashes!) that I  love.
Picture
Picture

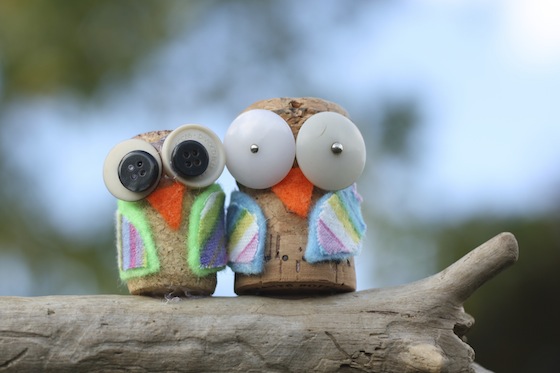
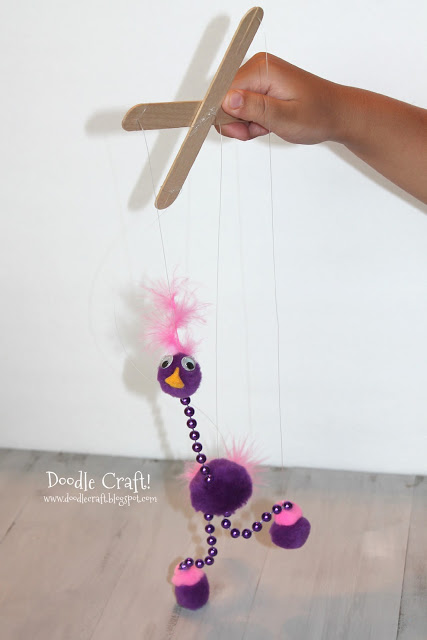
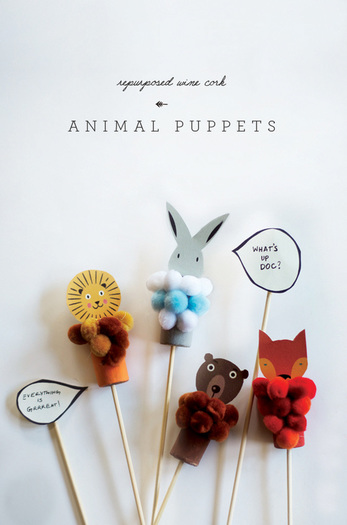
Little Monster Blog created these little guys, which are made with painted wine corks. I love their style and their soft pom-pom bodies!

Picture
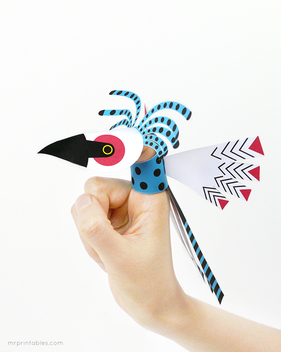
If you don't already know about the amazing Mr. Printables, go there right now. I mean it -- that's an order. Mr. P has loads of gorgeous free printable projects, such as these cleverly-designed bird finger puppets.

Picture
These fox sock puppets are, appropriately enough, inspired by Dr. Seuss's Fox in Socks. So darn cute! (See what I did there, with the "darn" and the "socks"...?) Jess from Craftiness is Not Optional posted this how-to over at Paging Supermom.
I had a store-bought version of this marionette in the *cough* 1980s, and I loved walking it all over the house. Doodle Craft came up with a homemade version that's super charming.
Picture
Picture
It's Always Autumn's snapping monsters seem to be evolutionary cousins to the clothespin Nommers above. The jaws lunge forward, thanks to a surprisingly simple mechanism. Older kids will love this one.

Do you have a favorite puppet craft I missed? Share it in the comments below!
xo

    Categories

    All
    Christmas
    Easter
    Franklin Friday
    Halloween
    Have You Met?
    I Love Museums
    I Love Stuff
    I Love Vintage
    Inspiration
    My Projects
    Nature Craft
    Recycling Crafts
    Round Ups
    Thanksgiving
    Valentine's Day

    Archives

    March 2017
    February 2017
    January 2017
    December 2016
    November 2016
    October 2016
    September 2016
    August 2016
    July 2016
    June 2016
    May 2016
    April 2016
    March 2016
    February 2016
    January 2016
    December 2015
    November 2015
    October 2015
    September 2015
    August 2015

    Author

    I'm Debbie Way, an artist and writer who enjoys making things.

    RSS Feed

Proudly powered by Weebly