|
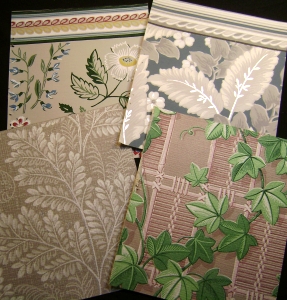
It's been a few years since I shopped at Manto Fev, so I'm extremely pleased to discover they are still going strong. What is Manto Fev? As they describe themselves: "Manto Fev is your best source for alternative art supplies. We carry products for collage, assemblage, art dolls, art quilts, scrapbooking, and more. We like to look for the vintage, the unusual, and the just plain odd. We live for this stuff and hope you do, too. Our stock is constantly changing as we find new and exciting products for your art." I have bought numerous things from them over the years, including fake plastic eyelashes, pages from a 1950's-era hairdressing manual, and sheets of mica. I don't know of anywhere else I could buy such things, especially at such reasonable prices. Manto Fev is a treasure. Here are some of my current favorite offerings; click on the picture to be taken to the shop.
I haven't even gotten to the flea market section of the site, full of one-of-a-kind items! It is difficult to stop myself from simply reposting the entire site, but I will. Go there and peruse.
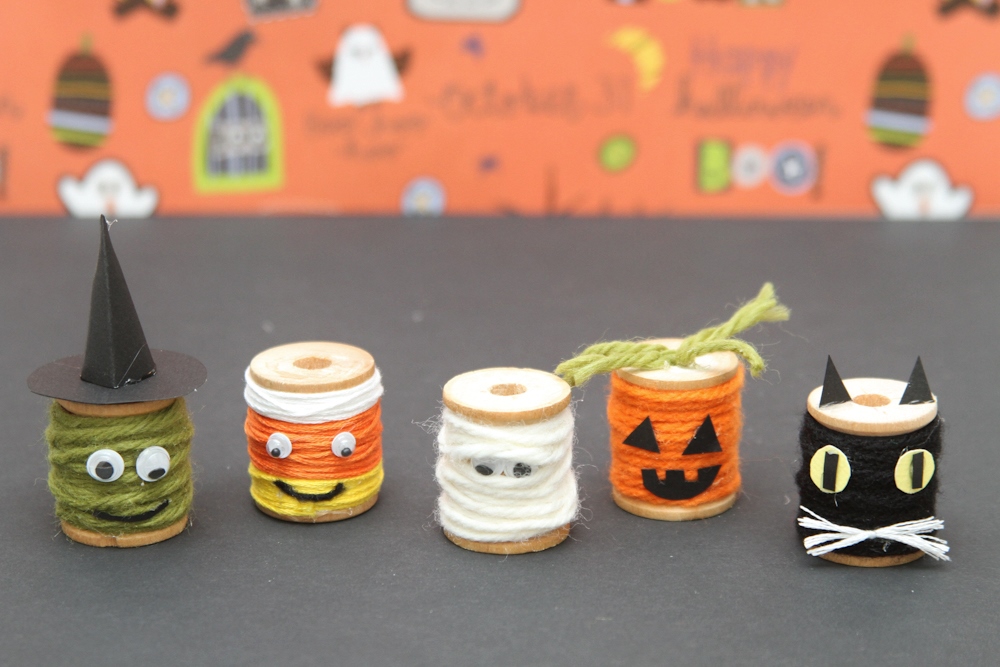
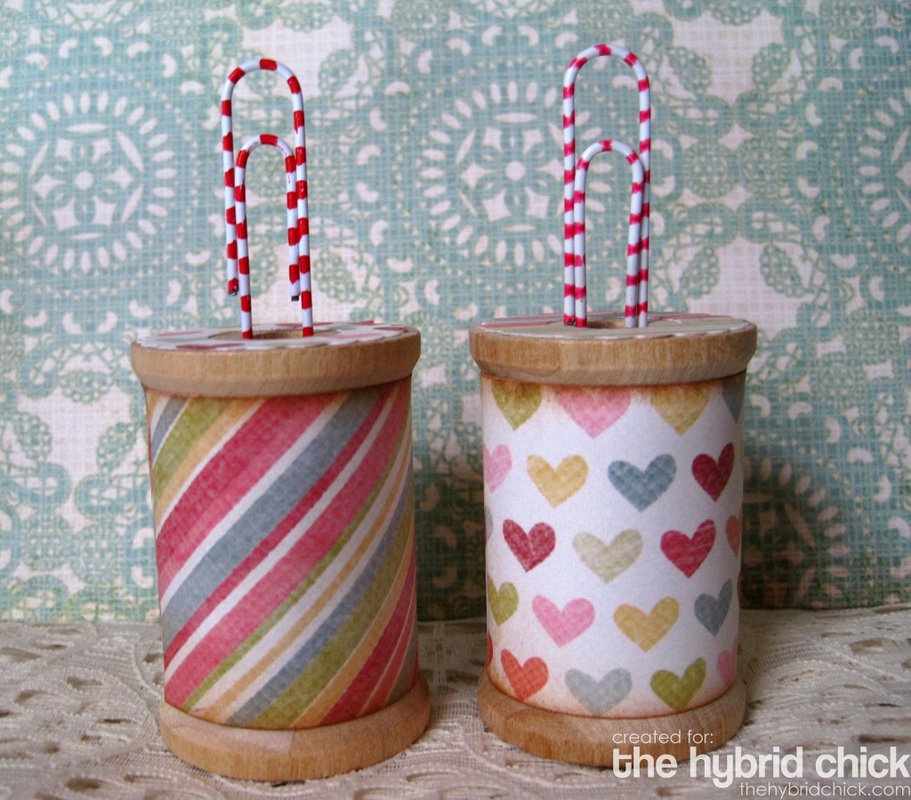
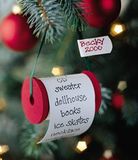
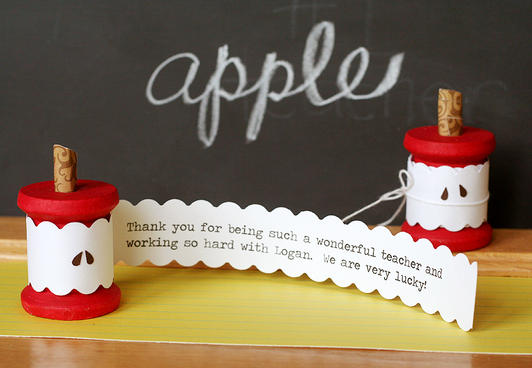
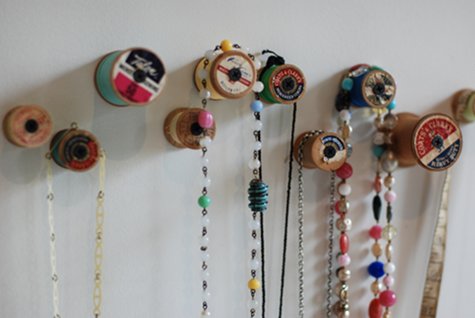
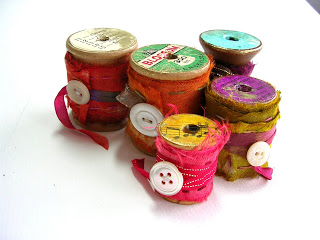
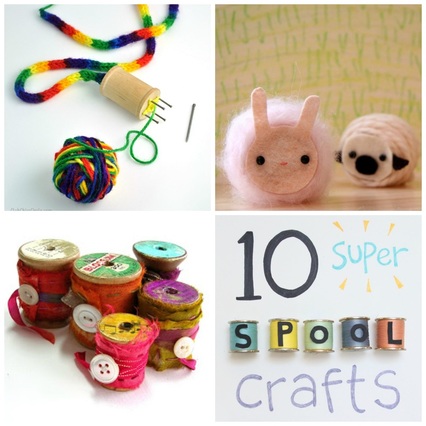 Since I've been on a sewing kick recently, I've been thinking about thread spools, and what to do with them once they're empty. I went on an internet search for the best crafts and projects to make with spools. Though pretty much all of the ideas I found use wooden, often vintage, spools, there are a few ideas in here that can be used with modern plastic ones — I'll mention it as we go. Another note: There are not a ton of little-kid projects in here, mostly because (I think) spools in and of themselves are fun to play with. You can use them as building blocks, you can thread them onto a length of string, you can roll them along the floor... Once you tire of such things, take a look at these ten ideas.
Got spools? Got a great project I missed? Let me know in the comments!
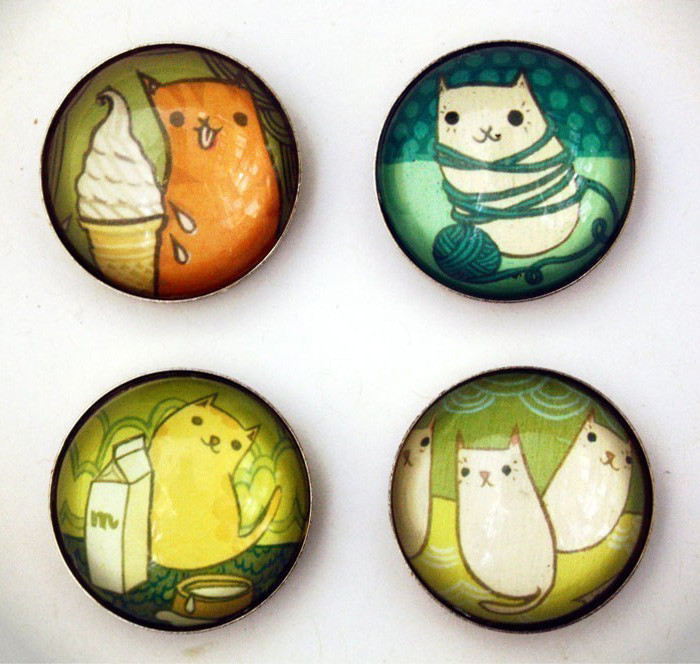
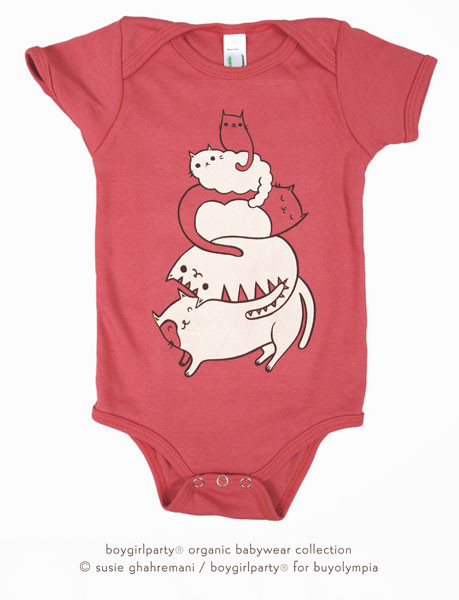
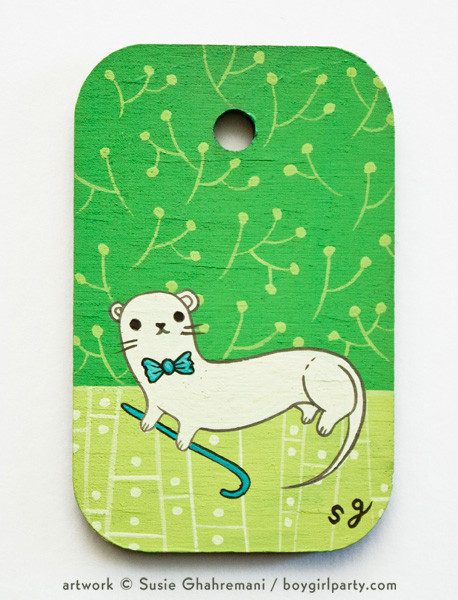
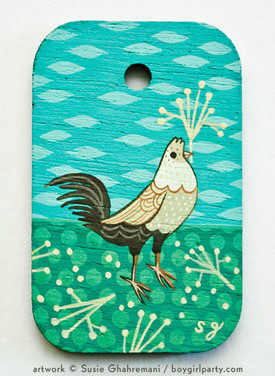
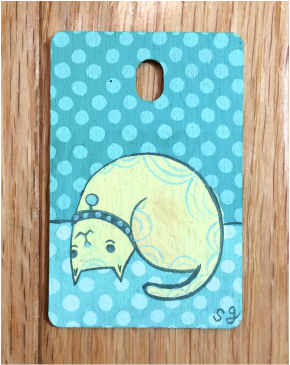
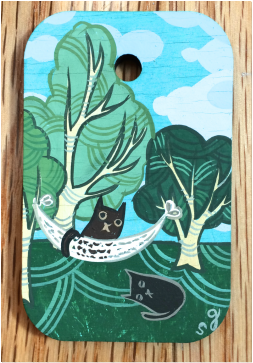
xo Have you met Susie Ghahremani? She is an artist, designer, and illustrator. Here's one of her illustrations: 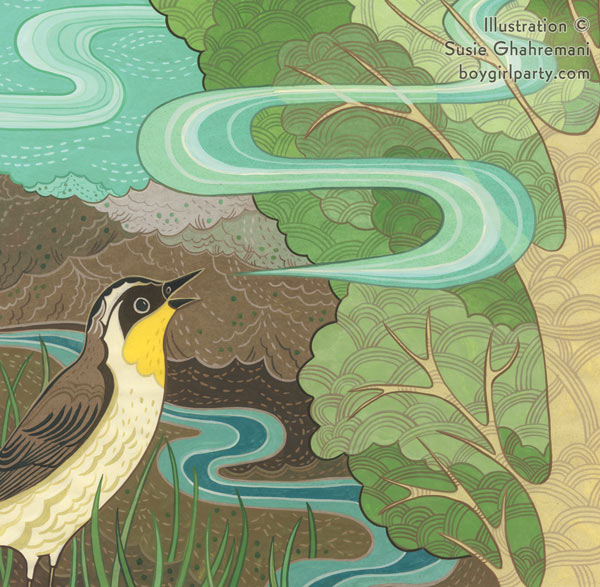 She makes gorgeous paintings, too. 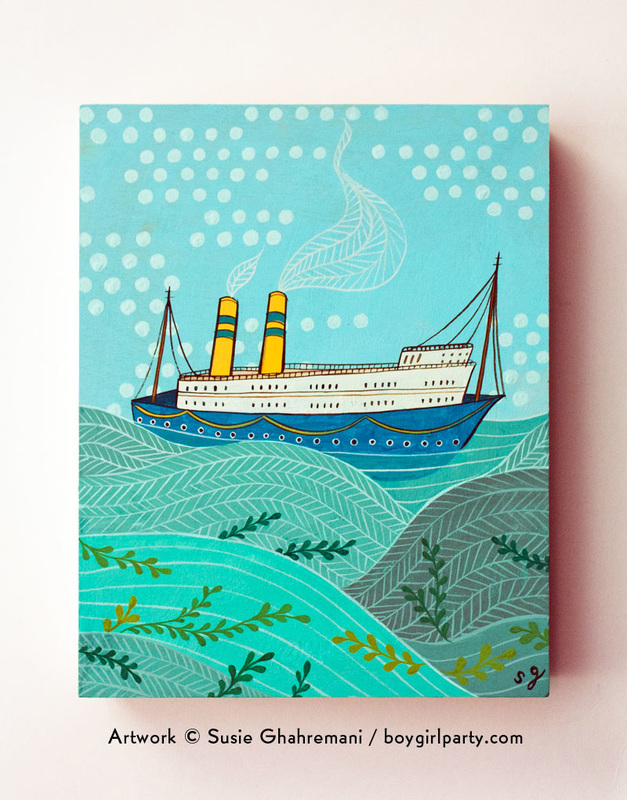 I love her use of color, and how she uses patterns of lines to suggest texture, movement, and contour. Not surprisingly, others love her style, too, and she sells a variety of products starring her illustrations. This journal is printed by Chronicle Books: 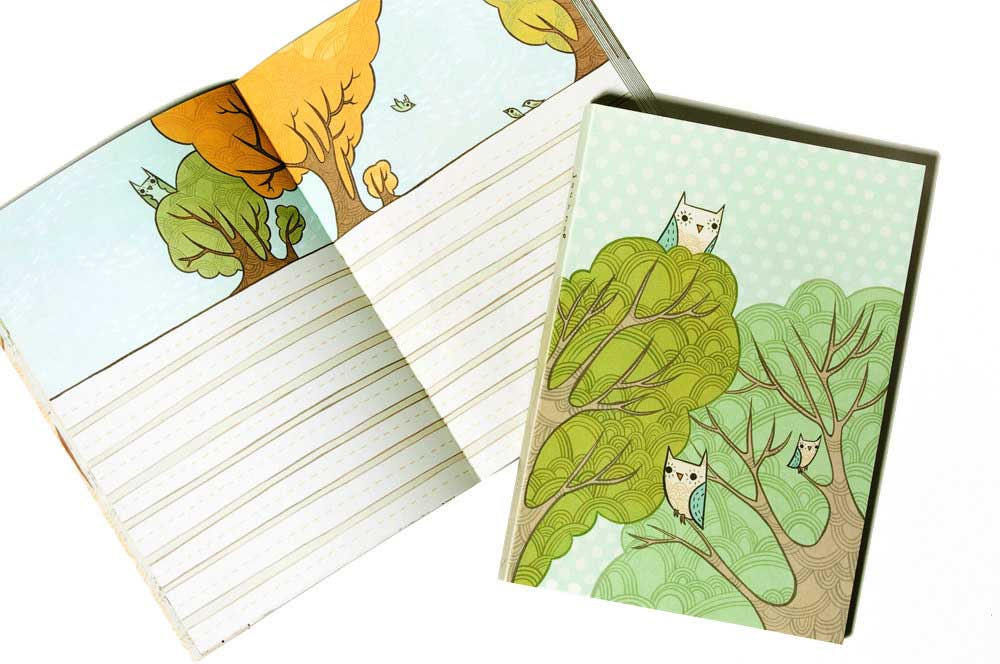 She sells it on her shop, too, along with many other adorable things. I especially love her cats.
Besides products such as t-shirts, magnets, jewelry, and stationery, she sells prints and original artwork. Check in often to snag a one-of-a-kind miniature painting — they sell out quick! These two are still available as of press time.
I own two of her mini paintings, myself. I believe at least one of them was a gift from my sister (thanks, Sarah!). And guess what: they're of cats! These sweet little paintings are precious to me, and hang on a bulletin board above my desk.
Her work could be a good jumping-off point for an older kid's painting activity involving the use of patterns instead of more traditional textures and shading.
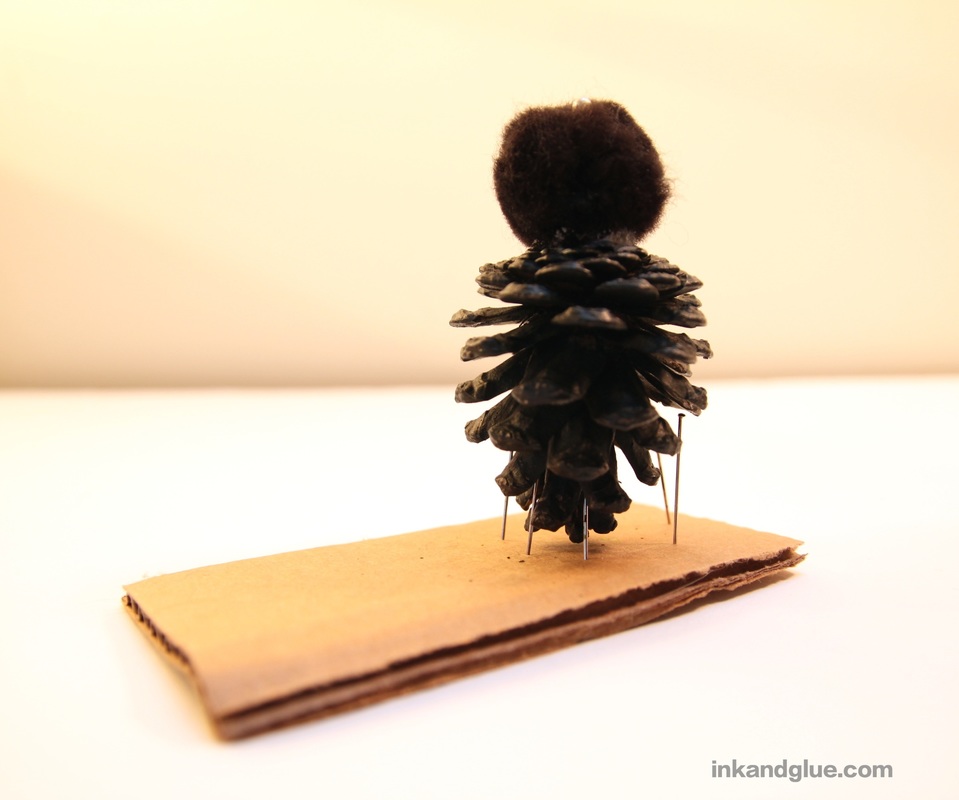
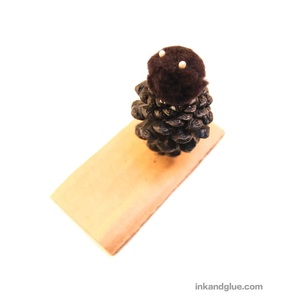
I hope you go and patronize Susie's shop at boygirlparty! xo 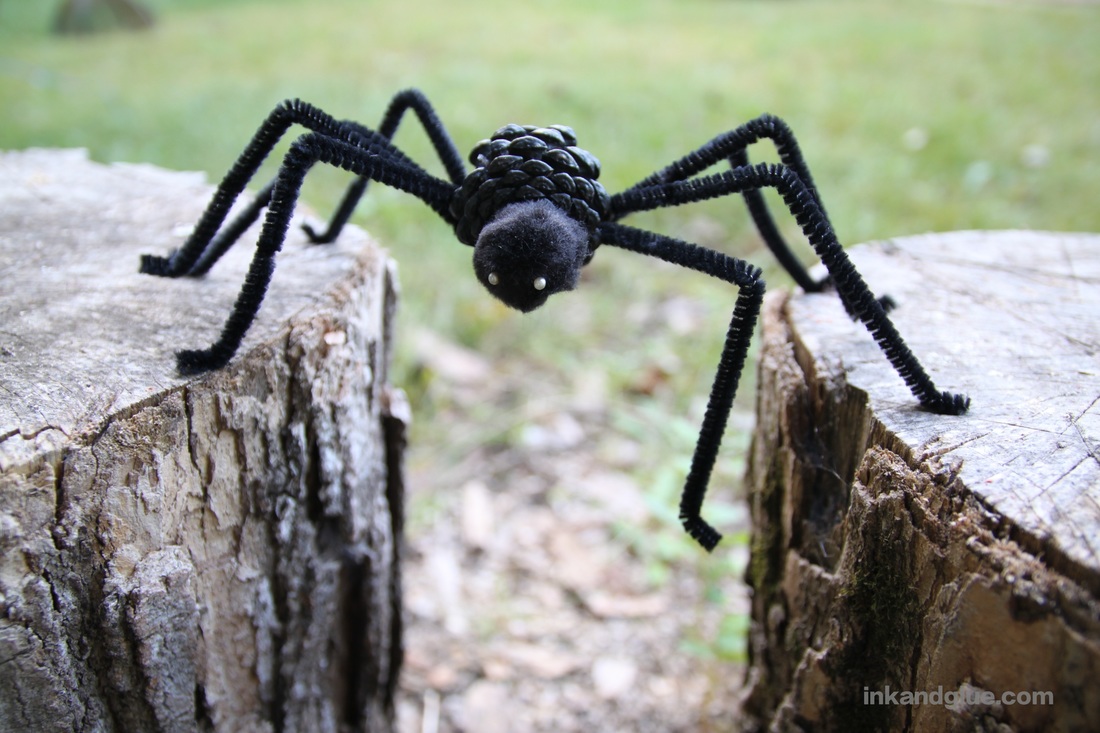 Why, hello, spider! I made this leggy lil' guy with a pine cone for a body. I like using natural (and free) materials in my crafts whenever I can. It satisfies my frugal nature and gives me a great excuse to go wandering through the woods. If you don't have pine cones where you are, the internet, as always, will provide: you can buy pine cones on Amazon. If you don't want to use a pine cone at all, you can substitute an extra-large pom-pom, or a styrofoam ball, painted black. Start by painting an egg-shaped pine cone all over with black acrylic paint. (A one-inch-wide pom pom is shown below for scale and context.) 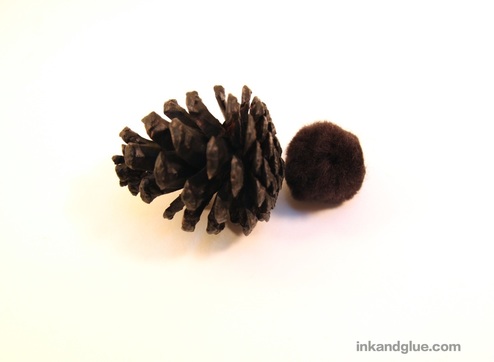 Once the paint is dry, glue a black pom pom to the flat end of the pine cone. For eyes, carefully glue two beads — I used small, fake pearls — to the pom pom. To avoid gumming everything up with too much glue, I used a pin to pick up a bead, dip it into a drop of glue, and press it onto the pom pom. (Too fussy? Self-adhesive googly eyes are a wonderful alternative.) With a scrap of cardboard and a few straight pins, I made a quick-and-dirty version of a pin drying rack to hold the cone upright while everything dried.
Next, line up four black pipe cleaners (a.k.a. chenille stems). Twist them together in the center, then bend the middle to create a short curve, as shown. 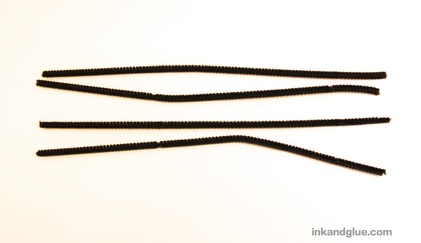 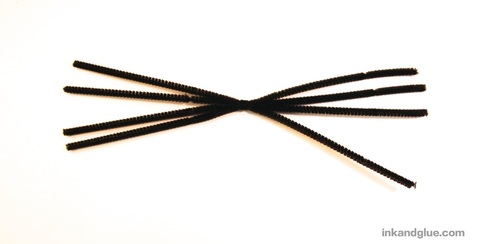 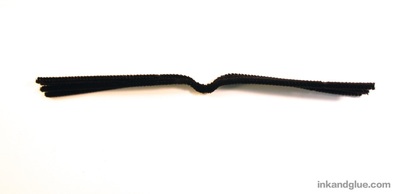 Pick a spot on the pine cone to be the belly of the spider. Apply a line of tacky glue to the inner part of the curve, then wedge it between the scales of the pine cone at the belly. 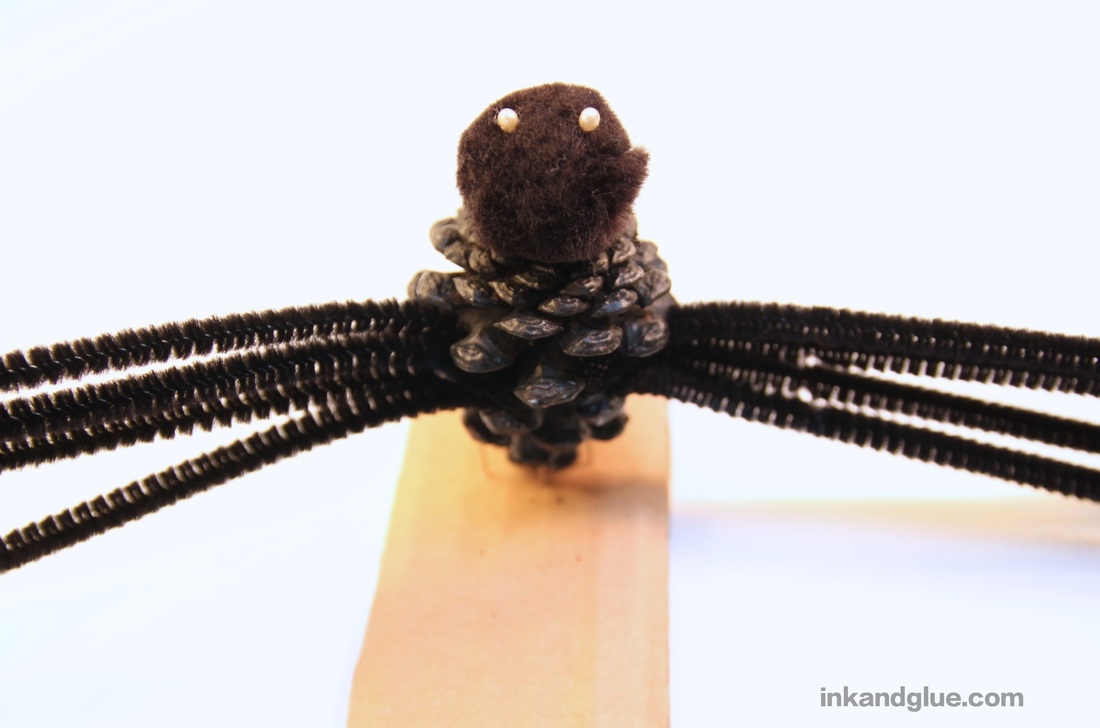 Spread out the eight legs, and bend each one into a leg. I like including feet on my spider, but you can leave the ends of the legs straight for a more menacing look. 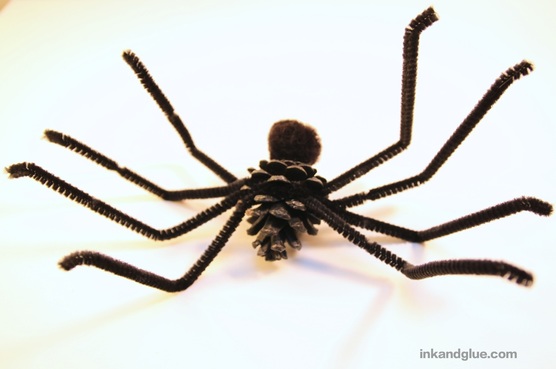 And you're done! Enjoy Halloween with your new arachnid pal! xo  Here he is in the backyard, standing straight and tall for the dog show judges. I'm awarding him Best in Show. 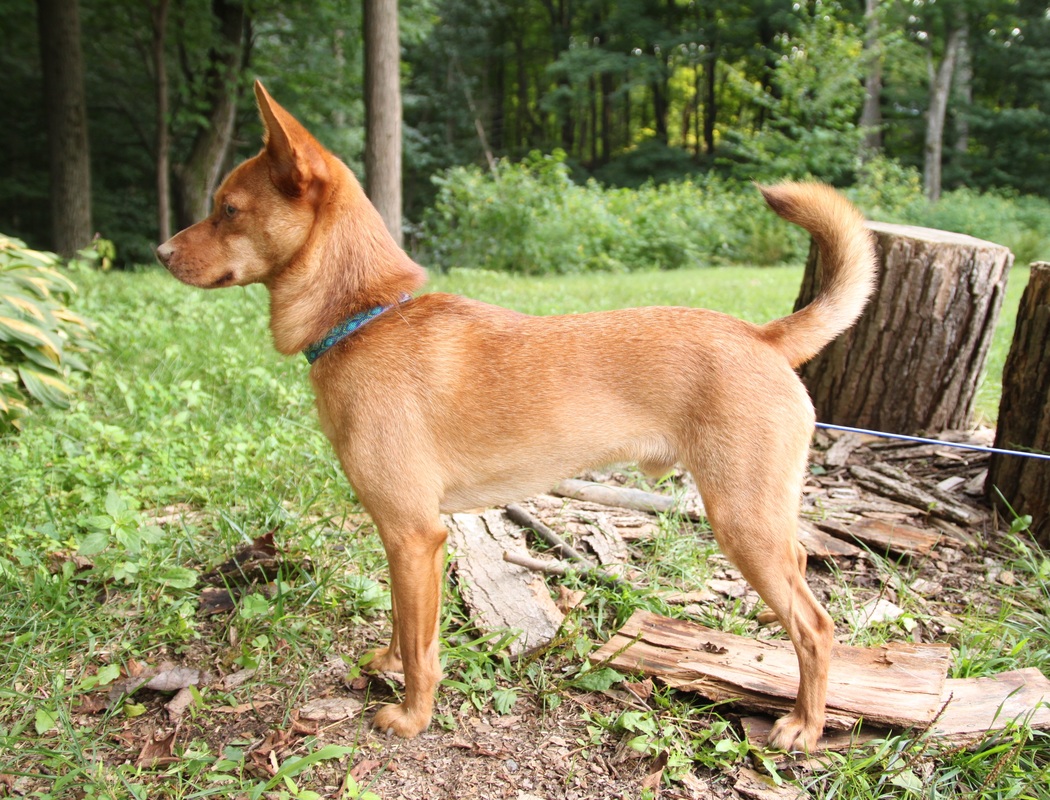 Happy Friday! xo
A couple of months ago, I signed up to participate in the Monster Art Project, an exhibit of monstrous artwork opening in Easthampton, MA on October 10 (and running through Halloween). The show will be in two rooms; one large room will have a Victorian explorer's study vibe, and will house scarier, more adult monsters; a smaller room will have cuter, more kid-appropriate monsters. Naturally, my work is going into the cuter room. Everything in the show will be for sale. I'm going to make a few different creatures, and have made 2.75 already. Here's one of the completed ones: 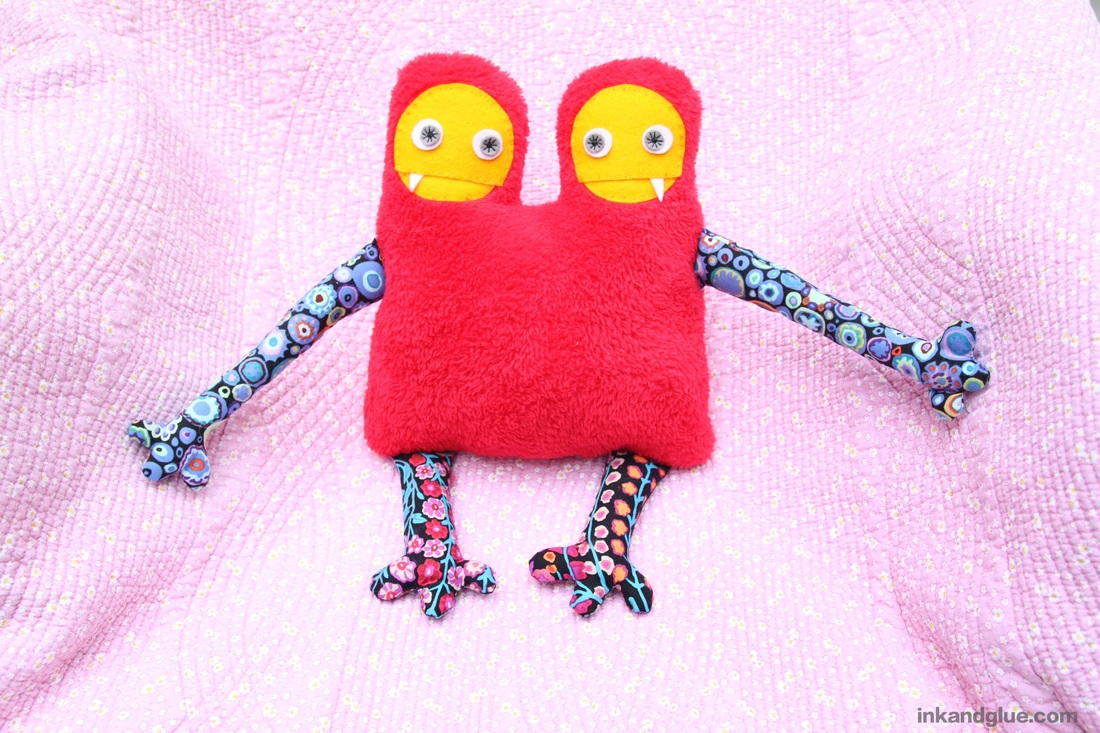 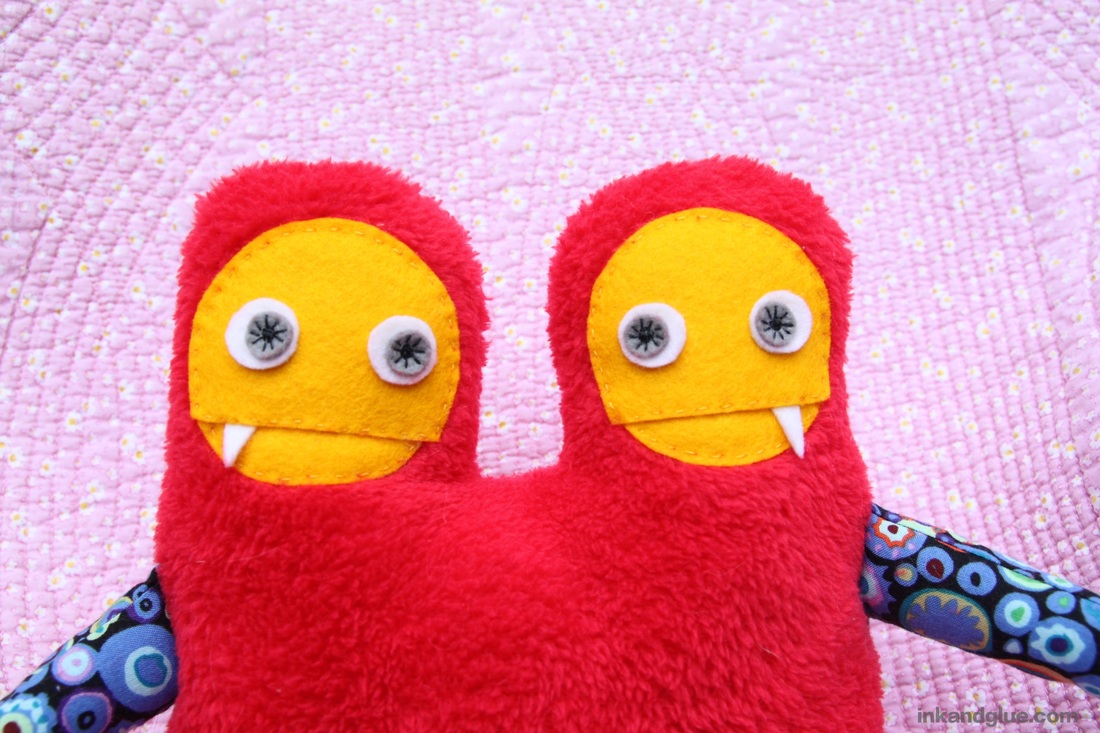 I am still trying to figure out pricing, because they take a stupid-long time to make, and each one is unique. But I also want people to be able to buy them and love them. (Figuring out how much to charge is a common artist's dilemma, I think.) I hope you like them!
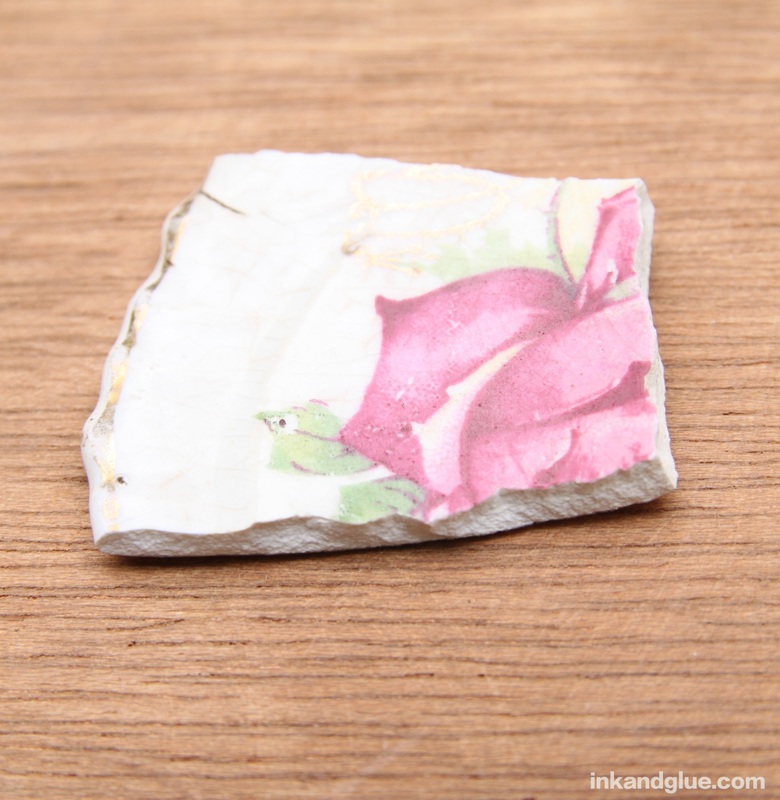
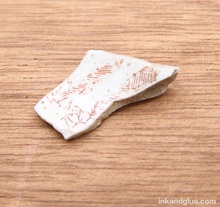
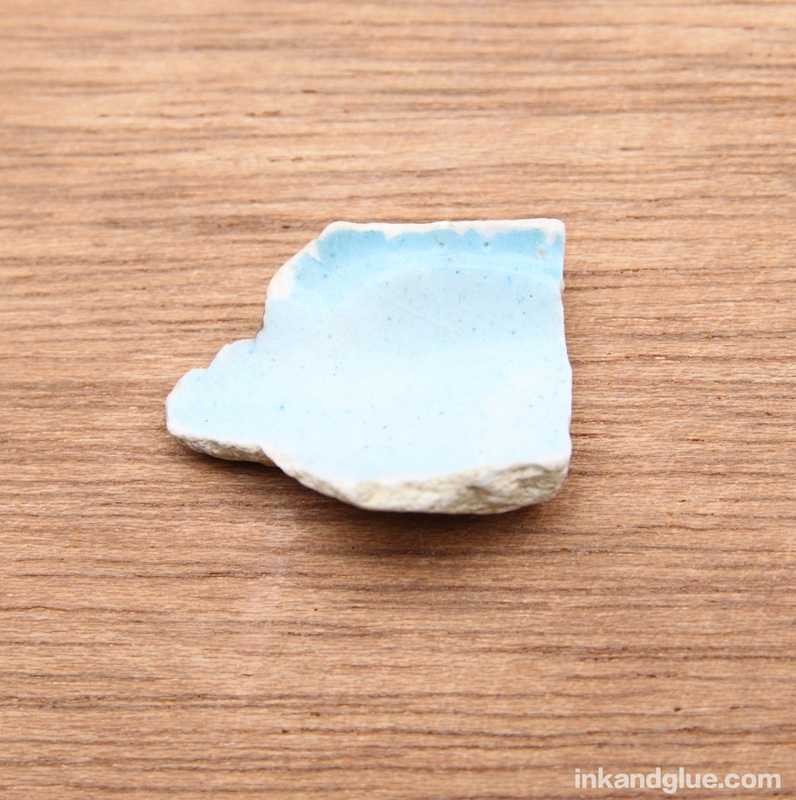
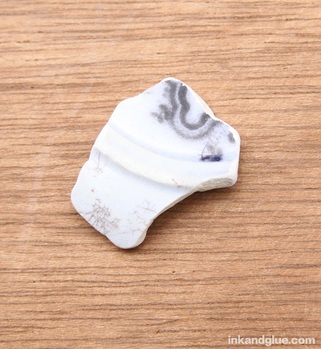
xo There's a small river near where I live that rarely gets deeper than a few feet. Named the Mill River, it once powered dozens of mills, and there are remains of them found all along its length. Many houses were built near its banks. The river gets heavy use in the summer by swimmers and waders, including me. I've never visited it without finding some piece of man-made something-or-other from the past. Near the area where the huge state mental hospital used to be, there are lots of shards of institutional-style Prolon melamine plates and bowls. 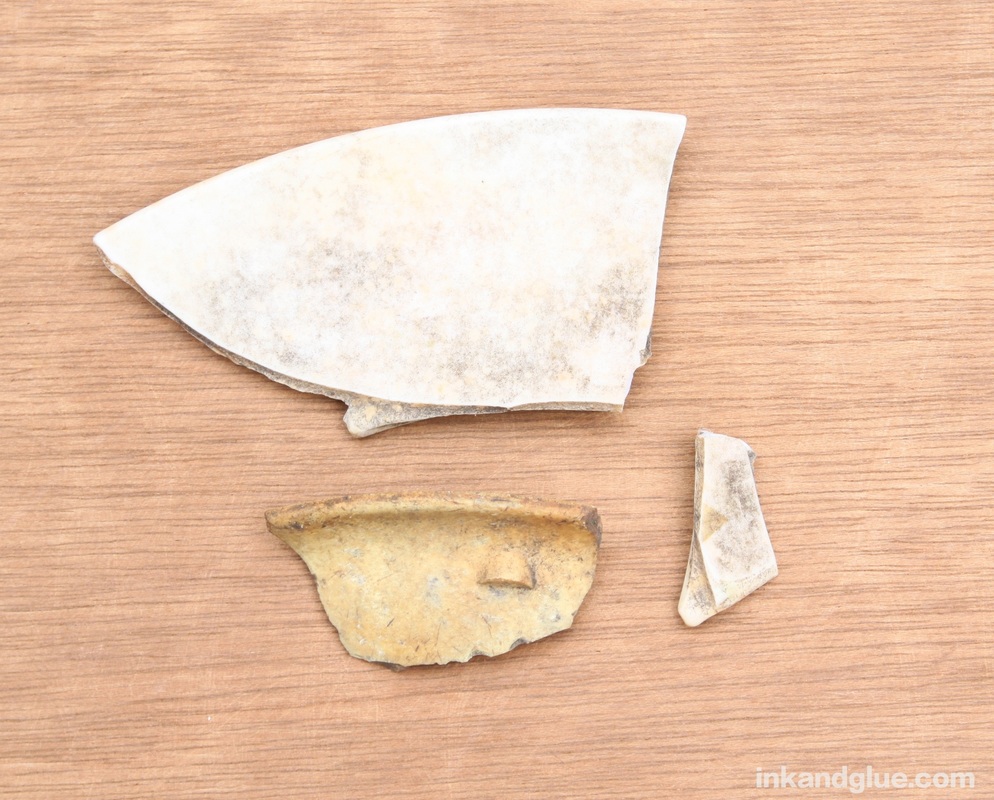 An interesting thing I learned: Prolon still exists, and is manufactured in Mississippi. The pieces I've found in the river are from when Prolon was still being made in Florence, MA, which the Mill River intersects. You can just barely see the "MASS" on this fragment. 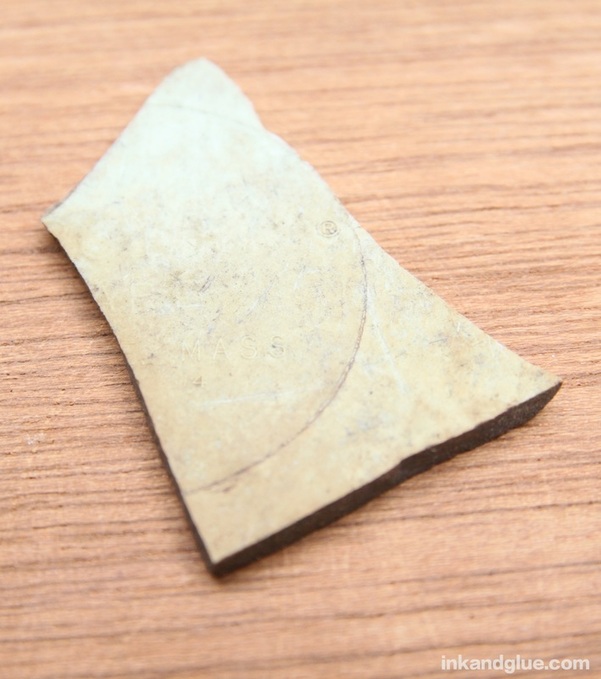 (Once I was extremely lucky to find this spoon — and then, a few months later, a second, identical spoon, which I gave to my sister — half-embedded in a stream bed on the grounds of the old hospital. They were not officially in the Mill River; I just wanted to brag.) 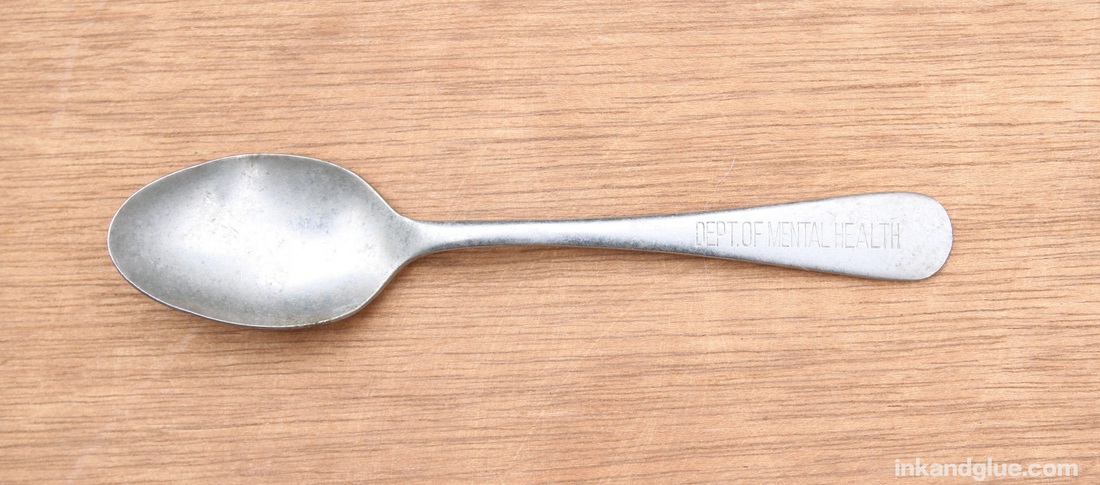 Every once in a while I'll find a piece of actual china, or a section of a huge brown crock. And every once in a great while, I luck out and find the most precious thing: a piece that had a glimpse of pattern on it. 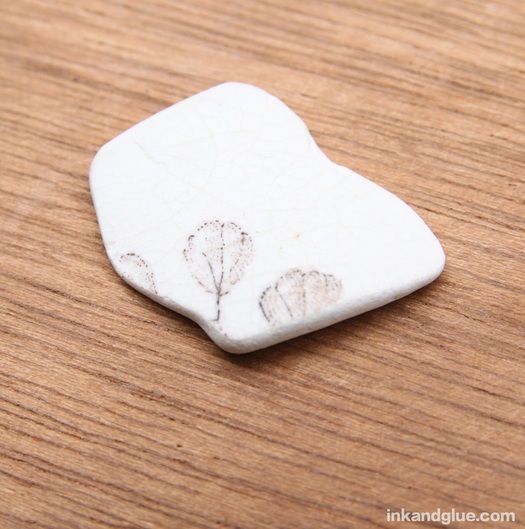 A couple of years ago, I was visiting a friend's apartment and he casually showed me a typesetter's tray completely packed with my holy grails. He was generous enough to tip me off to his hunting ground, which is a bit further upstream from where I usually go. That's where I found many of these.
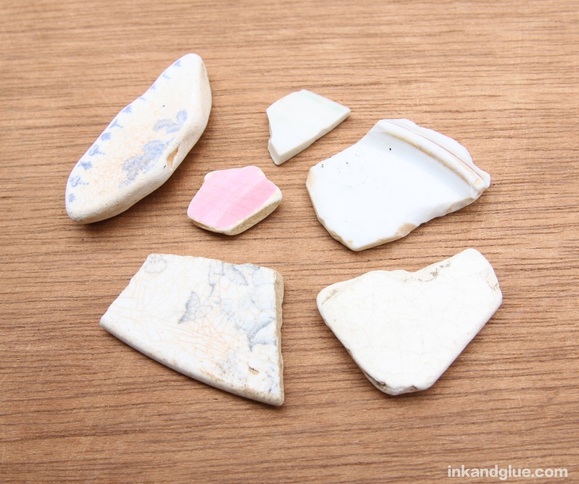 Now for the $64,000 question: What do I do with these? So far, they have been living in a decorative bowl, on display. I have seen necklaces made from similar fragments, but for whatever reason, they just don't attract me. I could cement them onto a pot, or use them in a mosaic. But so far, I enjoy merely picking them up and feeling their smoothed edges and imagining where they came from. Who ate from this plate? How did it end up here? It makes me feel connected to the history of this place.
Do you have any similar finds? xo What youngster wouldn't want to be the proprietor of their very own ice cream truck? Let them fulfill their dreams with this superbly designed cardboard play truck by Famous OTO, a manufacturer in Brooklyn, NY. (Clicking on an image will take you directly to the product's listing.) 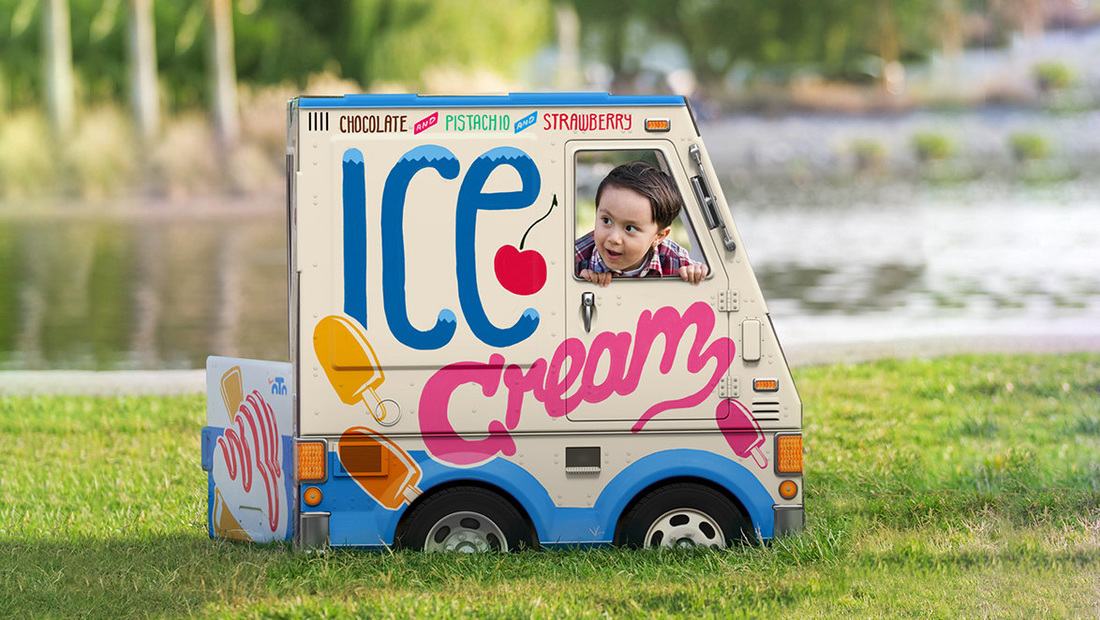 For kids with a slightly hipper, edgier style, or ones who simply prefer savory over sweet, get the taco truck:  Don't have a kid? No problem! They make a sized-down ice cream truck just for cats. Note the regular flavors have become fish-ified. 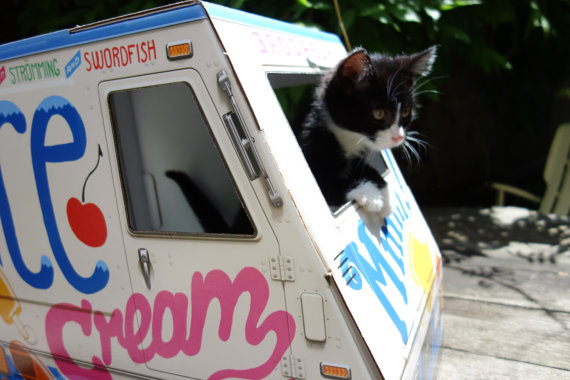 I love the level of detail that went into these, down to the "hand-painted" lettering. Well done, Famous OTO!
xo Have you met Hazel Terry? She's an artist and blogger who lives and works in the U.K. I came across her leaf paintings when looking for leaf craft ideas for my round-up. The shape of the leaf determines what each will become. 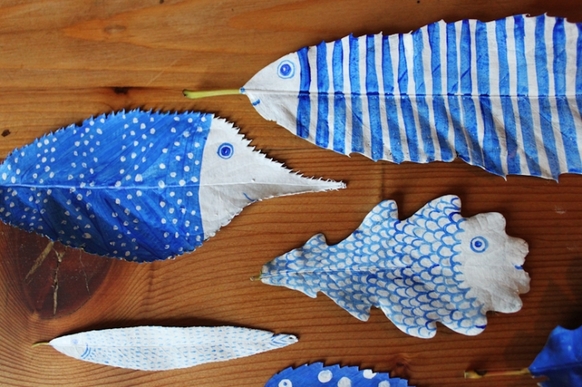 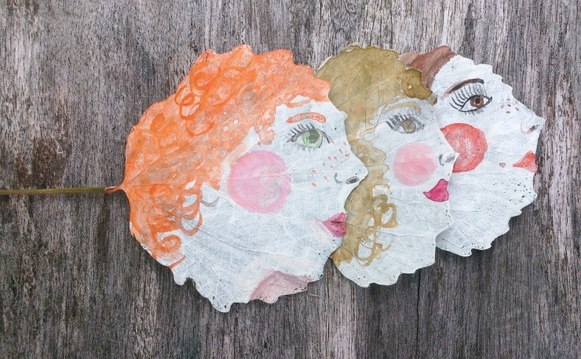 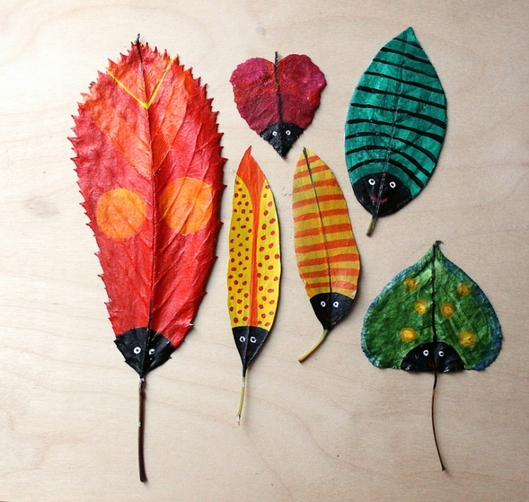 Inspiring, no? I also love her tissue collage: 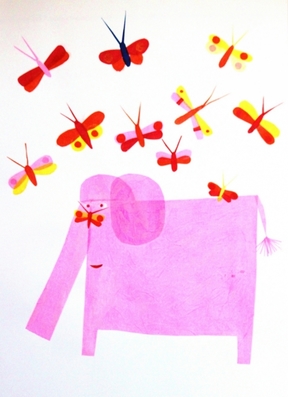 And her illustration work:  And her textile pieces, such as this example of her patchworked limerick series. 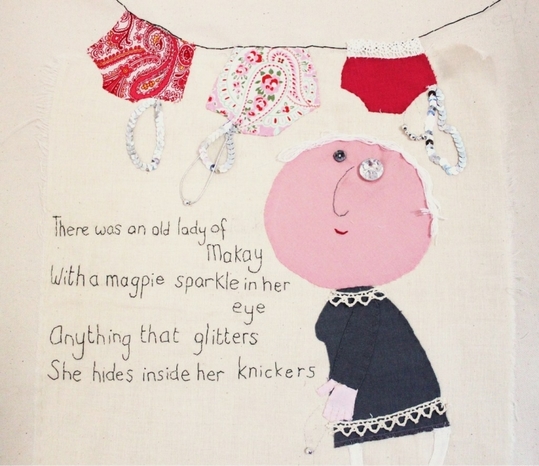 Lots and lots of ideas to try with kids, here! Painting on leaves, using cut pieces of tissue for collage, including word balloons in paintings, "writing" with thread... Thank you for your creative vision, Hazel Terry!
xo
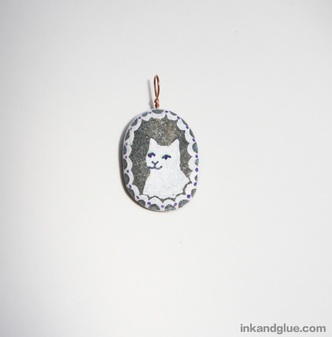
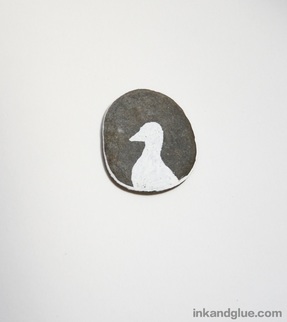
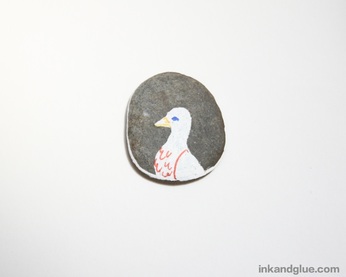
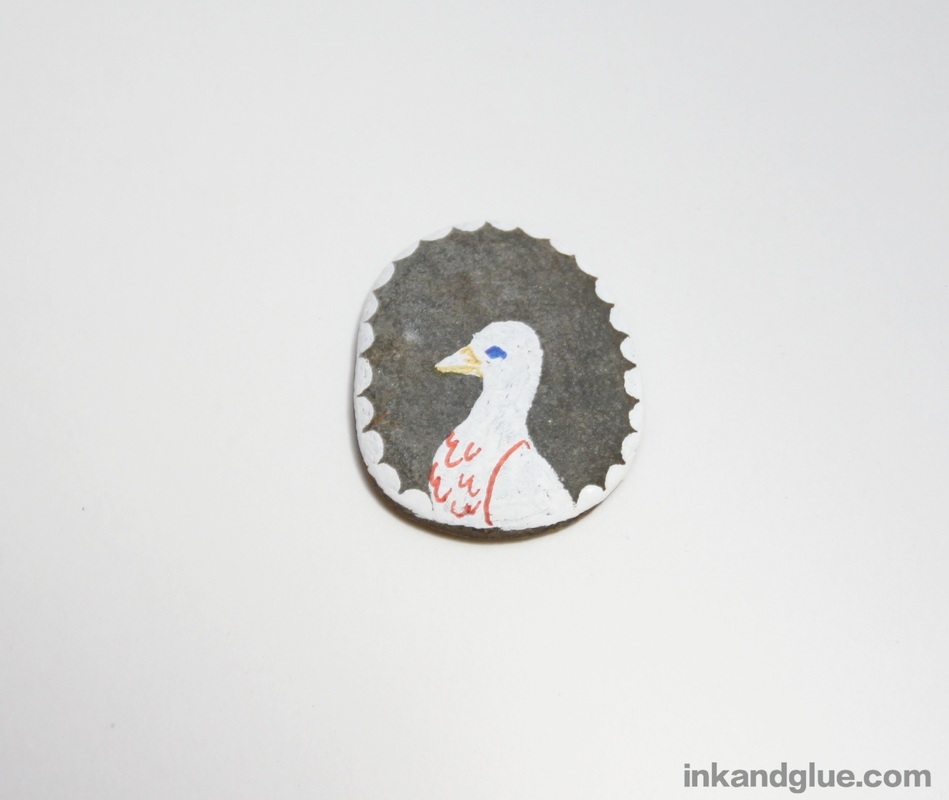
After you collect and clean your stones, decorate them however you wish. You can use acrylic paint and regular permanent markers, but my favorite technique is to draw with a Montana white acrylic paint pen. They are a bit pricey, but I spent way more than its cost on the several other markers that weren't as opaque, or the paint didn't run as smoothly. My marker is also refillable, which will potentially save me money, if I go nuts and paint a hundred rocks or something. I got mine at Michael's, and note that the Montana markers are kept in a separate case, usually near the check-out lines. I assume this is because the markers are designed for grafitti artists, and the store wants to keep an eye on potential law-breakers. Note: I do not endorse using these markers for tagging other people's property. But, the fact that the markers CAN be used to do so, means that they are really good at what they do. So anyway. You can stick with a plain white design, like these geometric shapes: 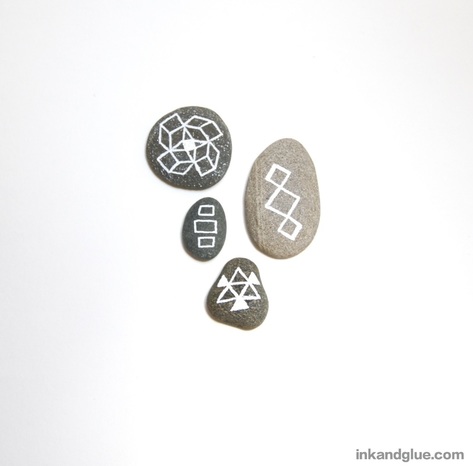 If you want a pendant with color, it's a good idea to paint your design with white first, letting it dry, and then going over it with colored markers or paint. The two below were made using acrylic craft paint; the one on the left has a white undercoat, and the one on the right is two coats of acrylic paint: 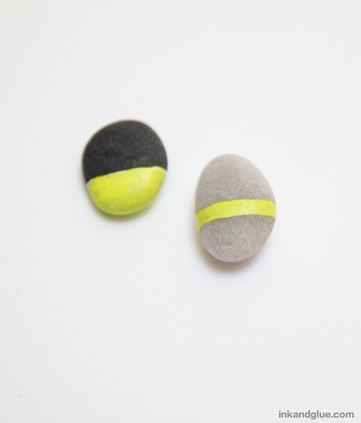 I've found that I can use regular fine-point Sharpies over the dried Montana white — there's no need to buy a rainbow of expensive paint markers. Once I discovered the level of detail I could get, it opened up my design options. I ended up creating a couple of simple animal cameos. Here's a series of photos to show you the order in which I added the elements and layers.
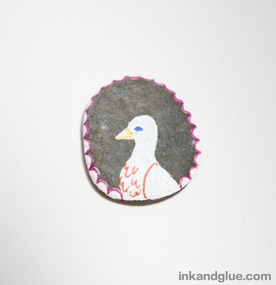
Next, make your bail. A bail is a metal thingy with a loop and a flat part you glue to the back of something to turn it into a pendant. You can buy bails, if you'd prefer, but I am a "make-do" sort of a person, so I made one out of wire. To do so, cut a couple of inches of wire. I used 22 gauge copper wire from the hardware store. 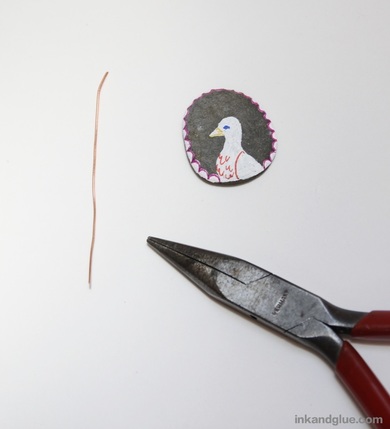 Twist one end into a loop for hanging, and the other end into a rough spiral. 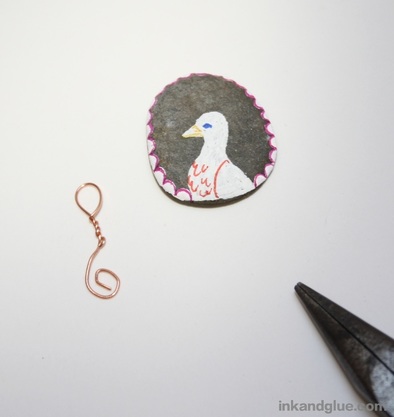 Bend the middle of the wire doohickey you made so it follows the curve of the stone somewhat. You just want the hanging loop part to end up sticking fairly straight out from the top of the stone. No need to be terribly fussy with this. 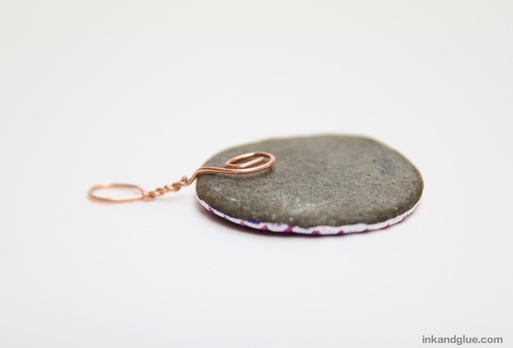 And now, you glue. For something like this, you want a strong glue. And that means you want a glue you don't want little kids using. This is a teens-and-up glue. That glue's name is E6000. It does not seem terribly fume-y to me, but there are warnings on the label, so I report what I see. It is a very strong glue. I once used it to make a tiered cookie display out of plates and candlesticks, and it survived several years until I dropped it -- and the bottom plate broke, not the glue. Strong. Squeeze a drop of E6000 onto the back of the stone, then swirl the spiral part of the wire around in the glue so it is enveloped by it. Then, let it dry for a few hours. 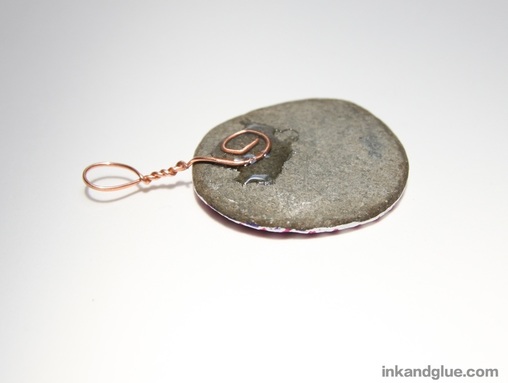 Cameo necklaces look best on a cord that's too short in length to fit over your head, so you'll need to either use an existing necklace, or make one with a clasp. I have a bag of jump rings and jewelry clasps (the link goes to something similar), so I tied the ends of a length of thin black cord to one of each. I just used a single knot for each end, and then I placed a drop of crazy glue (another adults-only material) onto each knot so they won't ever come undone. 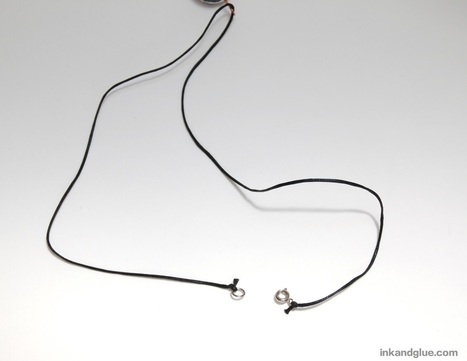 When all the glue has dried, you're set! Here's the necklace, using a cat cameo I made a couple of weeks ago. 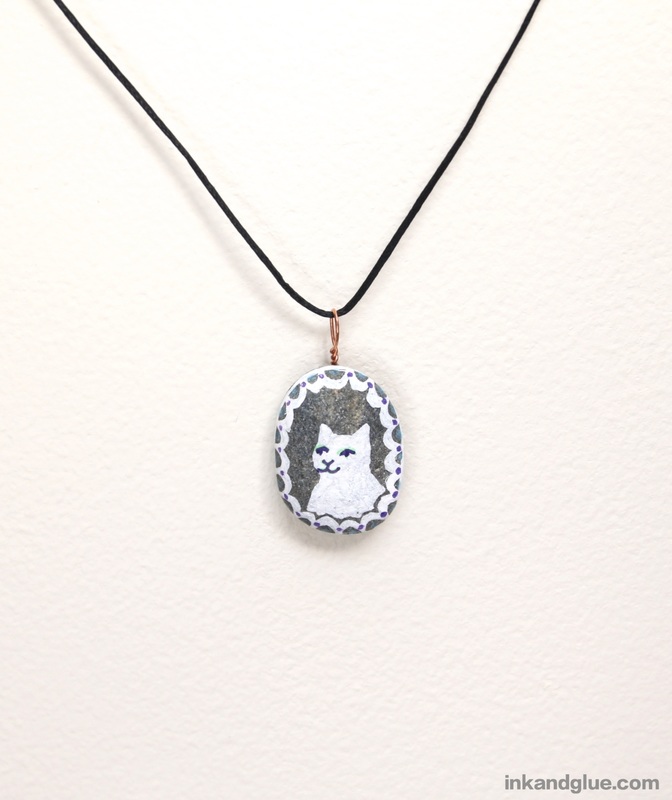 With a bit of adult help, this craft is truly all-ages. Get out there and find some stones!
xo |
Categories
All
Archives
March 2017
AuthorI'm Debbie Way, an artist and writer who enjoys making things. |


 RSS Feed