|
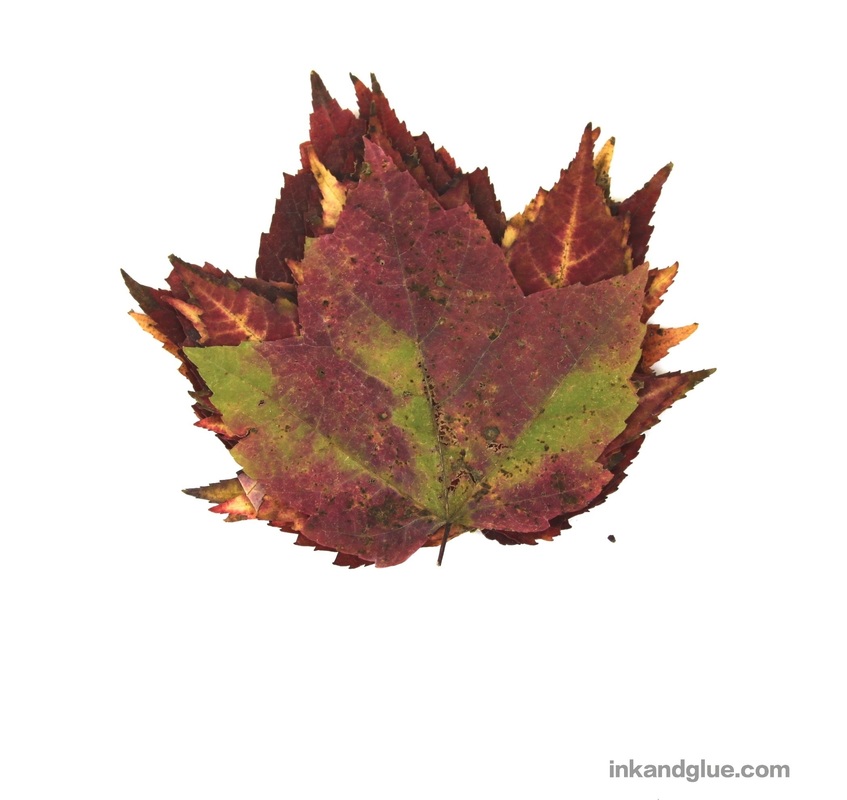
Surely there's a better word than "leaf ball" to describe this fall nature craft, but I can't think of a clearer one. Decorative orb? Autumn star? Whatever it is, it's a pretty way to use pressed autumn leaves. Up where I live, a few trees have started to turn color. Now's the time to collect and press a dozen or two, so you'll be ready to make these globes in a couple of weeks—when you've brought out your sweaters from storage, and have returned to drinking tea in the afternoons, and fall is undeniably here to stay. Let's try to welcome it. 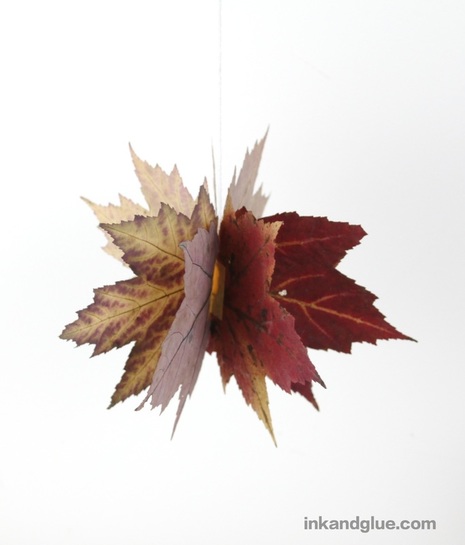 These guys are easy to make, but require 7 to 10 leaves of all one type, and of roughly the same size. If you use different sizes, you'll have a lopsided ball — not that big of a deal, but not the effect I'm going for. Your mileage, as they say, may vary. Start by cutting the stems from your leaves. 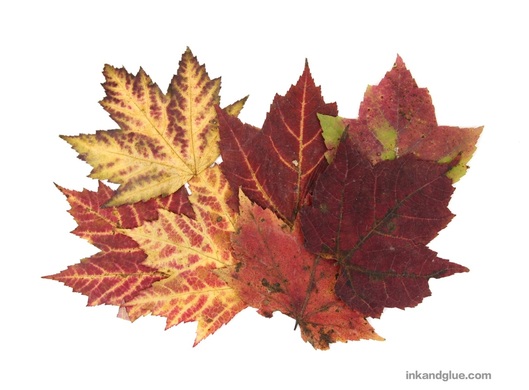 Stack the leaves so they're all aligned, then cut a straight line across the base of the stack.
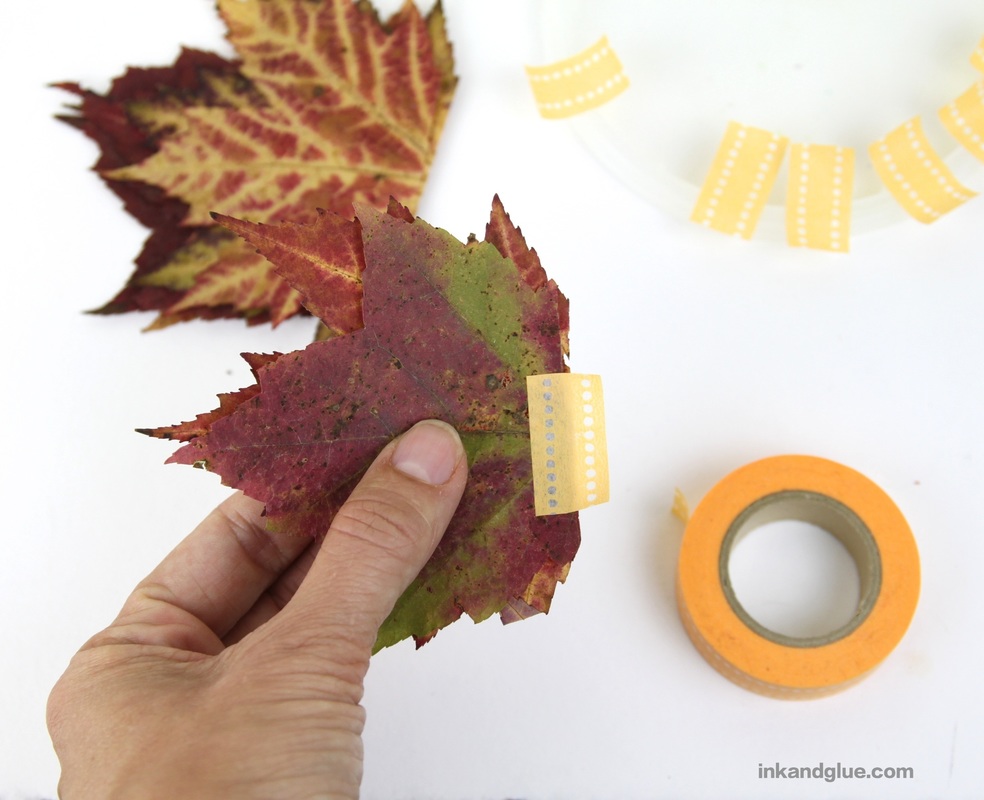
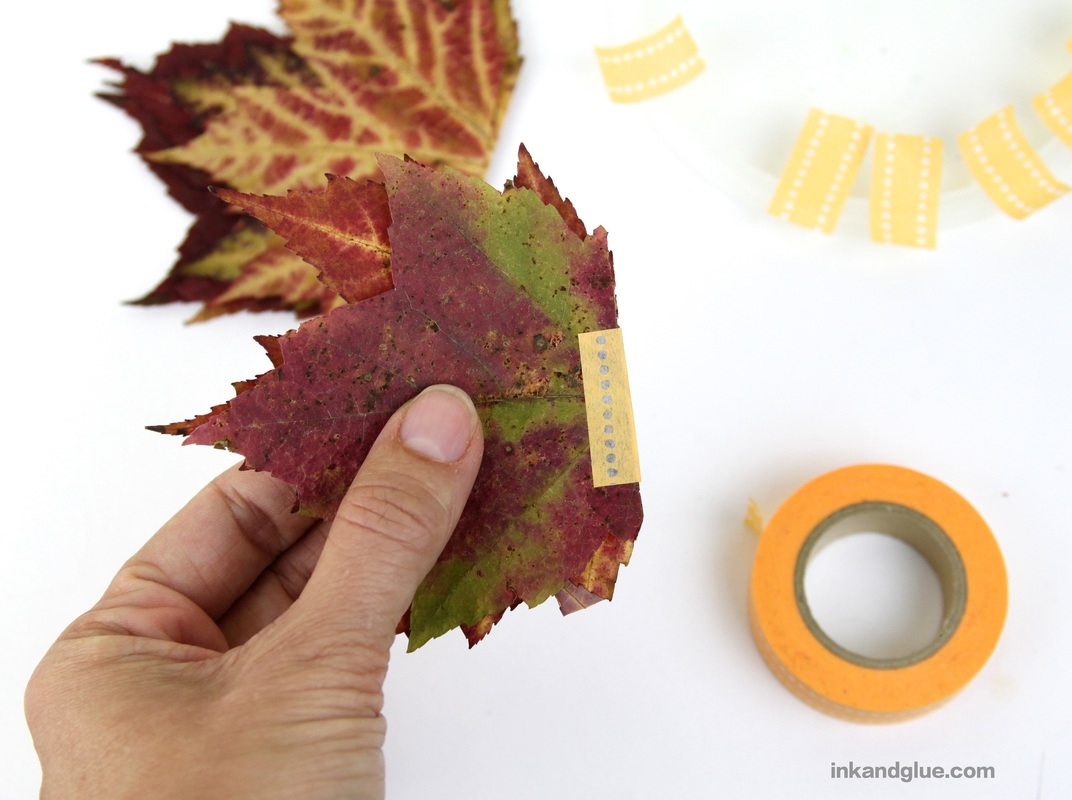
Cut a bunch of one-inch (or so) sections of washi tape and place them somewhere handy. I stuck mine lightly to the edge of a plastic lid. You'll need about 1.5 times as many pieces of tape as you have leaves. (So, if you have 8 leaves, cut 12 pieces. 13, to allow for mishaps.) 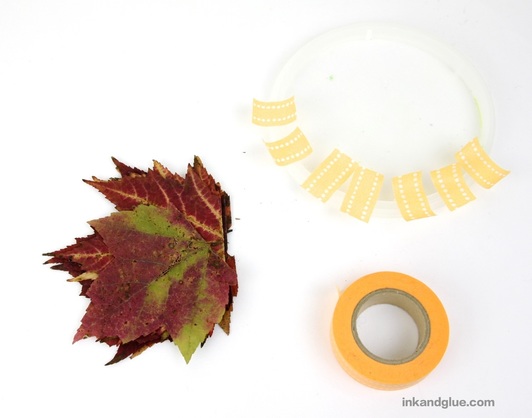 Pick up two leaves and align them along the cut edges. Stick half of the long side of the tape to the top leaf, and then fold it around to adhere to the bottom leaf. You've now connected two leaves with a tape hinge.
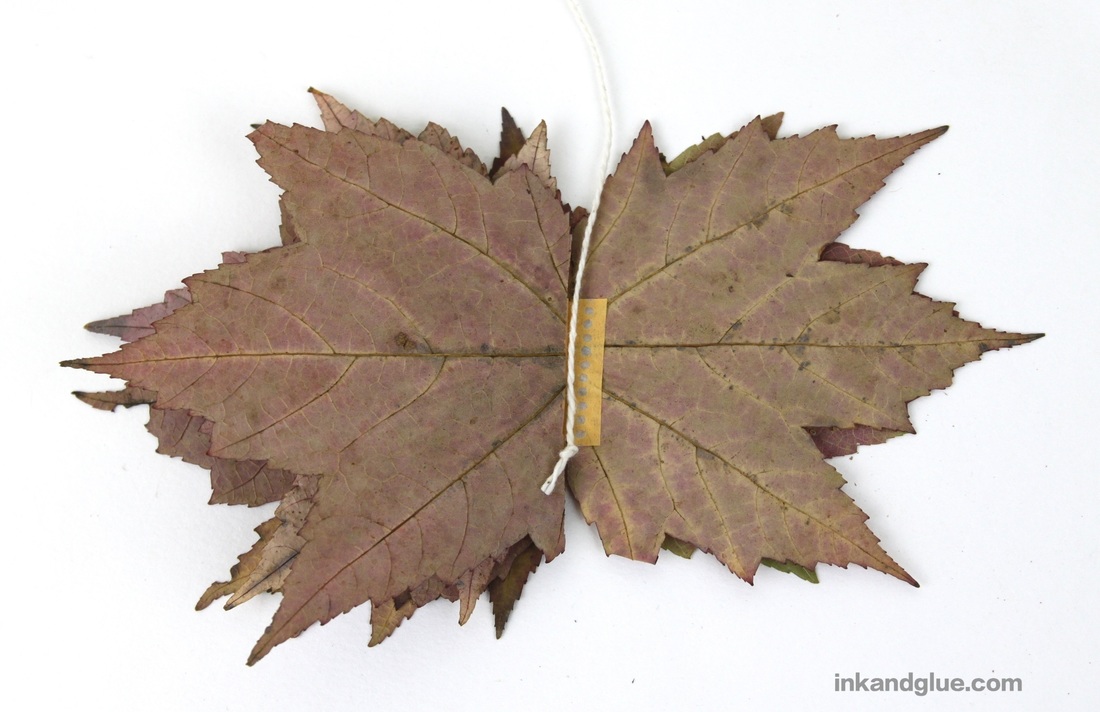
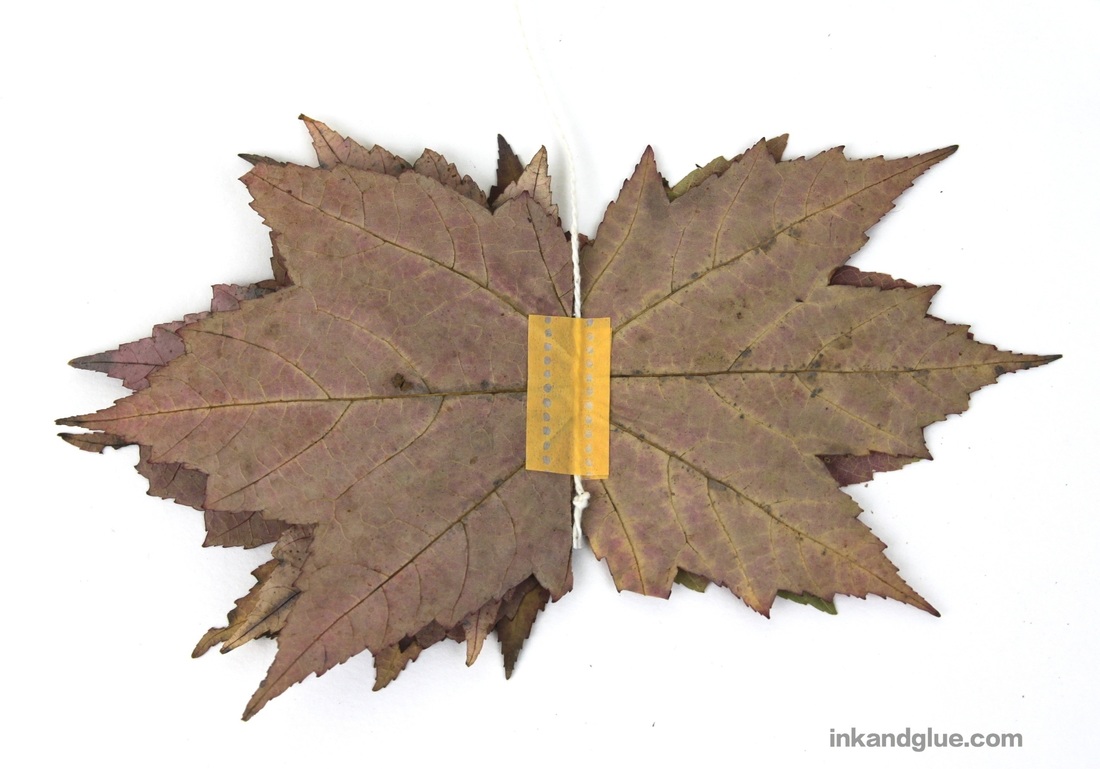
Do this with all of the leaves. If you have an odd number of leaves, just add a third to the top or bottom of a taped pair. Then, align two taped pairs along their straight edges, and join them with a length of tape. 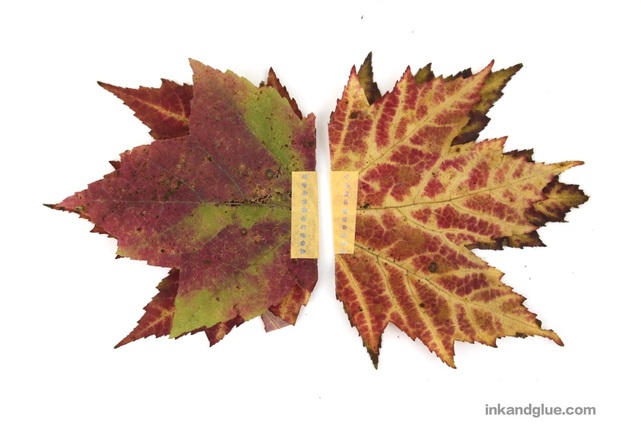 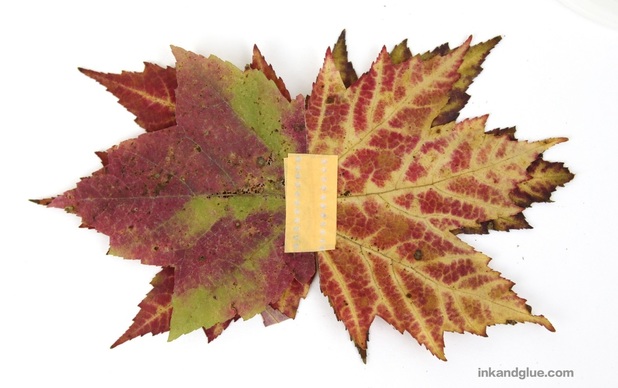 Keep taping pairs together until they're all attached by their hinges in one "book." Find one facing pair that doesn't have a tape hinge (if you have one -- if not, just use any pre-taped pair). Place the knotted end of a length of string in the center, and cover it with a piece of tape.
Pick up your leaf assembly using the string. Gently unfold and fold the various tape hinges to get a fairly uniformly-spaced ball. If your ball isn't hanging straight, extend the hinge channel for the string by adding more tape higher up in the center of a couple of the leaf pairs. 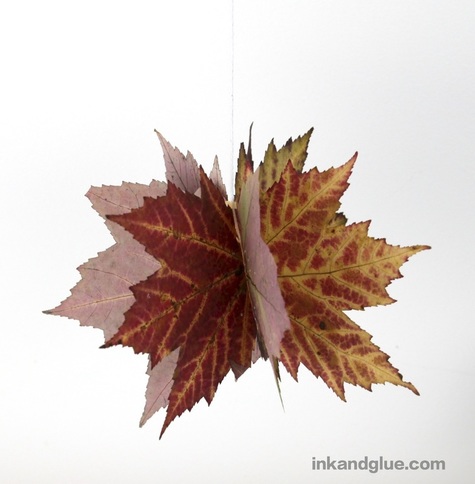 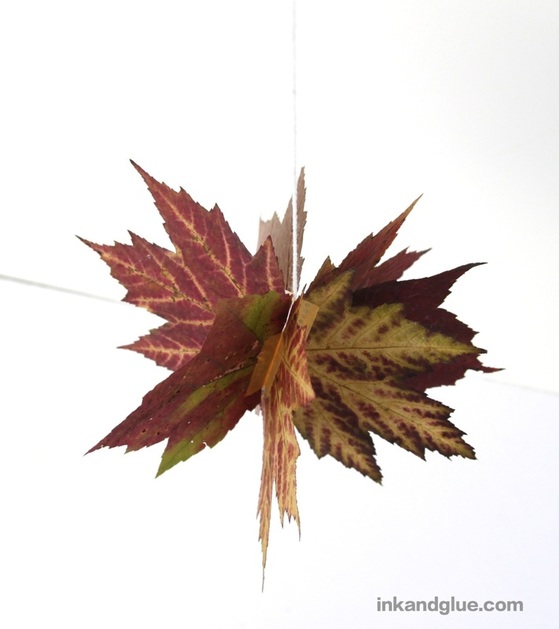 That's it! I like how star-ish these are. Get several of them together, hang them at varying heights over a table or mantle, and you'll be cultivating some serious fall spirit.
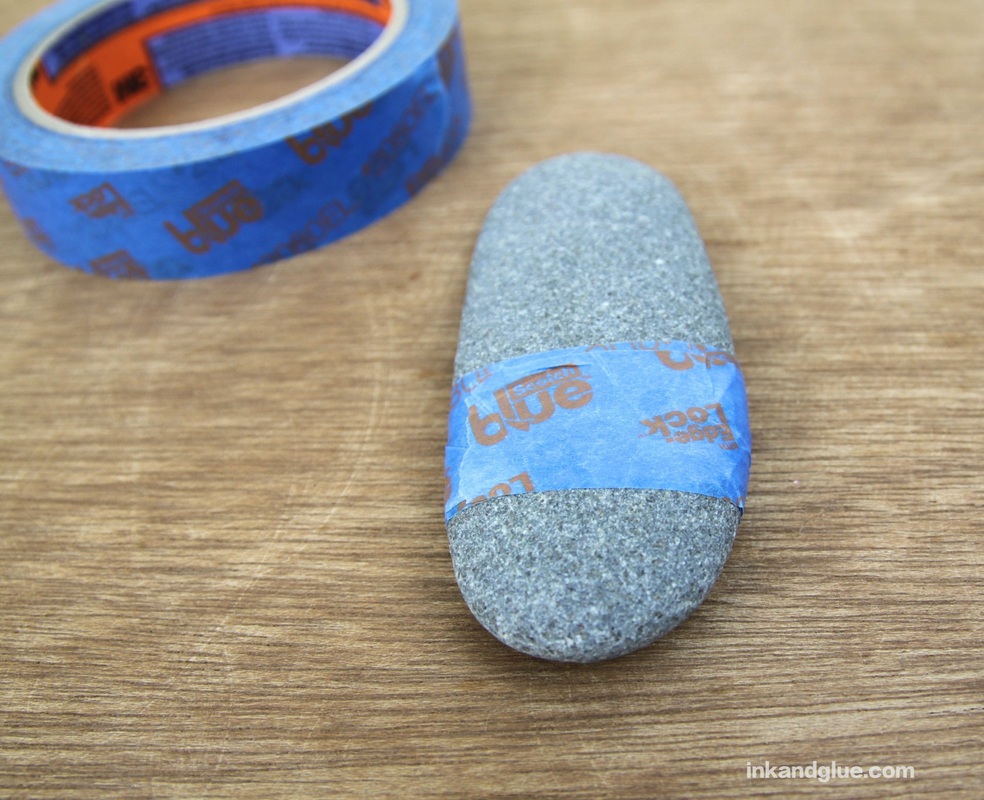
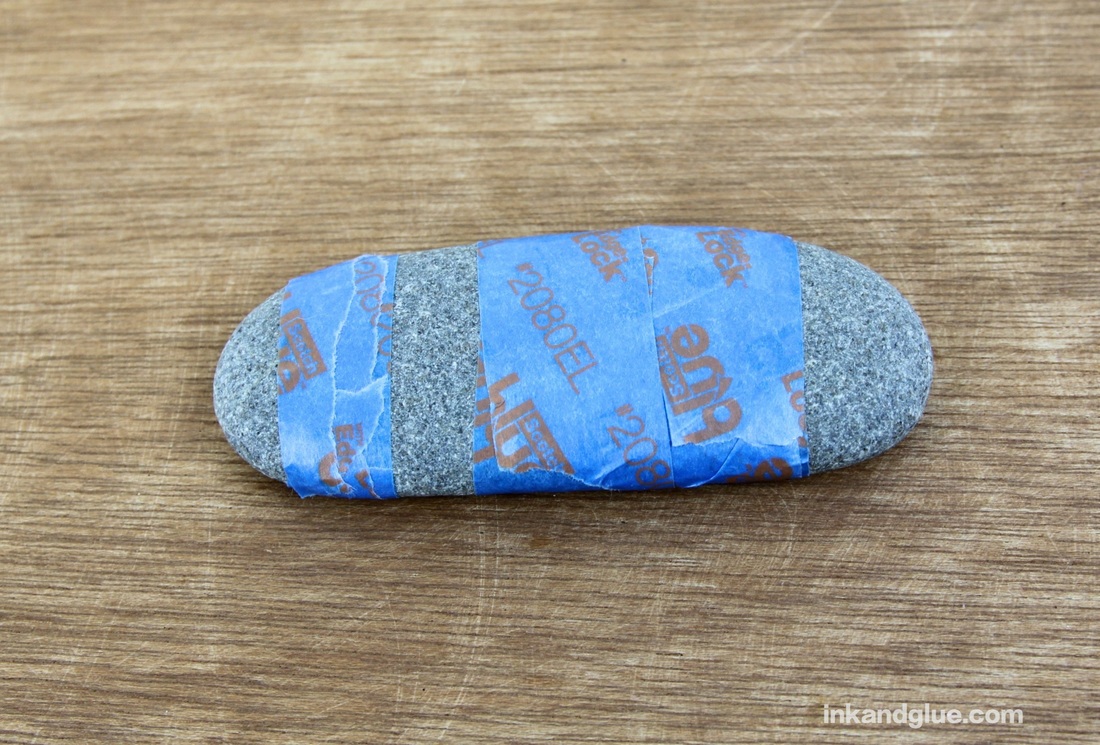
xo My favorite vacation souvenirs are rocks. (And shells, when appropriate; and washed-up bits of coral, if I'm in an especially wonderful location.) They're free, they're abundant, they're versatile, and they're easy to get rid of. I like to use them as a sort of mulch for house plants. If I am starting to feel like the house is becoming over-rocked, I can always chuck them in the garden or add them to our gravel driveway. Sometimes, I decorate them. In the past, I've wrapped them in fabric, coated them in nail polish, and drawn on them with paint markers. Today, I went for a more sophisticated look. 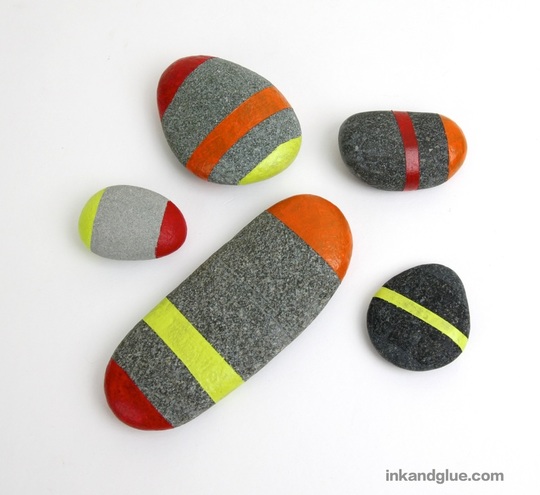 To make these color-block rocks, you'll want to choose the smoothest rocks you can. Look for smooth rocks in riverbeds and ocean beaches. You're going to be taping sections of your stone, so a smooth surface will allow for better adhesion and give you a sharper line in the end. 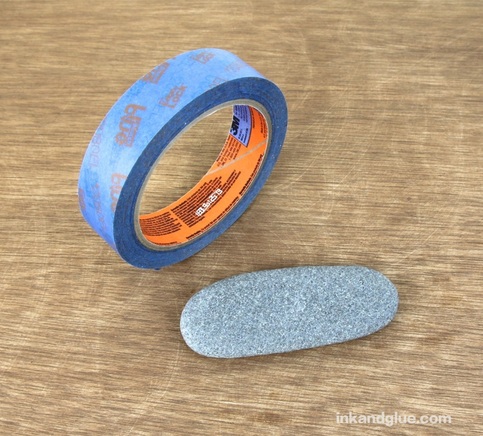 Use painter's tape to mark off a section of a stone, rubbing the edge of the tape into the rock with a fingernail. Rocks are curvy, as you may have noticed, so use multiple pieces of tape to get a "straight" line if you need to.
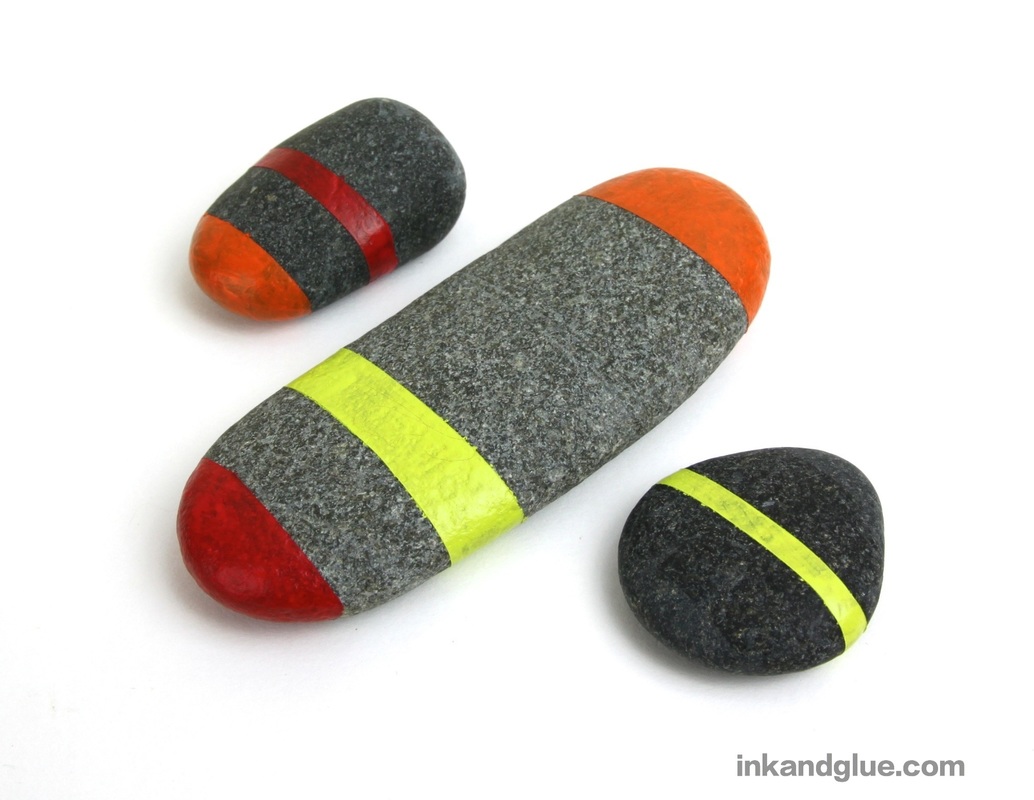
Repeat with the rest of your chosen stones. Paint each exposed section with acrylic paint. Try to brush from the tape onto the rock so you don't get any paint seepage under the masked areas. Note: I needed two or three coats of each color to get good coverage. I recommend doing a coat of white, first, if you can; doing so will give you much brighter colors. 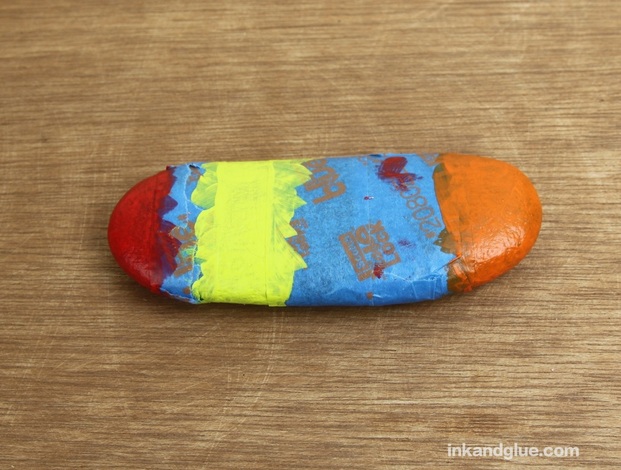 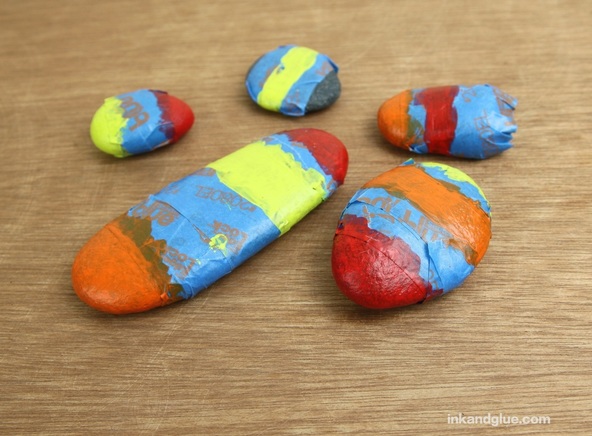 Once the paint is completely dry, peel off the tape. So satisfying! 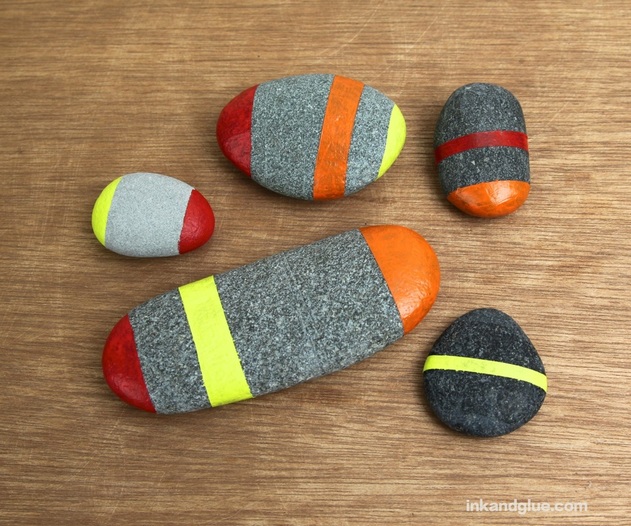 If any edges need to be cleaned up, use a small, flat brush to add a little paint. Just be conservative with it, or you'll end up expanding the painted section until it takes over the entire stone! Better to have a fuzzy edge than to lose the nice blockiness you set up.
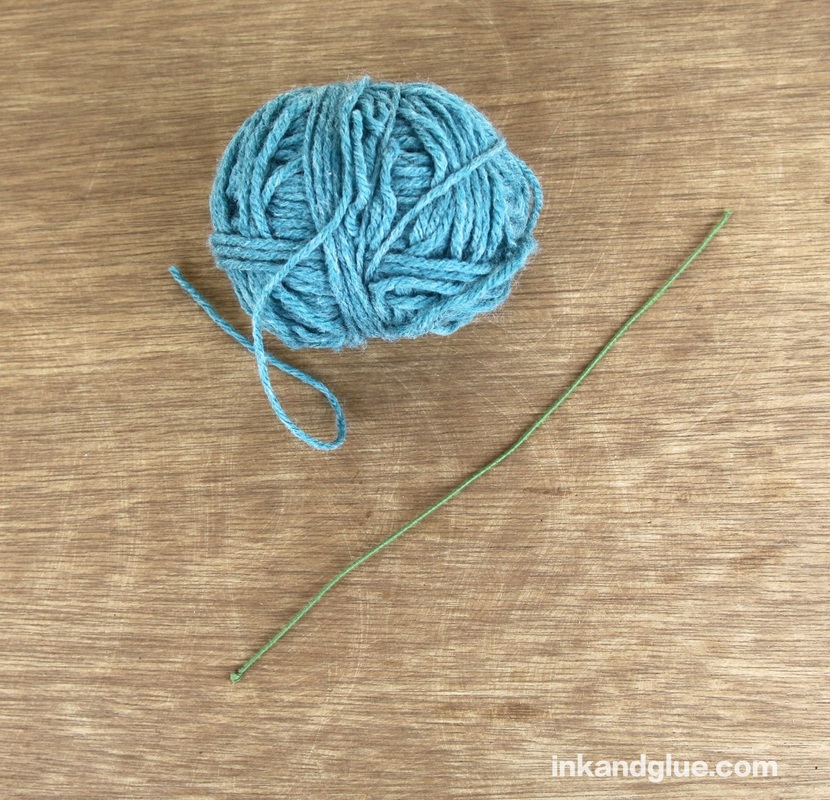
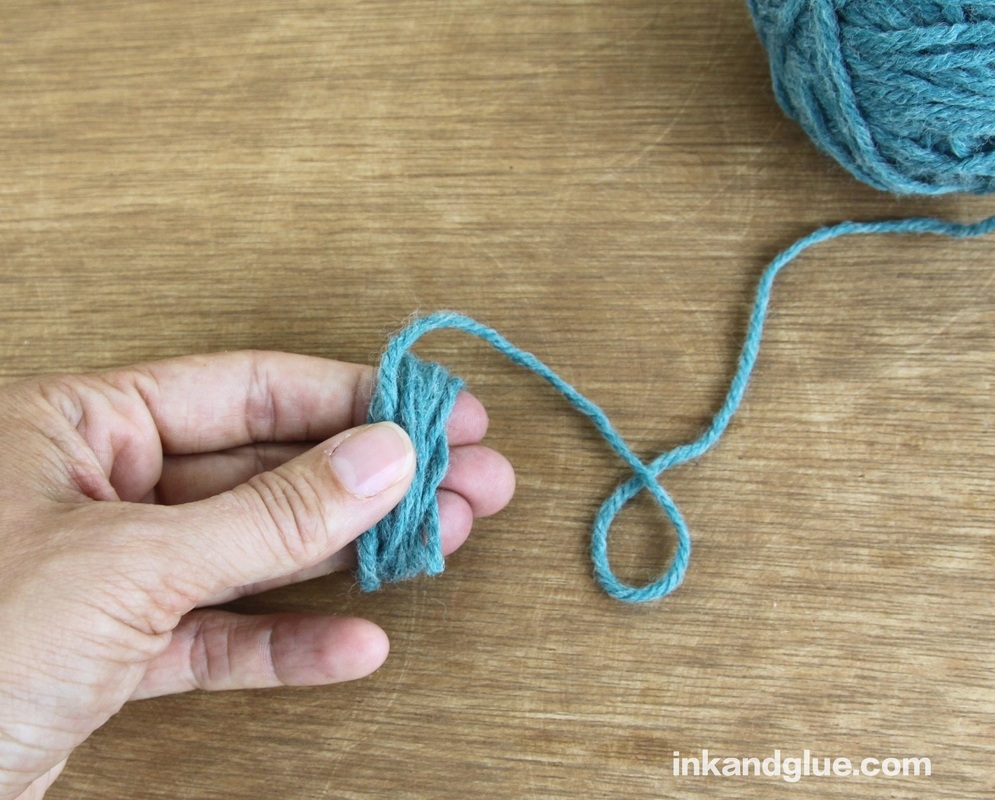
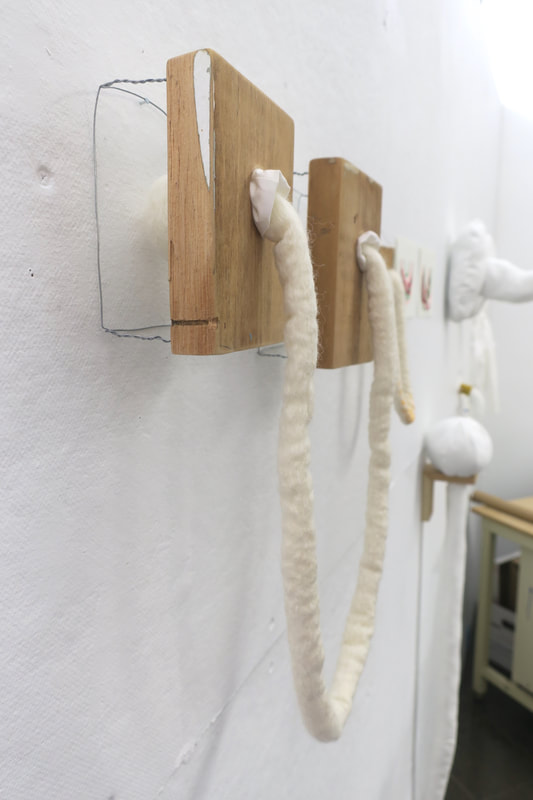
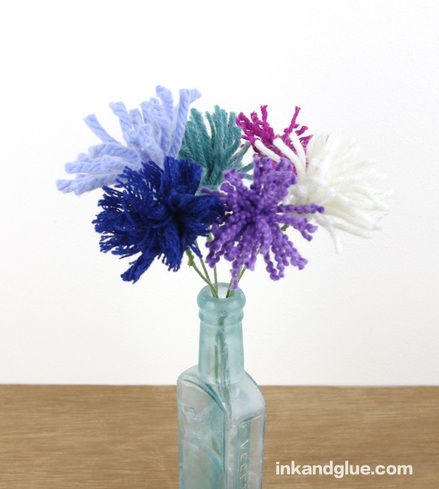 How does your garden grow? Mine's doing pretty well, except for the flowers I planted in pots on my patio. Those were blooming nicely until the chipmunks discovered they can hop right on up and munch away. Now the plants are all crewcutted and sad. So, to make up for my lack of flowers, I made these yarn blooms. They remind me a bit of Devil's Paintbrushes and Cornflowers. The construction of each is so quick and easy, you'll soon have a pot-ful of your own. All you need is yarn and cloth-wrapped stem wire, which is available at all the big craft stores. I cut my stem wire in half to make them shorter (and to get twice as many). That part's optional. Use your thumb to hold the end of a ball of yarn against three fingers. Wind the yarn around your fingers a bunch of times — the exact number of times will determine how thick your flower will be.
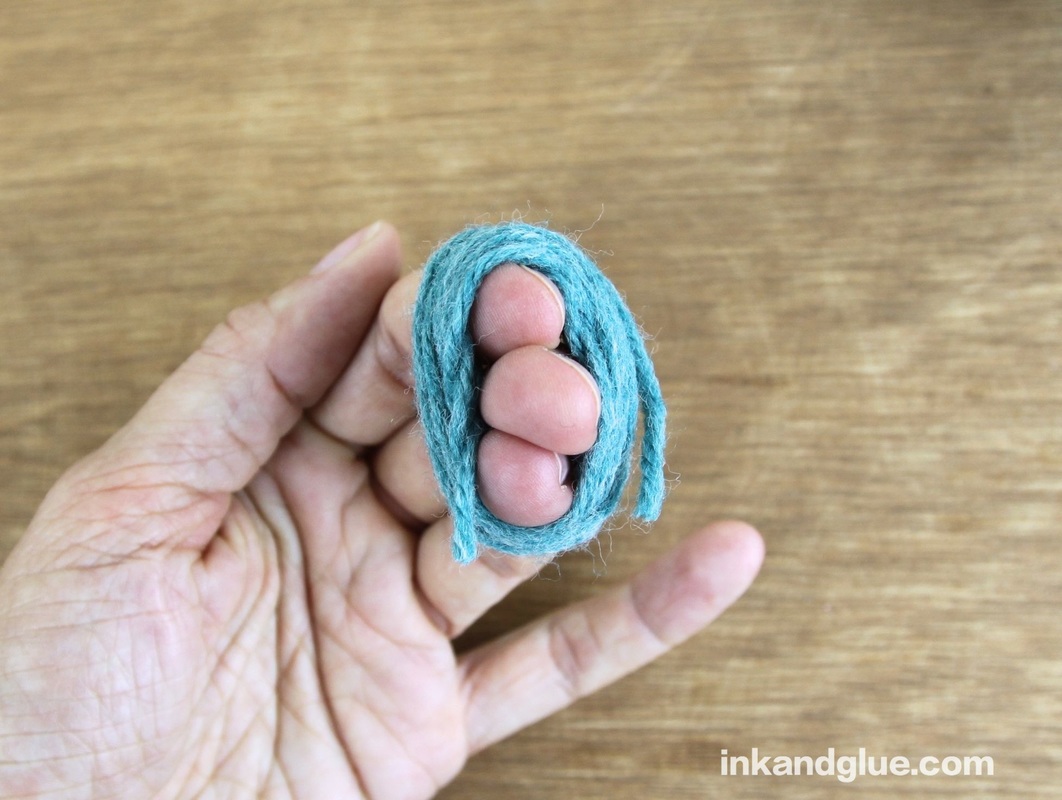
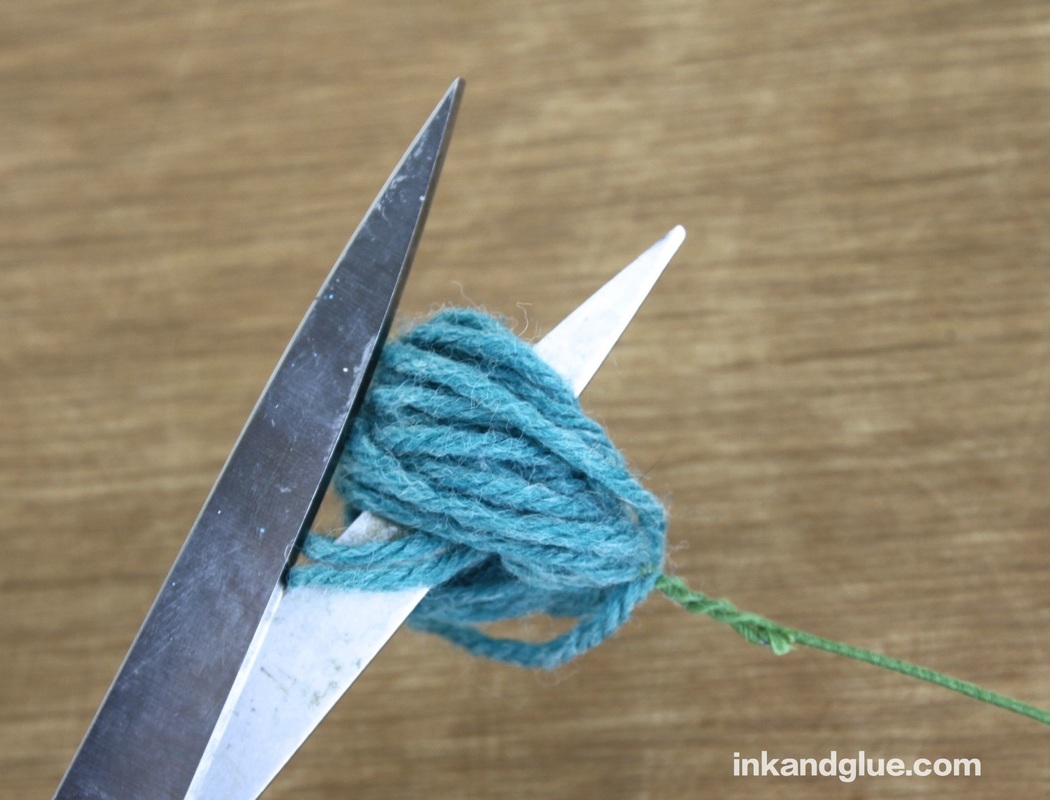
When you've reached a pleasing amount of thickness, cut the wound-up yarn from the ball. Carefully slide the yarn from your fingers, and slide a wire through the center of the loops.
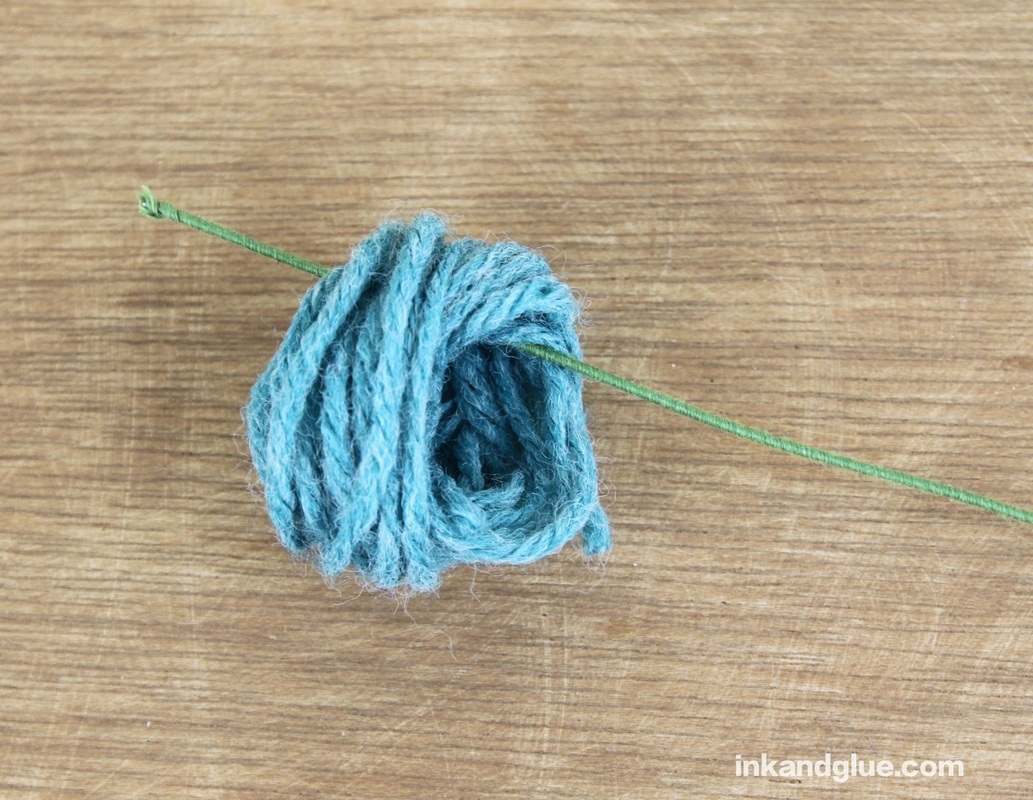
Fold a half-inch (or so) of the end of the wire over the yarn, as shown. Twist the wire's end around itself to secure. Use scissors to cut through all of the loops.
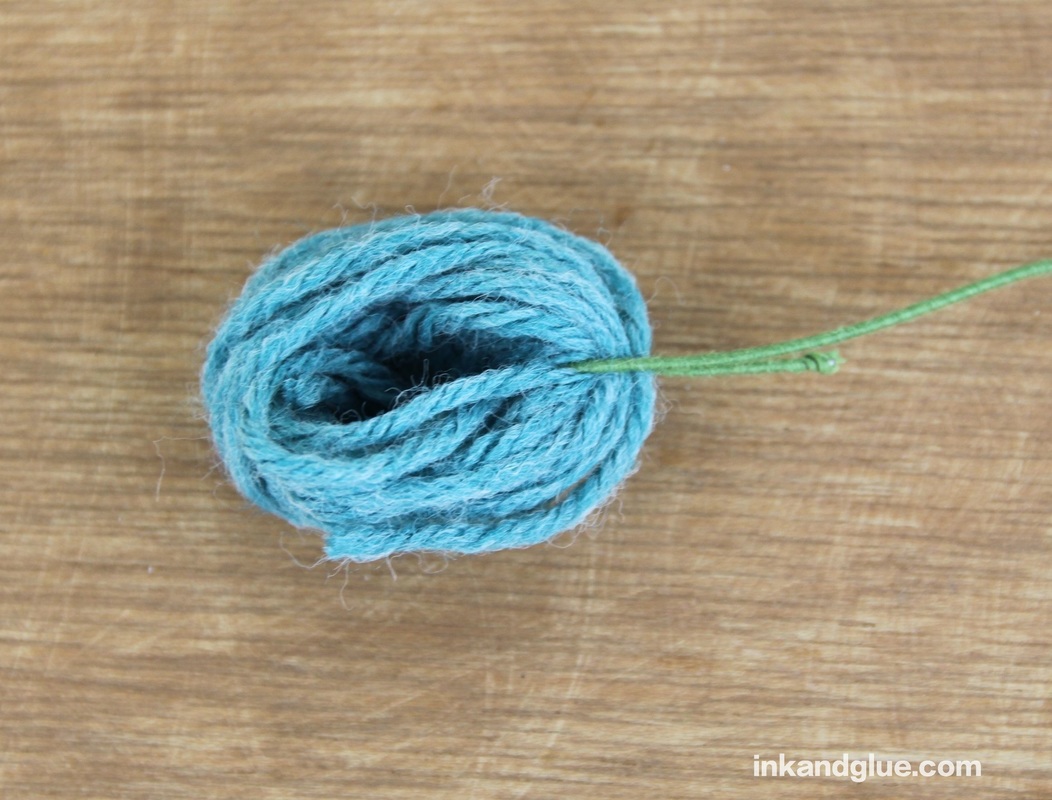
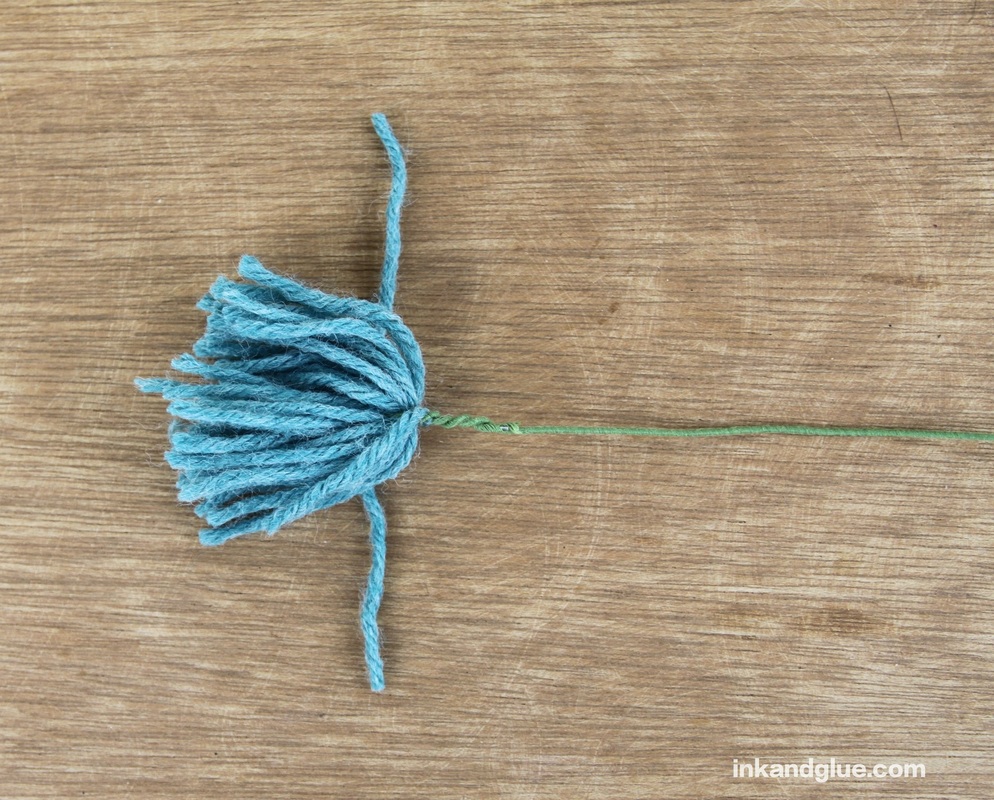
At this point, your flower will look like this: 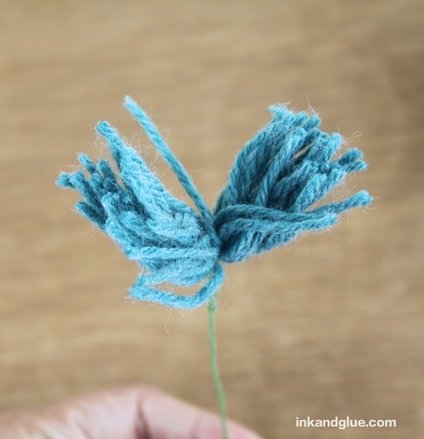 Lay the flower on top of a short piece of yarn. Tie the piece tightly around the rest of the yarn, close to the base.
Trim the ends of the knotted yarn, if you'd like. Pick up your yarn tassel flower and shake it a bunch to fluff it up. You may want to do some trimming and shaping; I did, because it's fun. 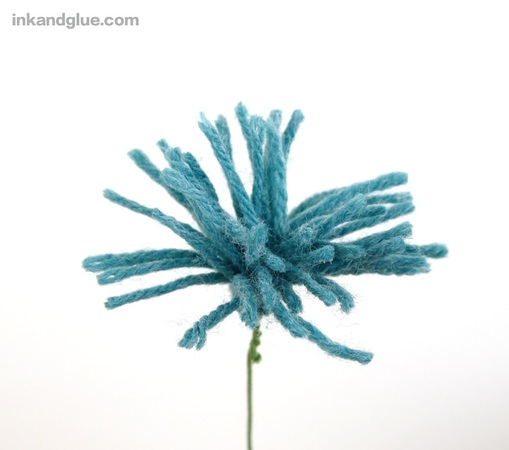 Different kinds of yarn produce different results. Here's a range of flowers made from my yarn stash, from thick to wavy and all in between.  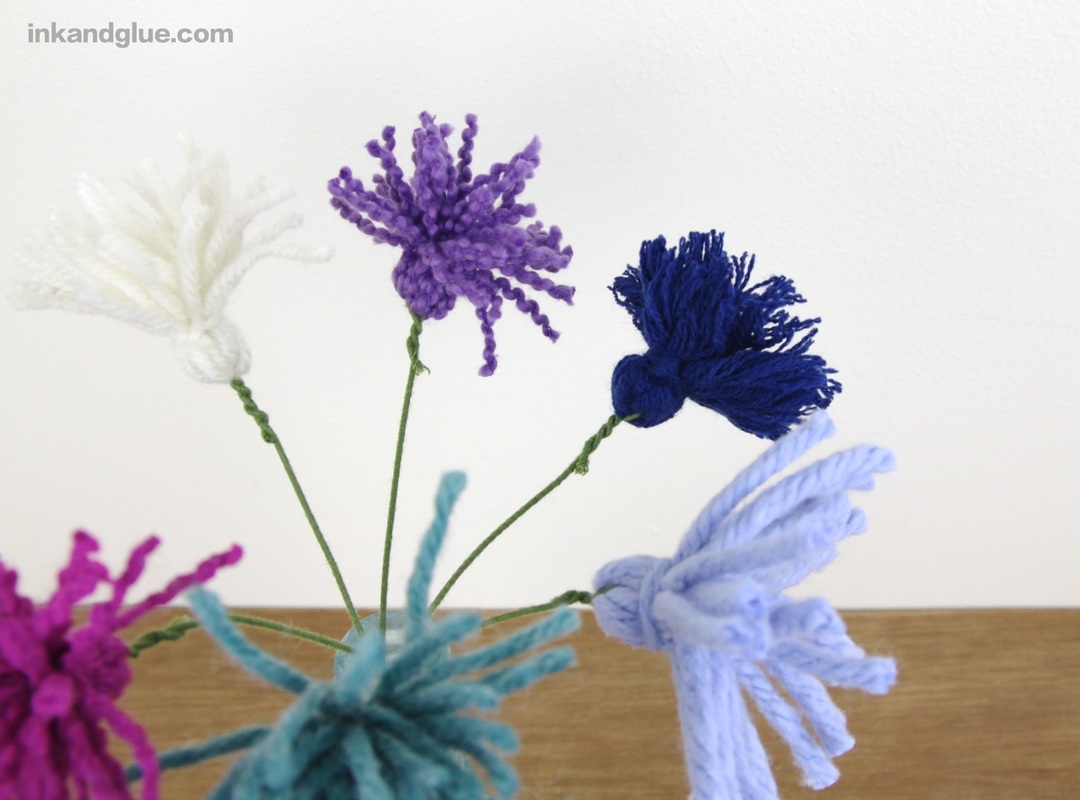 Happy summer! xo
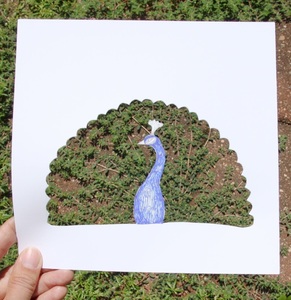
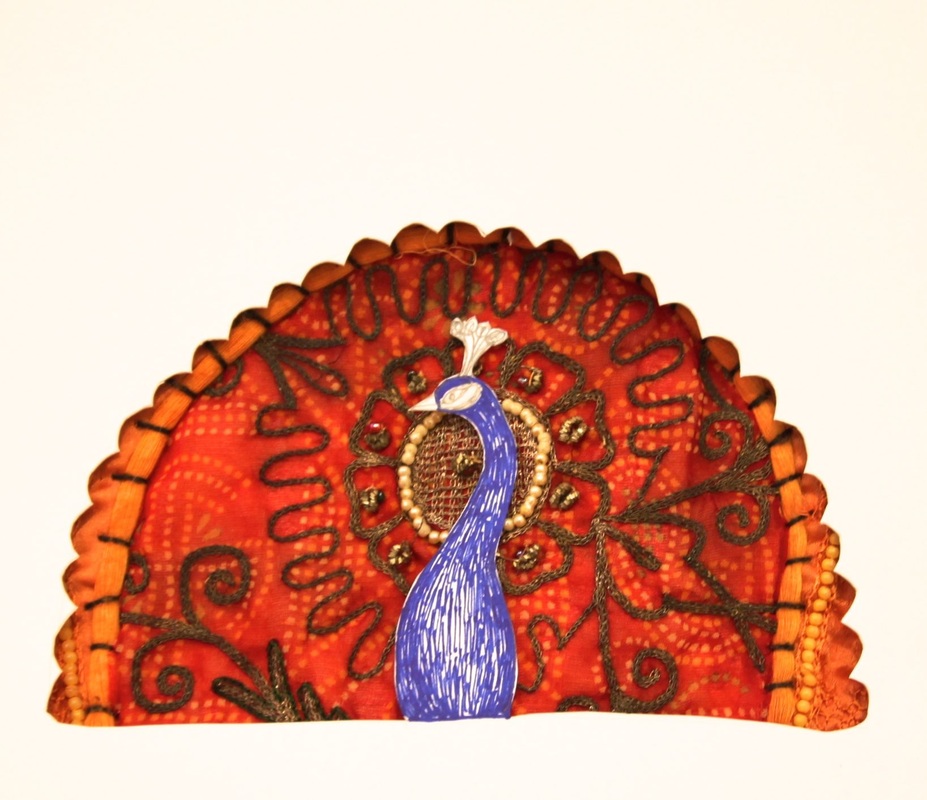
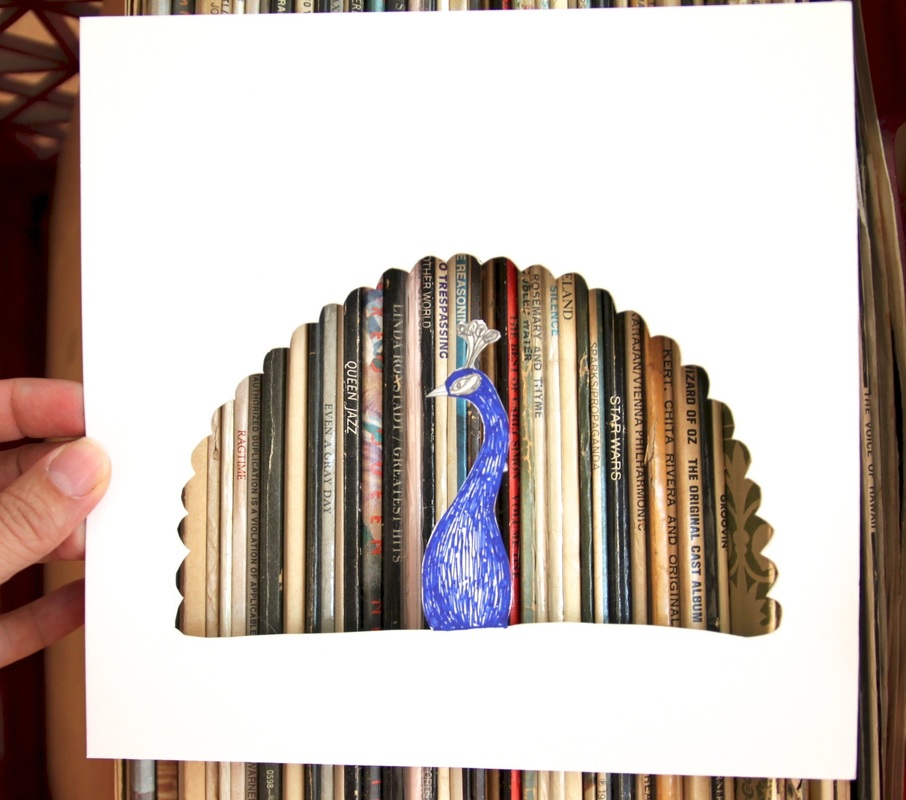
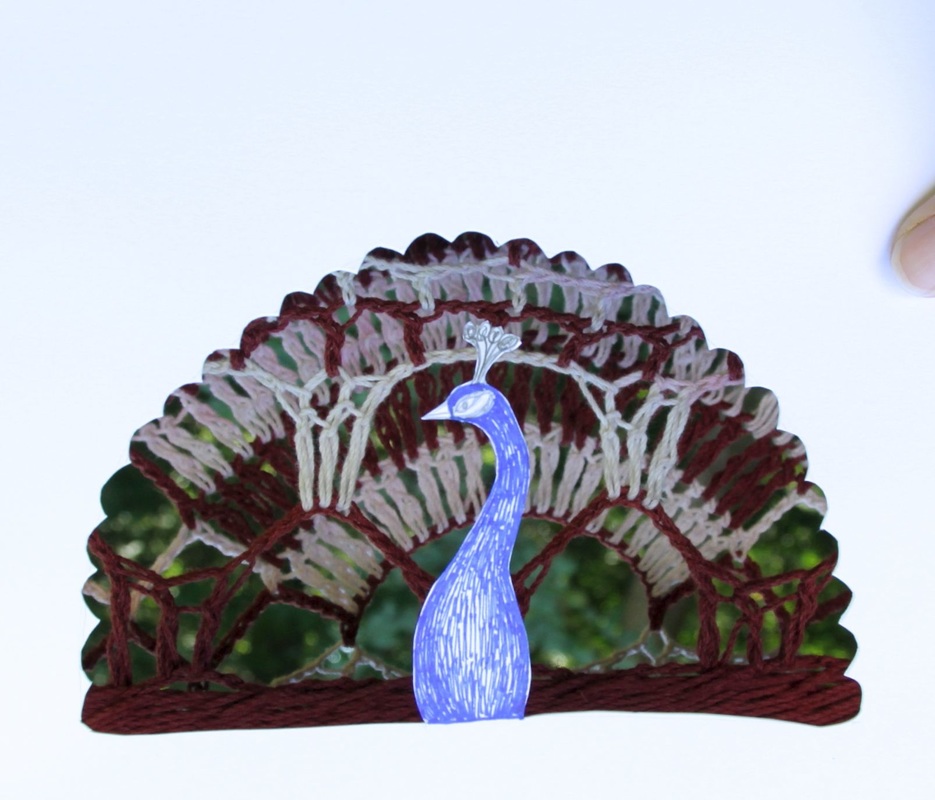
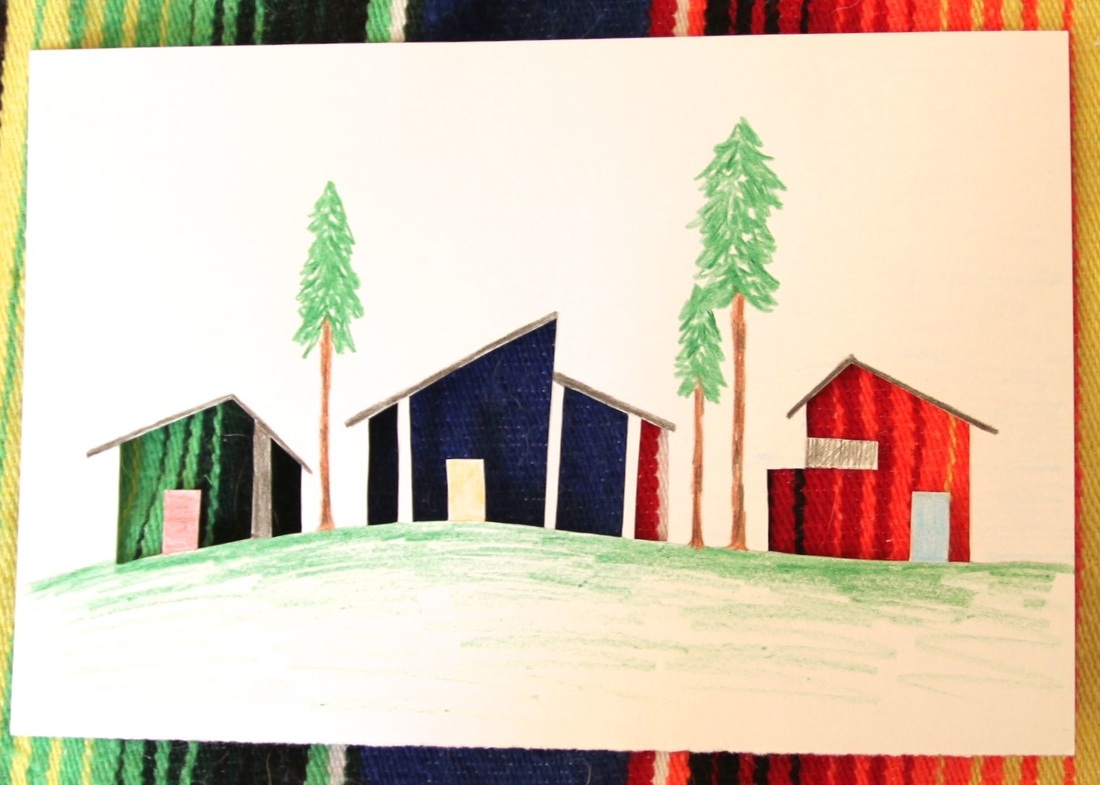
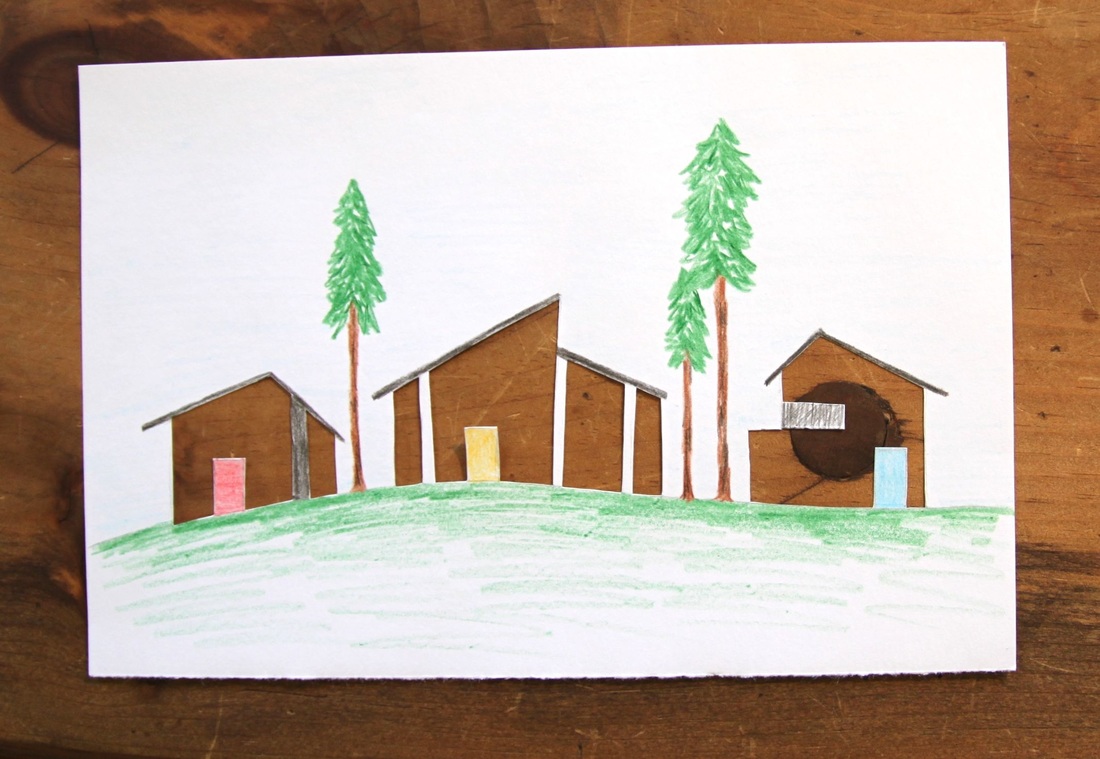
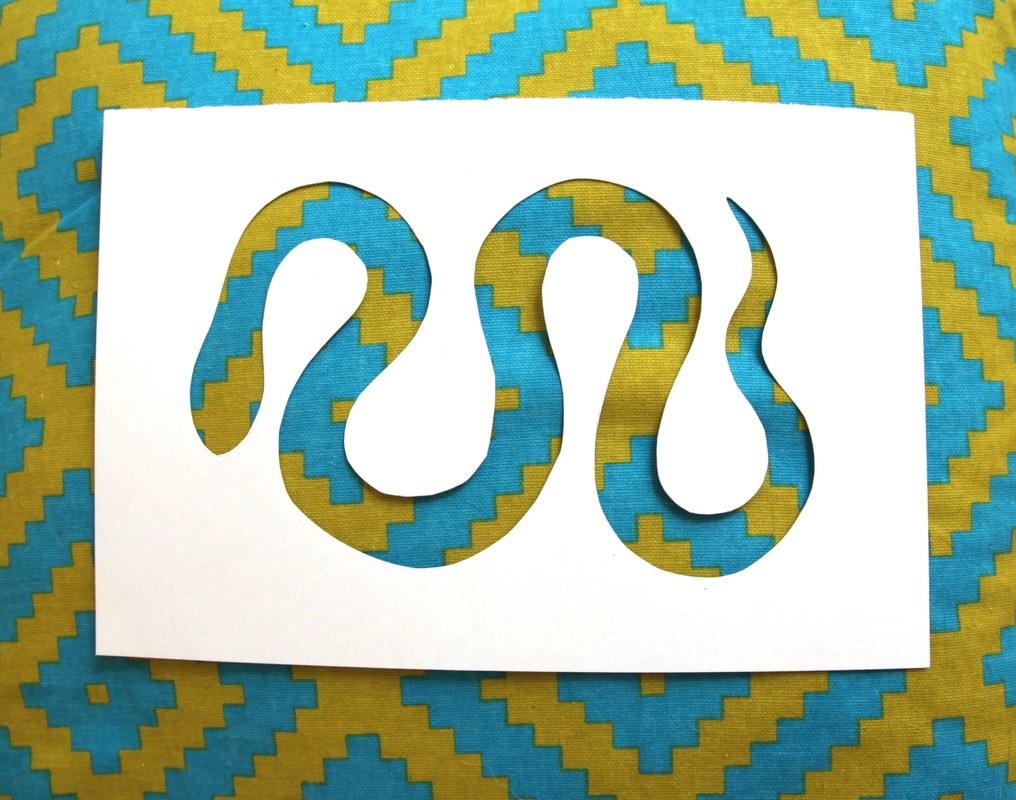
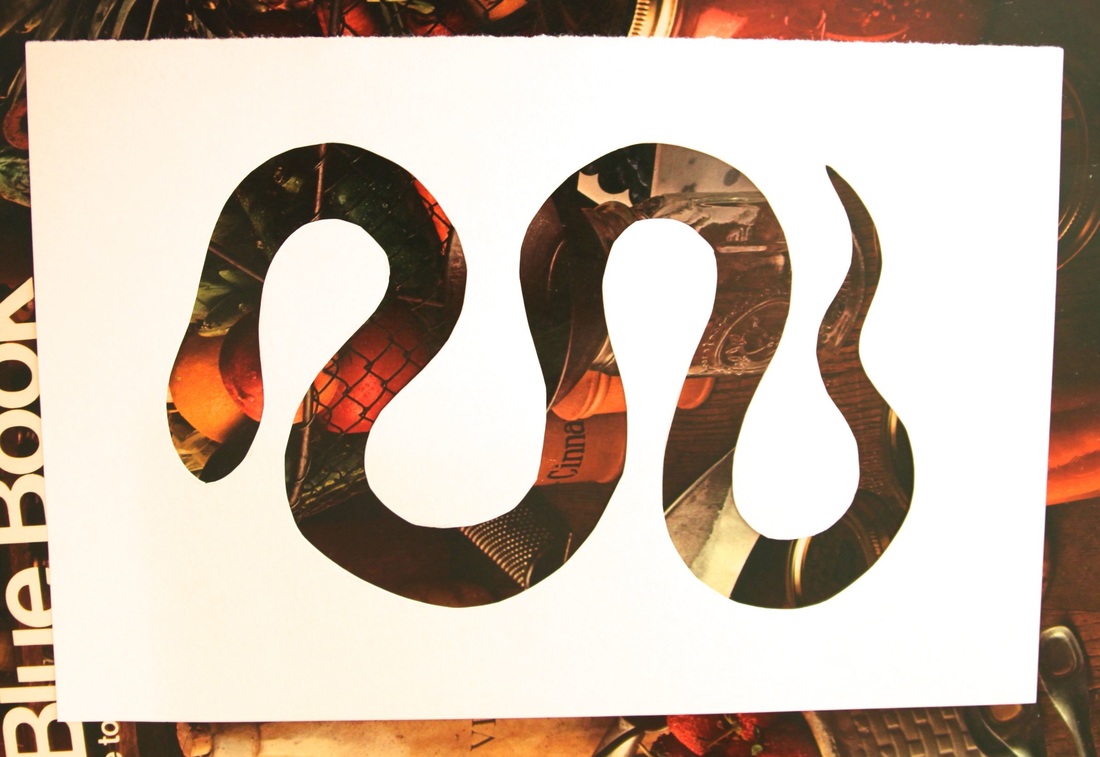
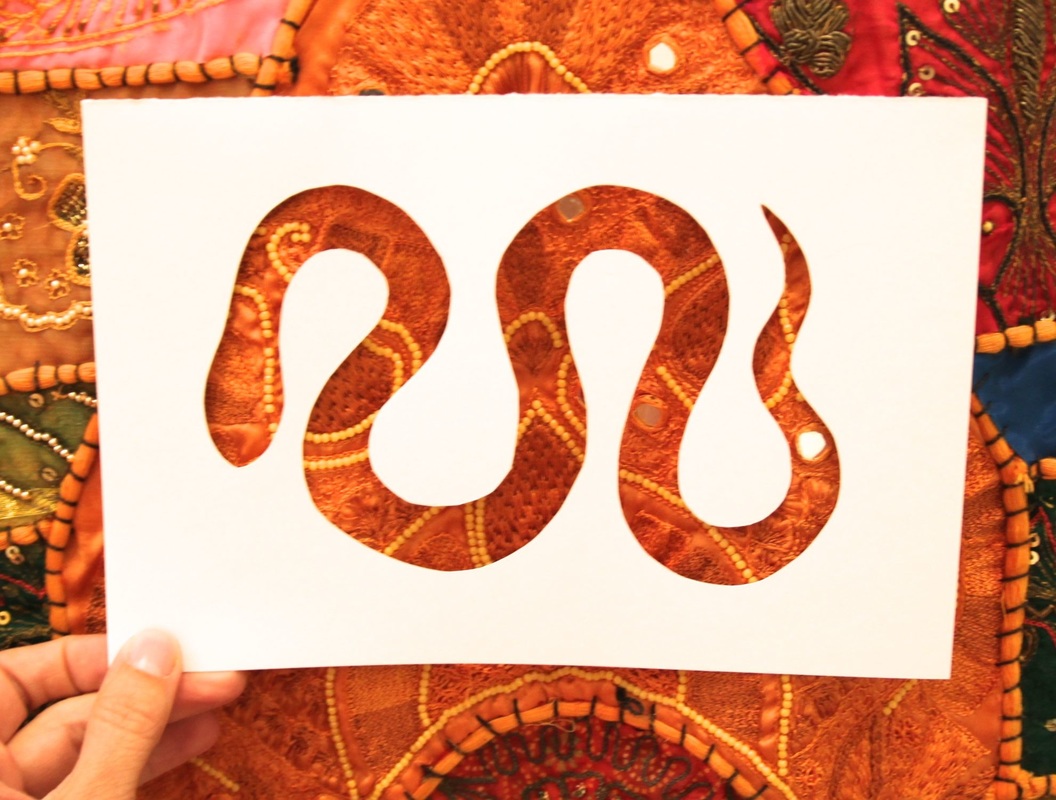
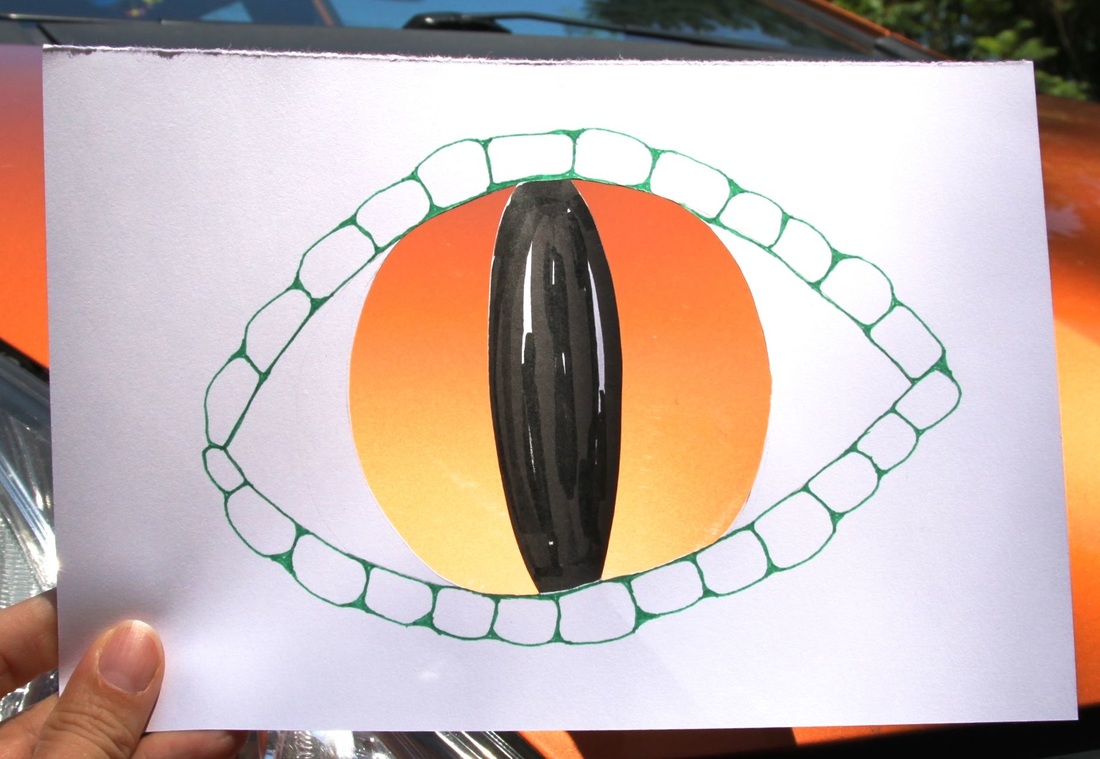
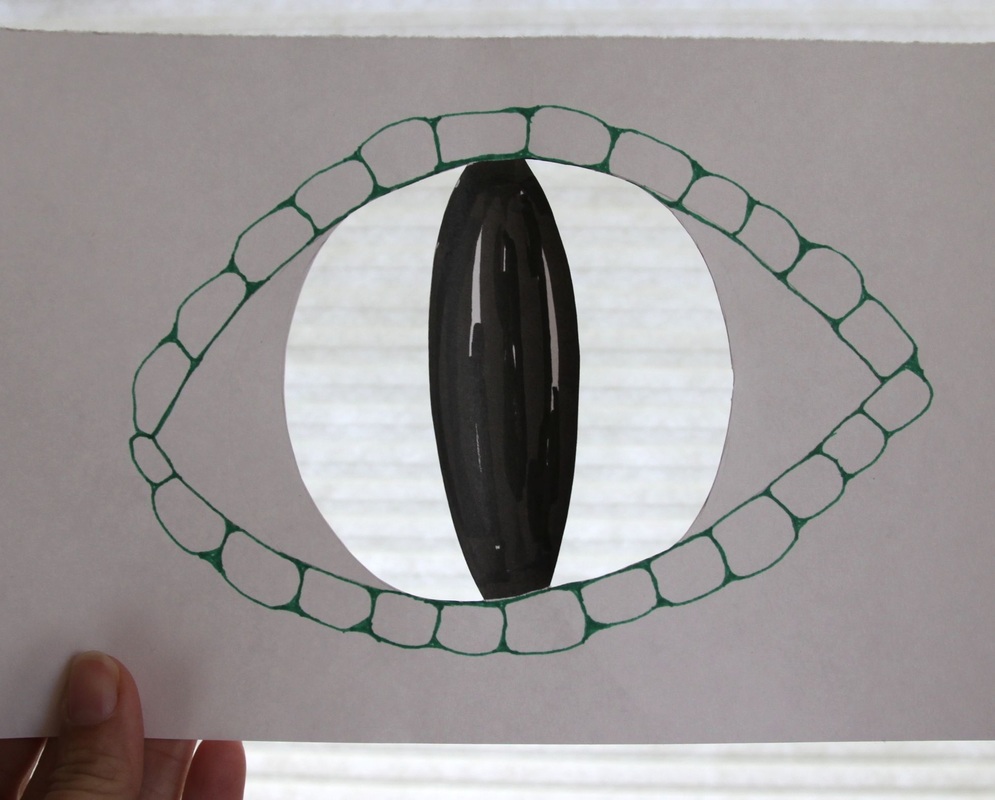
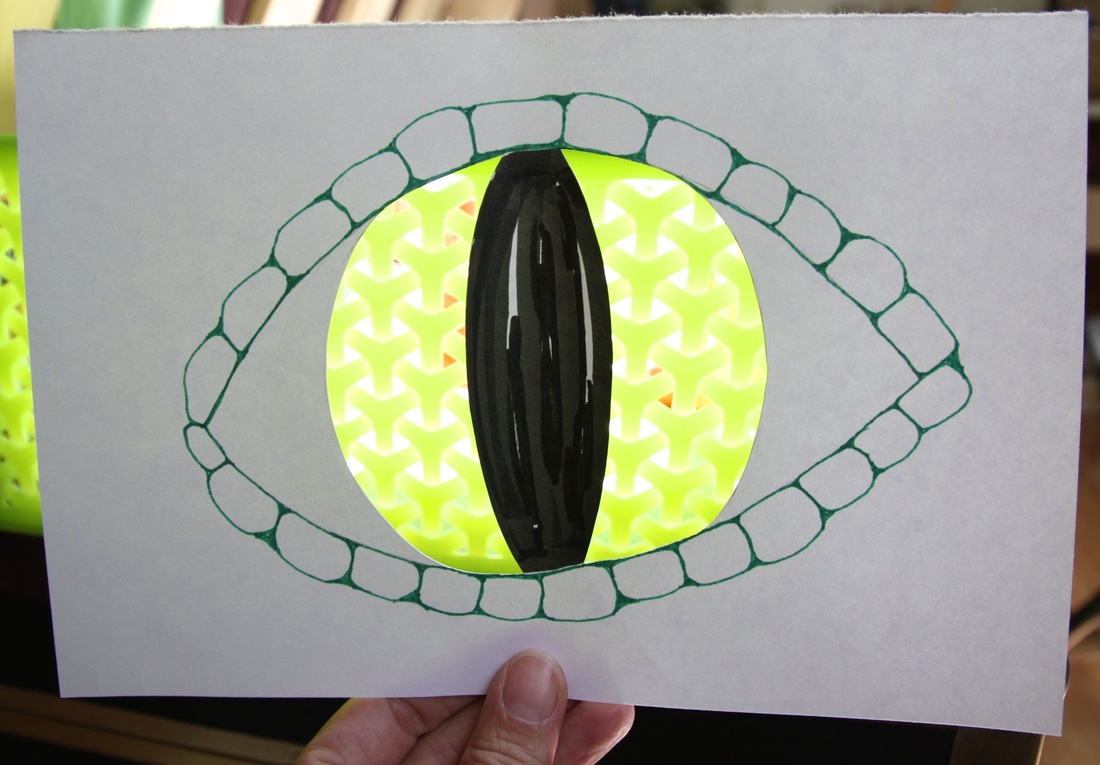
Here's a tween- and teen-friendly activity inspired by the artist in my last post. It's as simple as can be: Draw something that might need an interesting pattern (or color, or texture), then use a craft knife or scissors to cut out part or all of the drawing. Then, go on a photo safari! I made four photo stencils to show you a range of ideas.
Have fun pattern-hunting!
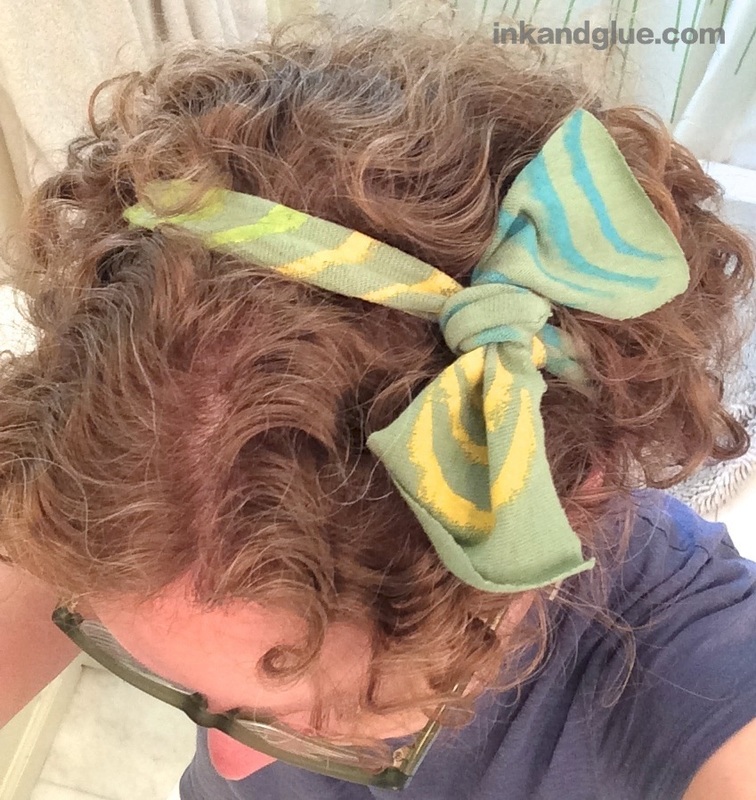
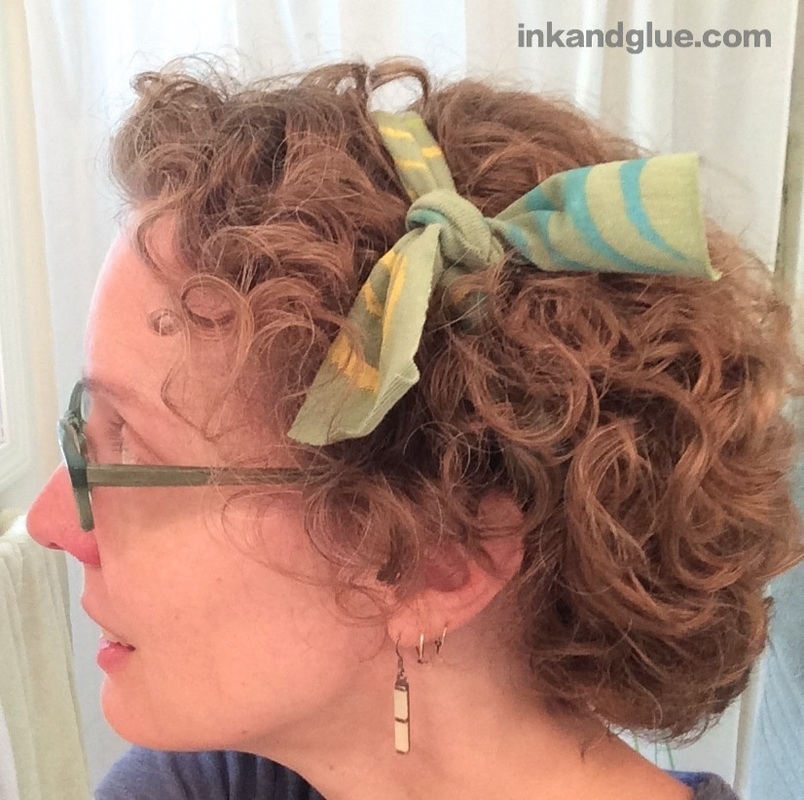
xo 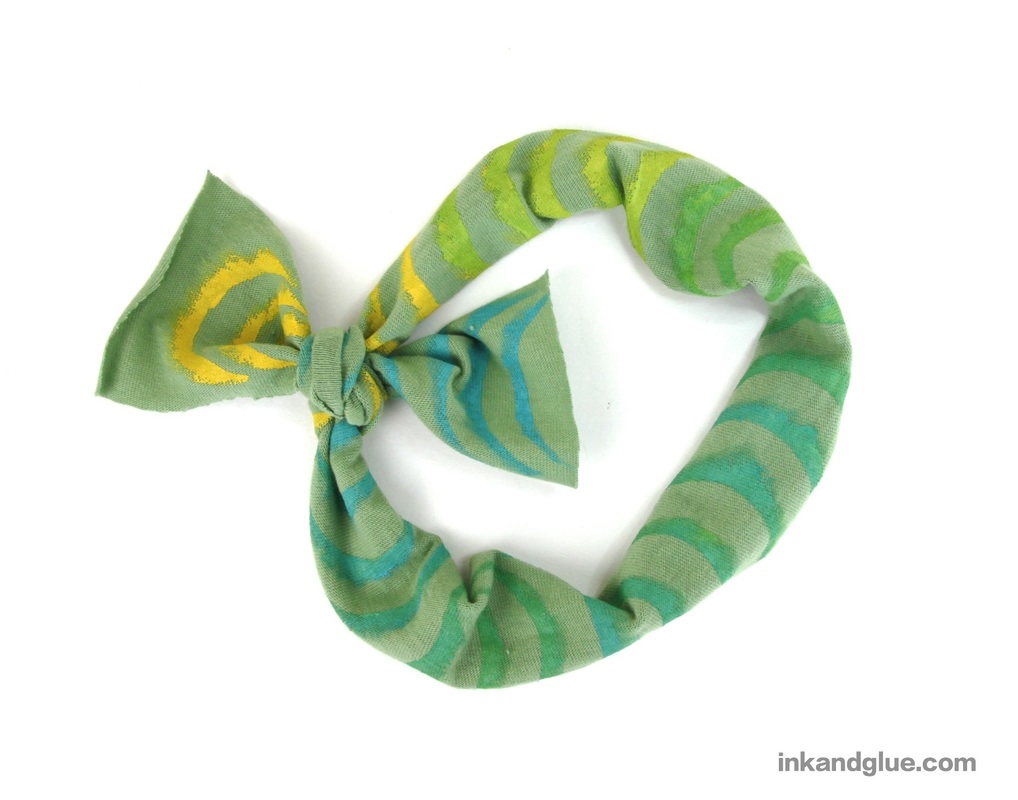 This project is both super cheap and very customizable. It uses a sort of a half-stencil to create a simple pattern on your fabric of choice — here I've used cotton jersey, which doesn't need to be hemmed, and is stretchy enough to make a comfortable headband or headscarf. To make one, cut a 3-inch strip from an old t-shirt (I bought an XL men's t-shirt for a dollar at the local Goodwill). Tie the strip around your head, and trim the ends to the length you want. 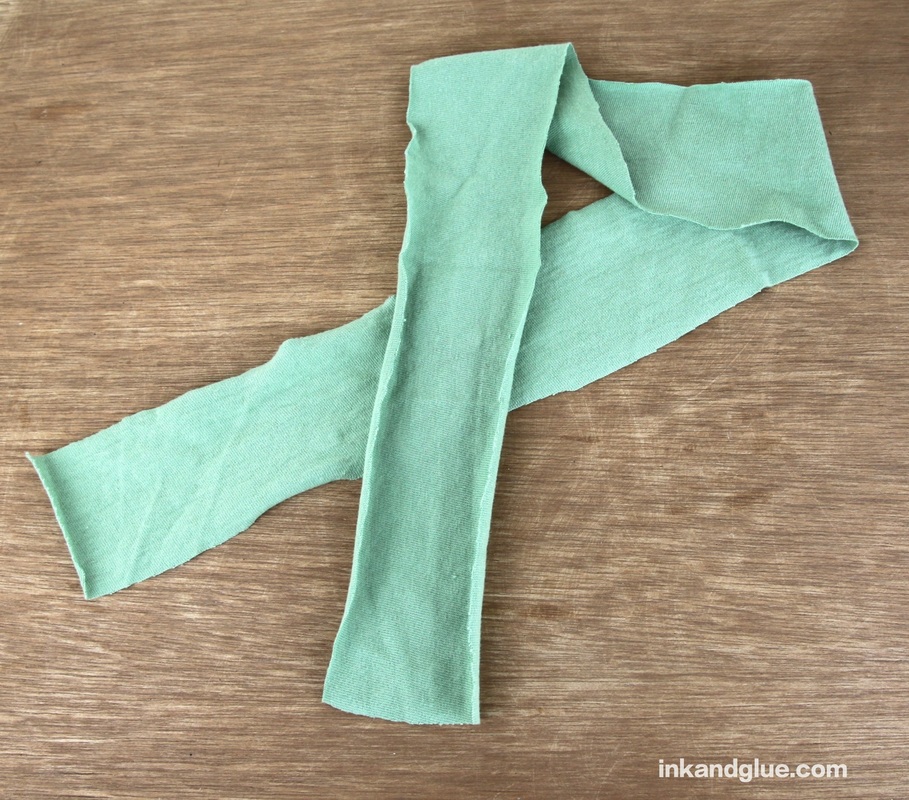 You'll notice that one side of the fabric curls up; you'll want to print on the convex side of the knit (at right, below). If you print on the side shown at left, it'll get all rolled up and you won't see it!
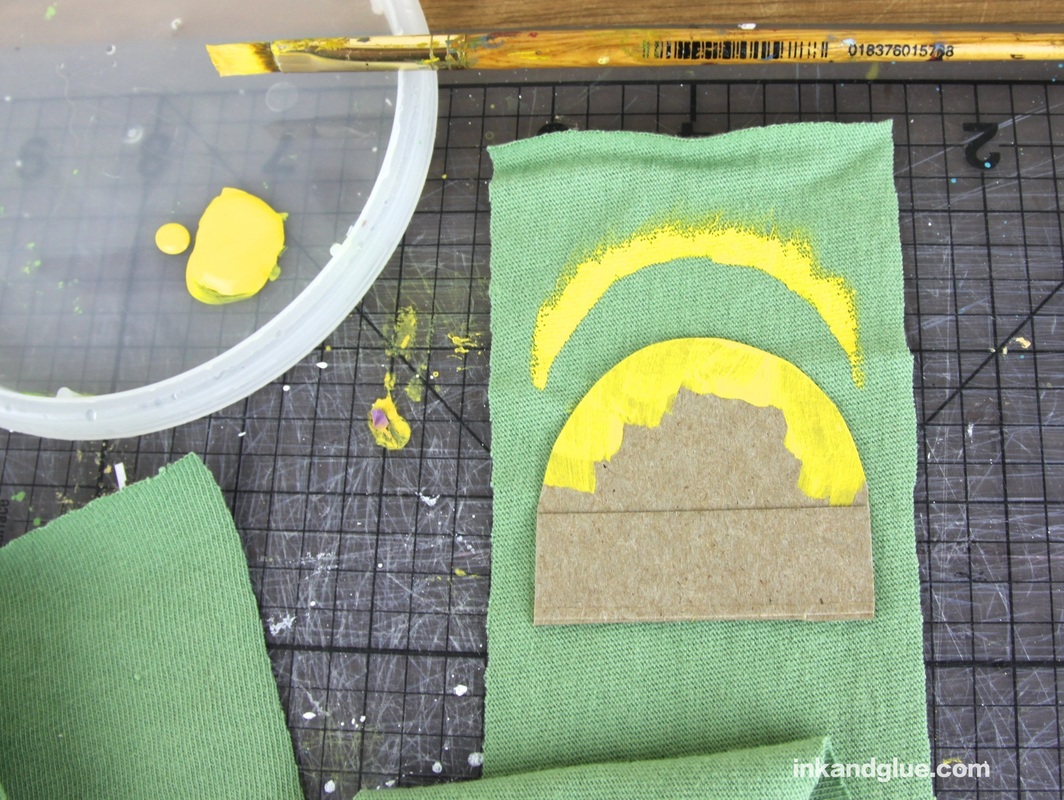
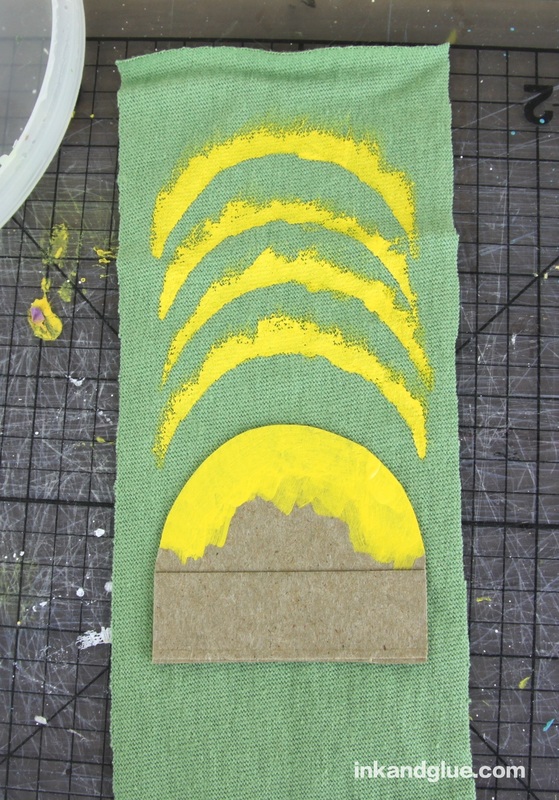
Cut a roughly rectangular shape from a piece of cereal box cardboard. Trim one edge into the shape you want to print. I wanted a simple half-circle for a vaguely fish-scale kind of a look; you could try a zig-zag, or multiple half-circles, or just a straight line. Just keep the shape simple, for the best results.  Grab some fabric paint and a brush. Hold the cardboard onto the fabric, near one end of the strip. Brush paint on the shape and onto the fabric. All of your brush strokes should go from cardboard-to-fabric, never fabric-to-cardboard, or you'll get bleeding along the edge. But this is a loose, sketchy design, so if your edge isn't clean, whatever. It's part of the handmade charm!  Move the shape down an inch or so and repeat.
About a third of the way down the strip, I added some aqua blue to my yellow paint and swirled it around. By the time I reached the end of the strip, I was using almost all aqua blue. You could choose to alternate colors, too, though you should use a second cardboard shape and brush to avoid cross-contamination.
Let the paint dry, and that's it — you're done! 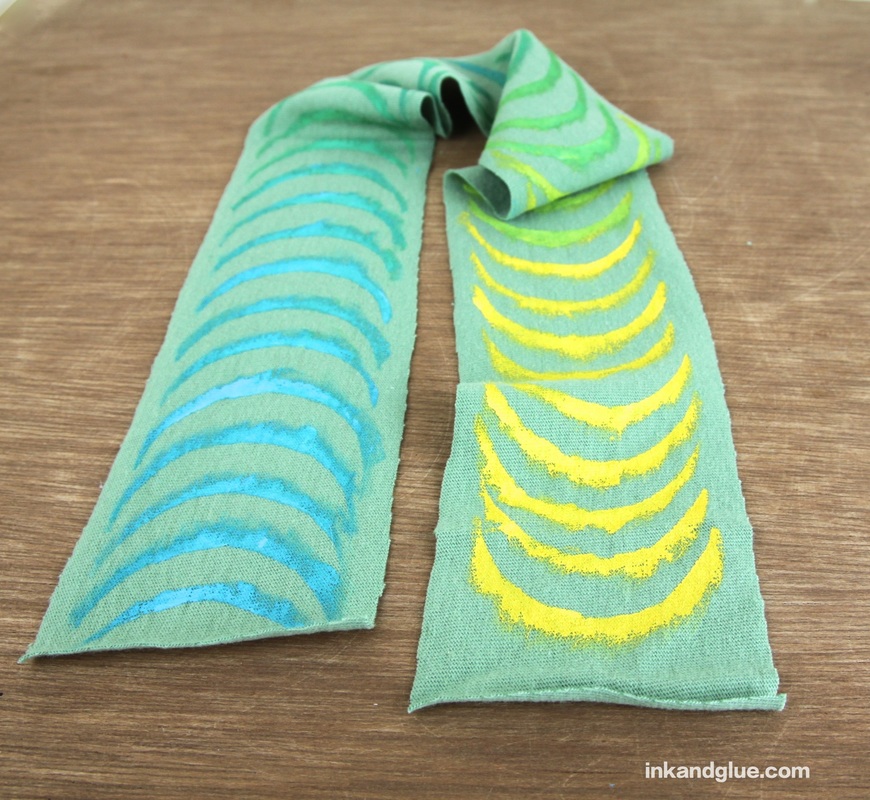
If you don't mind a little clean-up work, this project would be great for a playdate or even a summer birthday party. You gotta love an activity that creates its own party favors!
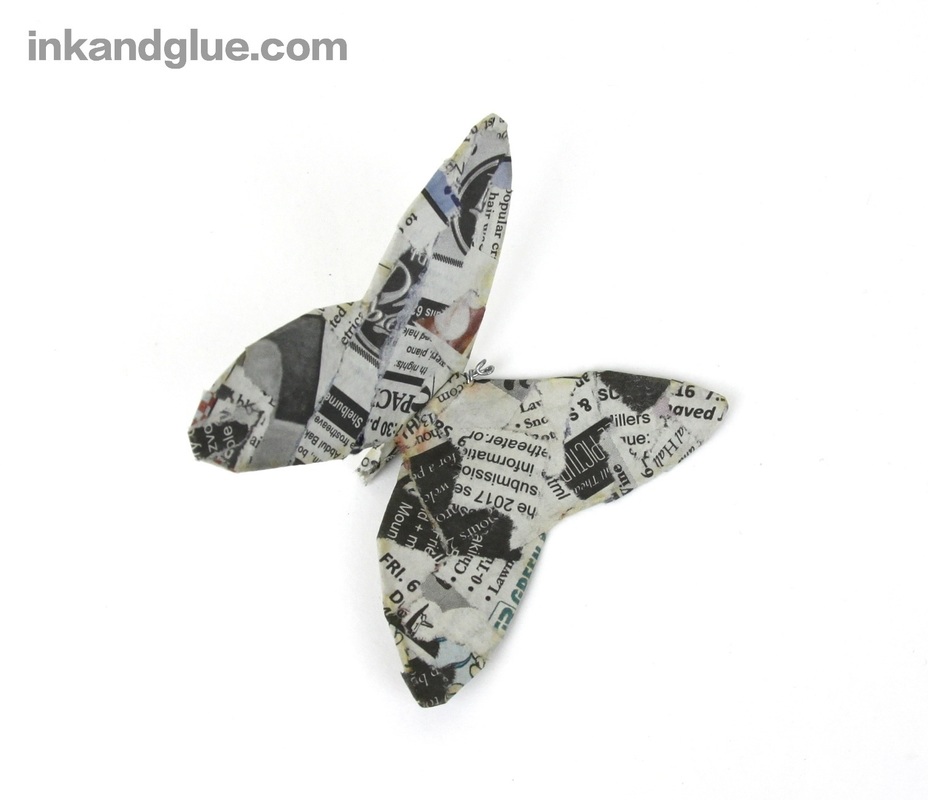
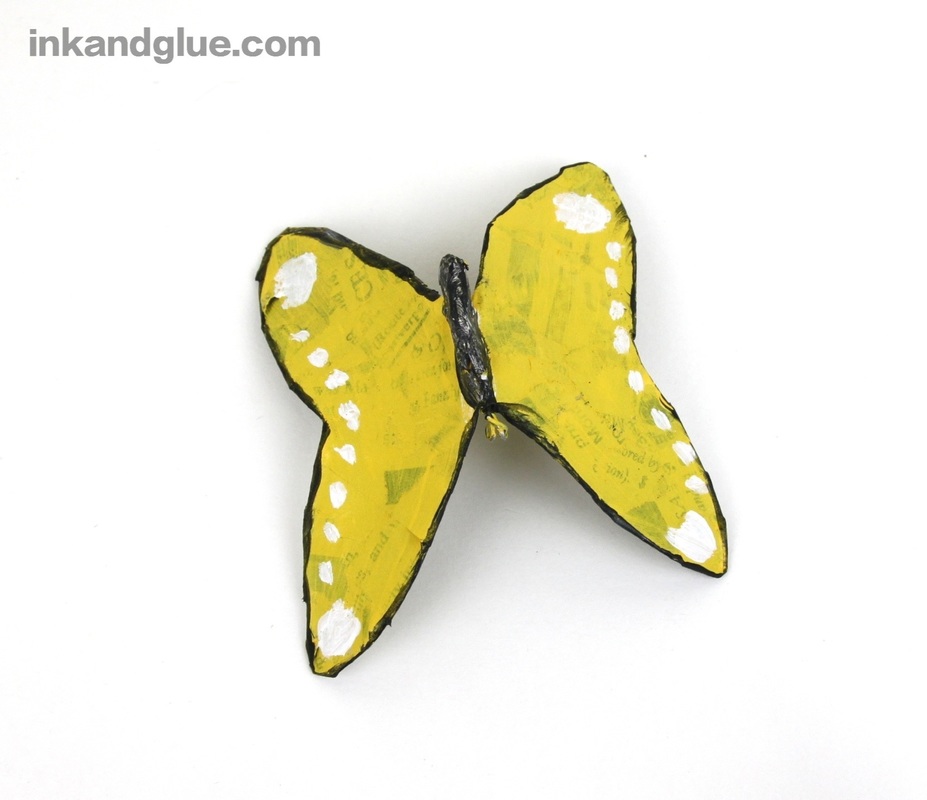
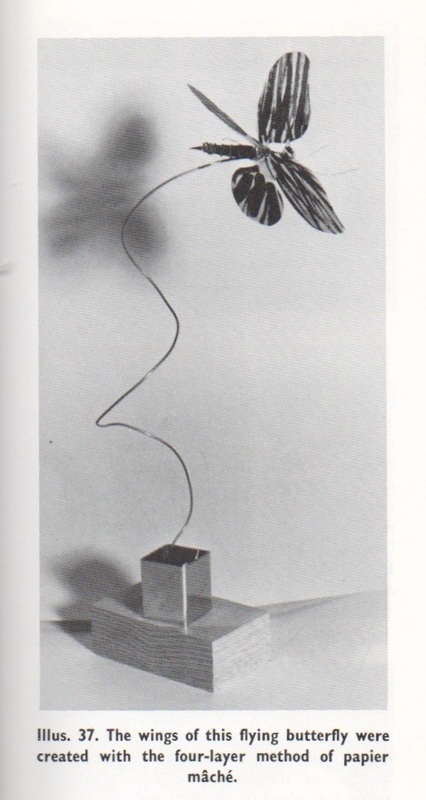
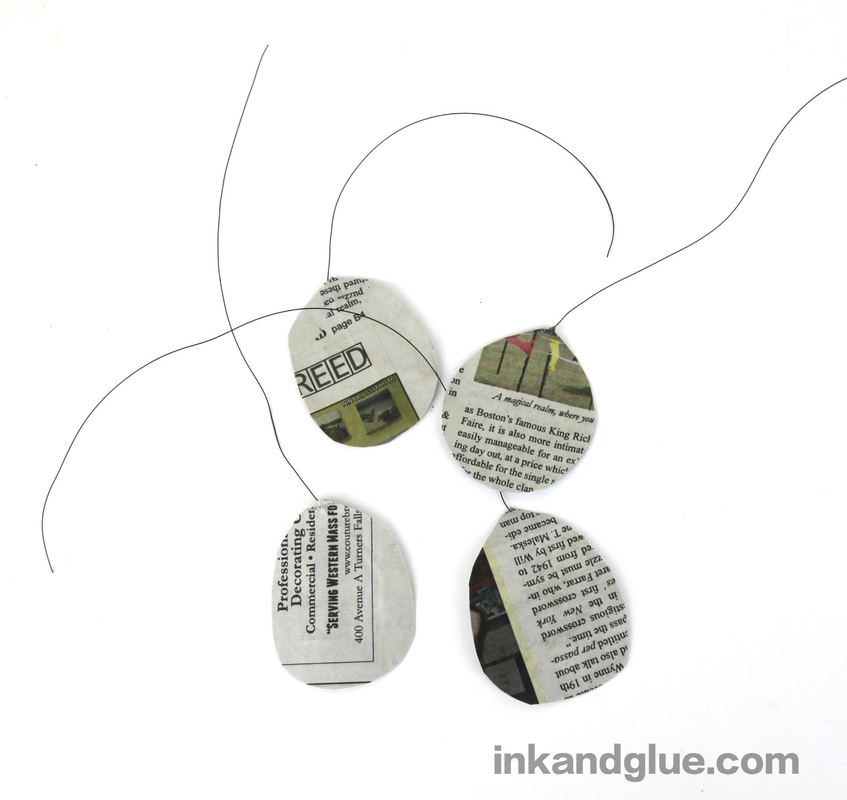
xo! Yes! There is one more. Take a look at the two previous butterfly crafts (one that's directly from Alkema's Scrap Magic, and a variation) if you're unfamiliar. 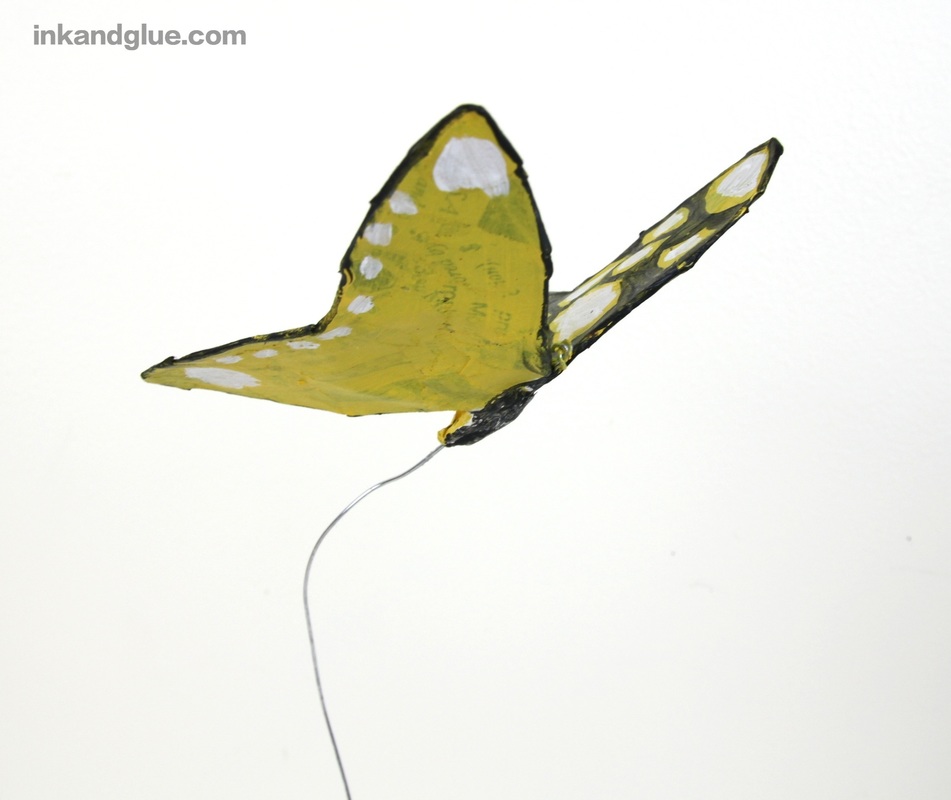 This one is probably the trickiest of the three, but how difficult it feels depends on where your skills lie. The shaping of the butterfly all happens in the first step, and you end up with basically a single-piece object, which can be less frustrating than having to put together four separate wing pieces. However, the papier mache-ing is a bit more difficult (I think it's still fun, though). Here's how you make this butterfly. Shape a piece of sturdy craft wire (I used 22-gauge steel wire) into a butterfly. (I made two equally-sized loops and a skinny loop in the center and then wrapped the ends around the center to make the body. Then I bent the wings into shape.)  Next, tear pieces of newspaper into strips of various widths, none more than an inch or so wide. Prepare a small bowl of wallpaper paste or papier mache goop. Dip strips into the paste/goop, smooth the excess off with your fingers, and wrap the strip around the wire armature. Keep covering until the wing and body surfaces are complete. Lay the end of a foot-long length of wire against the body, and smooth a couple of layers of paper over it to seal it to the body. Let everything dry. 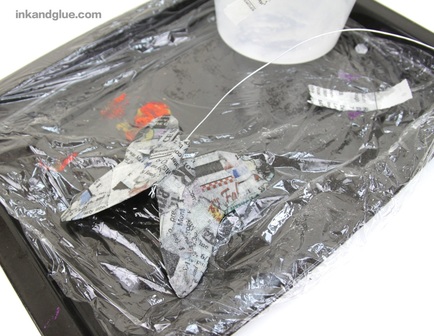 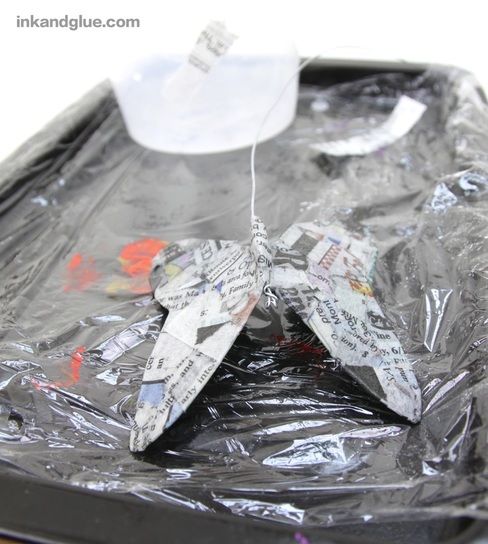 You may find that when you handle the dry butterfly that the wire stem you attached at the end slides right out Don't worry about that right now; it's time to paint! Use acrylic or tempera.
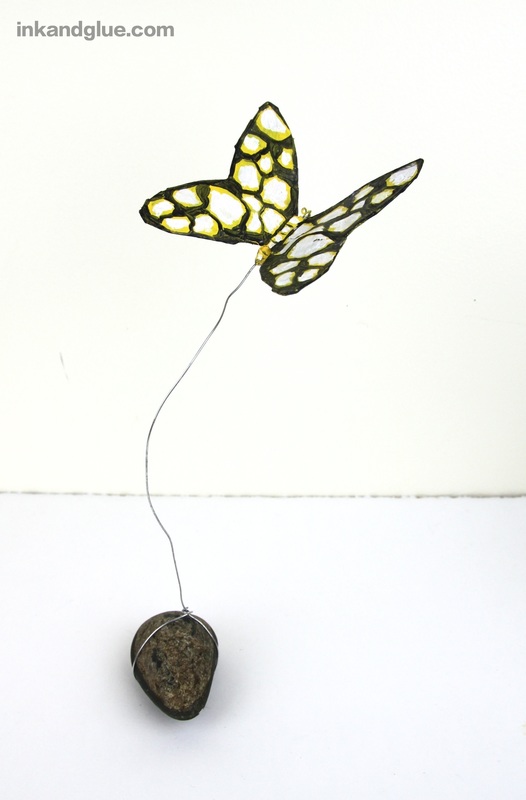
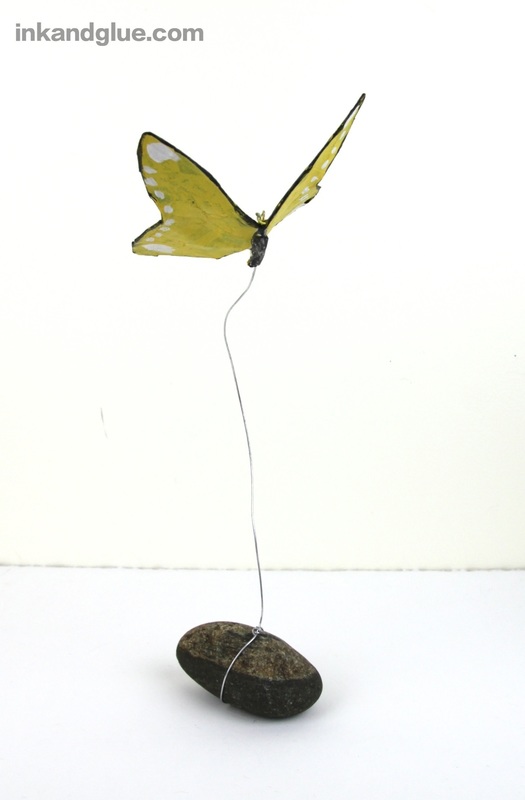
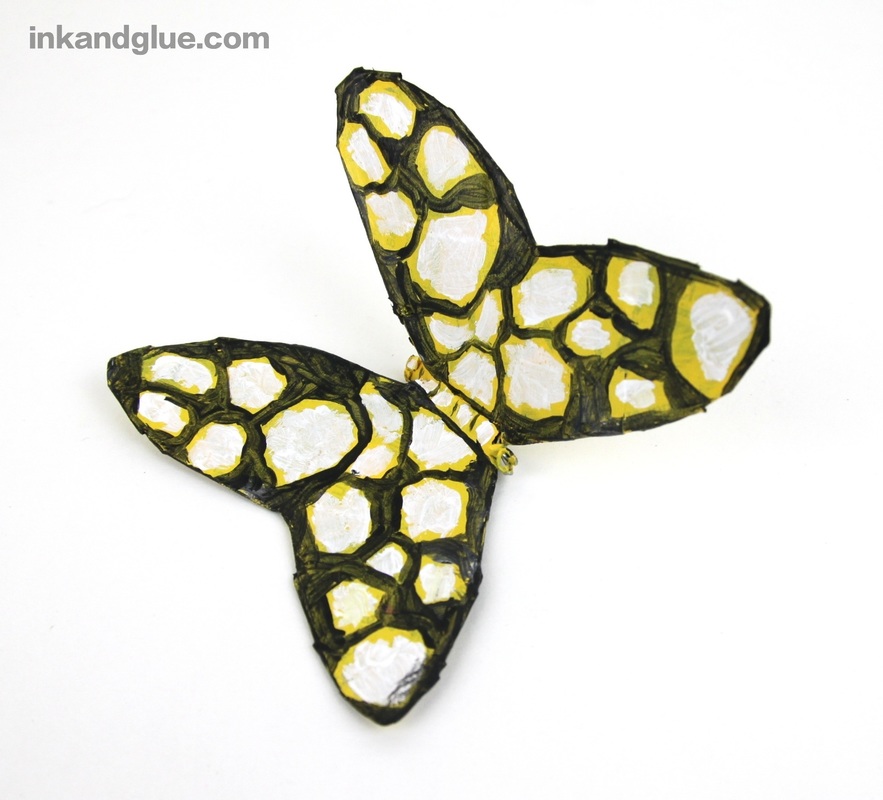 I did multiple coats to get a more realistic-ish effect, though I think the pattern turned out a little weird. Ah well. Now, reinsert the stem wire, along with a dab of glue, and let that dry. If the wire still won't stay in, poke holes in the papier mache near the sides of the body, thread the wire through, and twist it around the body securely. Either keep the other end of the wire straight, so you can place it anywhere — or, wrap the end tightly around a rock that's heavy enough to hold up the butterfly.
You're good!
This concludes the trio of Alkema's Scrap Magic-inspired butterflies. I hope it was somewhat enjoyable. xo! As promised on Friday, I made a couple of butterfly variations of the project found in Alkema's Scrap Magic. Here's one of them. It's similar to the first in that you make four wing sections separately, out of papier mache and wire, and put them all together at the end. But here, instead of using scissors to trim the wing pieces at the end, you start by bending wire into the wing pieces. 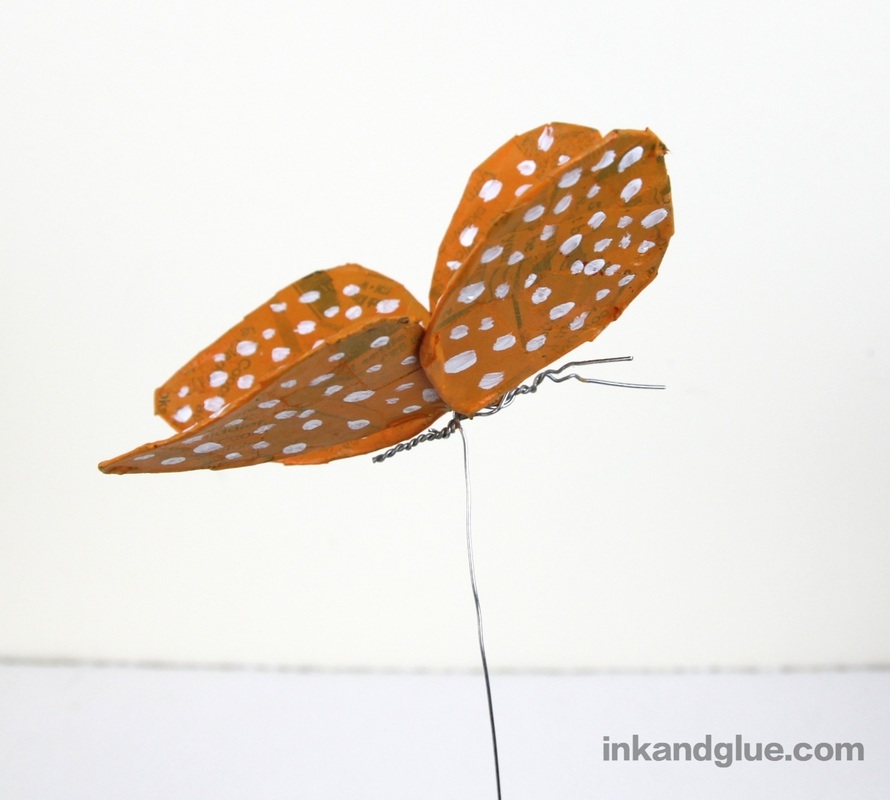 To make this butterfly, start by making four roughly-equal sized loops of wire, as shown. I used a fairly sturdy (but still easy to bend) 22-gauge steel wire from the hardware store. 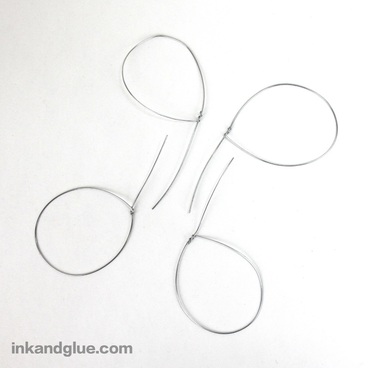 Bend the wing sections into more realistic butterfly-wing shapes, if you like. Prepare wallpaper paste or a flour and water solution, and tear up some strips and bits of newspaper. Working over a protected surface (plastic wrap or wax paper), dip strips into the paste, smooth the strips between your fingers, and wrap them tautly around the wire loops. Aim for complete coverage of the wire and the inside of the loop. Prop up the wing sections so both sides can dry evenly. 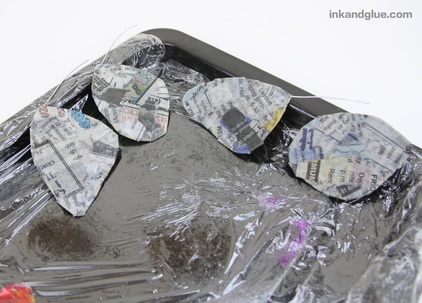 Here's what they look like dry and ready for the next step. 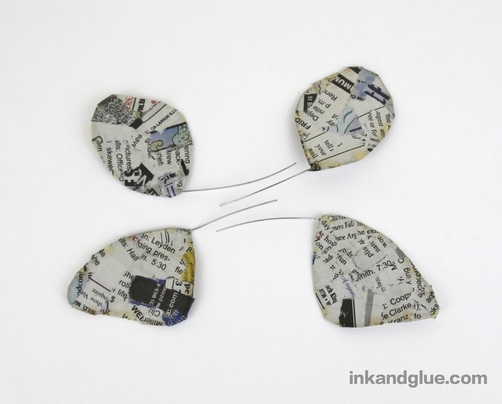 When everything is dry, paint both sides of the papier mache sections with acrylic or tempera paint. If you don't want the newsprint to show through, I recommend painting the sections white before adding the final coat or two. I liked the look of it showing, though — I think it looks more organic and natural. 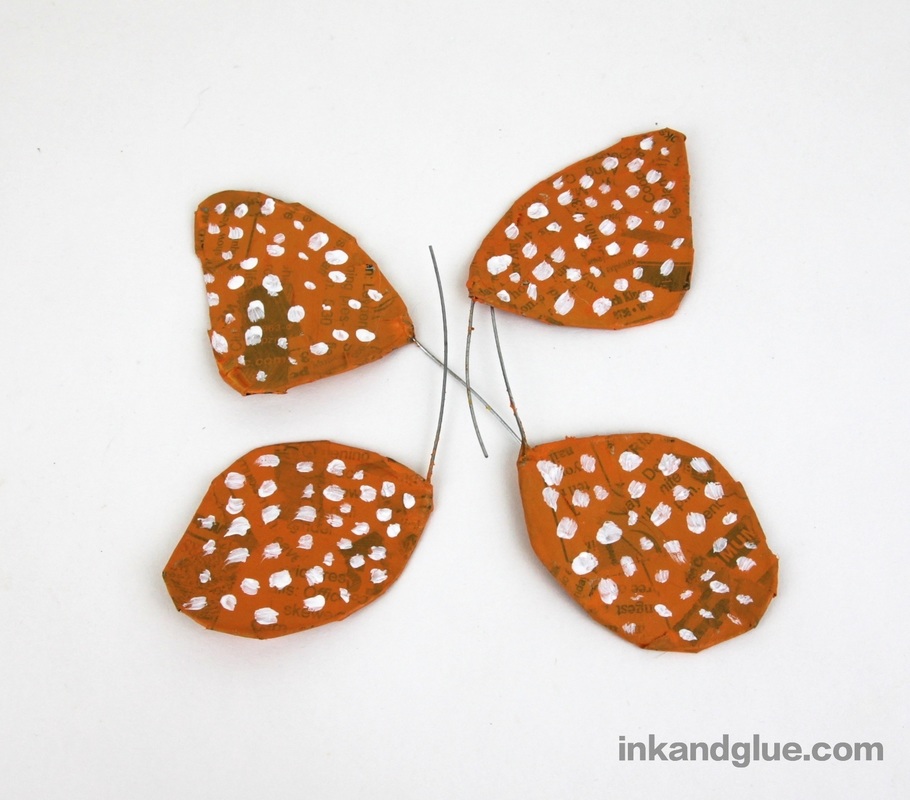 Pair up the wing sections and twist each pair together, close to where the wire meets the paper.  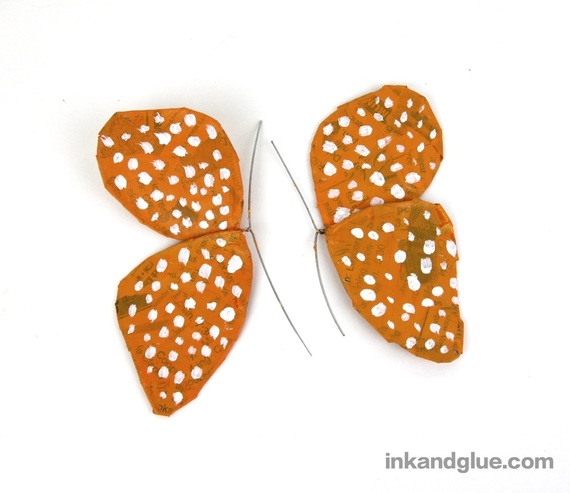 Match up the two halves of the butterfly, wire-to-wire, and twist those wires together. Trim one end of this twisted wire, and leave the other end's excess to act as antennae. 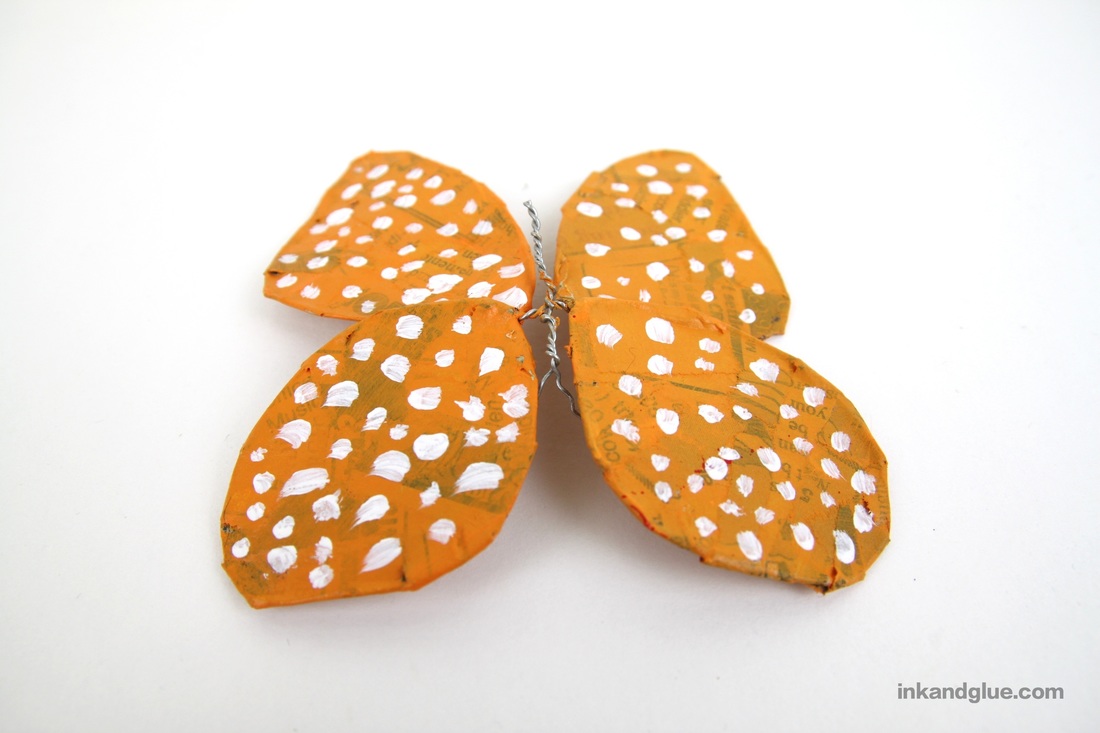 Wrap a new piece of wire around the body, to both add bulk and to act as a "stem" for the butterfly. 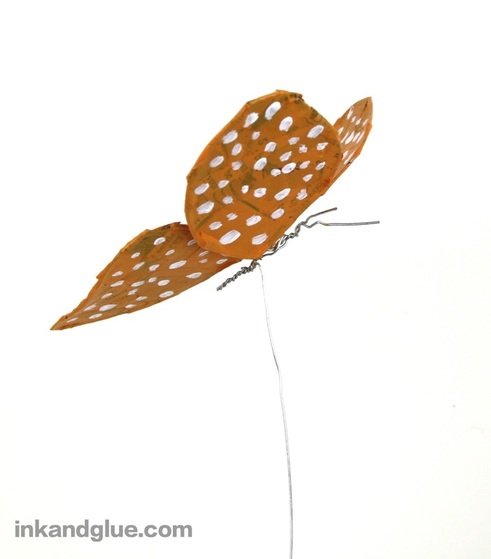 That's it! 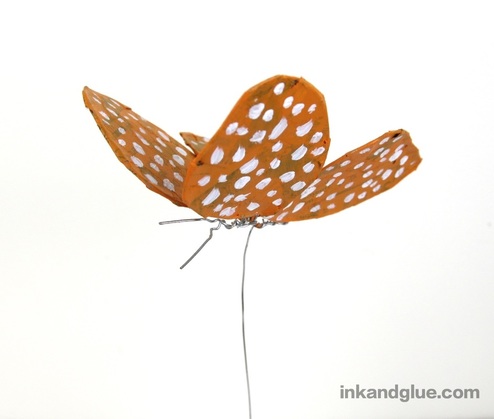 This method produces a sturdier finished item, but it's definitely more labor-intensive. Wrapping the open wire loops with strips of paper can take some getting used to. But, again, it ends up being a more substantial object, less delicate than Alkema's book's version. Easier to paint, too.
I'll share the third butterfly later this week! xo 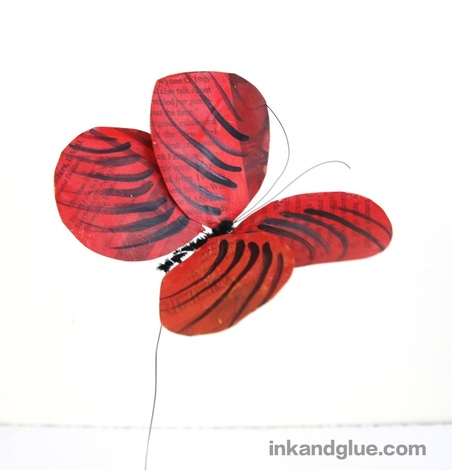
First, tear newspaper into 16 somewhat-equal pieces. Mix up some wallpaper paste (or flour and water) and protect a tray or board with plastic wrap. With your hands, coat a paper piece with paste, both sides; and then wipe off any gloppy extra. Do the same with a second piece, and then smooth the two pieces together. Lay the doubled piece on the tray. Place a curved end of a thin coated craft wire onto the center of the paper piece. Make another doubled-up pasted paper piece, and smooth it on top, sandwiching an inch or two of the wire end in between. Repeat to make four layered/sandwiched paper pieces with wires sticking out of them. 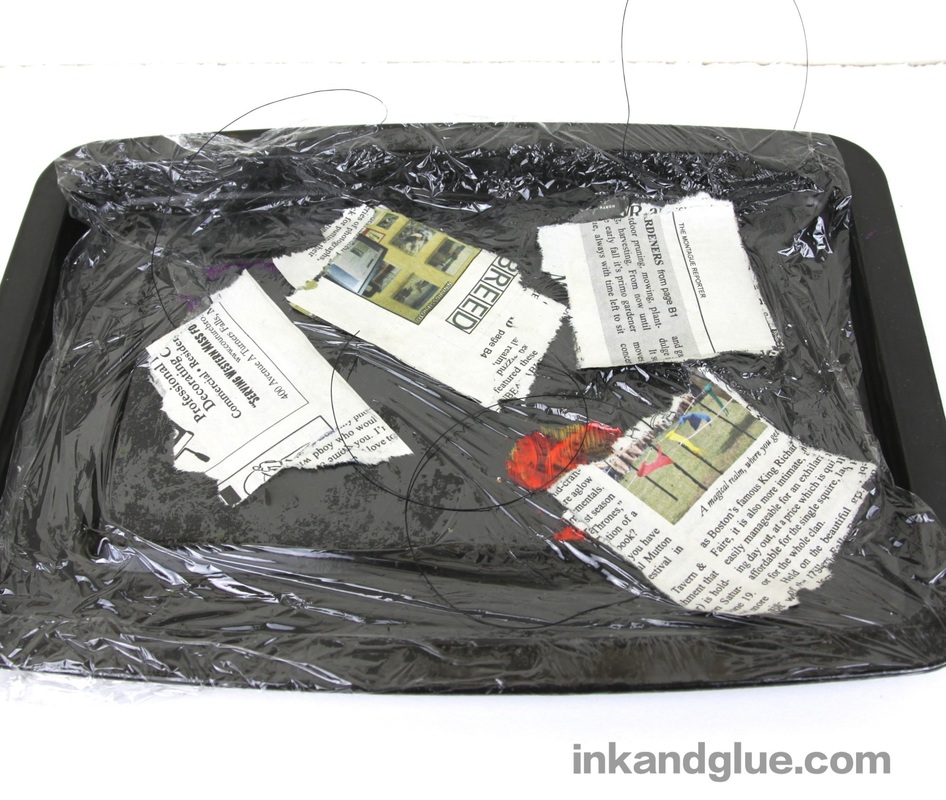 After the paper is totally dry (I just left it overnight, but a couple of hours outside in the sun would have been plenty), peel the pieces from the plastic. Trim each paper piece into the shape of a petal/wing-half, being careful not to cut the wire.
Paint these wing sections with acrylic craft paint, and let it dry.  I didn't have a long nail handy, so I used a piece of a pipe cleaner instead. Wrap the wing sections to the pipe cleaner (or nail, if you want to follow Alkema more closely), wrapping two of the wire ends near one end of the body—those will be used as antennae. 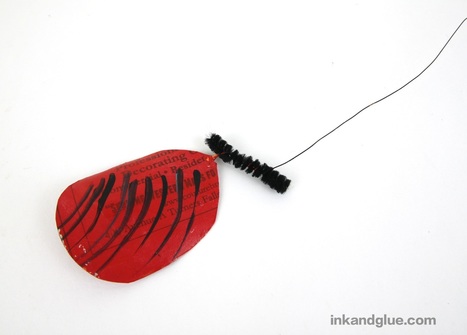 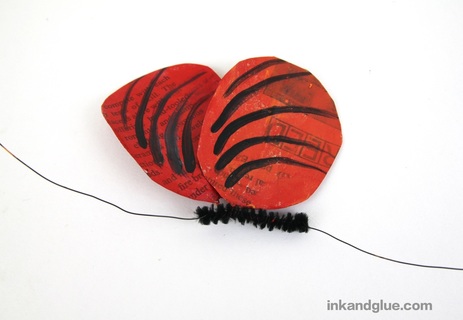 Here's the completed assemblage, with all four wing sections and trimmed wires. 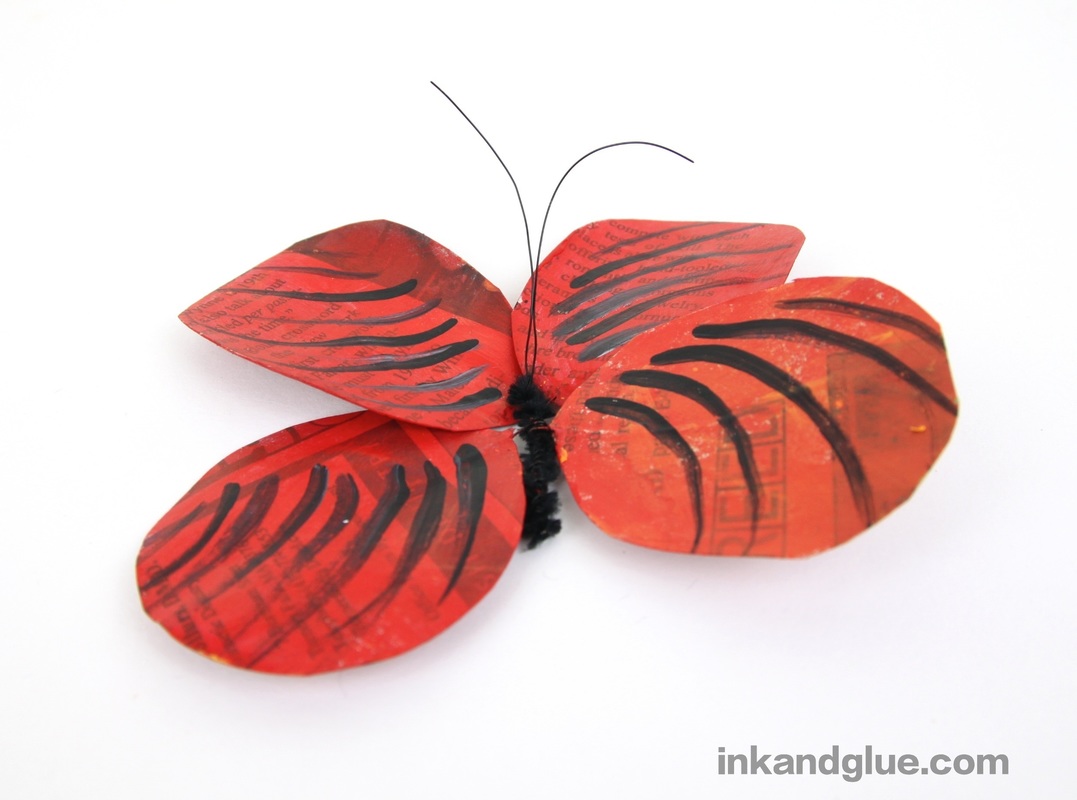 To make it "fly," wrap the end of a length of sturdier wire (I used 22 gauge steel wire from the local hardware store) around the butterfly's body. Wrap the other end around a rock or a wood block, or just leave it straight so you can insert it into a bouquet or a gift bag or a vase full of acorns, as needed.  This was good! But: while I was waiting for the wallpaper pasted paper to dry, I decided to hedge my bets, and made two other butterflies using slightly different methods (but all with just wire and papier mache). Are they better? Worse? Just different? You'll find out when I share them with you next week.
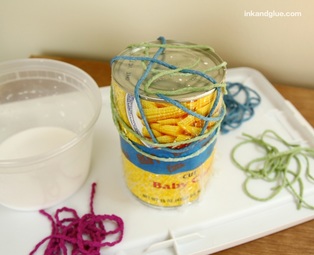
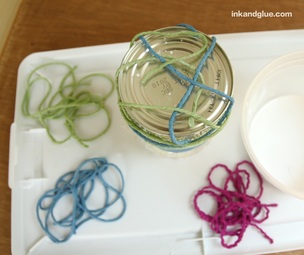
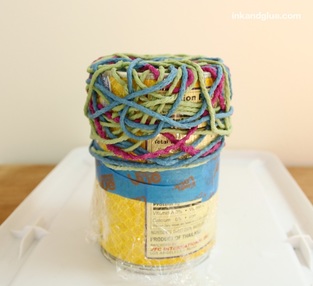
Happy fourth of July weekend, my little fireworks! xo  This glue-and-string project is as simple as can be. Choose a can from your pantry, cover half of it with gluey yarn, let the glue dry, and that's it. The finished object can hold lightweight items like cotton balls or acorns or Shopkins or Squinkies or whatever gumball-sized plastic collectable your child is currently into. Start by collecting three (or so) colors of yarn, and a can. Cover the can with plastic wrap, and secure it with tape. Try to keep the plastic wrap taut over the top of the can so you don't have to deal with the ridge around the edge. 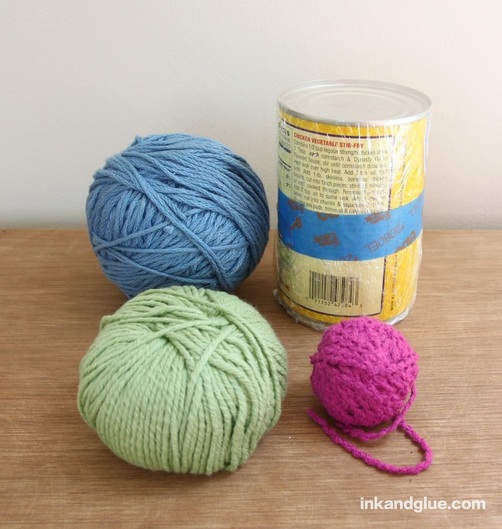 Cut each color of yarn into 4 or 5 foot-long lengths. Put everything on a work surface that can get wet; I used the upside-down lid of a plastic storage bin, but an old Sunday newspaper would work fine too. 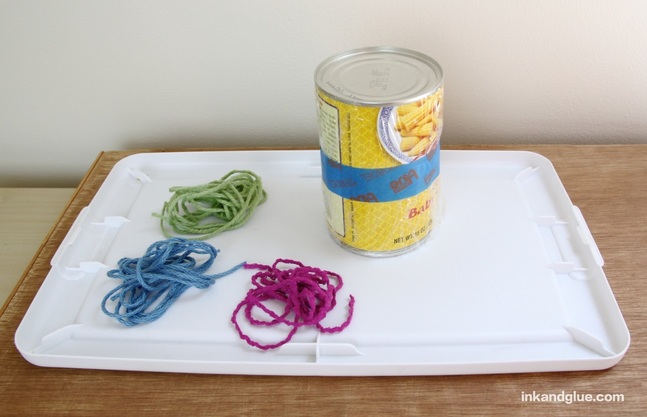 Make a 50/50 solution of tacky glue and water. One at a time, dip a string in the water and swizzle it around so it gets saturated. Let a bit of it drip off (don't squeeze it dry), and wrap it around the can. With each additional strand you add, make sure you're crossing previous strands in order to create a sturdy-ish matrix.
Once you've added what looks like enough strands — I prefer an airy, lacy look — gently press the strands onto the can so they'll adhere to each other even better as they dry.
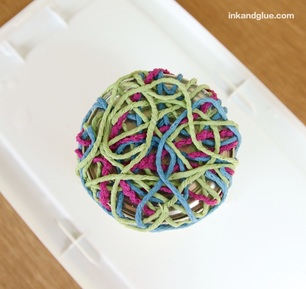
I put my yarn-wrapped can outside on a summer day and it was dry in just a couple of hours, but be sure to leave it alone until it's entirely dry. When it is, remove the string cup from the can. 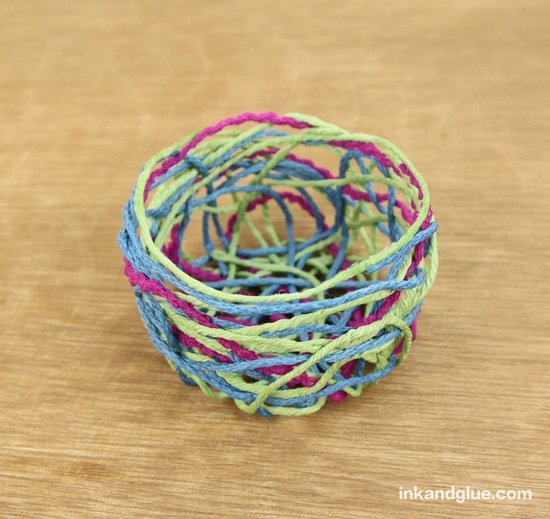 If you have any wayward strands that aren't anchored to enough cross-strands, just add a drop of tacky glue to any key junctures. That's it! 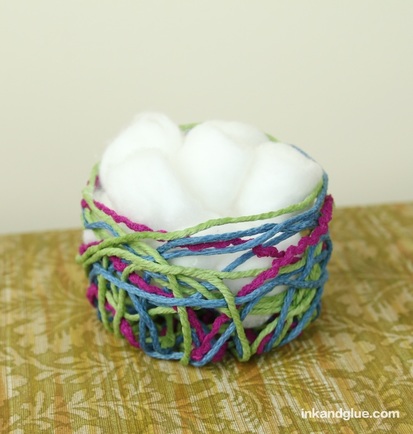 xo!
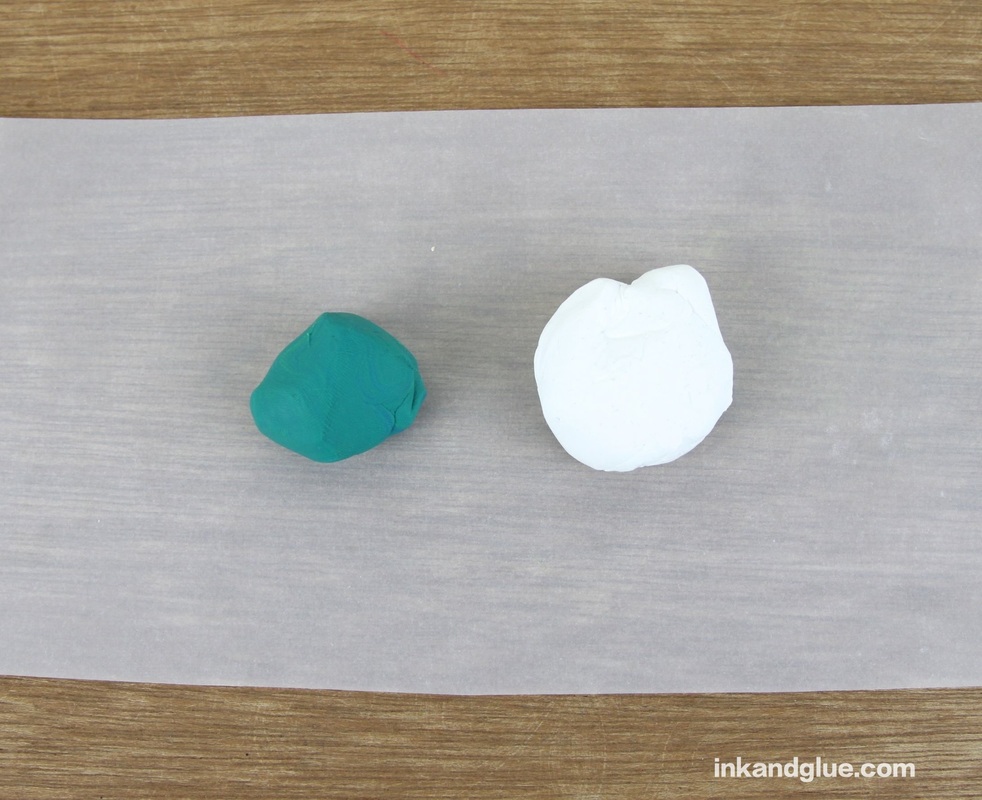
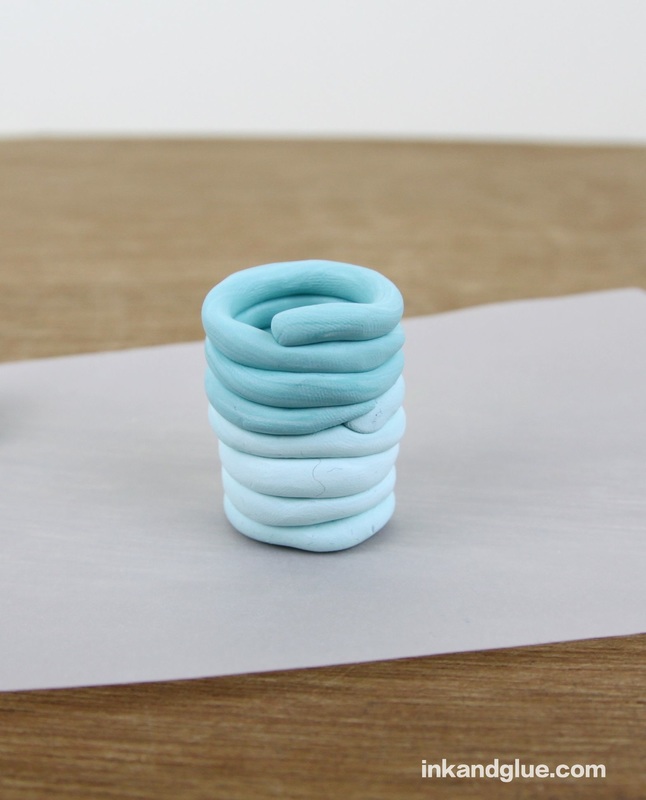
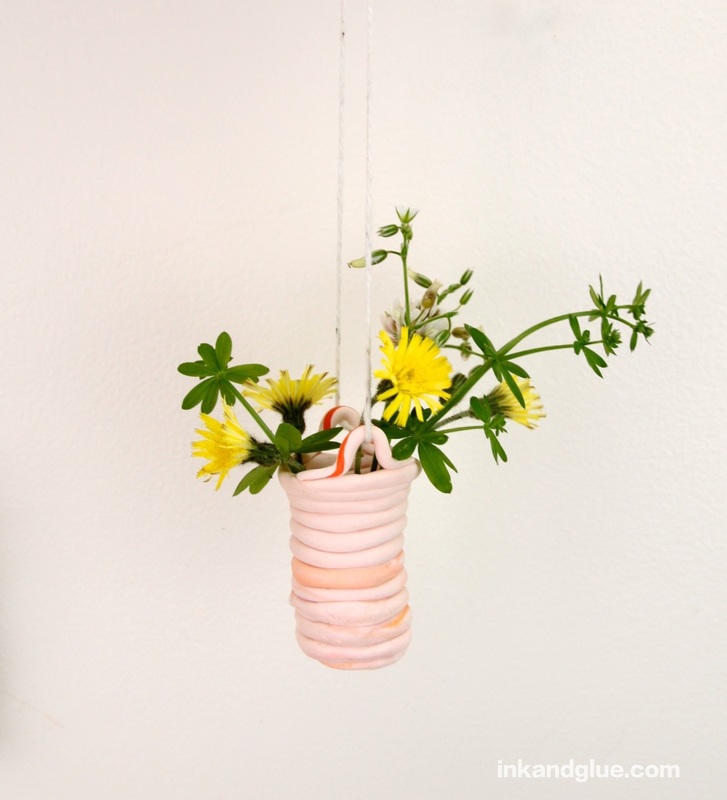
Celebrate the smallest and humblest of flowers by making them their own scaled-down coiled pot out of polymer clay (a.k.a.Sculpey and Fimo). Here's how! 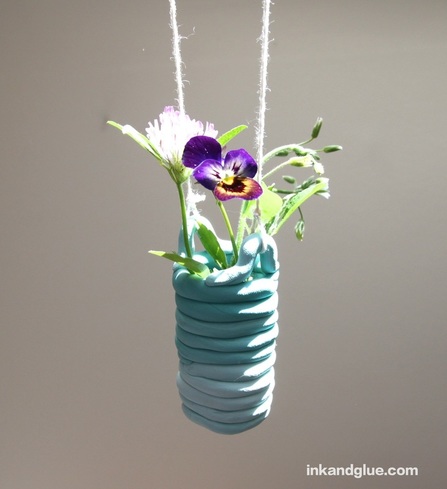 I attempted to do a gradient/ombre look, but it ended up more, ah... subtle than I wanted. And sometimes it's better to keep going with the flow rather than stop and restart from scratch, you know? If you want to try something similar, knead (to soften) a ball of colored polymer clay and a bigger ball of white. Place them on a proper work surface, like a scrap of parchment paper, or wax paper, or plastic wrap. Separate the two balls into smaller chunks of varying sizes. Matching a bigger ball of white with a small ball of color will give you a lighter color than a small ball of white and a bigger ball of color. Do keep in mind that a little color goes a long way.
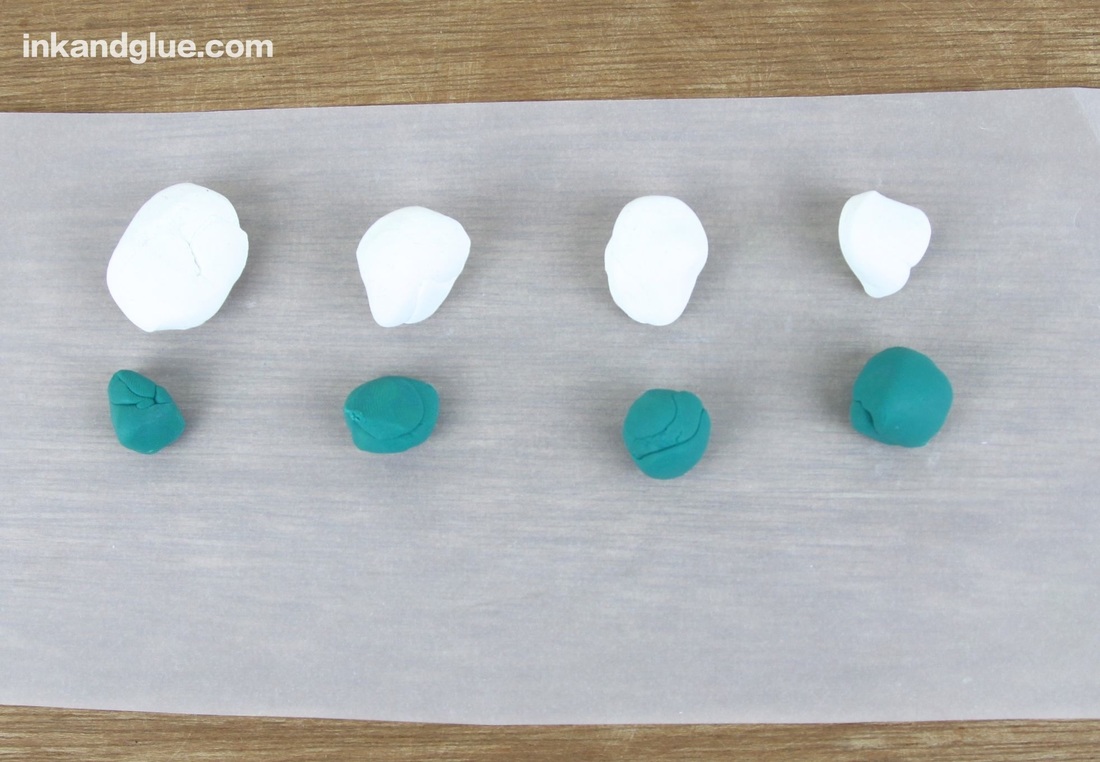
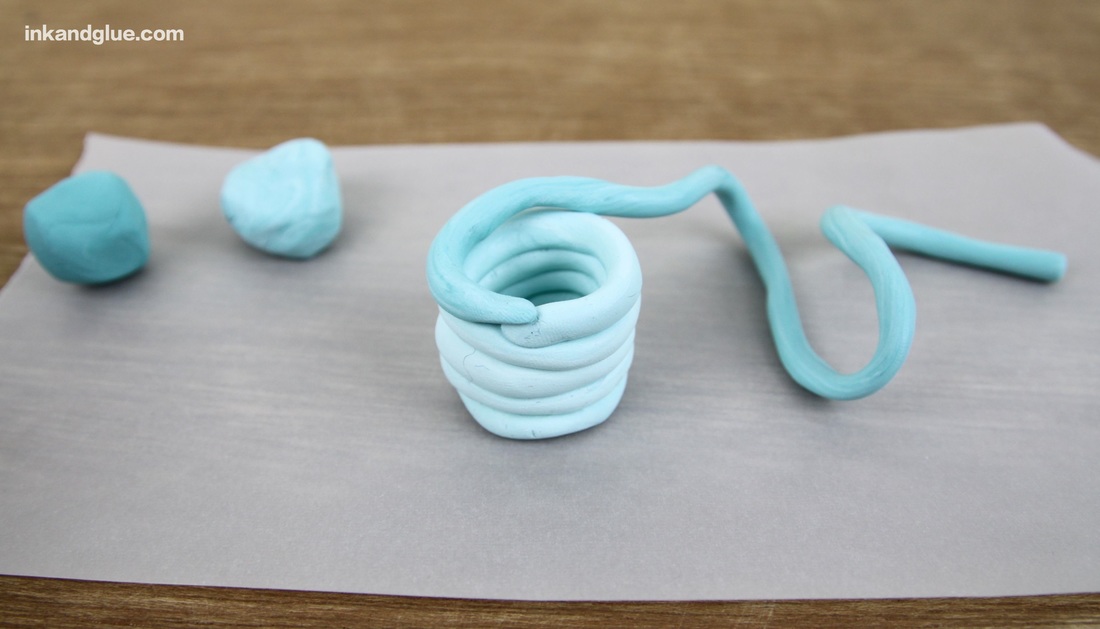
Knead together your matched pairs of balls. Add white to the ones that need to be lighter and add color to the ones that need to be darker. (Again, you can skip all of this and do a single color, or change colors with each coil.) Roll a dime-sized piece of clay into a ball. 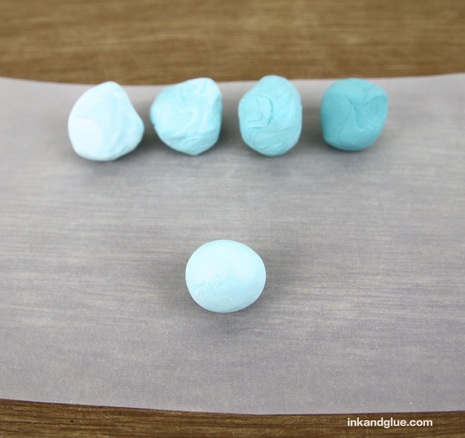 Flatten the ball with your finger. Pick the clay ball you want to have on the bottom portion of the pot, and roll it on the surface with your fingers to form a skinny snake. 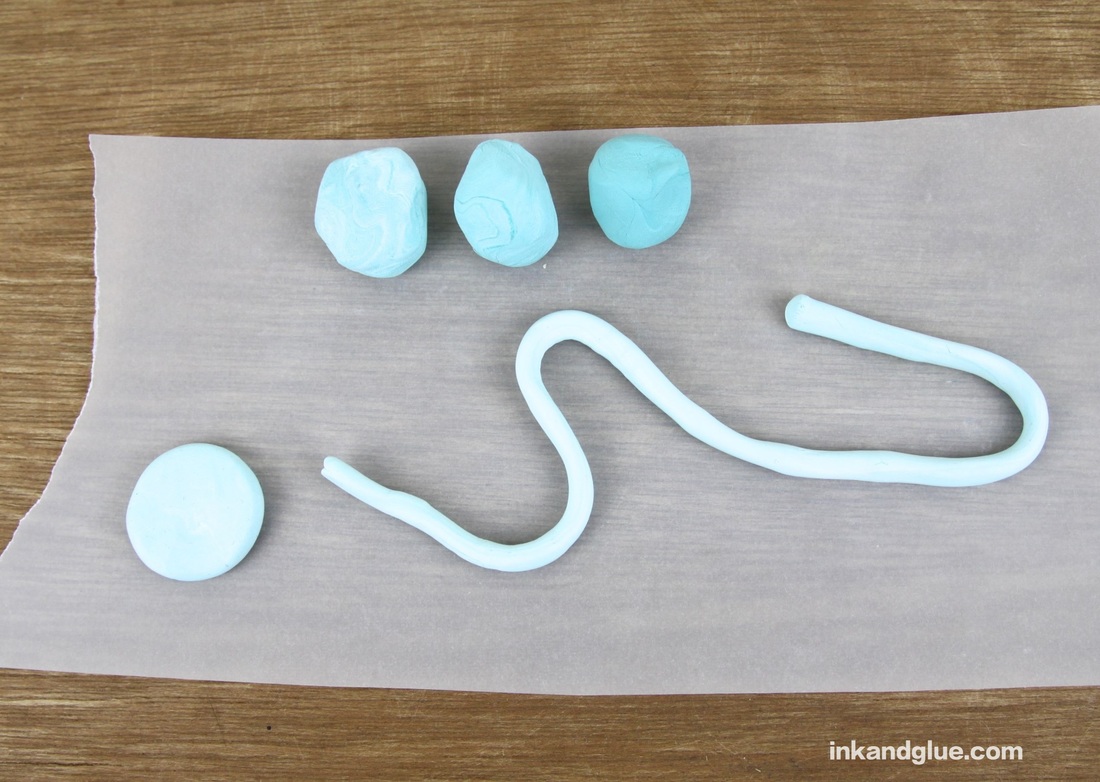 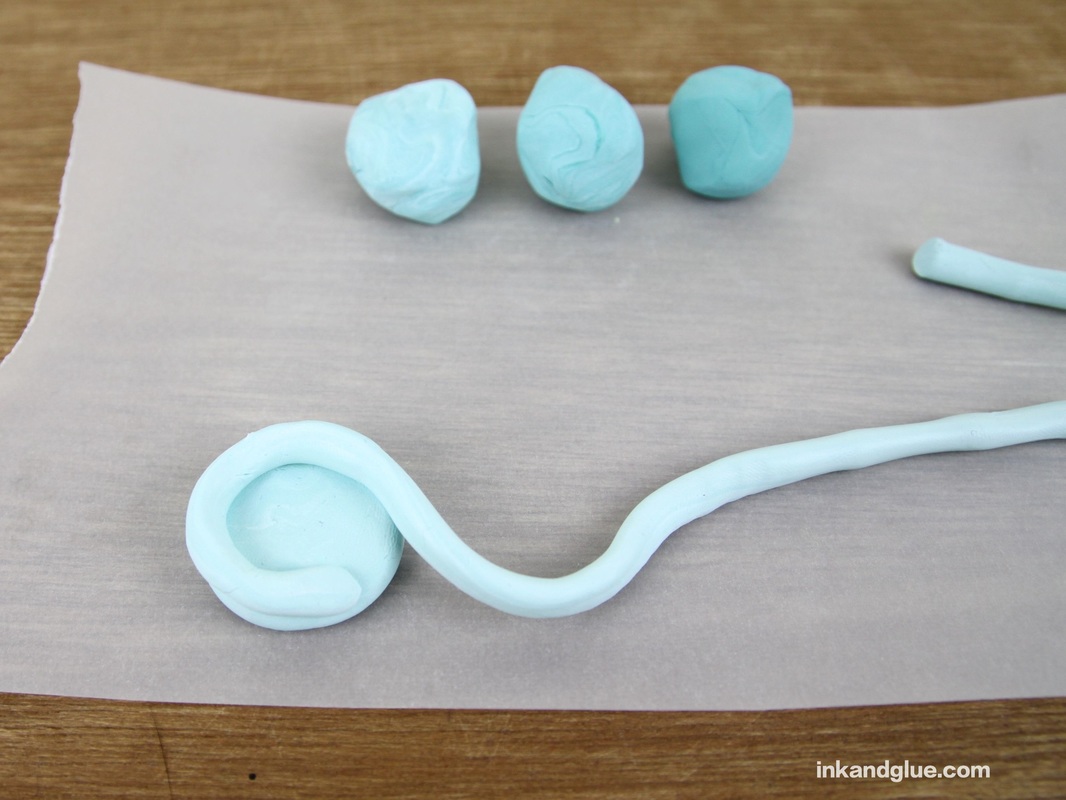 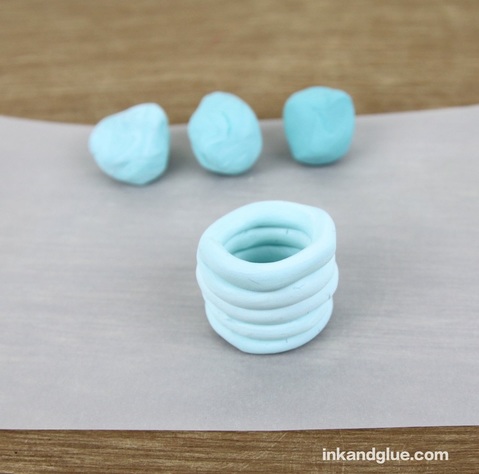 Once you finish with the first ball/coil, repeat the snake-rolling, end-flattening, and joining/coiling process with the second color of clay.
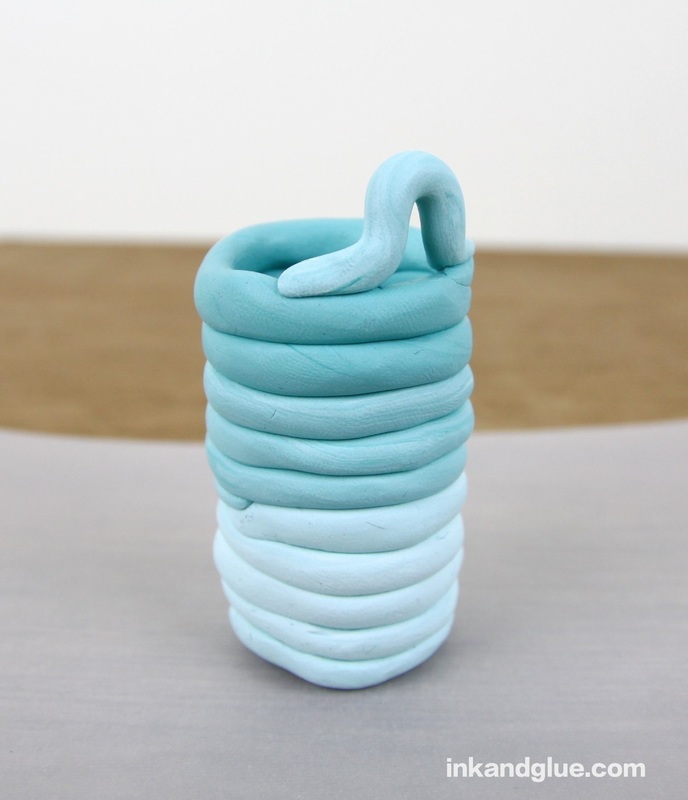
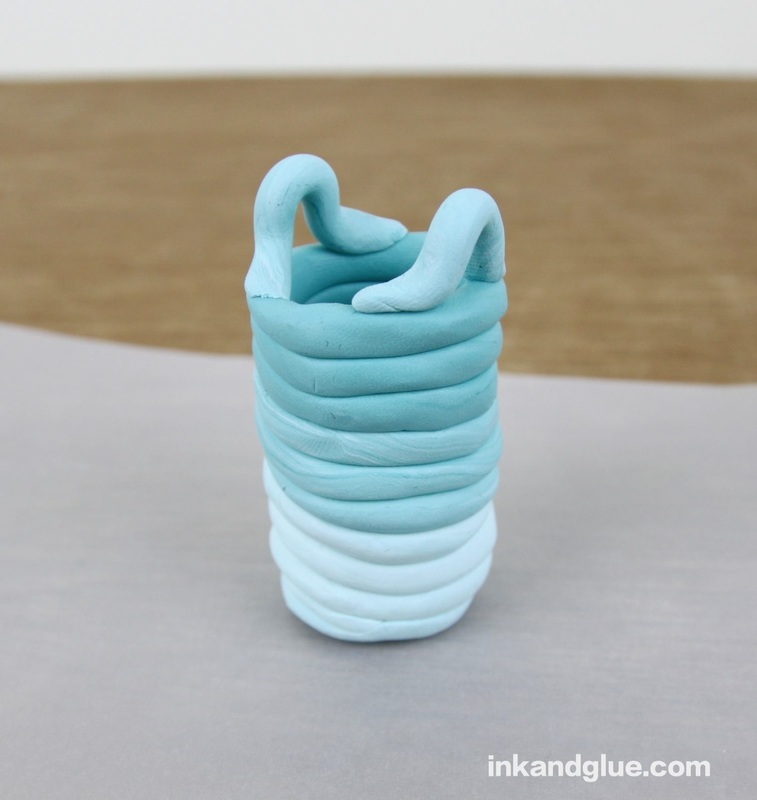
Continue with a third color. As you work up, keep pressing and pinching the coils together and down, looking out for gaps and holes. This is polymer clay, so you can be stern with it. 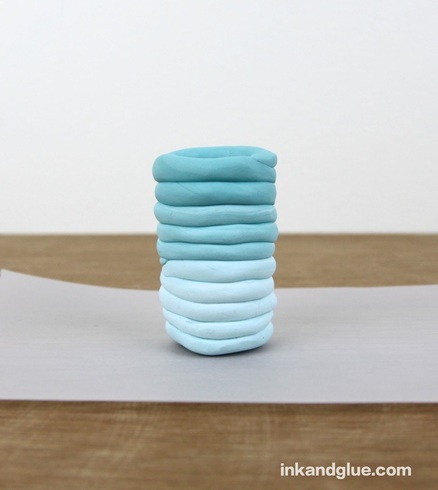 Make two short snakes. Bend them into curved handles and press them to the top of the pot, as shown.
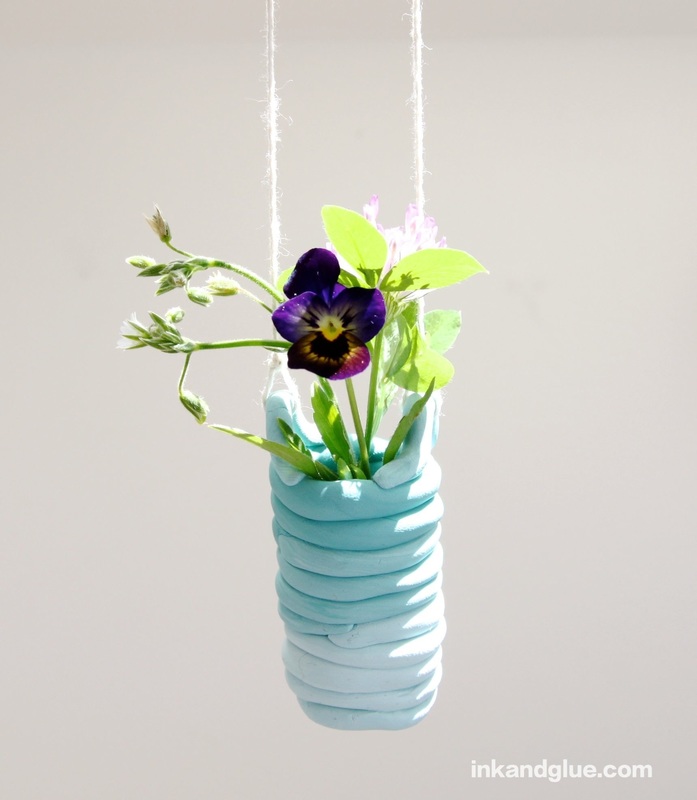
Bake your pot as directed. My Sculpey pot took 15 minutes at 275 degrees. Once it's cooled, fill the tiny pot with water. If there are any leaks, there are two things I'd try. First, once the pot is totally dry, use more kneaded Sculpey as crack-filler inside the pot, and re-bake. I had to do this with the creamsicle-colored number shown below, and it worked like a charm. Second, you can paint the inside (and the outside, if you don't mind changing the texture and level of shine of your pot) with Varathane Polyurethane Sealer. Blue Bottle Tree recommends it and she knows her stuff. Tie the ends of a length of string to the handles, or loop one piece of string through both handles and then tie the ends into a long loop. I did the former with this blue pot, and the latter with the creamsicle pot.
Happy pottering! xo
|
Categories
All
Archives
March 2017
AuthorI'm Debbie Way, an artist and writer who enjoys making things. |


 RSS Feed