|
More circa 1966 vintage goodness! 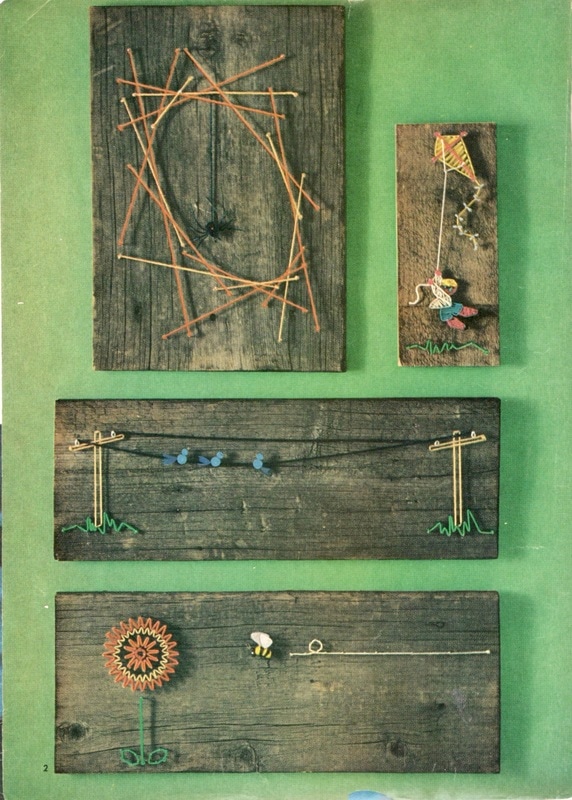 I don't know why this string art is called "scrap craft" except the bases are made of scrap wood (the type that only people living out in the country would ever have just lying around). 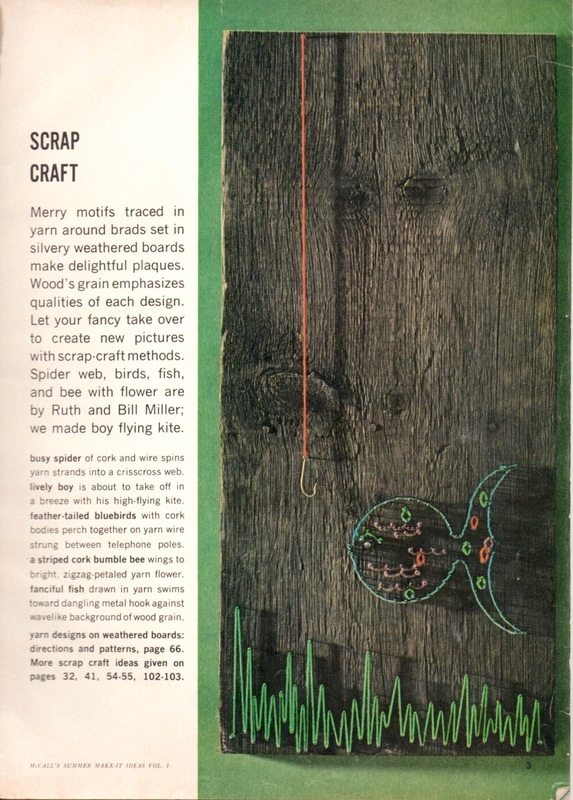 "Let your fancy take over" is my new motto for living a better, happier life. Need directions? I don't think you do, but just in case:  xo!
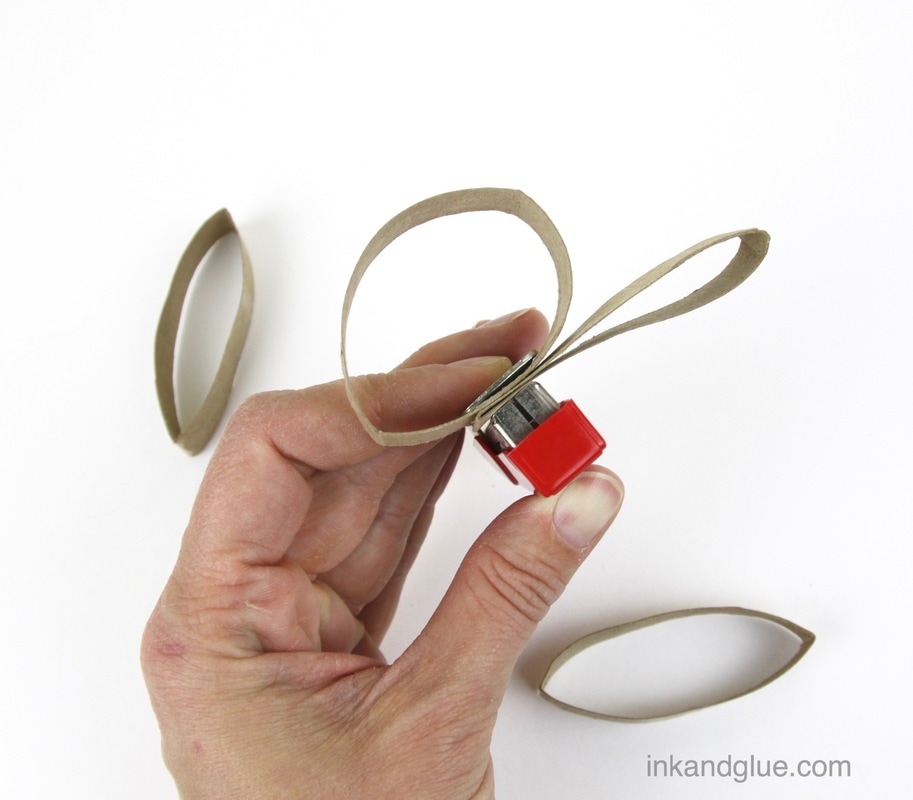
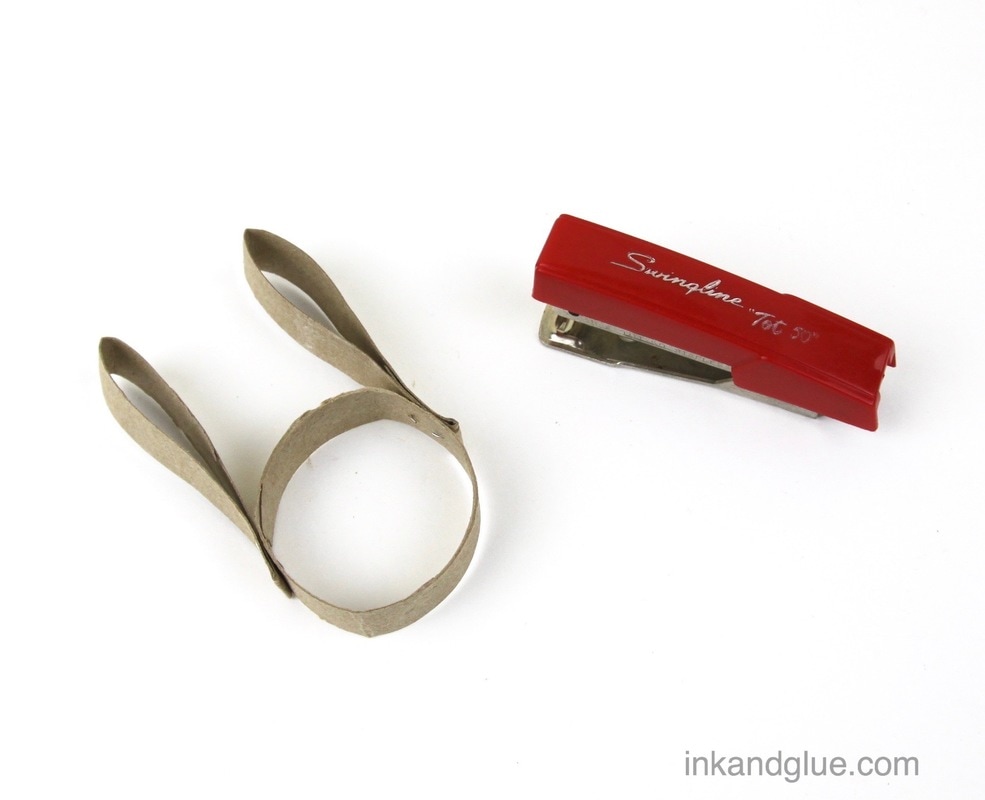
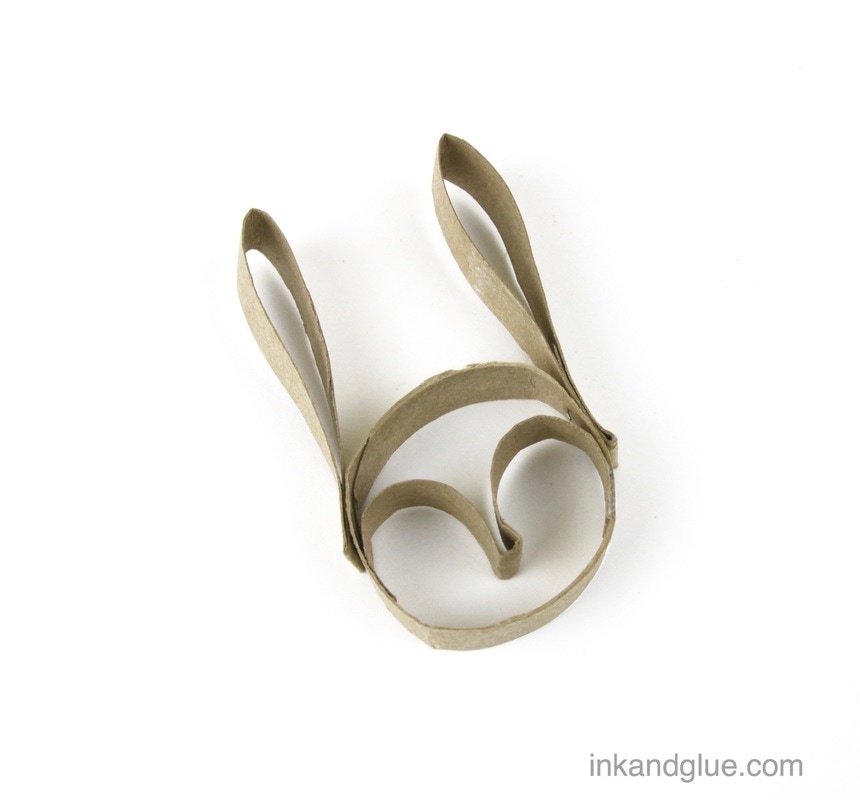
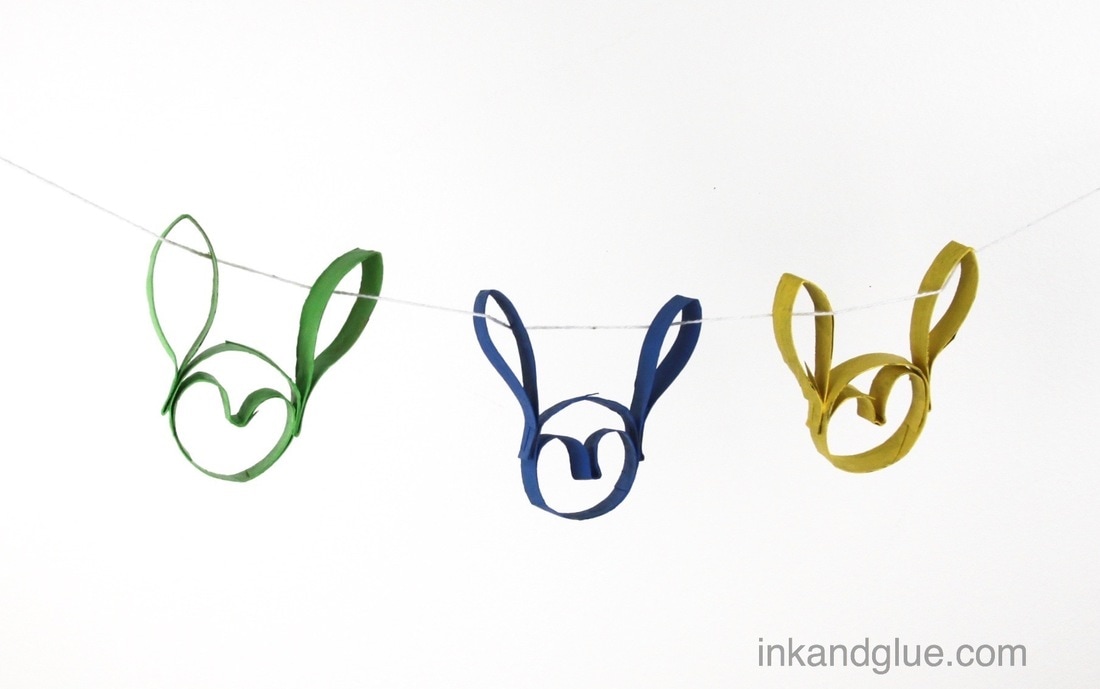 I have a stash of toilet paper tubes in my studio and from time to time they call to me. (By the way, we switched TP brands, and the new one — *cough angelsoft cough cough* — glues the end of the paper onto the roll so thoroughly, the cardboard tube is unusable for anything fun. Don't do that, tissue manufacturers. You are killing the creative dreams of children.) Anyway! I like the creative restrictions inherent in using these tubes. It's the difference between staring at a blank piece of paper, and staring at a piece of paper that already has a few lines drawn onto it — it just makes you want to take it further. Here's how you can make a bunny face like these. First, flatten a cardboard TP tube slightly and cut it in half — each half can make one rabbit head. Cut the half into sections that are each about 1/3-inch wide. Tip: If you want the rings pretty close to the same width without using a ruler, cut the half-tube in half, and then cut those resulting halves in half. 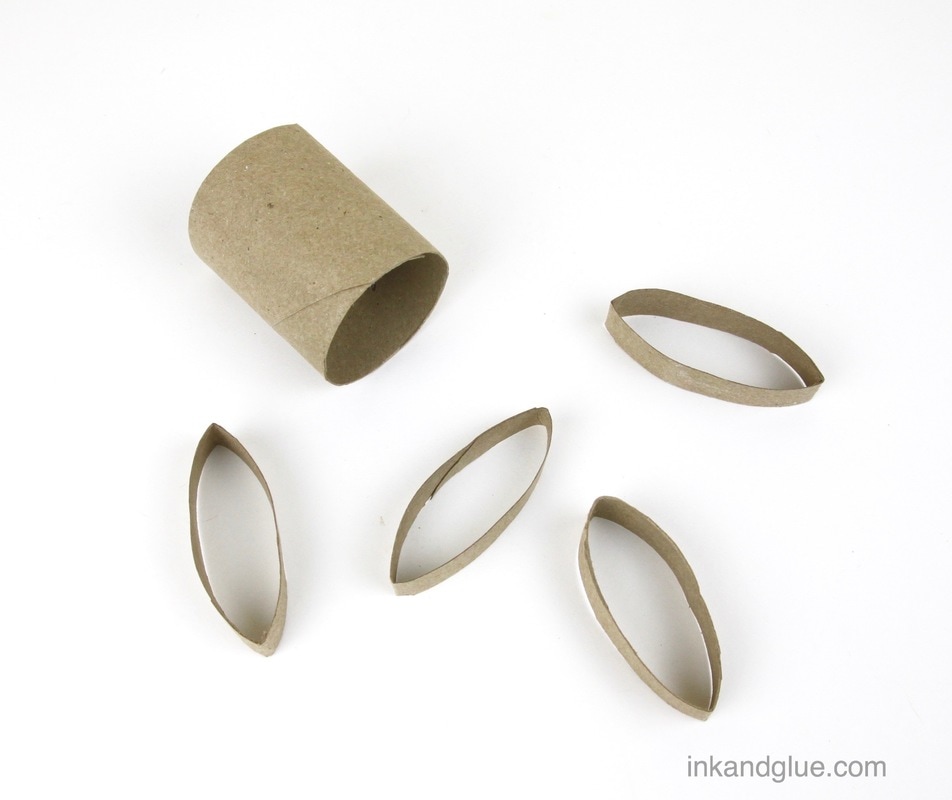 For the head and the ears, open one ring back up into a circle, and flatten two of the other rings. 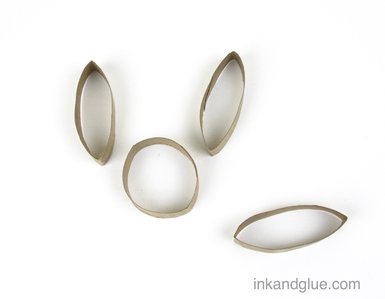 Staple the flattened rings to opposite points of the round ring. I happen to have an adorable mini stapler, but a regular size one will work ok too.
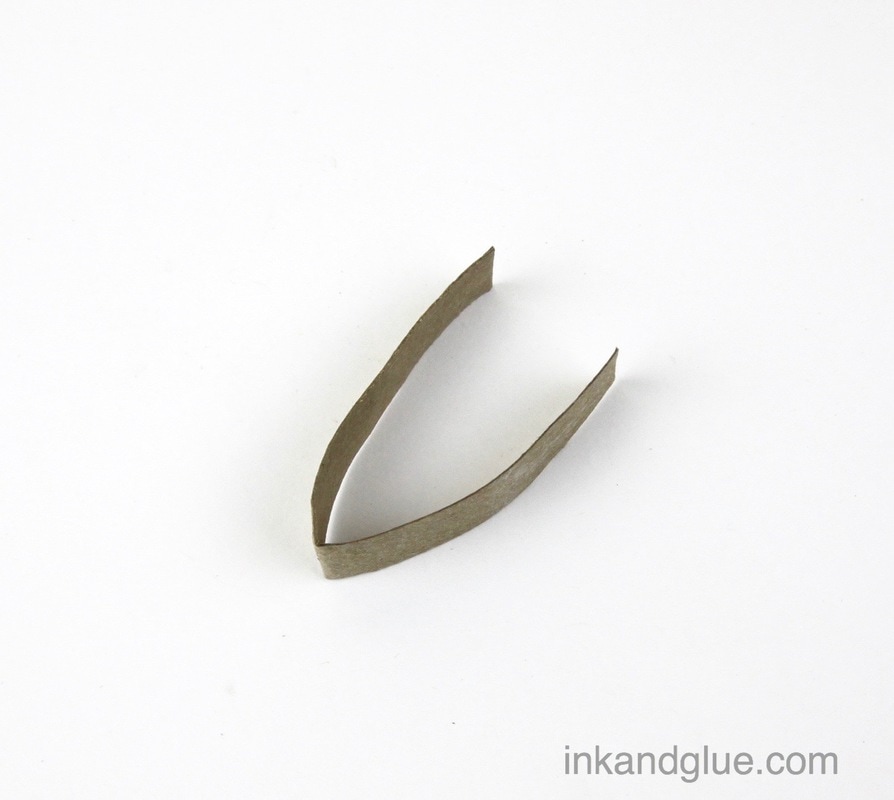
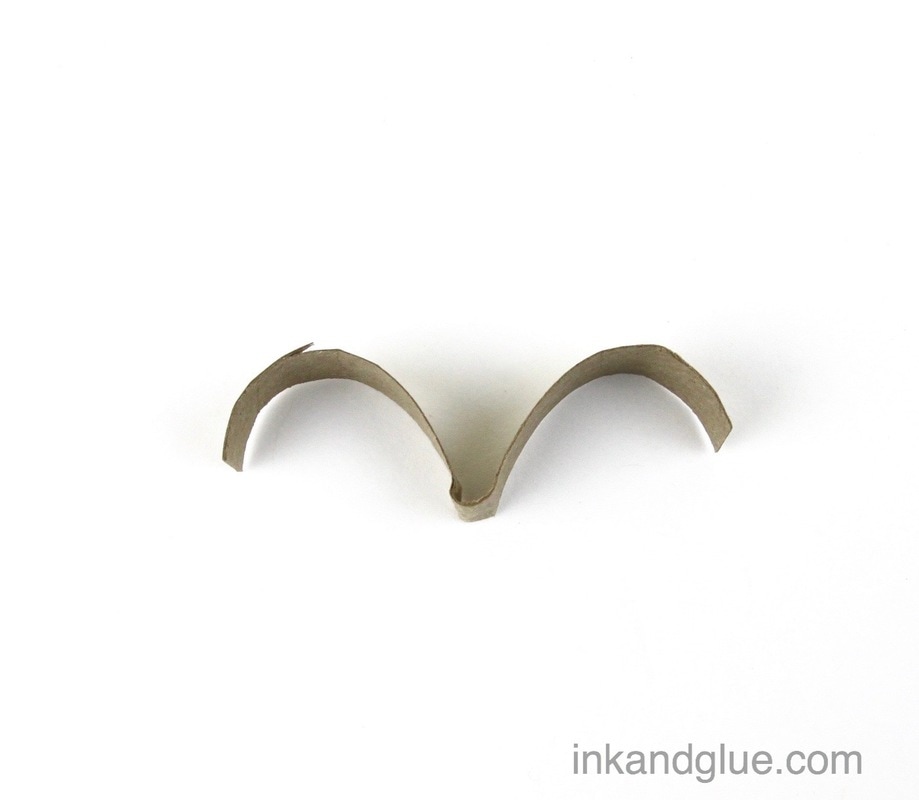
Cut about a half inch from one end of the flattened fourth ring.  Below left is what the ring will look like right after you cut it. See that fold at the bottom of the V shape? Bend the two halves of the V all the way around so that it's more of an A shape (without the crossbar in the middle, of course). Use your fingers to kind of flatten the tip of the A a bit, then rotate it 180 degrees — it might look something like the picture below, right. Bend the two wings of the shape to keep them curly.
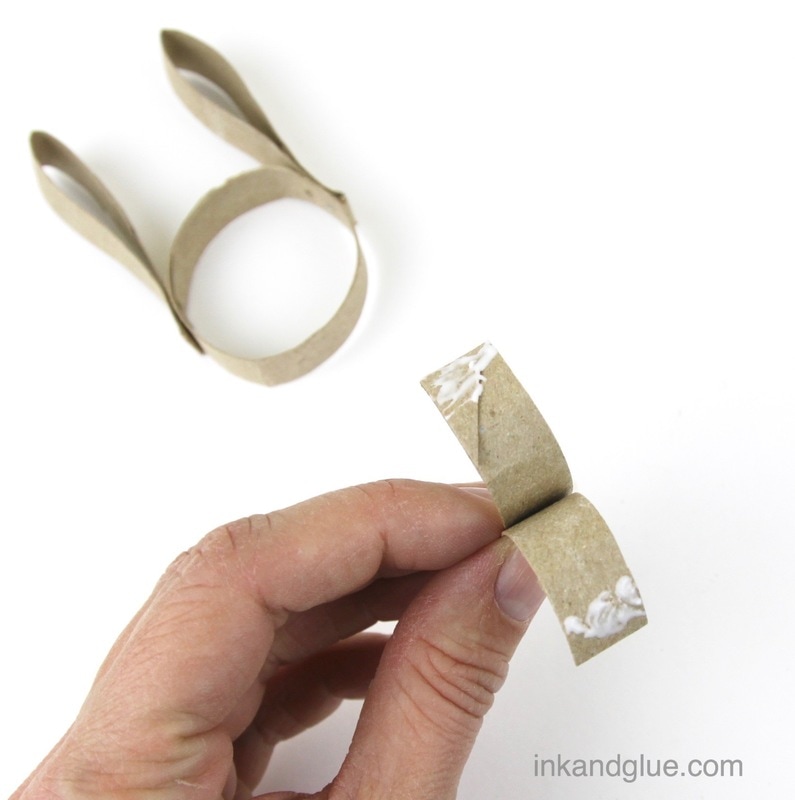
Apply tacky glue to a half-inch or so at the end of each wing, on top of the curl. Insert the shape inside the head piece, and bend and press the wings in place where you want them.
You are now free to decorate your rabbit head at will! As you can see, I simply painted mine with craft acrylics. To hang them, I wove a piece of thin cotton string through the ears. Easy! 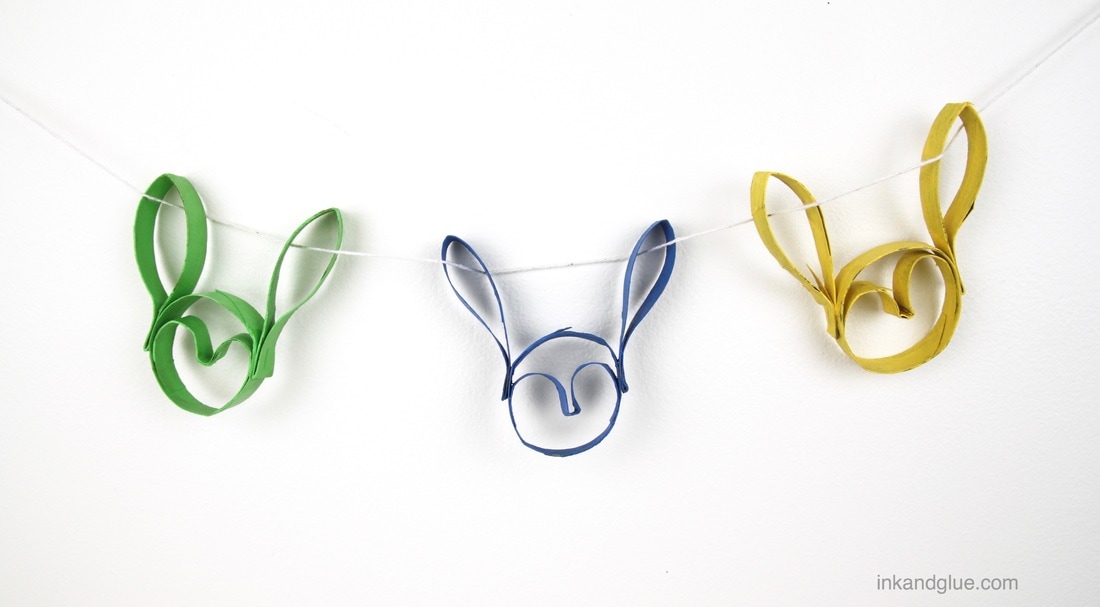 xo!
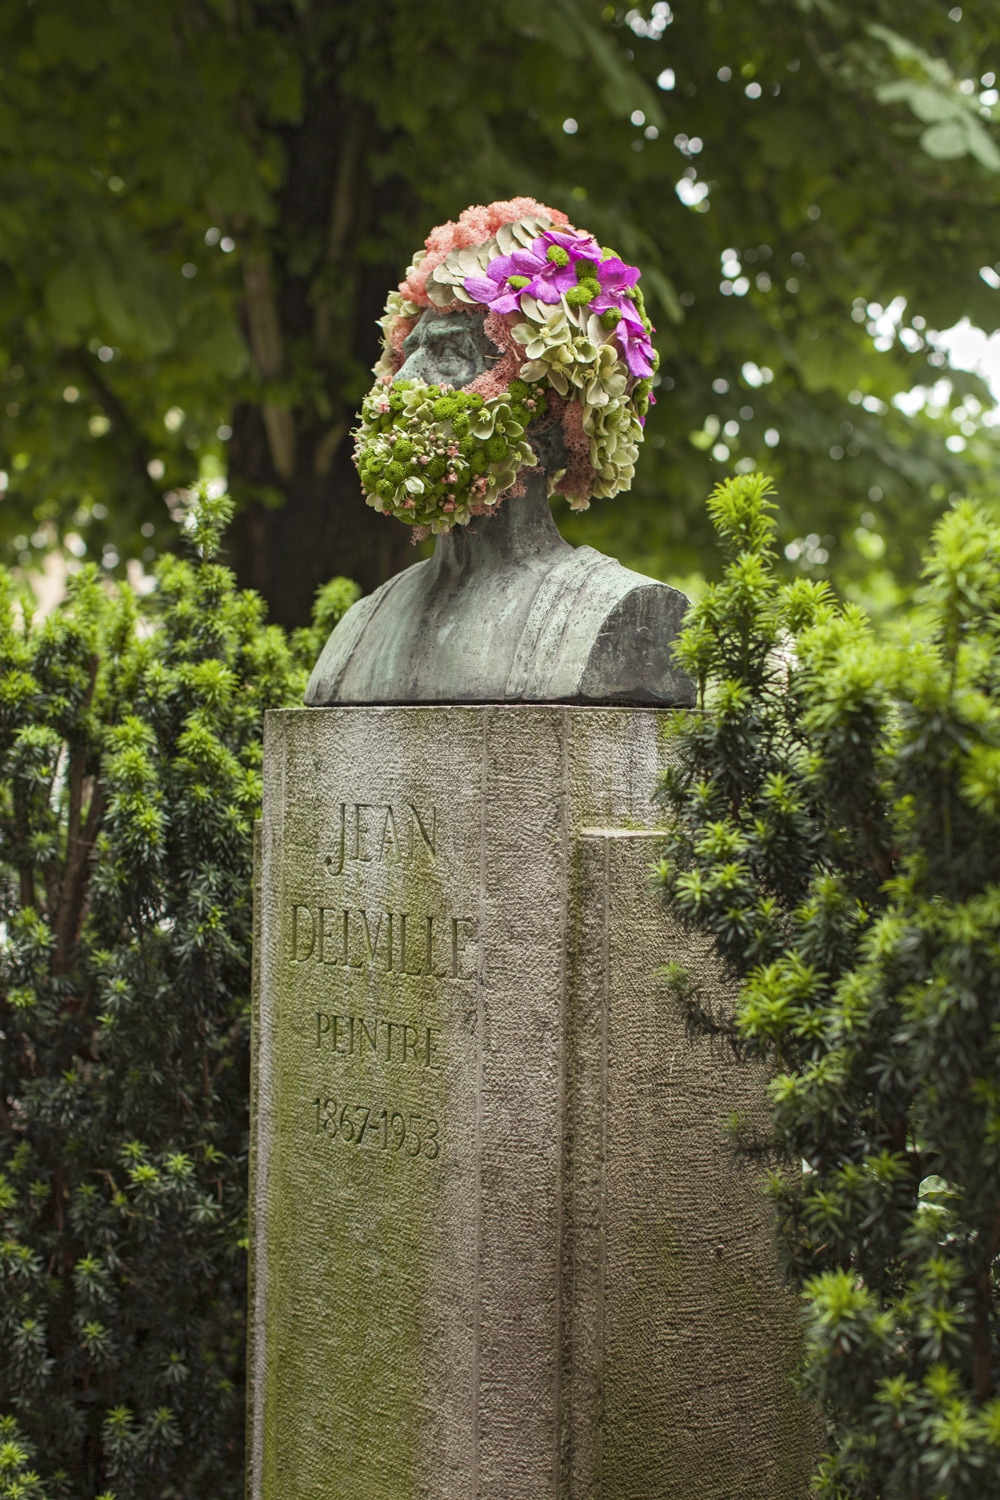
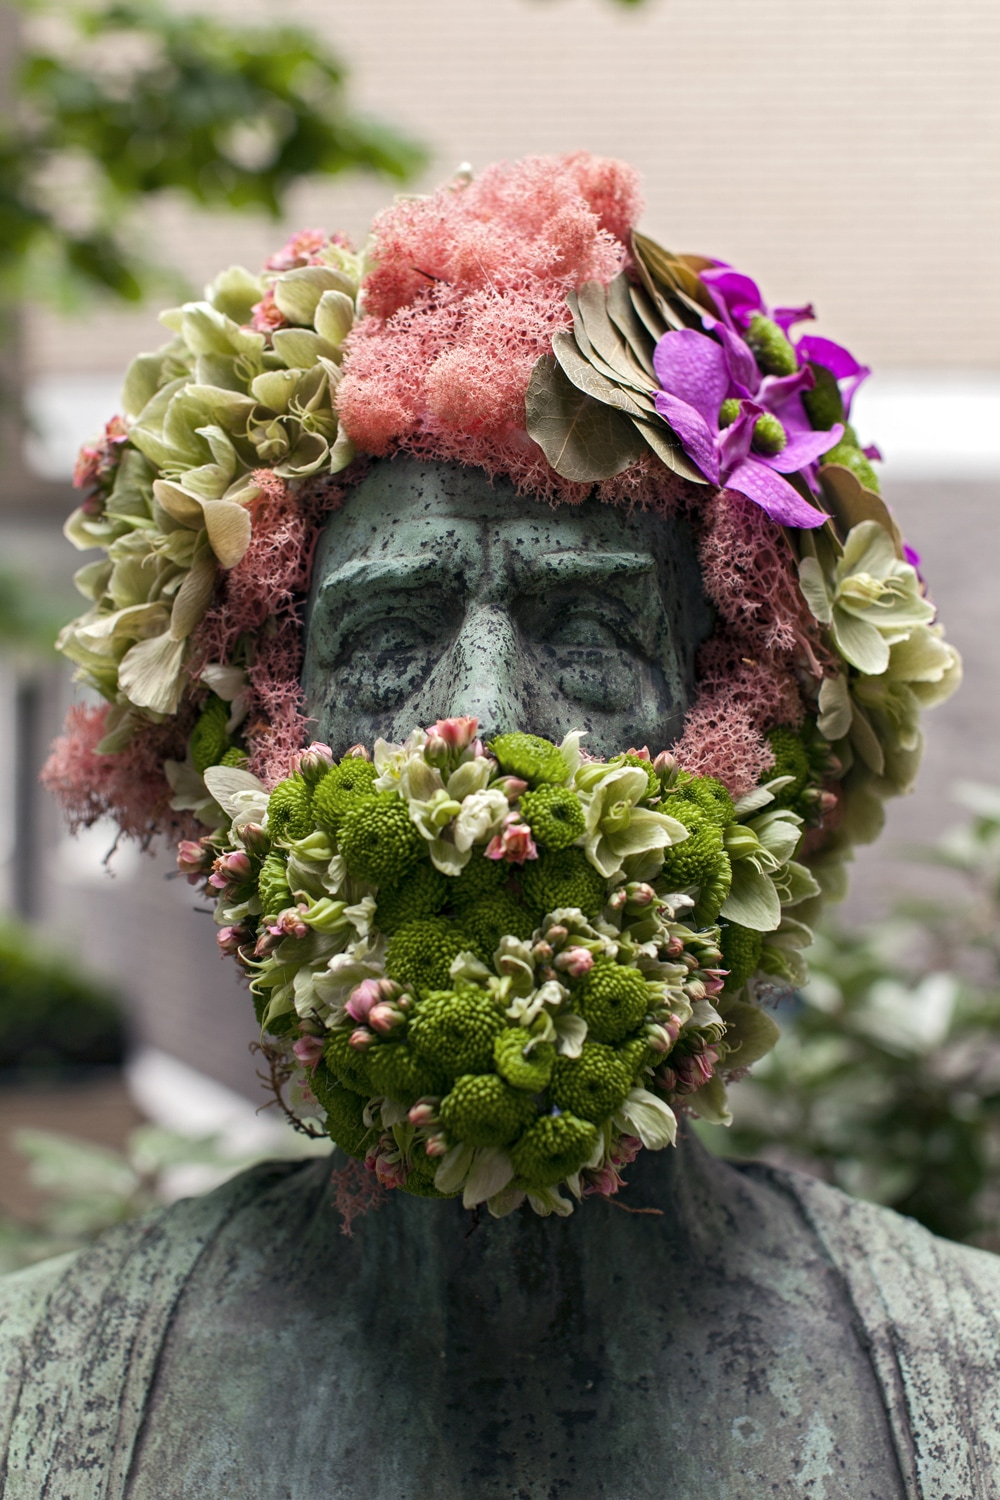
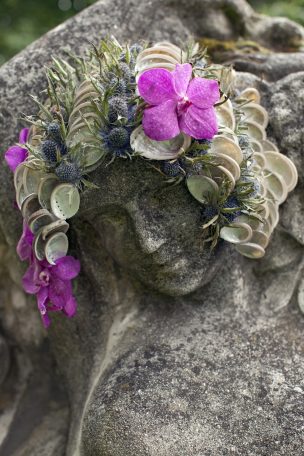
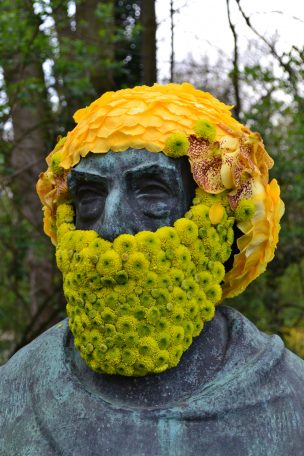
Have you met Geoffroy Mottart? He's a florist and artist in Brussels who uses his floral materials to beautify—temporarily—the often-overlooked statuary around town.
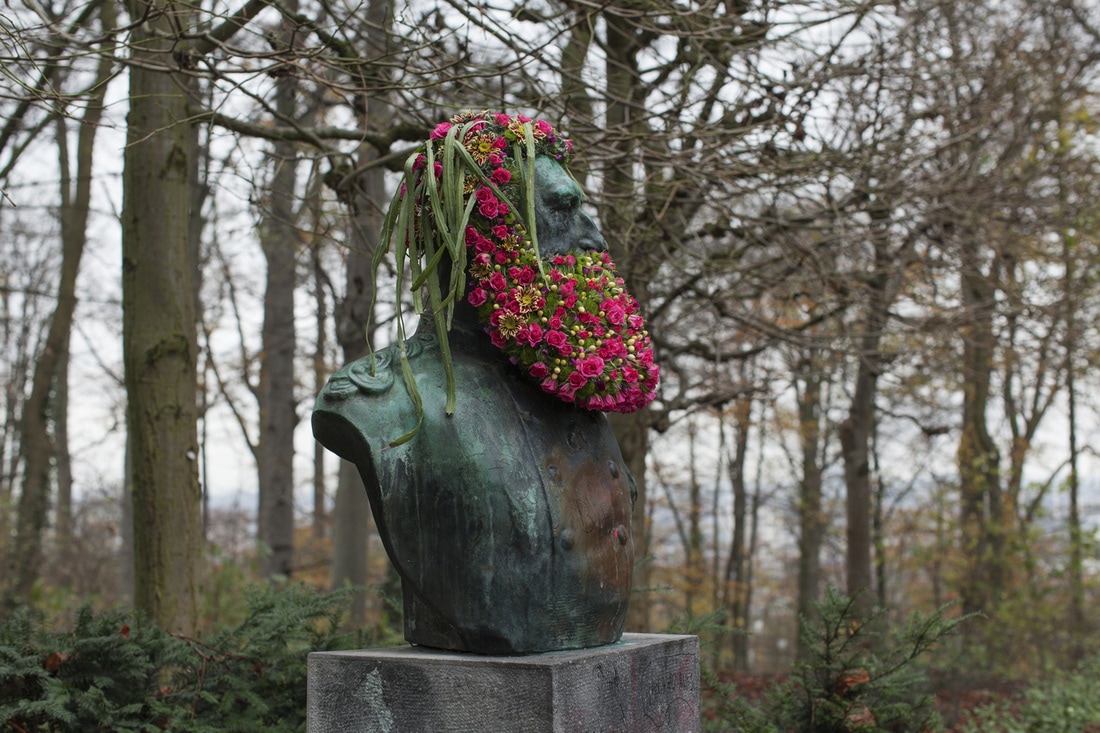 I love this kind of guerrilla art, because it's ephemeral, respectful (mostly) of what's already there, and very well executed. Go to his website to see even more. (And, if you're in Brussels and can speak French, take a floral-arrangement class with him!)
xo
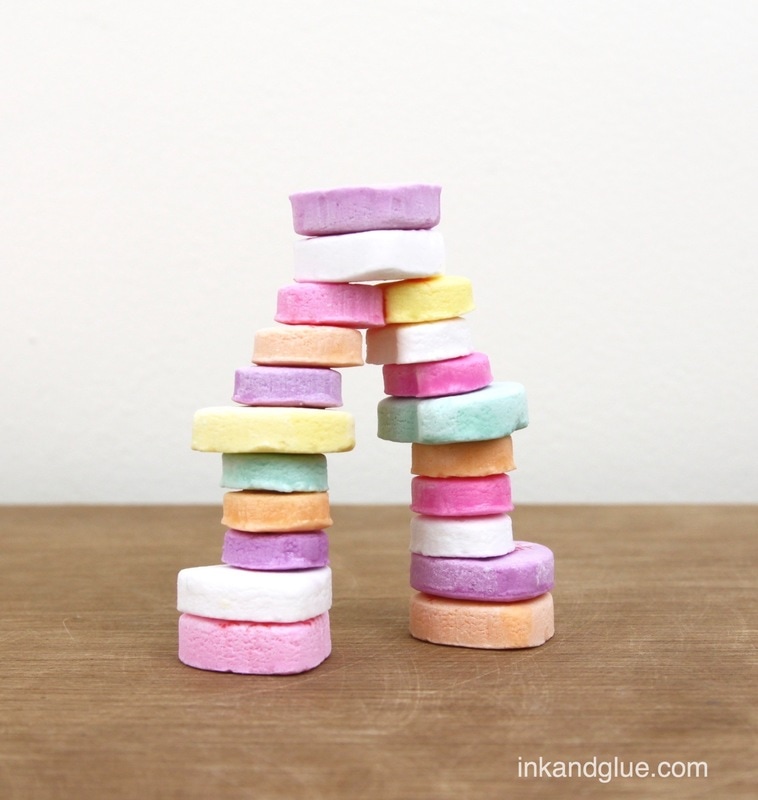
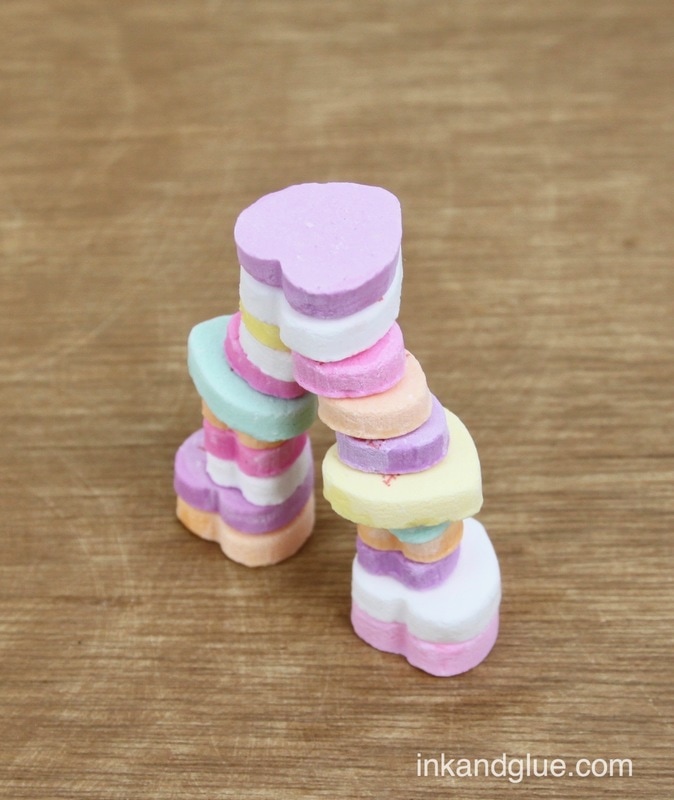
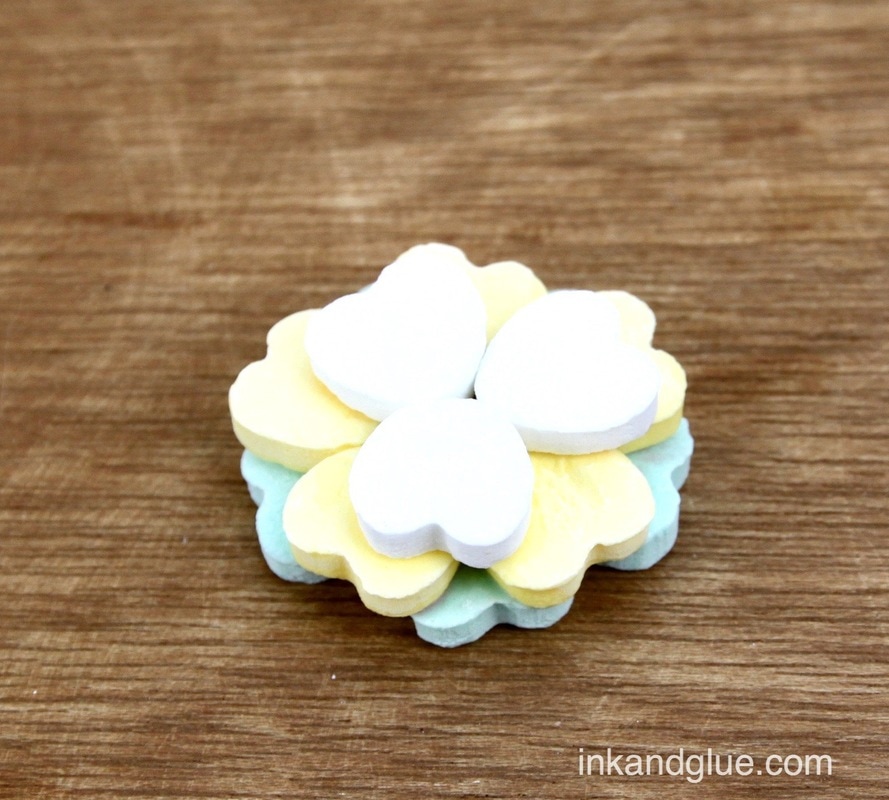
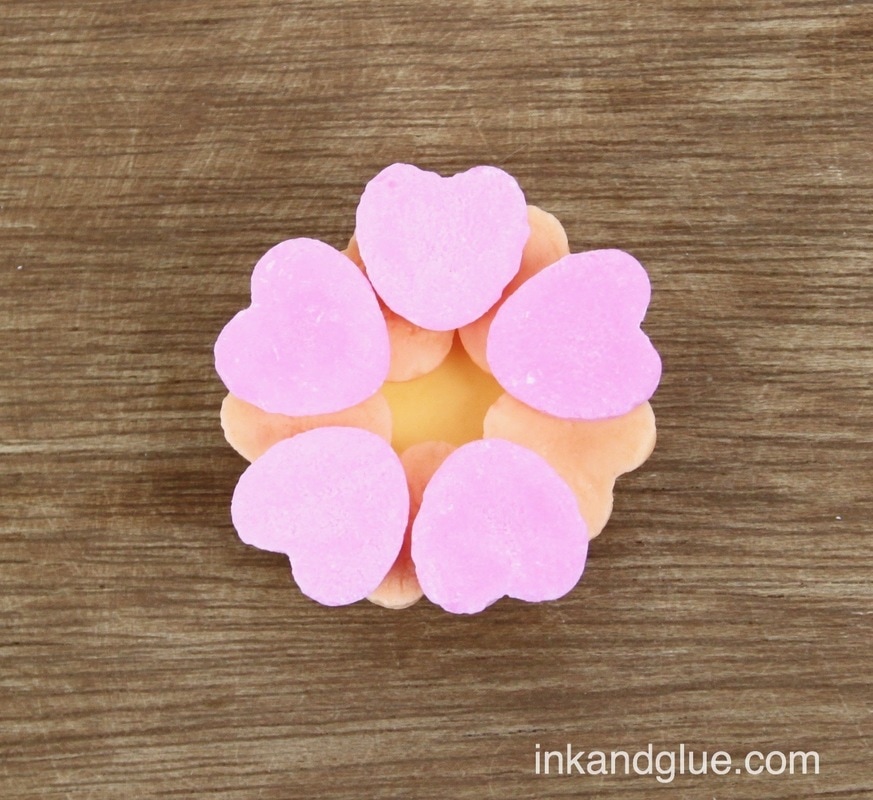
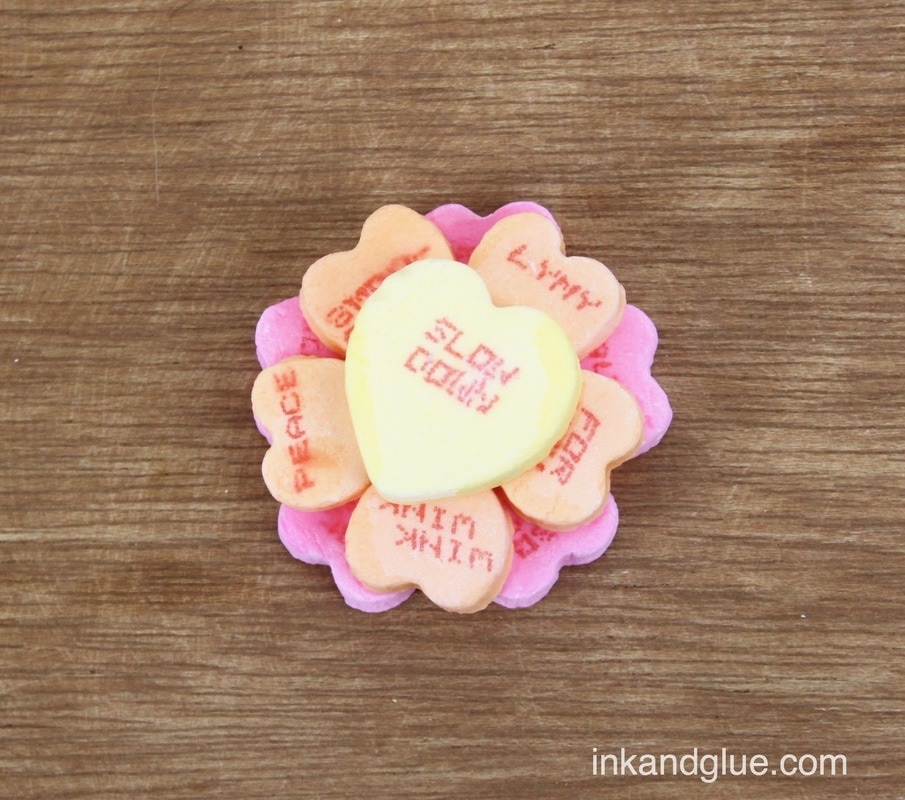
Valentine's Day was just a few short days ago, which means you either 1. have plenty of not-very-tasty conversation hearts candy around the house, or 2. can purchase bags of said candy at a deep discount. The two bags of candy I used for these little structures cost less than $2, total. And I have plenty left. PLENTY. But what to do with these ubiquitous candies? Eat them? Maybe a few, before you realize you're never going to make it through the entire bag. But they're so appealingly colorful and sweetly scented... Well, here's the magic thing that I discovered: All you need to attach two candy hearts together is WATER. Yes! Just water, which means whatever you make is still totally edible. Pour some water a shallow dish, dip a heart in it (try to only wet the side, don't dunk it — the "ink" will run), press it to another heart, and let dry. You do need to let them dry overnight, but then look what happens: 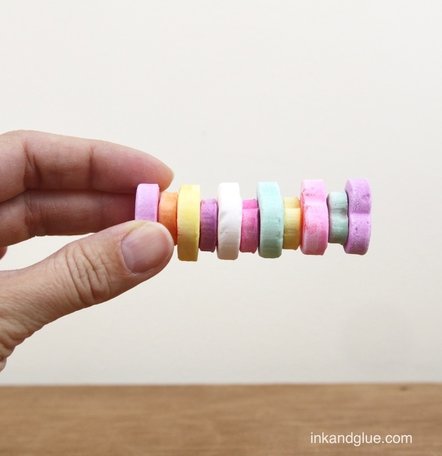 That is adhesion, friends. Here are a few more little things I made using this method. The flowers in particular would make great cupcake toppers. "Glue" green hearts together for St. Patrick's Day!
Here's to playing with your food!
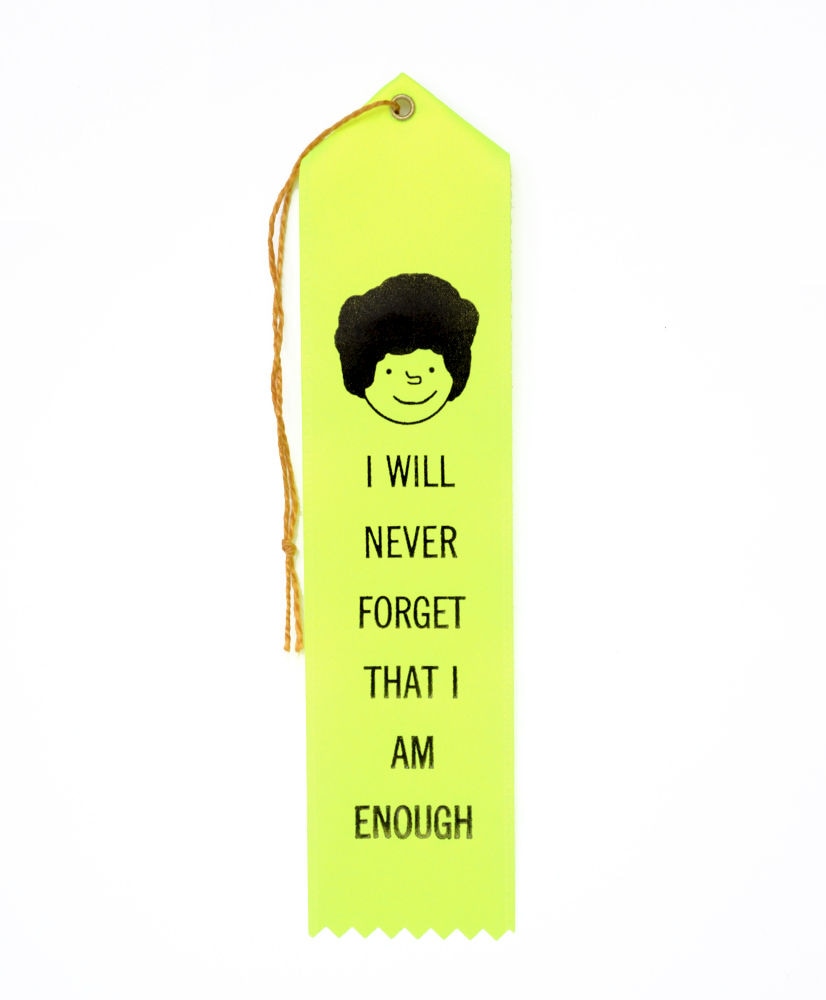
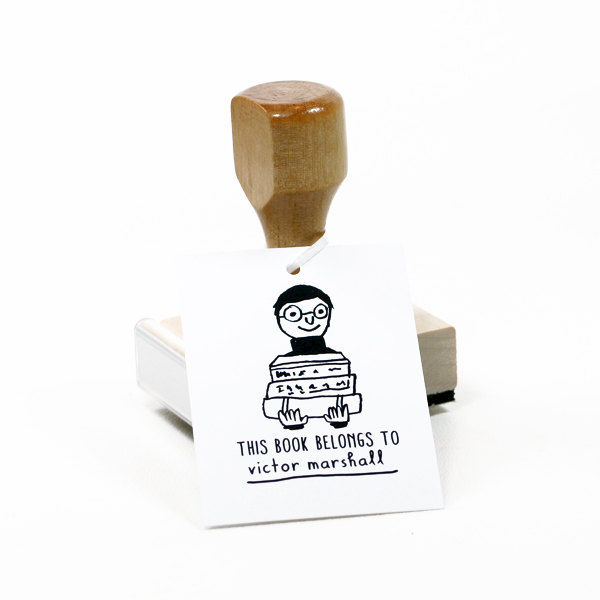
xo Have you met Sarah Neuburger? She is the artist behind The Small Object. I first encountered her work at a Renegade Craft Fair in NYC, years ago. She was mostly showing examples of her incredible custom wedding toppers and her stamp sets. She's since expanded her line to include high-quality prints of her illustration work, including this kids-room-perfect "The United States of Dogs" poster. (Some states have an official state dog, but for those that don't, Sarah chose for them!) 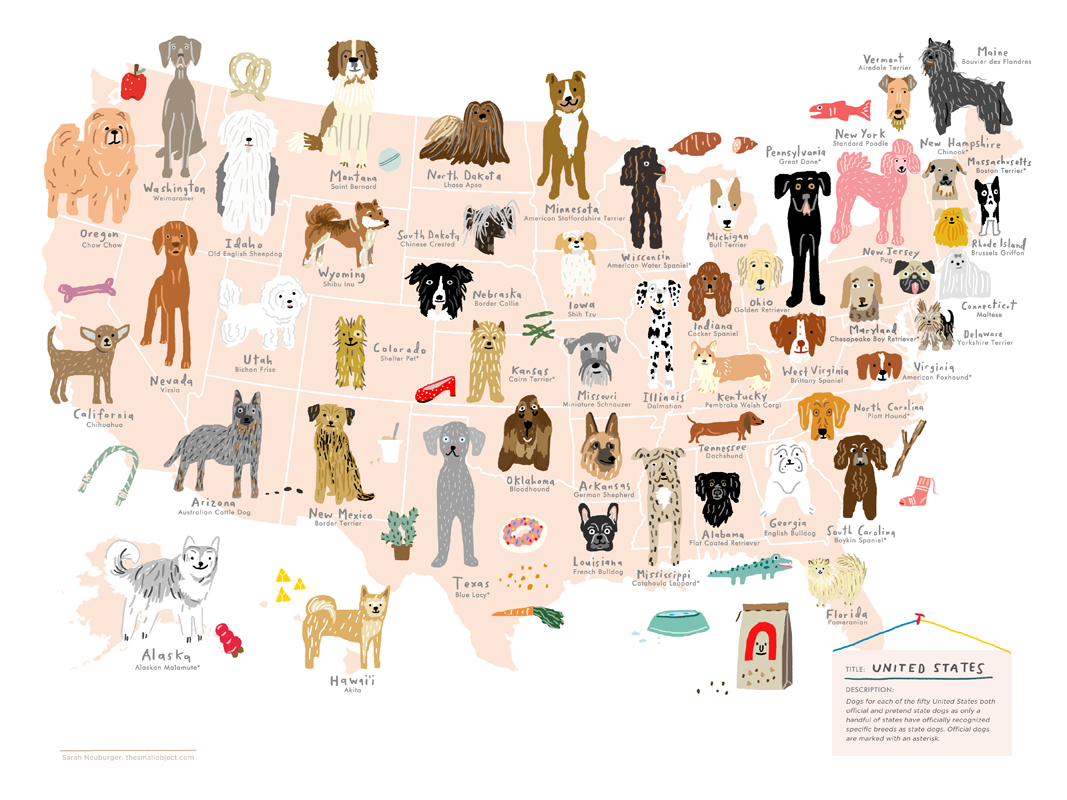 I appreciate the simplicity of this inspirational print, below. Way better than a "hang in there" kitten poster. 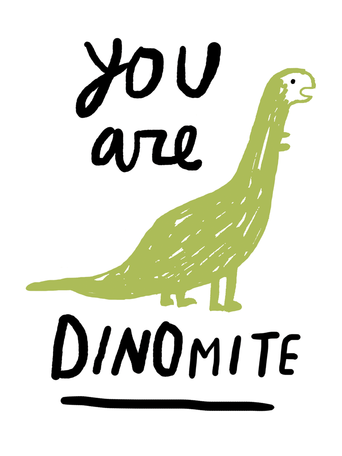
It's Valentine's Day today, which means you're probably (hopefully?) done with all of your Valentine crafting needs. So I'm moving forward, to the past, with this circa 1967 idea. 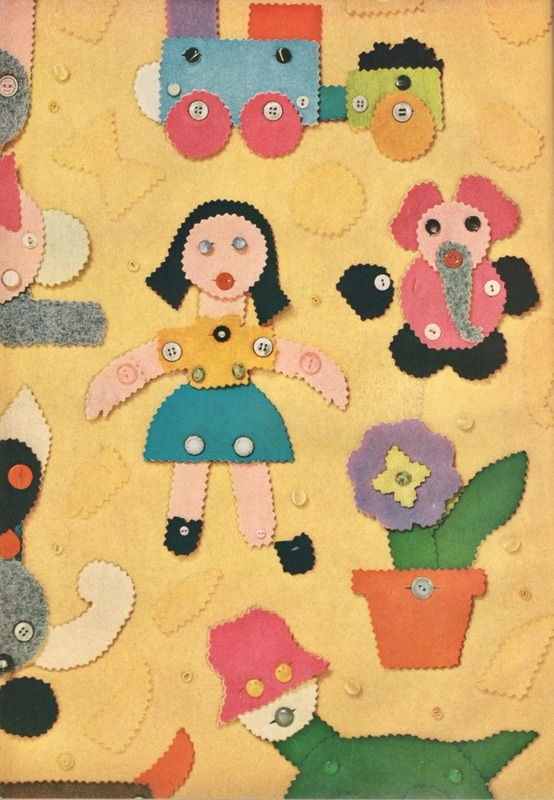 The idea is a simple one, easy to reproduce yourself: Cut shapes out of felt, and sew buttons on and/or add slits for buttonholes. The only problem I see here is that you have to be comfortable with sewing on a seemingly unending number of buttons. And, you need to be mildly strategic about your button/buttonhole placement. So, two tricky areas.  Once you have everything made, you can swap limbs and heads and tails and everything, and create your own version of The Island of Dr. Moreau. There are many, many pages of patterns in the back of the magazine, so I only scanned a portion of them so you'll get the idea. 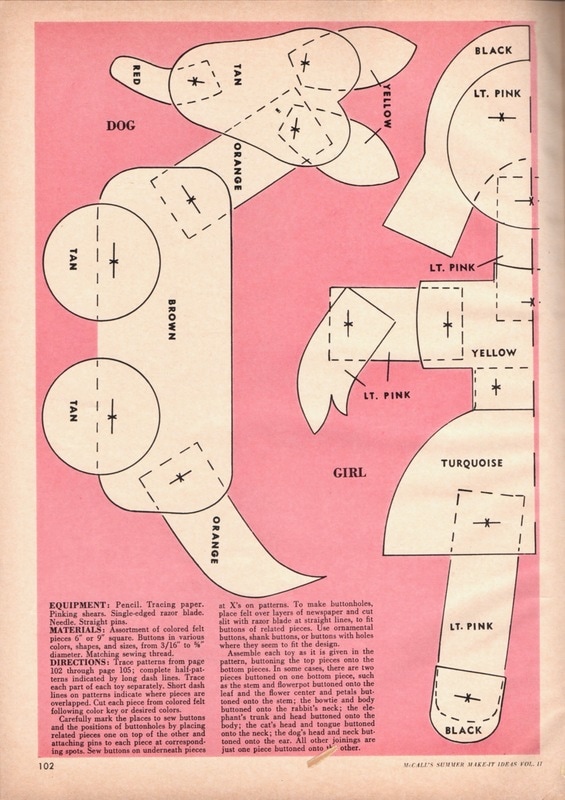 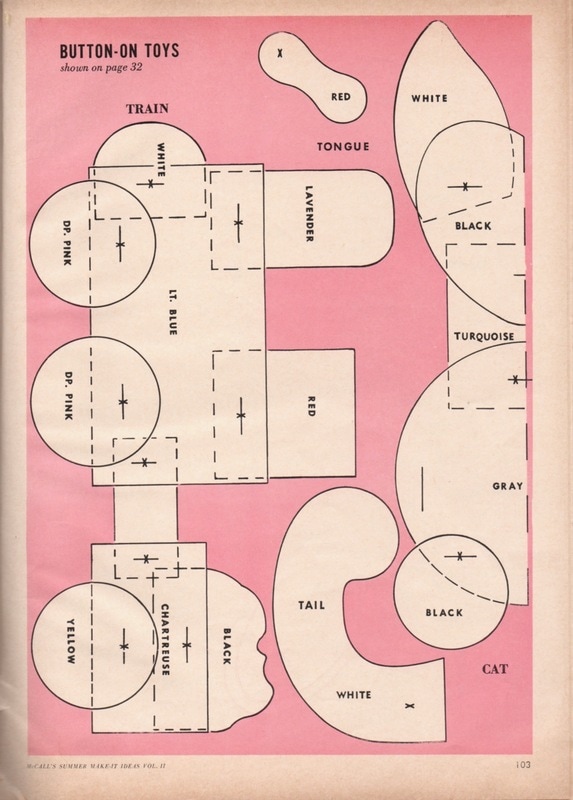  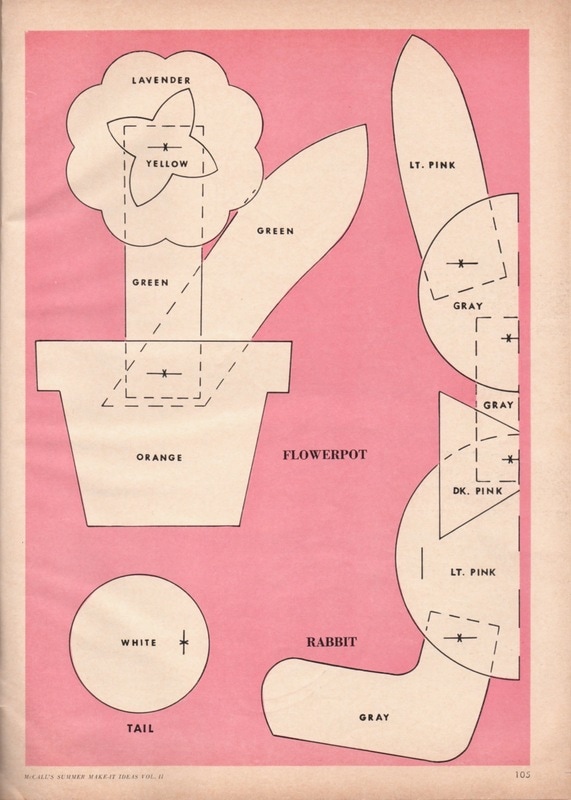 Simple shapes, simple idea, super cheap, potentially fun. I'll take it!
xo It's a snow day here — literally everyone in the state is home, all schools/offices/stores are closed. It's been snowing hard for hours. I may have gotten a little punchy, a little silly. And I made these Valentines, suitable for the special woke person in your life. 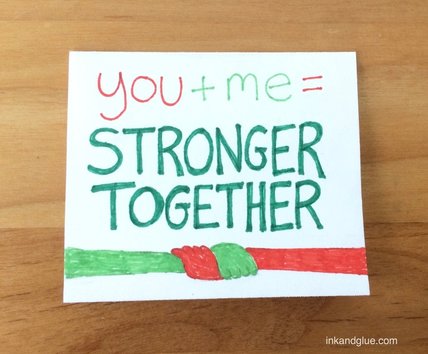 Are these kid friendly? Well... Maybe, if you have the kinds of snarky, leftist kids I know. 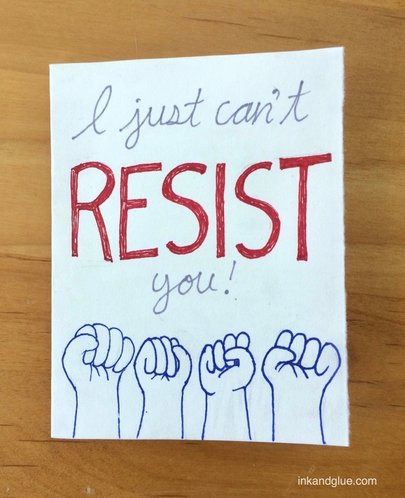 Of course there are lots of protest signs that need no alteration at all. "Love trumps hate" is a good example. 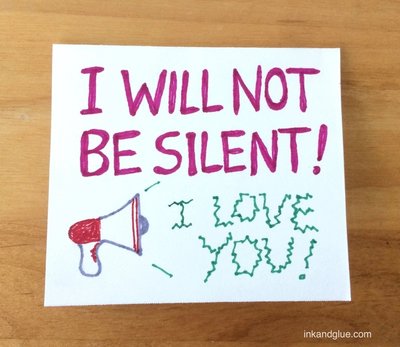 Don't worry—I didn't go anywhere near the, ah, cat-related slogans. But this last one is definitely meant for adults only. I recommend protesting with your partner, and your kids too; demonstrating your compassion and standing up for civil rights brings families together. 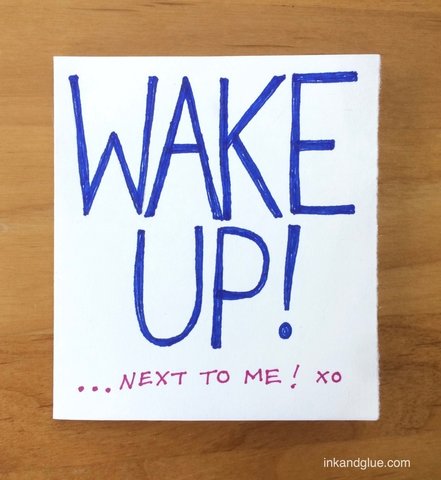 xo!
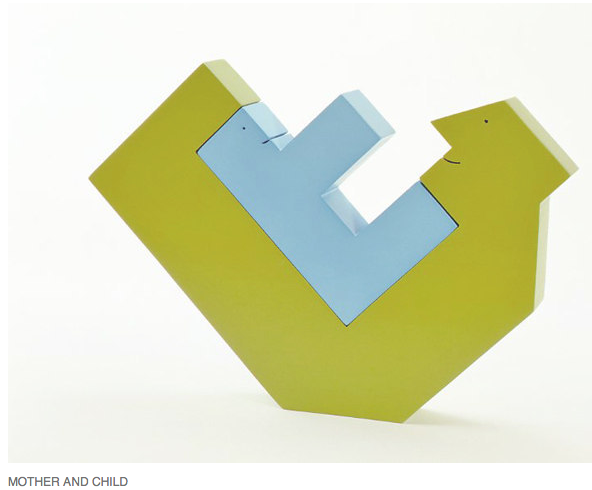
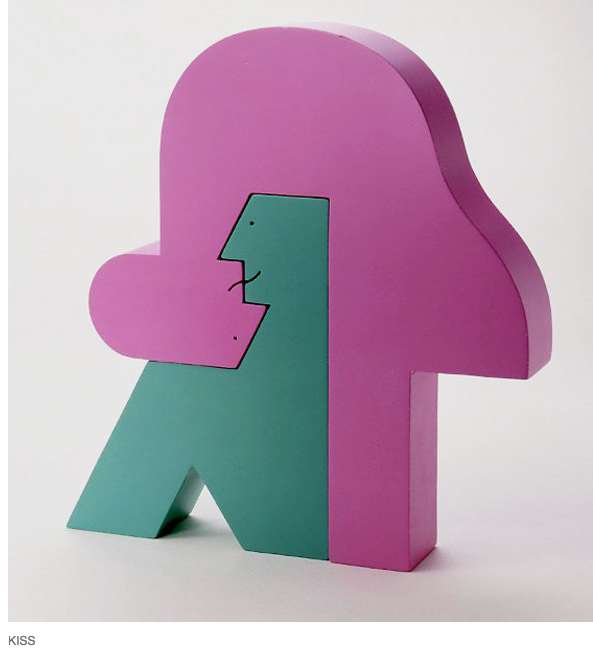
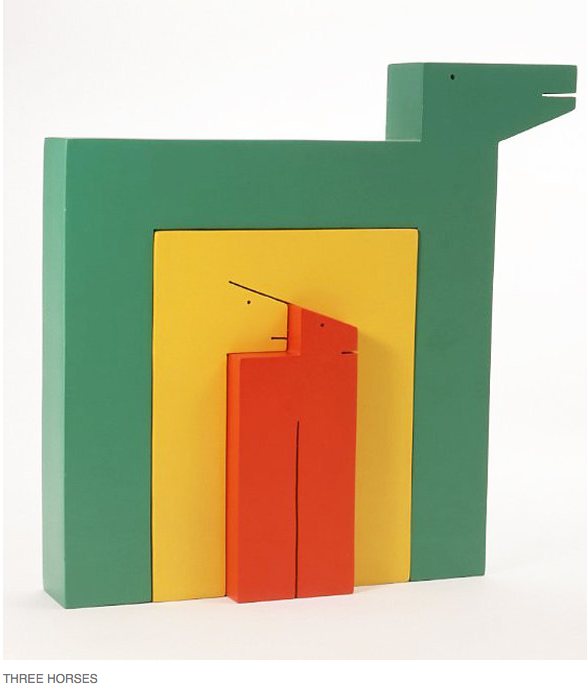
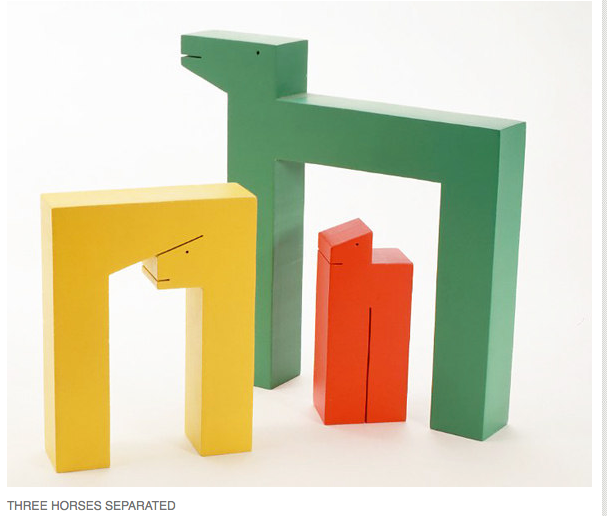
Have you met Zenji Funabashi? He's a Japanese artist, graphic designer, and illustrator. One of his projects is making colorful wooden sculptures made of scroll-sawn pieces that fit snugly together. They remind me of MC Escher patterns, and of similarly half-art-object, half-baby-toy "puzzles" you can find in your crunchier kids' toy stores. Click on an image to go to Zenji's portfolio on Behance. You can find an even more comprehensive portfolio at the Tokyo Illustrators Society. 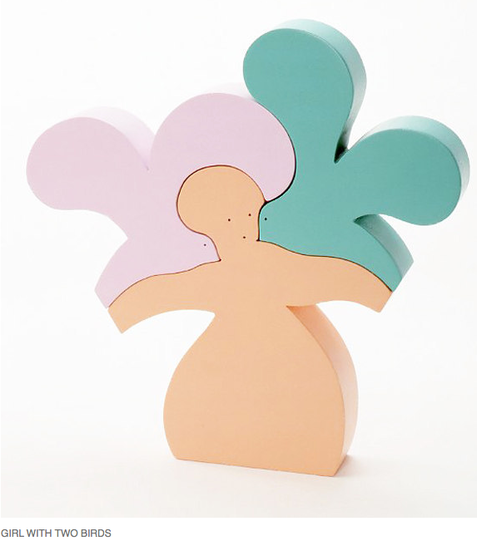
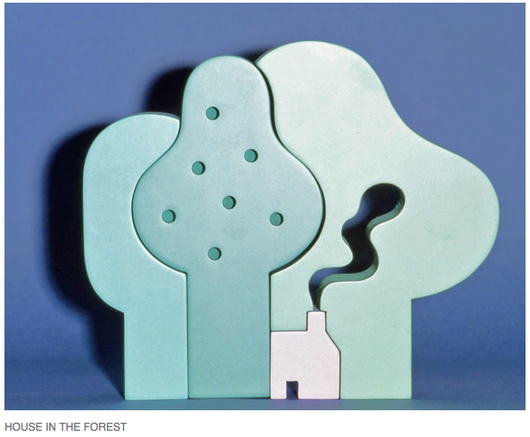
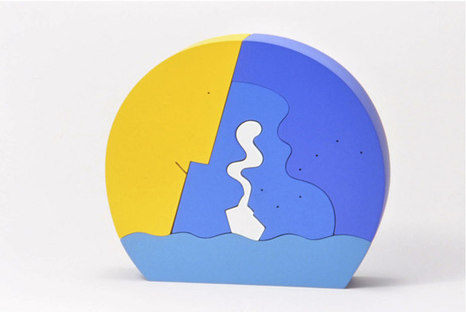 The one above is called "The Big Dipper." 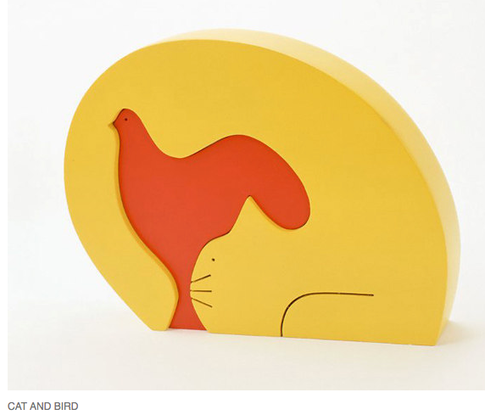 It's a fun creative puzzle to draw a simple outline of an object, and then try to make something fit that negative space—either surrounding the first outline, or budding off of it. Try it!
xo
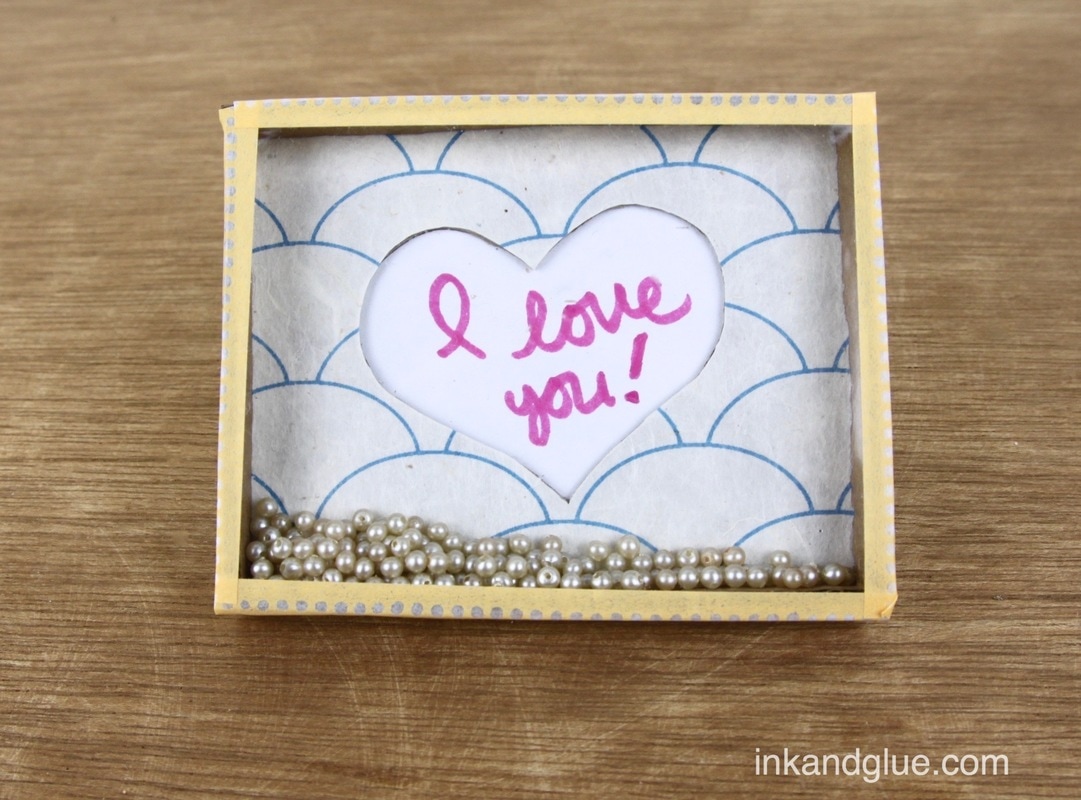
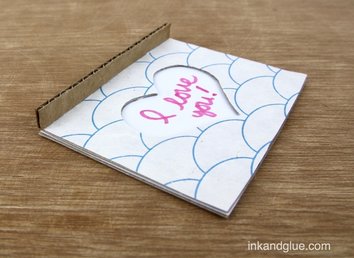
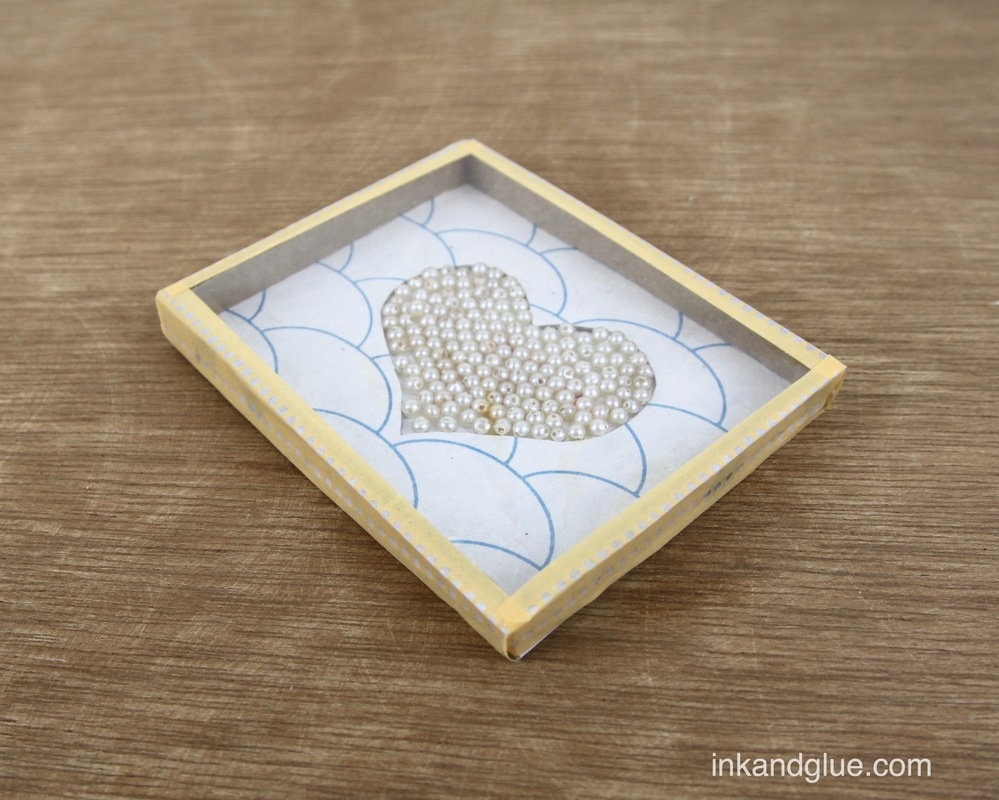
This is a tough project to write about, because who knows what these little bead/ball toys are called? Not me. I did a few google searches and "mini ball game" seemed to be a phrase that some knew, so I'm going with that. This one is a little different because shaking up the balls reveals a lovely message. But you still "play" it by tilting and shaking it until the balls all fall into place — one big area, instead of multiple single-ball spots. Here's how to make one like mine. Before you start, make sure you can source a flattish piece of clear plastic from a blister pack or a take-away container or a report cover. Mine is from a package of hole reinforcement stickers from Staples. Also, cut a couple of straight, even strips from corrugated cardboard, with the corrugations running the short way. Perpendicular to the length of the strip. I think you'll know what I mean. Now: Cut three identical rectangles from a cereal box, and one matching rectangle from a piece of white drawing paper. Cut a heart shape from one of the cereal box pieces. Align that piece on top of a second rectangle, trace it, and then cut out the second piece's heart. 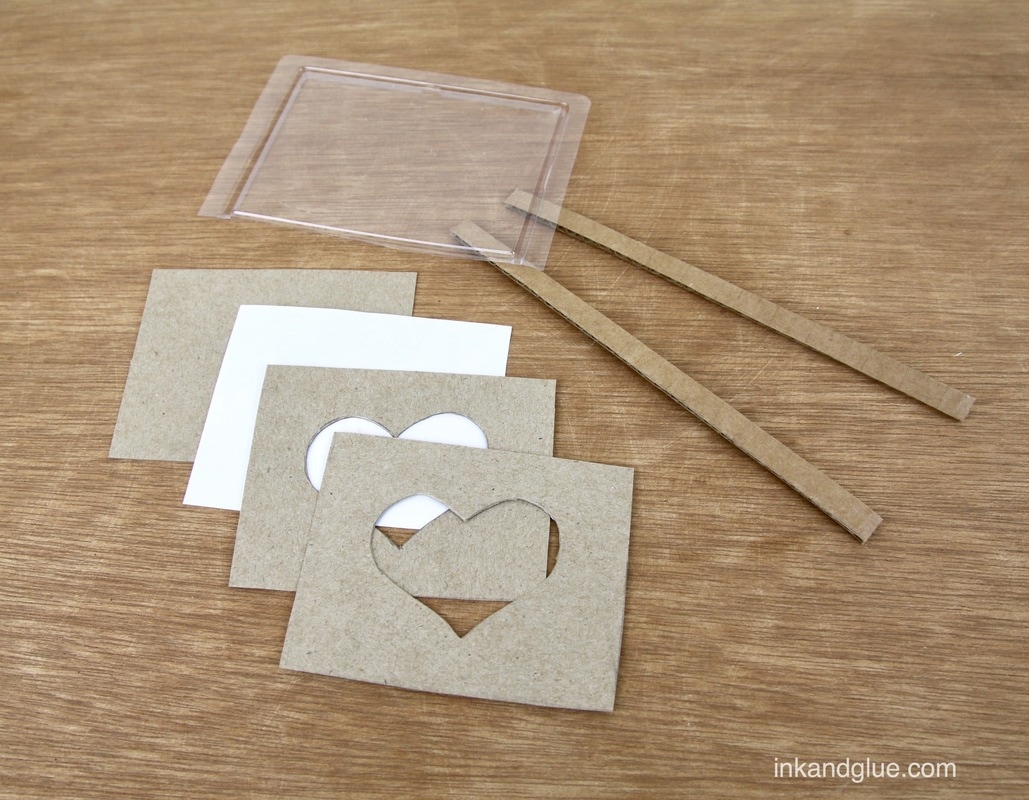 Align the heart-ed cardboard on top of the paper rectangle, and lightly trace the shape in pencil. Write your message inside the shape, then erase the pencil lines. This is what it should look like with the pieces stacked together: 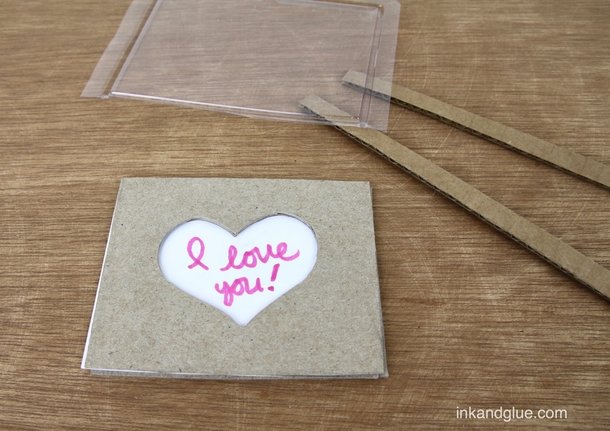 At this point it's safe to start do some gluing. Use glue stick to adhere the white paper onto the intact cereal box rectangle. Use tacky glue or glue stick to adhere the two heart-ed rectangles together, making sure the hearts align nicely. Lay the heart piece, front-side down, on top of the back of a piece of decorative paper, and trace the outside edges and the heart. Cut them out. Glue-stick this on top of the heart piece. 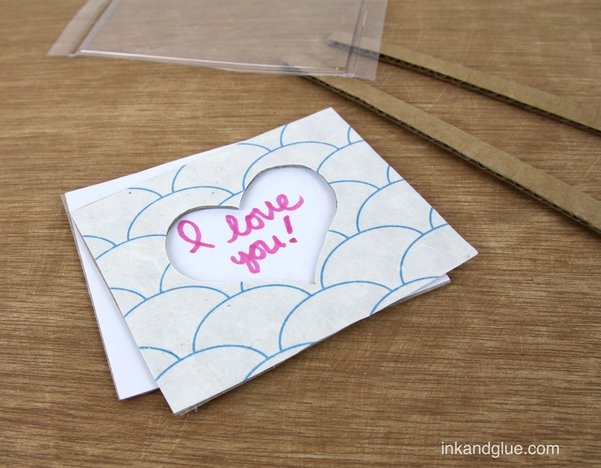
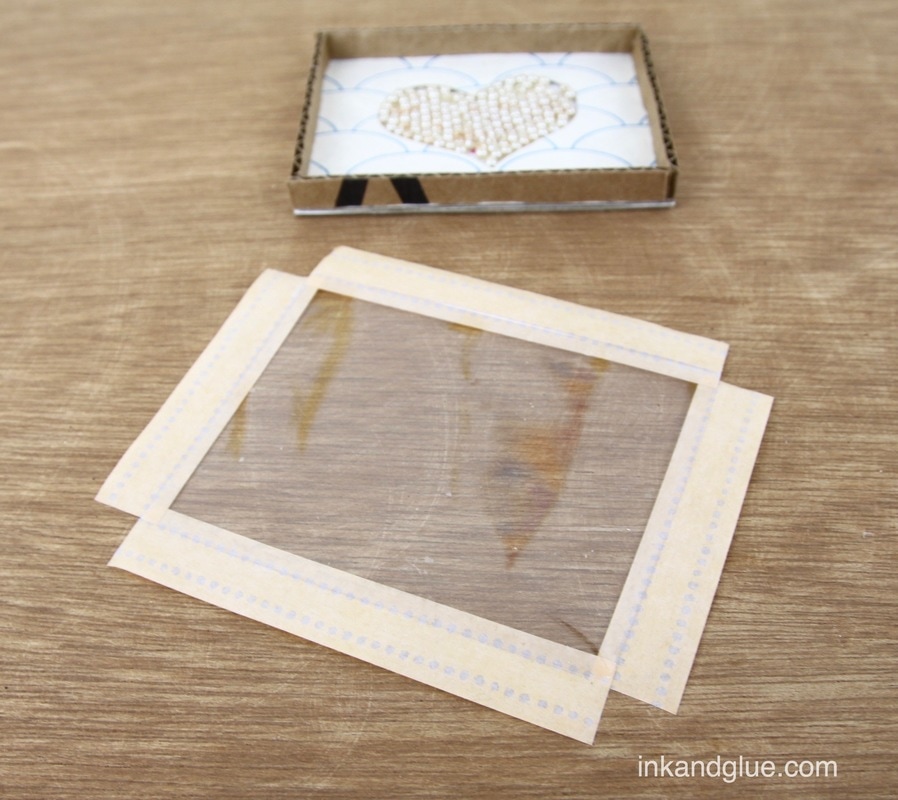
 It's time to add a bunch of tiny balls! I have an ancient strand of round, very-faux pearl beads that were just right for this purpose. Any small glass beads would work fine, even if they aren't perfect spheres. Add enough to cover the heart without being too impossibly-packed full. You want to make this a "winnable" "game." 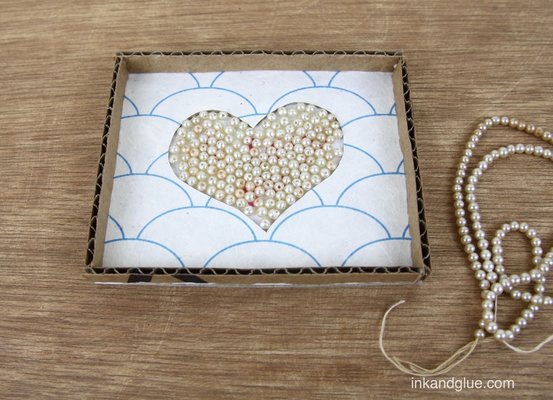 It's cover time! Place the box you've just made on top of the plastic piece and make some tiny dots with a marker to indicate where to trim it.  Tape the plastic piece to the top with washi tape (or any narrow tape you have). I did this in a finicky way: I stuck tape to the four edges of the piece, keeping the sticky-side up so it wouldn't get attached to anything, and I trimmed the four strips to fit as I added them. My sides and edges came out a bit crooked, so I assume I got the plastic piece turned around (and my box isn't perfectly even and square). So: Only do this finicky method if you're finicky all the way through.
And you're done! Have fun, then give it to a special someone. (You, yourself, count as a special someone.) xo!  I ran out of time last night, so here's just a look at what I was working on. More tomorrow! xo  |
Categories
All
Archives
March 2017
AuthorI'm Debbie Way, an artist and writer who enjoys making things. |


 RSS Feed