|
Surely there's a better word than "leaf ball" to describe this fall nature craft, but I can't think of a clearer one. Decorative orb? Autumn star? Whatever it is, it's a pretty way to use pressed autumn leaves. Up where I live, a few trees have started to turn color. Now's the time to collect and press a dozen or two, so you'll be ready to make these globes in a couple of weeks—when you've brought out your sweaters from storage, and have returned to drinking tea in the afternoons, and fall is undeniably here to stay. Let's try to welcome it. 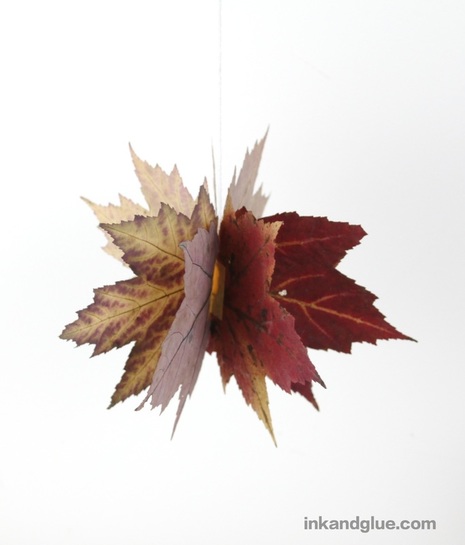 These guys are easy to make, but require 7 to 10 leaves of all one type, and of roughly the same size. If you use different sizes, you'll have a lopsided ball — not that big of a deal, but not the effect I'm going for. Your mileage, as they say, may vary. Start by cutting the stems from your leaves. 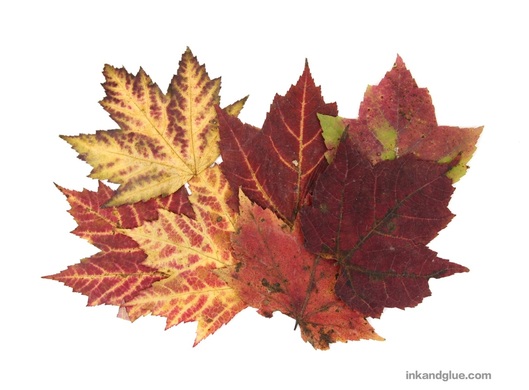 Stack the leaves so they're all aligned, then cut a straight line across the base of the stack.
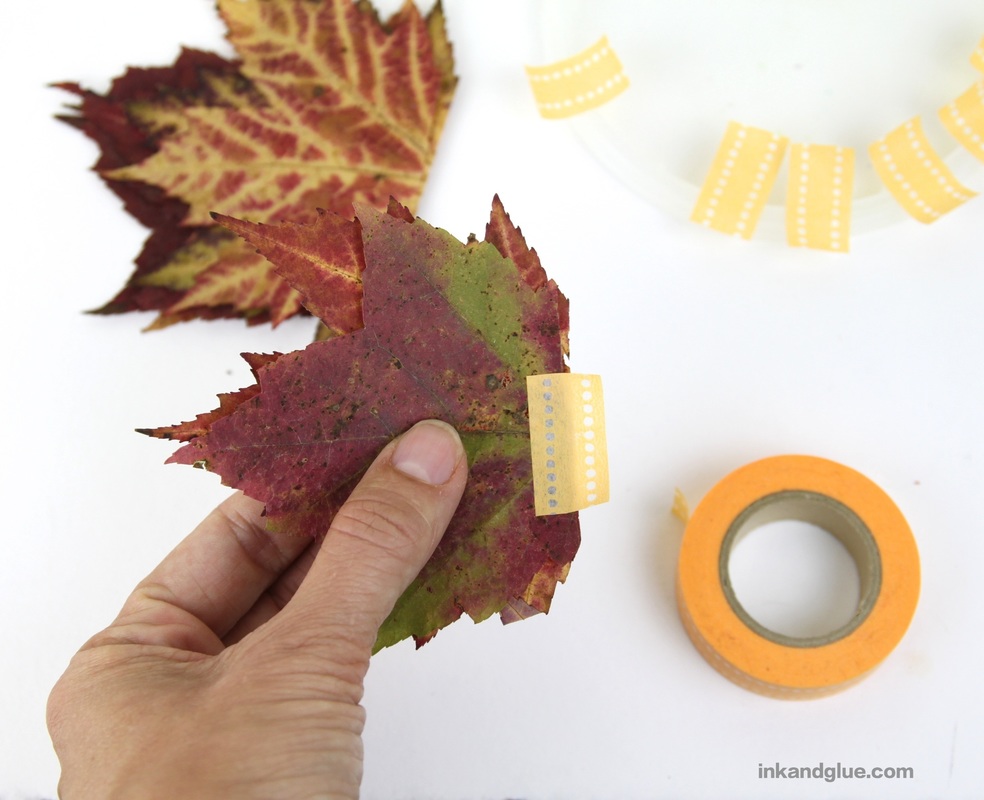
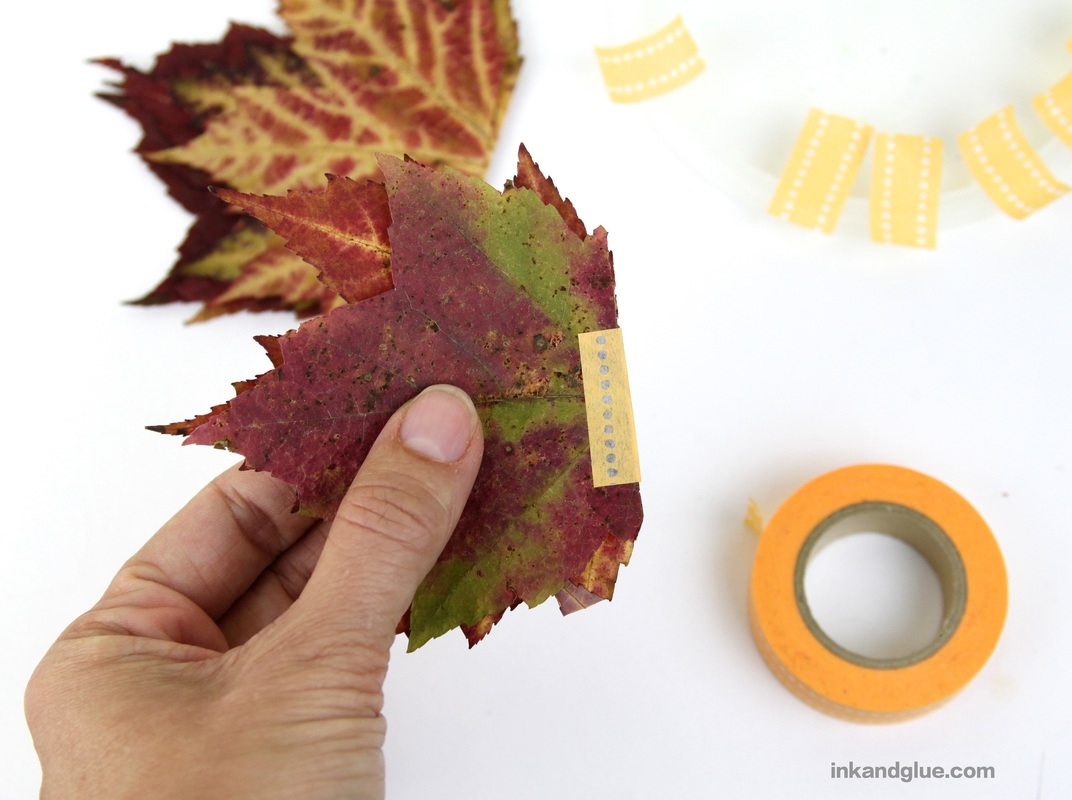
Cut a bunch of one-inch (or so) sections of washi tape and place them somewhere handy. I stuck mine lightly to the edge of a plastic lid. You'll need about 1.5 times as many pieces of tape as you have leaves. (So, if you have 8 leaves, cut 12 pieces. 13, to allow for mishaps.) 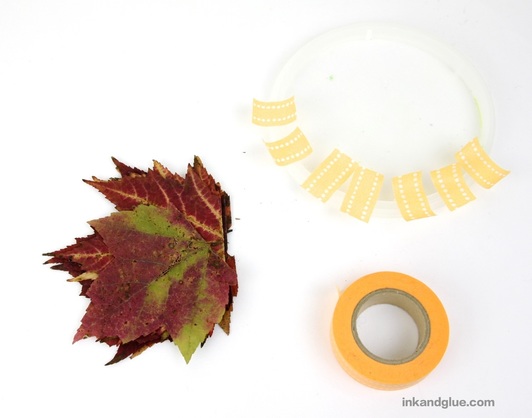 Pick up two leaves and align them along the cut edges. Stick half of the long side of the tape to the top leaf, and then fold it around to adhere to the bottom leaf. You've now connected two leaves with a tape hinge.
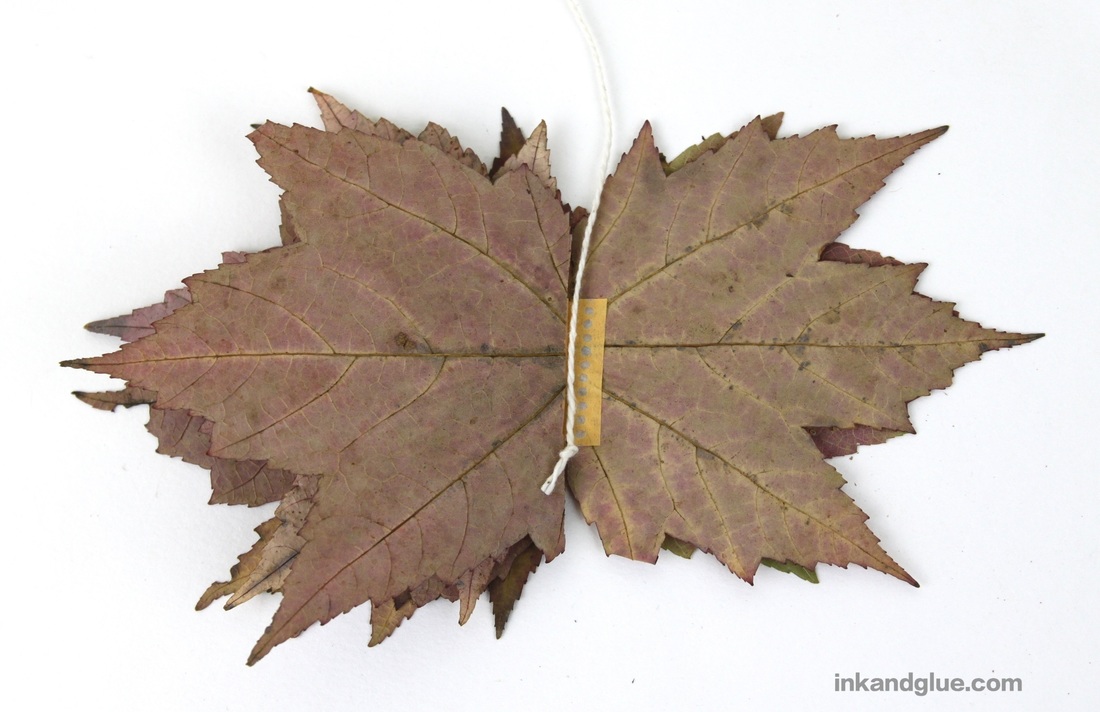
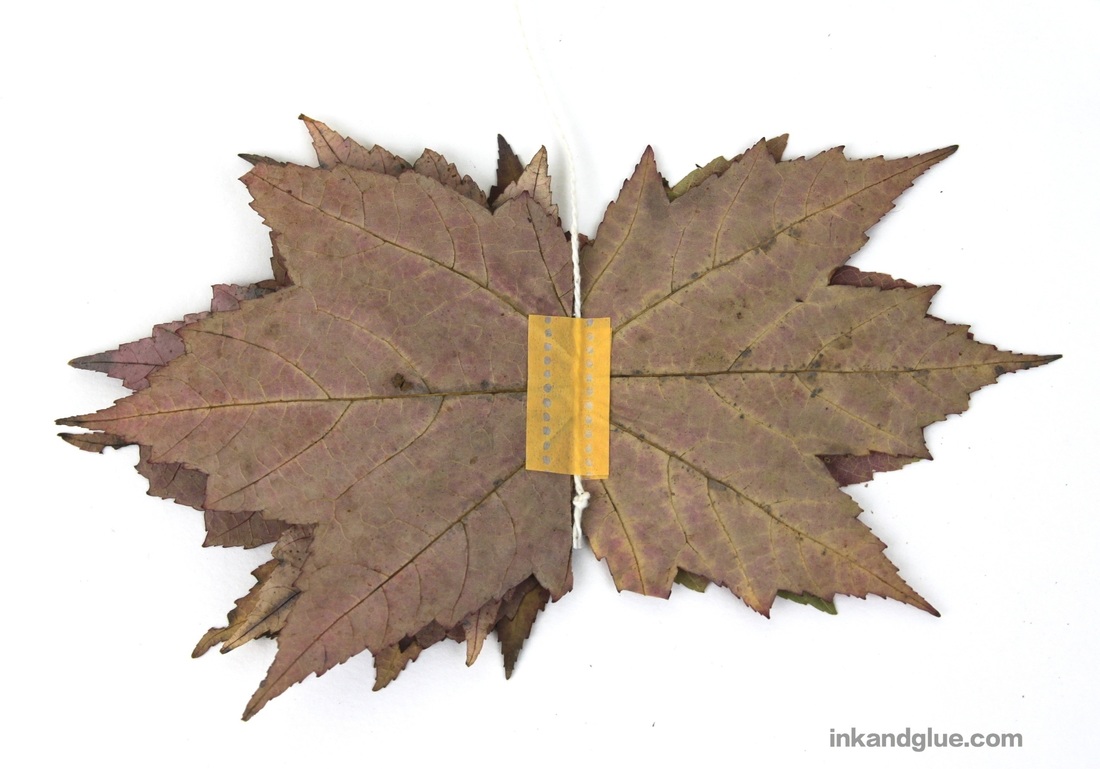
Do this with all of the leaves. If you have an odd number of leaves, just add a third to the top or bottom of a taped pair. Then, align two taped pairs along their straight edges, and join them with a length of tape. 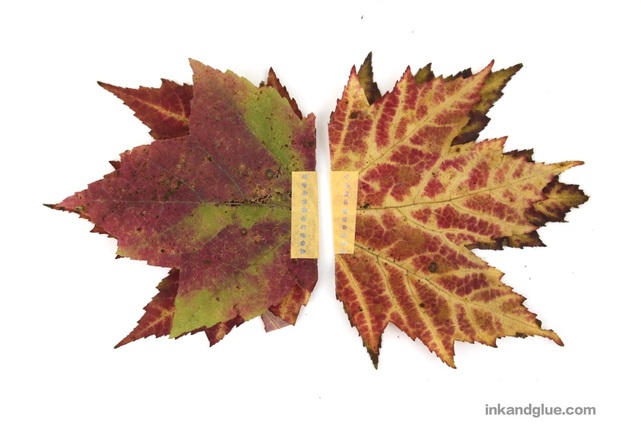 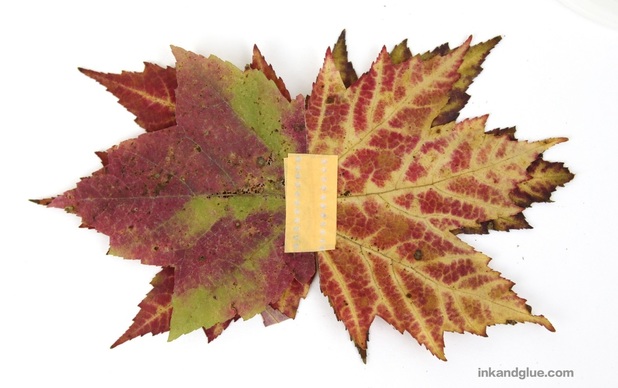 Keep taping pairs together until they're all attached by their hinges in one "book." Find one facing pair that doesn't have a tape hinge (if you have one -- if not, just use any pre-taped pair). Place the knotted end of a length of string in the center, and cover it with a piece of tape.
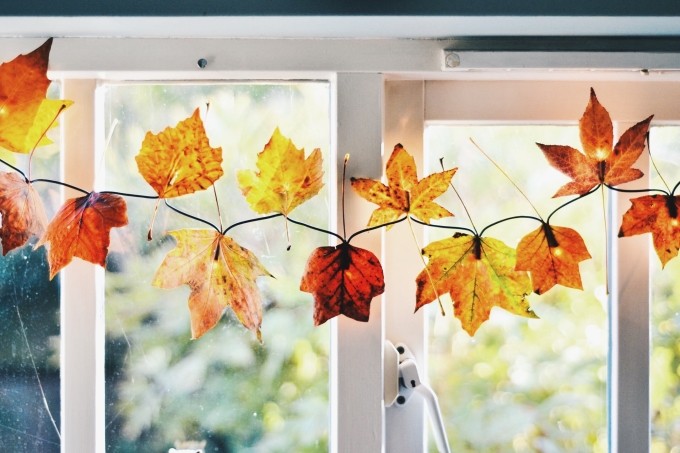
Pick up your leaf assembly using the string. Gently unfold and fold the various tape hinges to get a fairly uniformly-spaced ball. If your ball isn't hanging straight, extend the hinge channel for the string by adding more tape higher up in the center of a couple of the leaf pairs. 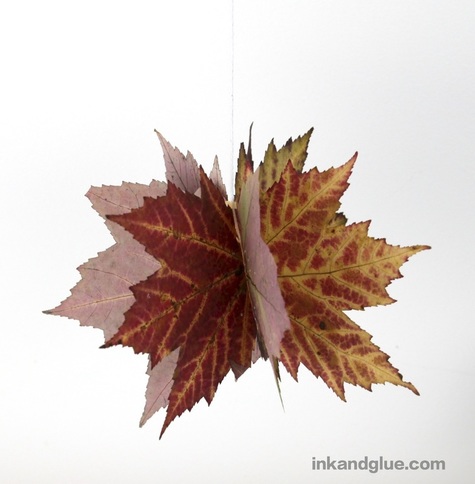 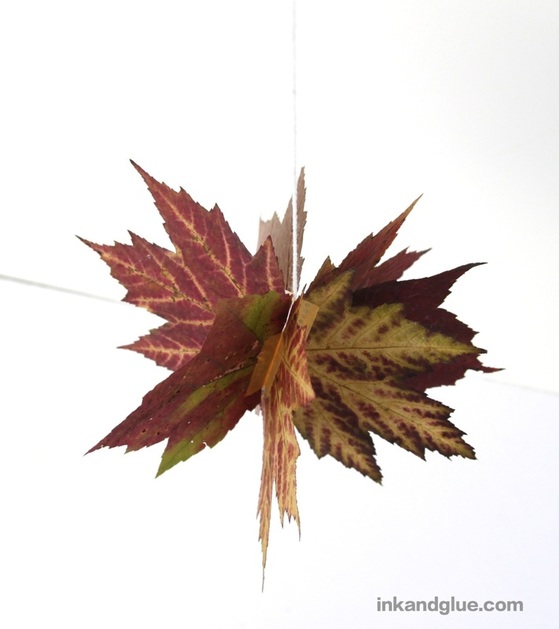 That's it! I like how star-ish these are. Get several of them together, hang them at varying heights over a table or mantle, and you'll be cultivating some serious fall spirit.
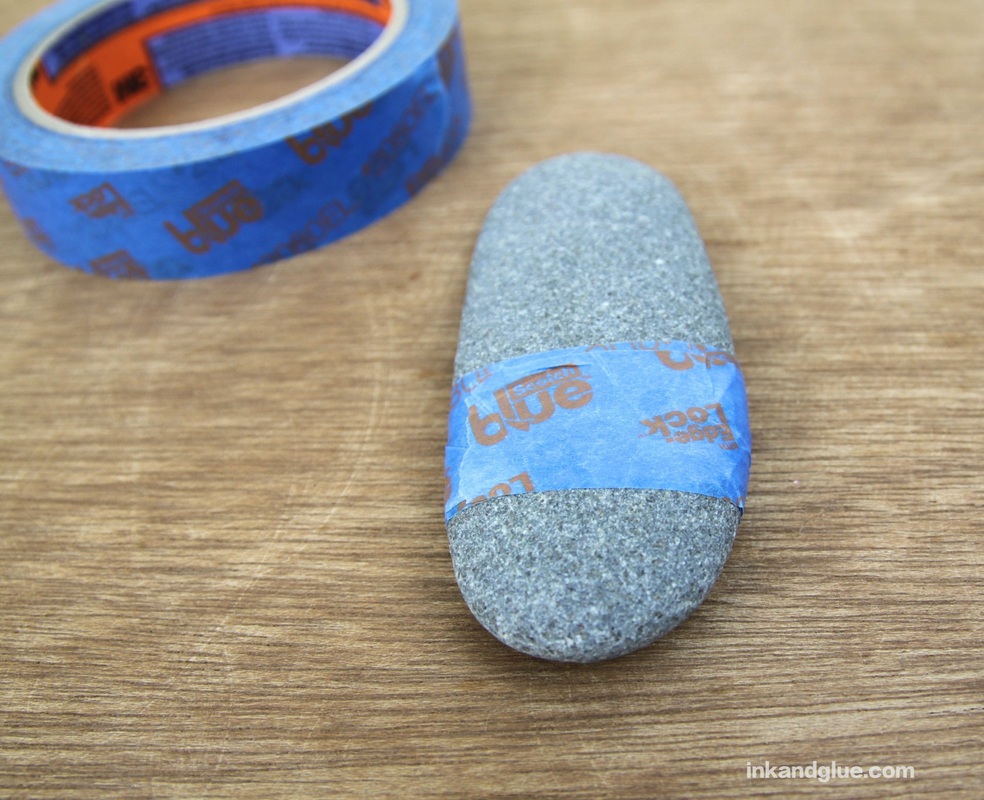
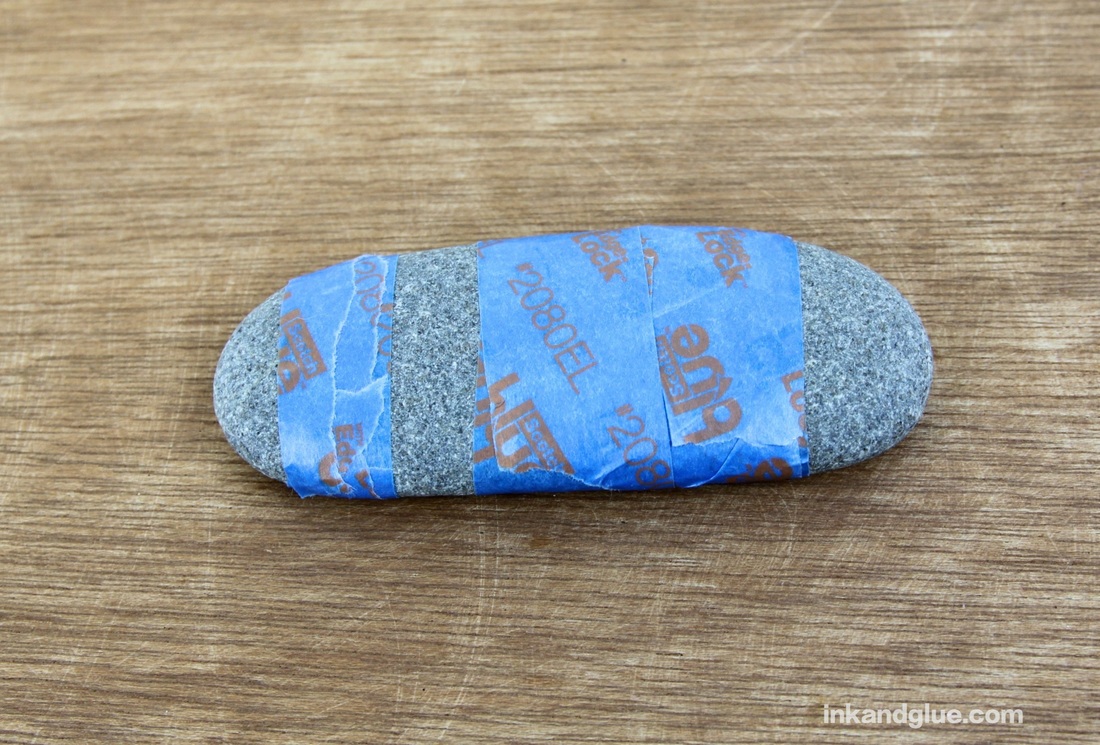
xo My favorite vacation souvenirs are rocks. (And shells, when appropriate; and washed-up bits of coral, if I'm in an especially wonderful location.) They're free, they're abundant, they're versatile, and they're easy to get rid of. I like to use them as a sort of mulch for house plants. If I am starting to feel like the house is becoming over-rocked, I can always chuck them in the garden or add them to our gravel driveway. Sometimes, I decorate them. In the past, I've wrapped them in fabric, coated them in nail polish, and drawn on them with paint markers. Today, I went for a more sophisticated look. 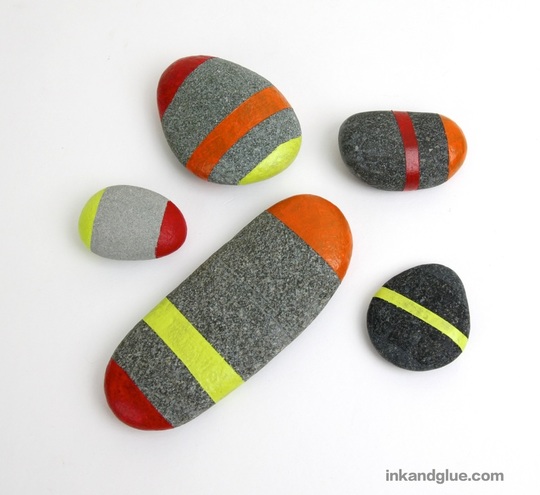 To make these color-block rocks, you'll want to choose the smoothest rocks you can. Look for smooth rocks in riverbeds and ocean beaches. You're going to be taping sections of your stone, so a smooth surface will allow for better adhesion and give you a sharper line in the end. 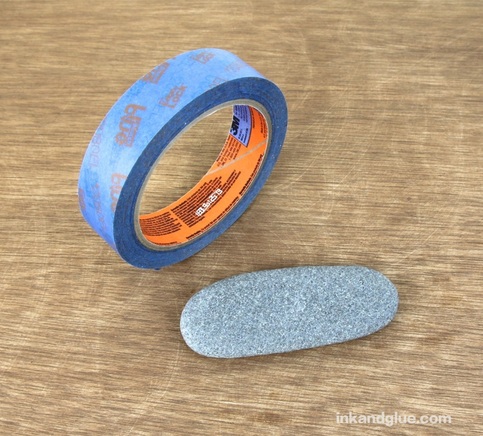 Use painter's tape to mark off a section of a stone, rubbing the edge of the tape into the rock with a fingernail. Rocks are curvy, as you may have noticed, so use multiple pieces of tape to get a "straight" line if you need to.
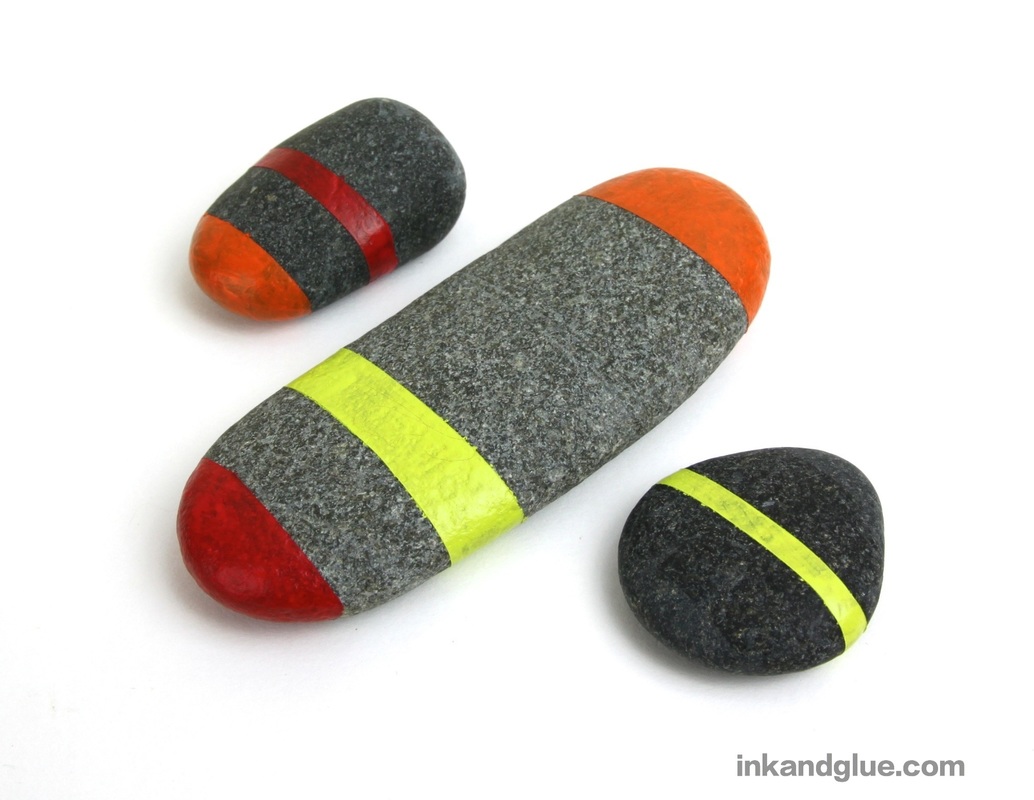
Repeat with the rest of your chosen stones. Paint each exposed section with acrylic paint. Try to brush from the tape onto the rock so you don't get any paint seepage under the masked areas. Note: I needed two or three coats of each color to get good coverage. I recommend doing a coat of white, first, if you can; doing so will give you much brighter colors. 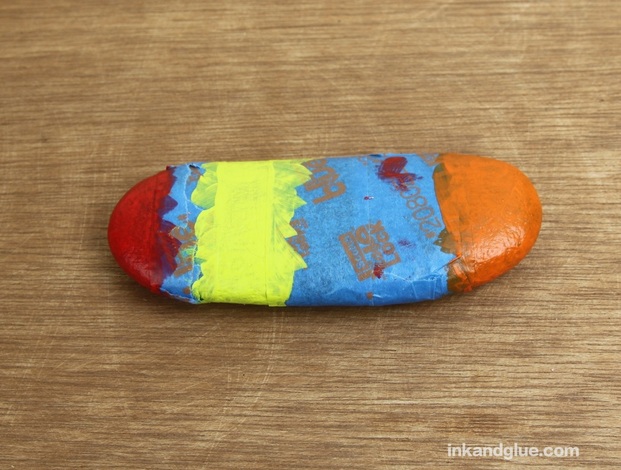 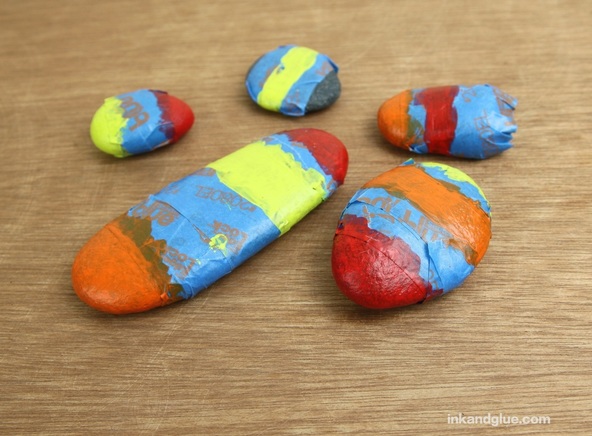 Once the paint is completely dry, peel off the tape. So satisfying! 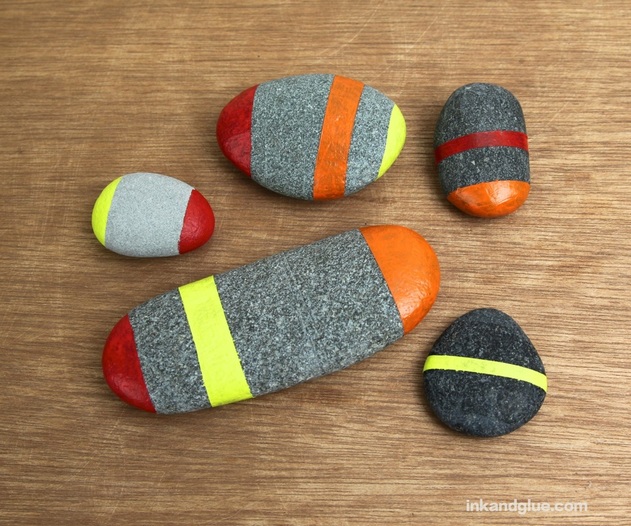 If any edges need to be cleaned up, use a small, flat brush to add a little paint. Just be conservative with it, or you'll end up expanding the painted section until it takes over the entire stone! Better to have a fuzzy edge than to lose the nice blockiness you set up.
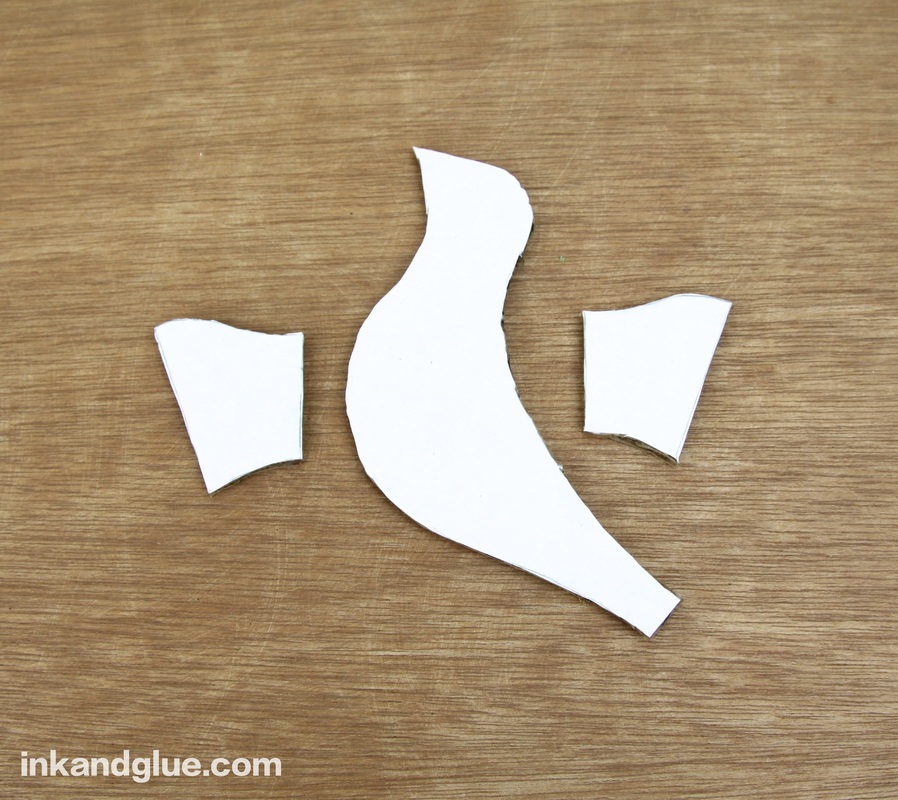
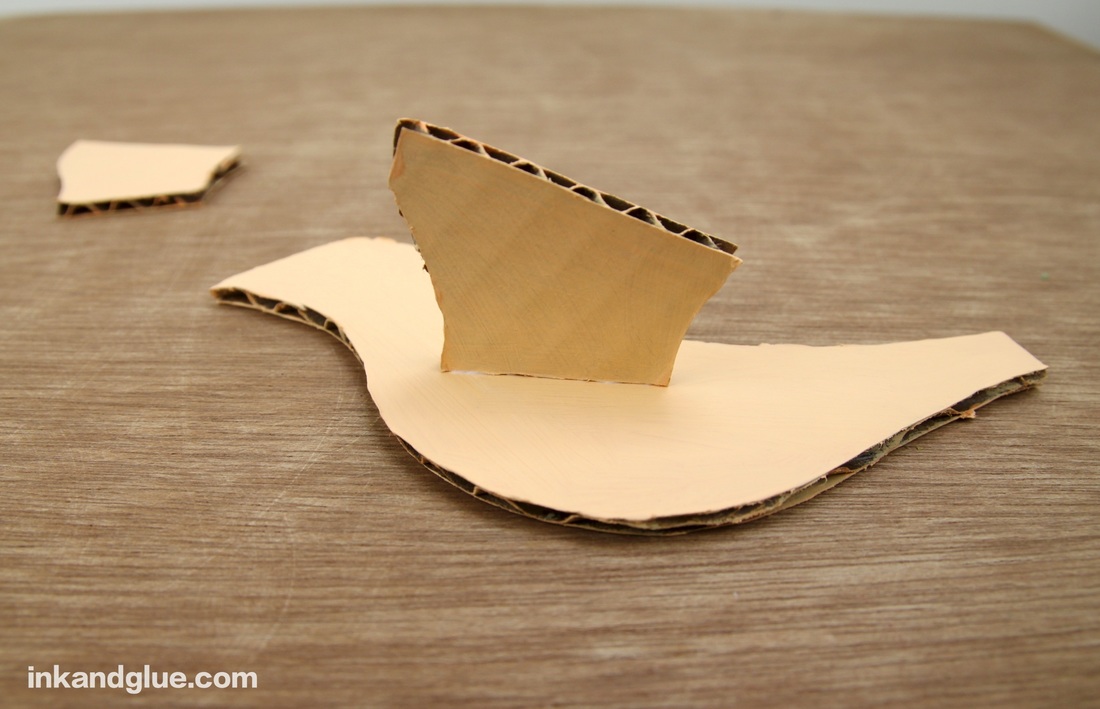
 I'm in the middle of doing some spring cleaning in the garden. A few things are growing already — some lettuce and arugula I planted back in March, plenty of daffodils are in bloom — but mostly the work involves clearing out the dead matter that dried out over the winter. I like to incorporate natural materials in my projects, and since the bird action around here has been heating up lately (so many conversations, so much drama!), I put two and two together. A grown-up or skilled child should do the cardboard cutting and the gluing, but everything else is super kid-friendly. To make this simple project even easier, I've provided a template of the three pieces you need to cut from corrugated cardboard, along with directions for aligning the grooves/corrugations of the cardboard with each shape. Download that template here:
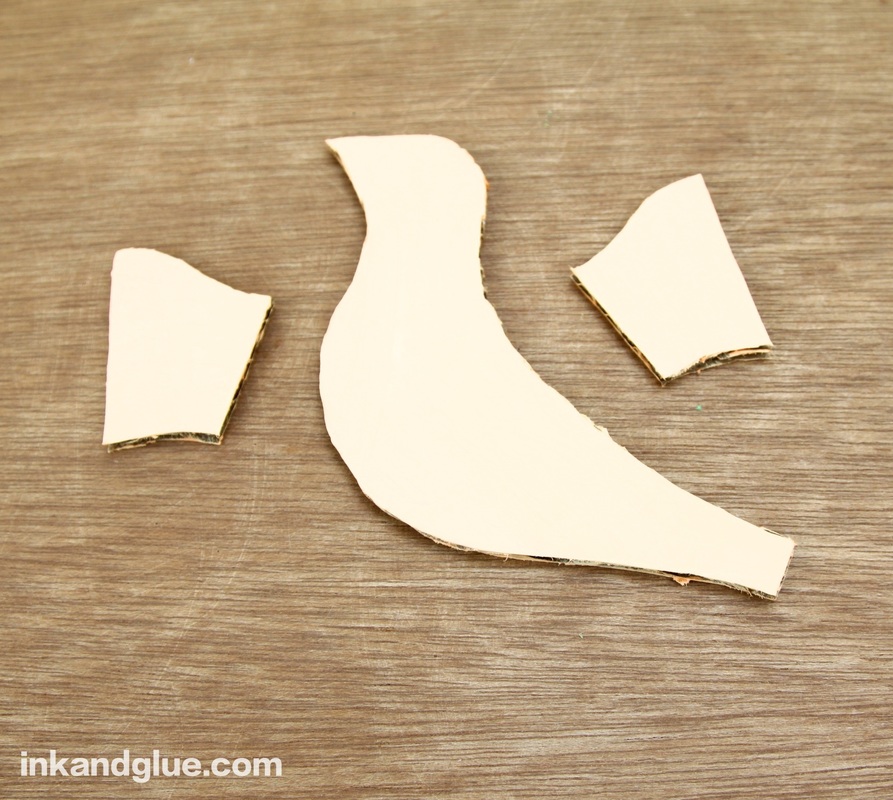
This is what the three pieces will look like. I painted mine, though you can barely tell in this photo (at right).
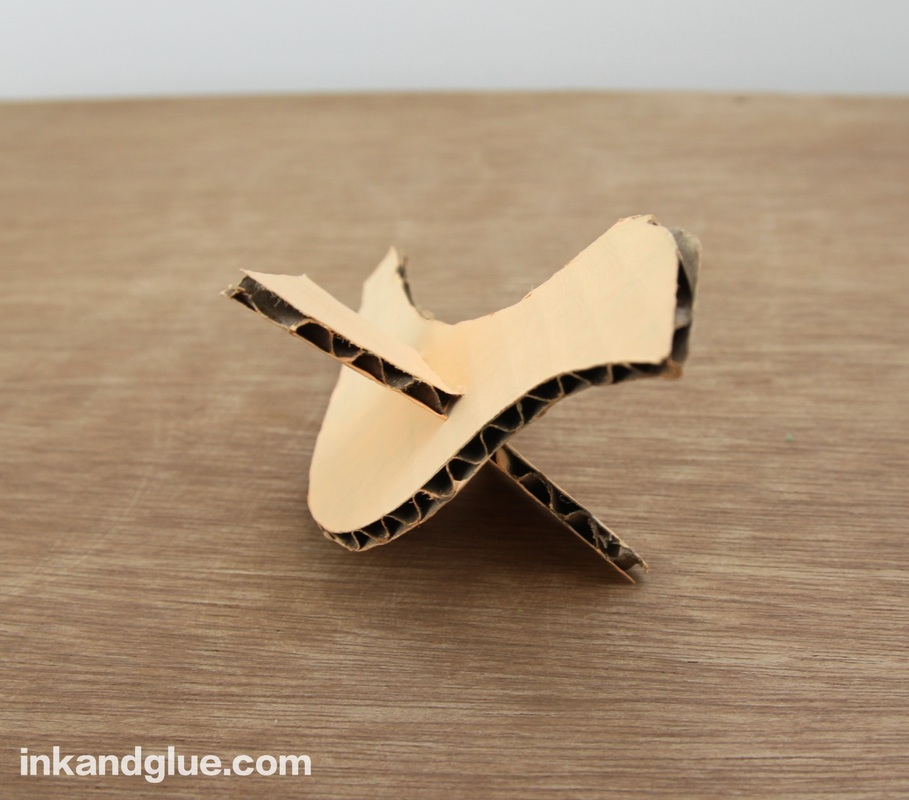
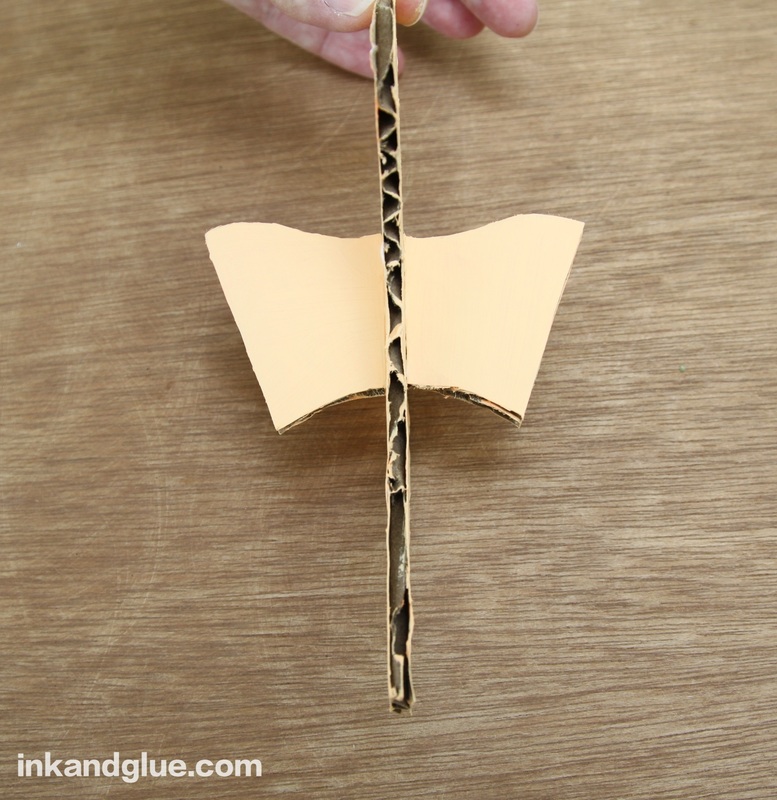
Glue the short edges of the two small shapes — the winglets — to the body of the bird. Try to get them both in the same spot on either side, or your bird might be unbalanced later.
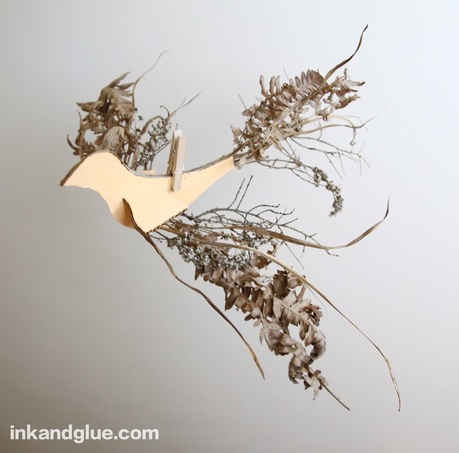
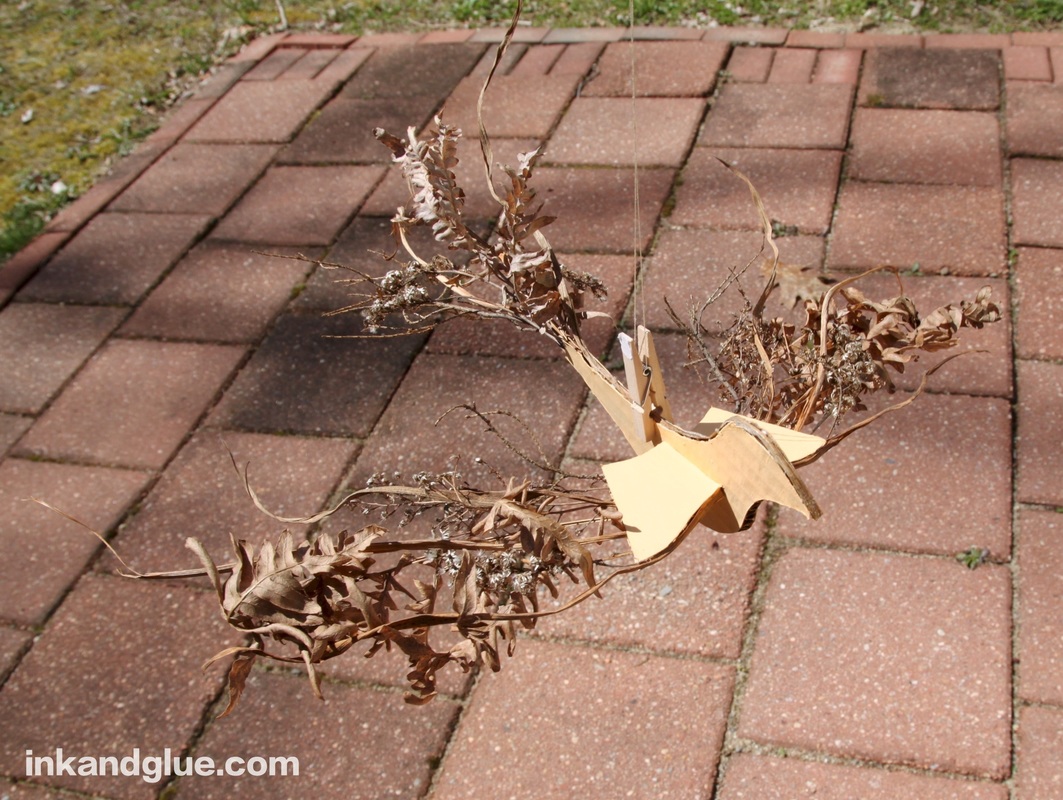
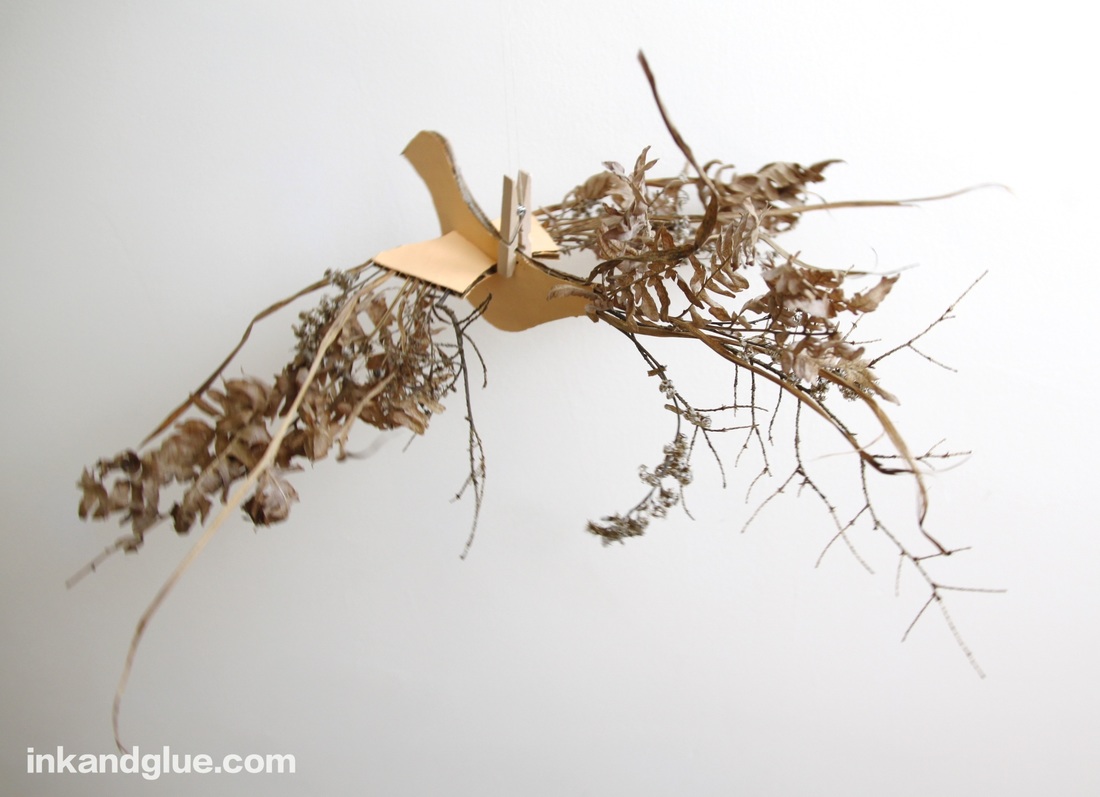
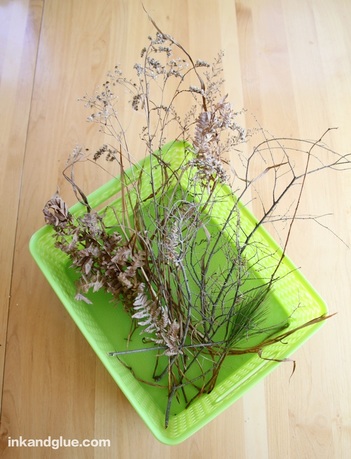 While that glue dries, go outside and take a walk. Collect dry pieces of ornamental grass, twigs, wildflowers, fern stalks, weeds — as long as the stem-ish part of whatever it is can fit inside of a corrugation tube in your cardboard, you're good. Use utility scissors (i.e. not the nice ones you save for paper or fabric) to trim the pieces and slip them into the corrugations of the winglets and the little tail. If they look right, slip them out, dip the ends in tacky glue, and replace. This part was really fun. The natural items I found were pretty curvy, and it was engrossing work to arrange the pieces in fanciful wing and tail shapes . 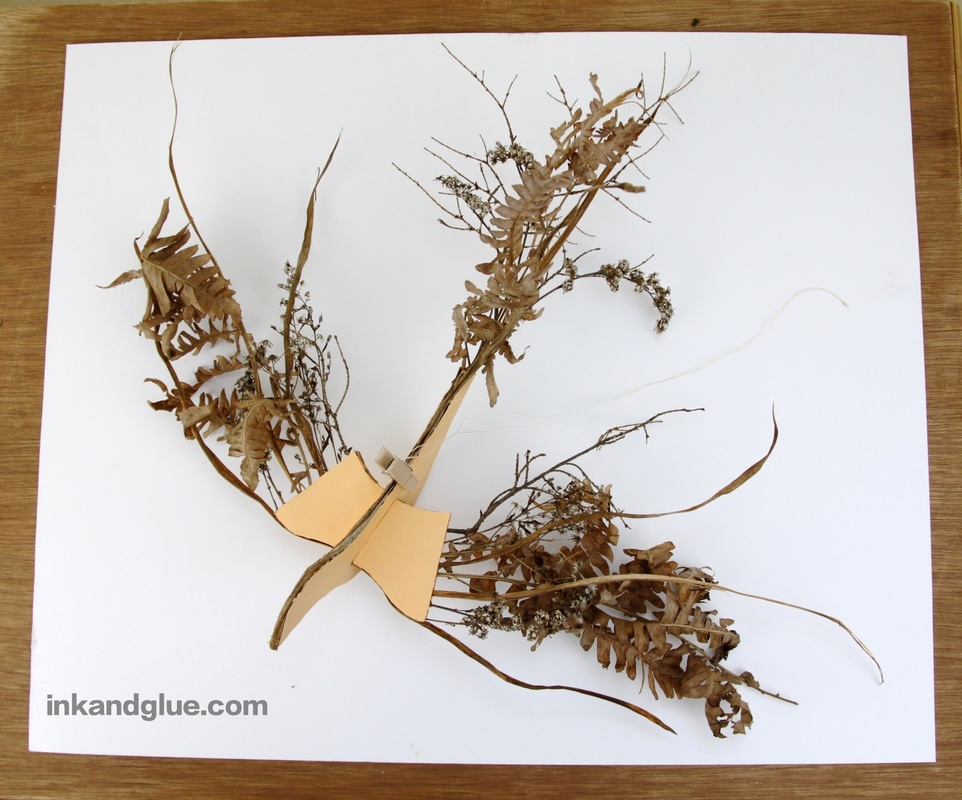 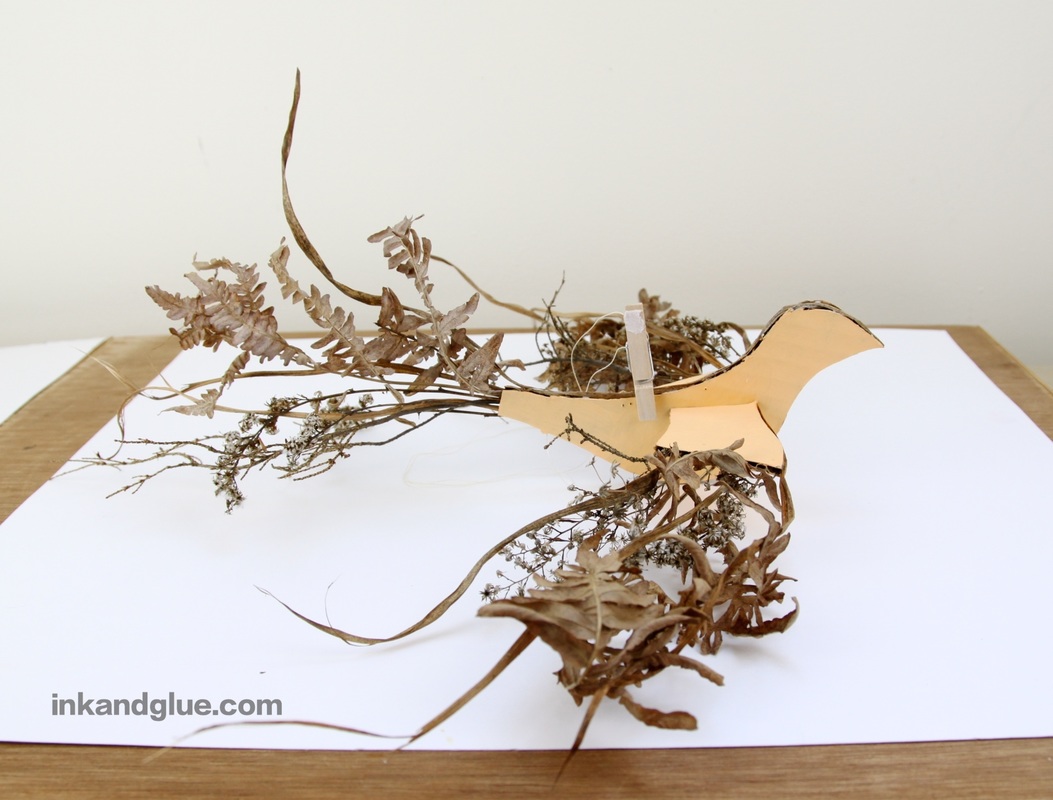 To hang the bird, clip the back with a small clothespin. At first, I tried threading string through a hole in the back, but I couldn't get the balance just right (see the little holes?) and the bird kept dive-bombing the ground or zooming upwards when I wanted a gentle floating. With a clip, you can readjust as needed.
 If this earth-mama project isn't quite your kids' bag, I have some ideas in mind for making a colorful version of this au naturale bird... Stay tuned!
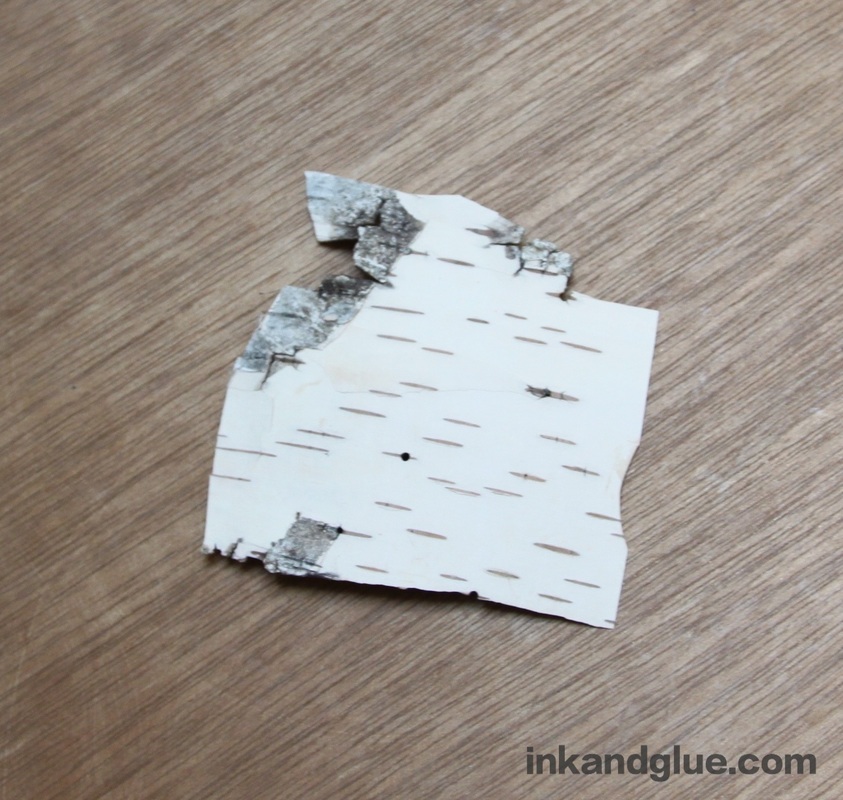
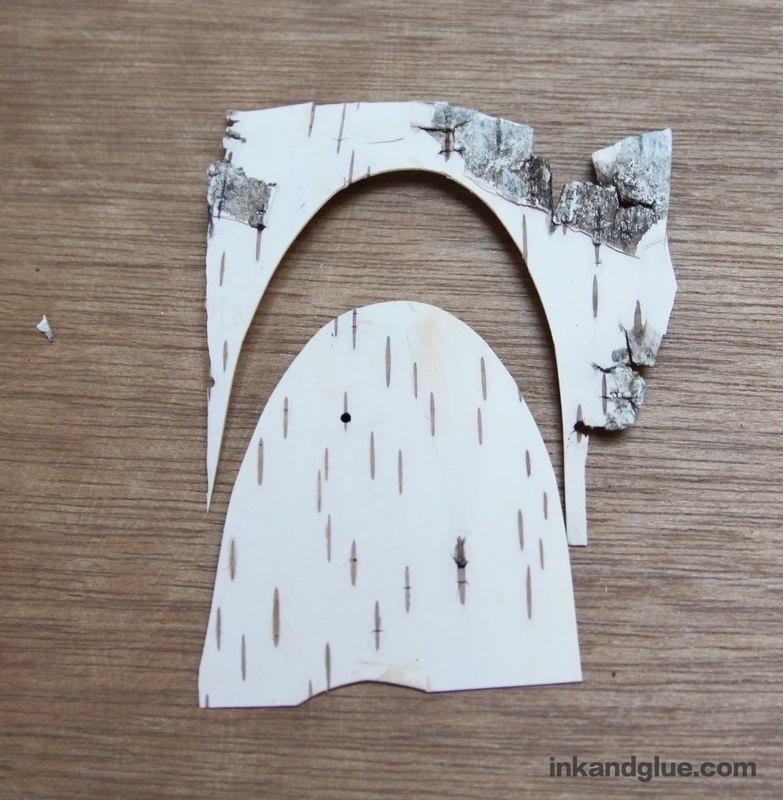
xo and happy spring. 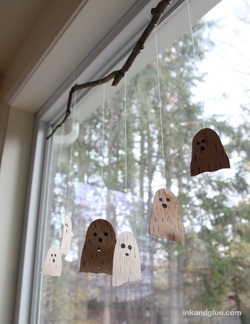 As promised yesterday, I'm back with another natural material-based mobile for a last-minute Halloween craft! Like the leaves, this requires a bit of prep, in that you need to find some birch bark. Note: do not peel birch bark right from the tree, as that can harm it. Look nearby and you'll likely find a piece or two that has fallen off. Back home, use regular scissors to cut simple ghost shapes from the bark.
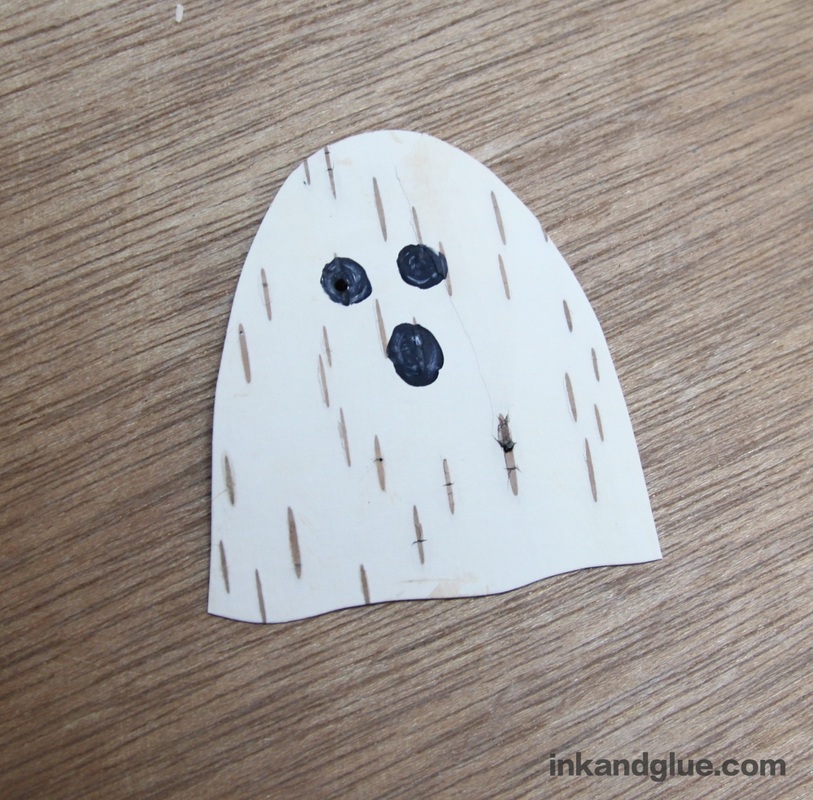
Use a black marker to add eyes and a mouth to each one.
Next you'll add the strings for hanging. As with yesterday's mobile, I separated a two-foot length of embroidery floss into individual threads. Use small dabs of tacky glue to adhere the thread ends to the backs of the birch bark ghosts, and let the glue dry for about a half-hour. 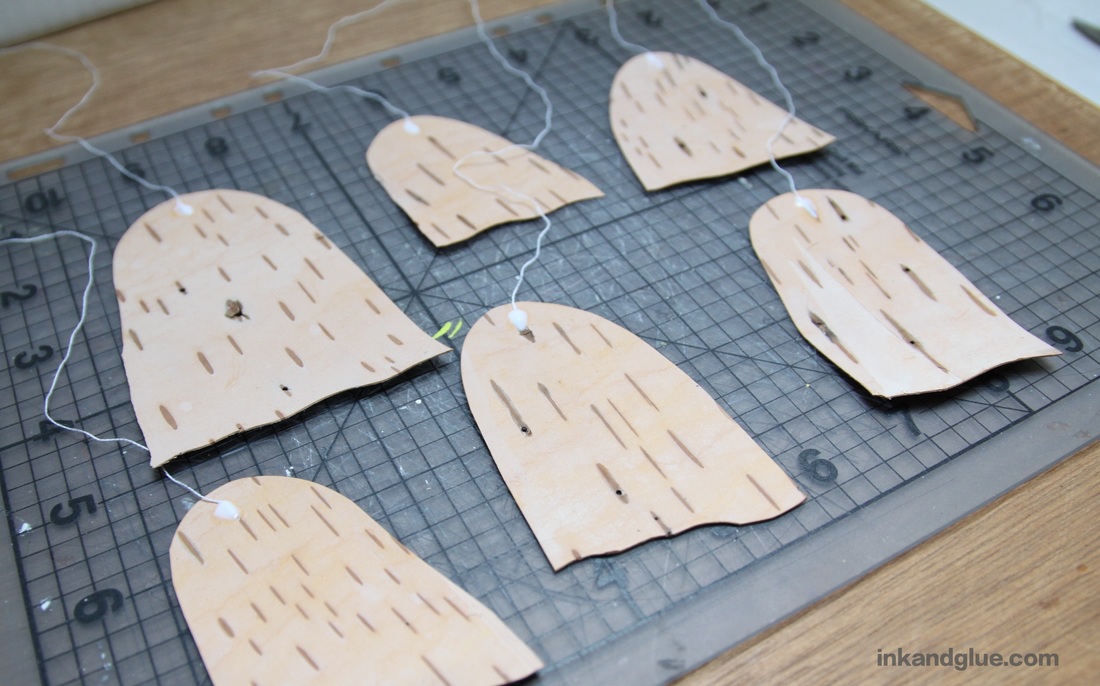 Use the waiting time to select a suitable stick to anchor your ghosts. I chose one that was a bit crooked so it's more Halloween-y. Whichever stick you choose, make sure it's dry and isn't flaking off bits of bark. Tie the thread ends to the stick with single knots, so you can easily adjust the length and make them nicely staggered. 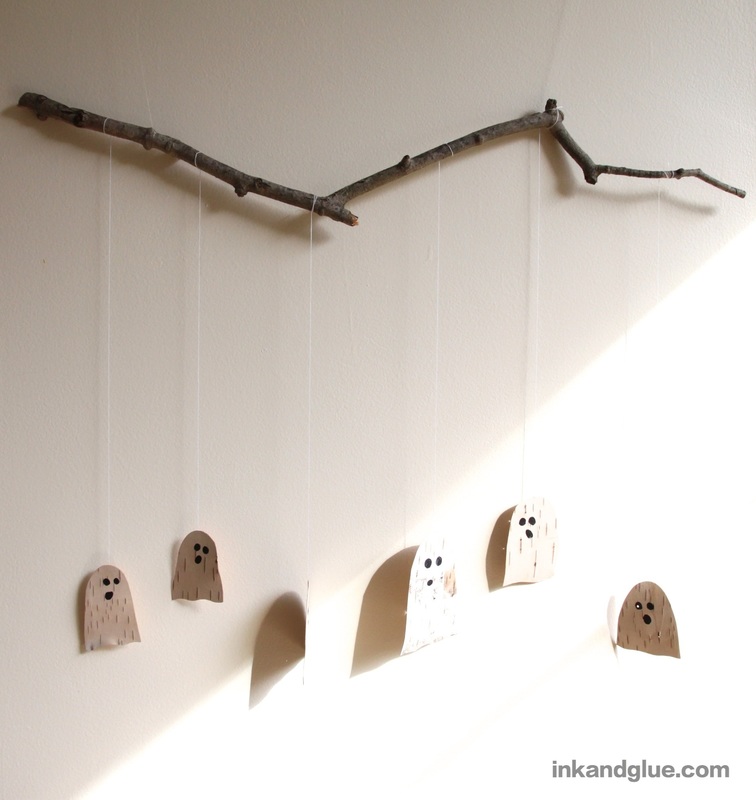 When the ghosts are floating at the altitude you prefer, dab tacky glue onto each knot with your fingertip. Hang your stick with a length of clear plastic cord or fishing line tied near each end. As with the jack o' leaves, I like my mobile near a window. Check out the reflections of the ghosts in the glass! Creeeepy. 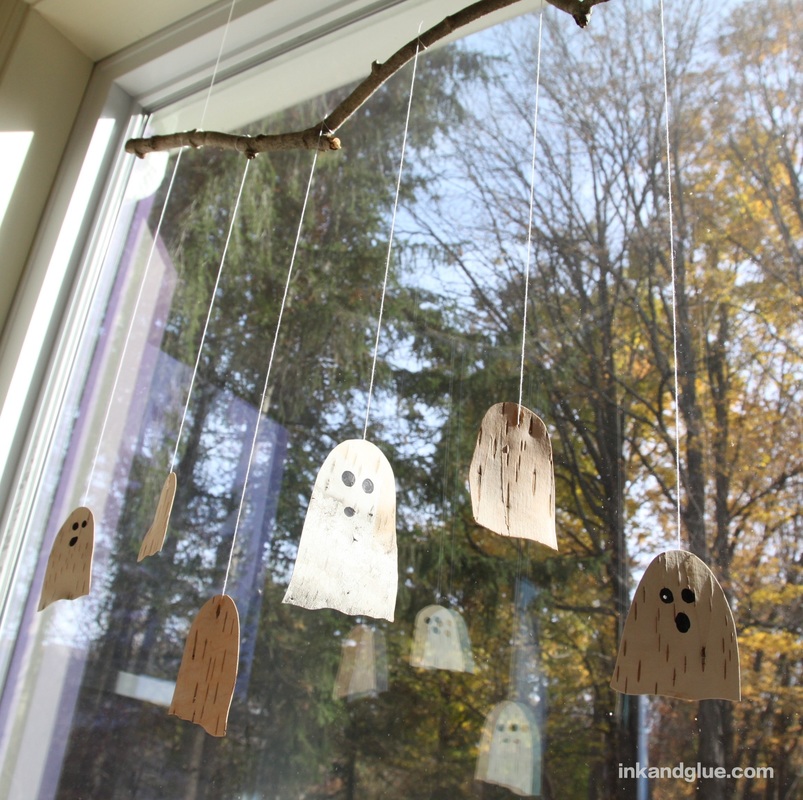 Happy almost-Halloween! xo
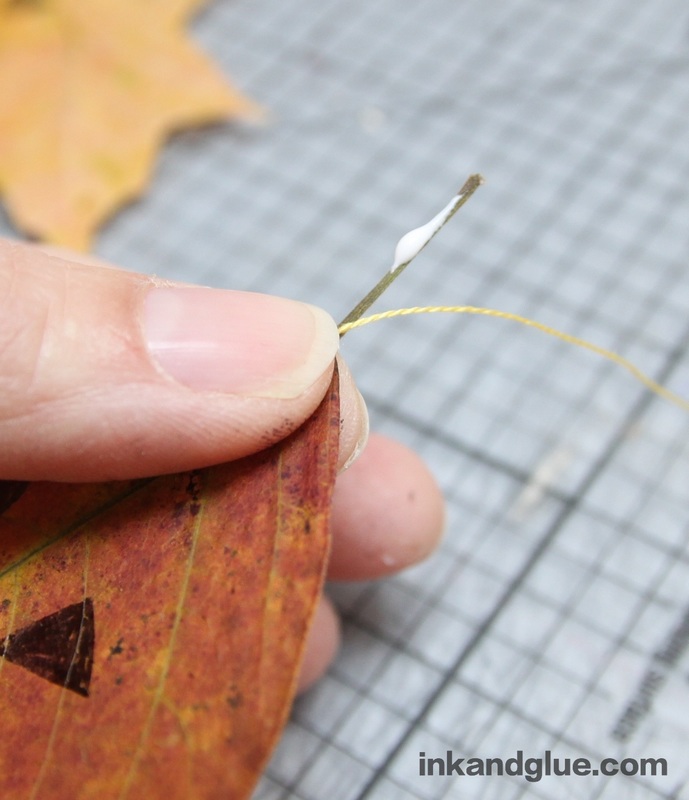
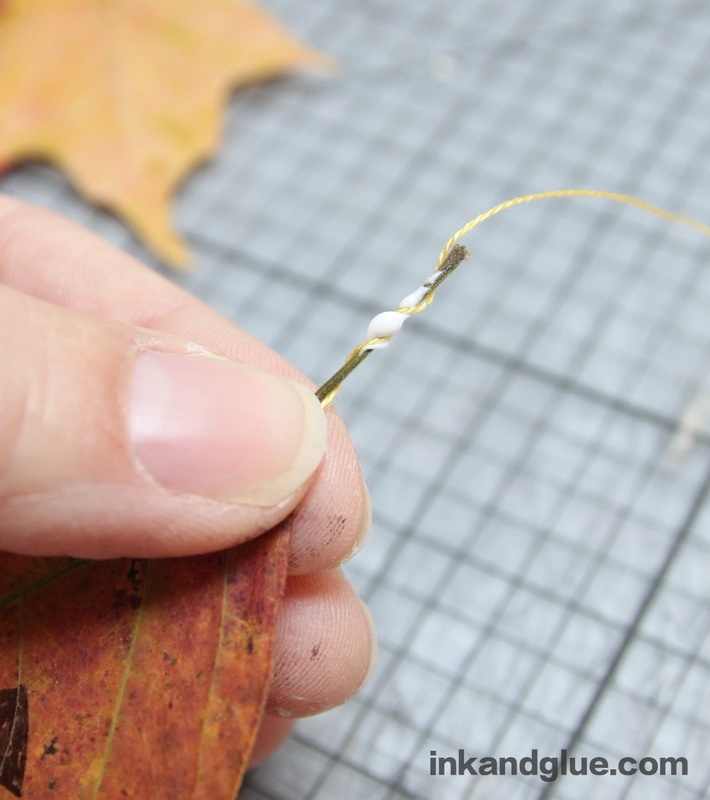
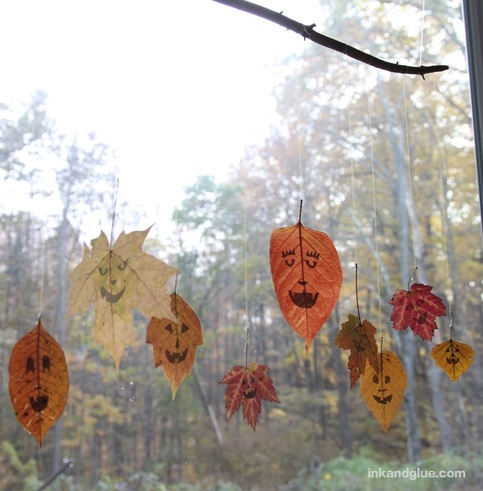 This has been an epic year for autumn foliage. I saved quite a few leaves inside the pages of a book, but wanted to get them out in the open. With Halloween coming in just a few days, I came up with this quick (really!) craft that the whole family can get involved with. The leaves you see here are a mixture of 1-year-olds and 1-week-olds. The 1-weekers, being more pliable and less crunchy, were much easier to draw on. Start by selecting seven or eight leaves that you've previously pressed. Draw jack o' lantern faces on them using a fine-point, felt-tip marker. 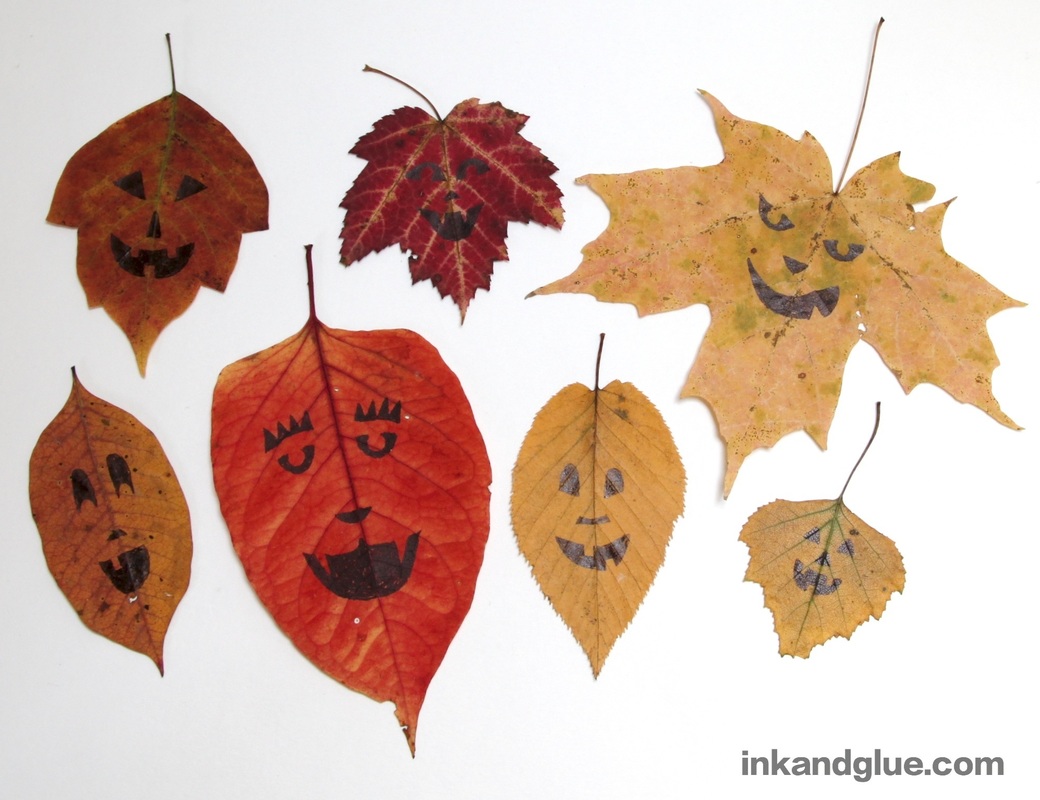 Next, you'll be gluing the hanging thread to the stem of each leaf. I separated the strands from a two-foot length of embroidery floss; those strands are just a tiny bit thicker than regular thread, making them easier to work with. Hold the end of a thread to the base of a stem, and dab a bit of tacky glue onto the stem with your other hand. Then, wrap the thread around the gluey stem, as shown. No need to make a microscopic knot!
Do this with all of the leaves, then let them sit and dry for a half-hour or so. Take this time to walk to the park or the woods and find your perfect stick to hang your leaves from. It should be somewhat thin, not too brittle, and dry, with no flaky bark. The photo below shows off the one I chose.  Then it's just a matter of tying the thread ends to the stick. If you tie with a single knot, the thread will be loose enough that you can adjust the length. Vary the lengths so the leaves won't crash into each other much. Once the lengths are where you want them, tighten each knot and use your fingertip to apply a bit of glue. Tie clear plastic cord or fishing line near each end of the stick, and hang! I like my mobile in front of a window, where the light can come through the leaves, and the leaves are reflected in the glass. 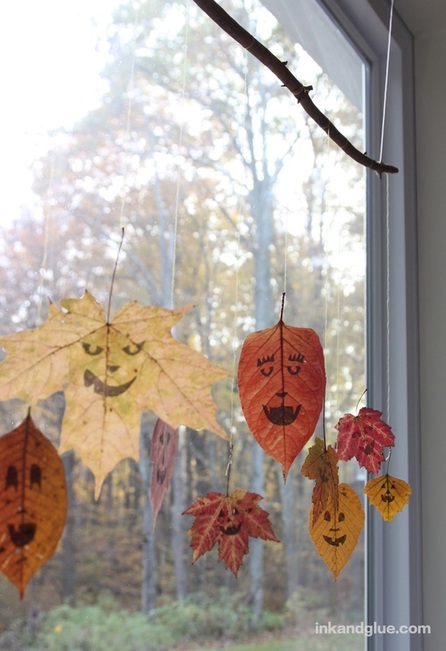 Come back tomorrow for a totally different, nature-based Halloween mobile!
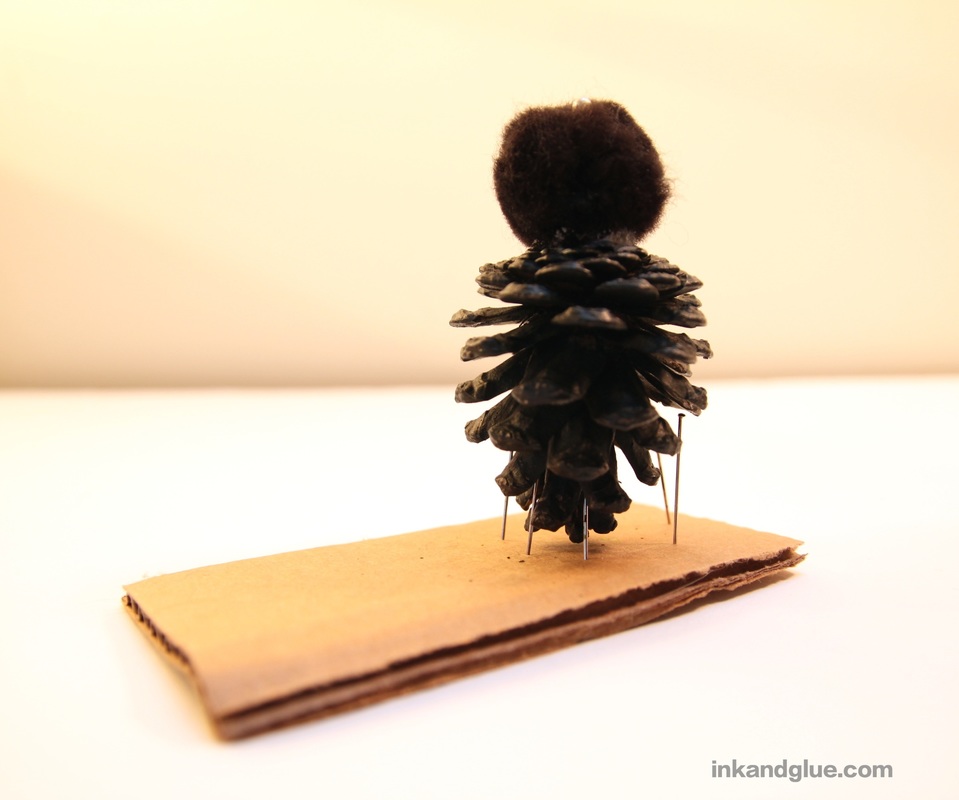
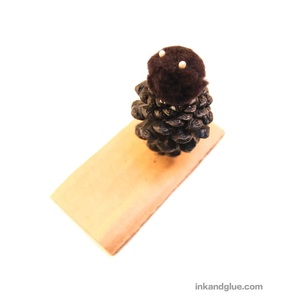
xo 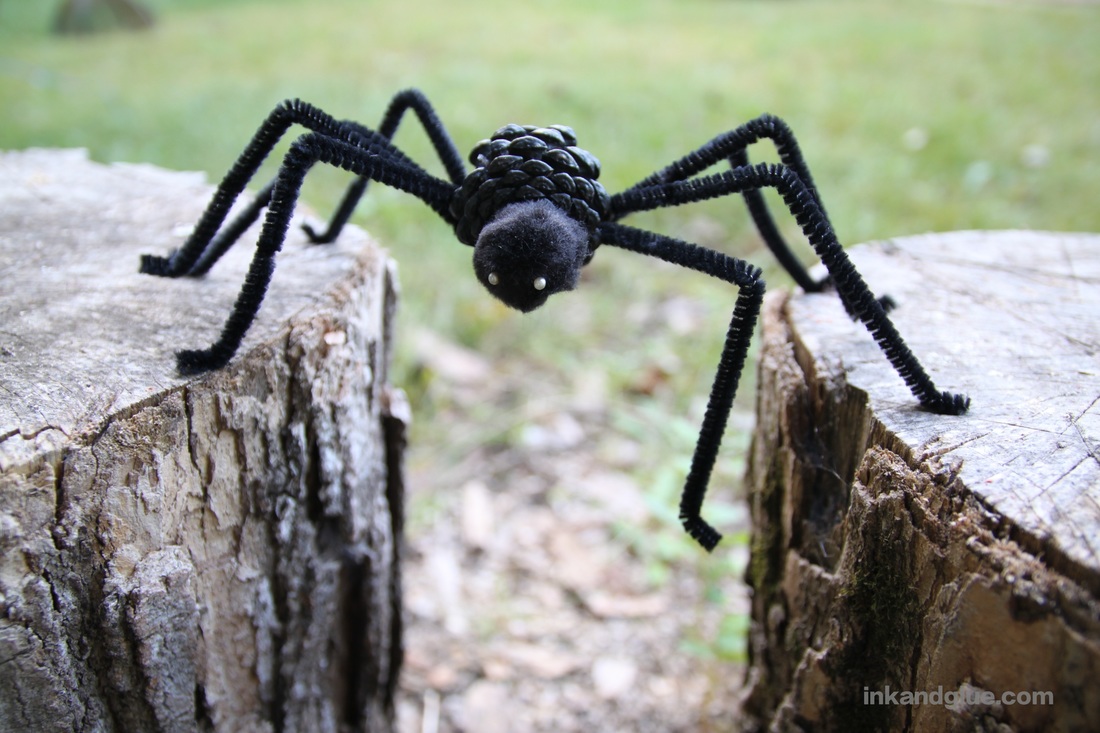 Why, hello, spider! I made this leggy lil' guy with a pine cone for a body. I like using natural (and free) materials in my crafts whenever I can. It satisfies my frugal nature and gives me a great excuse to go wandering through the woods. If you don't have pine cones where you are, the internet, as always, will provide: you can buy pine cones on Amazon. If you don't want to use a pine cone at all, you can substitute an extra-large pom-pom, or a styrofoam ball, painted black. Start by painting an egg-shaped pine cone all over with black acrylic paint. (A one-inch-wide pom pom is shown below for scale and context.) 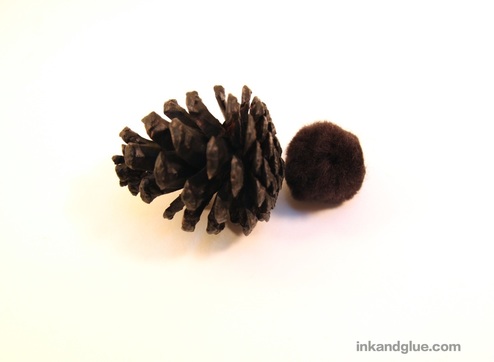 Once the paint is dry, glue a black pom pom to the flat end of the pine cone. For eyes, carefully glue two beads — I used small, fake pearls — to the pom pom. To avoid gumming everything up with too much glue, I used a pin to pick up a bead, dip it into a drop of glue, and press it onto the pom pom. (Too fussy? Self-adhesive googly eyes are a wonderful alternative.) With a scrap of cardboard and a few straight pins, I made a quick-and-dirty version of a pin drying rack to hold the cone upright while everything dried.
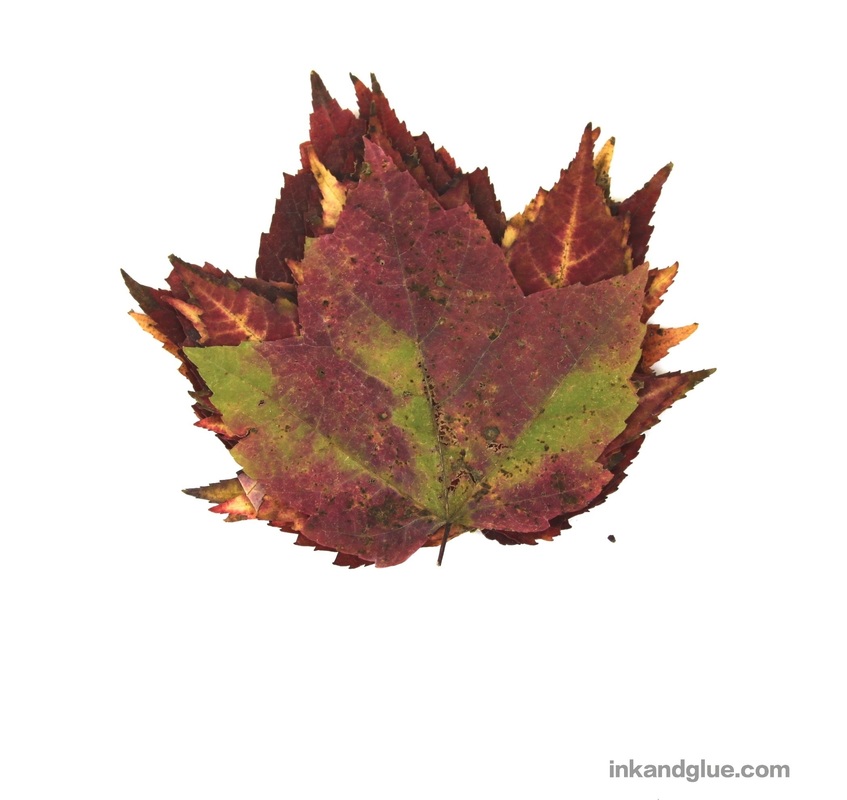
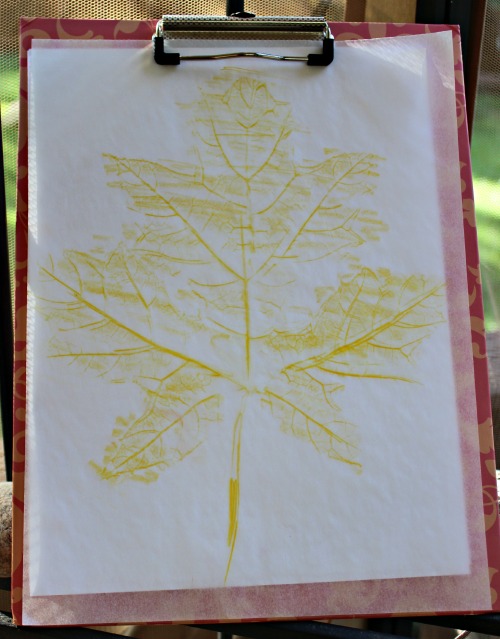
Next, line up four black pipe cleaners (a.k.a. chenille stems). Twist them together in the center, then bend the middle to create a short curve, as shown. 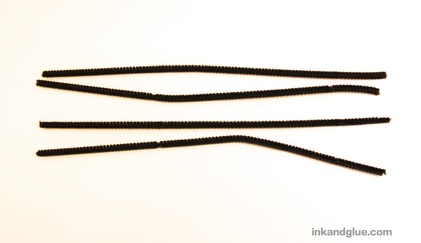 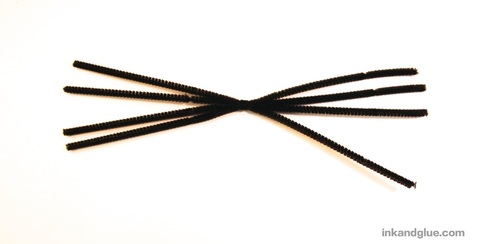 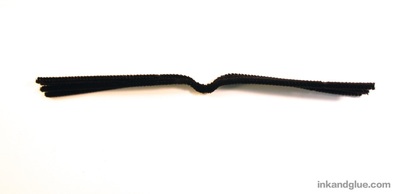 Pick a spot on the pine cone to be the belly of the spider. Apply a line of tacky glue to the inner part of the curve, then wedge it between the scales of the pine cone at the belly. 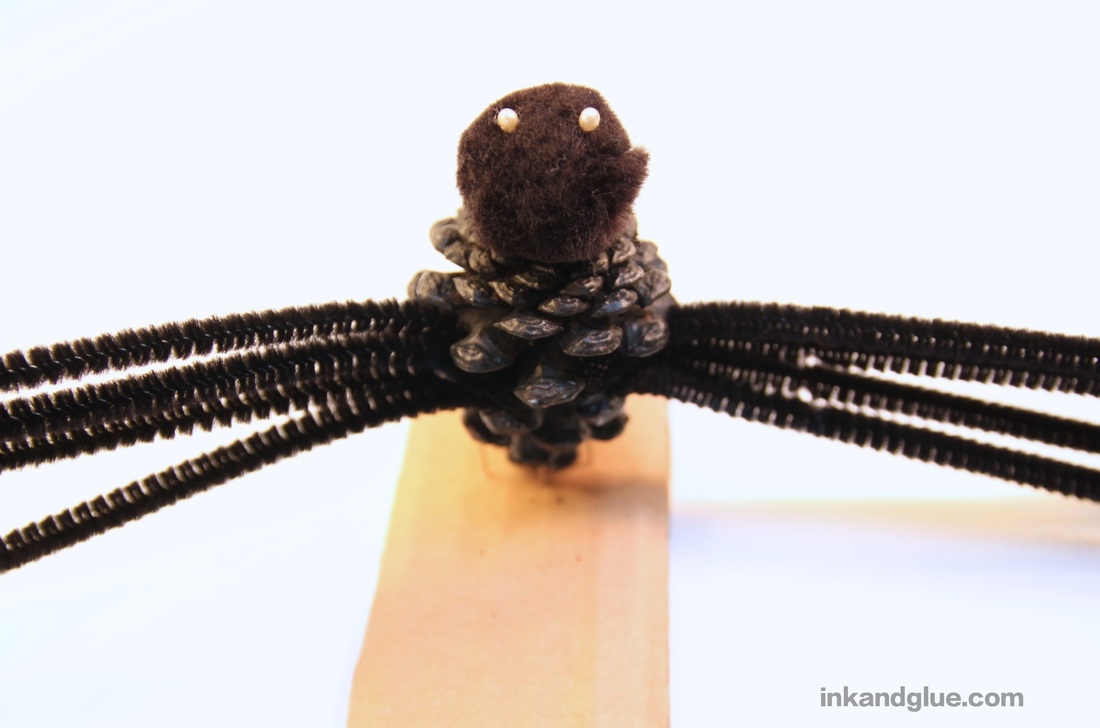 Spread out the eight legs, and bend each one into a leg. I like including feet on my spider, but you can leave the ends of the legs straight for a more menacing look. 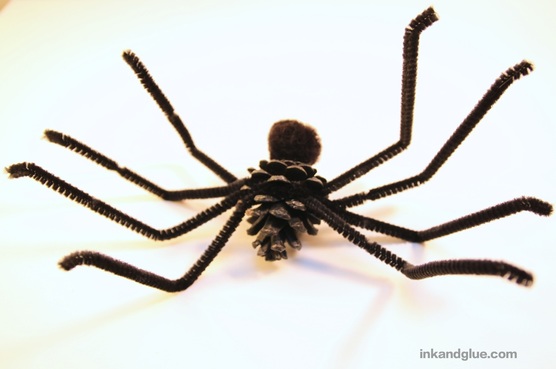 And you're done! Enjoy Halloween with your new arachnid pal! xo  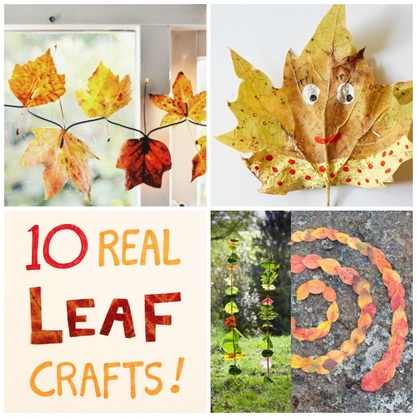 Up here in the northeast U.S., the leaves are just starting to turn. And if you or your kids are like me, you can't help but pick up the finest, most beautifully hued specimens. If you want to make projects with your leaves, and you want them to last more than a day, you need to preserve them somehow. I like to preserve leaves by placing them in between the pages of a heavy book, placing another heavy book on top, and semi-purposefully forgetting about them for months. (It only takes about a week until they're ready to be used.) If you are more careful than I, and have nicer books, sandwich the leaves between two pieces of copy paper before inserting them into the book. This link has 6 ways of preserving autumn leaves, and it seems accurate from my experience, although my book-pressed leaves are still pretty colorful. (The letters spelling "LEAF" in the graphic above were cut, via a craft knife, from a leaf I placed in a book two years ago.) Don't wanna make crafts with your leaves? I love this simple display idea for your finished leaves, from Art Bar Blog. The post I link to is about the Thanksgiving Day craft on the table, but check out the leaves above — they're just affixed to the wall with bits of washi tape. 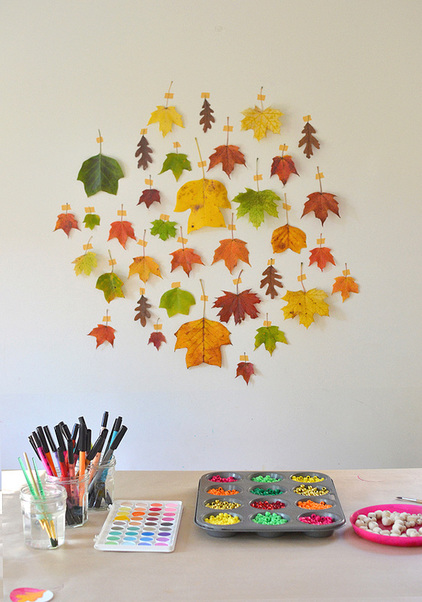 Anyway, on with the list! Easiest/youngest-age-suitable crafts first, harder/older kid or teen crafts last, all according to me; your mileage, as they say, may vary. 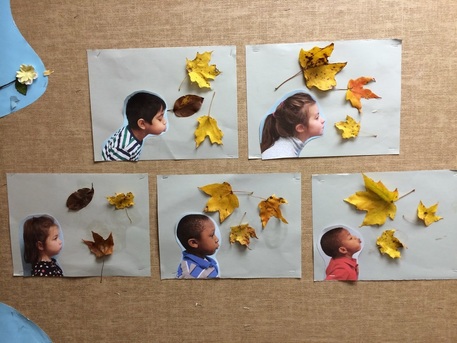 I like a project that forces you to finally print out a picture from your computer, dammit! (Just me?) Jennifer at Teach Them To Fly photographed her students as they pretended they were the wind blowing the leaves through the air. She printed out the portraits, and had them add real leaves to the scene. Cute!
Will you and your family collect leaves this year? Let me know what you end up doing with them! Me, I've got my eye on another book to fill...
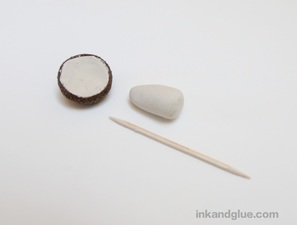
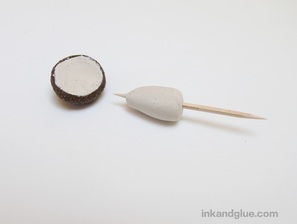
xo This weekend, I made my own little mushrooms to brighten up my oft-neglected houseplants. 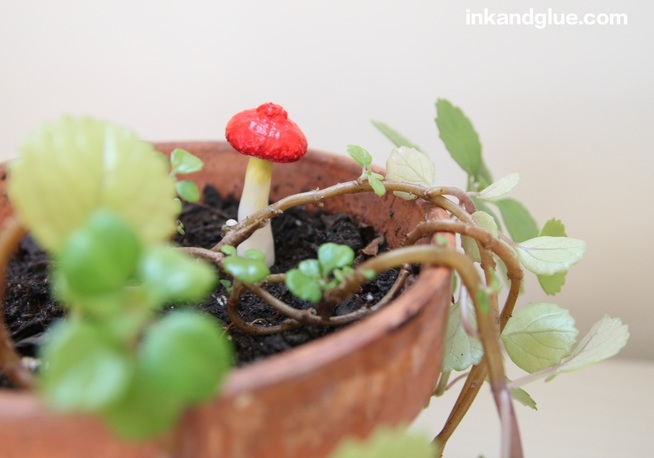 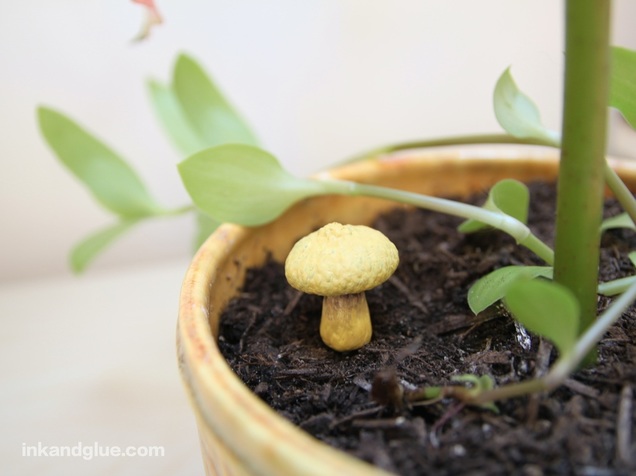 I've definitely had mushrooms on the mind. The woods where I live are full of all sizes, shapes, and colors of them. I love how they emerge so quickly from below the ground, pushing aside leaves and pine needles as they grow. I took these three photos just in the last week: 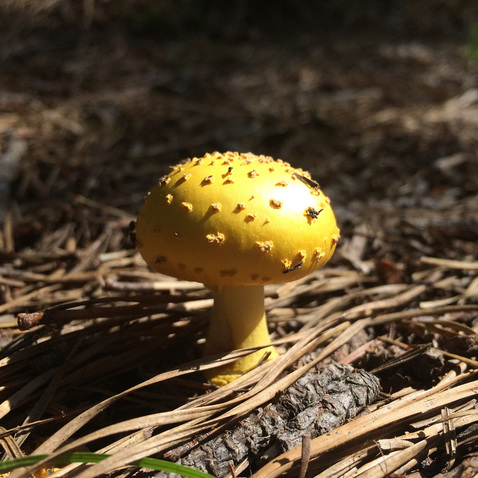 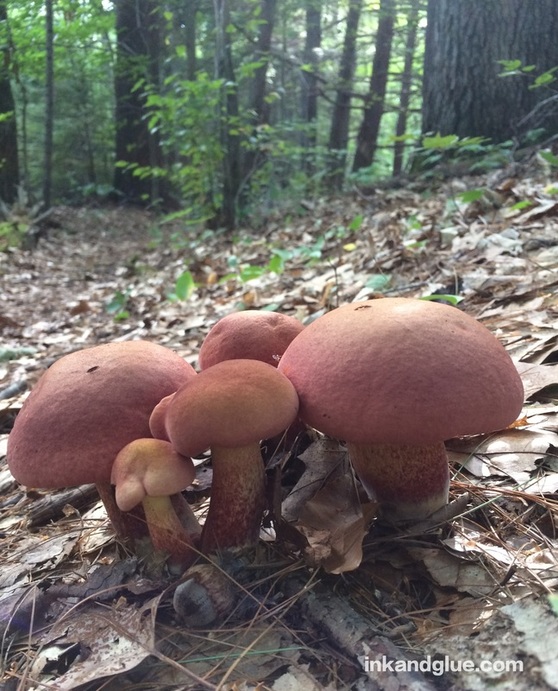 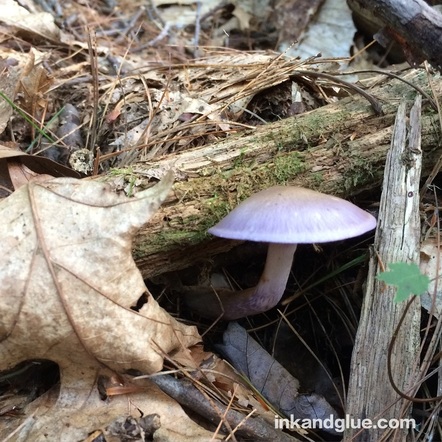 Today's project was inspired by these beautiful discoveries, and by the acorns which have been falling from the oaks the last few weeks. Pick up a few caps the next time you're walking in the woods or a park, and you're on your way to making these sweet mini-mushrooms. They're meant to be inserted into the soil of a houseplant, but if you'd rather have them sit on their own, keep reading for alternate directions. First, collect a few brown acorn caps. (If the caps are fresh and green, they'll shrink and possibly crack.) If the cap has any kind of a stem at the top, use a pair of scissors to lop it off. Then, choose a modeling material. I made this craft with both white Sculpey (though any bake-able polymer clay will do) and plain Paperclay. The main benefit to the Sculpey is that you can paint your mushroom soon after you bake it. Paperclay is a bit easier and softer to handle and sculpt, but you'll have to wait at least 24 hours (and sometimes longer) for the clay to dry before painting, and waiting is difficult for antsy kids or impatient grown-ups. Using either modeling clay, start by pinching off a blob and pressing it into the underside of a clean, dry acorn cap. 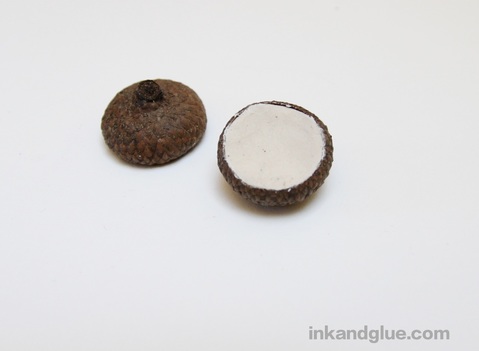 Next, sculpt the stem. Roll a piece of clay into a fat log shape. Insert a toothpick through the stem piece. Leave about a quarter inch of the pick sticking out from the top of the stem. Gently press the sides of the stem so the toothpick is gripped tightly inside.
Next, simply insert the stem into the cap. This is a Paperclay mushroom, FYI: 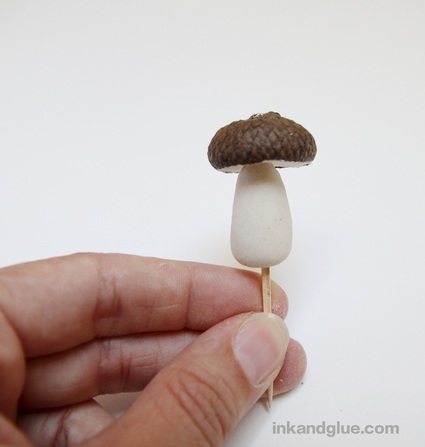 [Alternate, free-standing mushroom version: Use strong scissors to trim the toothpick at the base of the stem so it's flush with the clay. Smooth clay over the toothpick end. Set the mushroom upright, and adjust the position of the cap and stem so it can sit without help. If using Paperclay, let it dry as it sits. If using Sculpey, carefully lay it on its side to bake. Don't move it again until it's cool; the clay softens when baking.] 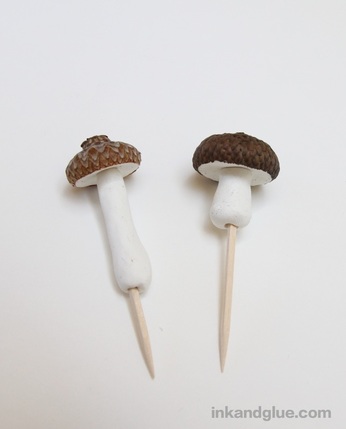 Here are two mushrooms I sculpted out of Sculpey. To bake them, lay them on their sides on a foil-covered baking pan. Don't worry: the temperature at which the clay bakes isn't high enough to scorch the toothpicks or acorn caps. Once your mushrooms are baked and/or dry, paint them as you wish with acrylic craft paint. [A tip: You may end up covering the entire mushroom with paint, only to realize you have no safe way to set it down to dry. Not that I would ever do such a thing. *ahem.* Try taping the toothpick end of the mushroom to the side of a coffee mug, with the mushroom jutting above the mug's rim.] 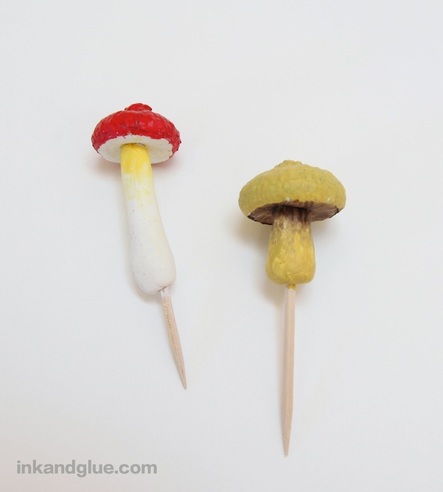 Here's another tip, though feel free to ignore it, especially if you're making stuff with kids: For the nicest, most even, and brightest results, paint the entire thing with white paint first. Let it dry, then paint on the color. Here's another angle that better shows how I painted the undersides of mine. Again, I went fancy, because sometimes I do that. 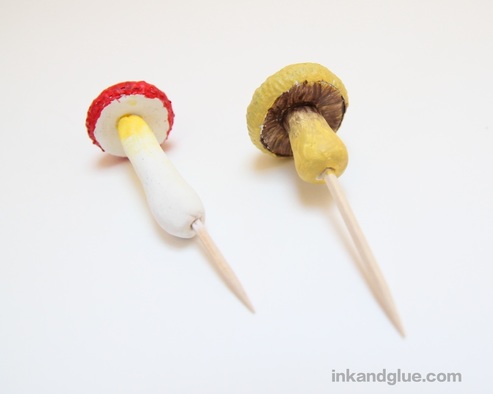 If you make acorn-cap mushrooms, I'd love to see how they turned out!
xo I only learned in the last couple of years that maple keys are also called samaras, which is just a lovely name, don’t you think? Whatever you call them, they are fun to throw into the air and watch them spiral down in a quick flutter. You can make crafts with samaras too, of course. The classic is the dragonfly -- the shape of the key is a near-perfect match for a dragonfly wing, and if you collect a suitably-sized twig while you’re gathering samaras, you have pretty much all you need. Fowl Single File has a lovely example of this craft: 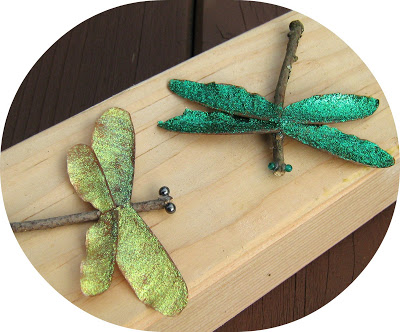 I wanted to use samaras in a new way. I collected a heaping handful, then I looked at them up close, then far away. I turned them all around, and cut one open to see what that was like. (There’s a flat little seed in there, and apparently, you can eat it!) The maple key shape started suggesting other things, like commas, or fluttering sleeves, or... well... eyebrows, and mustaches. With that thought, I whipped out my trusty copy of Fred Archer On Portraiture and got to work. 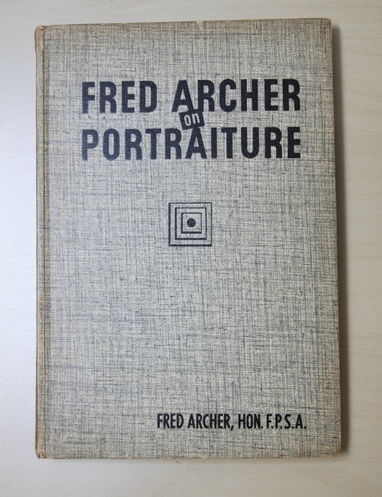 (What, you don't own a copy of FAOP? That's fine. For the following project, you can cut out big photos of faces — human or otherwise — from a magazine or newspaper. Or, you can print out a photo of your very own gorgeous mug.) Herewith are my “additions” to Fred Archer’s portraits. Please forgive me, Fred! 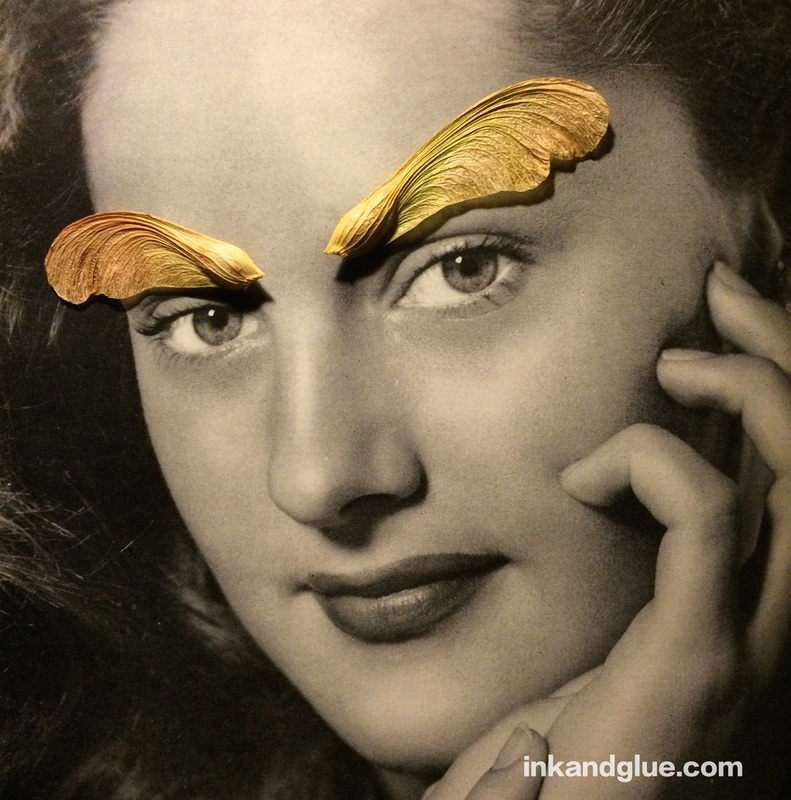 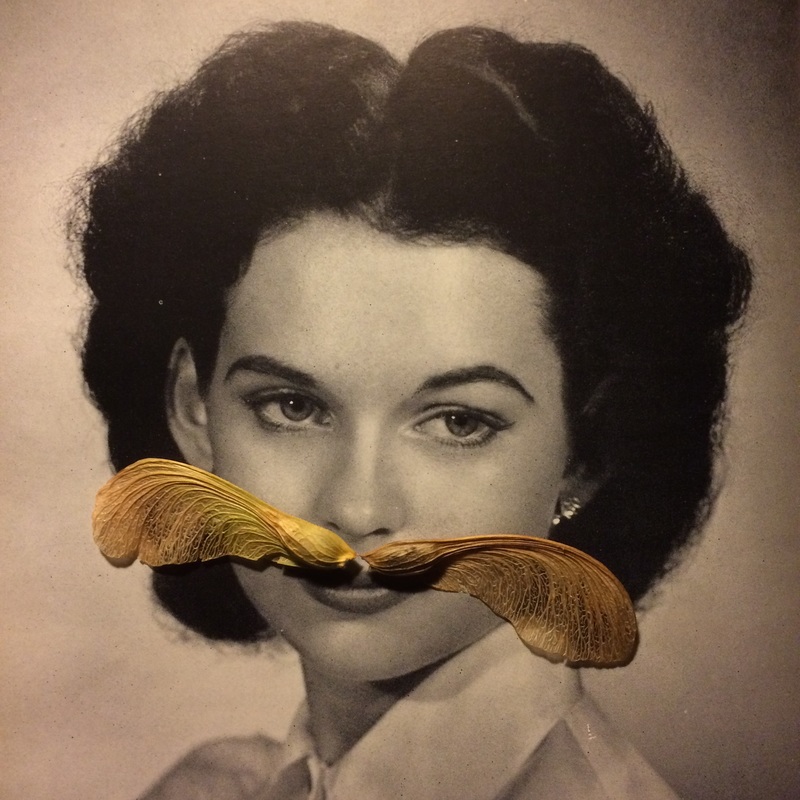 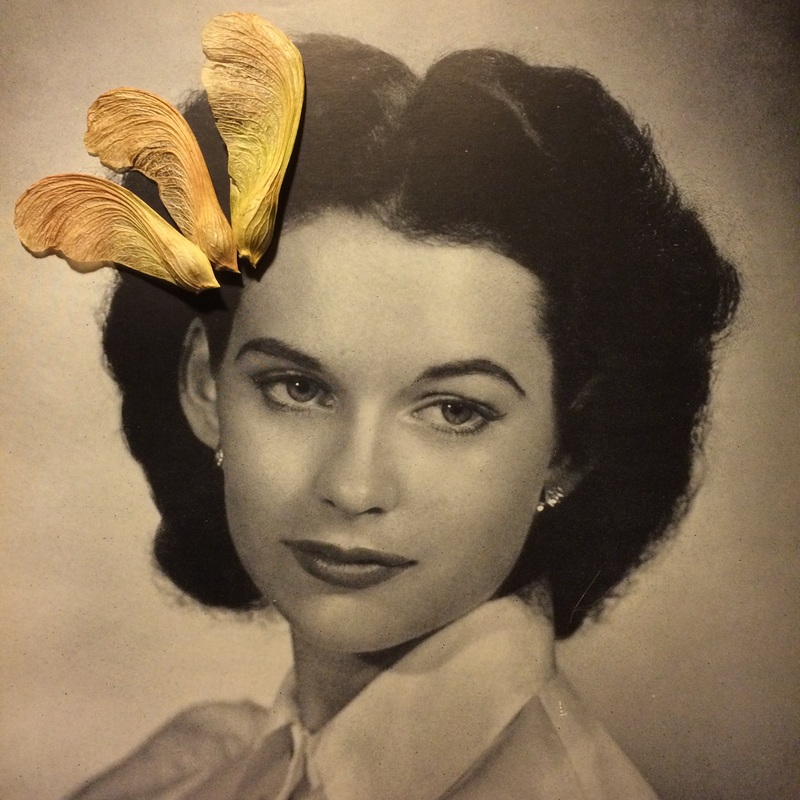 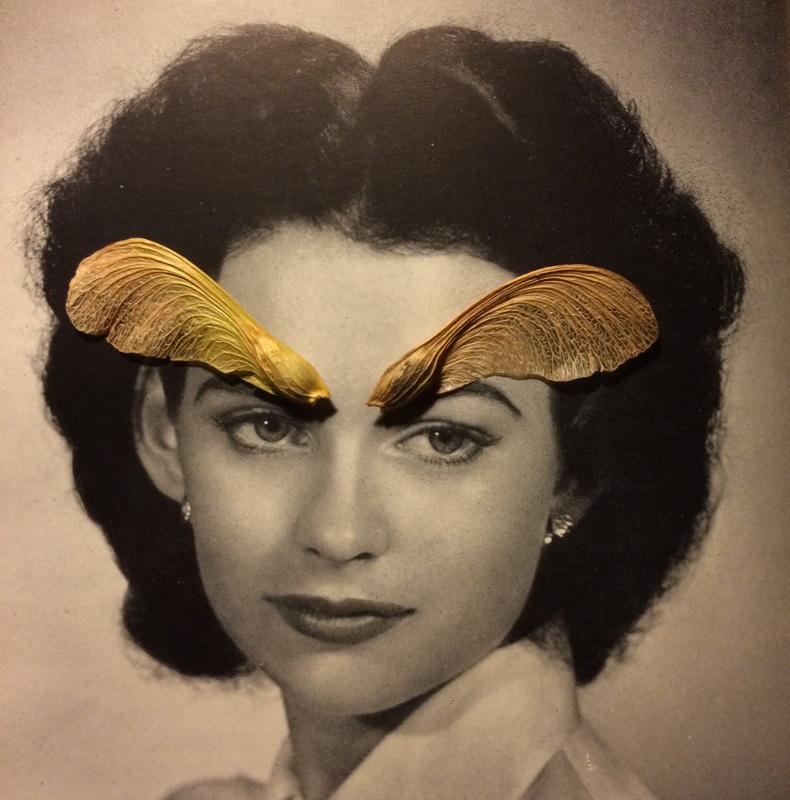 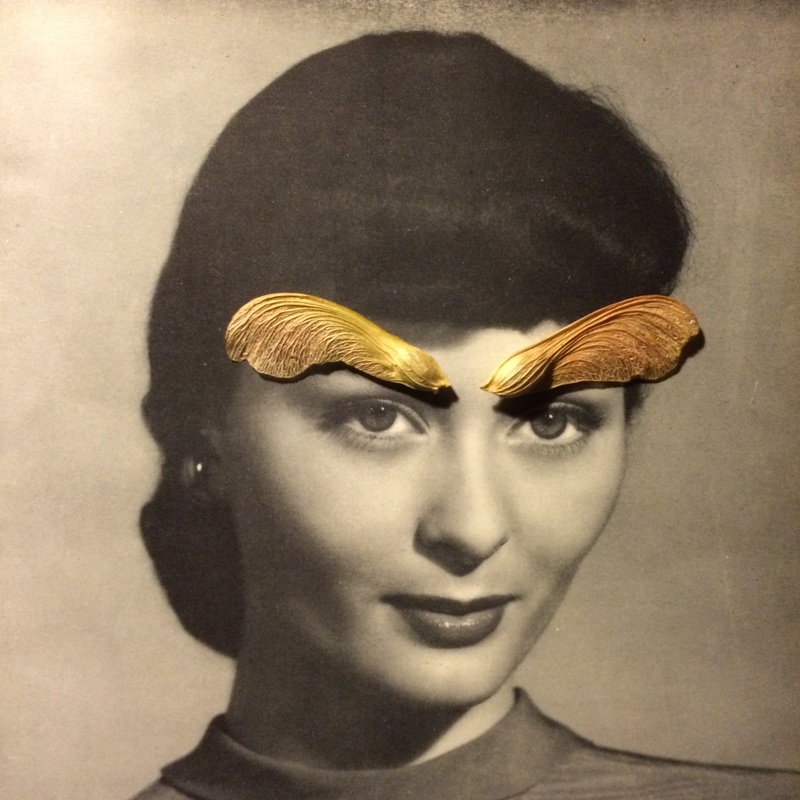 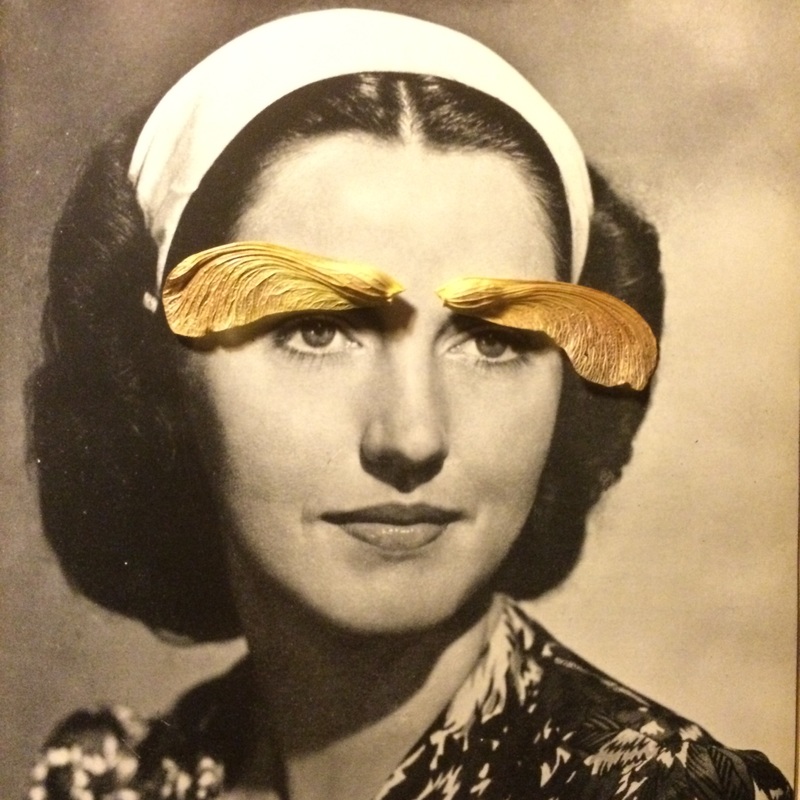  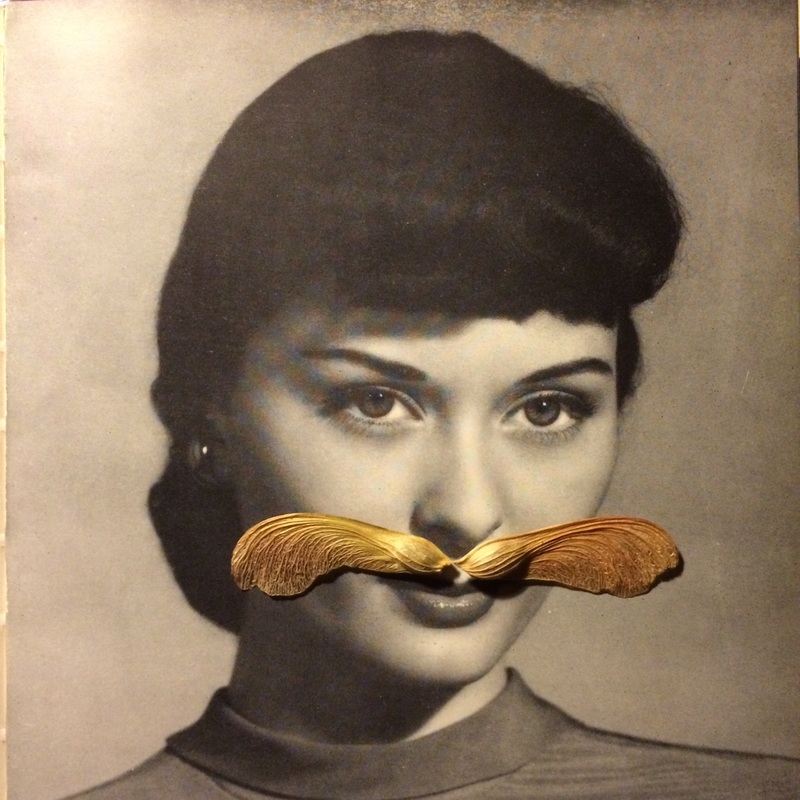 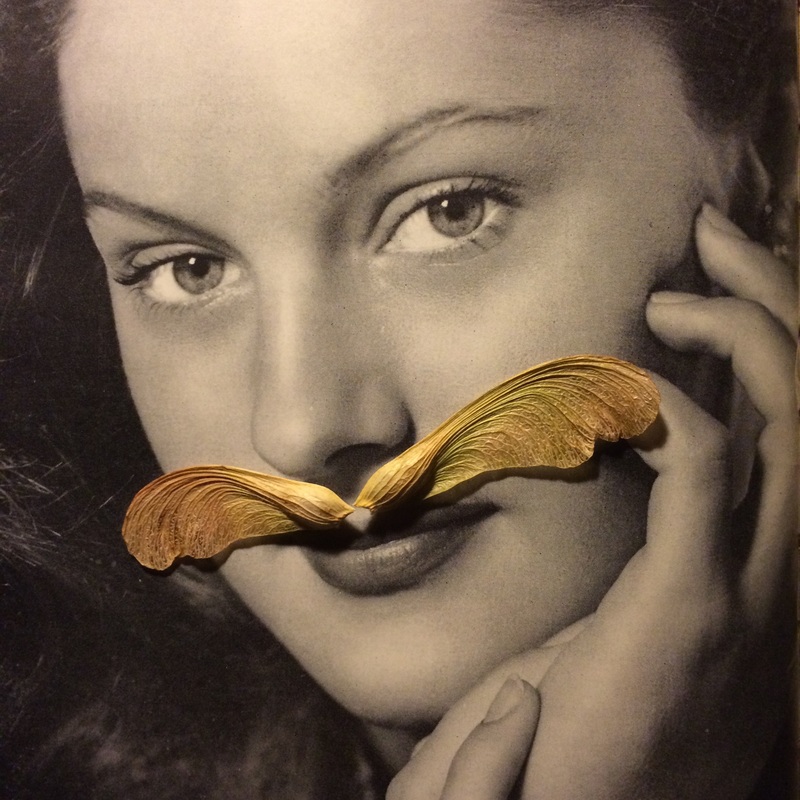 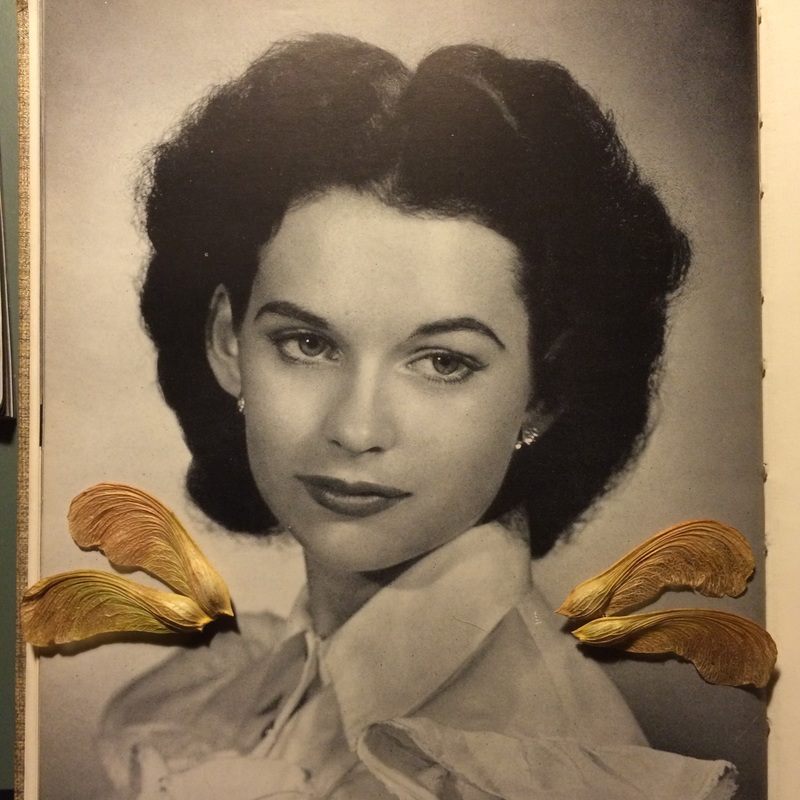 Super-fast, silly, and fun!
|
Categories
All
Archives
March 2017
AuthorI'm Debbie Way, an artist and writer who enjoys making things. |
||||||||||||||||||||||||||||||||||||||||||||||||


 RSS Feed