|
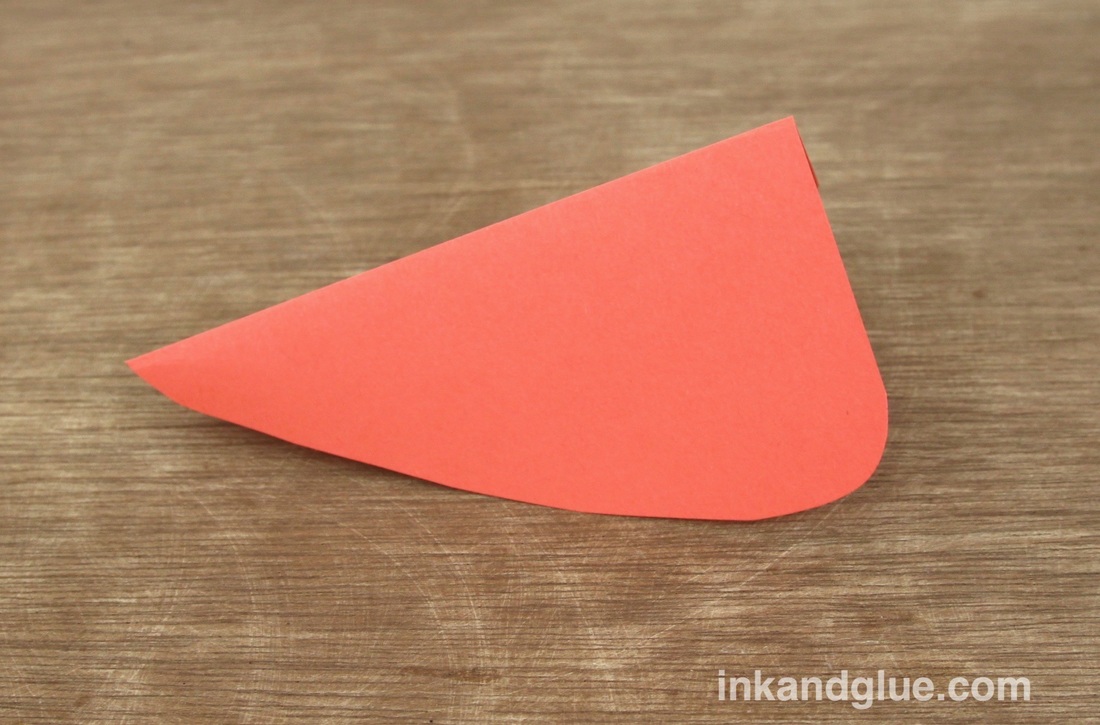
Here's the easiest paper beak ever. It's feather-light, super comfortable, and doesn't interfere with breathing. The only catch is that, unlike 99% of the costume ideas out there, it relies upon a pair of glasses to wear it. Have 20/20 vision? Get a cheap pair of costume glasses; you can glue things to them, which you really shouldn't do with prescriptions (unless you're made of money). Add feathers, and go big: think Elton John. 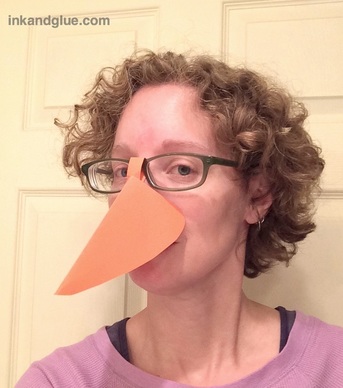 (Yes, that's me, in soft-pants studio-time mode.) You only need a piece of paper, scissors, and glue for this — really! Start by folding a piece of beak-colored paper in half. Cut a triangle with the fold along what'll be the top ridgeline of the beak. Trim your folded beak piece to shape and round the corners a bit.
This is what mine looked like when it was shaped as I wanted it.
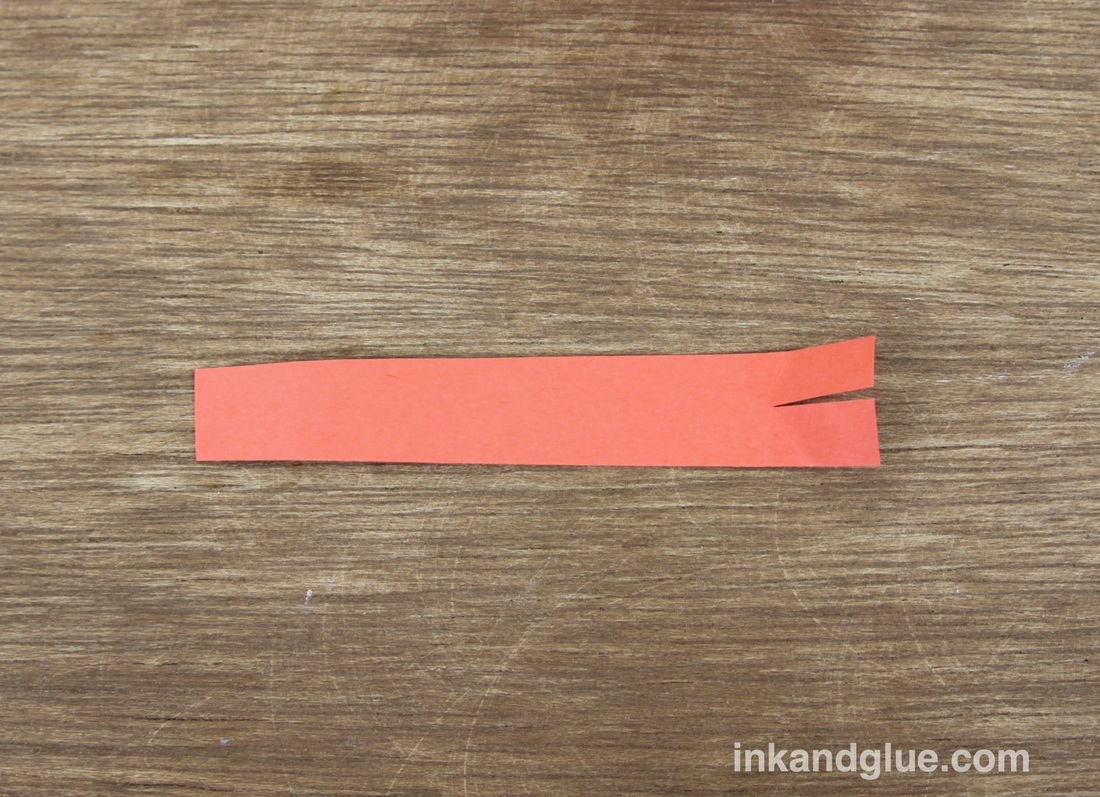
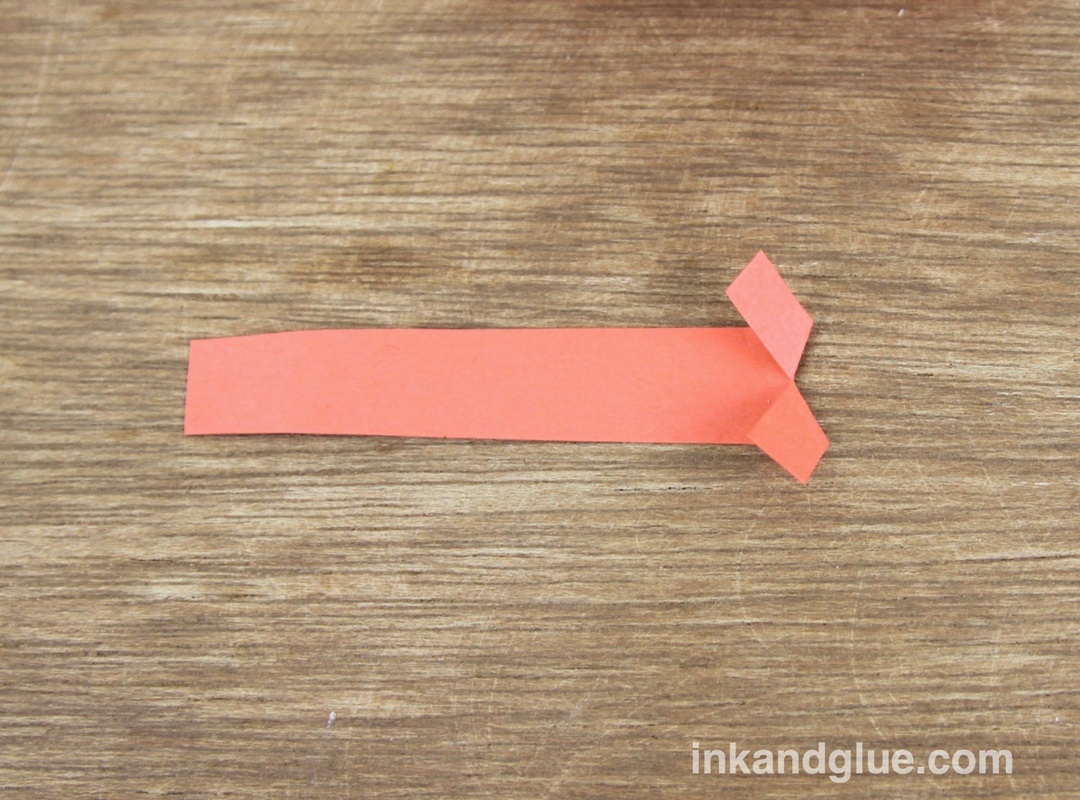
Next, cut a third- or half-inch-wide strip of paper that's about three inches long. Make a cut about a half inch into the center of one short end of the strip. Fold up the resulting tabs at 45-degree angles, as shown.
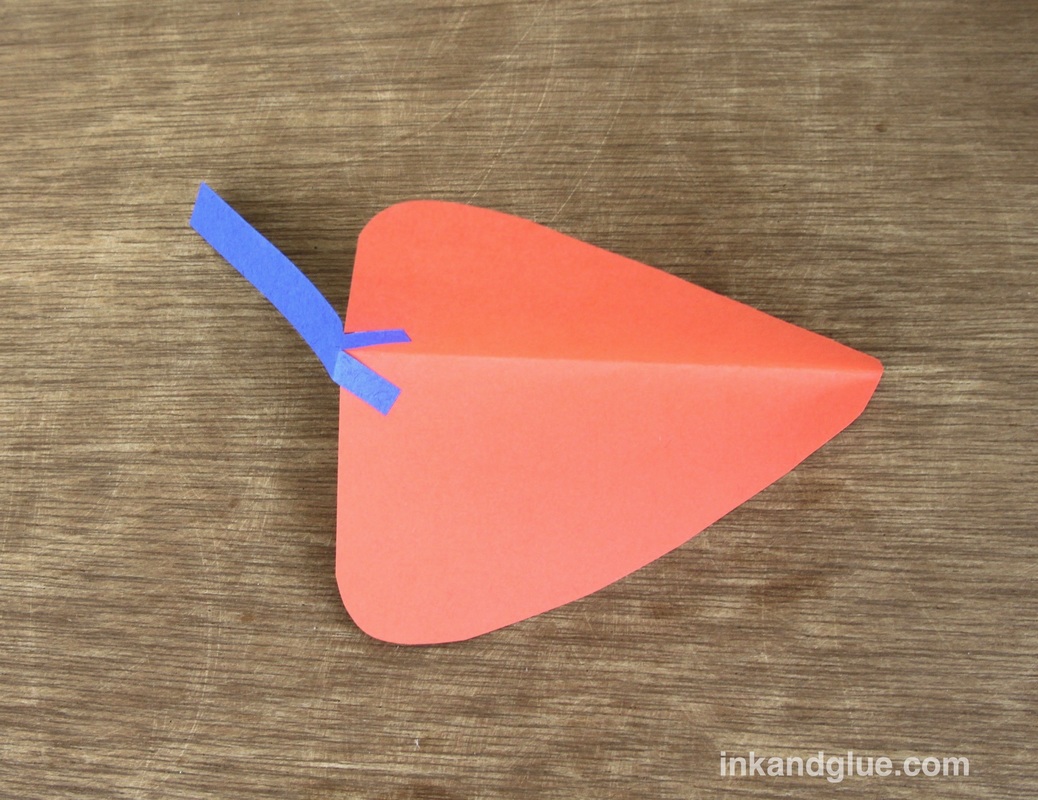
I'm using a blue strip of paper for the next steps to make it easier to see. You're going to glue the folded-in tabs to the inside of the fold at the wide edge of the beak. It feels a little counter-intuitive, so make sure you're not accidentally gluing it the wrong way. At left, you want to put glue on the sides of the two little tabs that are facing away from you. The photo at right is like one of those optical tricks where you don't know if the thing you're looking at is convex or concave. Here, it's concave — the middle fold is further away from you than the outer edges.
Here's a photo showing what the beak will look like if all has gone well. If it hasn't, just tear it off and try a new strip in the same place. The glued-on tabs will be hidden inside the beak, so no worries. 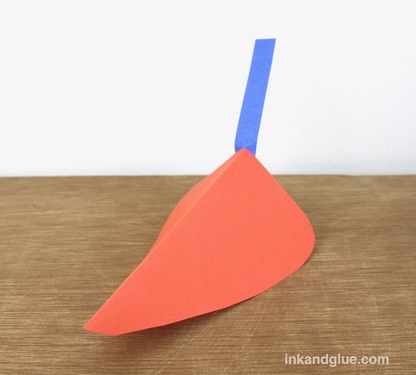 Now take your beak to a mirror, and slip the tab over the nose piece of your glasses. Fold the paper around the glasses. Tape the strip to the underside of itself, if you want a slightly more permanent hold. 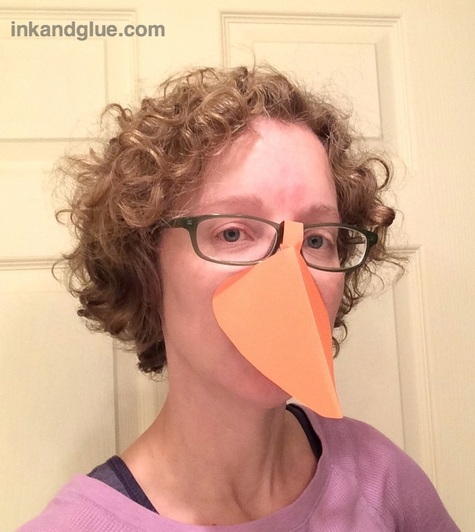 Finito! If you want your beak at more of a jaunty, upright angle, try changing the angle of the short side, as shown below. In that photo, the folds of the two beaks are at the top. The top beak has the same angle as the one I'm wearing; the bottom will point the beak a bit more skyward. 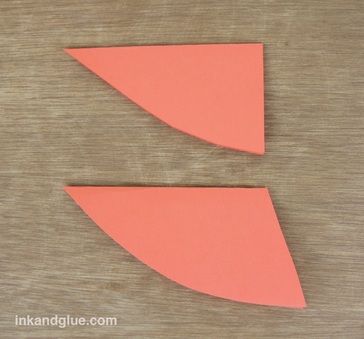 IIIIIIII (that's Woodstock-speak for xo)
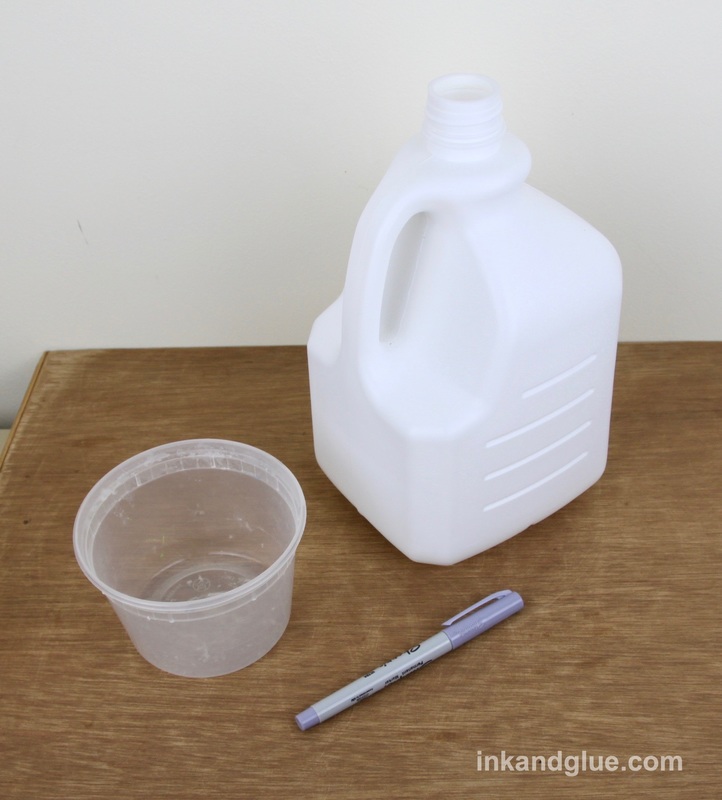
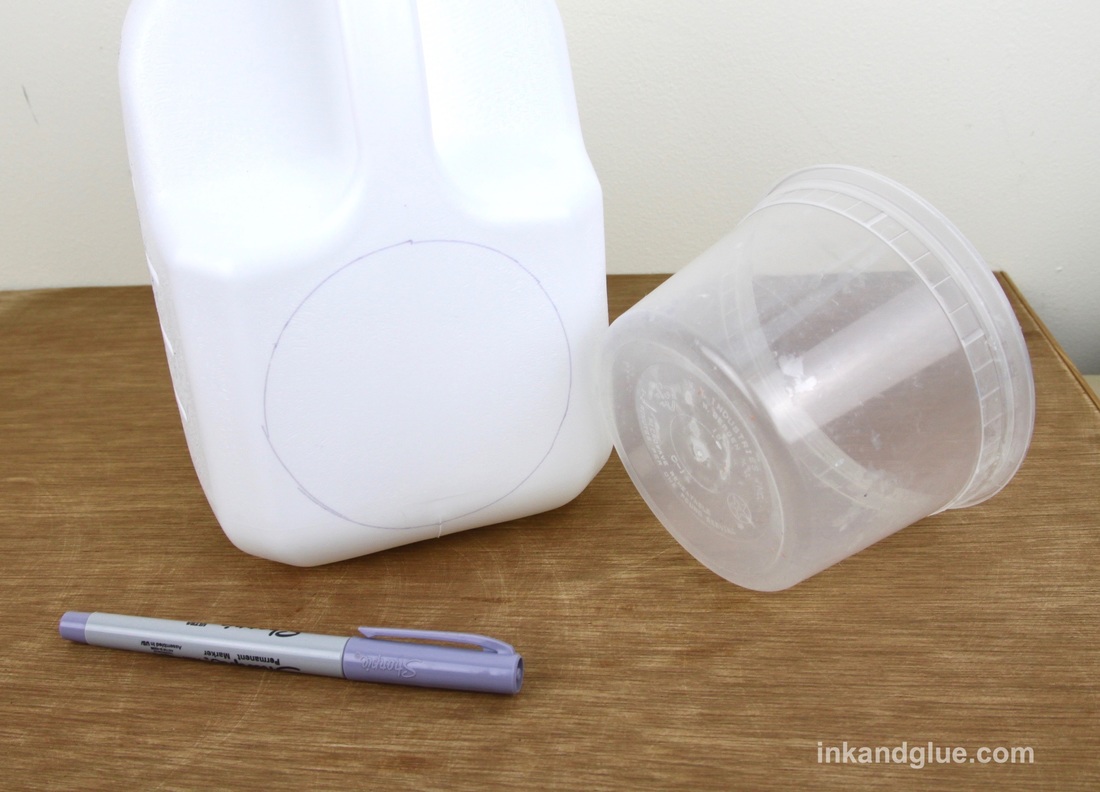
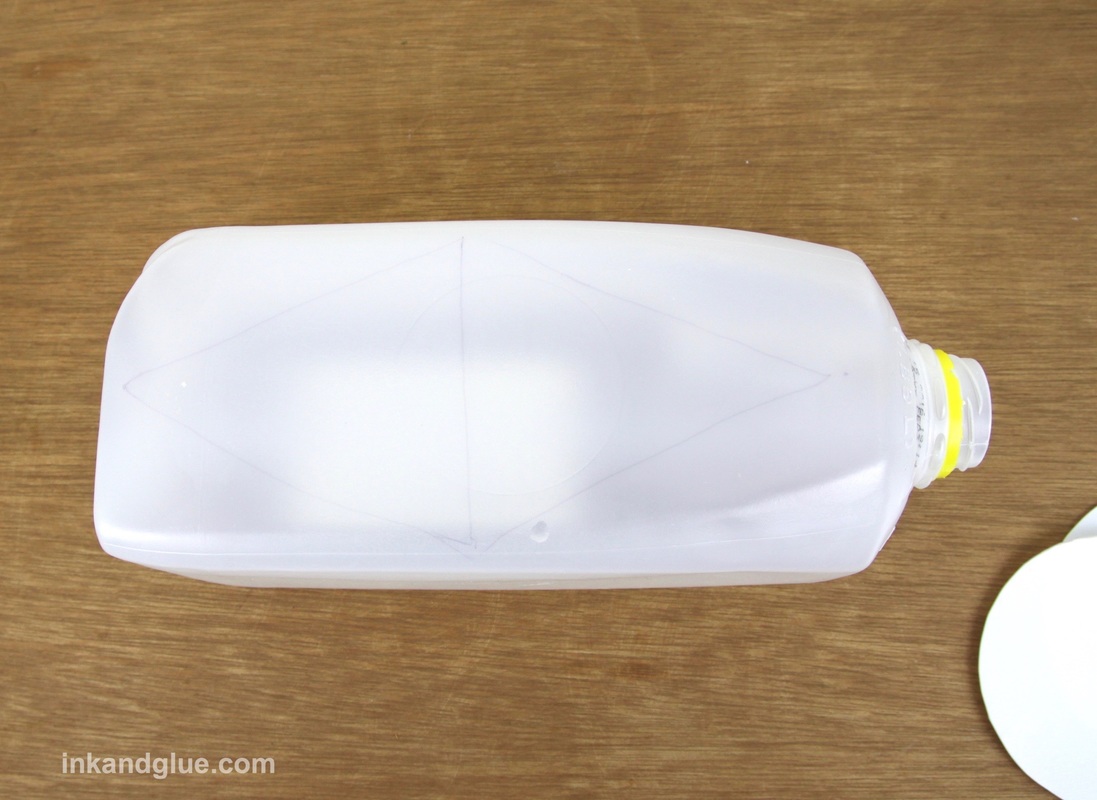
 Need a yard monster for the upcoming Halloween holiday? Of COURSE you do; everyone does. Here's a way to make one that's both quick and nearly free. Start with two white or white-ish plastic beverage jugs that have been emptied and swished with clean water. Find a round thing (such as this leftover Chinese soup container) that has a diameter that will fit on one of the flat surfaces of your largest jug. Trace the circle onto the jug twice.
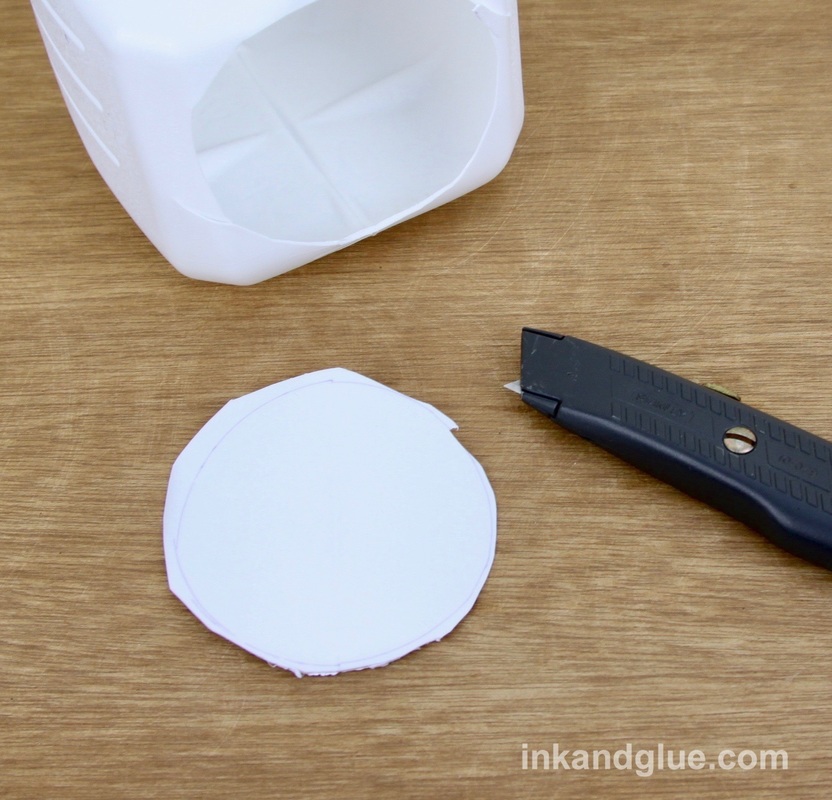
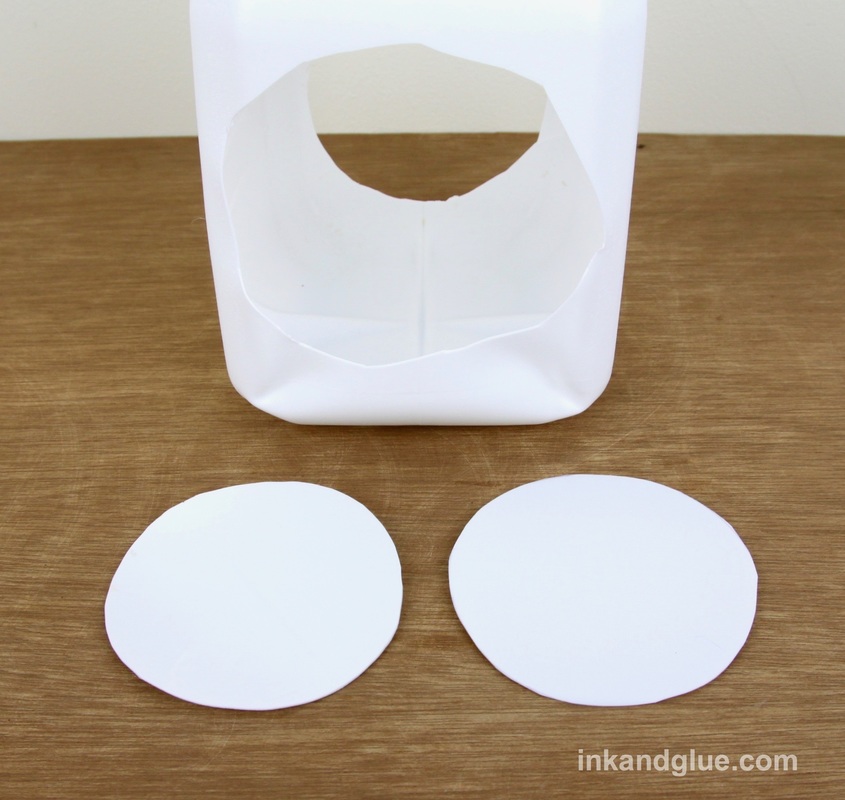
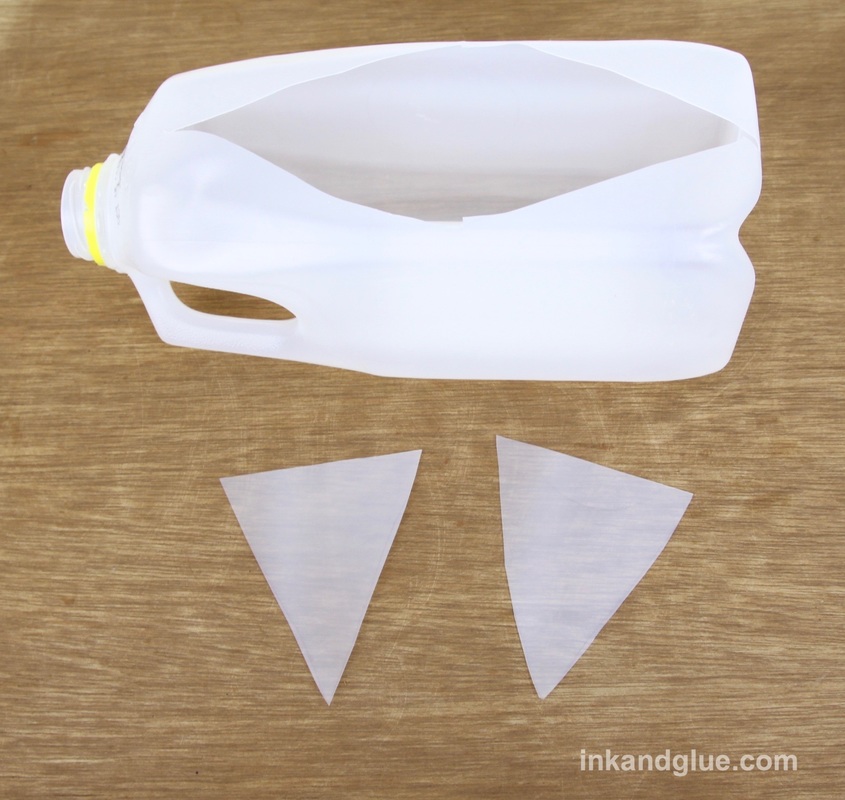
Use a utility knife to cut the circles from the jug. I cut them out pretty roughly, and then trimmed the circles neatly with scissors.
On the second jug, sketch five or six large triangular teeth on the flat panels and cut them out as you did above. My second jug was much softer plastic than the first, so I was able to just use the utility knife to start a hole, and used the scissors to cut out the shapes.
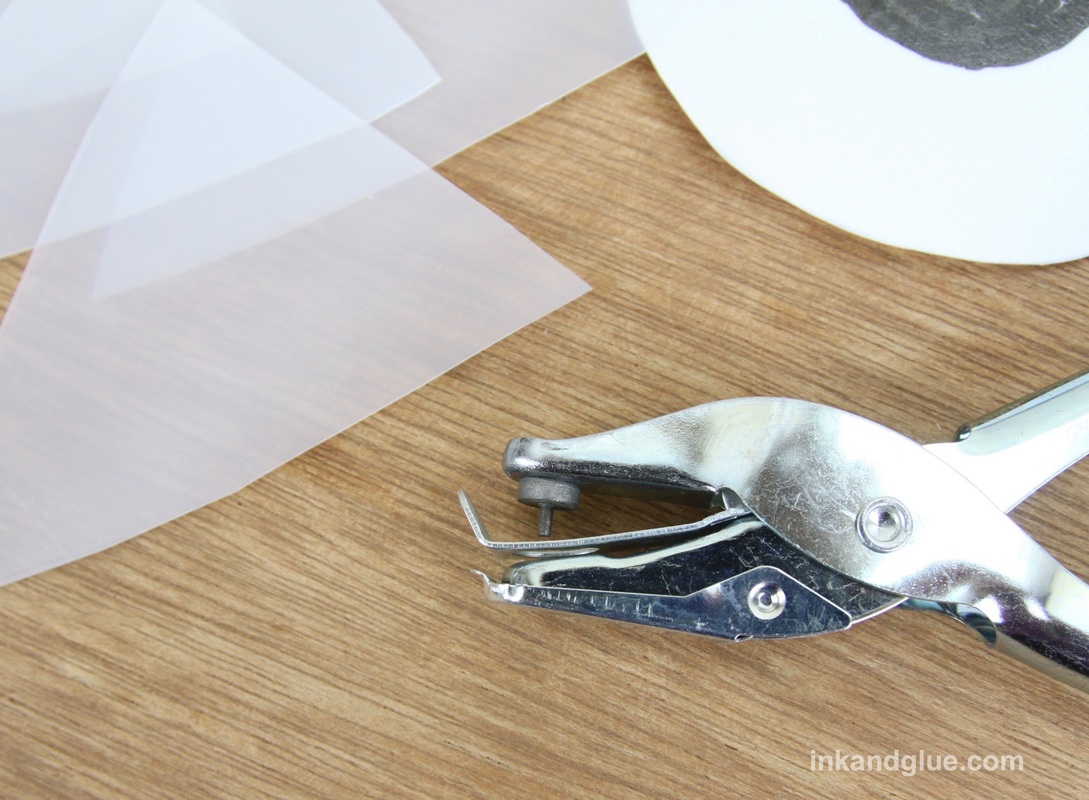
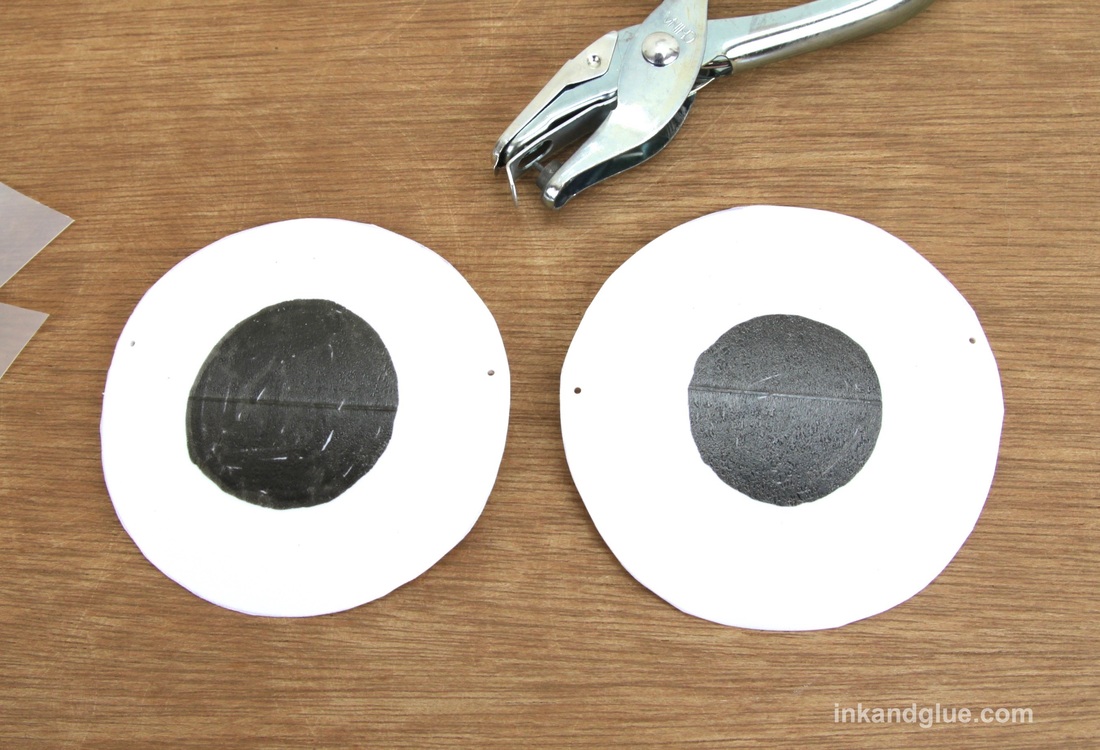
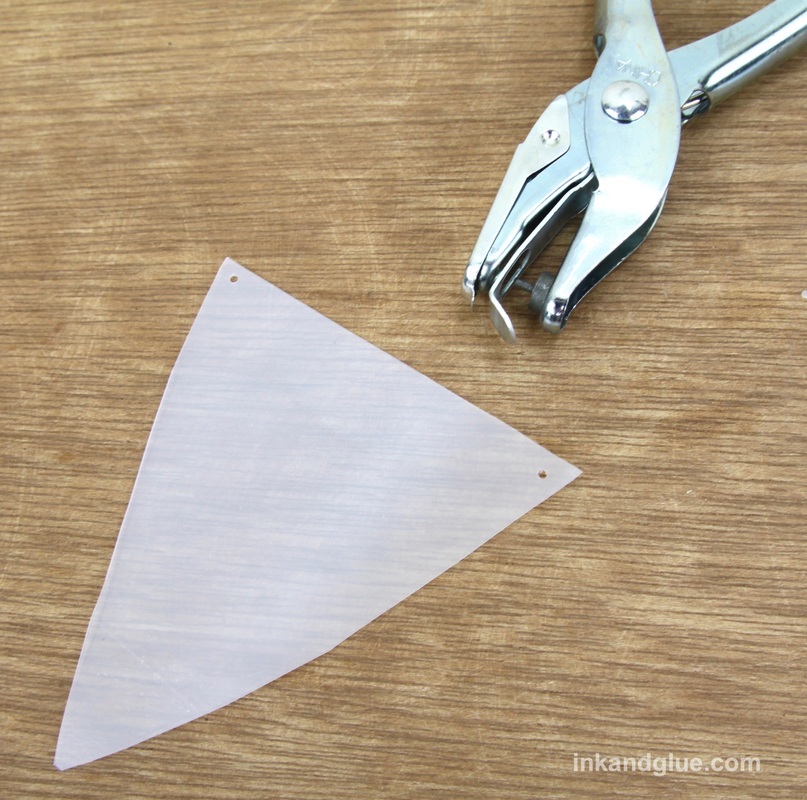
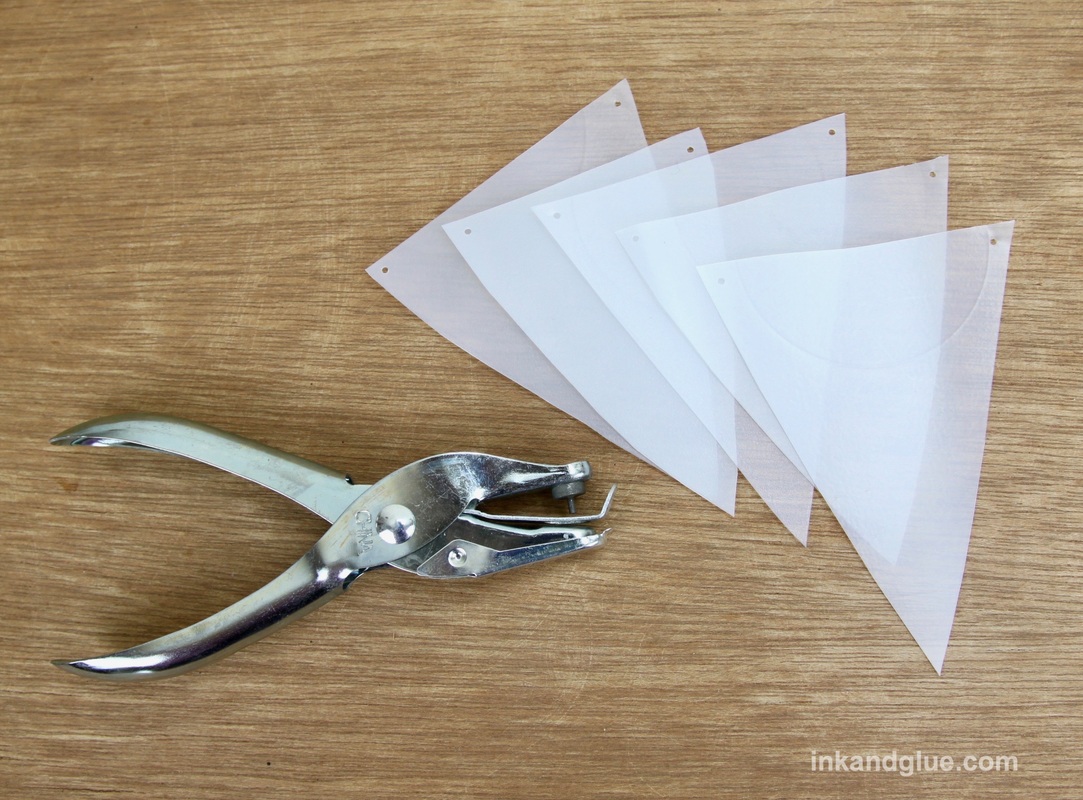
Draw pupils on the circles with black permanent marker, and let the ink dry (just a couple of minutes). As long as you don't rub and scrub, the ink will stay on the plastic in the rain.  Now you'll be punching holes in opposing edges of each eye and the corners of each tooth. You can use a large tapestry needle, or a pushpin (wiggle it to enlarge the hole), but I use a hand-held, 1/16" hole punch. I recommend it.
Punch the holes within an eighth to a quarter of an inch from the edge. For the teeth, only punch holes in the shorter two points; leave the tooth tip un-holed.
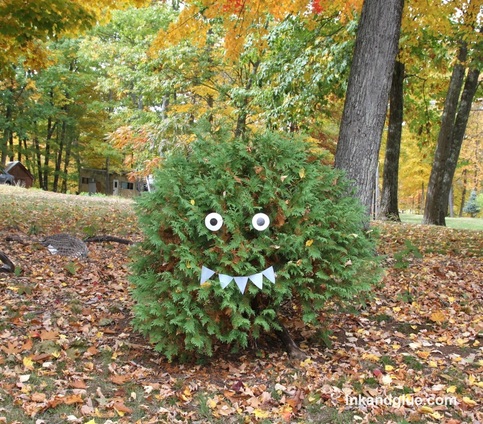
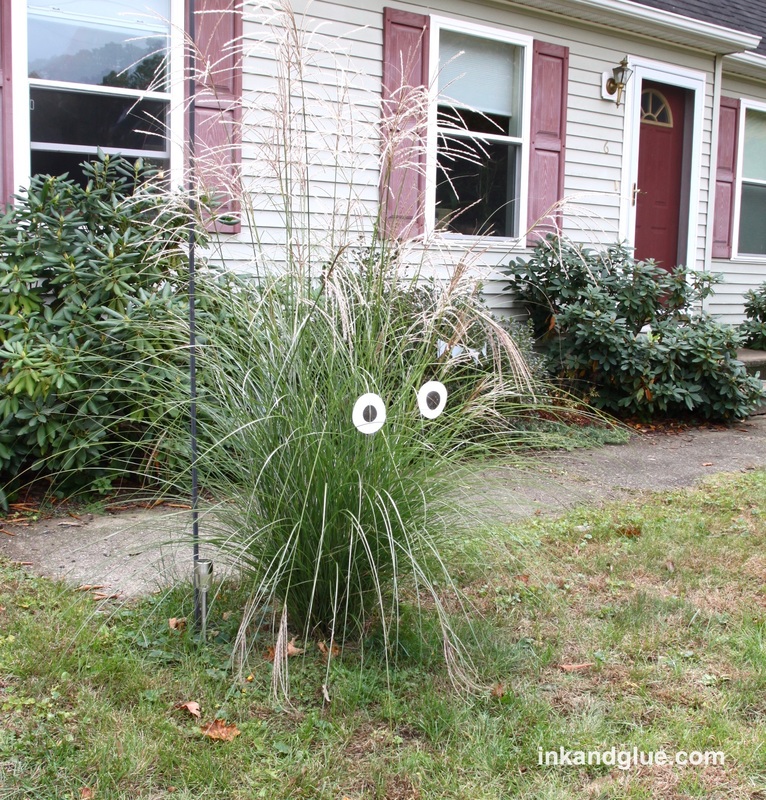
Cut two yard-long pieces of fishing line (aka clear plastic cord). Weave one cord length through the holes in the teeth. Tie a large-ish loop near each end of the cord. 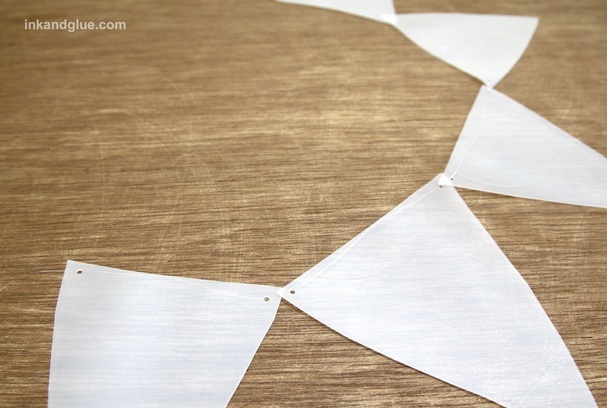 Feed the other cord length through the holes in the eyes, looping the cord through twice — this will keep the eyes from sliding freely, but will still let you slide them along the cord's length if you need to. Tie a loop at each end of this cord, too. Note: It is very difficult to photograph "invisible fishing line." 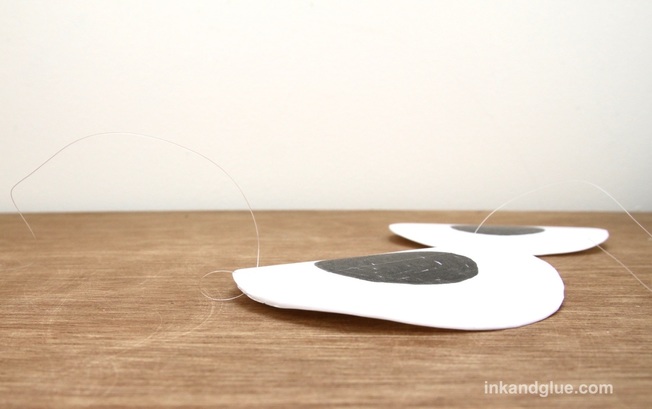 Head outside with your eyes and teeth and find a suitable shrubbery to enliven. Hang your eyes and teeth row by hooking the loops around any semi-sturdy part of the bush. Don't be afraid to do some minor pruning if you need to. I kept mine au naturale, but it took patience to get everything to lay correctly and neatly. 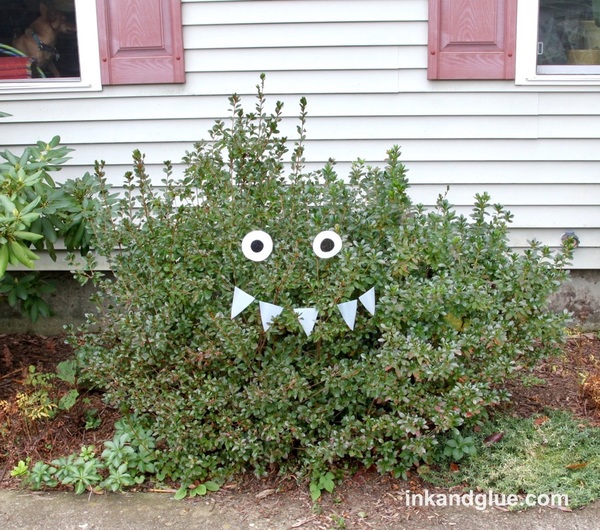
Last weekend I went to one of those pop-up Halloween superstores where you can buy an entire costume set (outfit, mask, props, makeup) for, like, $15. It's almost too easy. Why, back in my day, the only affordable "costume sets" were like this one: 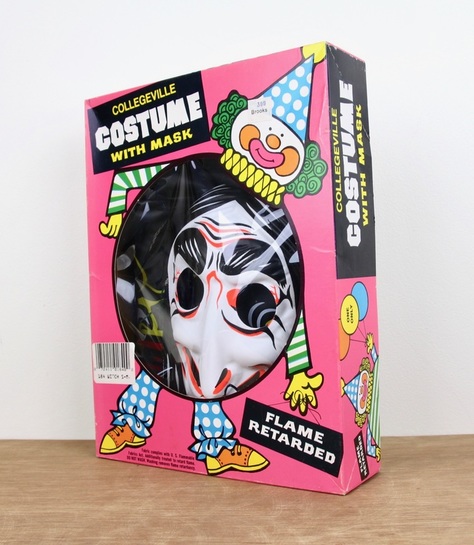 I can't remember exactly where I bought this, but it wasn't a vintage store or a Goodwill. I think it was an old, fading discount store, like a Caldor or Bradlees. It was sometime in the mid to late 90s, and seeing as this thing was manufactured in 1982, it wasn't all that old to begin with. It just looks like it was designed in the 60's. And probably was. 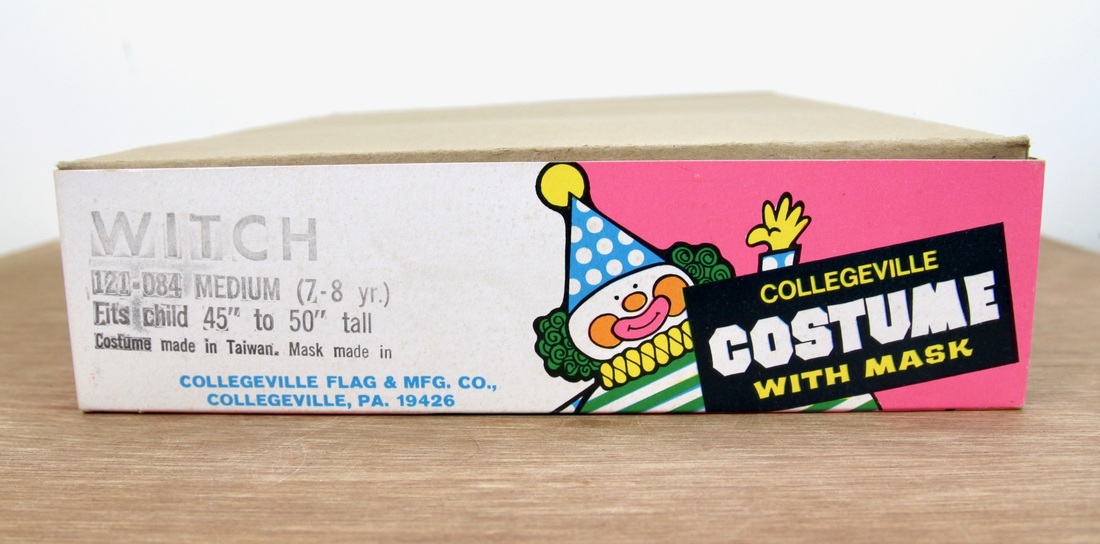 If you're unfamiliar with this genre of costume, it's quite simple. You get a plastic mask, and a plastic shirt/smock with an image of the thing you were supposed to be — not an image of the clothes your character would wear, but a picture of the entire character. So, so disappointing. 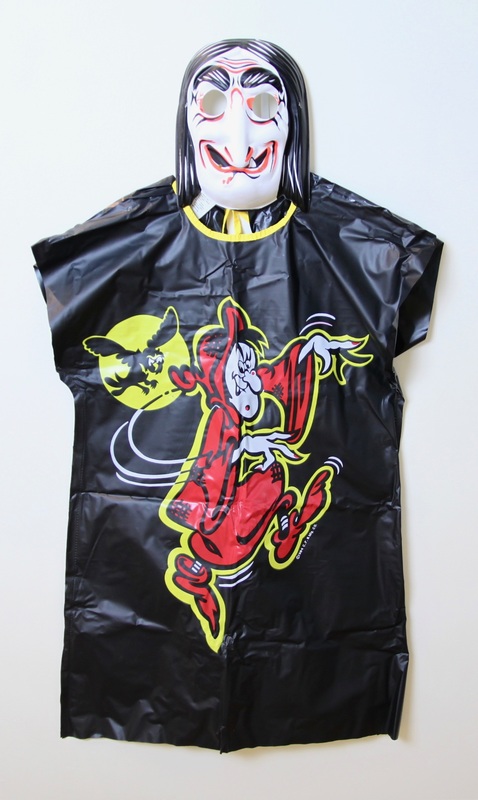 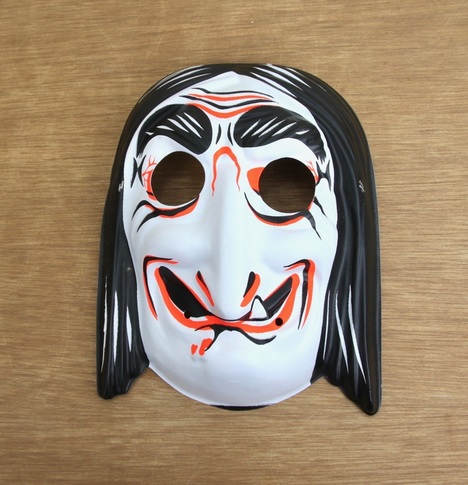 I think the mask is great, from a design and graphics standpoint. But, come on: Would a witch wear a shirt with a witch on it? It doesn't make sense. The witch on the shirt is wearing a red robe, just make the smock out of red plastic! I'd even be ok with it if you threw the owl on there.  I actually wore this one Halloween back in my 20's, when irony was at its apex. Wearing this tight plasticky smock thing and some leggings was the closest to a "sexy" costume as I ever wanted to get.
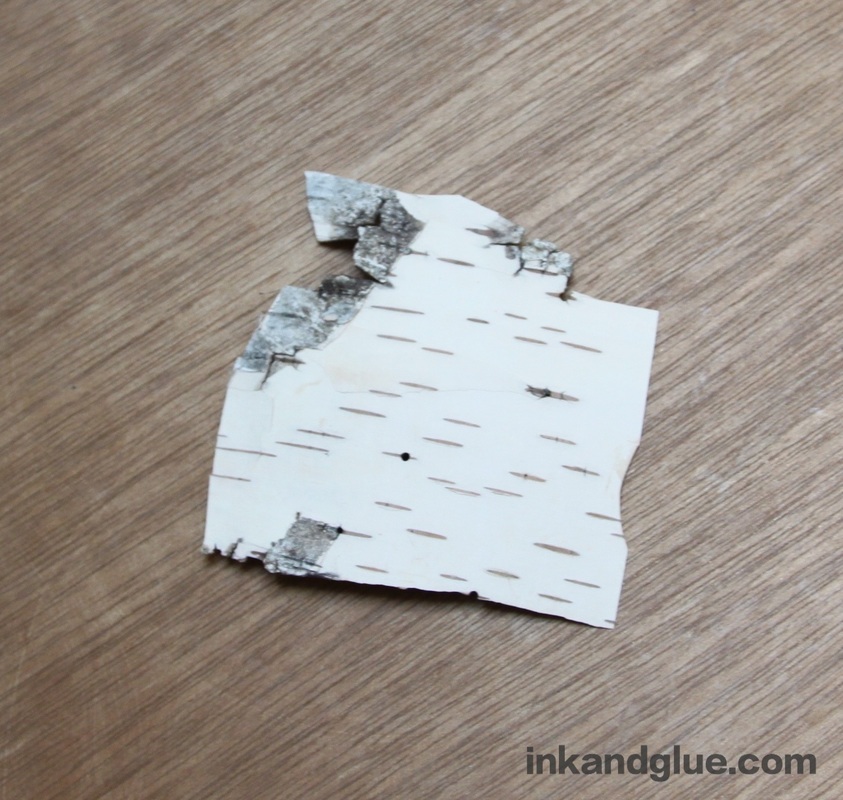
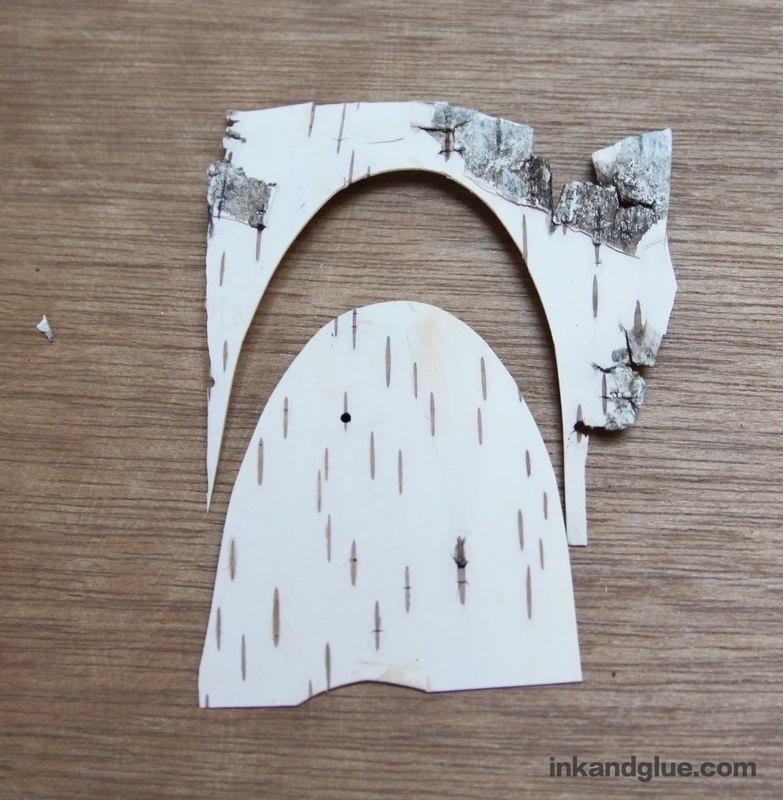
For more drug-store costumes of this sort, check out Plaid Stallion's Collegeville Costumes catalog from 1983. It is a delight. xo! 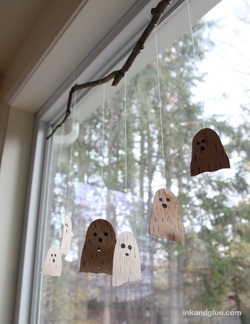 As promised yesterday, I'm back with another natural material-based mobile for a last-minute Halloween craft! Like the leaves, this requires a bit of prep, in that you need to find some birch bark. Note: do not peel birch bark right from the tree, as that can harm it. Look nearby and you'll likely find a piece or two that has fallen off. Back home, use regular scissors to cut simple ghost shapes from the bark.
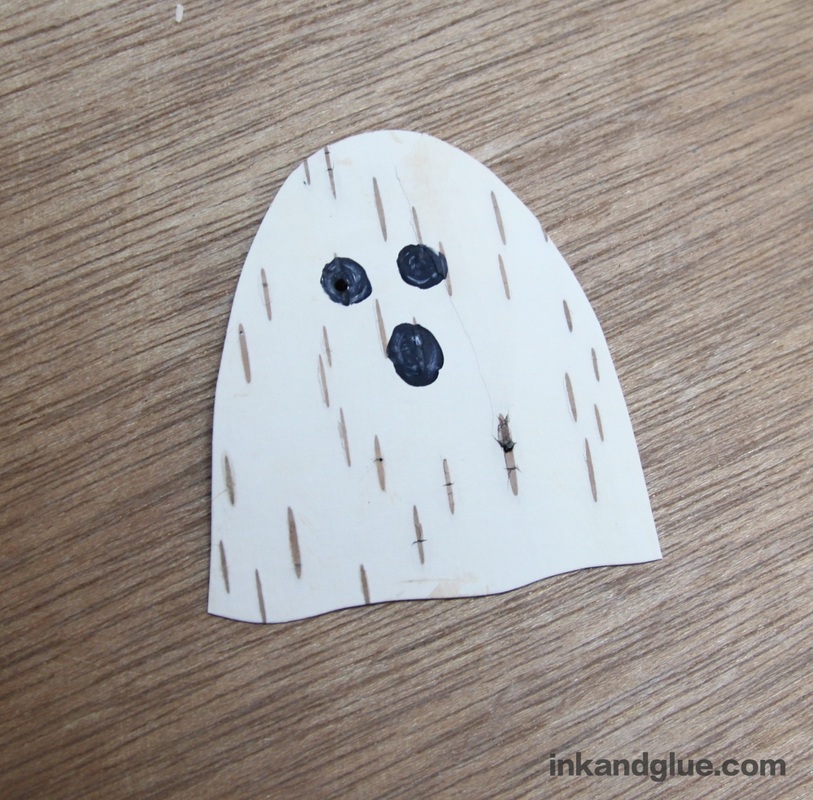
Use a black marker to add eyes and a mouth to each one.
Next you'll add the strings for hanging. As with yesterday's mobile, I separated a two-foot length of embroidery floss into individual threads. Use small dabs of tacky glue to adhere the thread ends to the backs of the birch bark ghosts, and let the glue dry for about a half-hour. 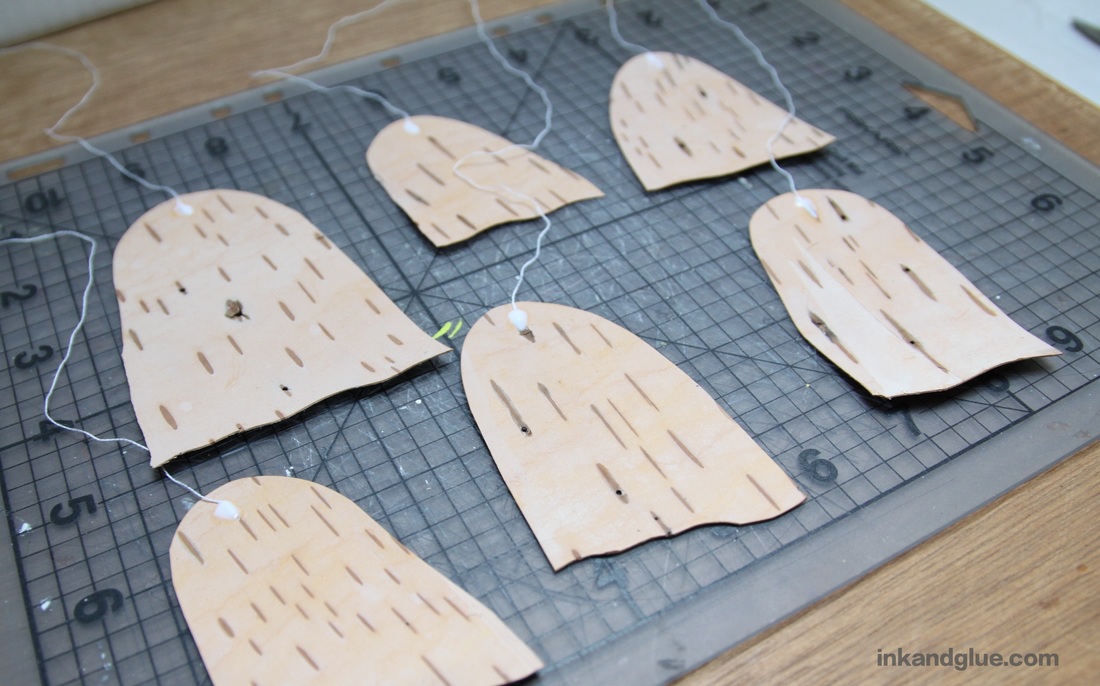 Use the waiting time to select a suitable stick to anchor your ghosts. I chose one that was a bit crooked so it's more Halloween-y. Whichever stick you choose, make sure it's dry and isn't flaking off bits of bark. Tie the thread ends to the stick with single knots, so you can easily adjust the length and make them nicely staggered. 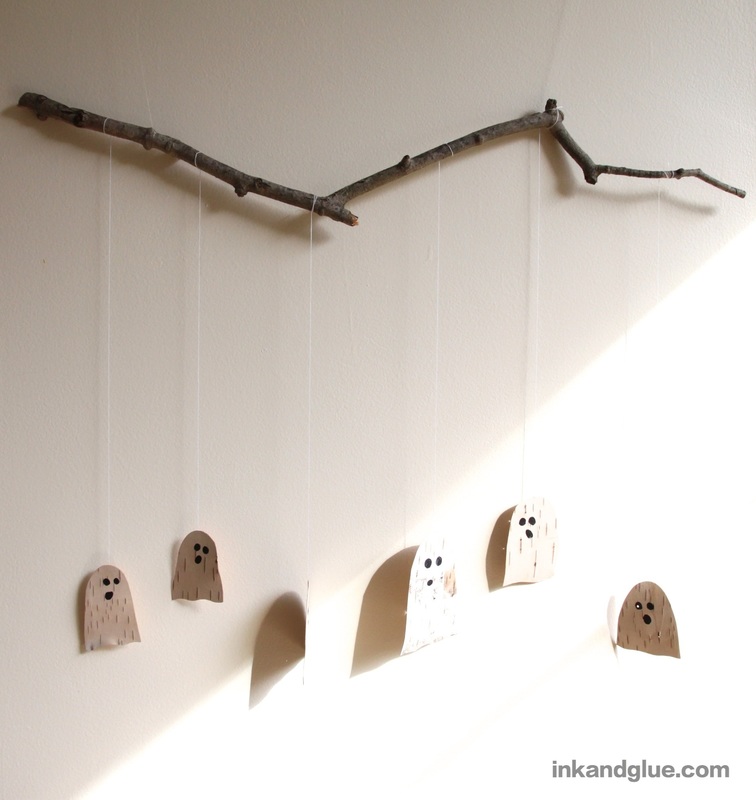 When the ghosts are floating at the altitude you prefer, dab tacky glue onto each knot with your fingertip. Hang your stick with a length of clear plastic cord or fishing line tied near each end. As with the jack o' leaves, I like my mobile near a window. Check out the reflections of the ghosts in the glass! Creeeepy. 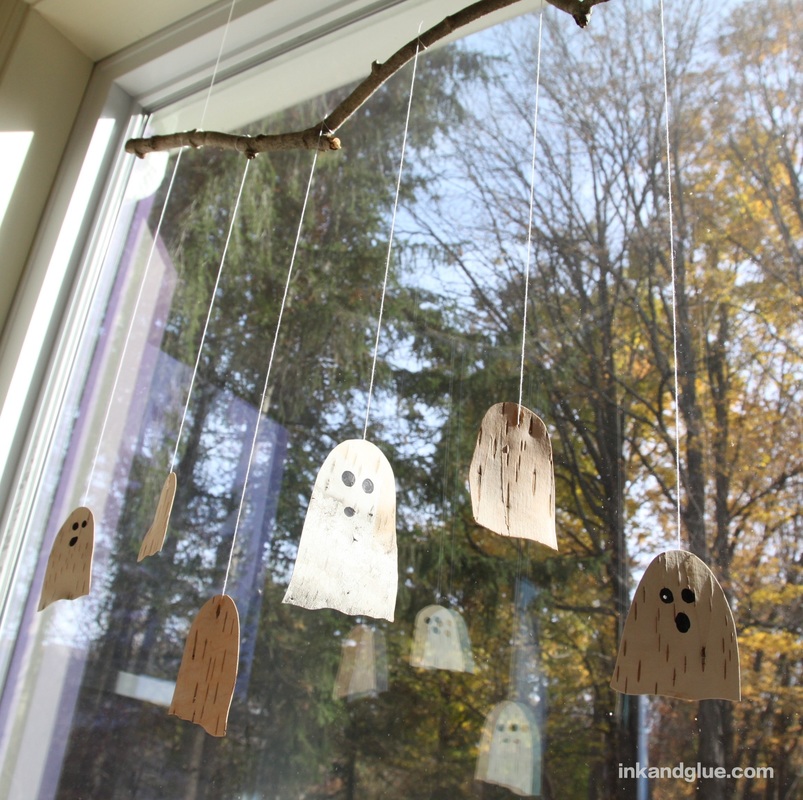 Happy almost-Halloween! xo
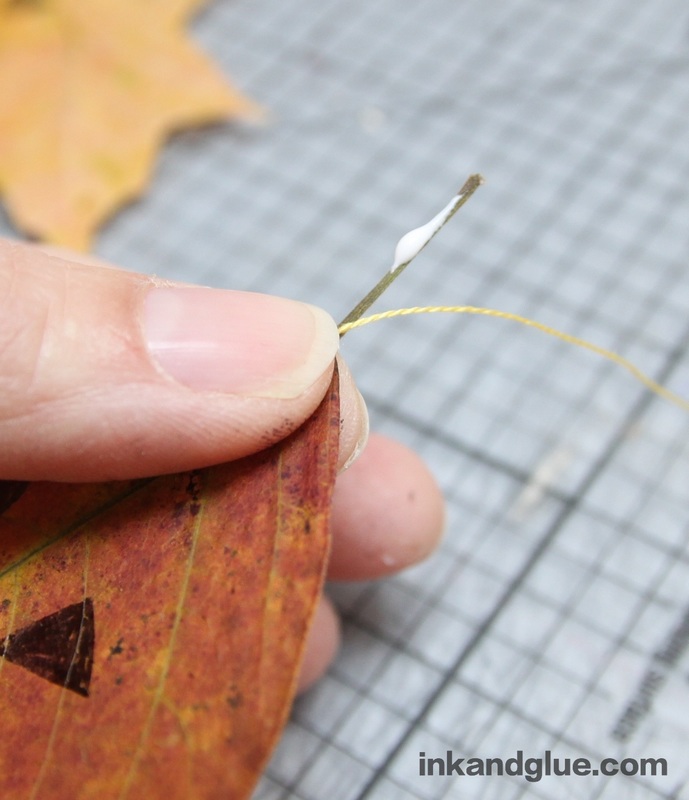
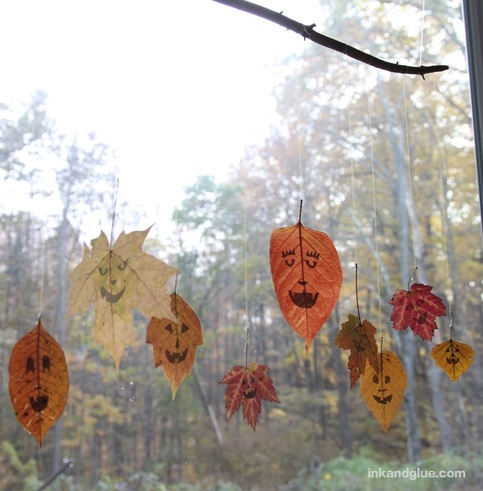 This has been an epic year for autumn foliage. I saved quite a few leaves inside the pages of a book, but wanted to get them out in the open. With Halloween coming in just a few days, I came up with this quick (really!) craft that the whole family can get involved with. The leaves you see here are a mixture of 1-year-olds and 1-week-olds. The 1-weekers, being more pliable and less crunchy, were much easier to draw on. Start by selecting seven or eight leaves that you've previously pressed. Draw jack o' lantern faces on them using a fine-point, felt-tip marker. 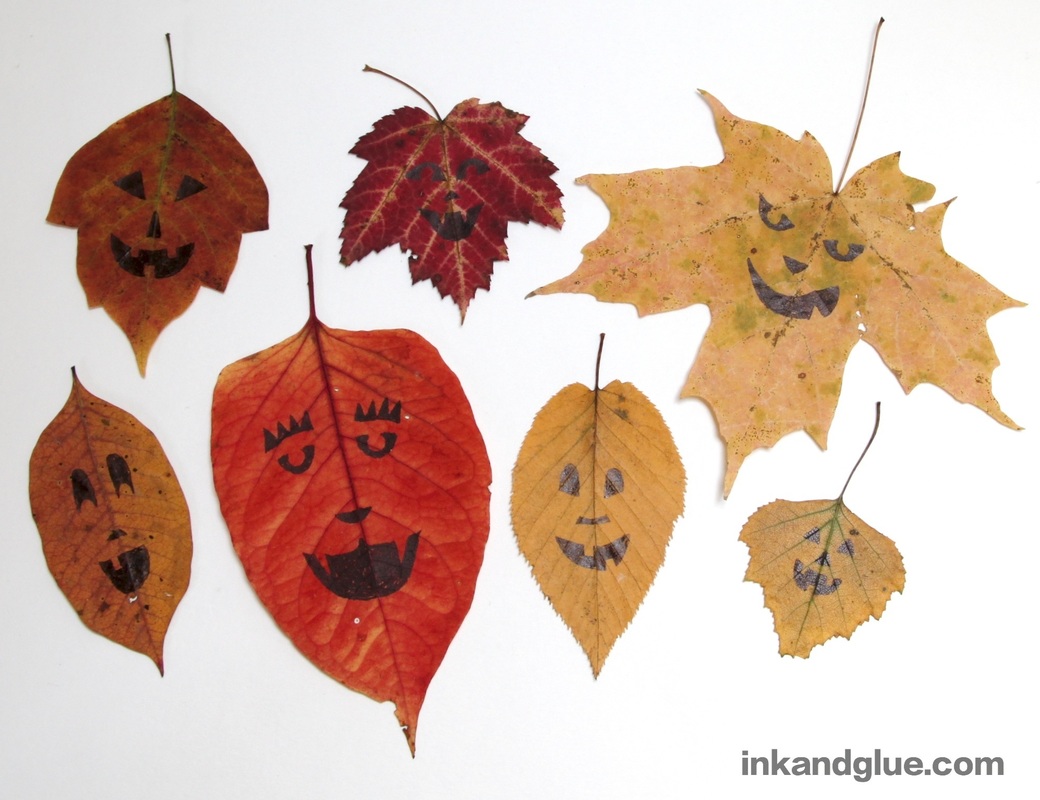 Next, you'll be gluing the hanging thread to the stem of each leaf. I separated the strands from a two-foot length of embroidery floss; those strands are just a tiny bit thicker than regular thread, making them easier to work with. Hold the end of a thread to the base of a stem, and dab a bit of tacky glue onto the stem with your other hand. Then, wrap the thread around the gluey stem, as shown. No need to make a microscopic knot!
Do this with all of the leaves, then let them sit and dry for a half-hour or so. Take this time to walk to the park or the woods and find your perfect stick to hang your leaves from. It should be somewhat thin, not too brittle, and dry, with no flaky bark. The photo below shows off the one I chose.  Then it's just a matter of tying the thread ends to the stick. If you tie with a single knot, the thread will be loose enough that you can adjust the length. Vary the lengths so the leaves won't crash into each other much. Once the lengths are where you want them, tighten each knot and use your fingertip to apply a bit of glue. Tie clear plastic cord or fishing line near each end of the stick, and hang! I like my mobile in front of a window, where the light can come through the leaves, and the leaves are reflected in the glass. 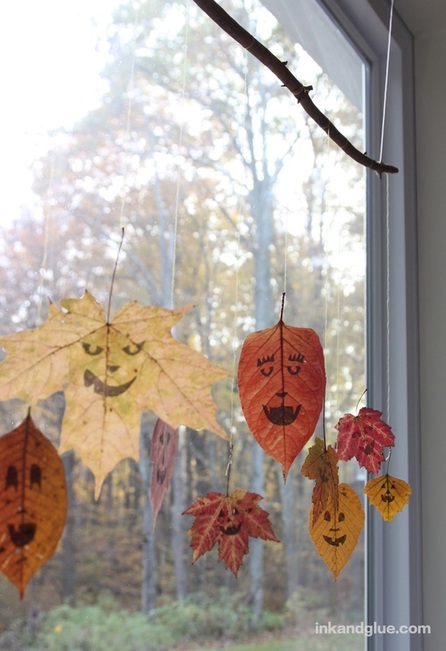 Come back tomorrow for a totally different, nature-based Halloween mobile!
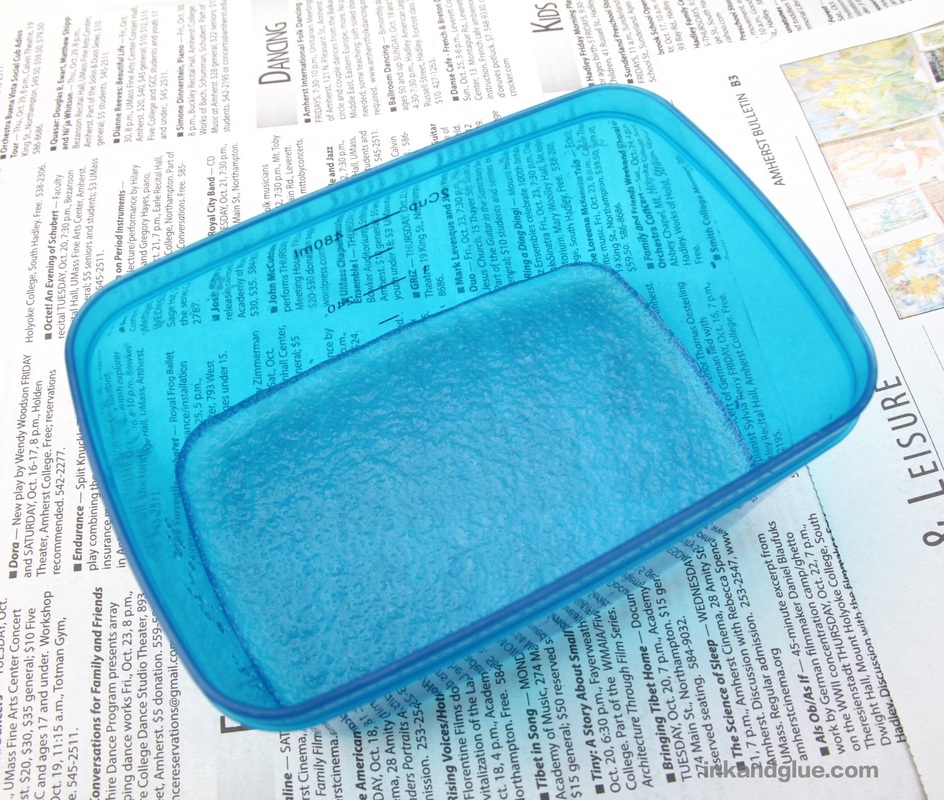
xo Ahh, the Halloween season. When families carve pumpkins, dress up in costumes, eat candy together, and of course, set up the traditional Halloween eyeball tree. 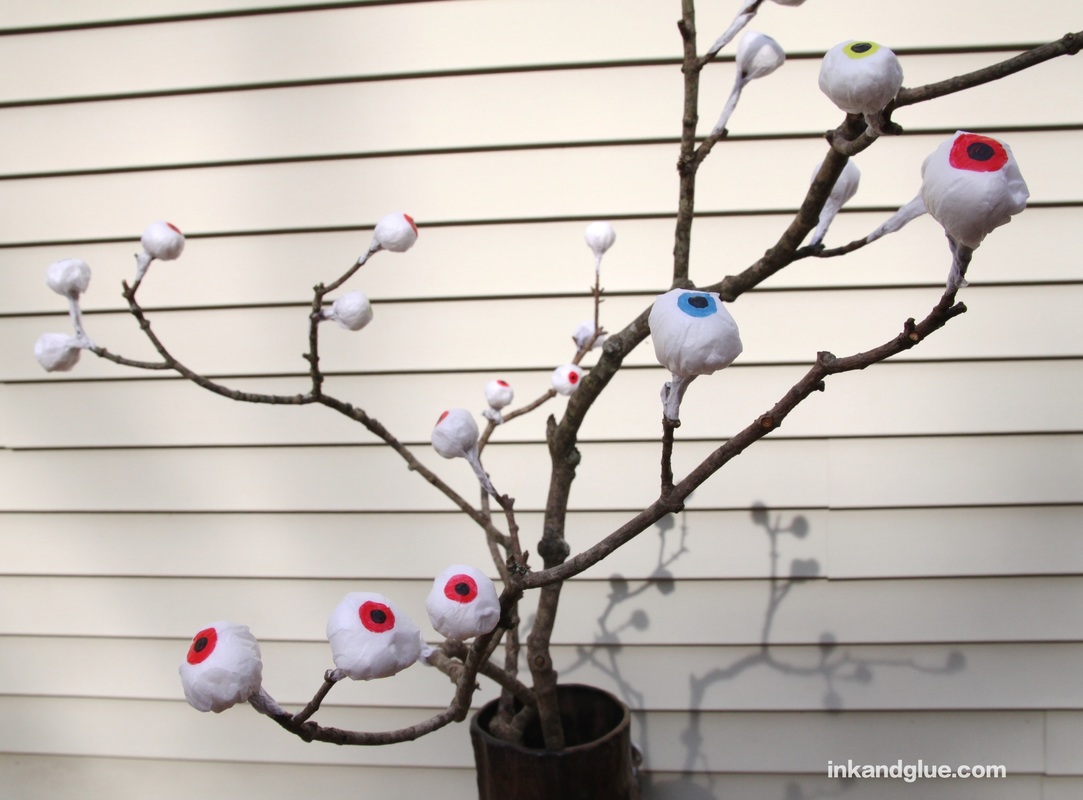 This is a fun craft, and it's got some messy parts, which kind of goes with the theme. It's also, like pretty much everything I make, very inexpensive. You'll want to start by finding the right branch or two. I happened upon one in my yard that was pretty much perfect, but I know from experience how rare that is. You'll want one that has a bunch of smaller branches that, um, branch out, so you'll have stems for your eyes. Get out a large vase that's heavy enough to hold your branch without tipping over. The next important ingredient is powdered wallpaper sizing or adhesive. You can use papier mache for this craft instead, but I like the gel-like consistency of the adhesive; since it's less watery, it won't instantly dissolve the tissue paper you'll be using. It also dries super strong, is non-toxic, and is easy to clean up. One container will last you for years, and once you try it for papier mache, you'll never go back to flour and water. Trust. For enough adhesive to make a whole tree, pour about a third of a cup of water into a container. 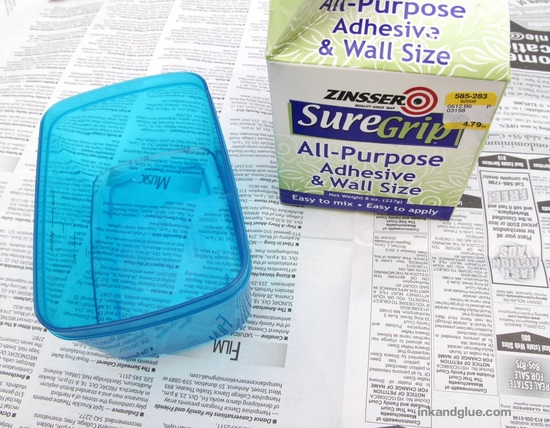 Sprinkle the water with just a little of the adhesive powder — maybe half a teaspoon, at most. Swirl it around with your finger, then let it sit for five minutes. It will magically turn into a clear gel (at right).
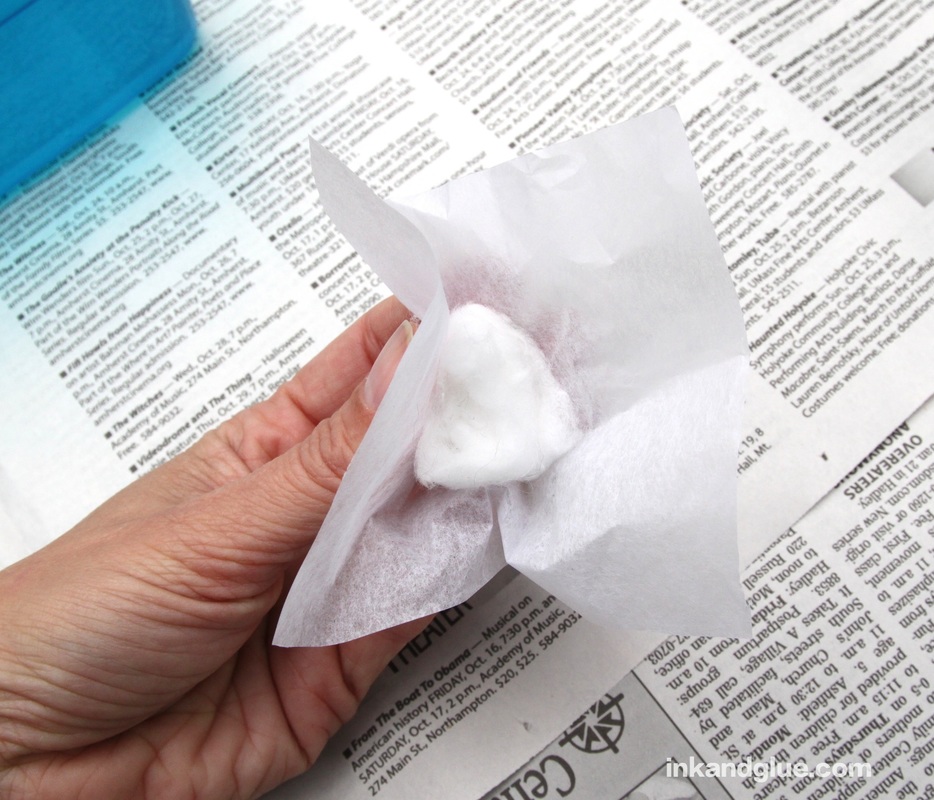
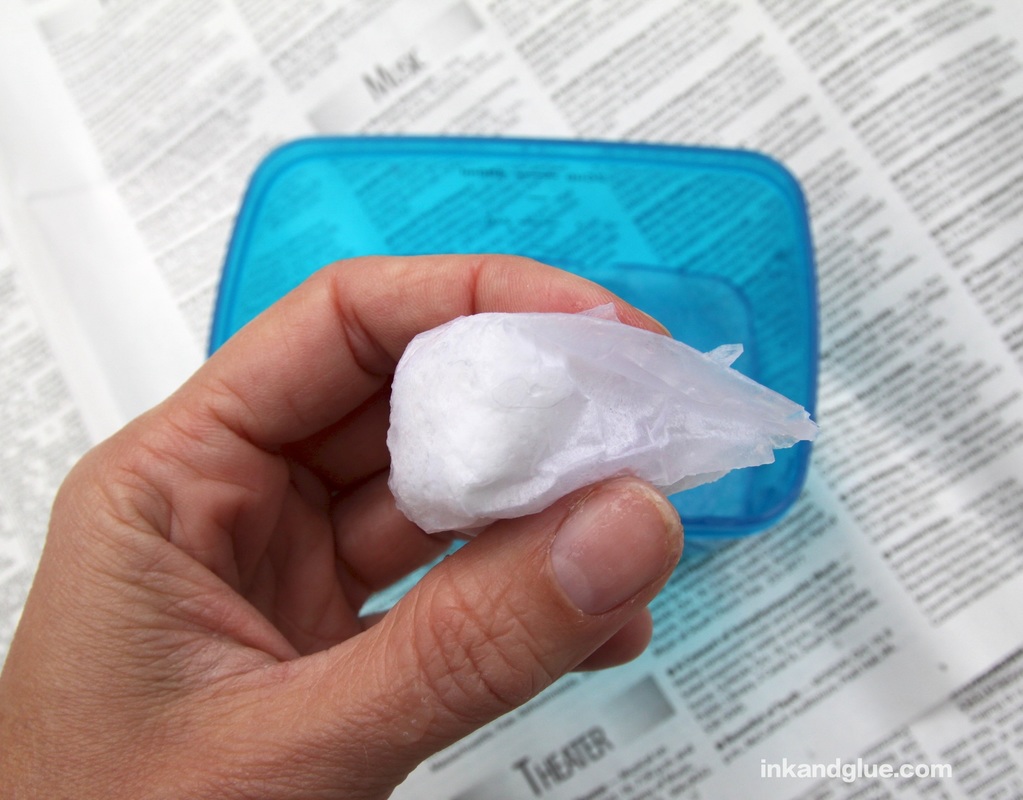
Cut white tissue paper into squares about 4 inches wide. For each eyeball, place a cotton ball in the middle of a square, and gently crumple the paper around it so the cotton is enclosed.
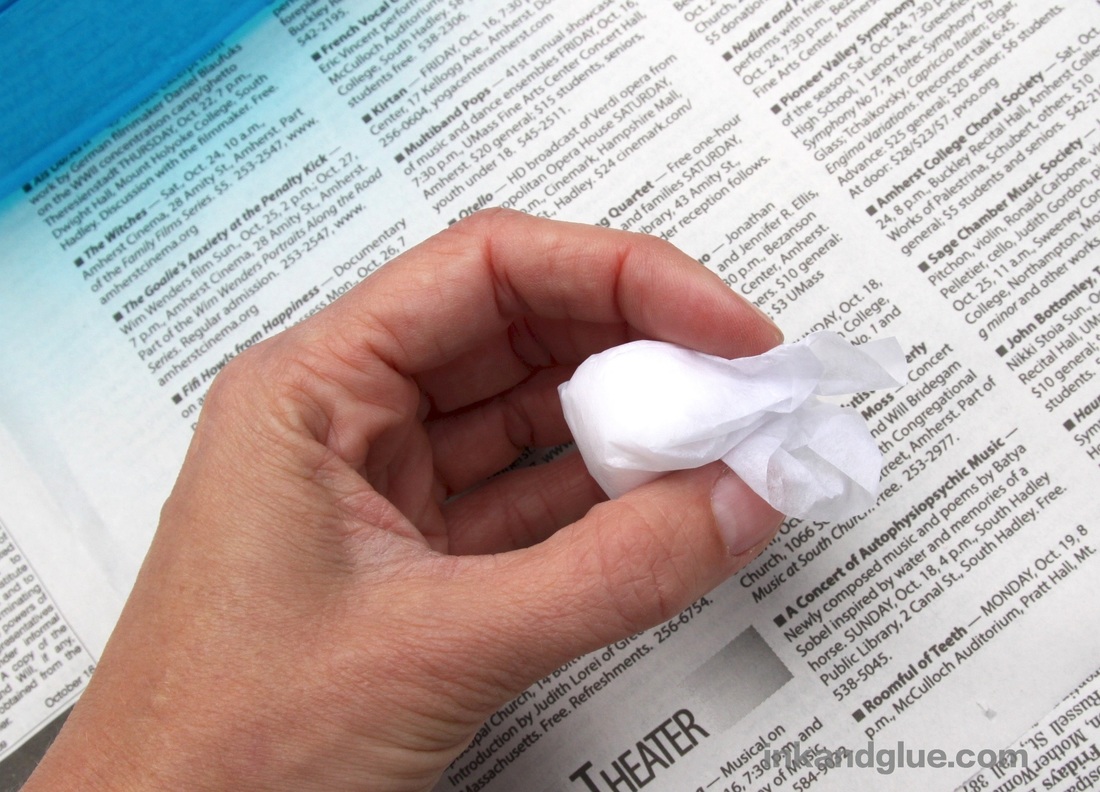
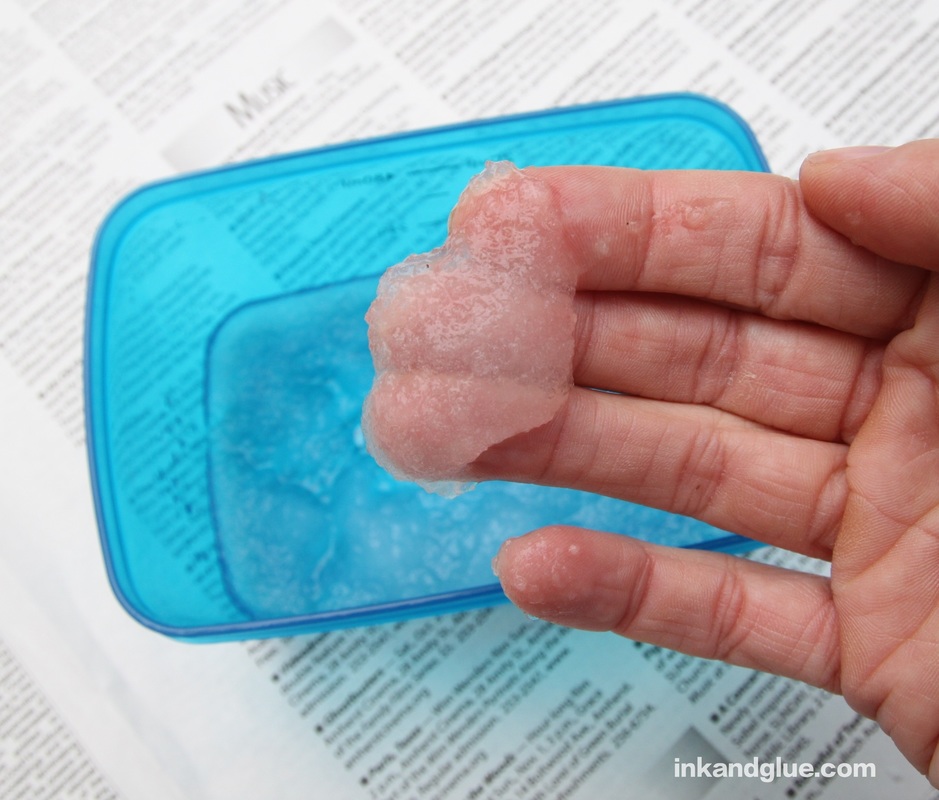
With your other hand, scoop up a bloop of the adhesive. Dab and smooth it onto the paper. Try to keep the rounded end smooth and unwrinkled.
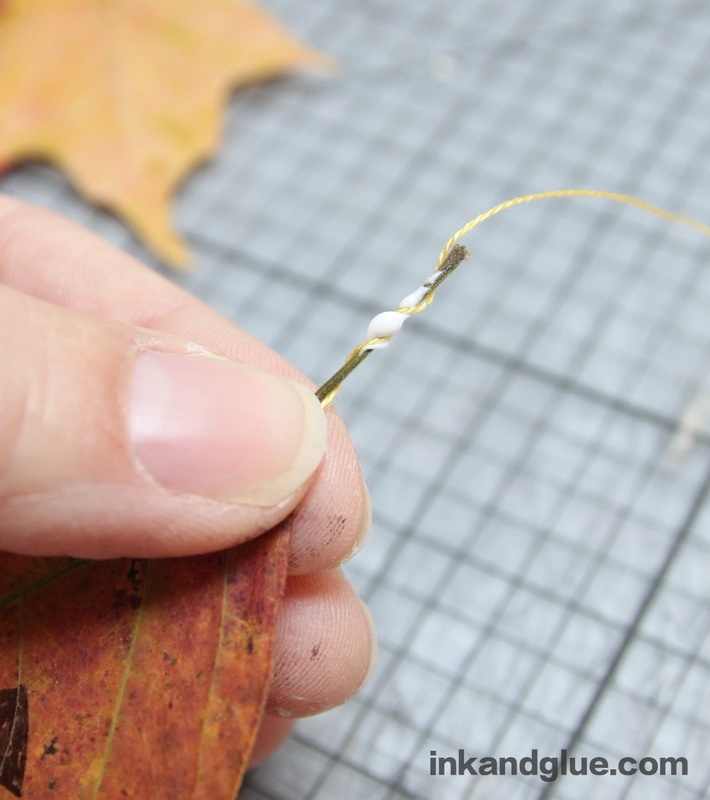
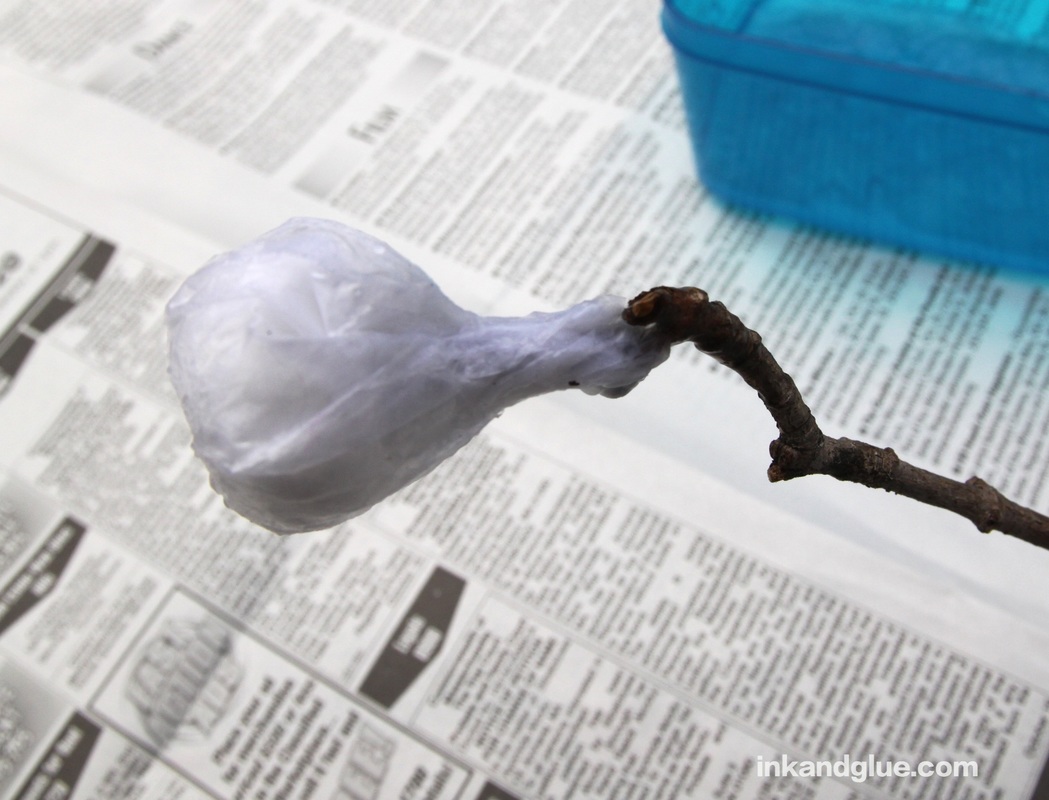
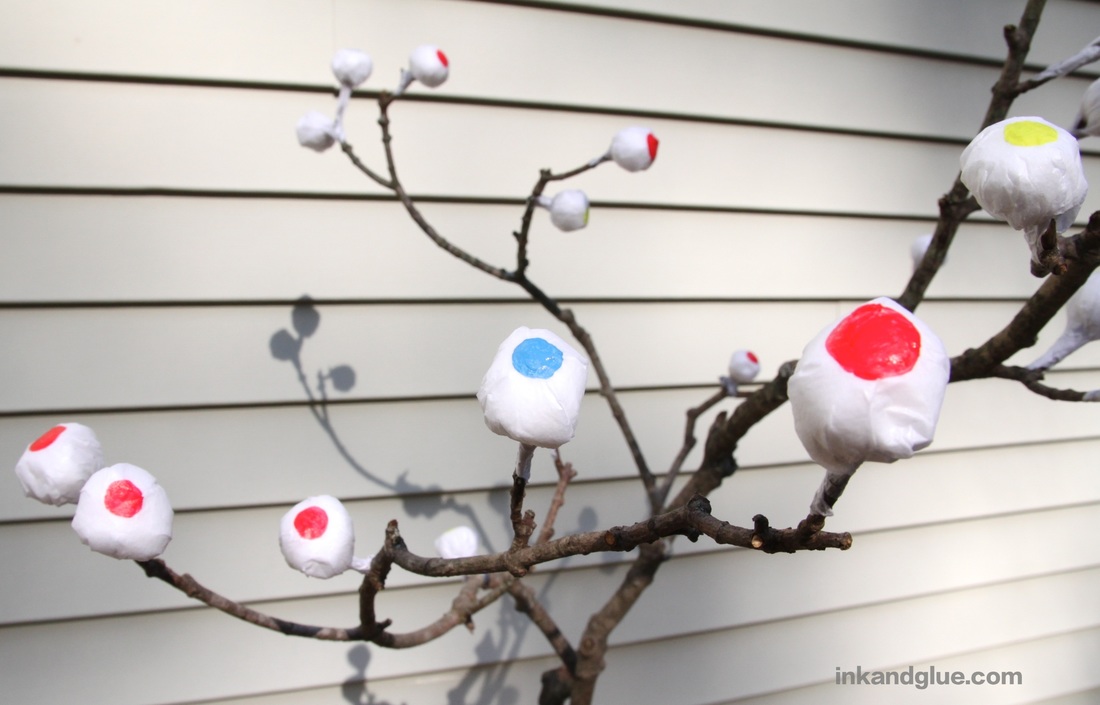
Open the end of the eyeball a little, and place it onto a branch end. Smooth the ends of the gelled paper onto the branch. Twist the paper around the branch a bit as you smooth everything down. This is a two-handed process, despite what you see below. 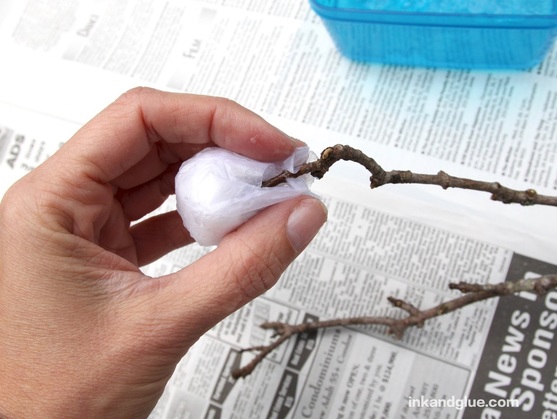 This is what your finished eyeball will look like (at left). And here's what the entire branch will look like, once you've added multiple eyes and let them dry overnight (right).
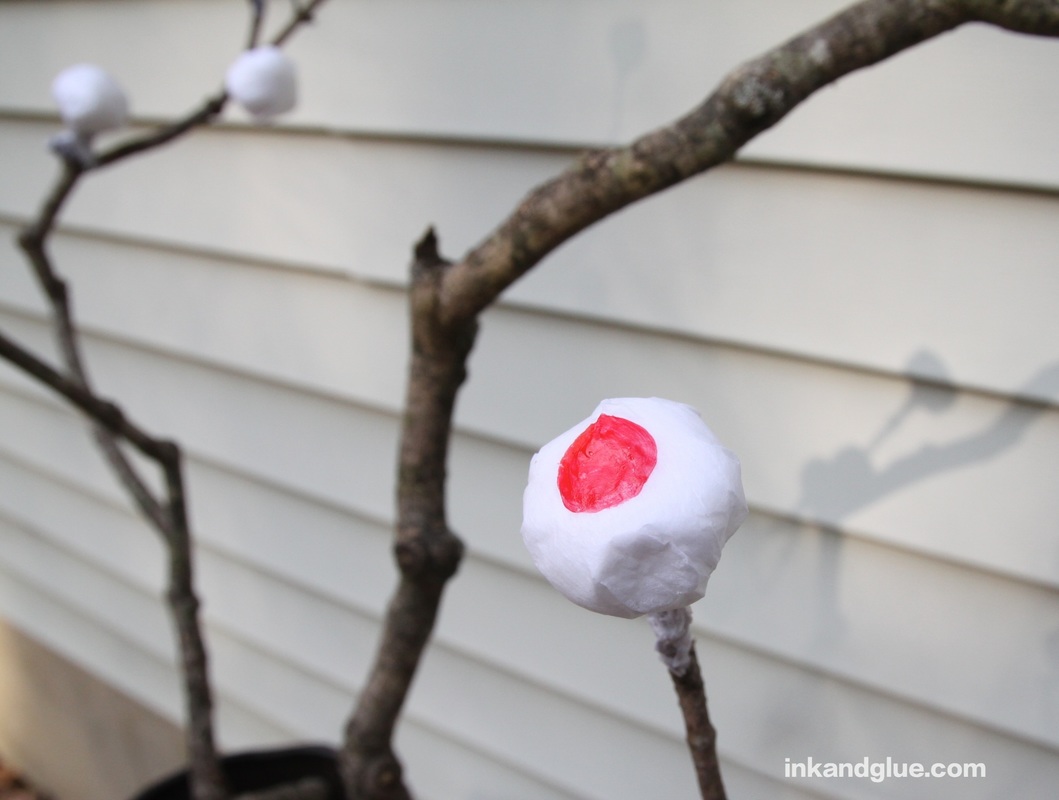
If you wanted to be minimalistic and mysterious, you could stop right here, and have a creepy branch with unsettling white blobs growing on its ends. For eyeballs, use a bit of craft paint to add dots to each paper blob. I painted most of them red, with a few blue and chartreuse green ones for diversity.
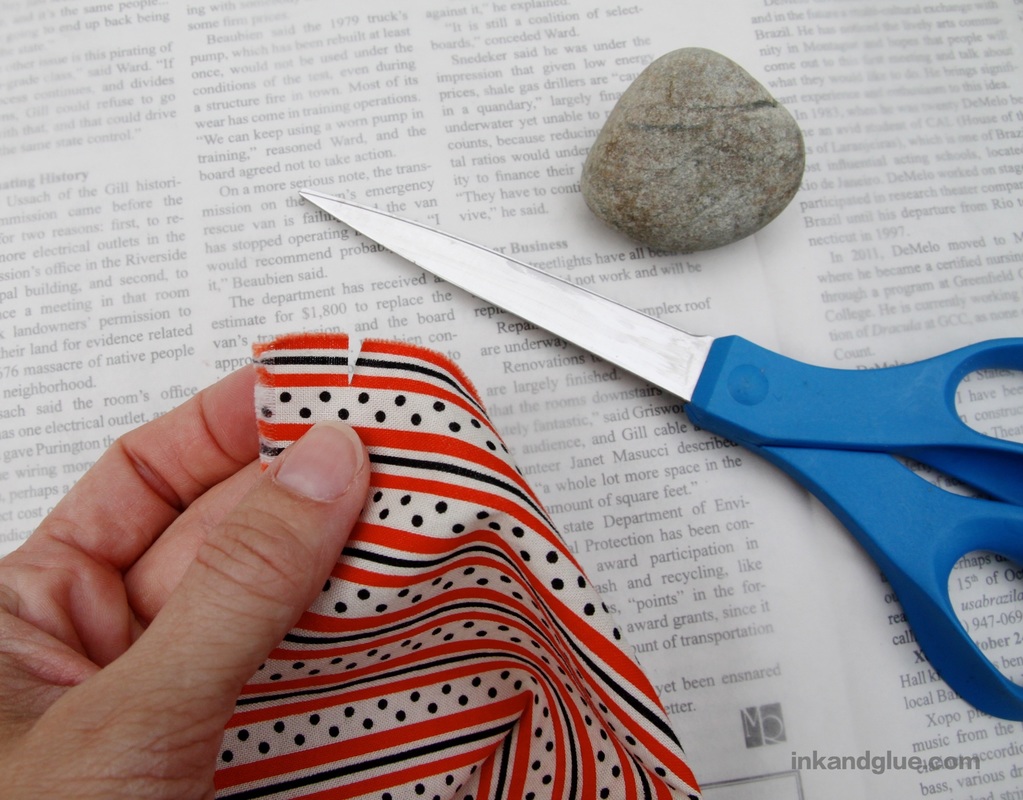
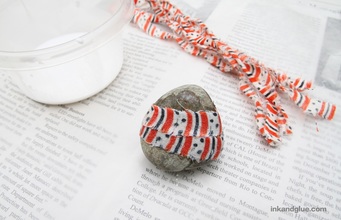
After the paint is dry, add pupils with black acrylic paint. If you are worried about making perfectly round dots, use a hole punch and black paper to make pupils, and add them with glue. But I think that with disembodied eyeballs you should expect a bit of imperfection. 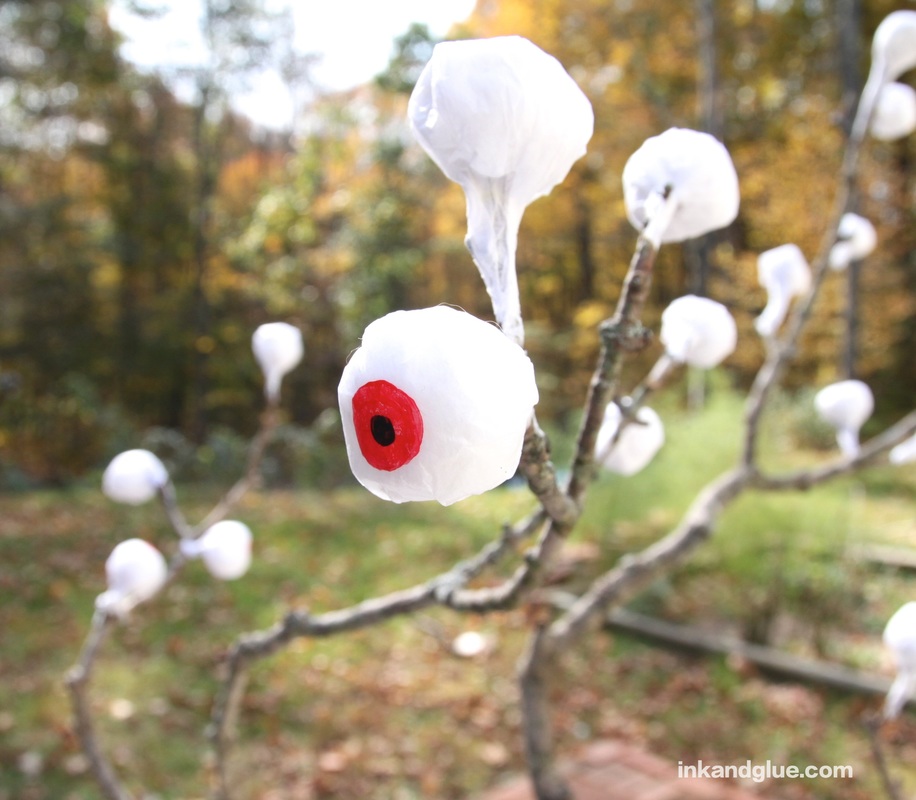 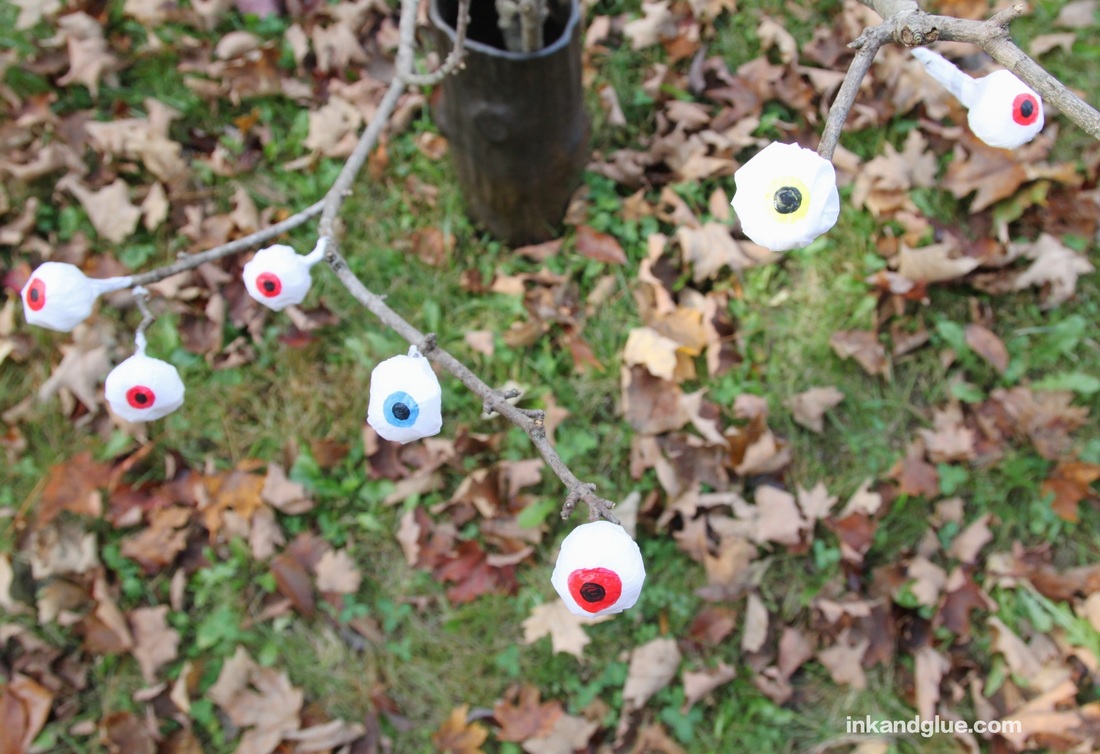 And you're done! Bask in the glow of your all-seeing eyeball tree all Halloween. Happy haunting! xo 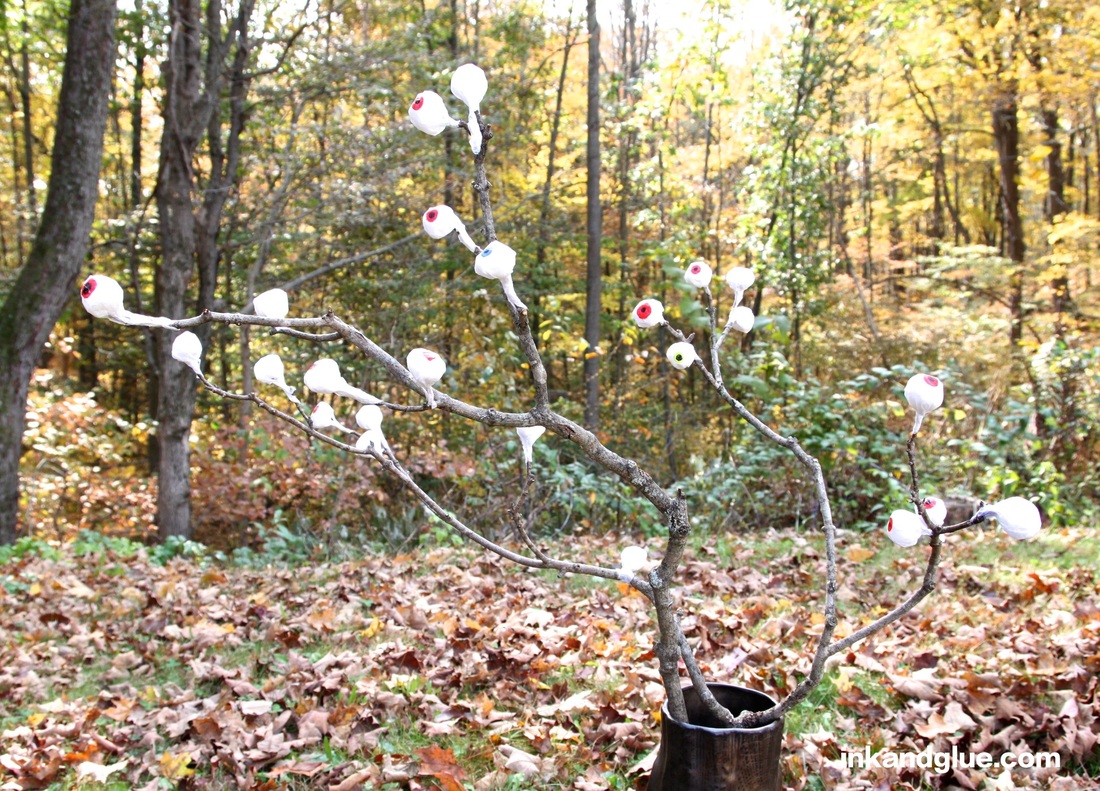 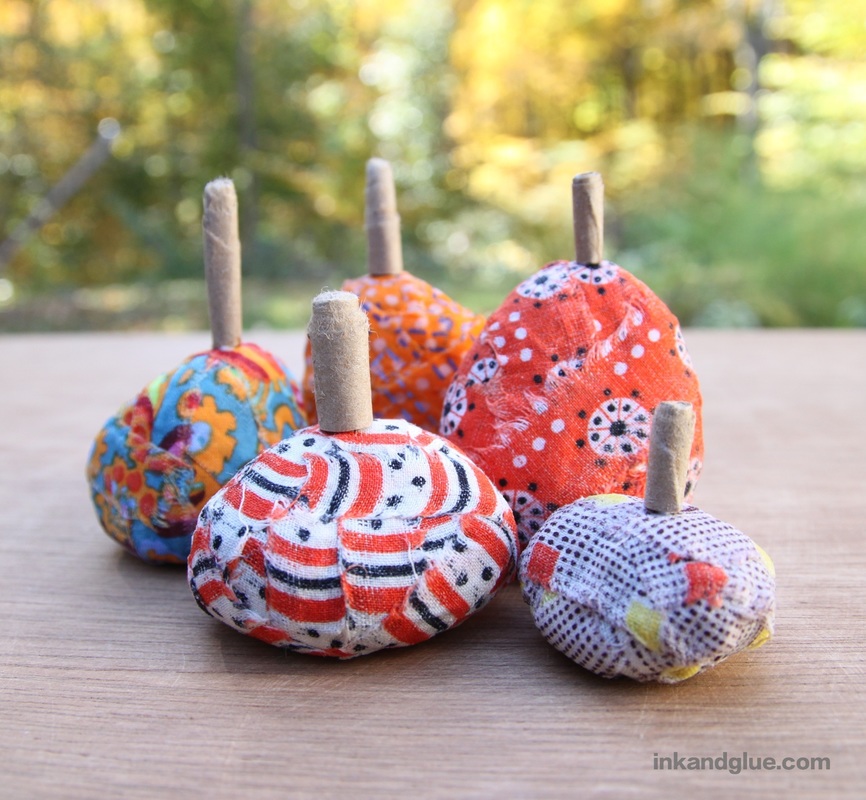 This fall project uses a free, natural material (rocks) and uses up a bit of your fabric stash. Use these rocks sans stems in a modern decor display, or add paper stems to make them more on-the-nose seasonal. Start by collecting several rocks that are somewhat roundish, smooth, and ideally, can stand "up" on their own. Comb through your fabric stash and pick out any and all orange-ish patterns. If you don't have a stash, a trip to a fabric store is in order! Choose two or three fat quarters, and check the remainders bin for good candidates. 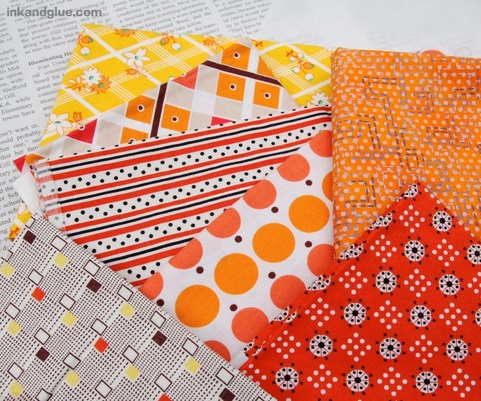 Next, set up your work area. I put down newspaper (probably unnecessary) and waxed paper (definitely necessary). Then, tear strips of fabric: Cut a snip into the edge of one of your fabrics, about a half-inch in. Firmly grasp the fabric on either side of the snip, and pull them away from each other.
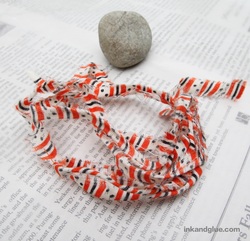
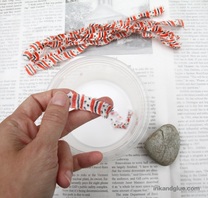
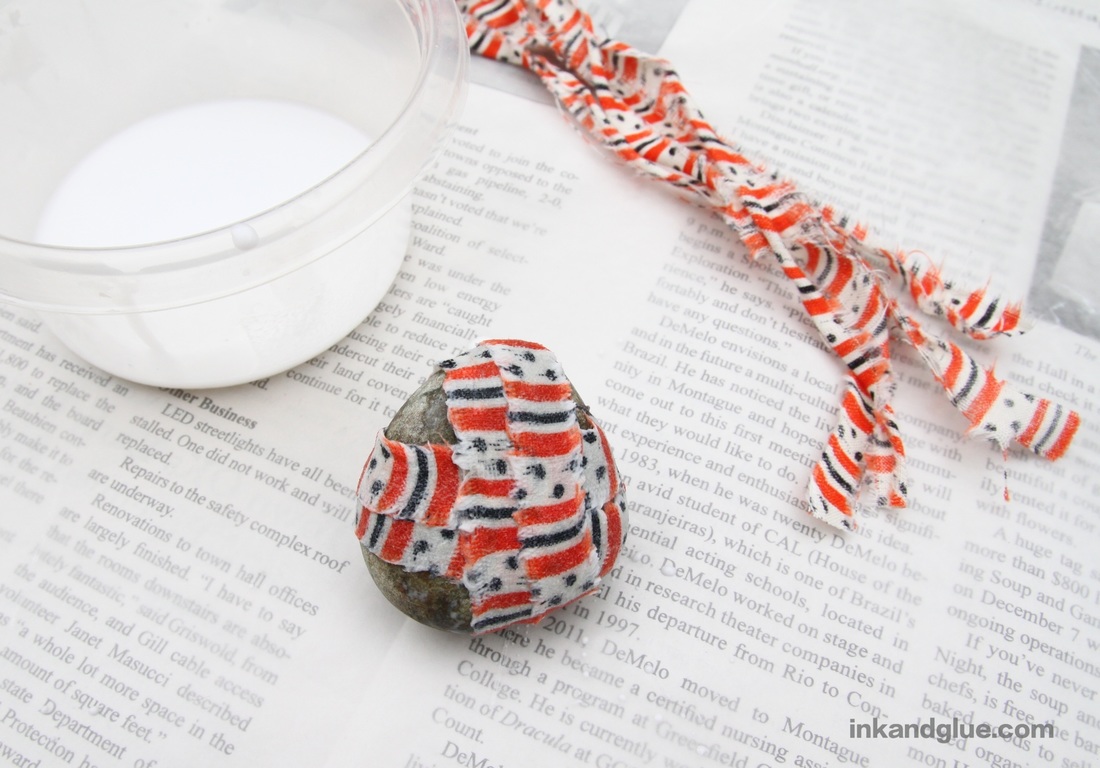
To make them easier to handle, I advise cutting your fabric strips into lengths of no more than six inches. Now for the messy part. Stir together a solution of half tacky glue and half water. (I tried a mixture that was lighter on the glue, but the strips didn't hold after drying.) You don't need much, so start with just a tablespoon of each.  Place a strip into the glue solution, pressing it down so it gets completely saturated. Pull out the strip and run it between your fingers to wipe off any excess glue. Wrap the strip around your rock.
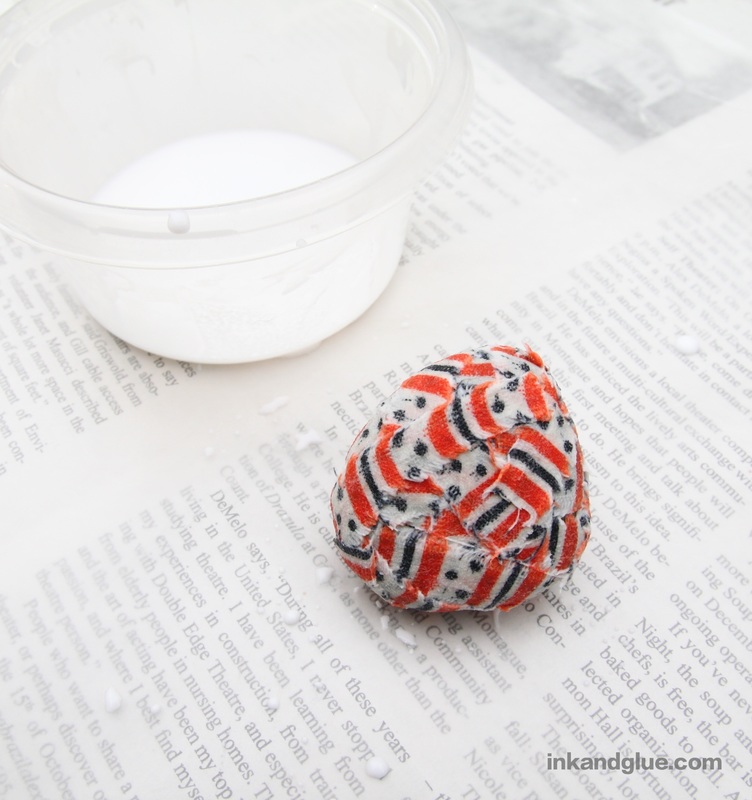
Repeat with additional strips. When your stone is almost completely covered, you may want to cut a strip into smaller lengths to patch up the remaining holes.
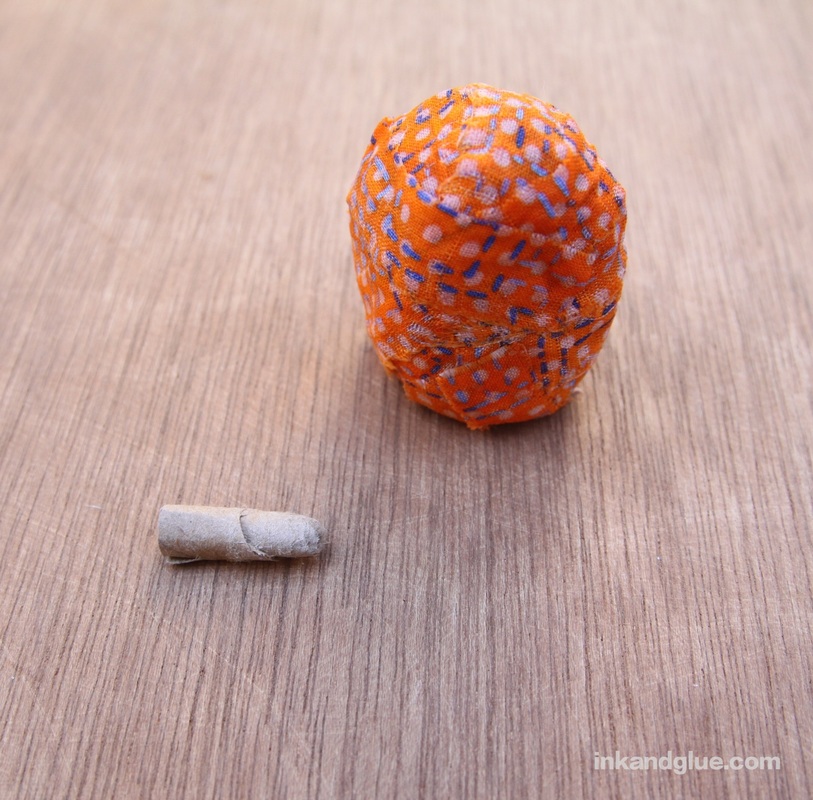
Let the rock (or rocks, plural; I recommend making several, as they look great in a group) dry overnight. Here's what they look like, stem-free. I rather like them!  To make them more pumpkiny, let's add some stems. For each one, tear or cut out a strip of brown paper. Dab some glue onto the strip, then roll it up tightly.
Glue the flat part of the stem to the top of the pumpkin. (If there's no flat end on your rolled-up paper, just trim off an end with scissors.) Repeat for all of the rocks. 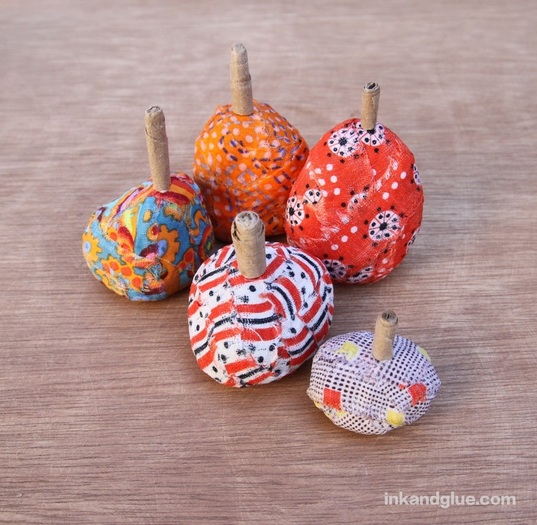 If your kids want to make jack o'lanterns, wrap your stones with fabric that's more monochromatic than the patterns shown here. Use a black permanent marker or paint marker to add faces to the dry rock pumpkins.
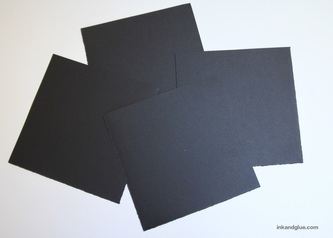
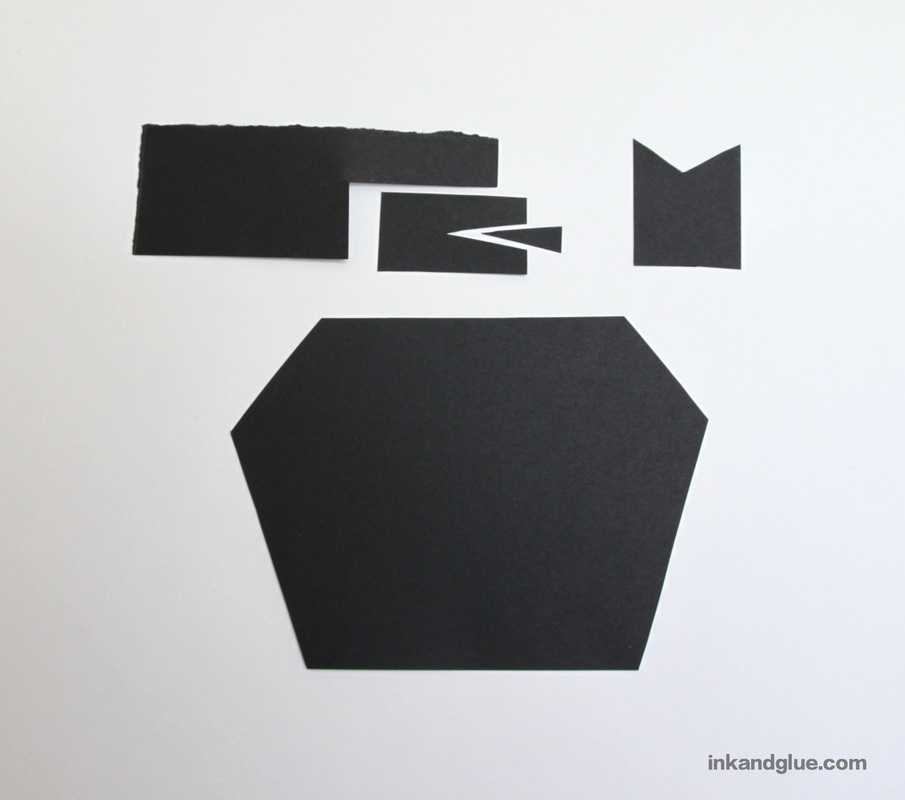
xo! 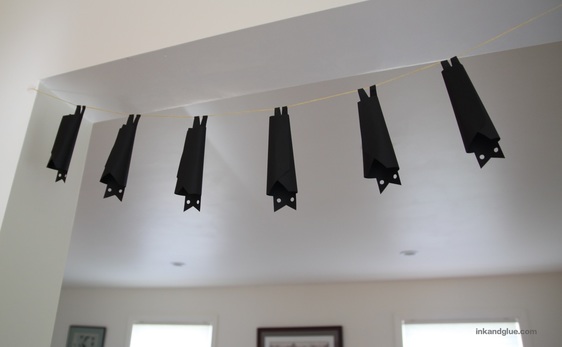 It's no secret that I like bats. And since I also like garlands, and not-coincidentally had a bunch of black card stock on hand, I came up with this spooky sleeping bat garland. Hang it anywhere you'd least like to find a bunch of large bats staring at you. Start by cutting or tearing a 12-inch square of card stock into four smaller squares; each one will become a bat. Cut a 1.5-inch (ish) strip from a square.
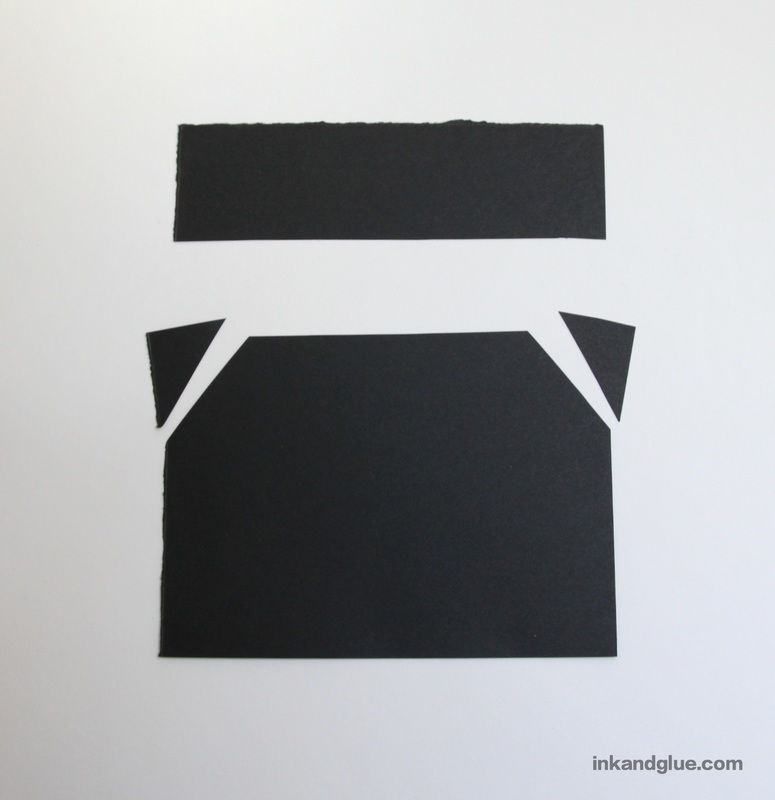
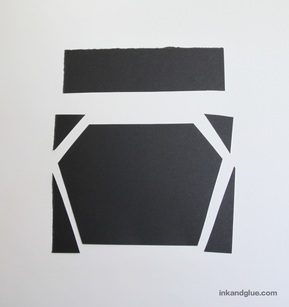
Cut the top corners from the larger rectangle, and skinny triangles from the lower corners, so you end up with a 6-sided shape as shown.
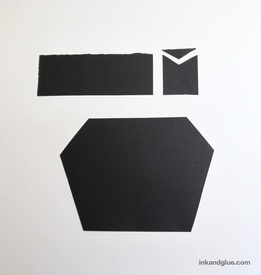
From the skinny rectangle, cut off about one inch of an end, and then trim a shallow V-shape from the top. From the other part of the skinny rectangle, cut a smaller, narrower rectangle, and cut a slim V shape from a short end, as shown.
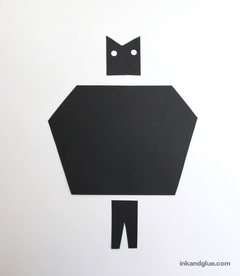
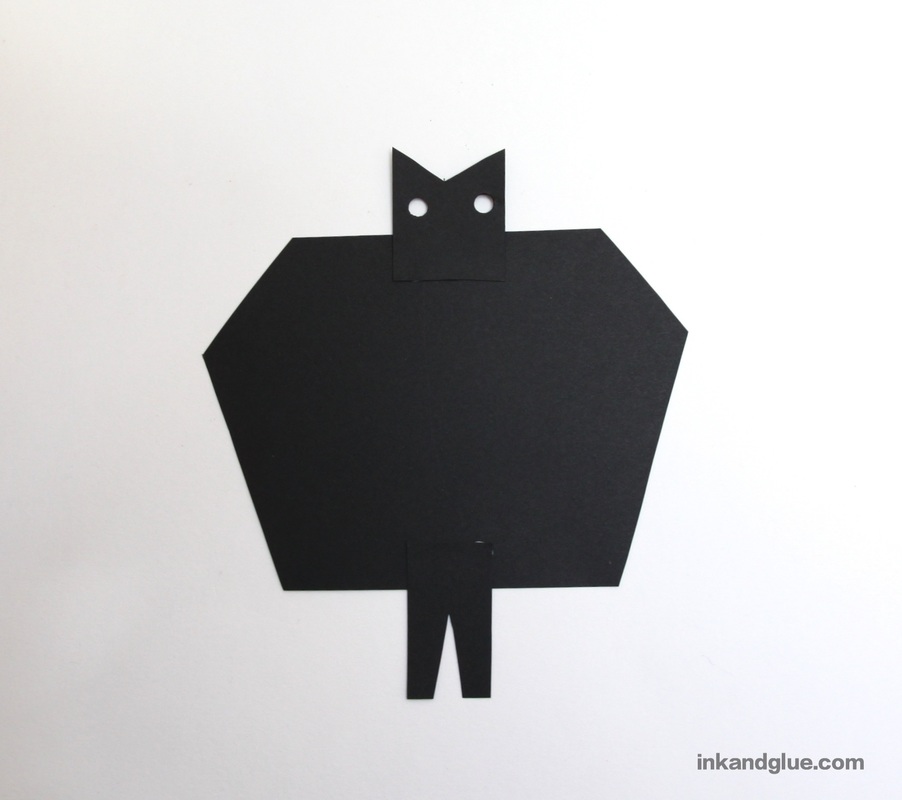
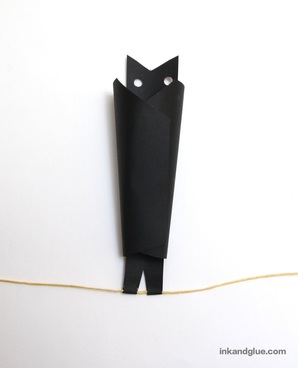
Punch eye holes in the head shape. You've now got the three paper pieces you'll need for a bat. Glue the head and leg pieces to the main piece. (I used tacky glue. I tried double-sided tape, but it wasn't strong enough.)
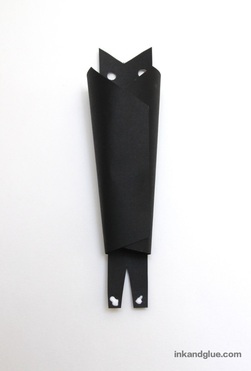
Let the glue dry for a few minutes before continuing. Apply tacky glue near the edge of one of the pointy sides of the body. Roll the two sides together so they overlap into a slightly-cone-shaped cylinder. Card stock is very stiff, and would prefer to remain nice and flat, so clamp the overlapping pieces together with clothespins while the glue dries. 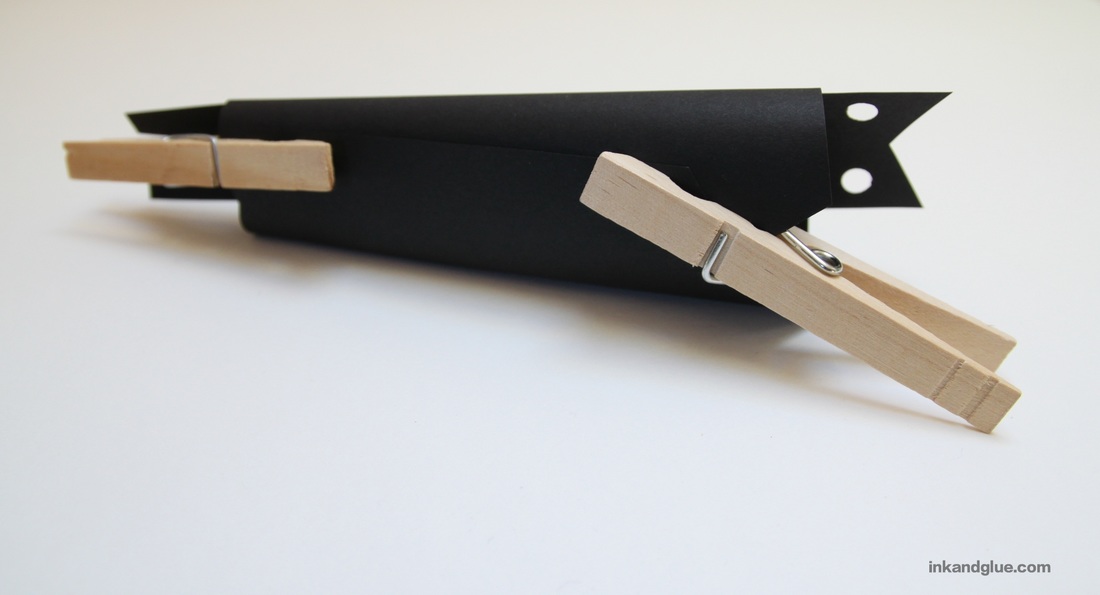 Dab glue onto the ends of the legs, then fold them over a piece of string (or wire, or fishing line, or yarn...).
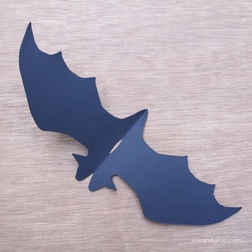
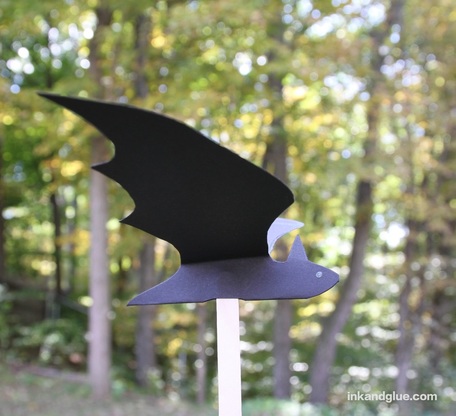
Make several bats, assembly-line style, and attach them to the string a few inches apart from each other. Hang up and enjoy! xo  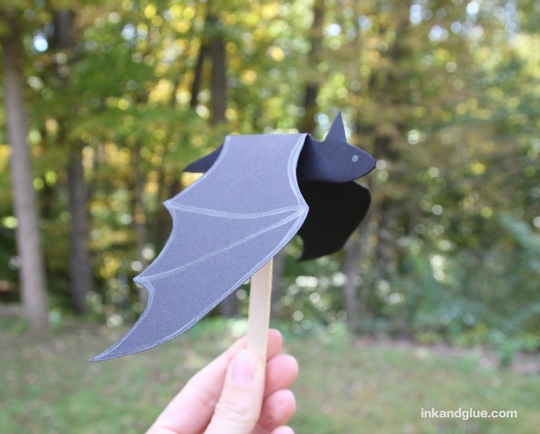 I have to admit, I love bats. They are beneficial, in that they eat mosquitoes and other bugs; they're kind of cute; and it is totally amazing that they are actual flying mammals (beat it, "flying" squirrels!). Because I have a generous heart, I don't mind that they have been co-opted into a Halloween motif. I embrace their nocturnal nature, and their somewhat-unsettling wing flapping! So I created this craft, which is made to be flapped. Just hold onto the stick, and move the bat up and down quickly; the wings will flap as you do. To make this easy craft even easier, I've included a template. And to make it even more Halloweeny, I decorated it with glow-in-the-dark paint. This craft would be great for a kids' party, especially if you pre-made a bunch of "blank" bats and had the kids decorate them. Read on for the how-to.
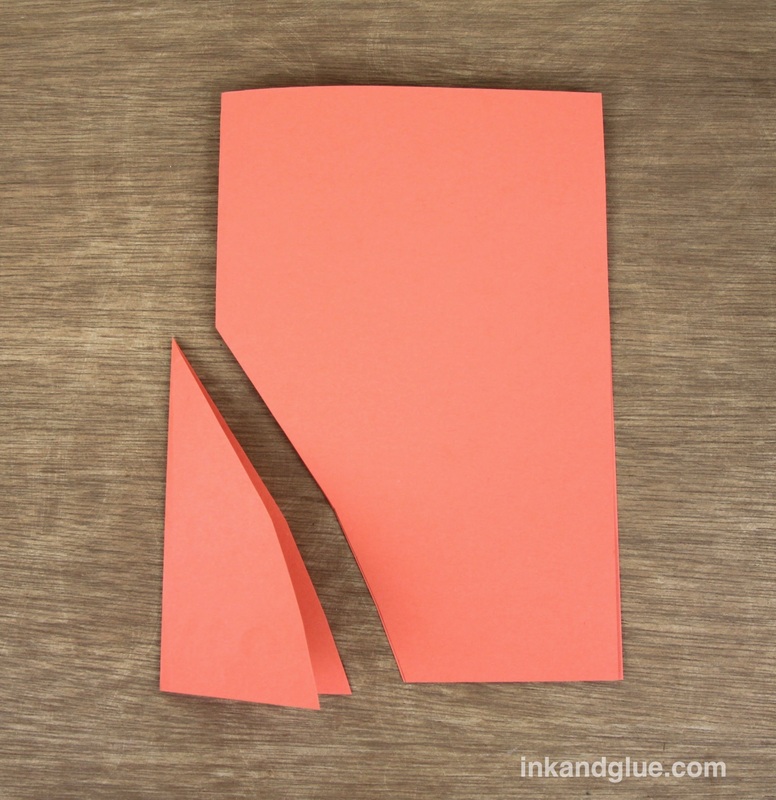
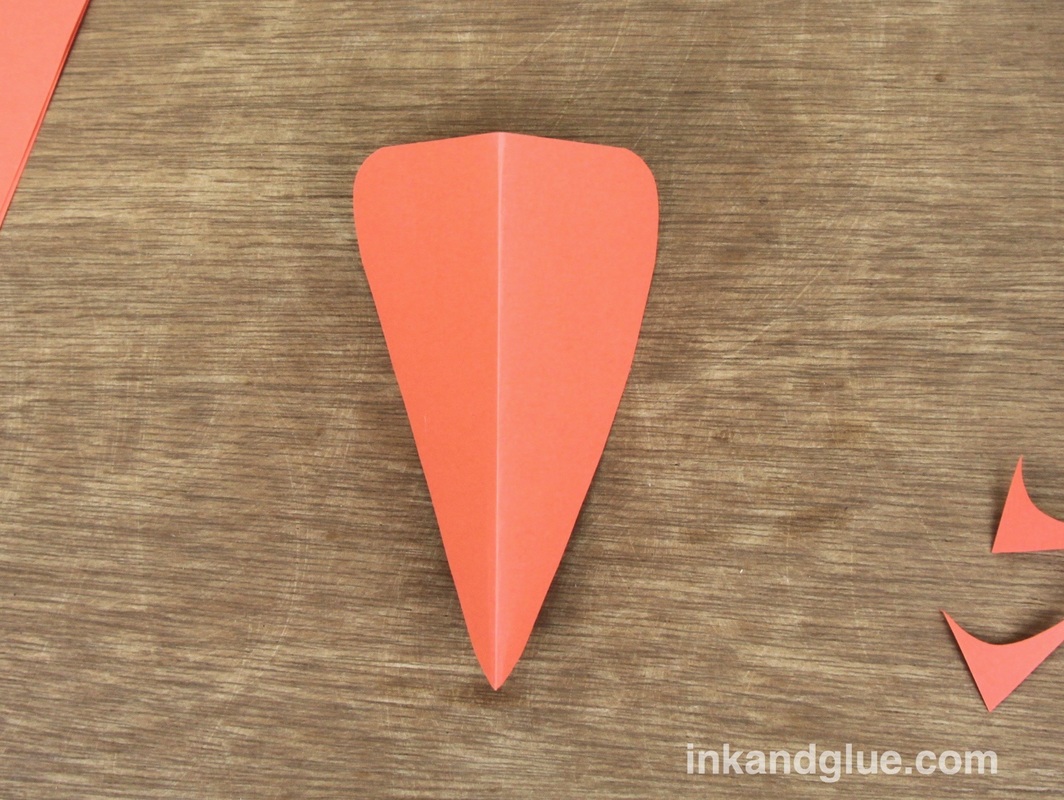
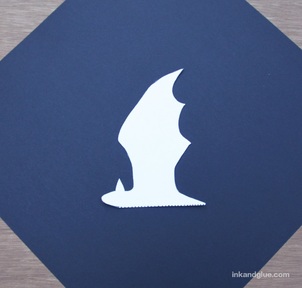
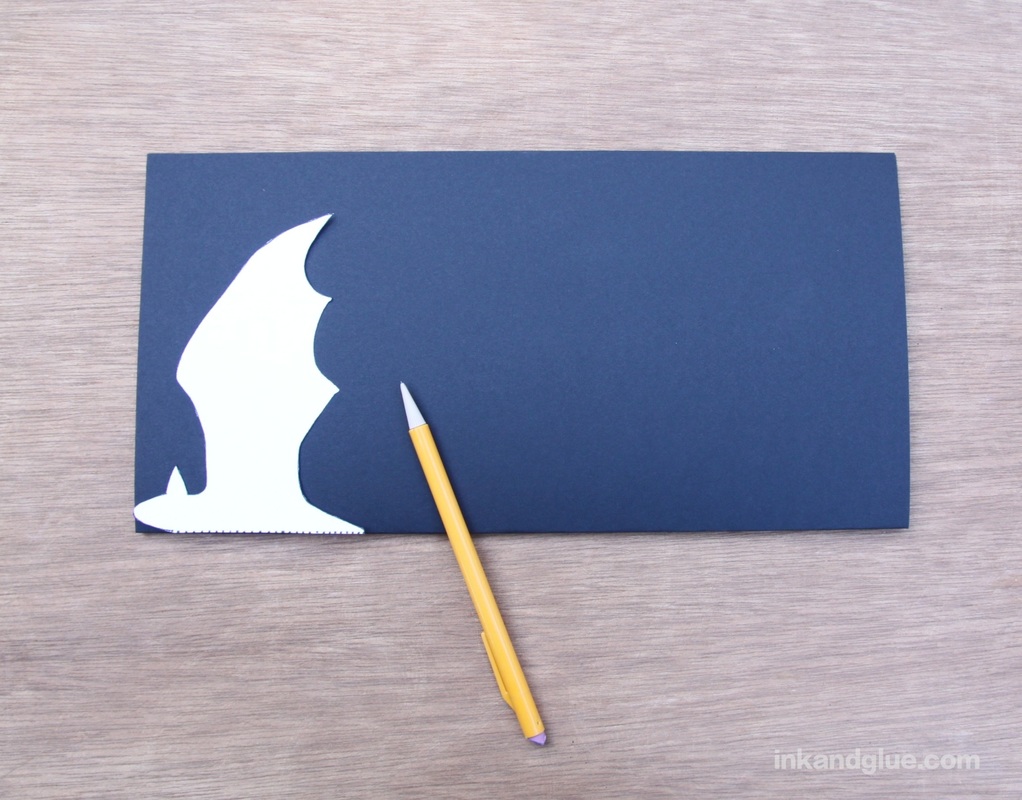
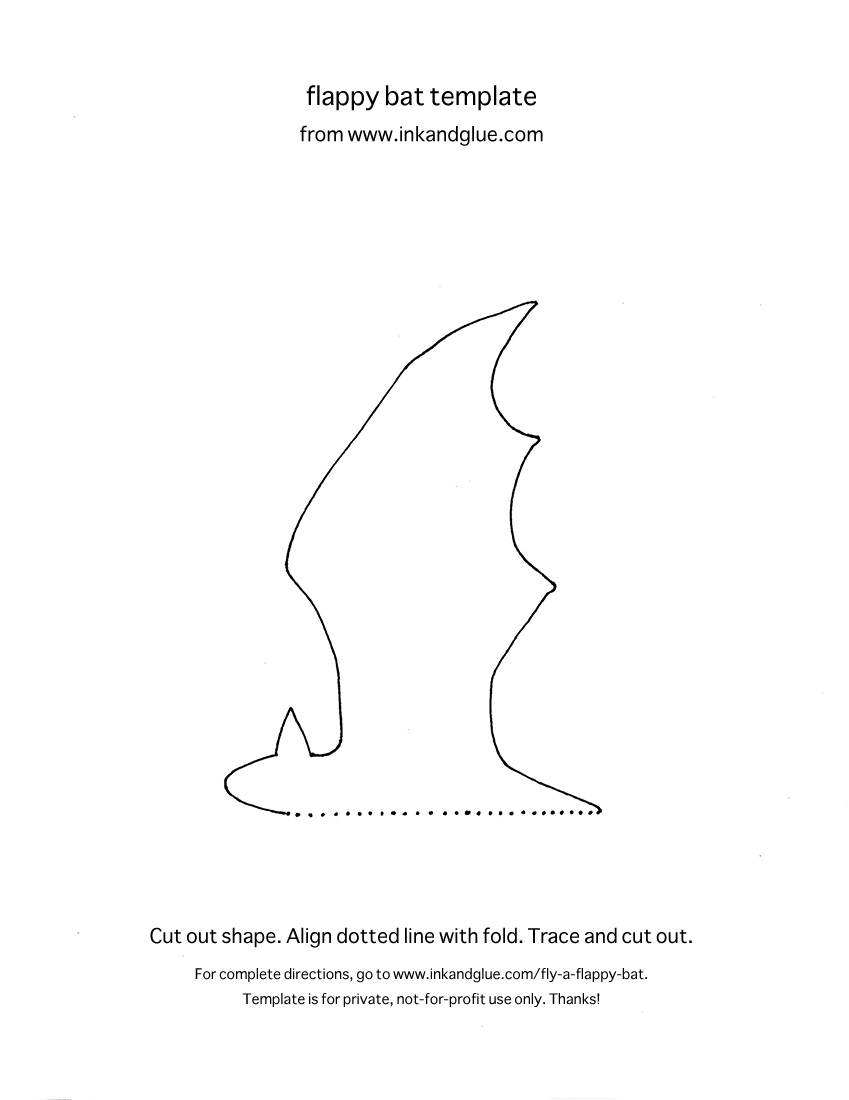
The template is sized so you can fit three bats on one 12-inch-square sheet of paper. (Of course, you can always freehand it; just look at the photo to get a sense of the shape.) Cut out the template. Fold a 12-inch-square sheet of card stock or scrapbooking paper in half. Align the template so the dotted line is against the fold. Trace the shape with a light pencil, then cut it out.
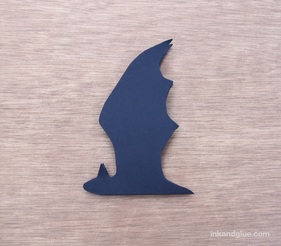
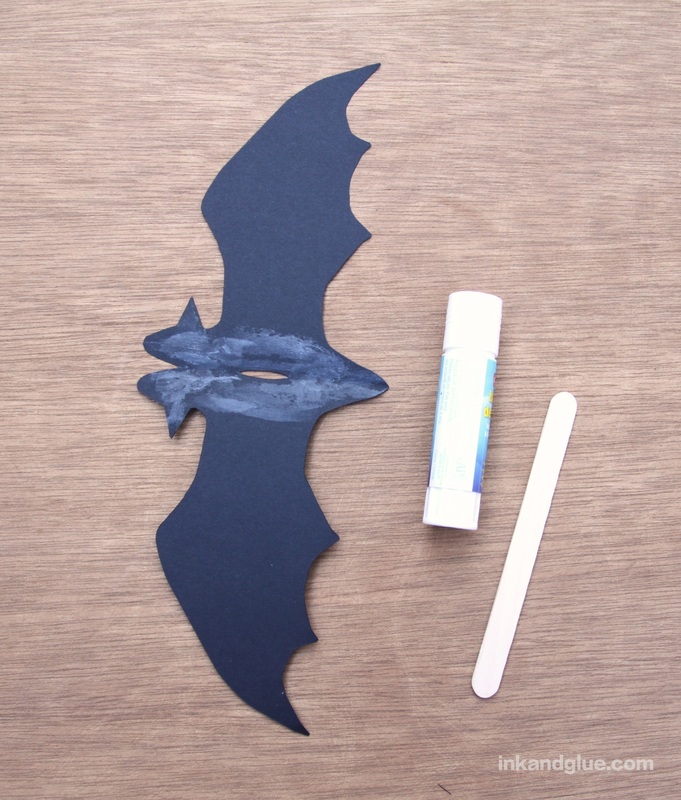
Erase any pencil marks. Then, cut a half-inch-long, super-skinny slit along the fold, in the center of the bat's belly. This will allow you to insert the craft stick, later. 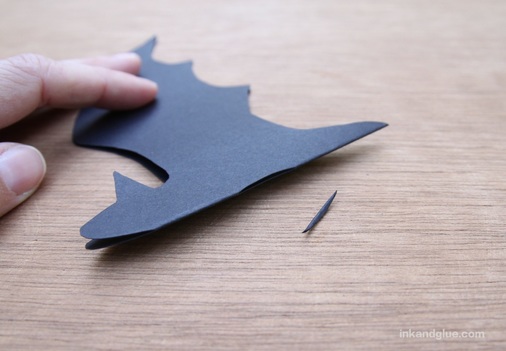
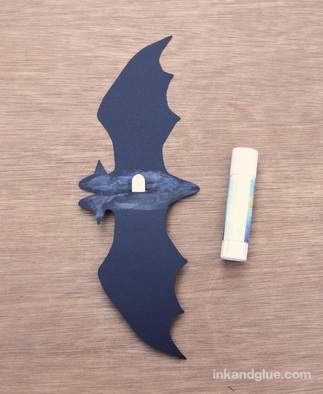
Apply a generous amount of glue stick onto just the body and head of the unfolded bat. Insert the end of a craft stick, then fold up the paper. Smooth and press the paper around the stick, and make sure everything's sticking together at the edges.
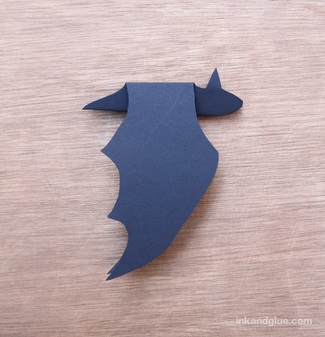
Fold the body back up. Fold one wing down, then the other. Make the creases fairly hard; the more you rub the fold line, the weaker the paper will get at the fold, and the wing will get more floppy and flappy. Just don't overdo it, or you'll end up with a wingless bat!
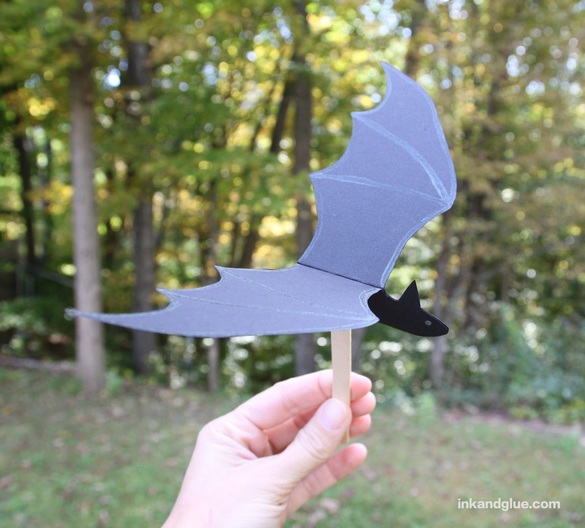
Let's paint! I chose to use a fine paintbrush and some glow-in-the-dark craft paint that dries fairly clear. I also tried a 3D craft paint with a bottle applicator, but it's much easier, and faster, to use regular paint and a brush. Plus, you can have several kids painting at once, without having to purchase multiple bottles. Note, however, that it may take more than one coat to get a good glow. Don't be shy when applying the paint! 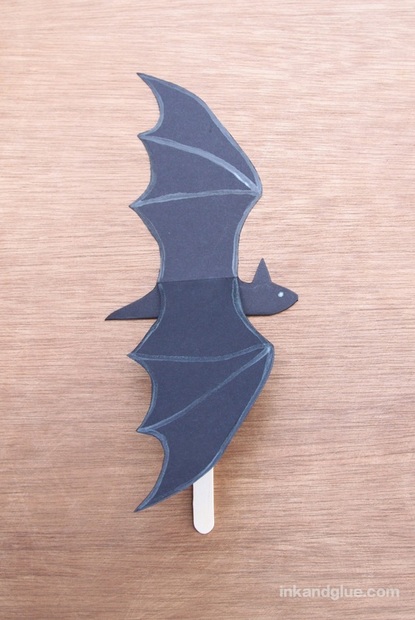 When the paint's dry, the bat is ready for flying. Wait until dark, then charge up the glow paint with a lamp, and head outside. Flutter the bat up and down as you swoop through the night!
 xo!
|
Categories
All
Archives
March 2017
AuthorI'm Debbie Way, an artist and writer who enjoys making things. |
||||||||||||||||||||||||||||||||||||||||||||||||||||||||||||||||||||||


 RSS Feed