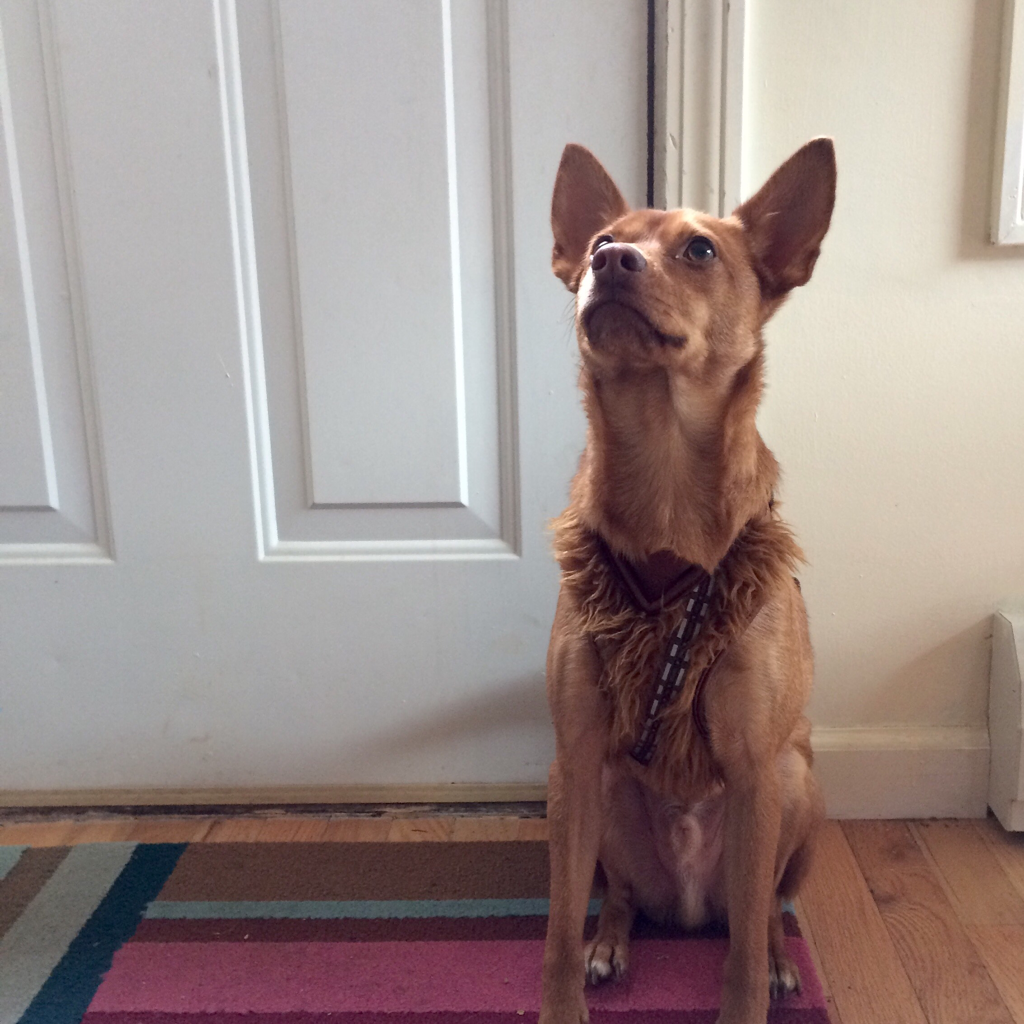
 Franklin is cosplaying as Chewbacca this Halloween. He almost has the vocal sounds just right.
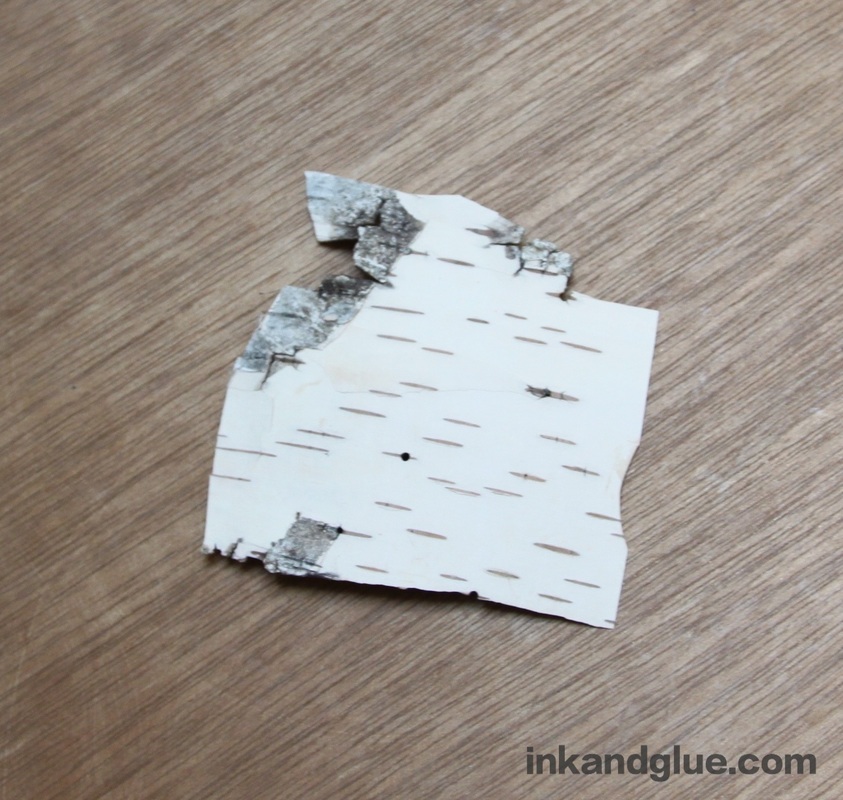
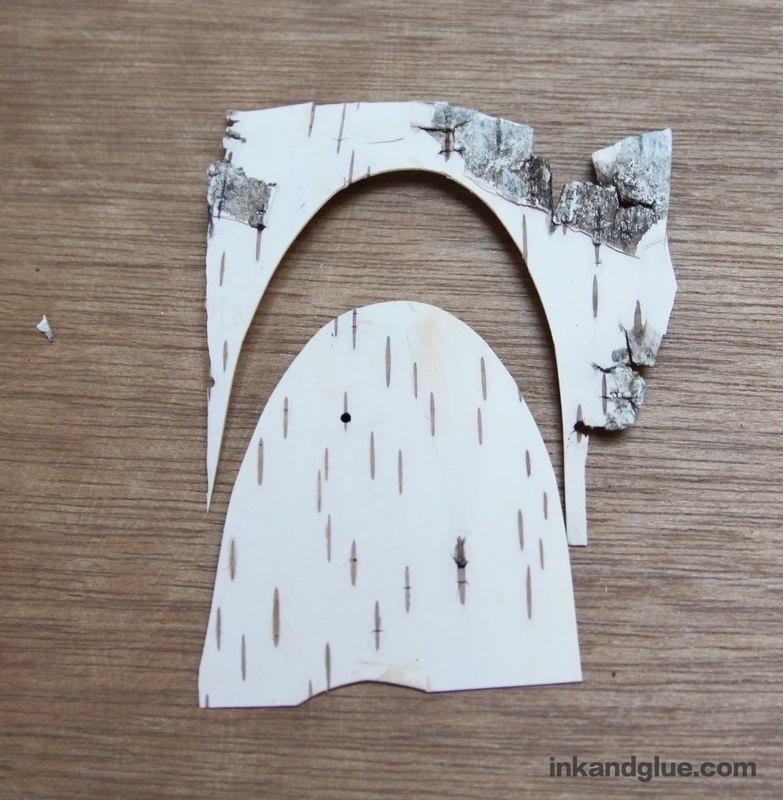
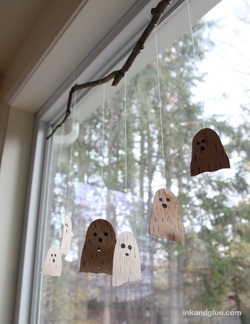 As promised yesterday, I'm back with another natural material-based mobile for a last-minute Halloween craft! Like the leaves, this requires a bit of prep, in that you need to find some birch bark. Note: do not peel birch bark right from the tree, as that can harm it. Look nearby and you'll likely find a piece or two that has fallen off. Back home, use regular scissors to cut simple ghost shapes from the bark.
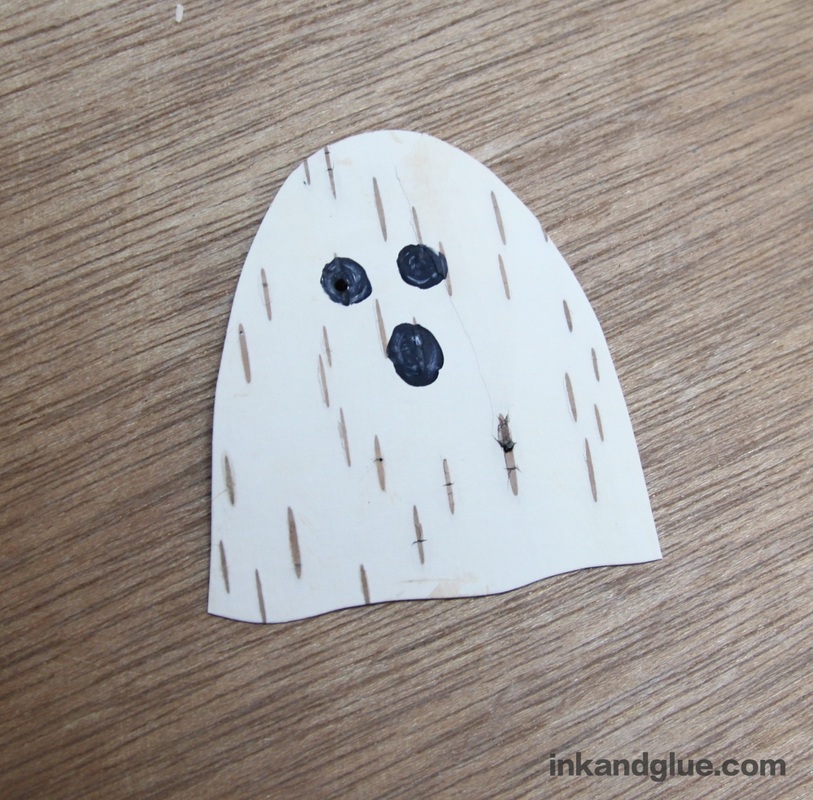
Use a black marker to add eyes and a mouth to each one.
Next you'll add the strings for hanging. As with yesterday's mobile, I separated a two-foot length of embroidery floss into individual threads. Use small dabs of tacky glue to adhere the thread ends to the backs of the birch bark ghosts, and let the glue dry for about a half-hour. 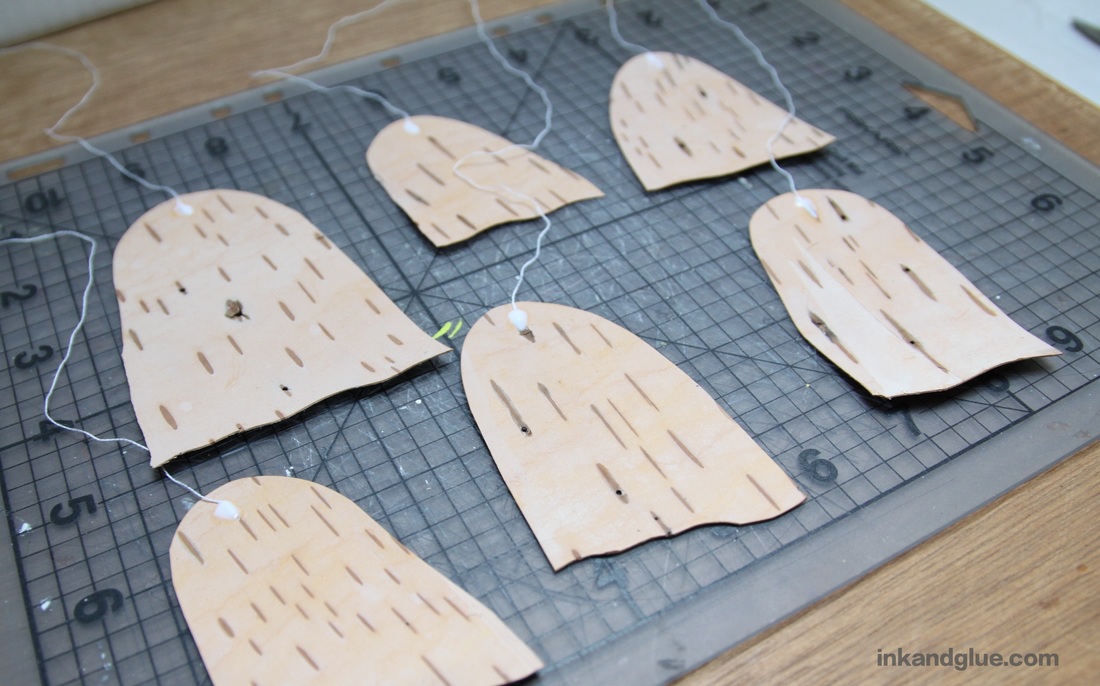 Use the waiting time to select a suitable stick to anchor your ghosts. I chose one that was a bit crooked so it's more Halloween-y. Whichever stick you choose, make sure it's dry and isn't flaking off bits of bark. Tie the thread ends to the stick with single knots, so you can easily adjust the length and make them nicely staggered. 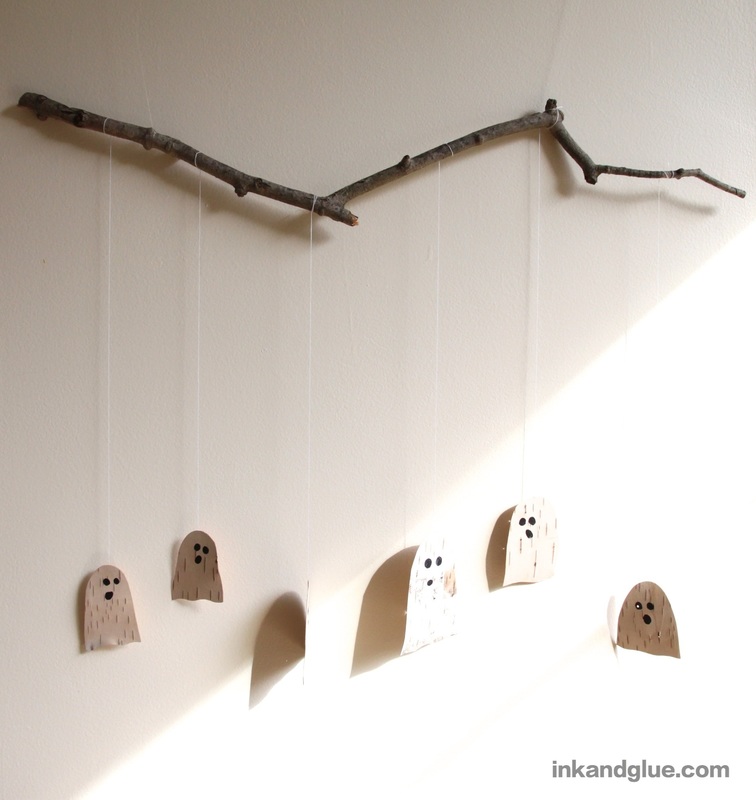 When the ghosts are floating at the altitude you prefer, dab tacky glue onto each knot with your fingertip. Hang your stick with a length of clear plastic cord or fishing line tied near each end. As with the jack o' leaves, I like my mobile near a window. Check out the reflections of the ghosts in the glass! Creeeepy. 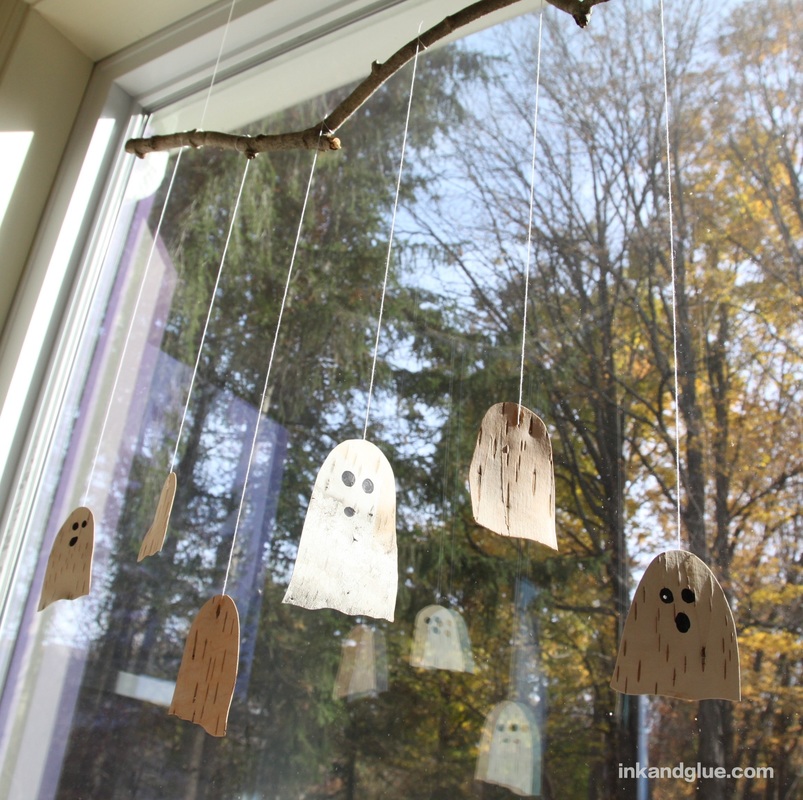 Happy almost-Halloween! xo
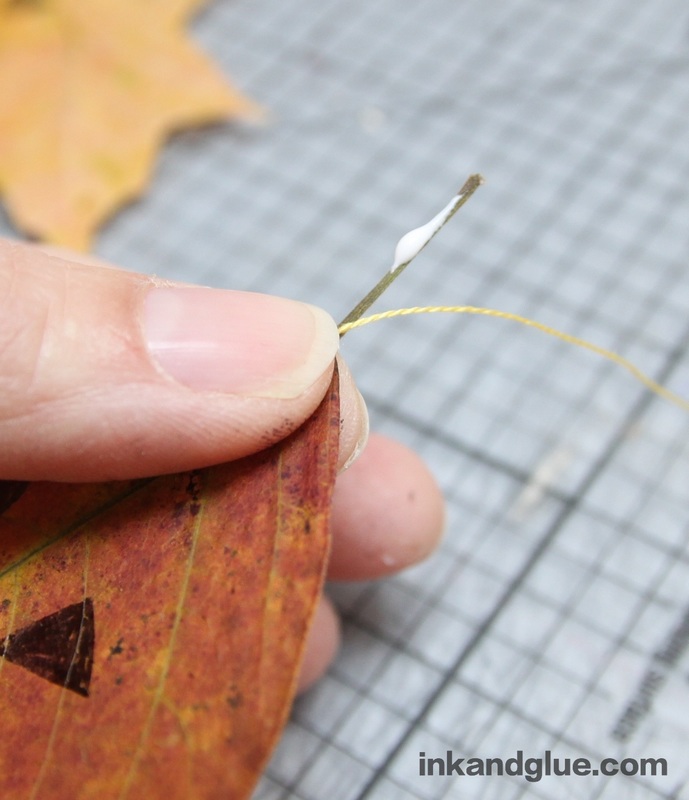
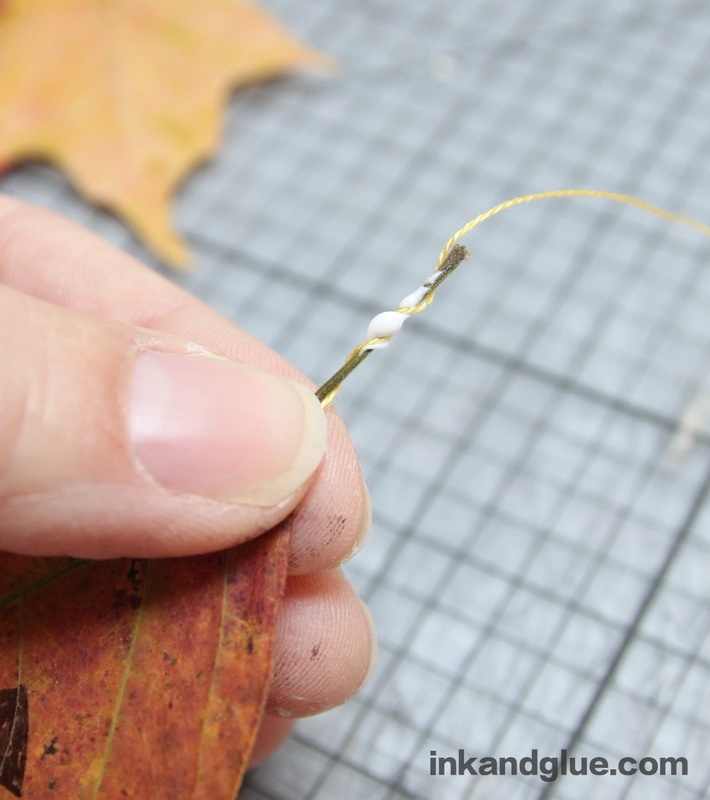
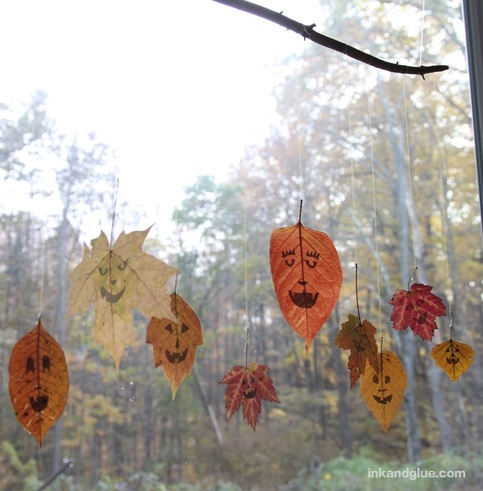 This has been an epic year for autumn foliage. I saved quite a few leaves inside the pages of a book, but wanted to get them out in the open. With Halloween coming in just a few days, I came up with this quick (really!) craft that the whole family can get involved with. The leaves you see here are a mixture of 1-year-olds and 1-week-olds. The 1-weekers, being more pliable and less crunchy, were much easier to draw on. Start by selecting seven or eight leaves that you've previously pressed. Draw jack o' lantern faces on them using a fine-point, felt-tip marker. 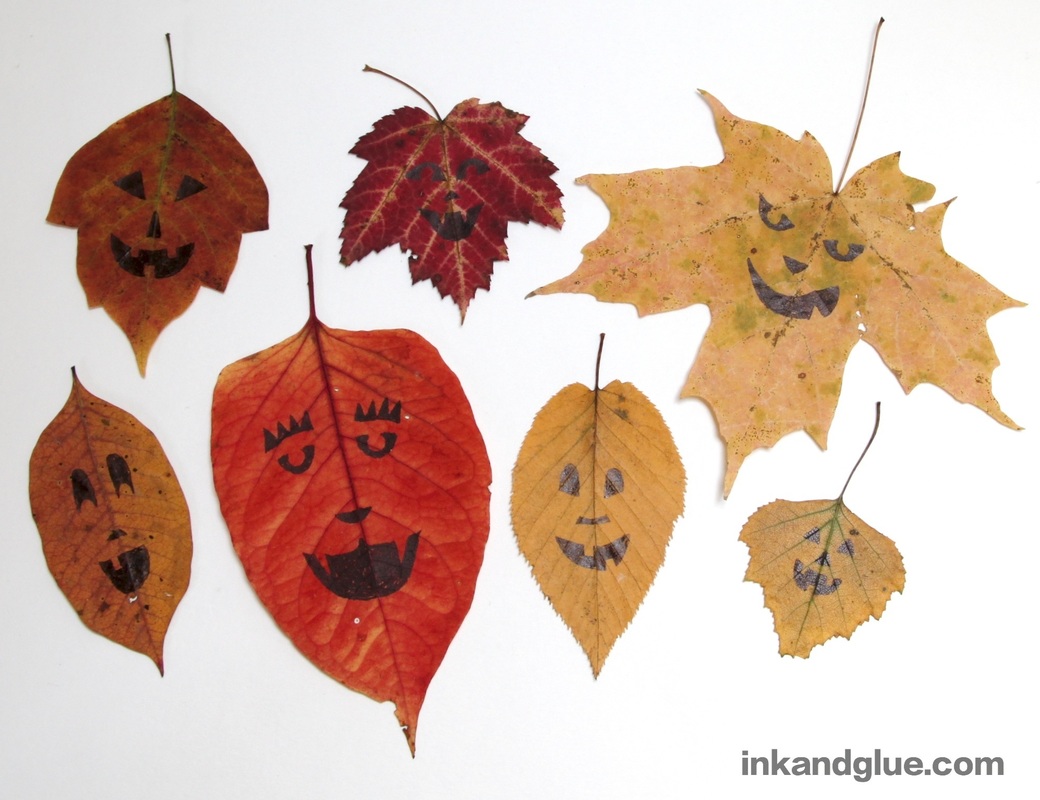 Next, you'll be gluing the hanging thread to the stem of each leaf. I separated the strands from a two-foot length of embroidery floss; those strands are just a tiny bit thicker than regular thread, making them easier to work with. Hold the end of a thread to the base of a stem, and dab a bit of tacky glue onto the stem with your other hand. Then, wrap the thread around the gluey stem, as shown. No need to make a microscopic knot!
Do this with all of the leaves, then let them sit and dry for a half-hour or so. Take this time to walk to the park or the woods and find your perfect stick to hang your leaves from. It should be somewhat thin, not too brittle, and dry, with no flaky bark. The photo below shows off the one I chose.  Then it's just a matter of tying the thread ends to the stick. If you tie with a single knot, the thread will be loose enough that you can adjust the length. Vary the lengths so the leaves won't crash into each other much. Once the lengths are where you want them, tighten each knot and use your fingertip to apply a bit of glue. Tie clear plastic cord or fishing line near each end of the stick, and hang! I like my mobile in front of a window, where the light can come through the leaves, and the leaves are reflected in the glass. 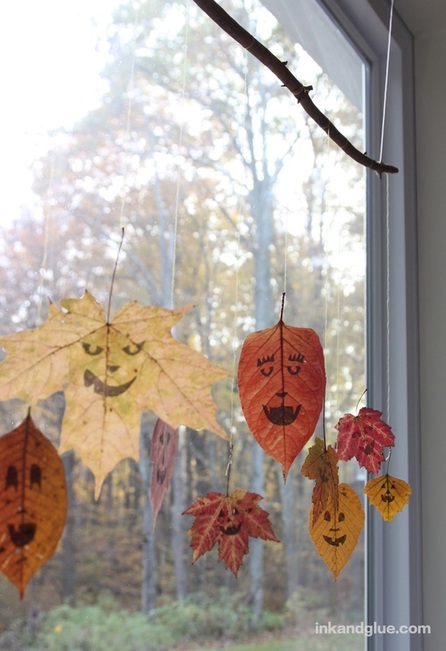 Come back tomorrow for a totally different, nature-based Halloween mobile!
xo Have you met Rus Khasanov? He uses oil, ink, soap, and all sorts of liquids that interact with each other in fascinating ways. His most recent video is Odyssey. Here's a still photo, and a gif. You really should go to his site to see the whole video. As a bonus, it has a beautiful score, so turn on your sound. 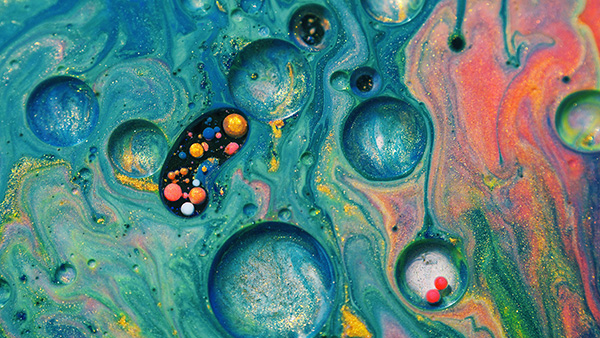  Untethered to context, the motion and shapes he creates are like a glimpse into the movements of the planets and the universe. An older video, Warm-Up, plays with water on a computer or TV screen, and ink spreading across the tiny lines in a finger and palm.  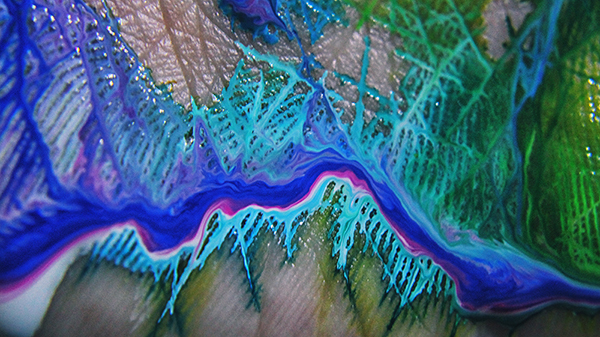 All of his work is meditative and mind-expanding. Go to his site and check it out!
xo I love the colors, patterns, and overall creative goodness in the Stack and Scare block sets from Invisible Creature. [Note: some of these links are affiliate links, and I get a few cents if you make a purchase on Amazon after clicking through.] Here's a shot of all of the four sets, together:  This is one set, named Rodney: 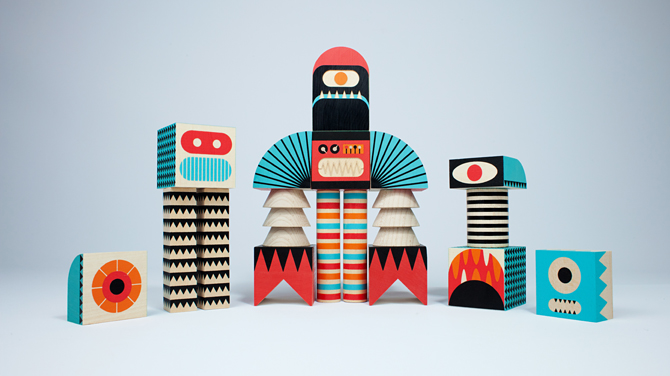 A few more beauty shots: 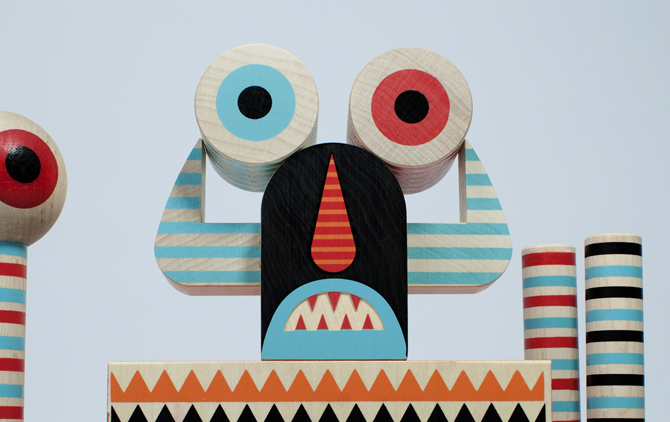  They are so fun and gorgeous that I dare say they would be fun for all ages, or at least "the young and the young at heart." The bad news is that they're expensive, which is not surprising based on the quality of the printing and the wood. But, I have a DIY solution. The blocks won't be the same, but they'll be fun to make, and designed just how you and/or your kids want them. Buy a cheap set of plain wood blocks such as these or these, then paint them with acrylic craft paint. Use painter's tape and stencils to get super-sharp lines. Or, go freeform!
xo Let's revisit the 1970 McCall's Annual, and take a stroll through its Forest Fantasy.  This scene combines a few of my favorite things: Bright, pop-py colors, pompoms, and mod, semi-abstract shapes. It also includes one of my craft nemeses, Styrofoam balls. Unfortunately, sometimes there's no good substitute for a foamed blob of polystyrene. Note the spool and the golf tees being utilized here. Clever! Here are the directions, if you want to make a Forest Fantasy for your very own dresser top. There's also some handy information on embarking on a thrilling career as a doll hospital operator. 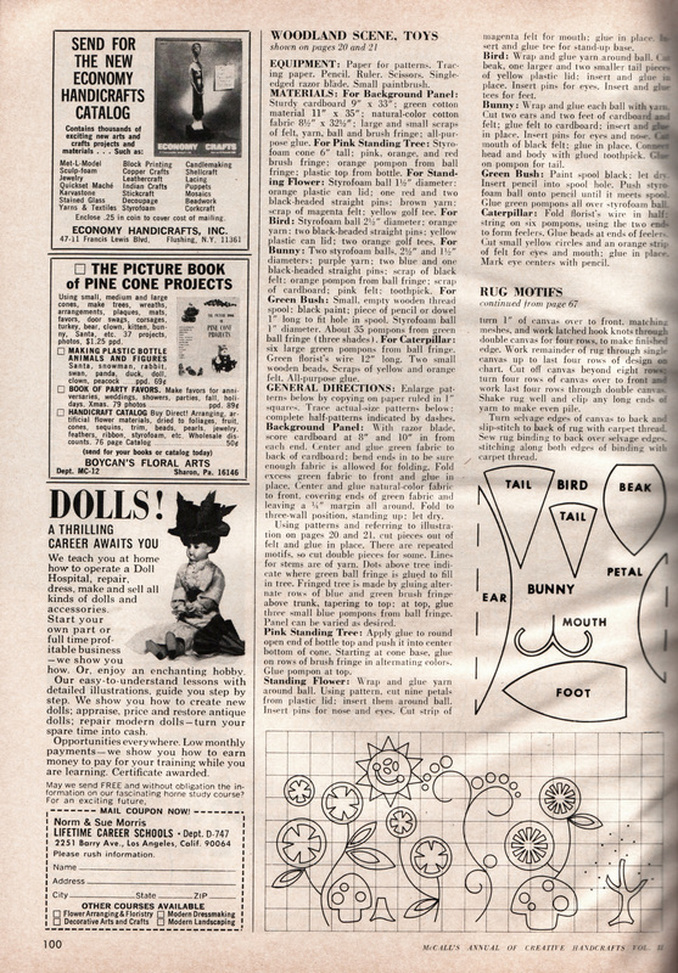 Happy retro crafting! xo
Have you met Troy Emery? I discovered him while I was researching the recent pompom project round up. He covers polyurethane animal mannequins and taxidermy forms with pompoms. They are adorable, strange, and sometimes a little scary. Meet the "Small Companion": 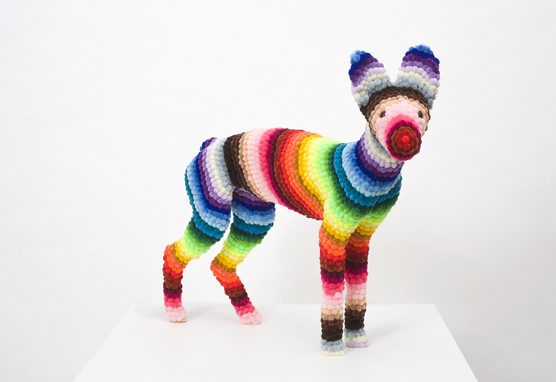 This one is called "Dysfunctional Camouflage." 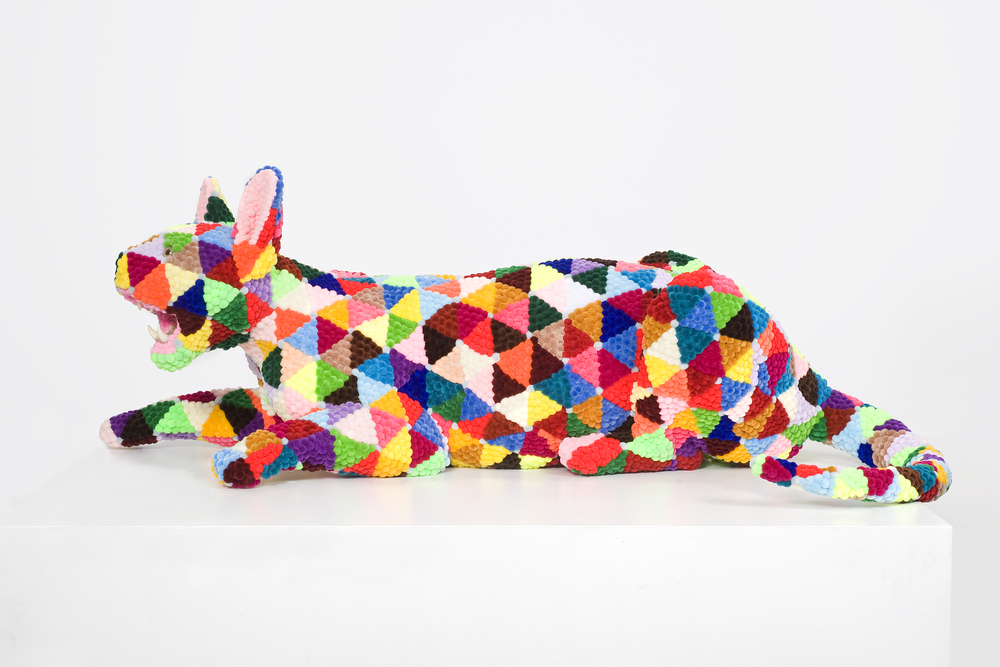 This untitled piece reminds me of one of those hairless cats. 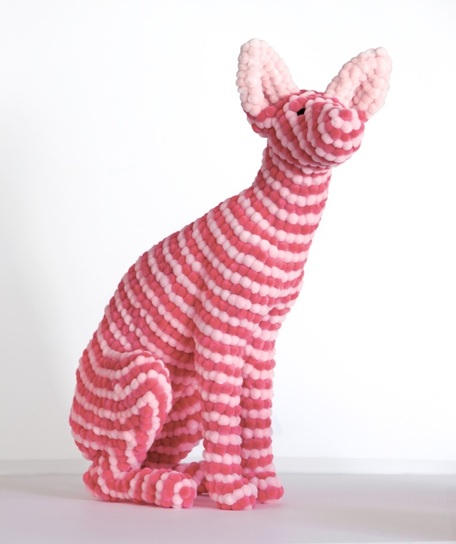 Troy also works with yarn and tassels. This black dog is pretty unnerving. 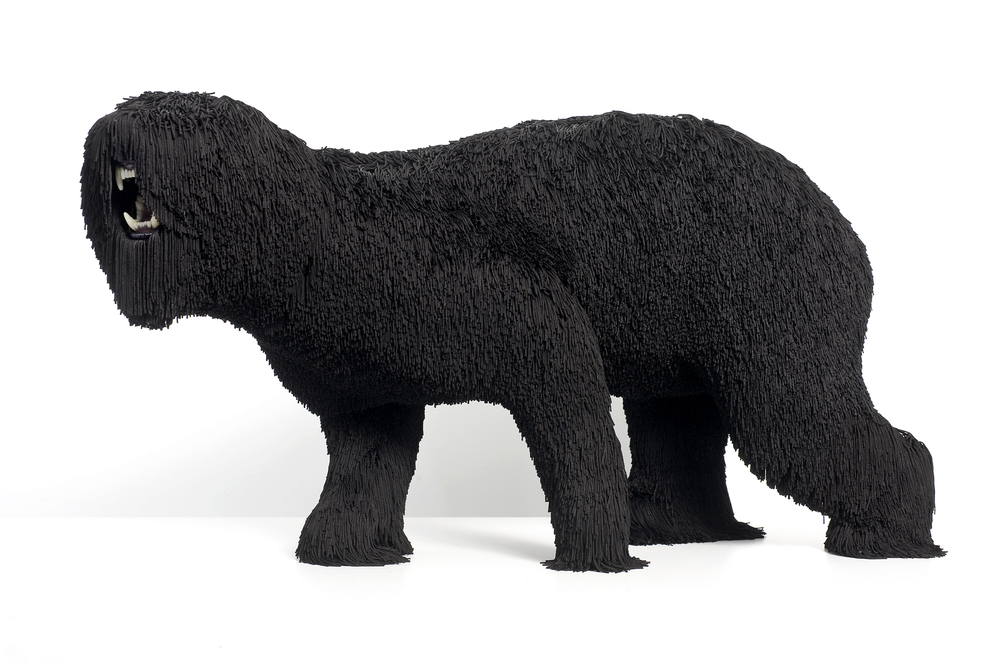 ...but not all of the yarn/stringy ones are as menacing. Take the "Wooly Woofter," for example. 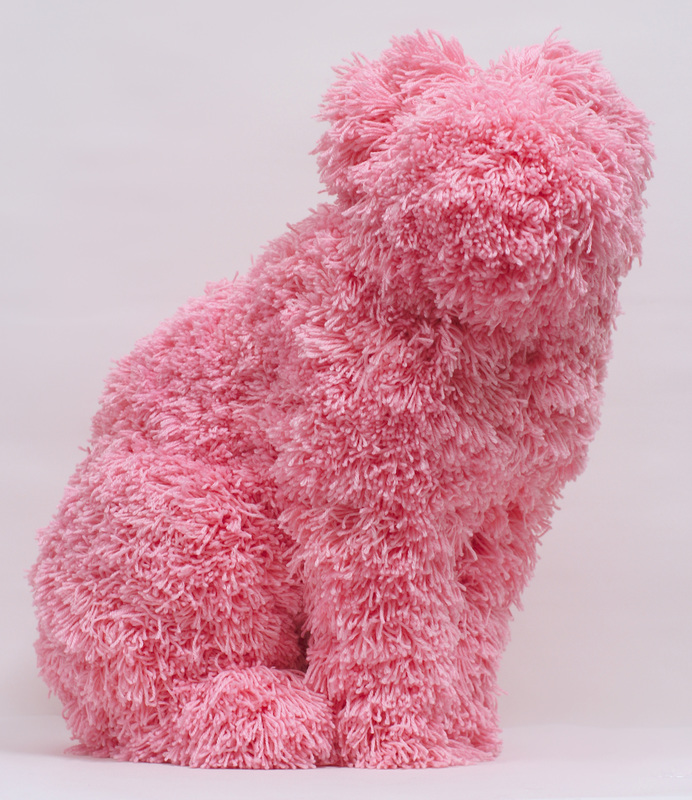 I love this one, called "Portal to a Better Place." 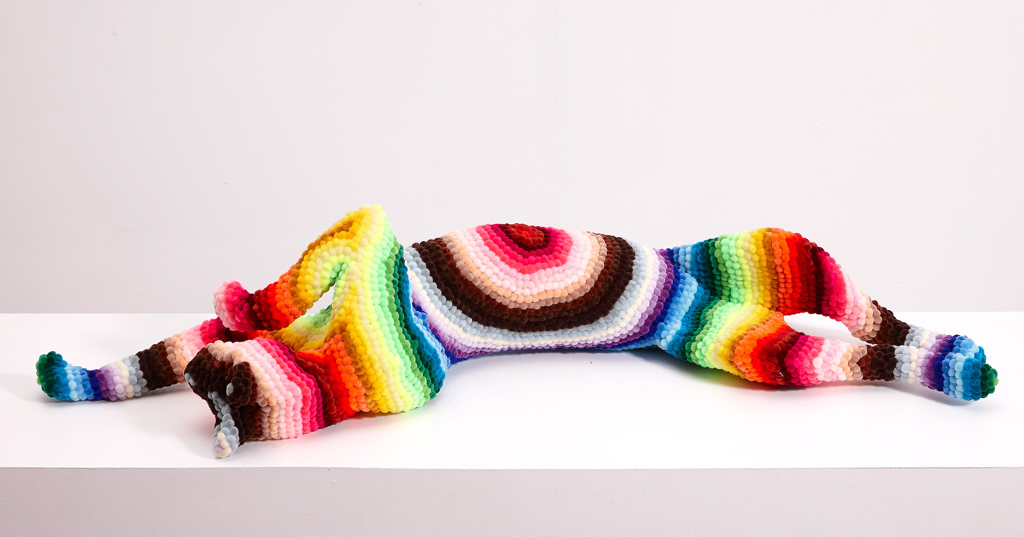 These pieces make me think about using pompoms to create patterns, using them to cover a three-dimensional surface, and to think of other unexpected materials I could use to cover a shape.
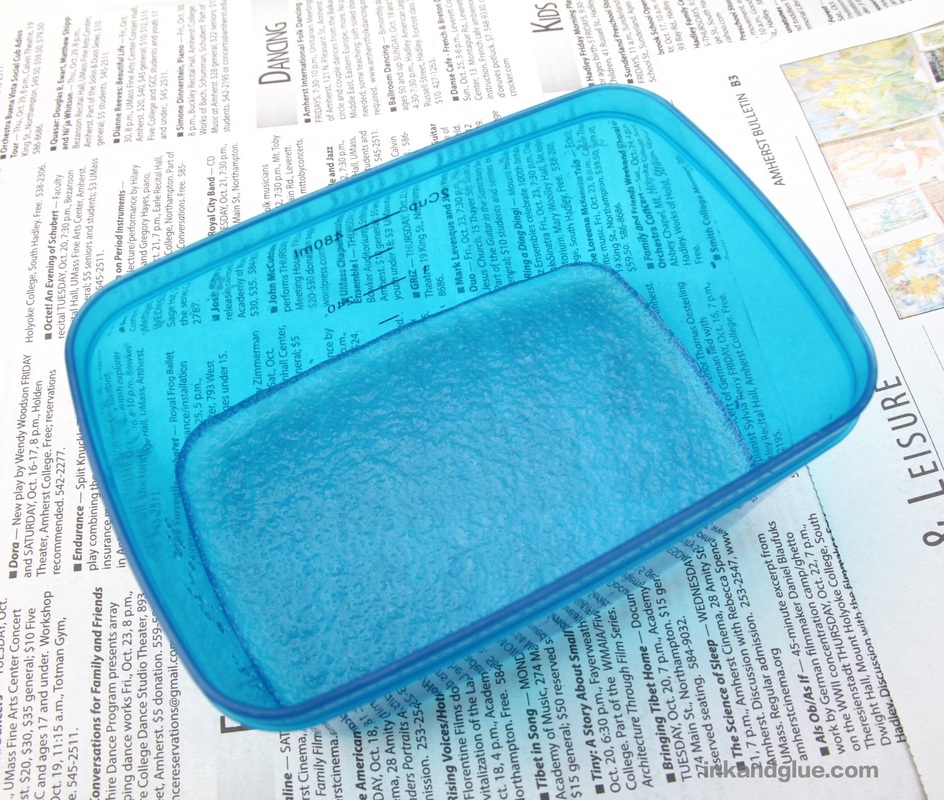
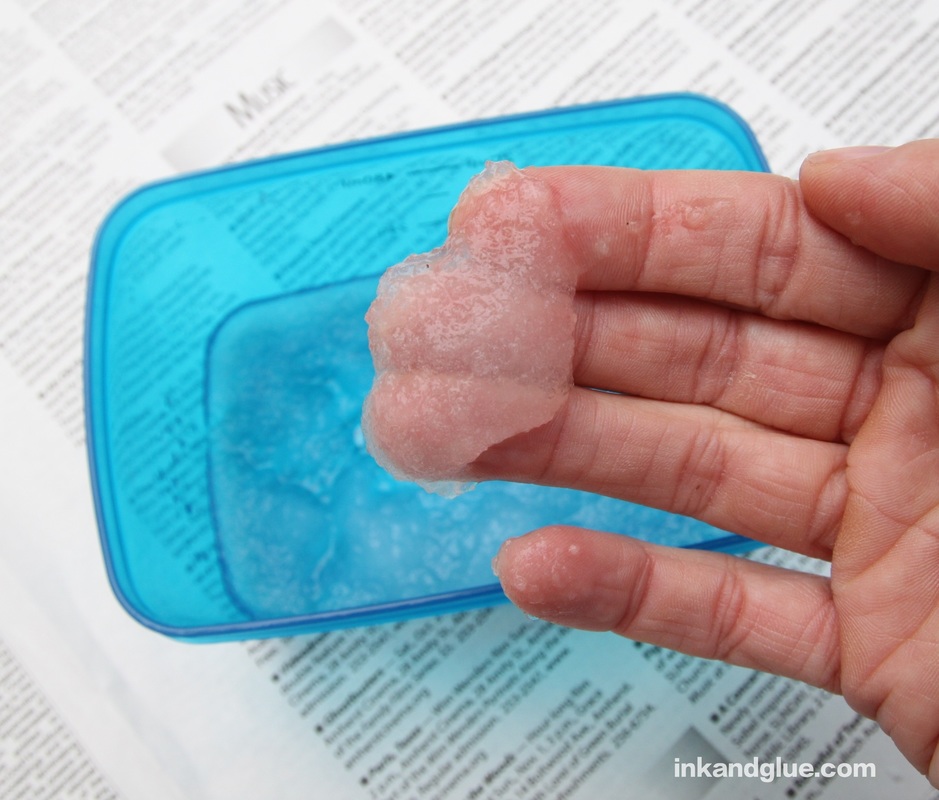
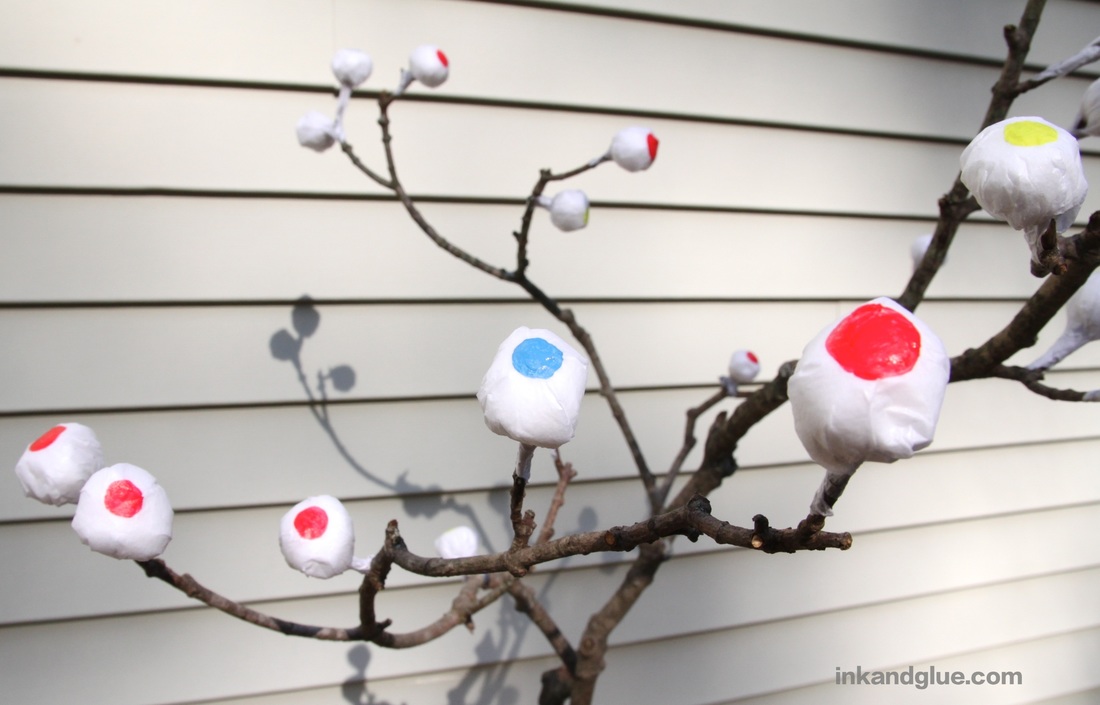
There's lots more to see on Troy's website, so go take a tour! xo Here's a very happy dog, running bouncily down the trail at the Montague Sand Plains. 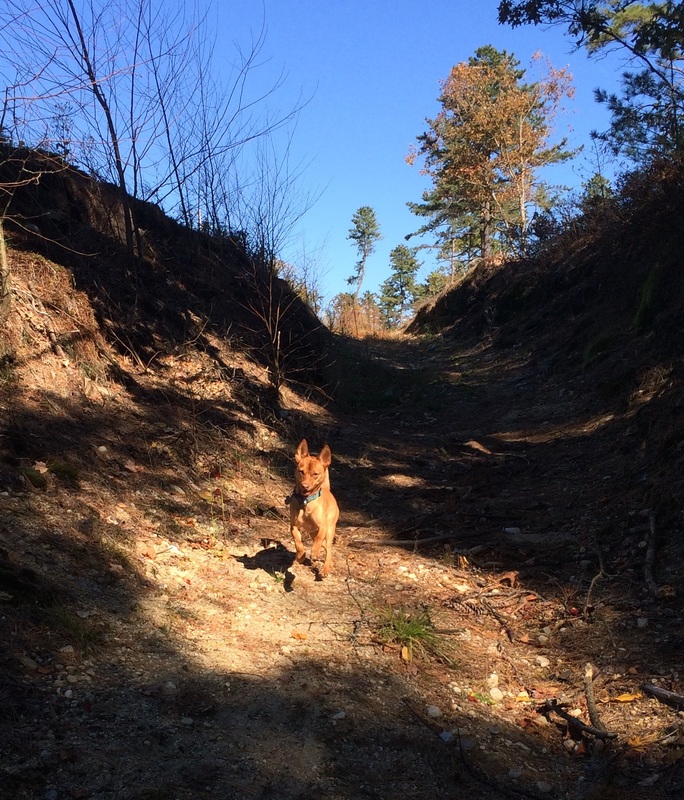 Ahh, the Halloween season. When families carve pumpkins, dress up in costumes, eat candy together, and of course, set up the traditional Halloween eyeball tree. 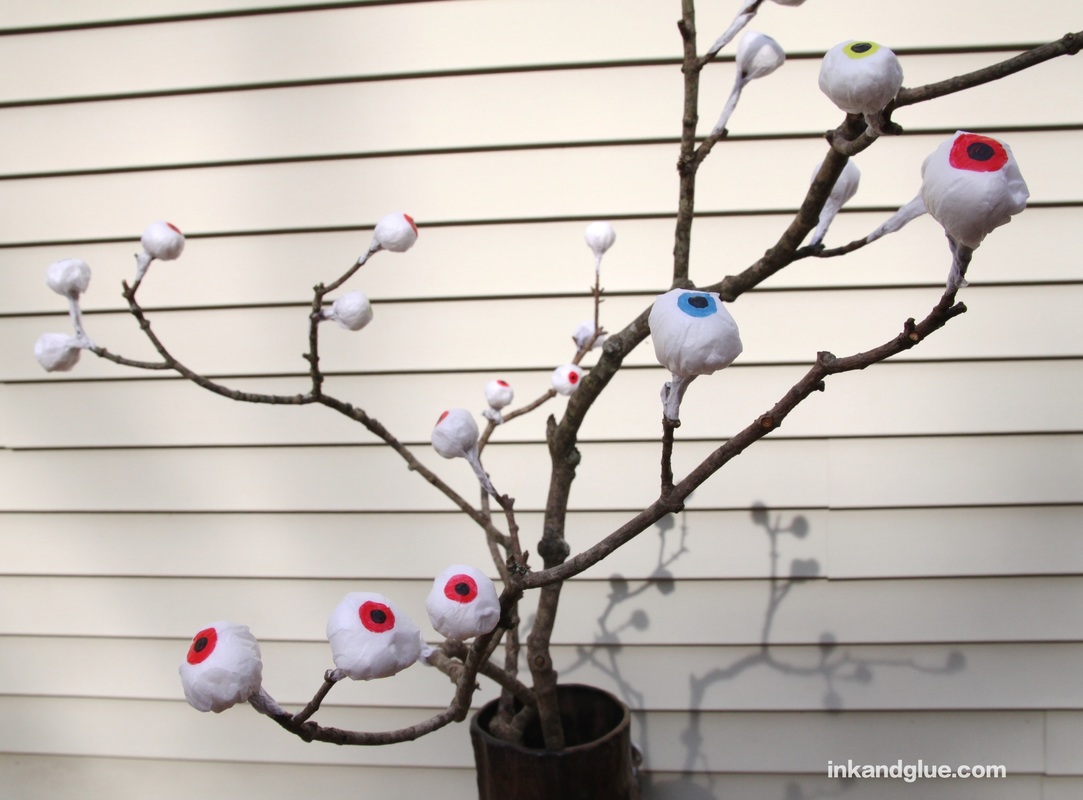 This is a fun craft, and it's got some messy parts, which kind of goes with the theme. It's also, like pretty much everything I make, very inexpensive. You'll want to start by finding the right branch or two. I happened upon one in my yard that was pretty much perfect, but I know from experience how rare that is. You'll want one that has a bunch of smaller branches that, um, branch out, so you'll have stems for your eyes. Get out a large vase that's heavy enough to hold your branch without tipping over. The next important ingredient is powdered wallpaper sizing or adhesive. You can use papier mache for this craft instead, but I like the gel-like consistency of the adhesive; since it's less watery, it won't instantly dissolve the tissue paper you'll be using. It also dries super strong, is non-toxic, and is easy to clean up. One container will last you for years, and once you try it for papier mache, you'll never go back to flour and water. Trust. For enough adhesive to make a whole tree, pour about a third of a cup of water into a container. 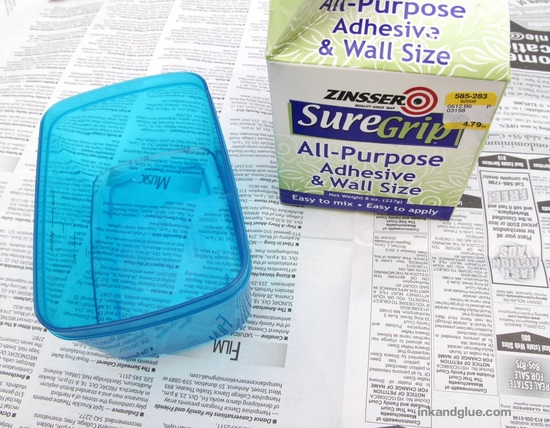 Sprinkle the water with just a little of the adhesive powder — maybe half a teaspoon, at most. Swirl it around with your finger, then let it sit for five minutes. It will magically turn into a clear gel (at right).
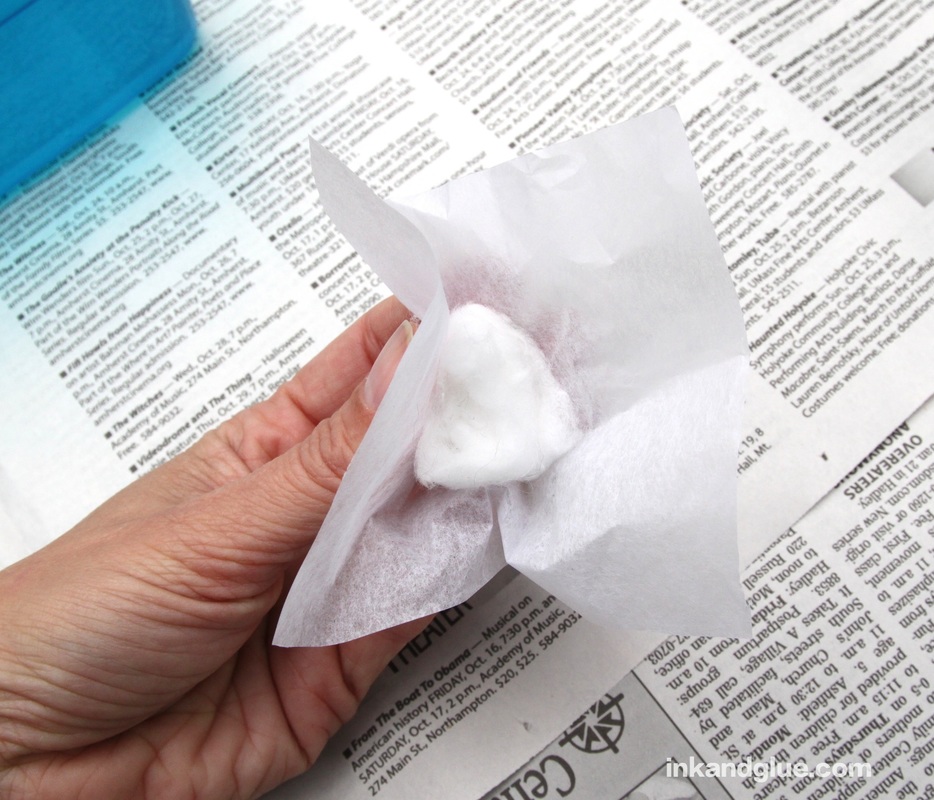
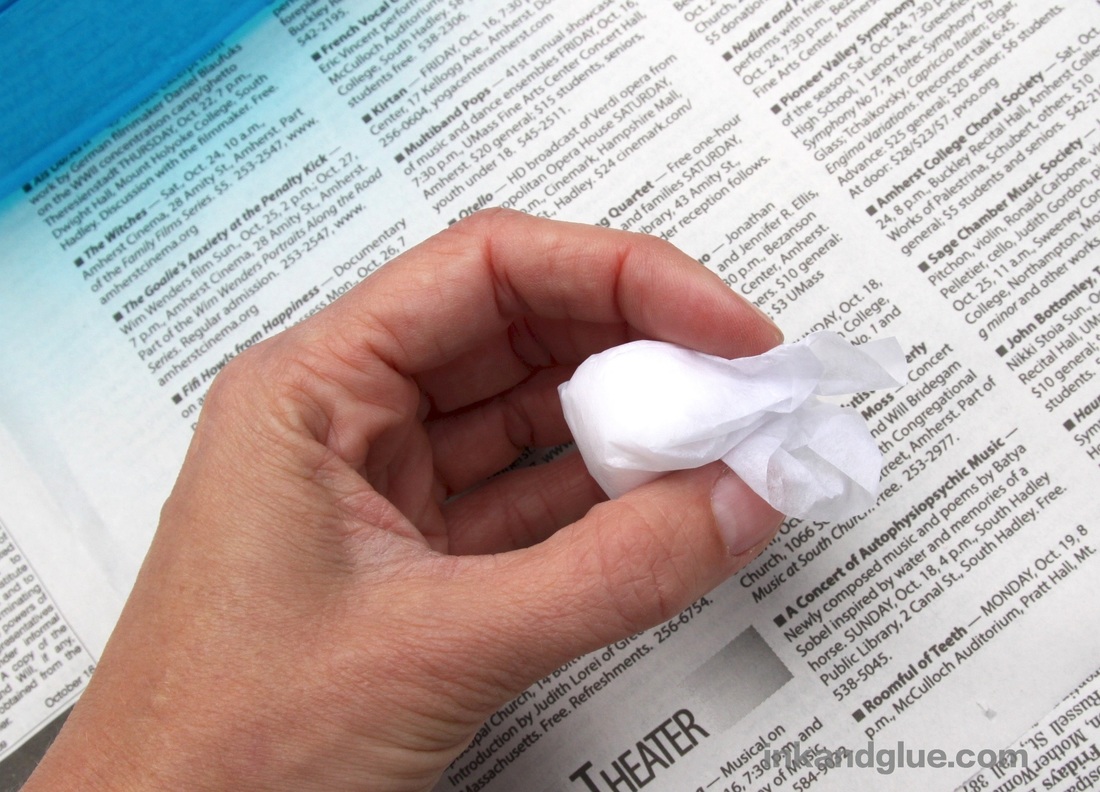
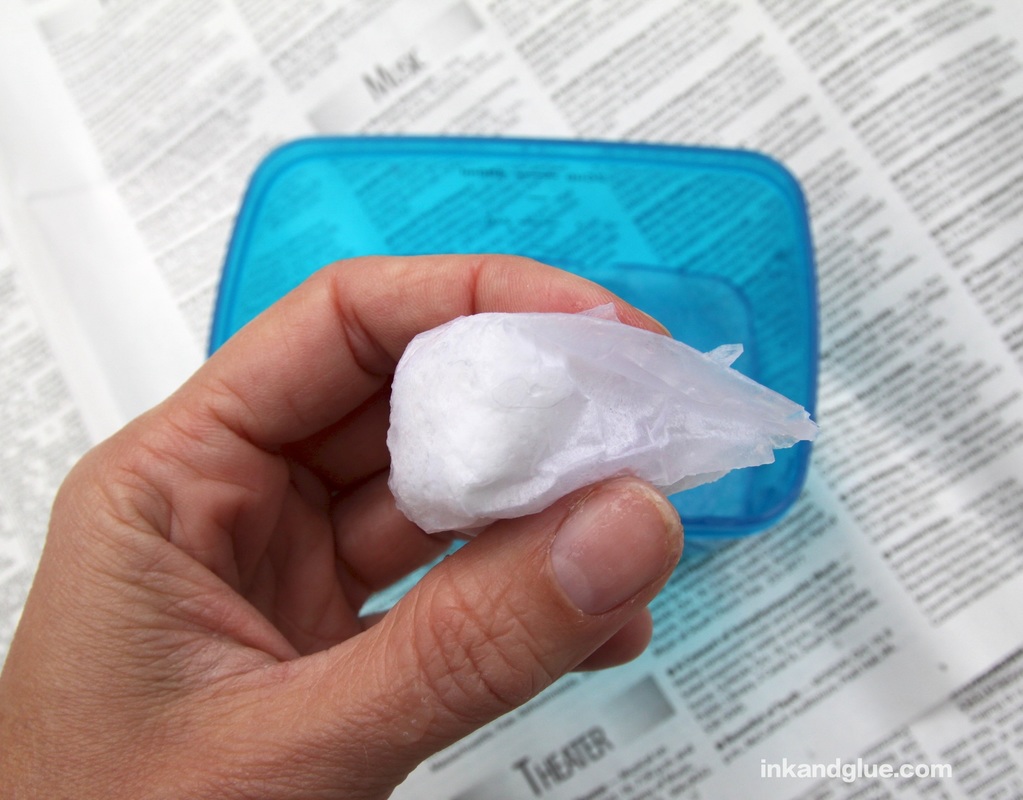
Cut white tissue paper into squares about 4 inches wide. For each eyeball, place a cotton ball in the middle of a square, and gently crumple the paper around it so the cotton is enclosed.
With your other hand, scoop up a bloop of the adhesive. Dab and smooth it onto the paper. Try to keep the rounded end smooth and unwrinkled.
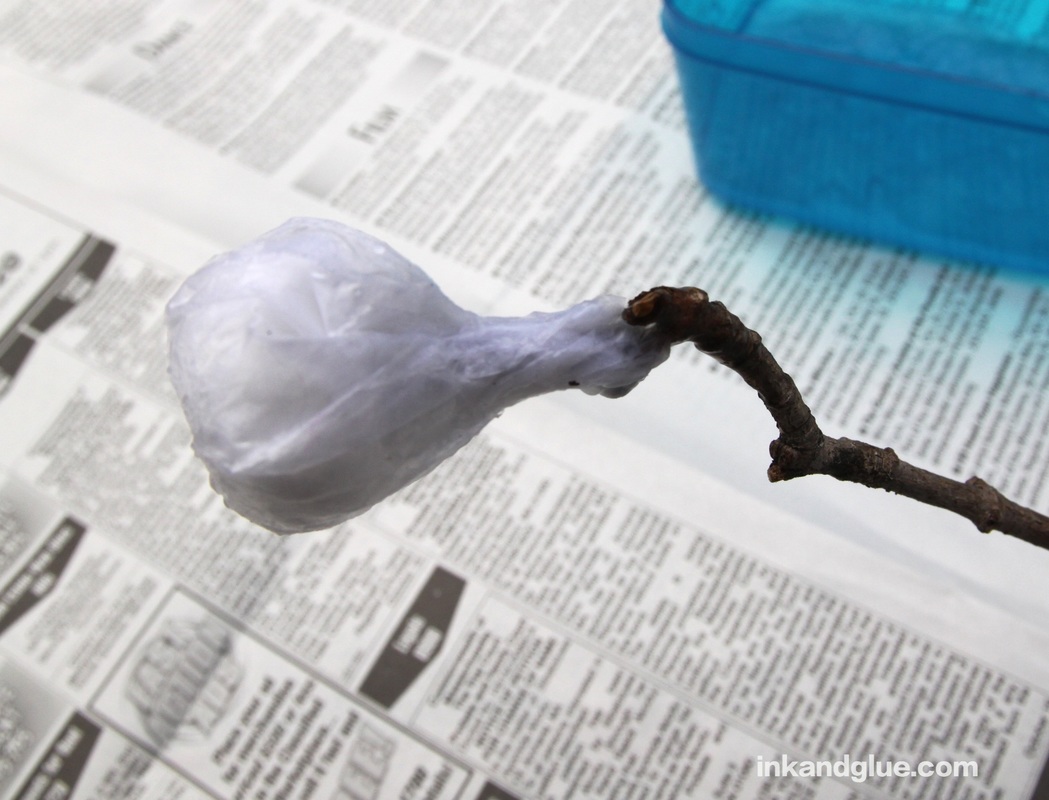
Open the end of the eyeball a little, and place it onto a branch end. Smooth the ends of the gelled paper onto the branch. Twist the paper around the branch a bit as you smooth everything down. This is a two-handed process, despite what you see below. 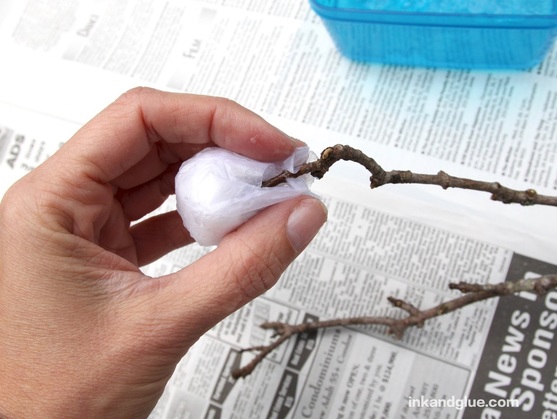 This is what your finished eyeball will look like (at left). And here's what the entire branch will look like, once you've added multiple eyes and let them dry overnight (right).
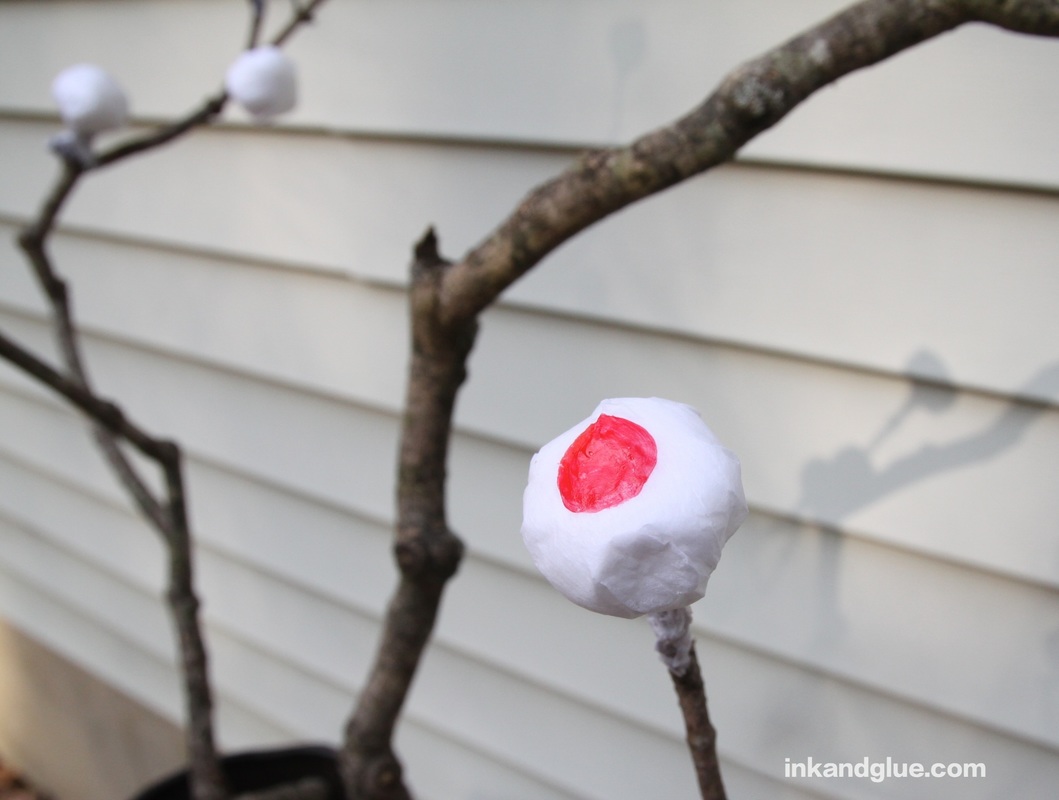
If you wanted to be minimalistic and mysterious, you could stop right here, and have a creepy branch with unsettling white blobs growing on its ends. For eyeballs, use a bit of craft paint to add dots to each paper blob. I painted most of them red, with a few blue and chartreuse green ones for diversity.
After the paint is dry, add pupils with black acrylic paint. If you are worried about making perfectly round dots, use a hole punch and black paper to make pupils, and add them with glue. But I think that with disembodied eyeballs you should expect a bit of imperfection. 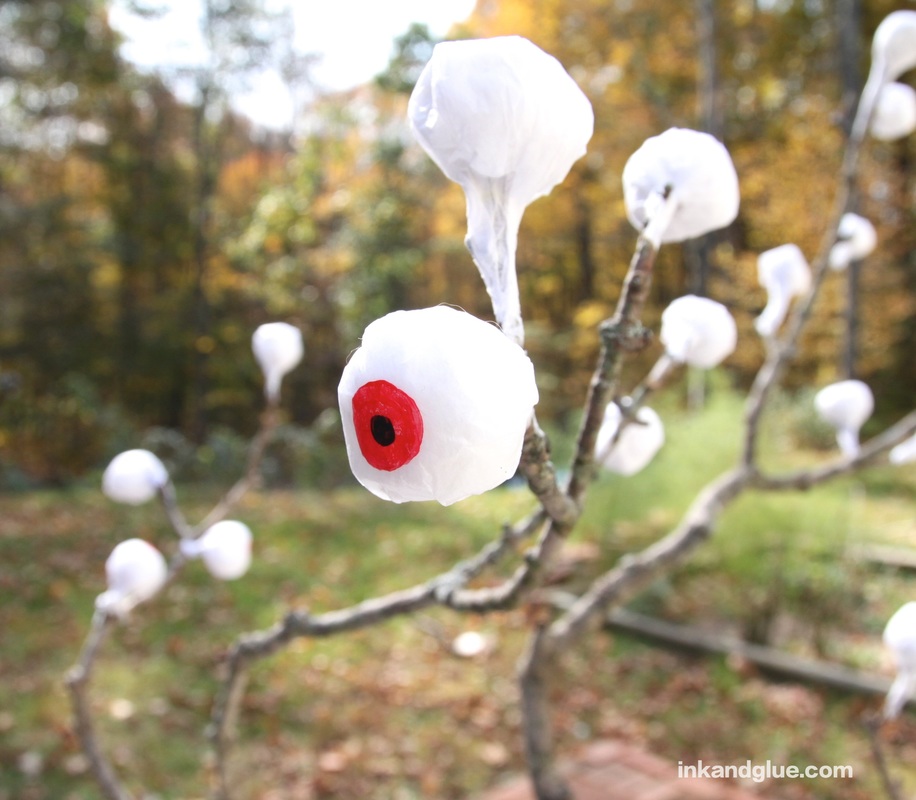 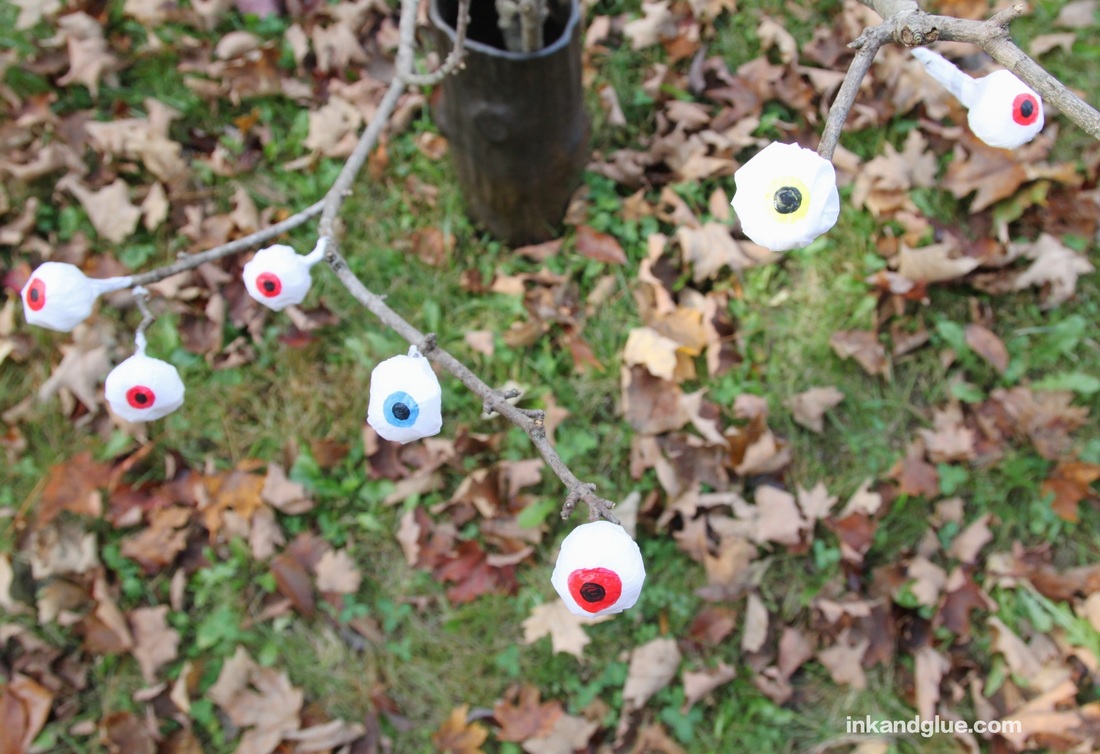 And you're done! Bask in the glow of your all-seeing eyeball tree all Halloween. Happy haunting! xo 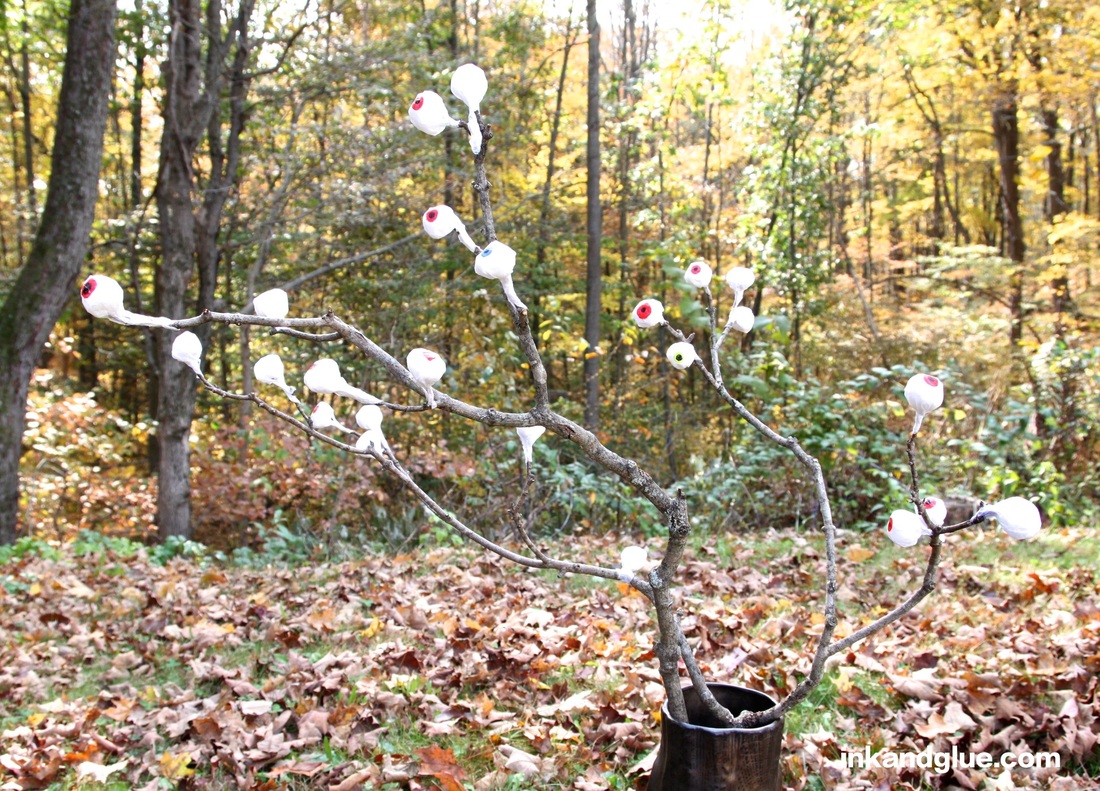 |
Categories
All
Archives
March 2017
AuthorI'm Debbie Way, an artist and writer who enjoys making things. |


 RSS Feed