|
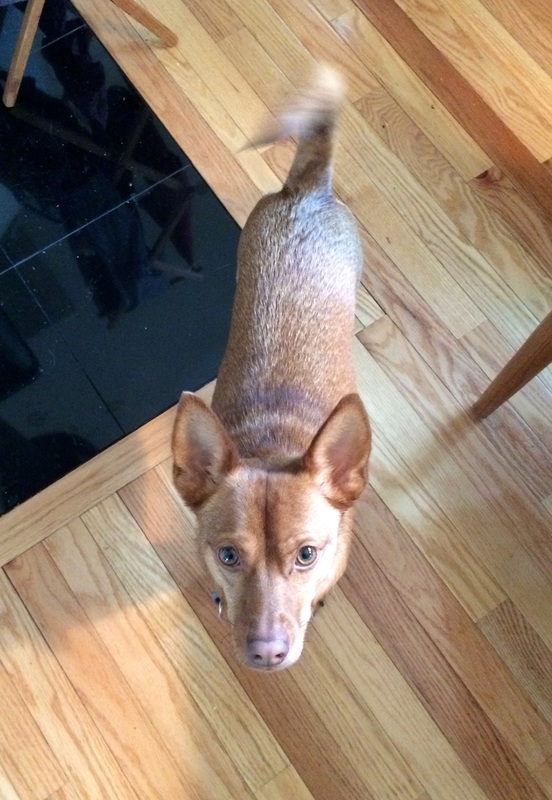
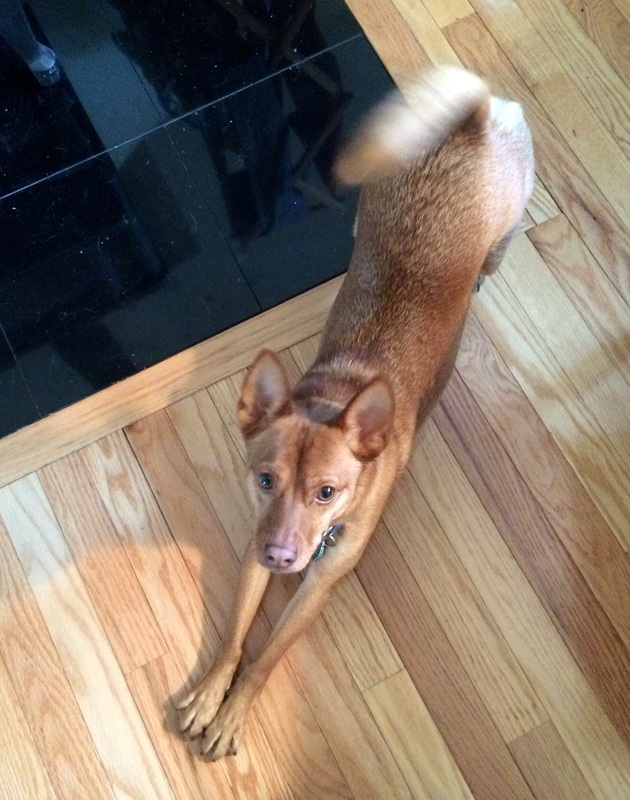
He's a pro at both mountain pose and downward facing dog. These shots were taken today, after I tore myself from the computer to go downstairs and see him. Note the motion-blurred tail.
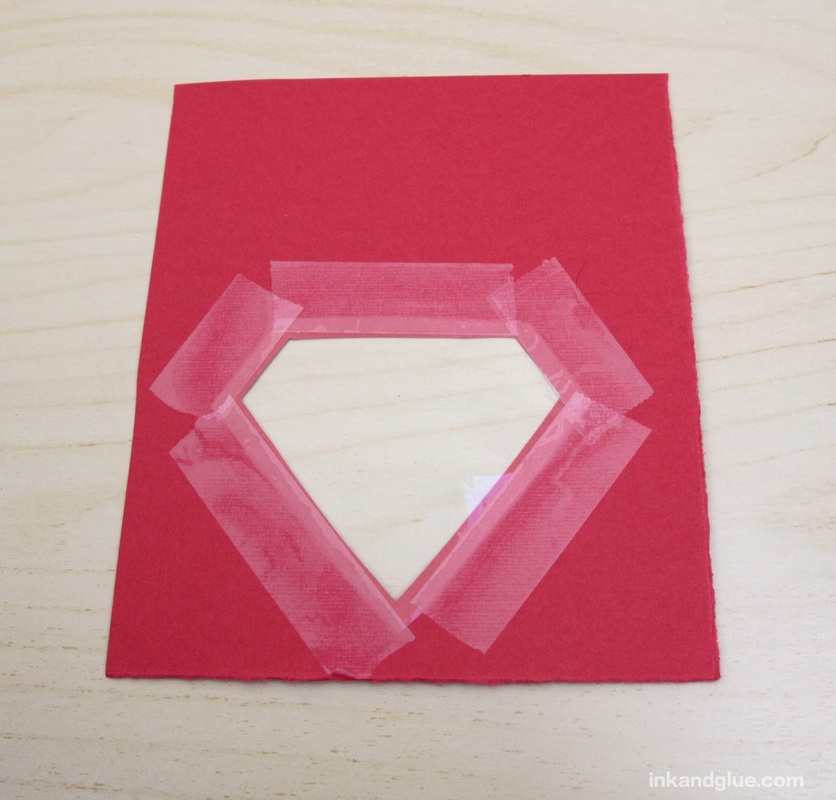
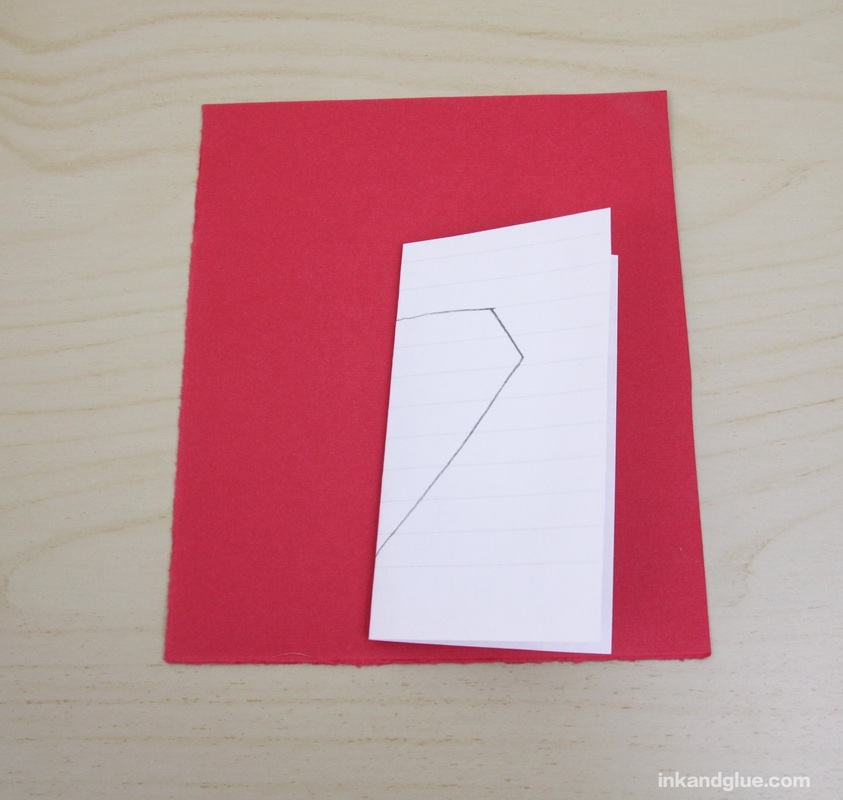
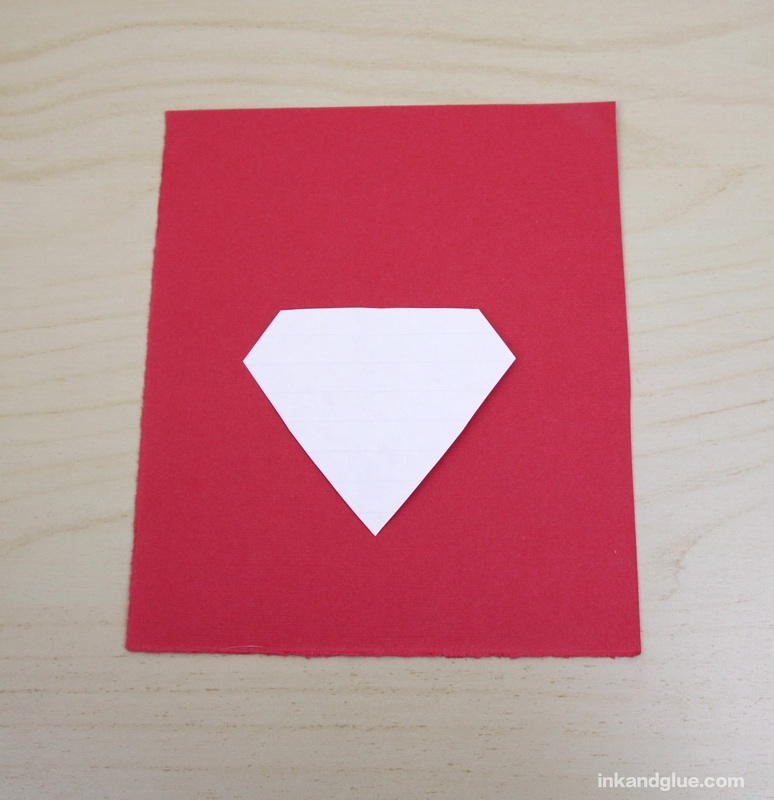
 This Valentine's Day card combines two things I love: rock candy, and letter stamps. I also enjoy a card with a window, but that's more of a 'strongly like' than a 'love.' Here's how you make it! First, fold and cut a sheet of card stock into quarters. You'll need two quarters for this card. (It's more of a postcard, really.)
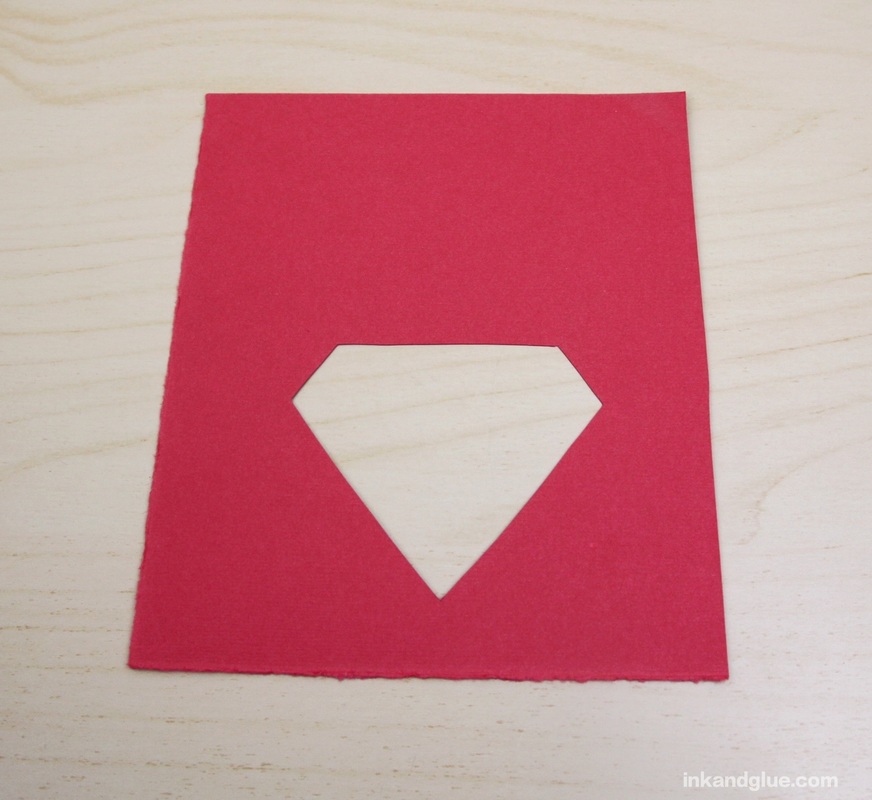
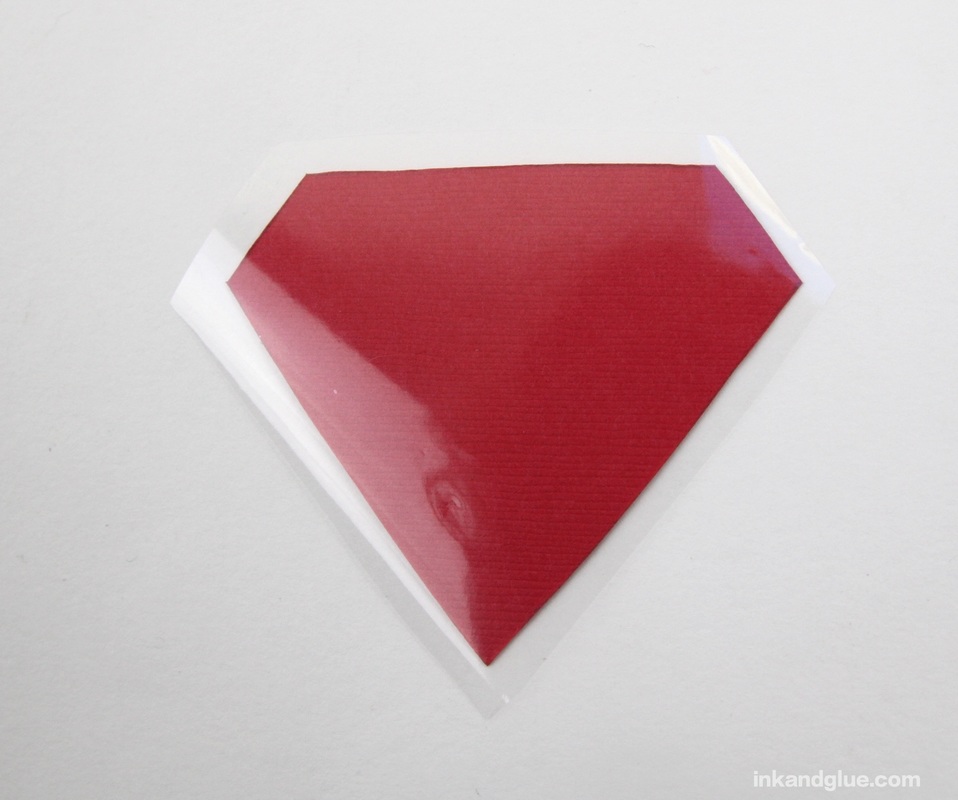
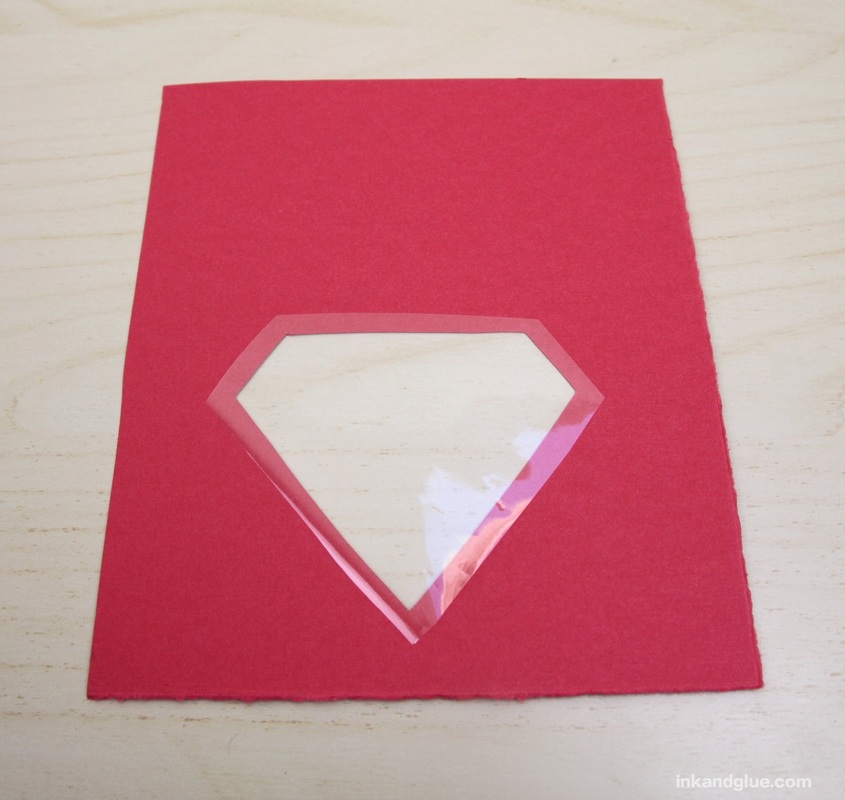
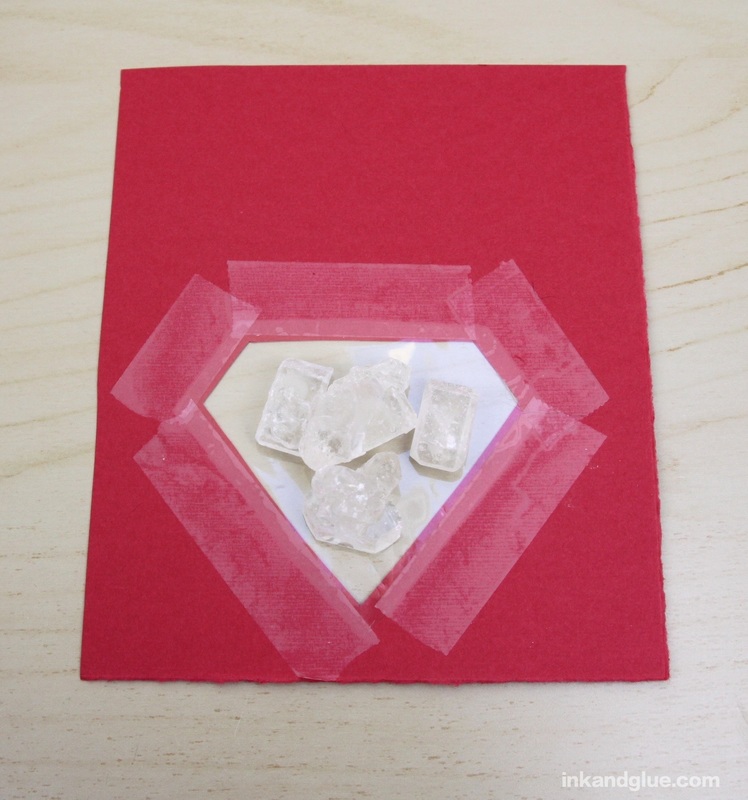
You know that diamond shape you cut from the center? Use it as a rough template to cut out a piece of cellophane or plastic bag that's about an eight- to a quarter-inch larger on each edge. Lay the plastic shape over the hole in the card, and tape it down.
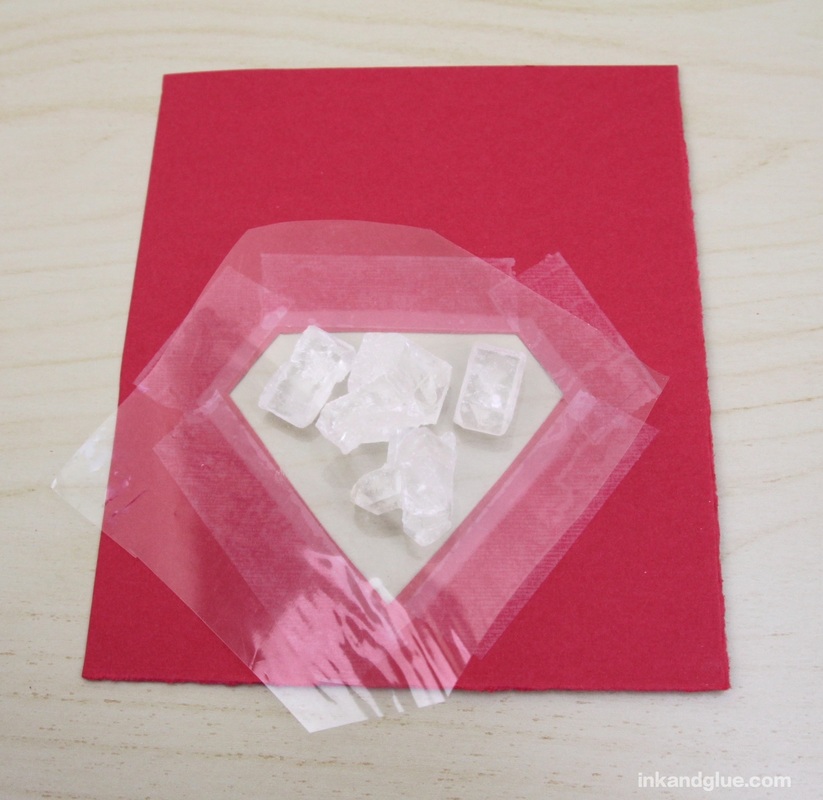
 Place a few rock candy crystals in the middle. I have a local 'by the pound' candy shop that sells rock candy in bulk, but if you don't have something similar near you, Amazon has it, of course. Cut another piece of cellophane or plastic that's very roughly the shape of the diamond, but a half-inch or so bigger on every side.
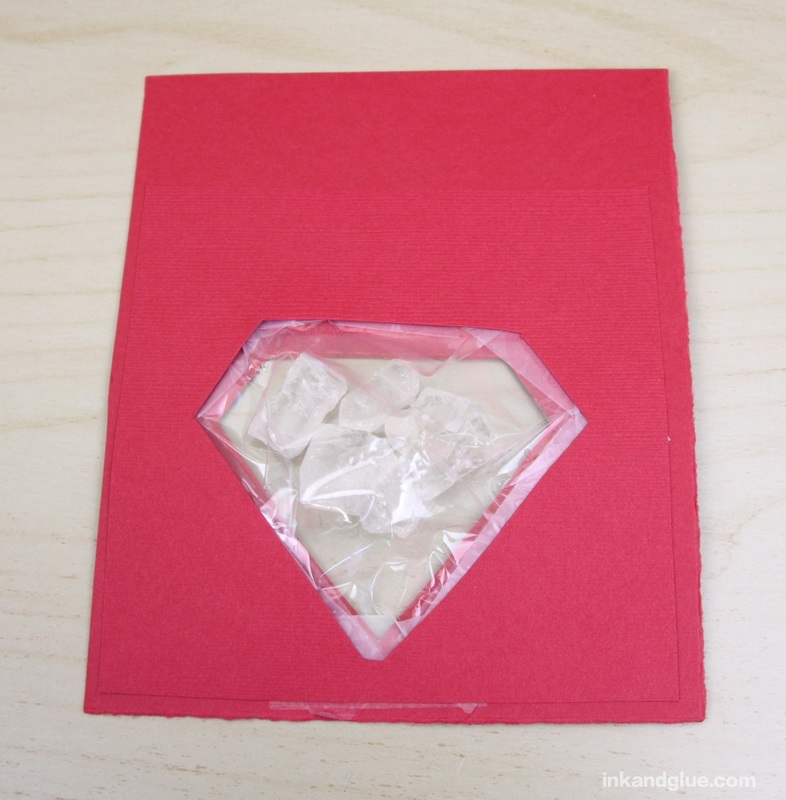
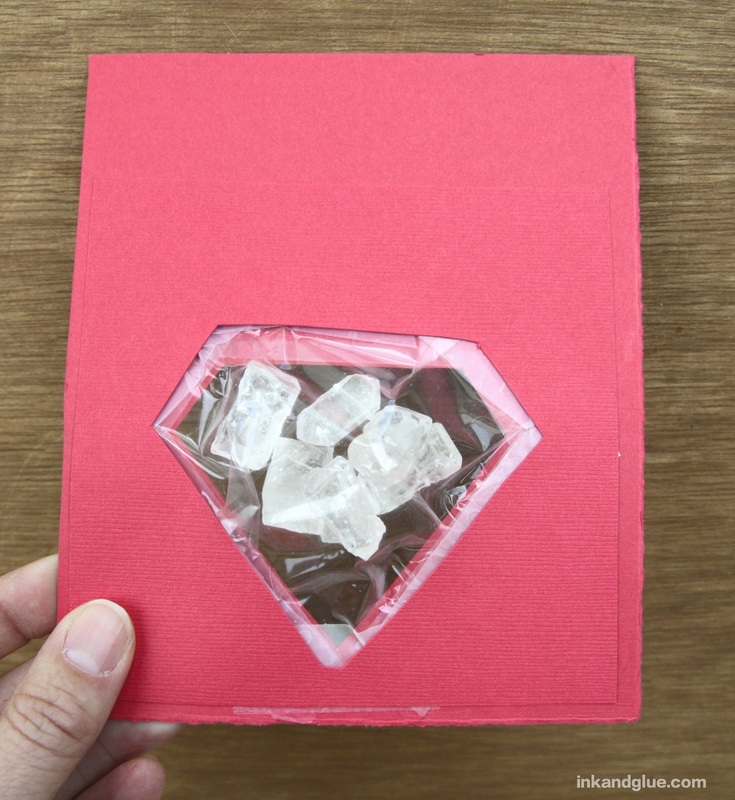
Tape down the top edges, folding and pleating the plastic as you go to fit around the bulk of the candy. Trim the plastic as needed before taping it in place. 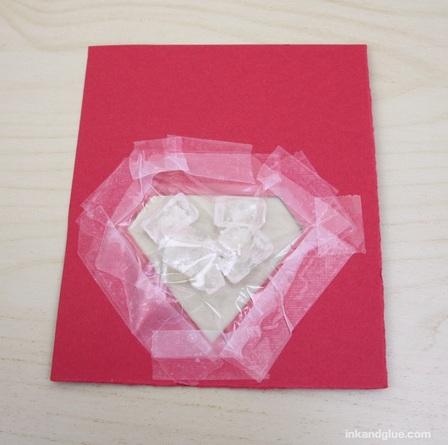 Here's how it should look from the front. 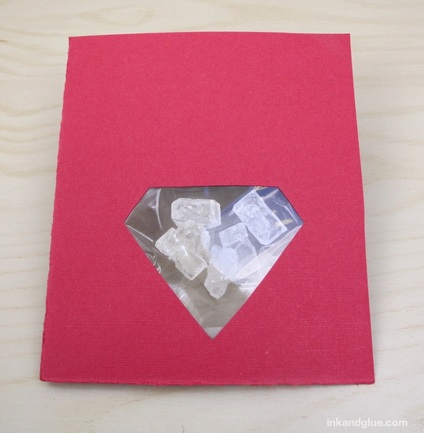 Now to add the text. I recommend trying this first on another piece of scrap paper so you get the spacing right. In general, I like to do lettering and stamping-type things on a separate piece of paper instead of right on the card, so that if you make a mistake, you can redo it without having to throw out the entire thing and start from scratch. I got these tiny letter stamps at Michael's, but there are about a gazillion different kinds out there. 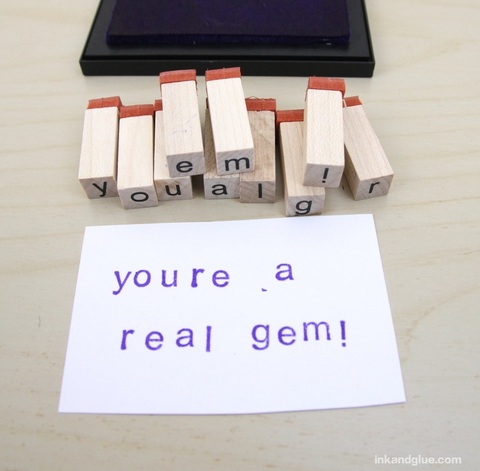 Note that the set doesn't come with an apostrophe (which makes editor-me sad) so I found a matching purple marker and added one later. Attach the final stamped message to the front with glue stick, then add a couple of pieces of washi tape, if you dig the look. I do. 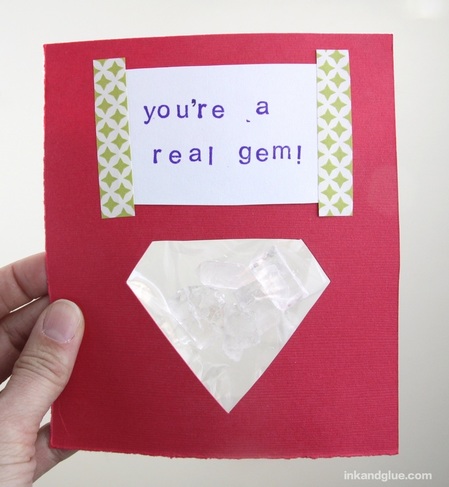 Your card is now complete, unless you wish to hide the unsightly backside with its layers of plastic and tape. You do? OK, here's how. Bring back the diamond shape you cut out from the card in the beginning, and another of the card stock quarters. Trace the diamond onto the card, but again add a border of about an eighth of an inch. Cut it out with a craft knife. (You want the opening in this card to be larger than the first so you won't be able to see it from the front.) Trim the top couple of inches from the top, just because you don't need it, and I'm paper-thrifty. 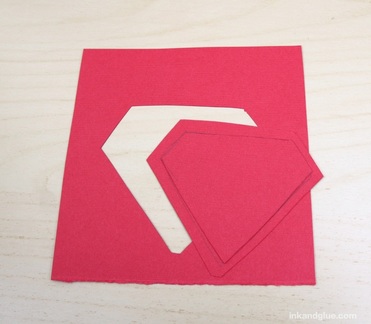 Lay this over the back of the candy-filled card, and trim anything that needs to be trimmed in order to be hidden from a frontal view. Attach it to the card with double-sided tape. Here are two views of the finished back:
Now you're actually done!
xo This Valentine's Day idea is perfect for a parent, or a kid in collusion with a parent, to leave as a surprise for another family member. It requires no artistic or crafting skill, though you do need to know how to make the shape of a heart. And how to recognize colors, I guess. That's it! 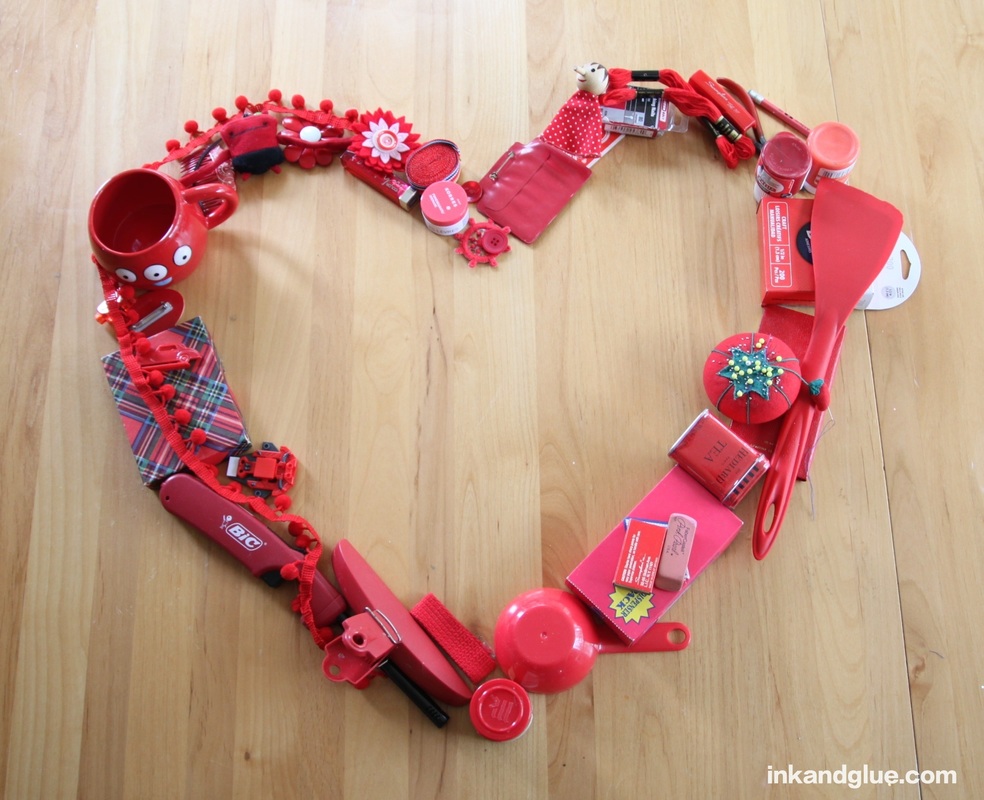 Step one: Go around the house with a bag or a basket and collect everything you can find that's red (or close to red). My collection includes a box of staples, a pin cushion, a box of small nails, a spatula, pom-pom trim, an old name tag, and a couple of pots of lip gloss. 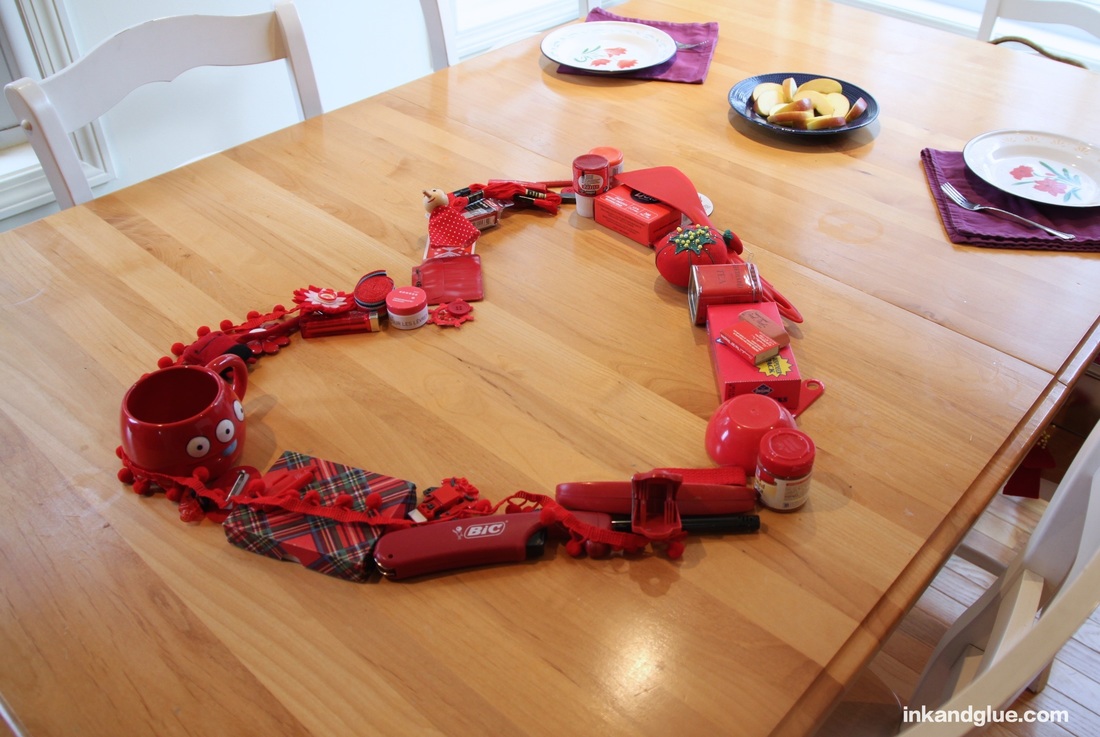 Step two: clear off half of your dining room or kitchen table (wherever you have the room AND where the heart will be noticed immediately) and arrange your red things in a heart. Done! Optional step three: Write a message on a paper heart and place it in the center. 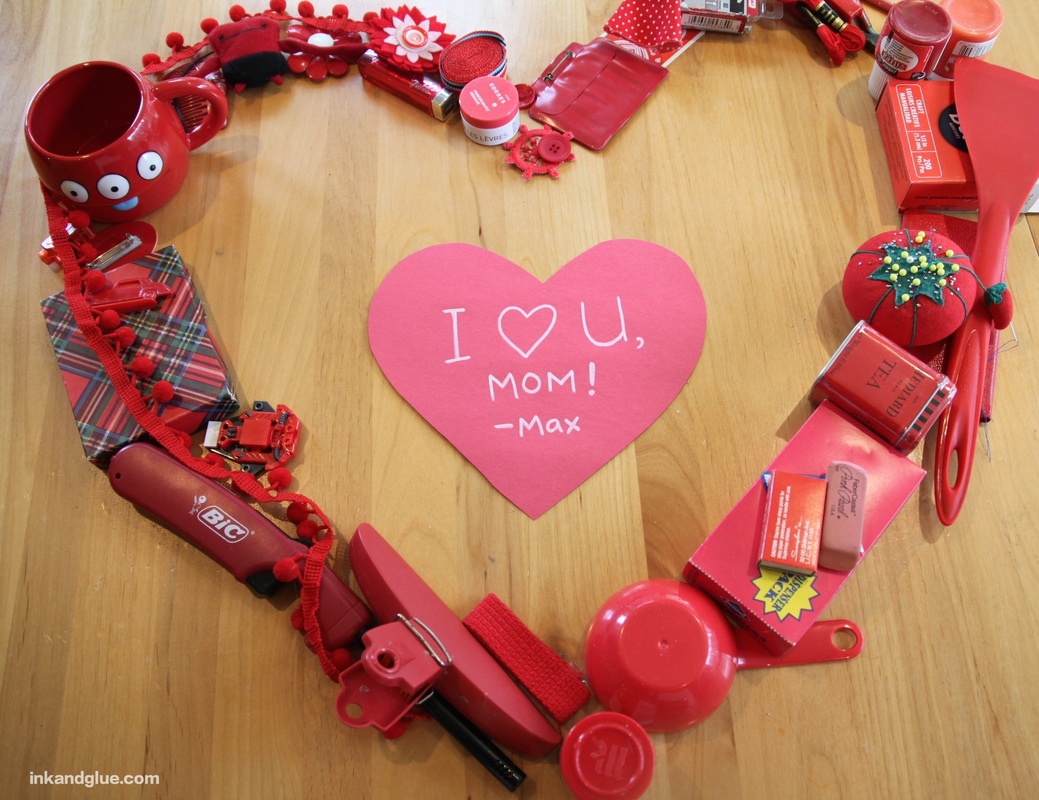 Mandatory step four: Within 24 hours of the heart's reveal, return all of the items back where they belong! Cleaning up afterwards is part of the gift. xo!
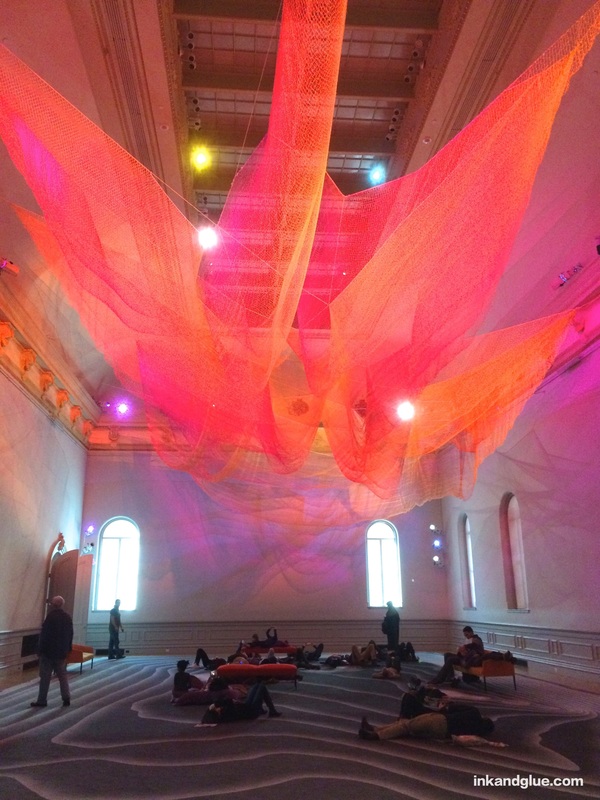
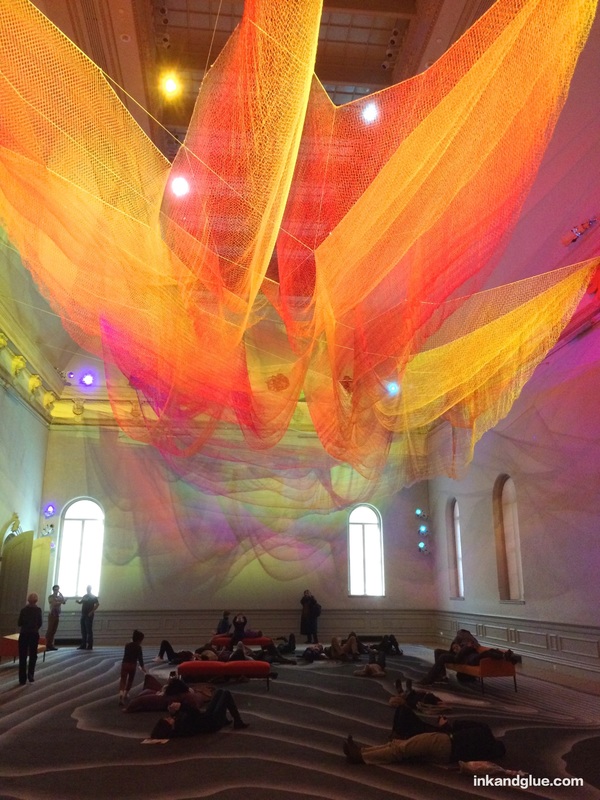
I just got back after being stuck in Washington, DC during Snowzilla. Before the blizzard moved in and shut down the city (except for many restaurants and bars — thank you for that, DC), I was able to visit a few museums. One of them was the newly-renovated Renwick Gallery, which is currently exhibiting a show called Wonder. Their website has a short video about the exhibit. I really love installation art. As a child, walking through immersive, room-sized sculptures was transformative and other-worldly, and those experiences are partially why I chose to study art in college. The Renwick has signs in every room encouraging people to take photos, so I did. Here are three of the nine pieces on display.
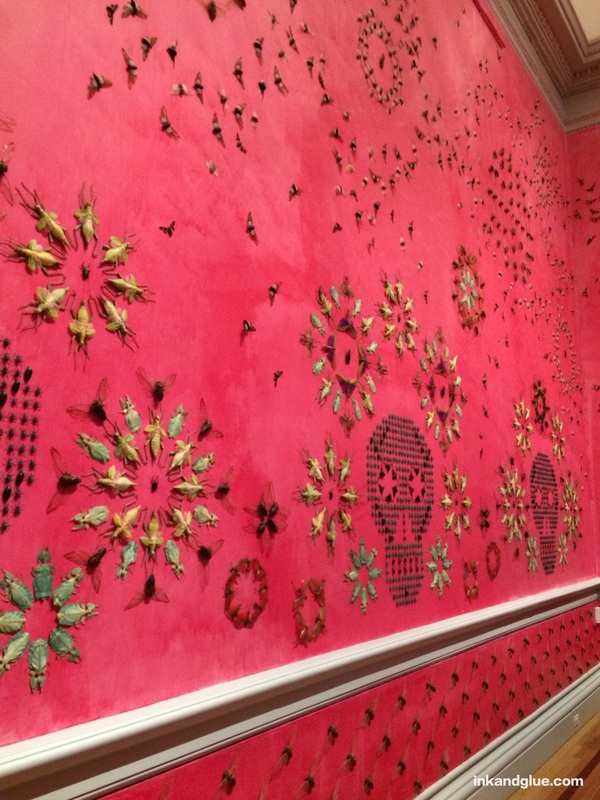
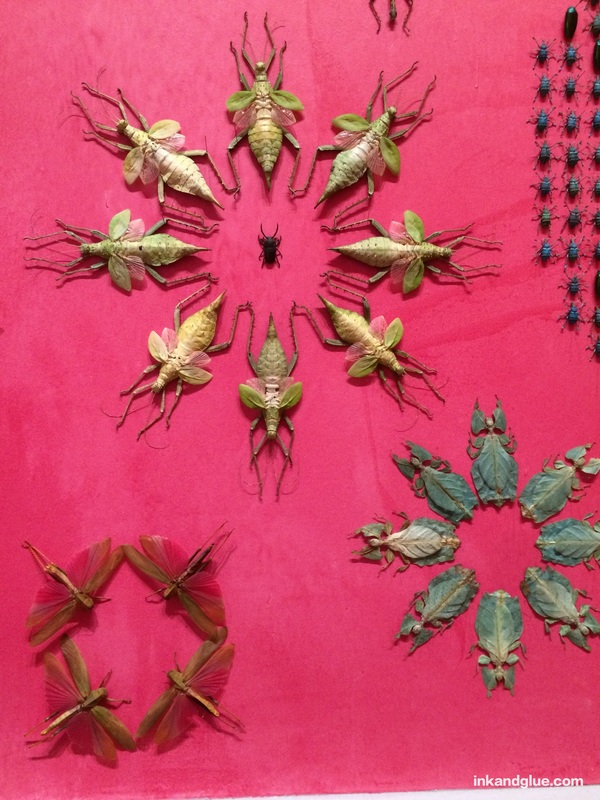
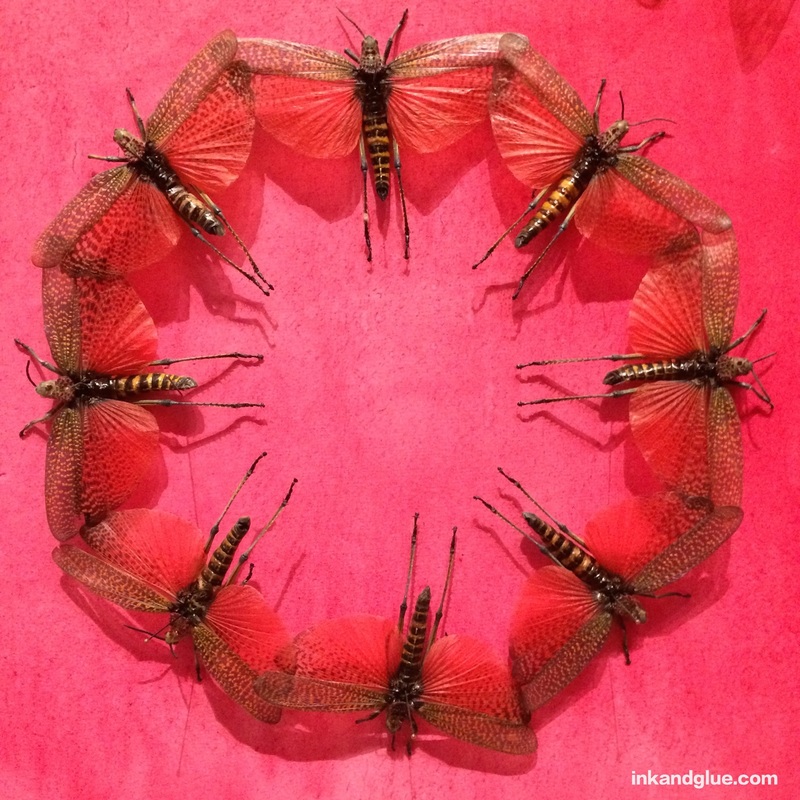
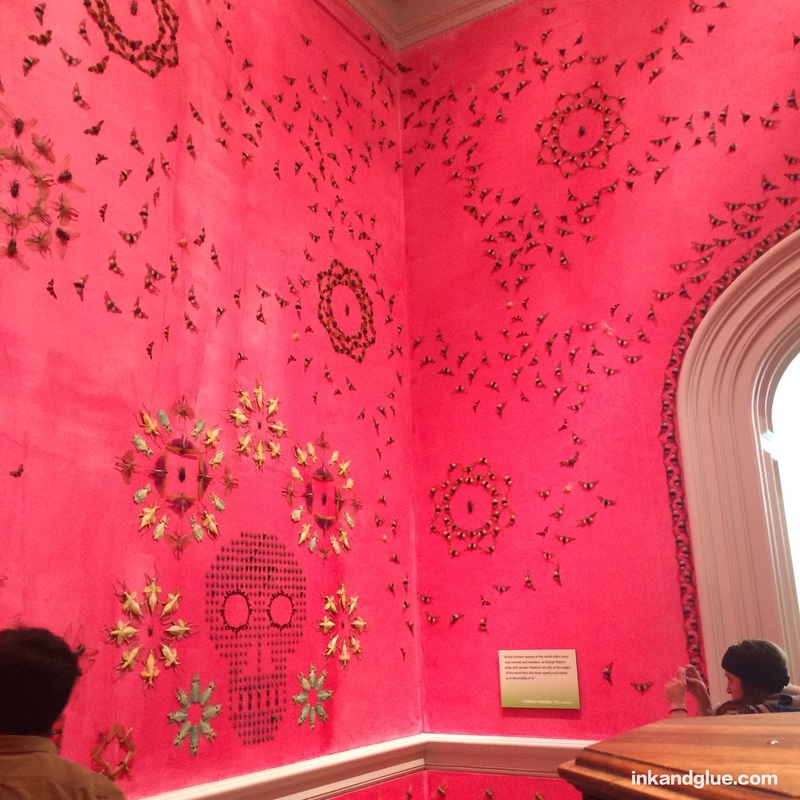
Artist Janet Echelman filled the biggest space with suspended netting illuminated with lights that slowly changed colors. The shape of the fabric is a 3-D map of wave heights from the tsunami that hit Japan in 2011. The floor had low benches and bean-bag sacks, encouraging people to lie down, look up, and watch how the lights transformed the space. Here's another view, showing the reflections on the wall. Love it. 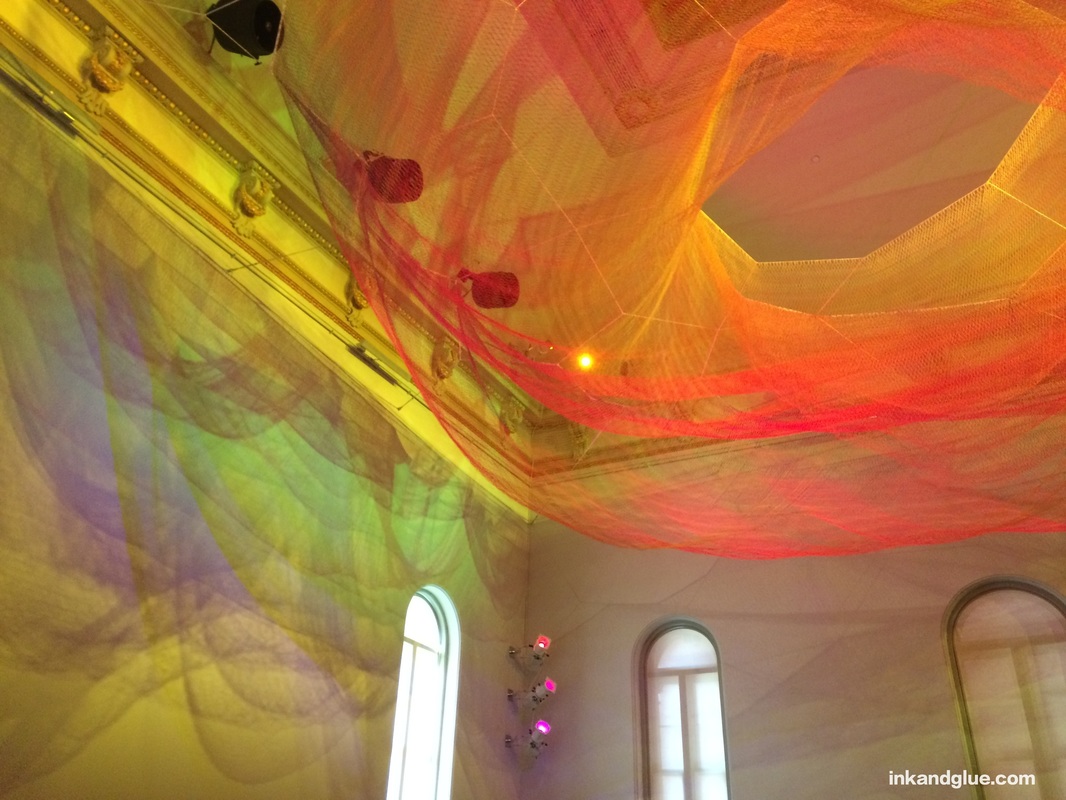 As you might have noticed, I like making art and crafts with everyday materials, so naturally I'm a fan of this next piece. Tara Donovan 's termite-mound-like hills (or are they stalagmites? Mountains? Cairns?) are constructed almost entirely of stacked index cards. 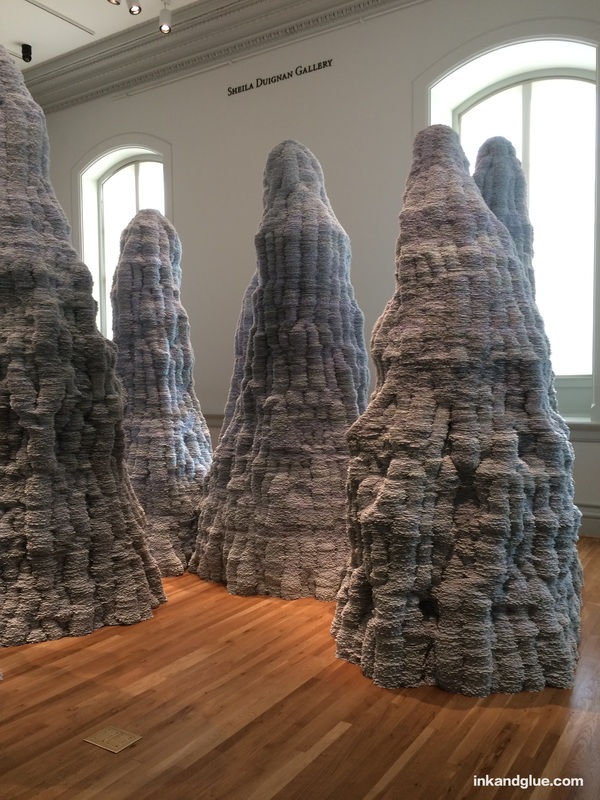 A closer look: 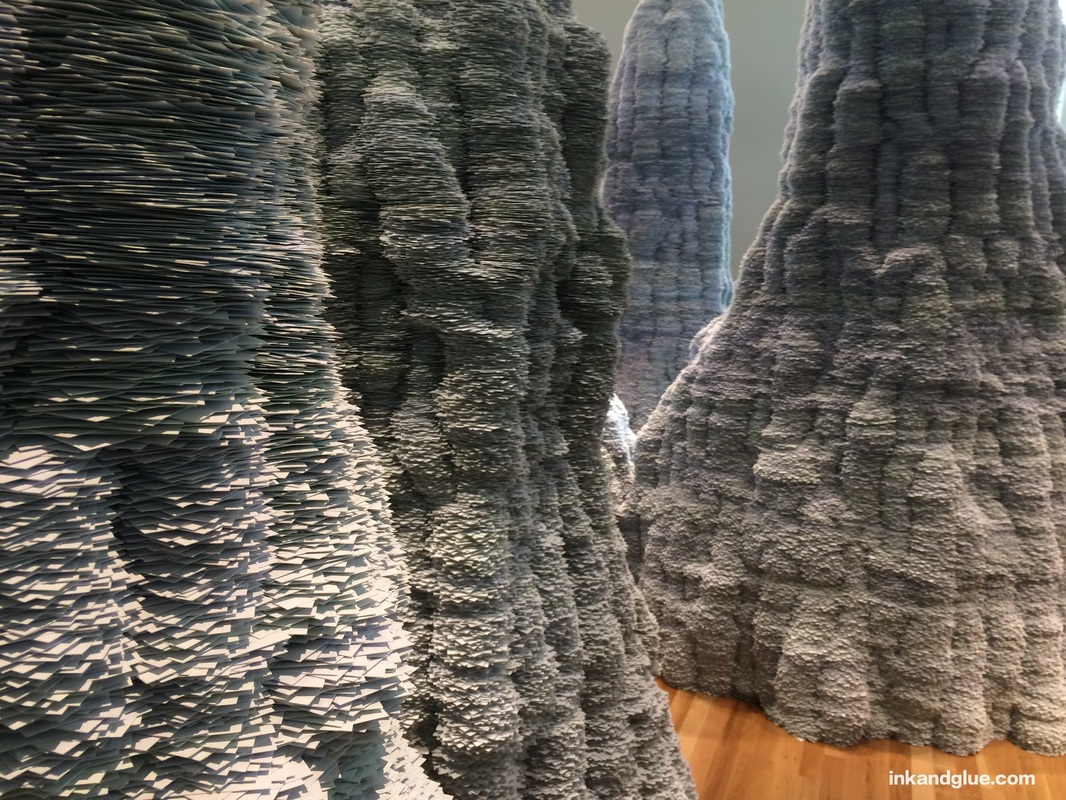 And finally, what has to be the most Instagrammed of the nine installations, Jennifer Angus's "In the Midnight Garden." The walls are painted bright pink with cochineal, a dye made from the bodies of the female cochineal insect. Check out the labels of any food or candy with a pink tint, and you might find cochineal or carmine (a processed form of cochineal) in the list of ingredients. Yep, you've been eating bugs. Anyway: The main attraction is the patterns on the walls, which are formed by the bodies of insects and beetles. Yes, the bugs are real, and all are species that are overabundant or invasive in their Southeast Asia territories.
It's odd and creepy and awe-inspiring, especially on a logistical level (how did she...?). But my favorite part of the room was a tall, many-drawered, hexagonal cabinet in the center that seemed to have once held machine or engine parts. Many of the drawers were pulled out to reveal dioramas of insect bodies engaged in various scenes, either as protagonists or as raw materials. 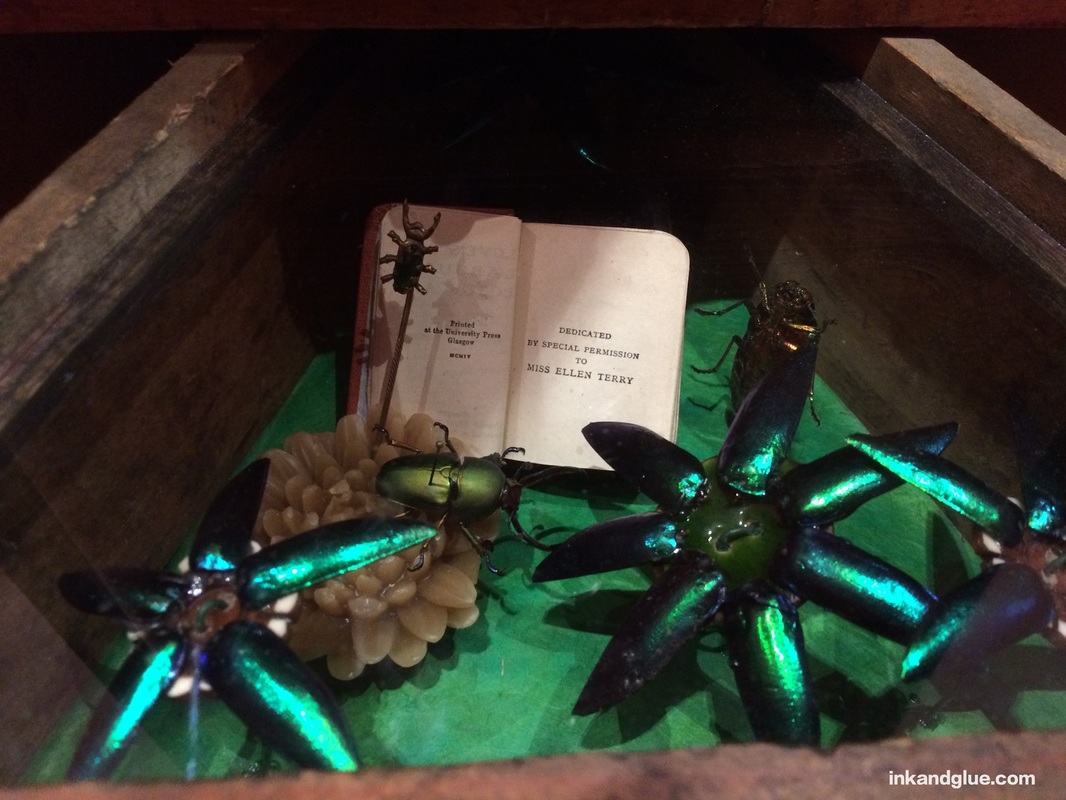 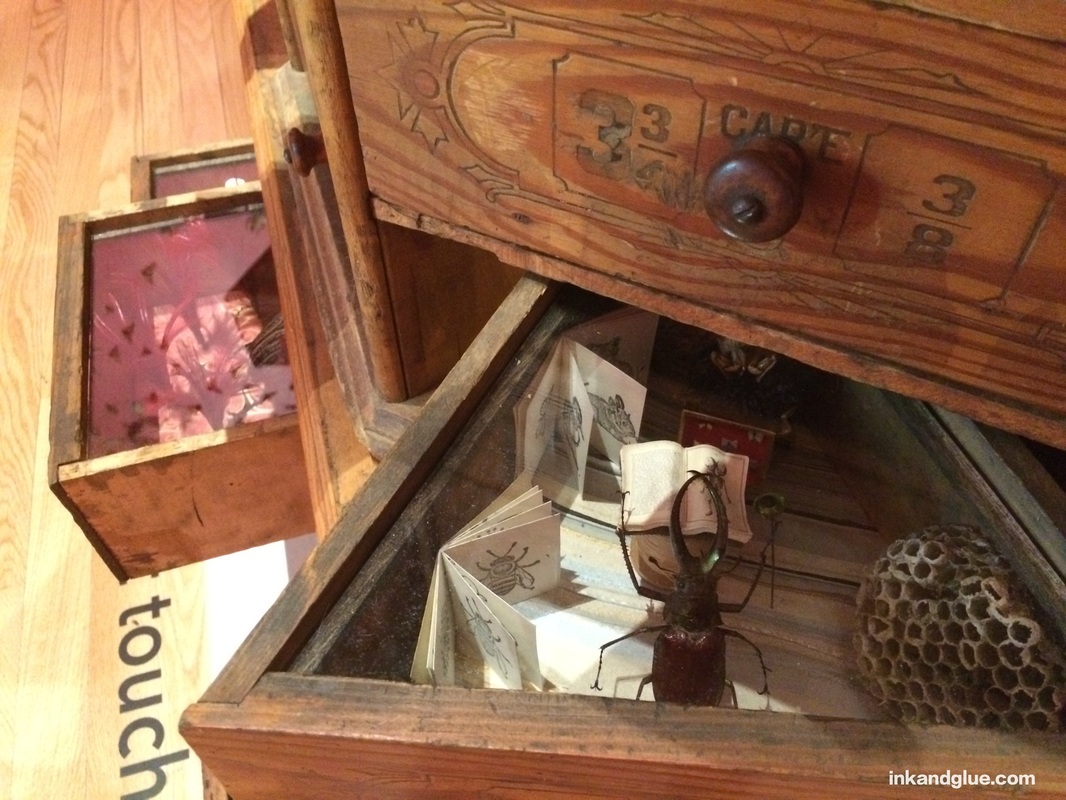 If you're in or visiting DC in the next few months (until May 8), go check it out. Since the Renwick is a Smithsonian museum, it's free to see.
xo He's got legs, and he knows how to use them (to run around in circles, to dig up treasures in the dirt, and to paw at your clean pants). The foreshortening of this photo makes him look like a big-pawed puppy, though he's at least two years old. 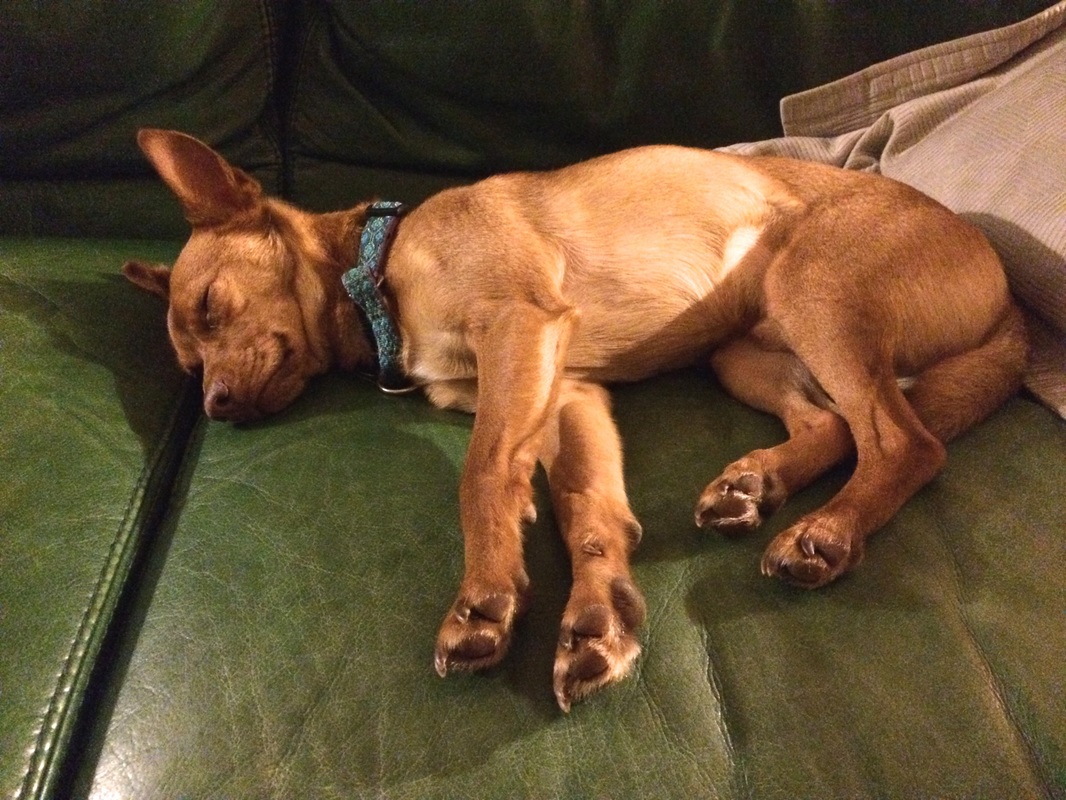 I think this one-pager from a 1969 issue of McCall's needs no directional text, but as a hint, I'll tell you that the main ingredient is dried milkweed pods. 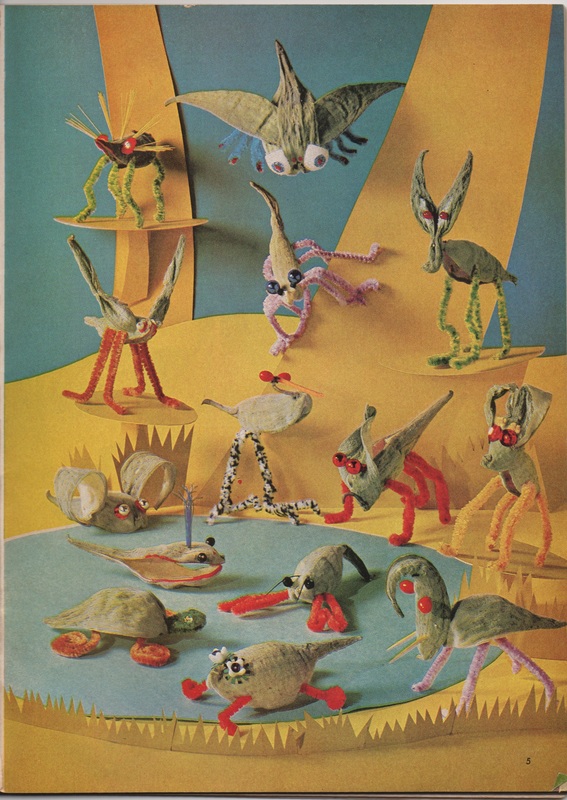 I think my favorite is the whale.
xo Have you met Rosa de Jong? Besides being a freelance art director and creating analog (as in, not on the computer) commercial illustrations, she makes tiny structures and habitats that seem to float inside of test tubes. 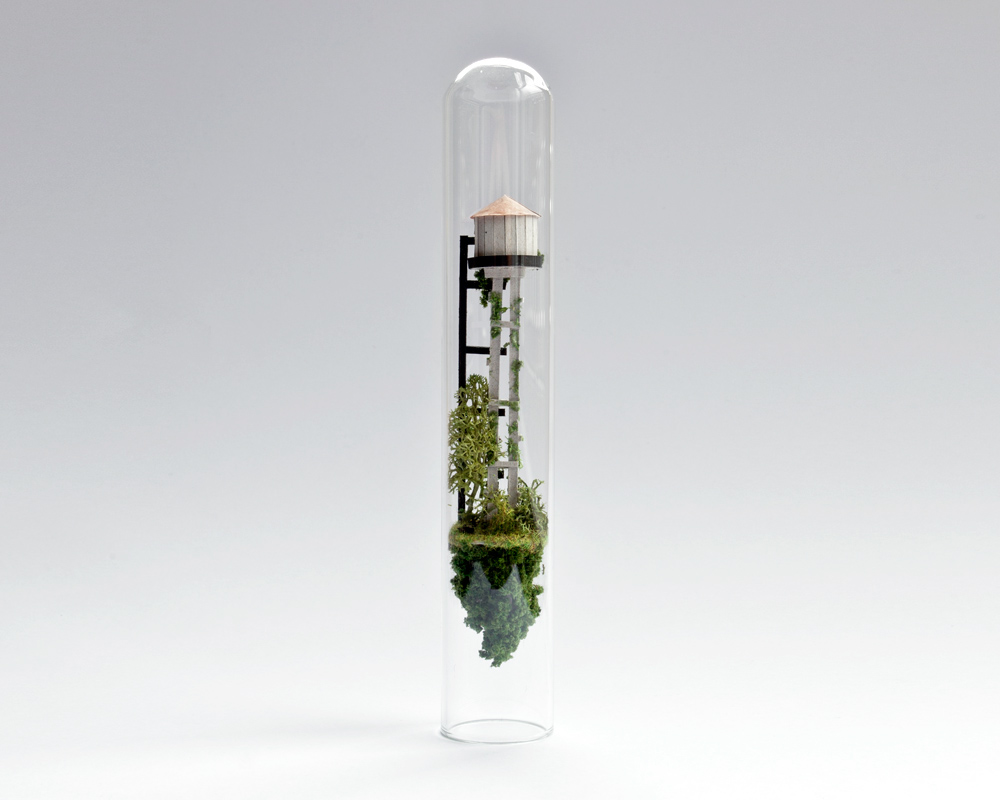 If you click on any of the images, you'll be taken to her Behance page, which has tantalizing glimpses of her building process and of her studio. 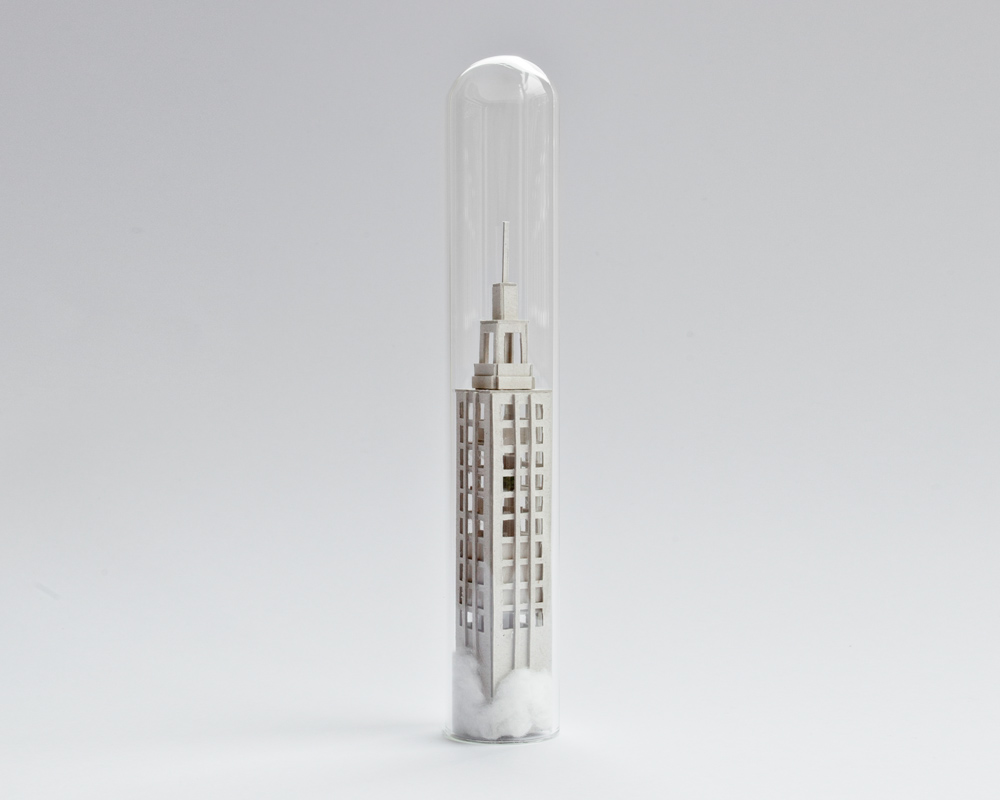 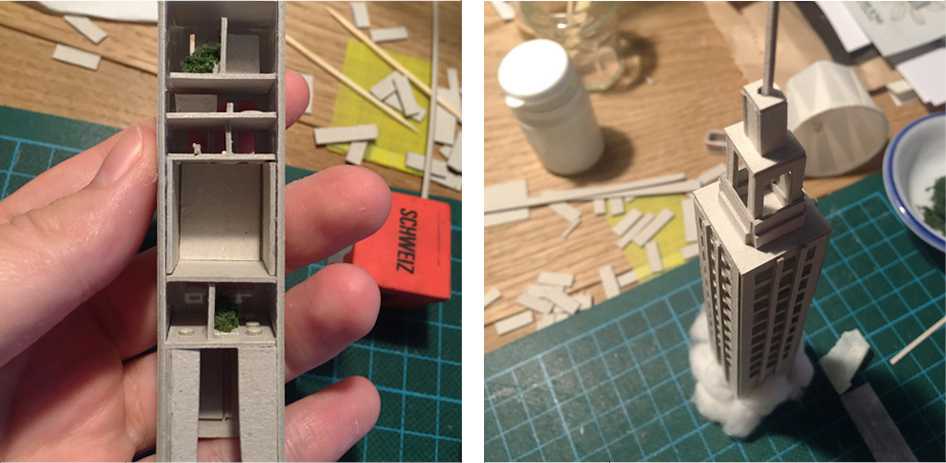 Here's a better look at her workspace. 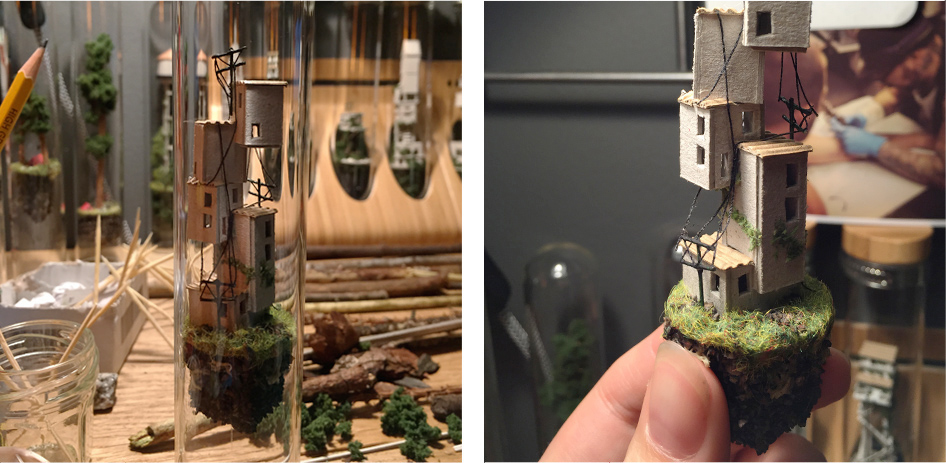 I like that these sculptures are really small, but not, "come on, no mortal being created that" small (like those sculptures made from pencil leads — totally bananas). Perhaps that's selfish, but I appreciate being able to dream that I could someday make such a thing.
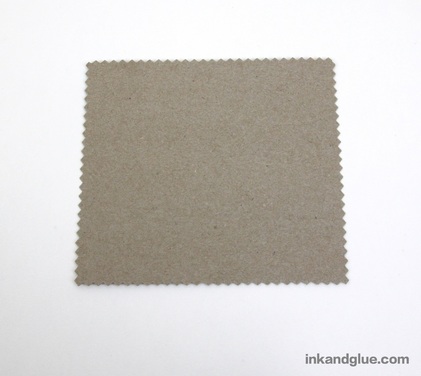
xo! 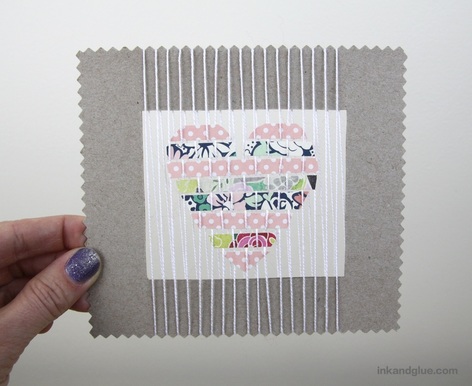 As I mentioned yesterday, I came up with an alternative to using a styrofoam tray as a loom frame. Using cereal-box cardboard has a few drawbacks, but I think the pros (readily available; easy to cut; clean and environmentally-friendly) outweigh the cons (a tendency to buckle). Here's how to make the loom, and ultimately, the paper-weft heart you see here. It would make a sweet and special Valentine for a parent, grandparent, or teacher. First, use a square to draw a rectangle on a cereal (or similar) box. Cut it out with pinking shears. Draw a rectangle in the center of the cardboard shape — I used the width of a ruler as a guide — and cut it out with a craft knife.
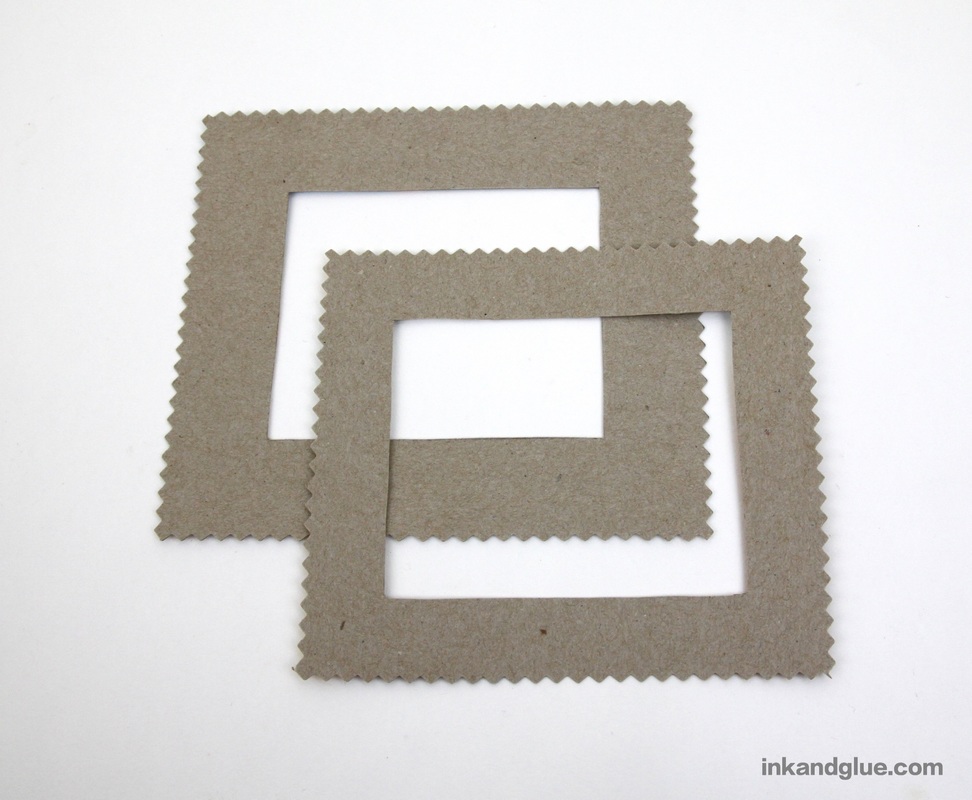
Make a slightly smaller rectangular frame by tracing the first one and then cutting inside of the traced lines. Glue the smaller frame to the larger one, to add strength. Tape the end of a ball of string (I used size 10 crochet yarn, which is cheap and strong) to one corner of the back of the frame.
Wind the string around the frame as slackly as you can; if you pull the string too tight, the frame will bow. This string is now the warp of the loom. 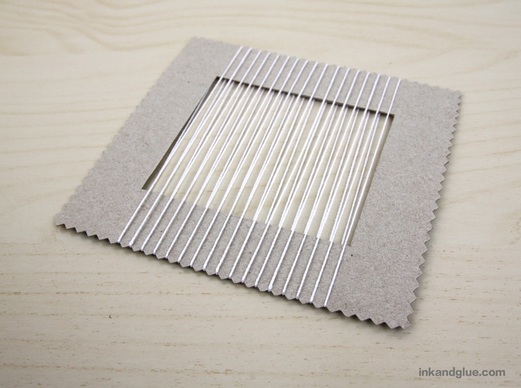 Here's where I attempted to weave a heart with some wooly yarn I have. It came out just o.k., and was a frustrating experience. Not really worth the fiddly, unfun work it took to make it. Still, I took a photo for you. This might have been easier, and come out better, if the loom was bigger and the warp was tighter. 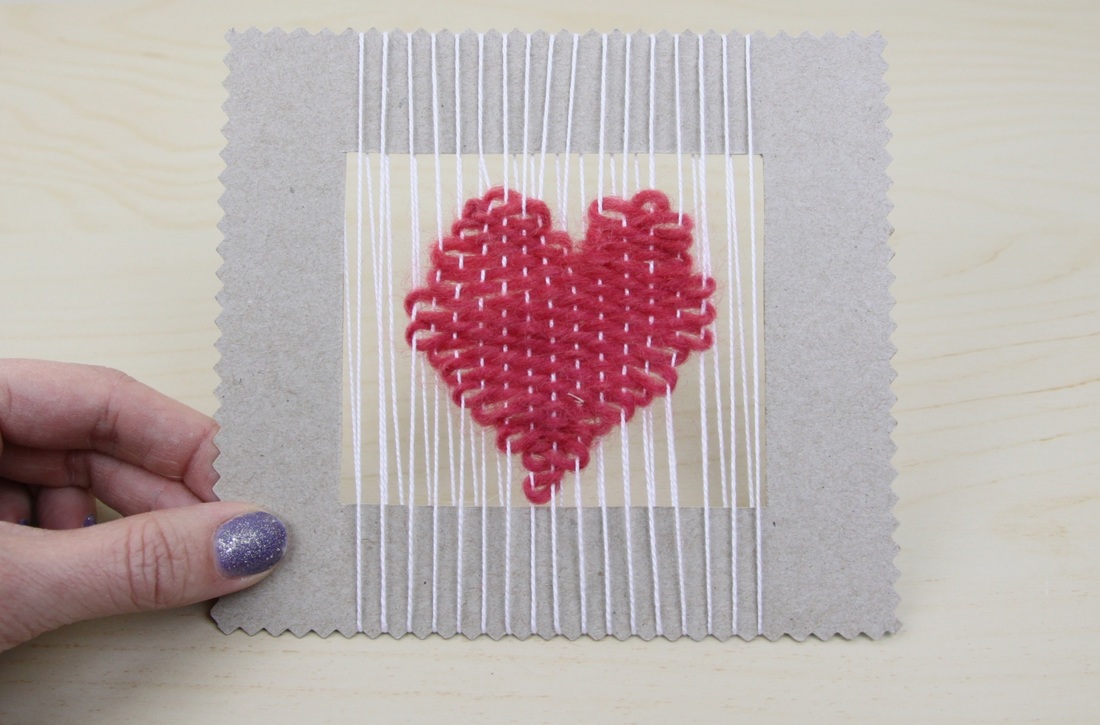 I un-wove the heart and tried another tack: paper. I keep happening upon crazy sales at the craft store for patterned scrapbooking paper, so I had a few pieces that were heart-worthy. Cut paper into quarter-inch wide strips. Weave them in, one by one, trimming the edges with scissors after each one is in place. OR: Cut all of your strips before you start weaving, and then weave them in. Either way works! 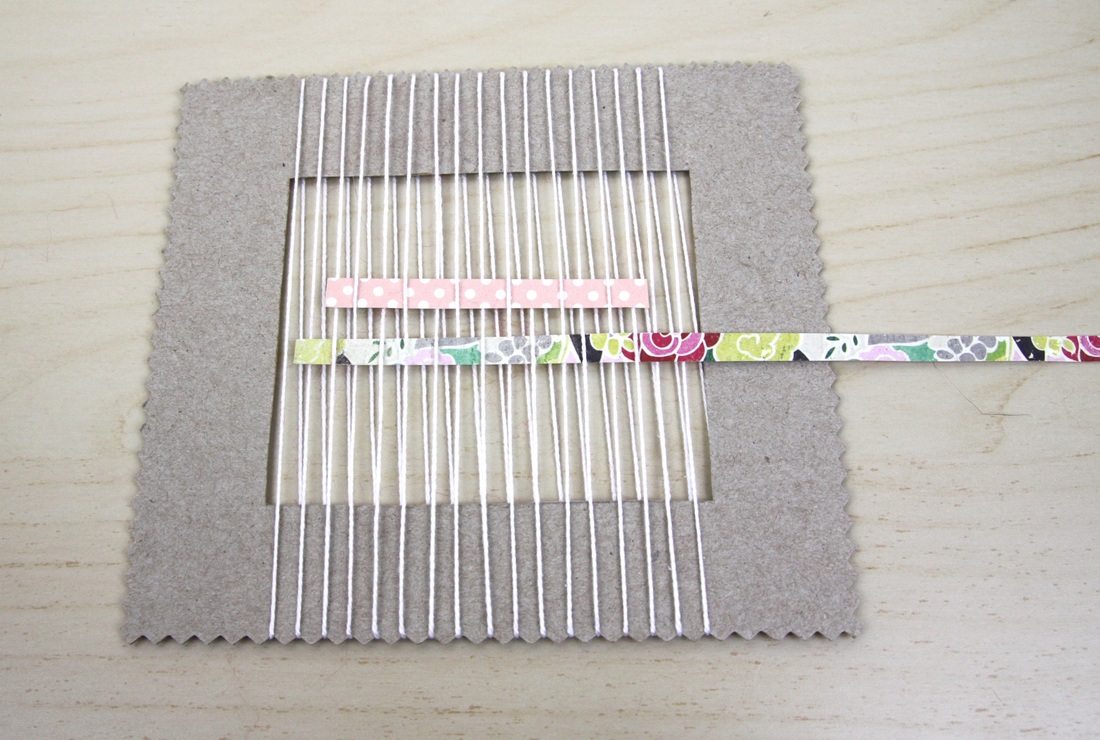 Once your heart strips are in place, flip over the loom and use a skinny brush to dab Mod Podge onto the string-crossed strips. The Mod Podge will adhere the strings to the paper so they don't shift and fall out of the loom. 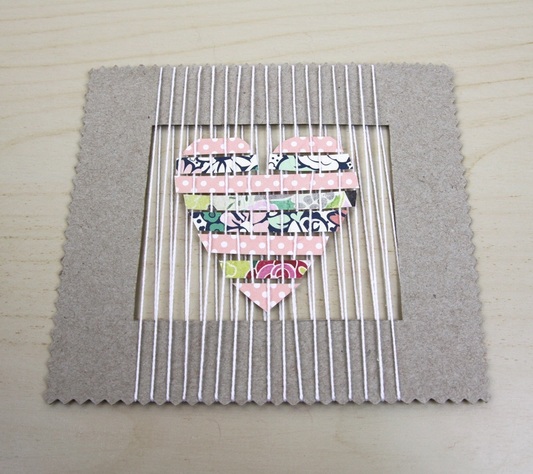 Happy starting-to-think-about-Valentine's Day!
xo 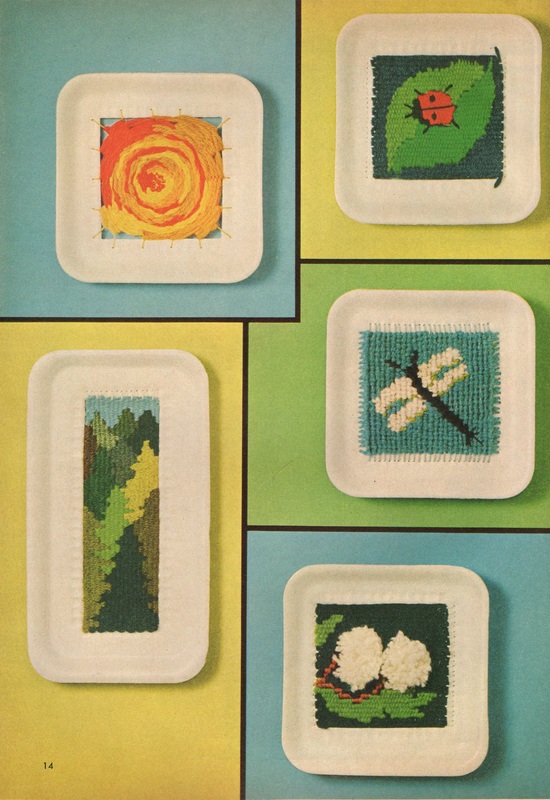 After a several-week period of mourning my old, seemingly-deceased scanner, I again have access to one that works. Which means I can bring you more McCall's Creative Handcrafts! This tray-loom idea is from 1969's Annual.  I love this craft idea and think it looks great today. The main problem with translating it to a 2016-era craft is the relative unavailability of styrofoam trays. I think the last tray I got was at H-Mart, where it was holding a half-dozen Asian pears (so delicious). I am far too paranoid of e coli and salmonella to use a meat-containing tray for crafts. It's been a while since I looked, but my local supermarket used to sell their half-price, over-ripe produce wrapped in styrofoam trays, so that would be a safe way to get some. I'm working on a variation of this craft that doesn't use styrofoam at all. In the meantime, here are the directions, beamed to you from way back in 1969. 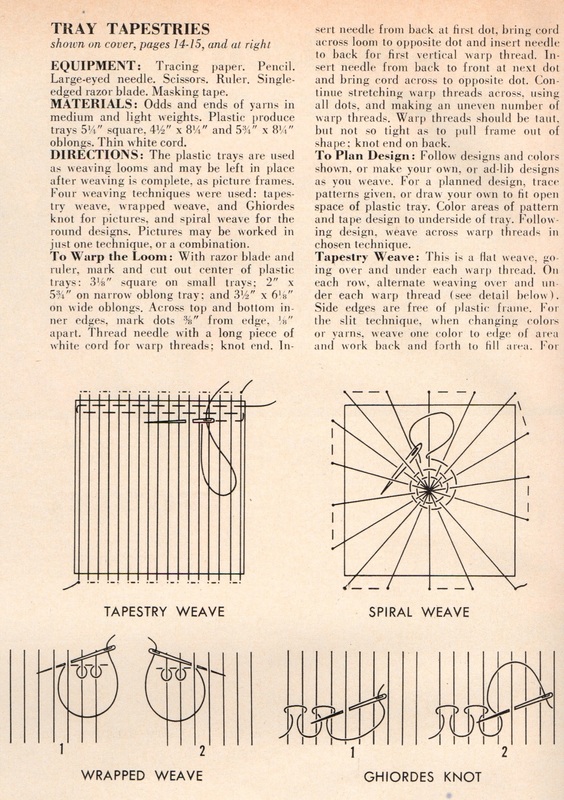 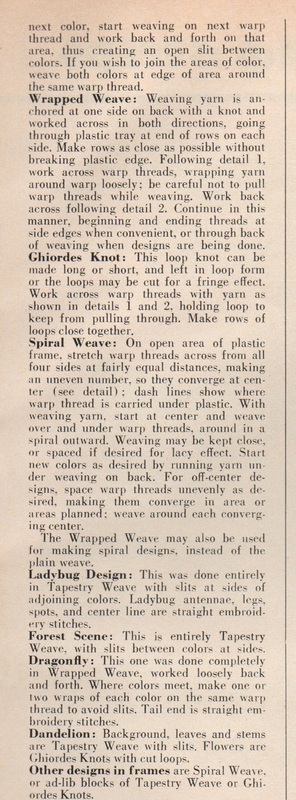 It's currently white and snowy where I live. What you can't see in the photo is the layer of ice an inch or so below the fluffy snow, making each step an adventure in traction and gravity. Franklin is lucky to have built-in Yak Trax on all four feet. 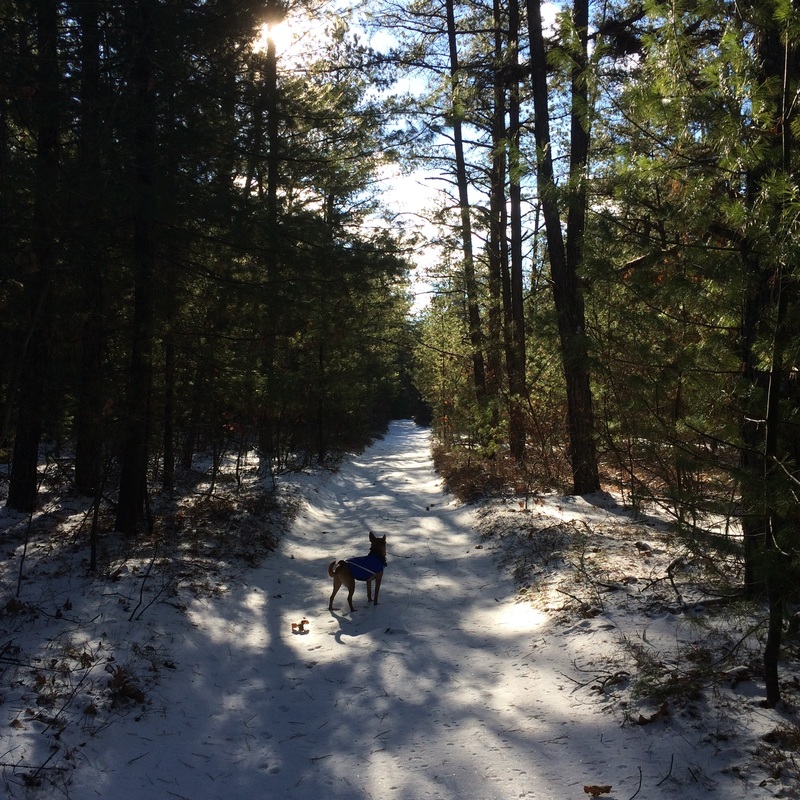 |
Categories
All
Archives
March 2017
AuthorI'm Debbie Way, an artist and writer who enjoys making things. |


 RSS Feed