|
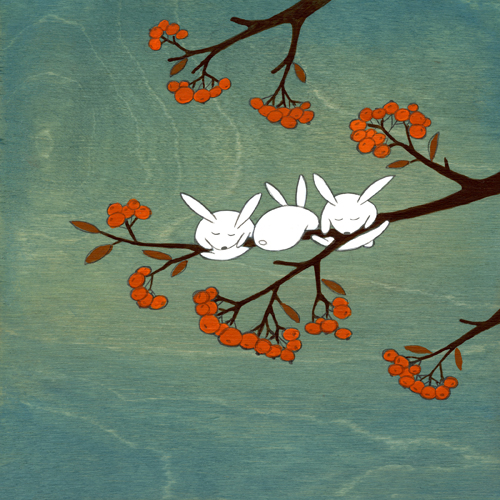
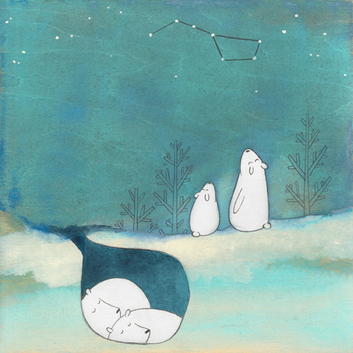
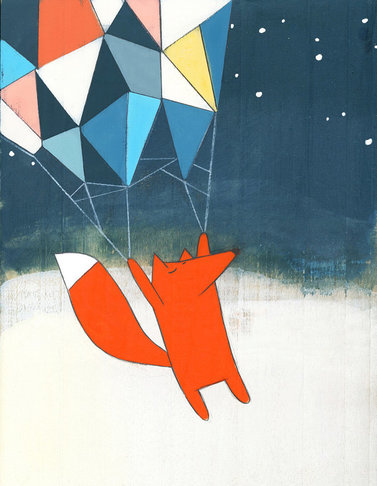
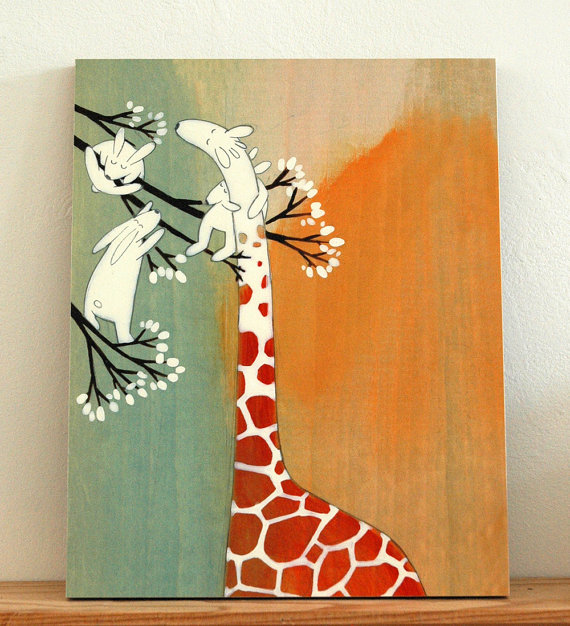
Have you met Kristiana Parn? She's an illustrator from Estonia who currently makes her artwork in Brooklyn. She likes to paint on wooden panels, letting the grain of the wood be part of the design. Her images are populated by dreamy, sleepy animals that are adorable as heck.
She's printed a line of stationery, and has a robust shop on etsy, where she sells both prints and original artwork. Lots to see!
xo!
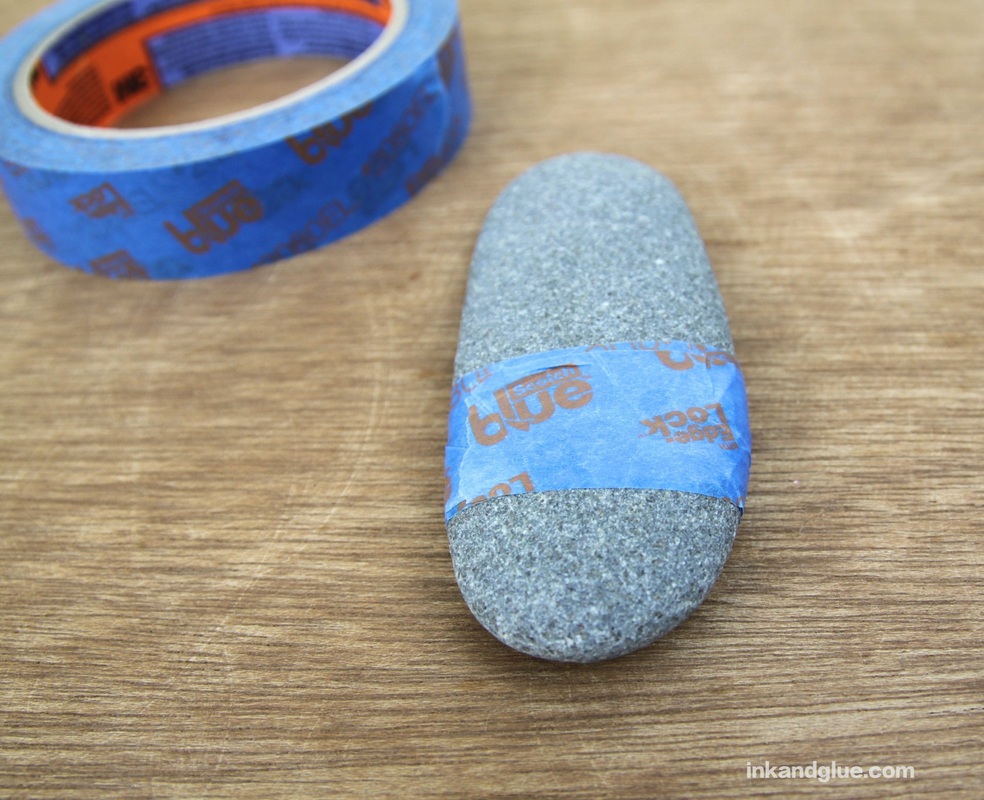
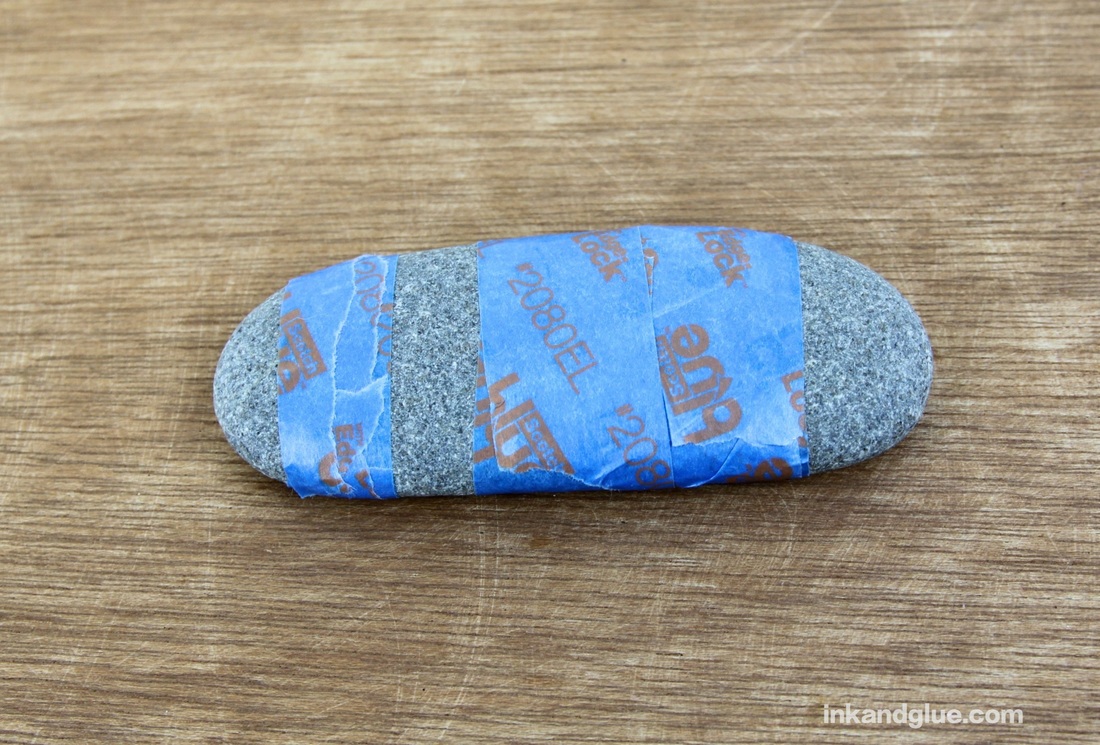
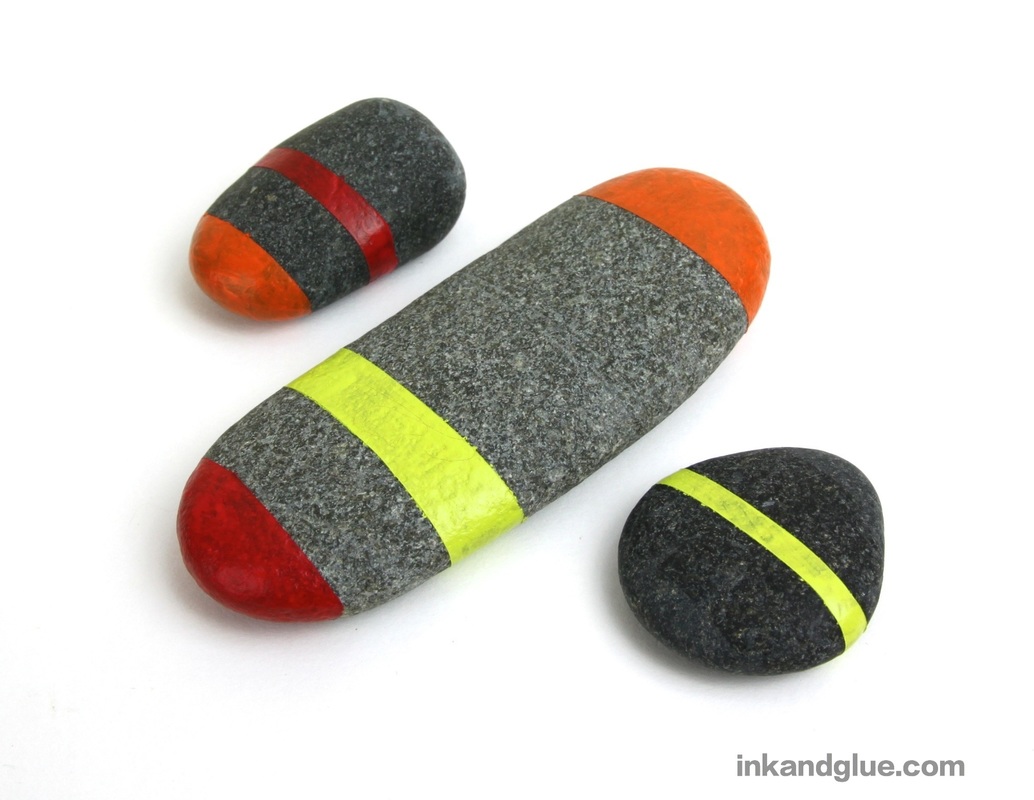
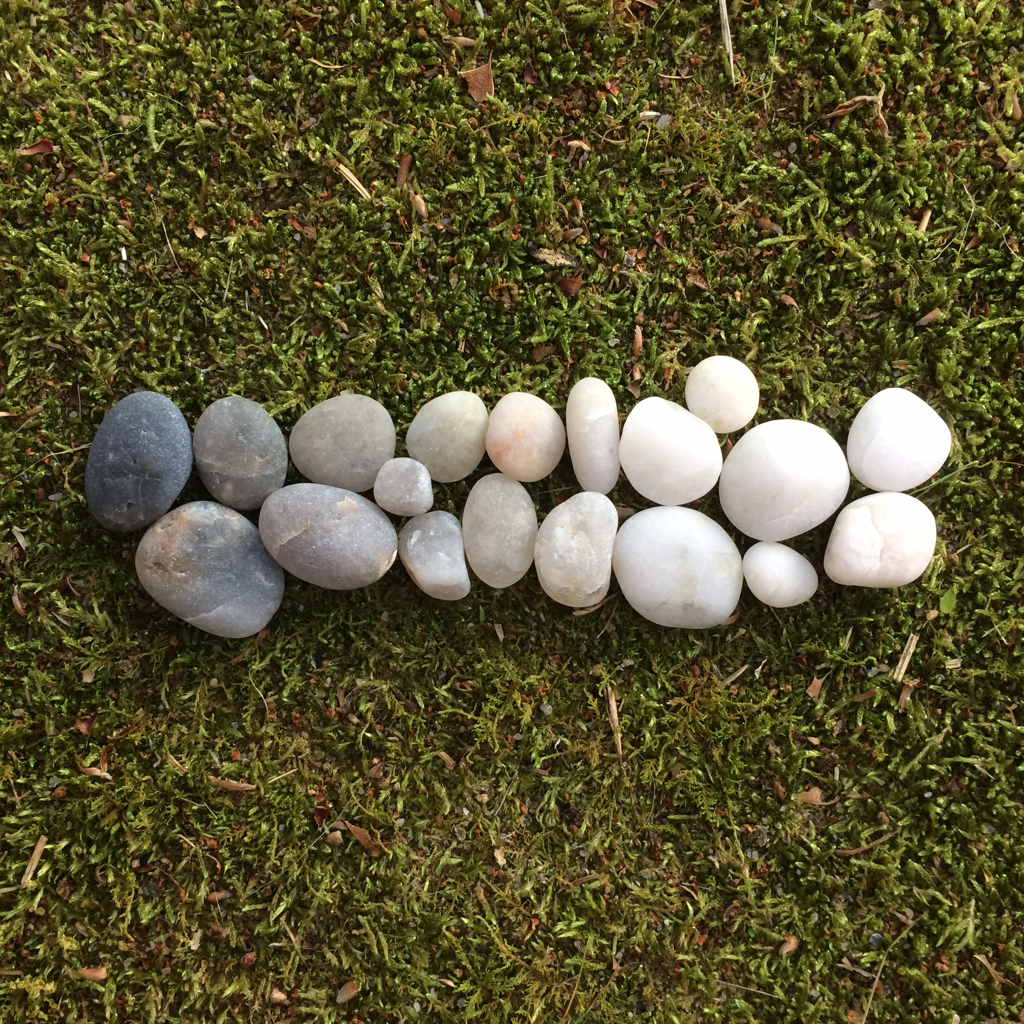
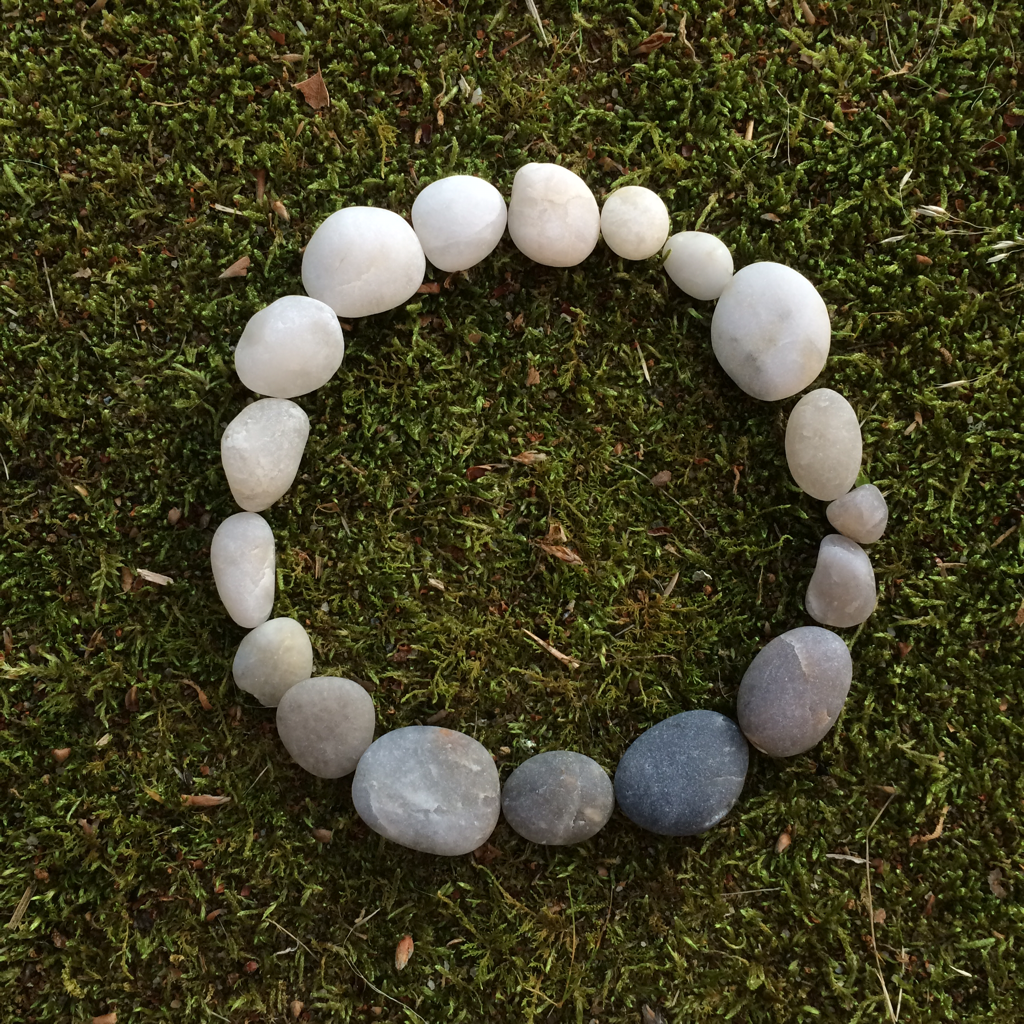
My favorite vacation souvenirs are rocks. (And shells, when appropriate; and washed-up bits of coral, if I'm in an especially wonderful location.) They're free, they're abundant, they're versatile, and they're easy to get rid of. I like to use them as a sort of mulch for house plants. If I am starting to feel like the house is becoming over-rocked, I can always chuck them in the garden or add them to our gravel driveway. Sometimes, I decorate them. In the past, I've wrapped them in fabric, coated them in nail polish, and drawn on them with paint markers. Today, I went for a more sophisticated look. 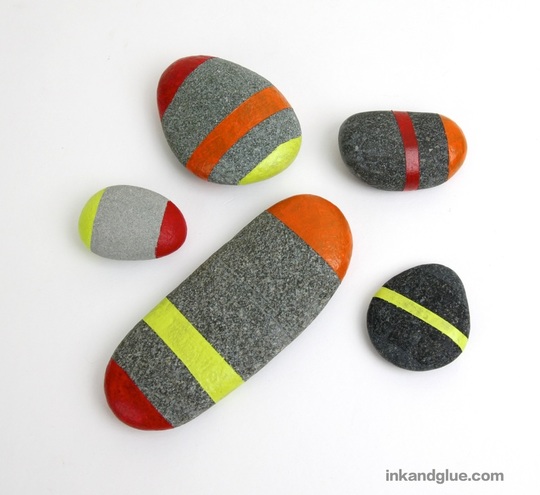 To make these color-block rocks, you'll want to choose the smoothest rocks you can. Look for smooth rocks in riverbeds and ocean beaches. You're going to be taping sections of your stone, so a smooth surface will allow for better adhesion and give you a sharper line in the end. 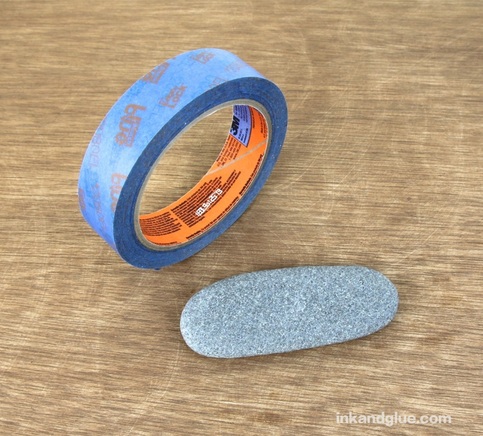 Use painter's tape to mark off a section of a stone, rubbing the edge of the tape into the rock with a fingernail. Rocks are curvy, as you may have noticed, so use multiple pieces of tape to get a "straight" line if you need to.
Repeat with the rest of your chosen stones. Paint each exposed section with acrylic paint. Try to brush from the tape onto the rock so you don't get any paint seepage under the masked areas. Note: I needed two or three coats of each color to get good coverage. I recommend doing a coat of white, first, if you can; doing so will give you much brighter colors. 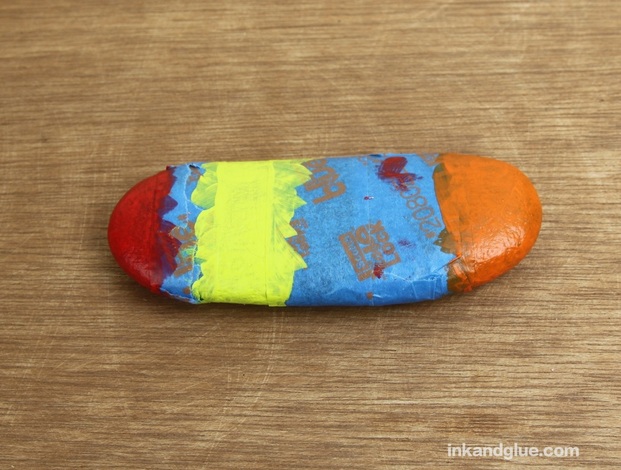 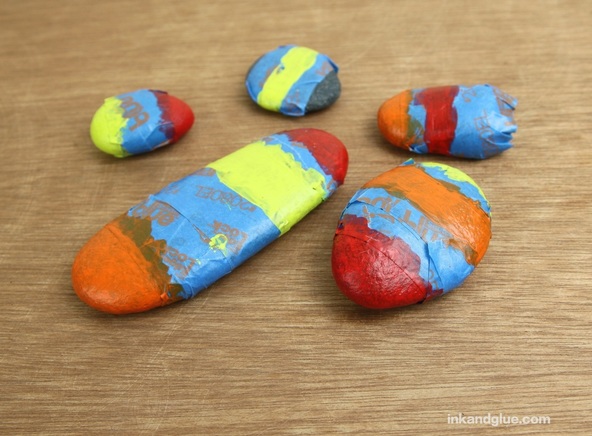 Once the paint is completely dry, peel off the tape. So satisfying! 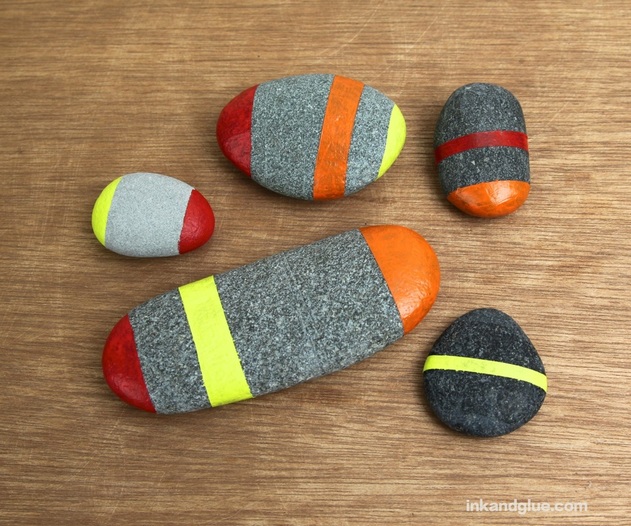 If any edges need to be cleaned up, use a small, flat brush to add a little paint. Just be conservative with it, or you'll end up expanding the painted section until it takes over the entire stone! Better to have a fuzzy edge than to lose the nice blockiness you set up.
It's National Dog Day, apparently! And who could be more national than Franklin, this scrappy mutt from the streets of the south, now being raised in a struggling post-industrial New England town? His is the story of America itself. Cheers to you, Franklin! May every hammock welcome you.  xo!
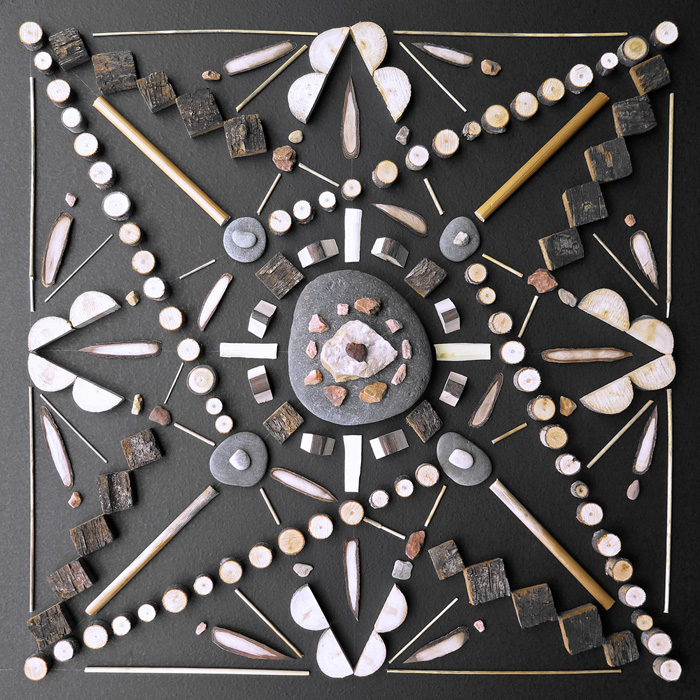
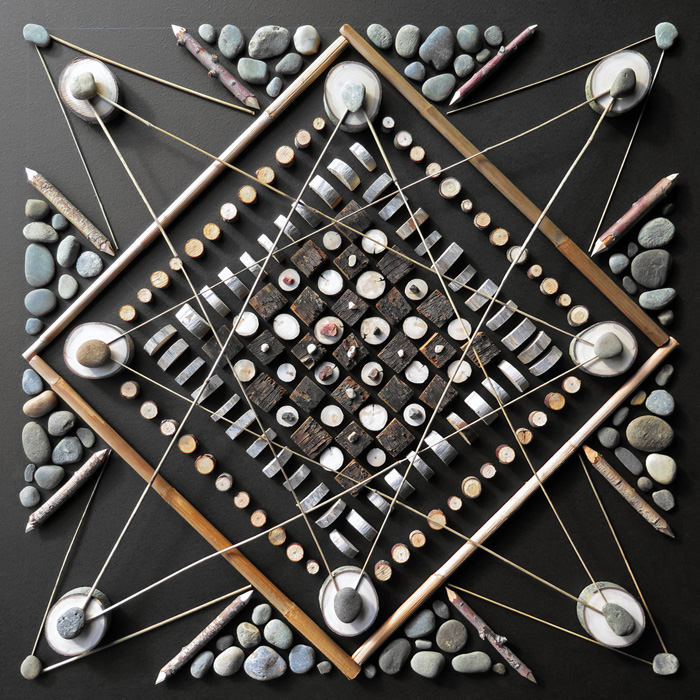
Have you met artist and illustrator Matt W. Moore? If you saw this post from last week, it'll soon become clear as to why I'm sharing his work with you now. During an artists' residency in Utah, Matt created complex mandalas and geometric patterns out of found natural materials. Take a look: 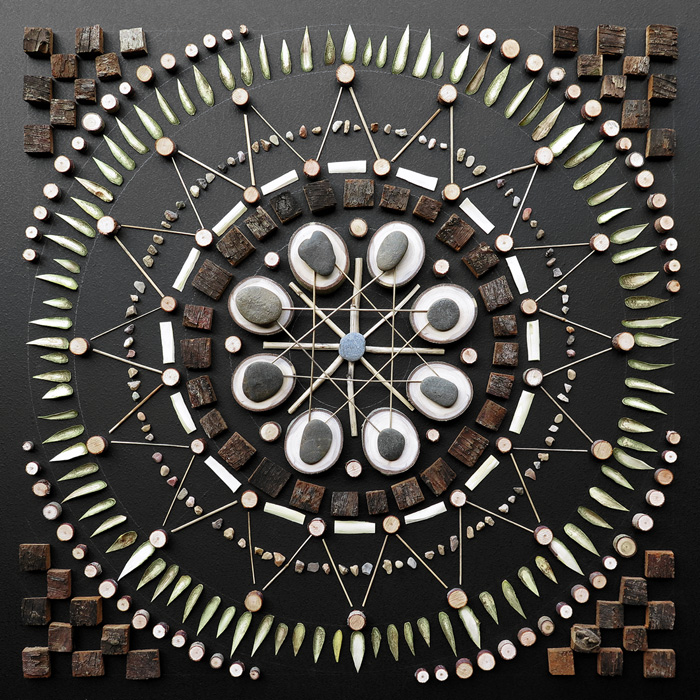
 Click on any of the images to go to his portfolio site, where you'll see many other examples, as well as close-up and detail shots. It all has me itching to get outside and spend a few hours engrossed in activity with a whittling knife and a camera.
xo If it's everyone's birthday, does it mean that it's really nobody's birthday? If everyone is special, doesn't that mean nobody is? These are the questions raised by this charming Zodiac Birthday Party plan, originally from a 1969 issue of McCall's.  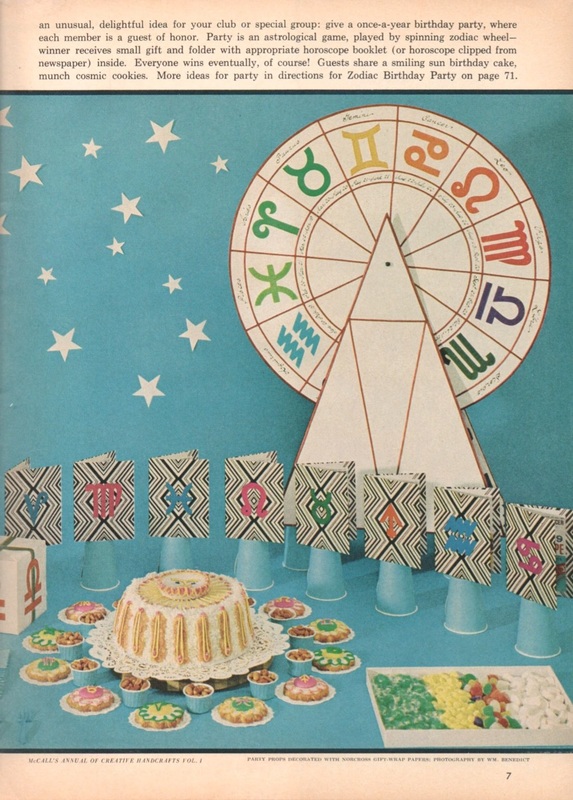 I understand the appeal of having one annual birthday party for an office or club that would otherwise be having birthday events every darn week, but this idea reduces the whole concept of a birthday celebration to nothing. Better to throw a Zodiac Party as an addition to regular birthday recognitions, and not a replacement. As usual, I love the color scheme for this party, and the groovy yet simple design. To help you throw your own swingin' cosmic soiree, here are the directions: 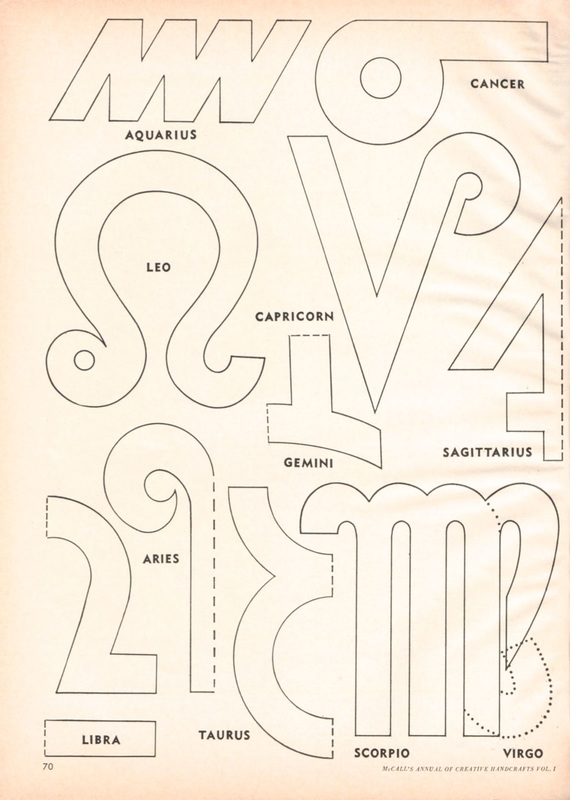 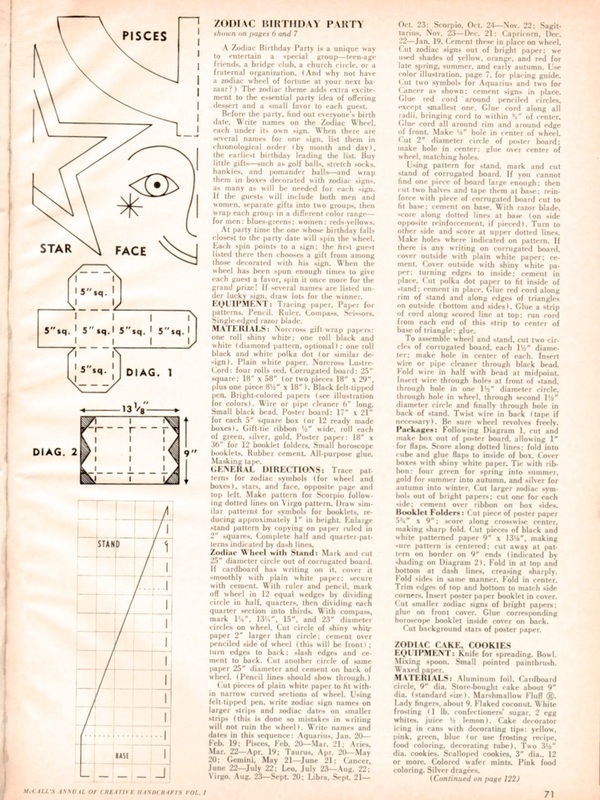 (There's a bit more copy on a later page about placing cookies and applying frosting and dragees, but just look at the photo — it's more helpful than the text.)
xo! 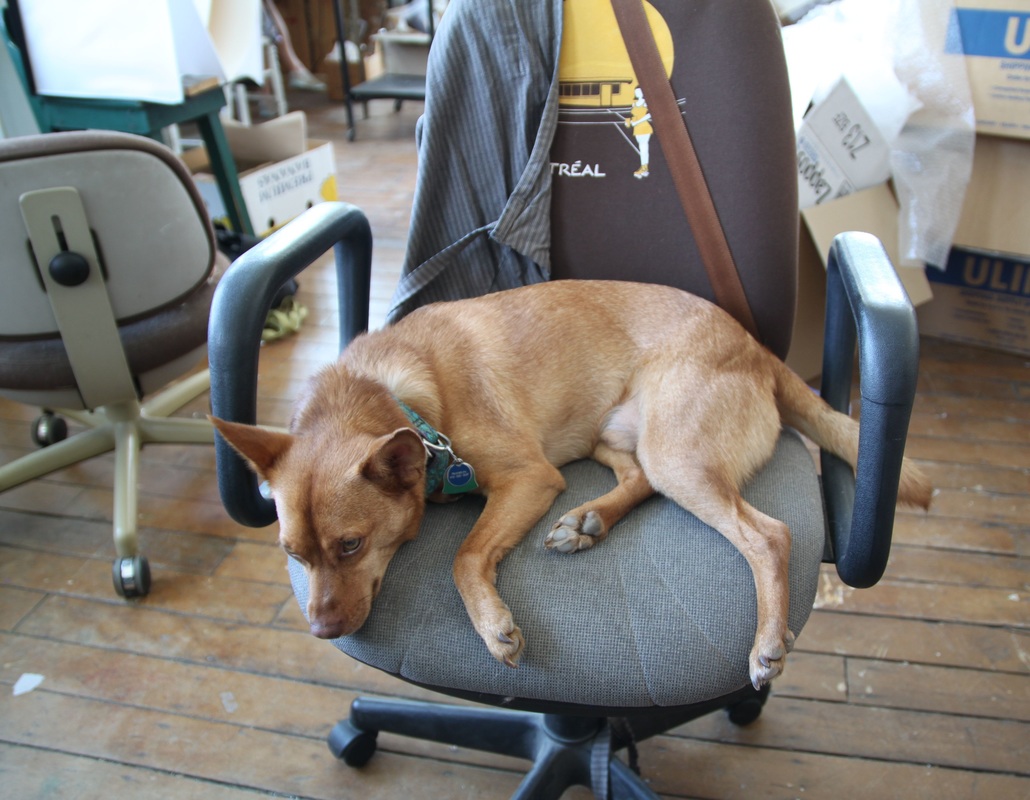 I'll be away from my big computer next week, but I have a plan for sharing some creative stuff with you while I'm on the go. Tune in to see how that goes!
xo |
Categories
All
Archives
March 2017
AuthorI'm Debbie Way, an artist and writer who enjoys making things. |


 RSS Feed