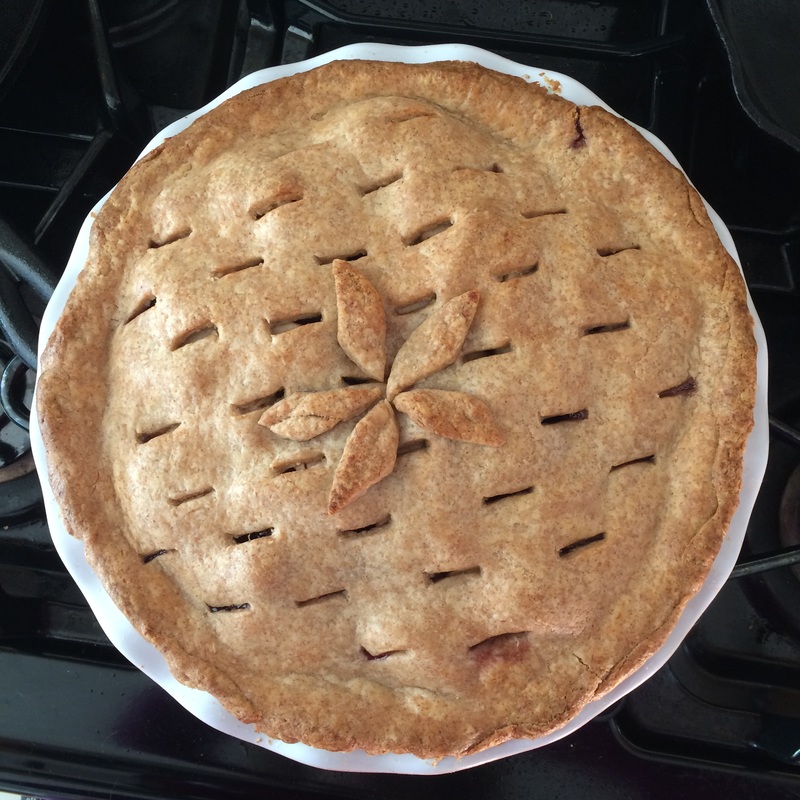
 It's been a few years since I baked a good ol' double-crust pie. This one has blueberries (which I picked this summer, and froze) and local Jonagold apples inside. I used Mark Bittman's easy food-processor pie dough recipe. The proof will be in the eating, tomorrow afternoon. Happy Thanksgiving!
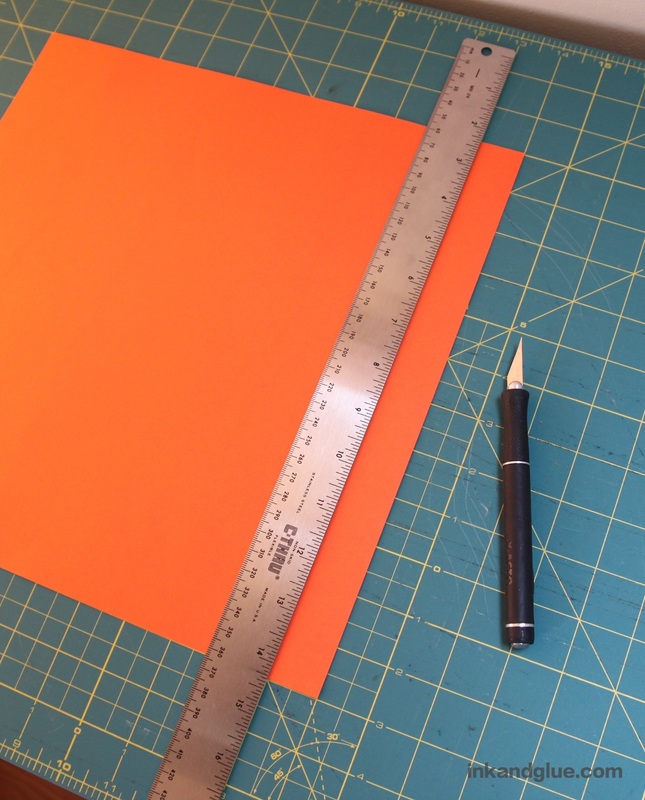
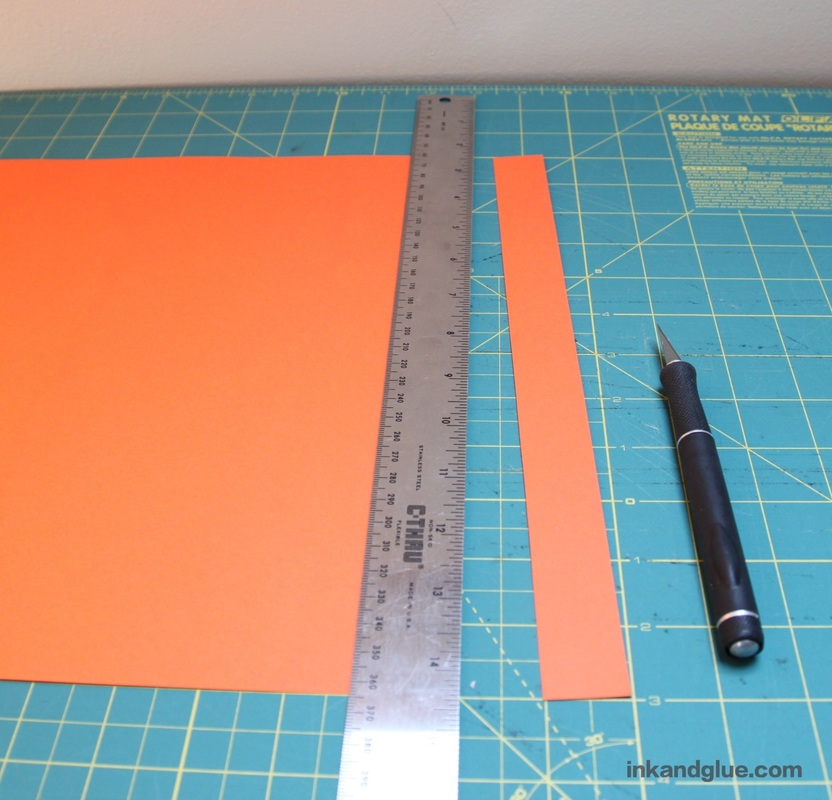
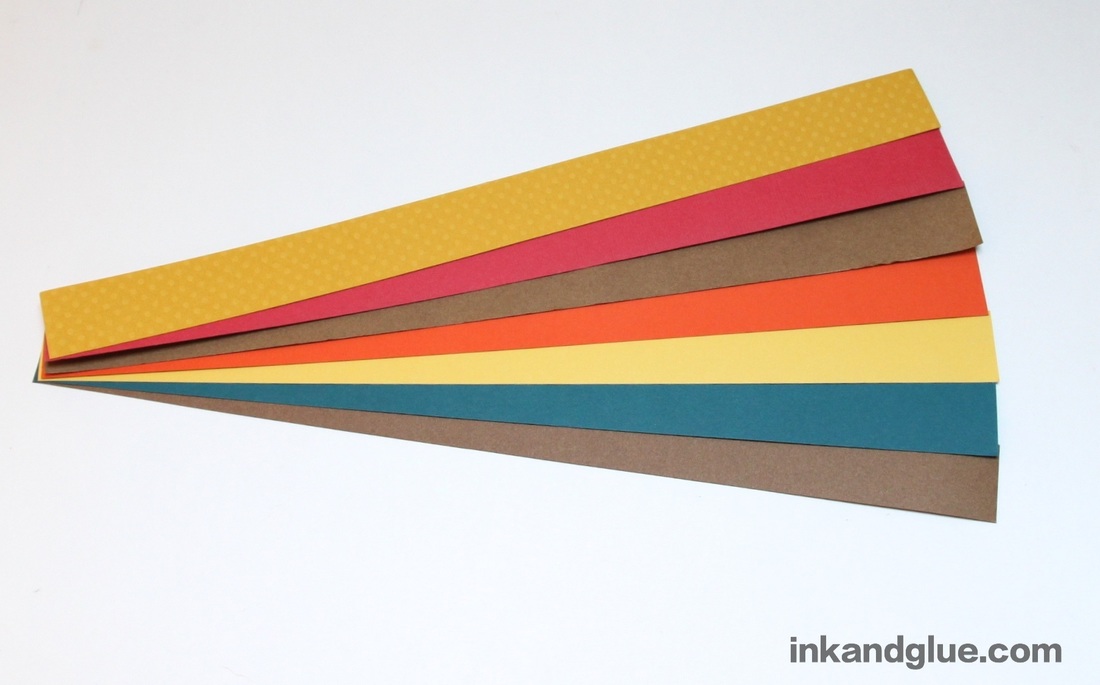
xo 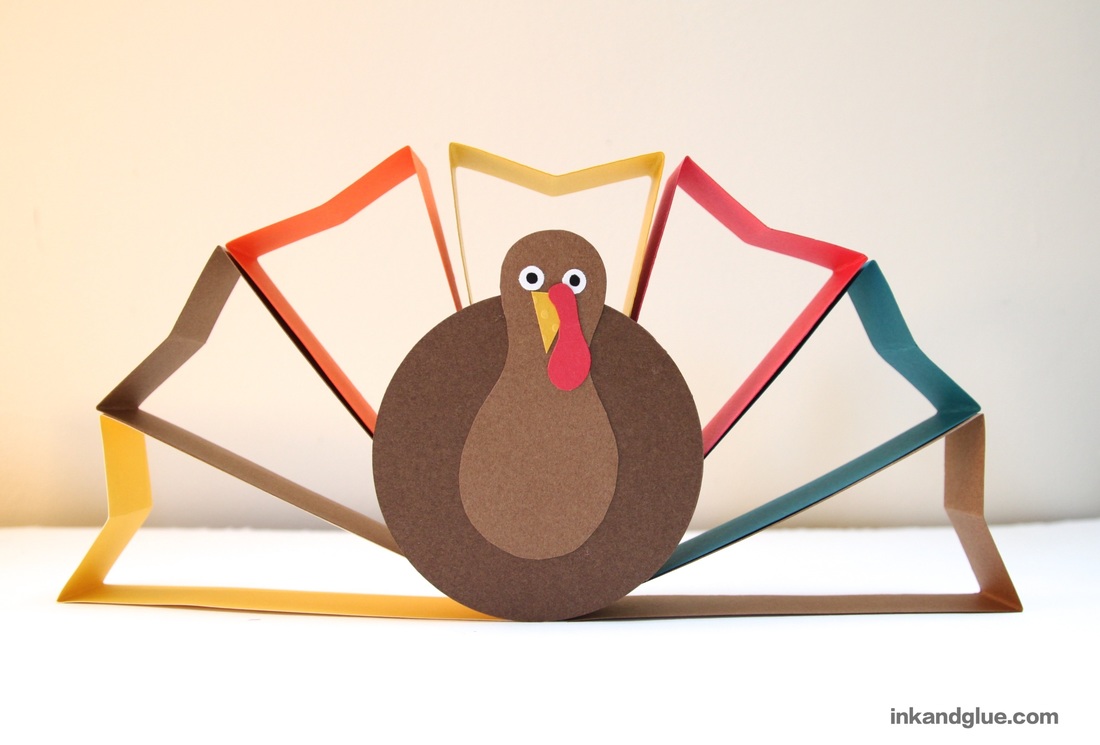 It's hard to believe Thanksgiving is just a few short weeks away. To help get into the mood, I created this turkey out of strips of paper and simple shapes. Set up this tom as a piece of decor, or make a flock and add name cards for a fun T-Giving tablescape. Start by collecting a few different colors of paper. I chose only sheets of 12-inch-square paper (the standard scrapbooking paper size) but you needn't be that particular. Later on you'll see that I abandoned the patterned one; I just liked the simplicity of the solid colors, and slightly different textures of the paper, to go along with the simple shapes of the bird. You will also see that my cutting mat is pretty dirty. (Let's just call it "well-used.") 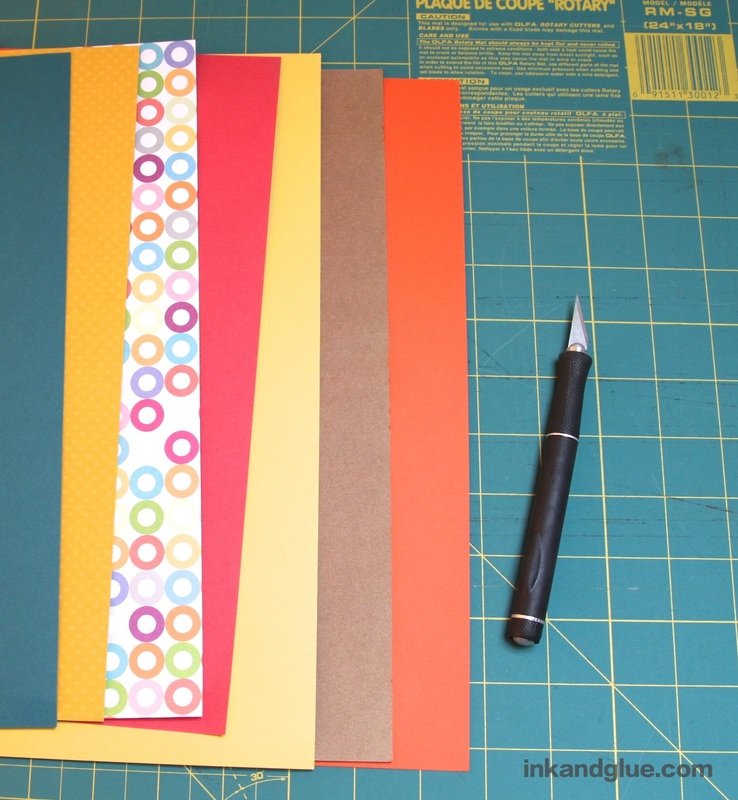 Next, you'll be cutting seven one-inch-wide strips from the paper. If you have a surface with ruled lines, use them to square up your paper and to place the ruler an inch from one edge. (If you don't have a ruled mat, use a ruler to make a tiny pencil mark one inch in along the top and bottom edges. Align the ruler with these two points.) Then, use a craft knife to cut the strip. You can lightly draw a line in pencil and use scissors, if you're anti-craft knife; but it is way faster to use a knife, and you end up with a neater, straighter edge.
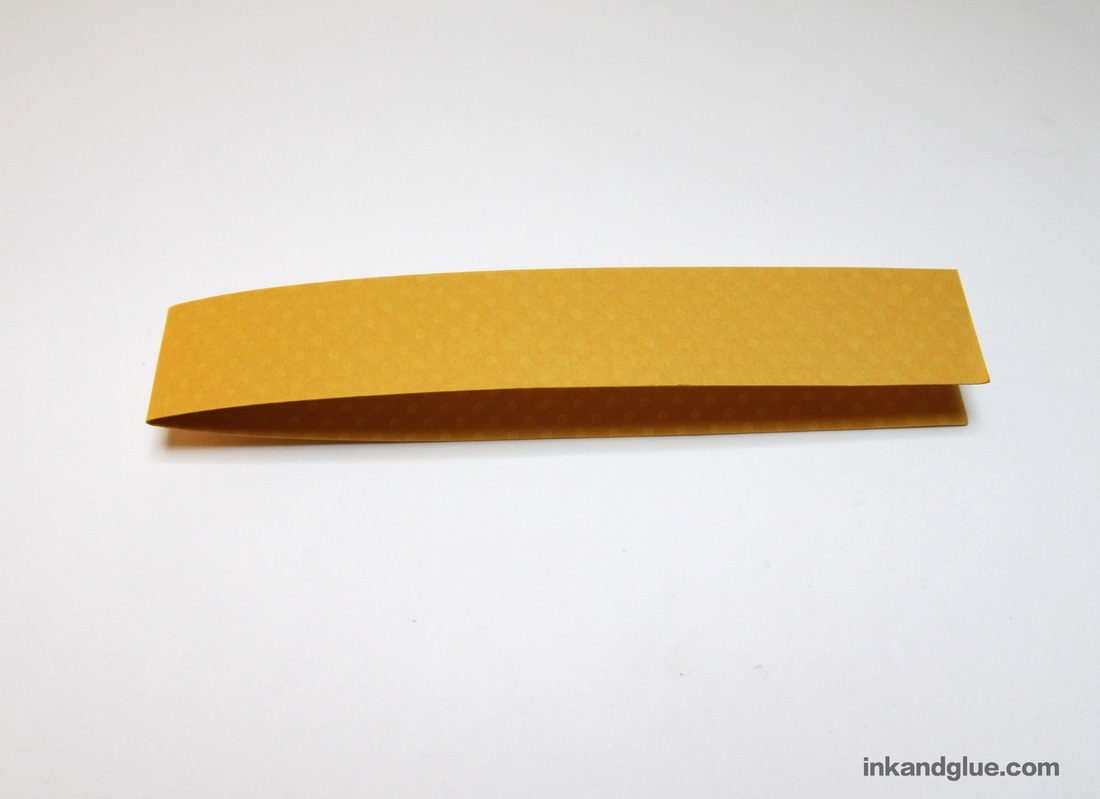
Once you've cut seven strips, it's time to fold! Fold a strip in half, with the patterned/printed side on the inside. Then fold the strip back the other way, an inch from the first fold. Flip over the strip and do the same with the other side.
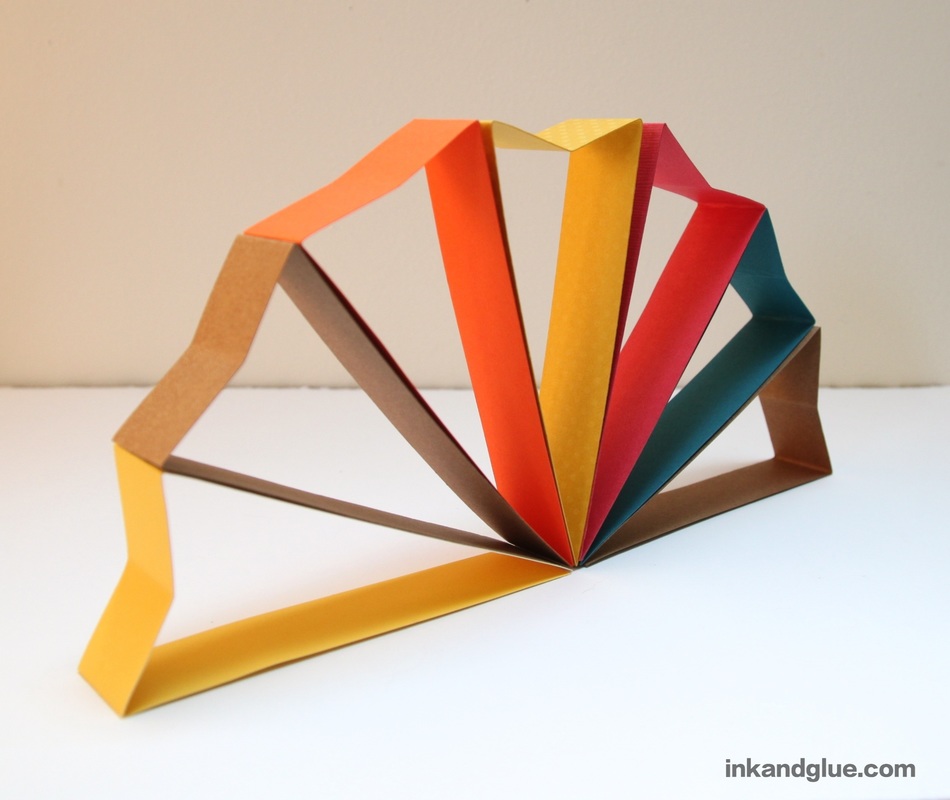
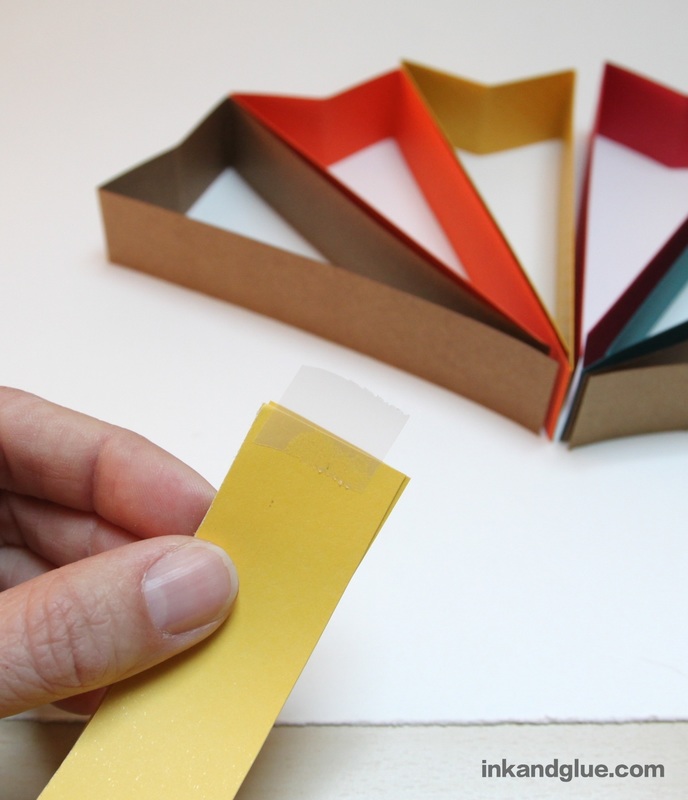
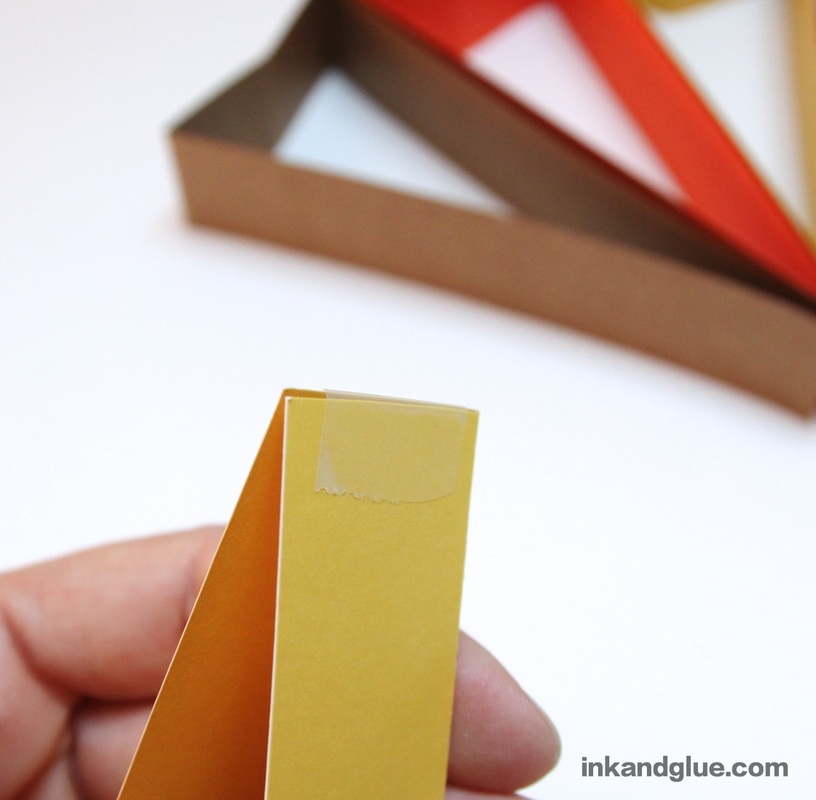
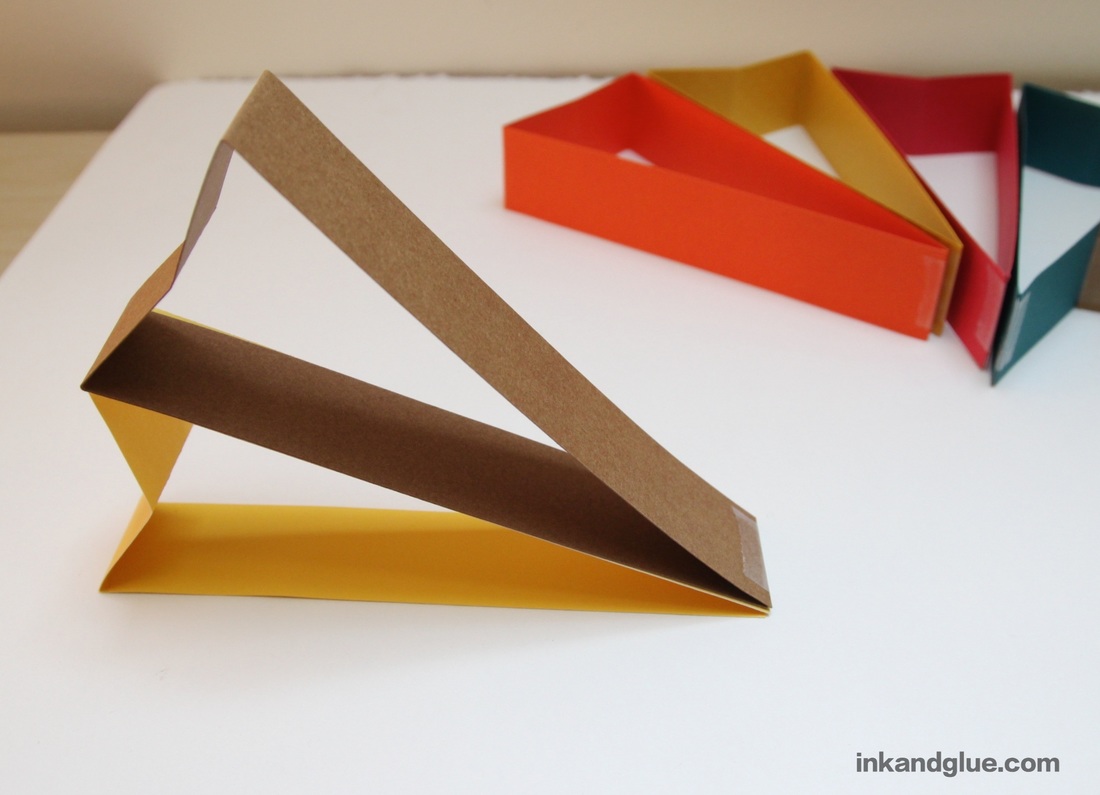
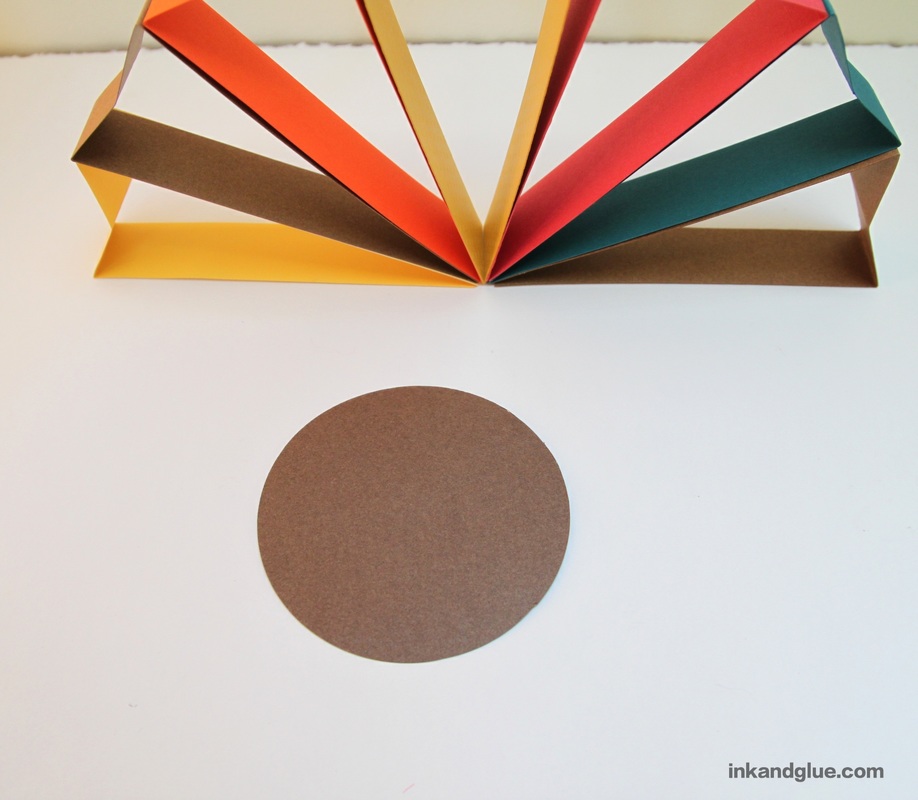
Do the same with each strip. Flatten the center folds so you get a bunch of skinny triangles with slightly dented short sides. 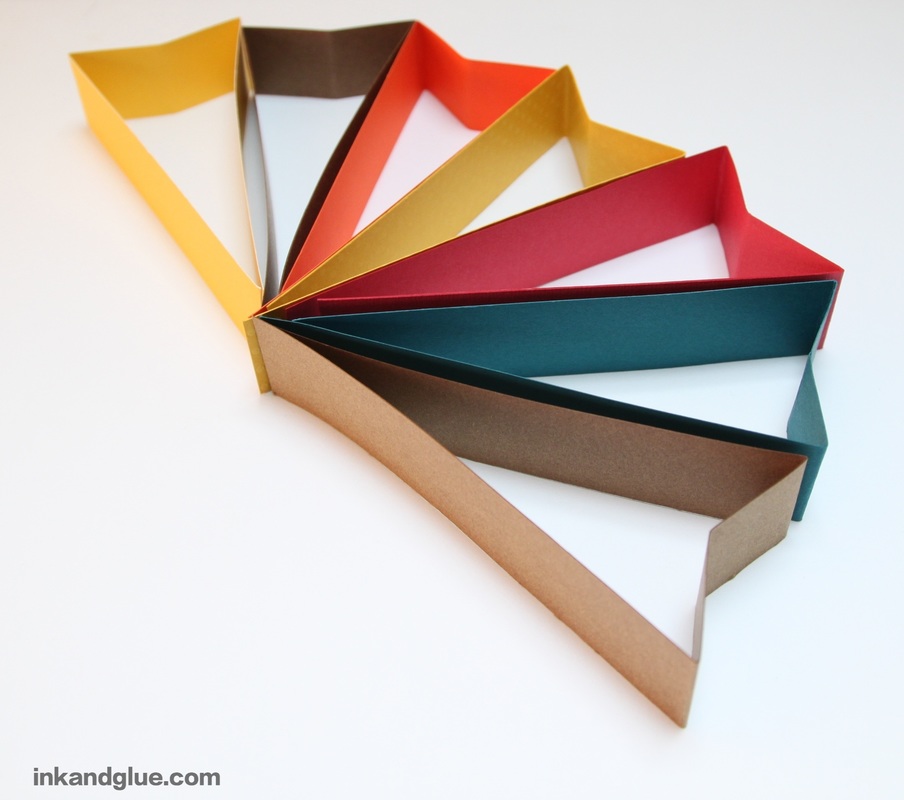 Tape the ends of each folded strip together at the tip, as shown.
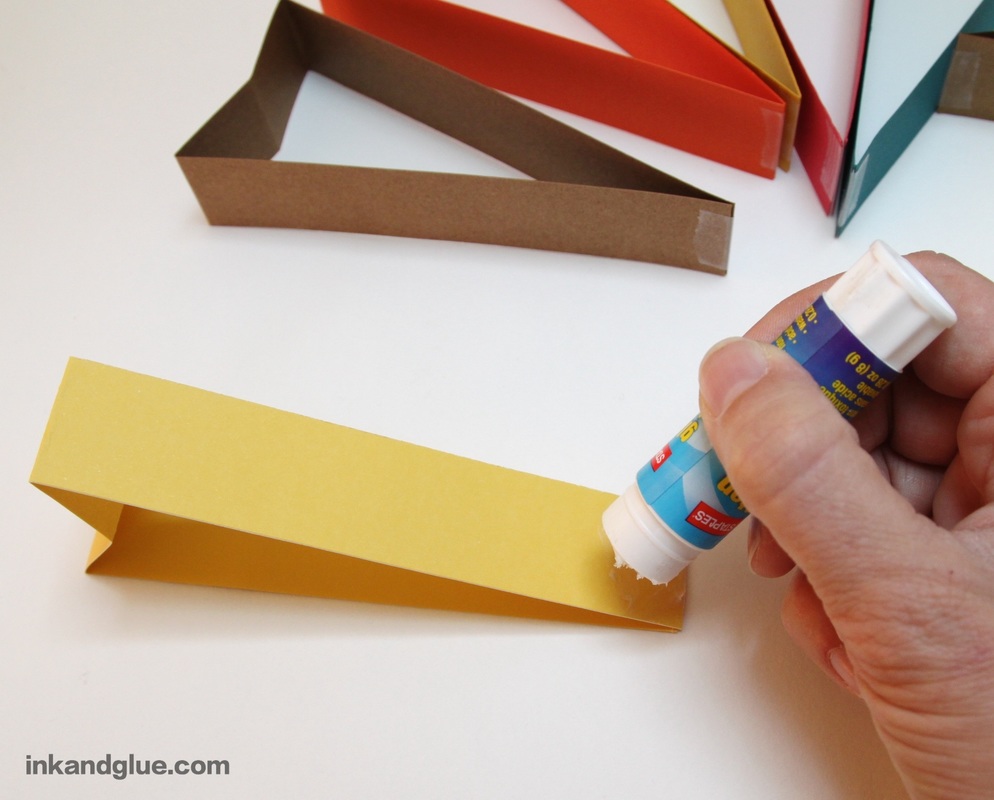
Now you'll be gluing the triangles together to form the tail. Spread glue stick on one side of the pointy end of a triangle, then press the next triangle on top, with edges aligned. Repeat until all are attached to each other.
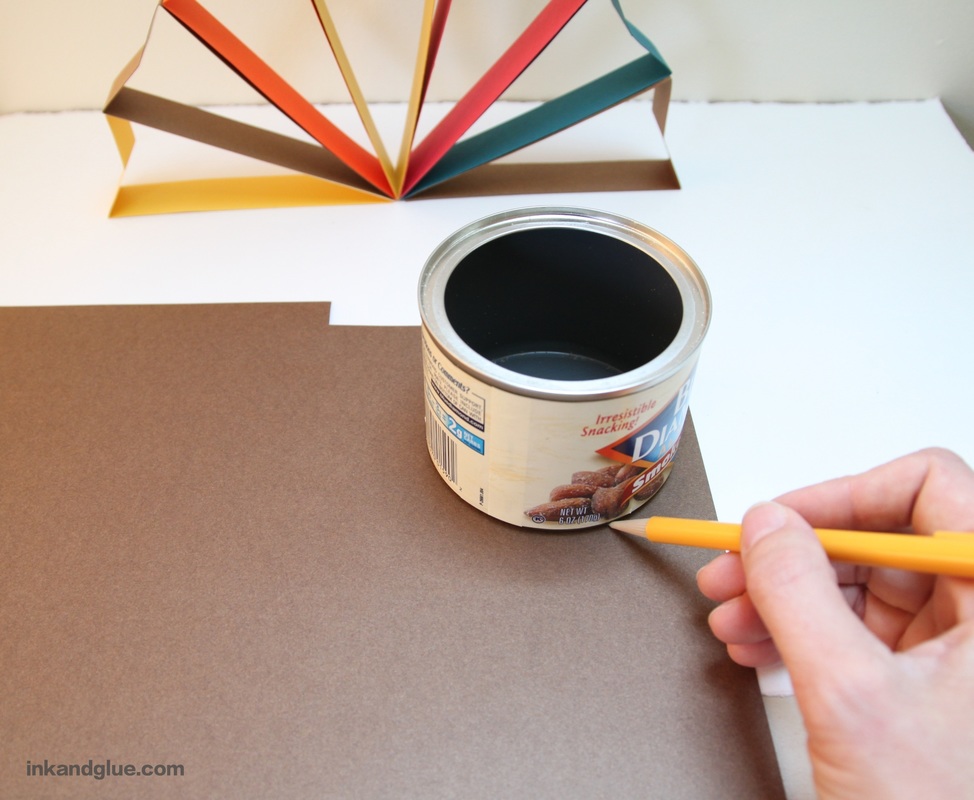
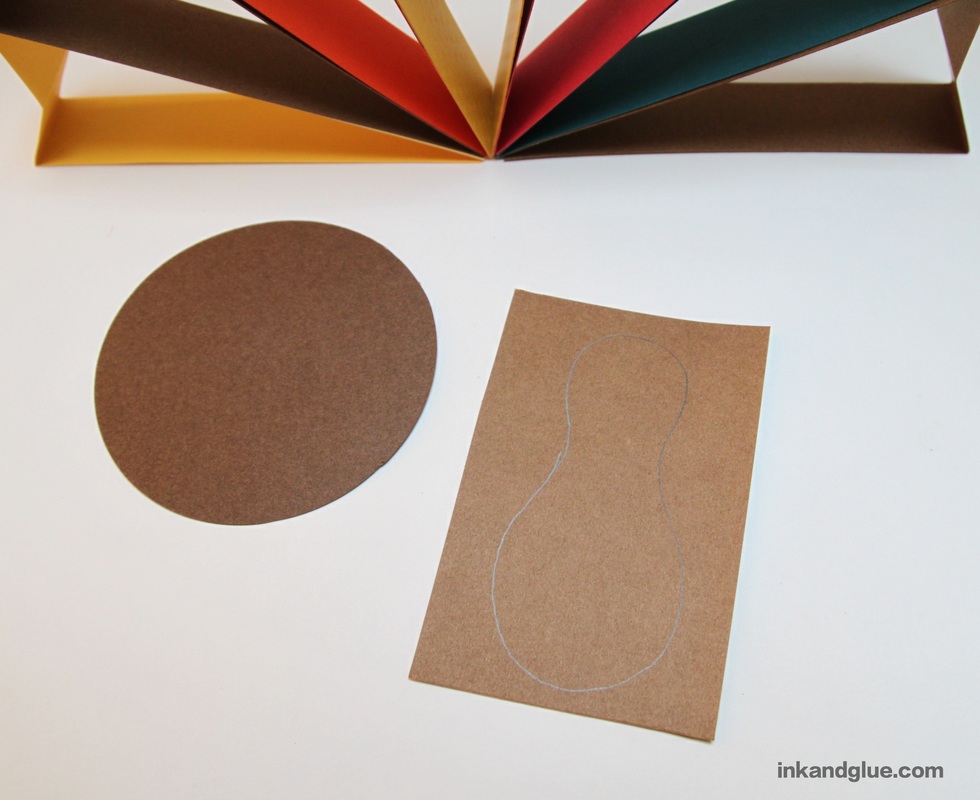
 On to the body! On a sheet of brown paper, use a circle cutter (link goes to the one I use), or trace something round and cut it out.
With pencil, draw a rounded bowling pin shape onto a sheet of light brown paper, and cut it out. (Why pencil for all of these marks? So you can erase them after you cut the paper.)
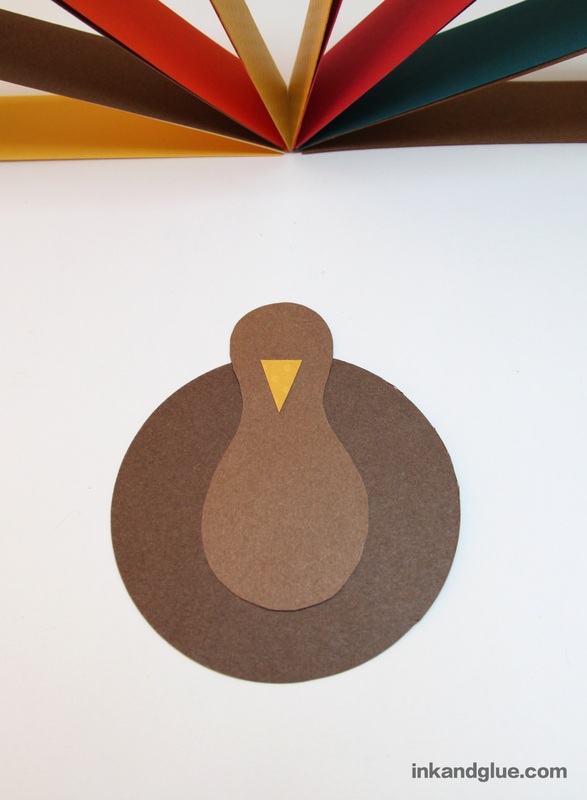
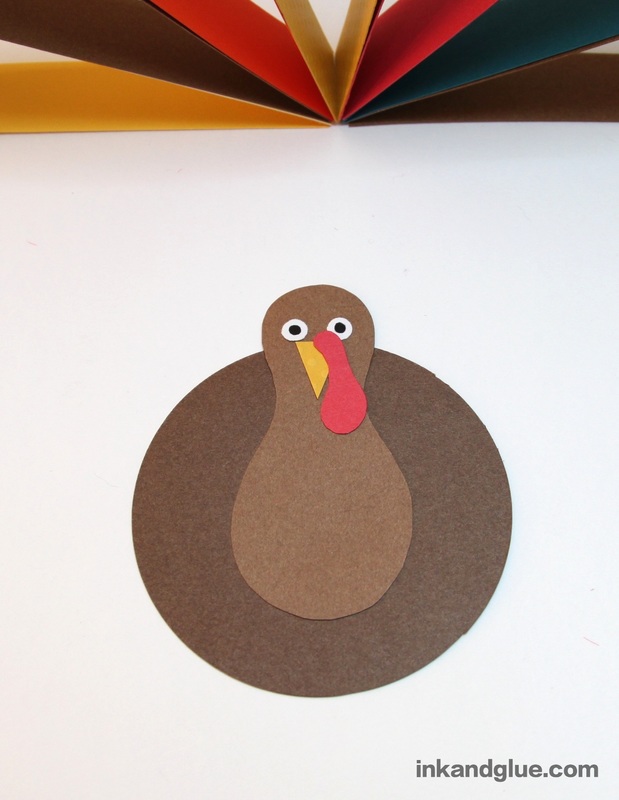
Glue-stick the head/neck shape to the body. Cut out an orange triangle for a beak, and glue that on as well. Use a hole punch to cut out two white paper eyes, and add pupils with marker. Glue those on. Cut out a snood (the proper term for that red blobby thing that hangs from a turkey's nose) from red paper, and attach with glue.
Cut a couple of bits from a glue dot (or a glue strip, which is what I have). Stick 'em on the edges of the tail assembly, roughly near the center. 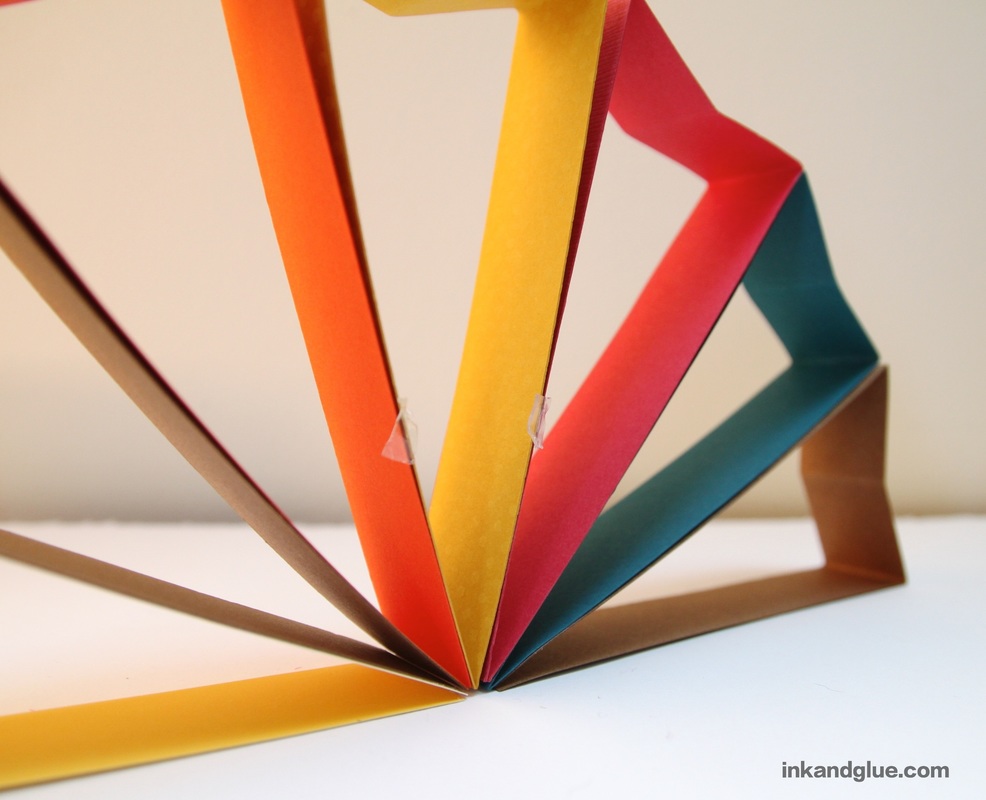 Press the body onto the glue dots, and you have your turkey! To add a name tag, simply slide it under the tip of his beak. I Use a little glue stick as needed to secure it. 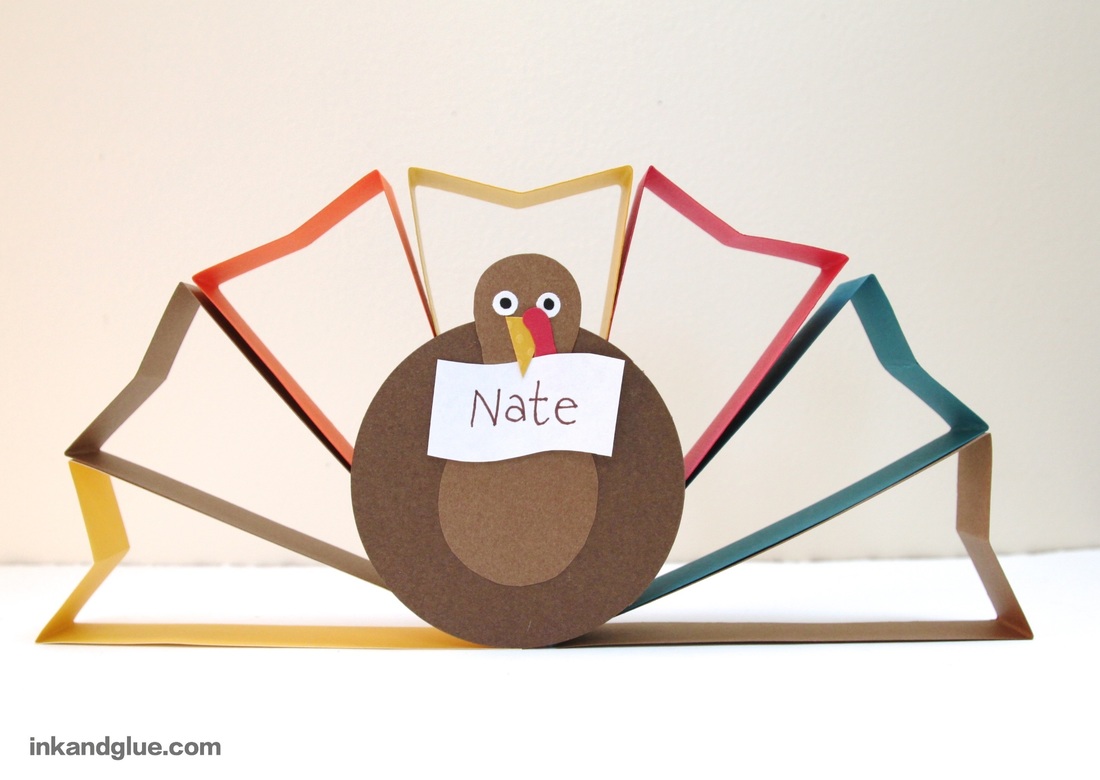 I'm thankful for you, my readers! xo
|
Categories
All
Archives
March 2017
AuthorI'm Debbie Way, an artist and writer who enjoys making things. |


 RSS Feed