|
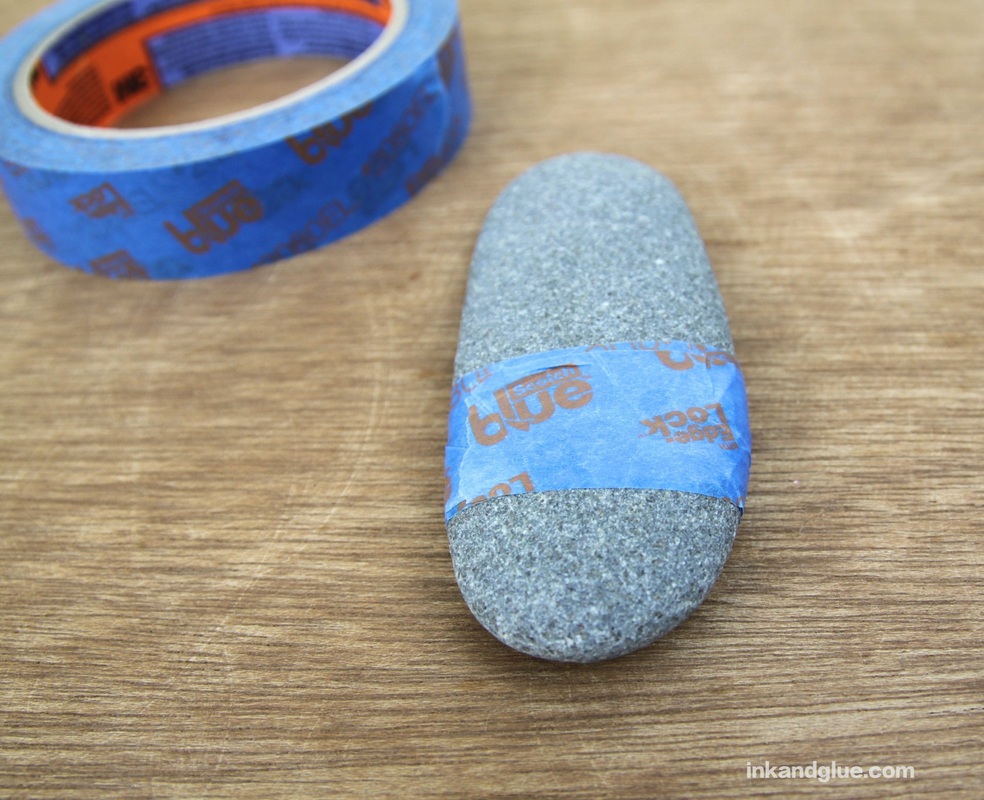
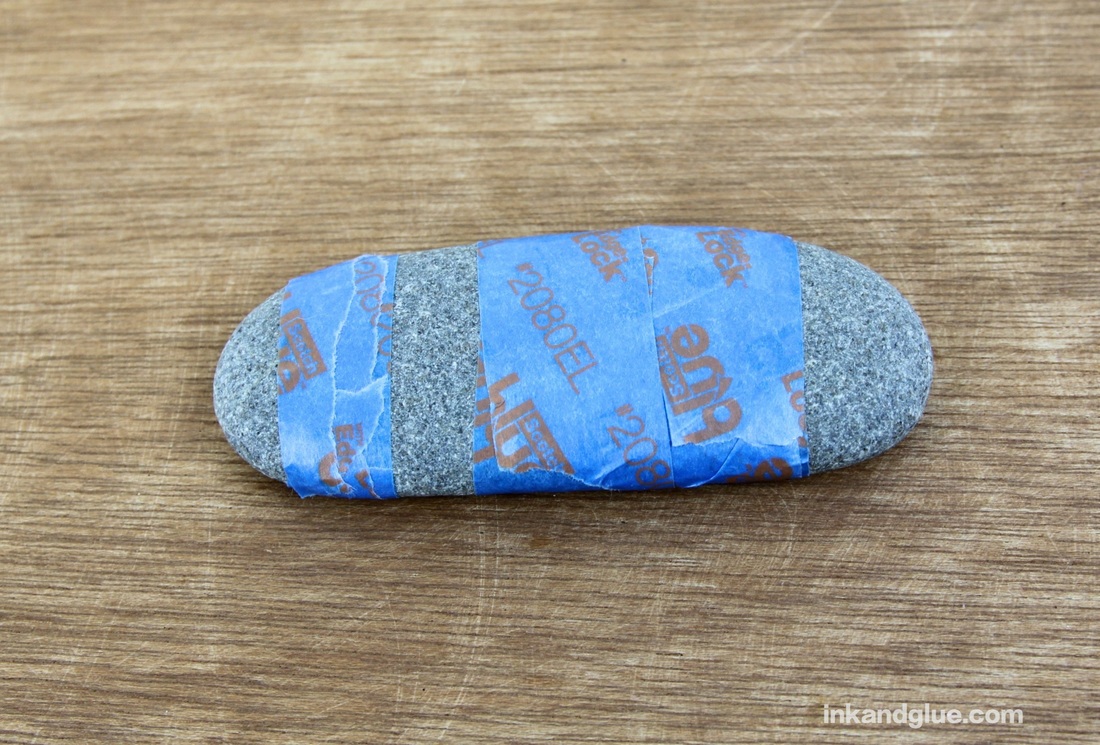
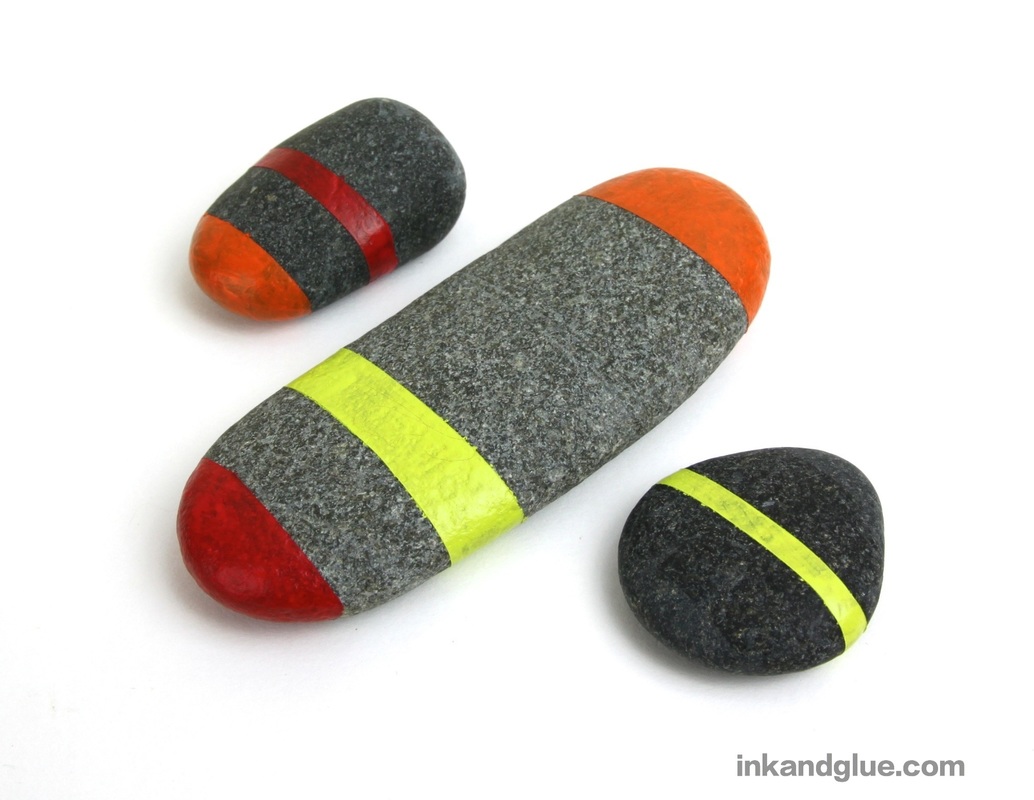
My favorite vacation souvenirs are rocks. (And shells, when appropriate; and washed-up bits of coral, if I'm in an especially wonderful location.) They're free, they're abundant, they're versatile, and they're easy to get rid of. I like to use them as a sort of mulch for house plants. If I am starting to feel like the house is becoming over-rocked, I can always chuck them in the garden or add them to our gravel driveway. Sometimes, I decorate them. In the past, I've wrapped them in fabric, coated them in nail polish, and drawn on them with paint markers. Today, I went for a more sophisticated look. 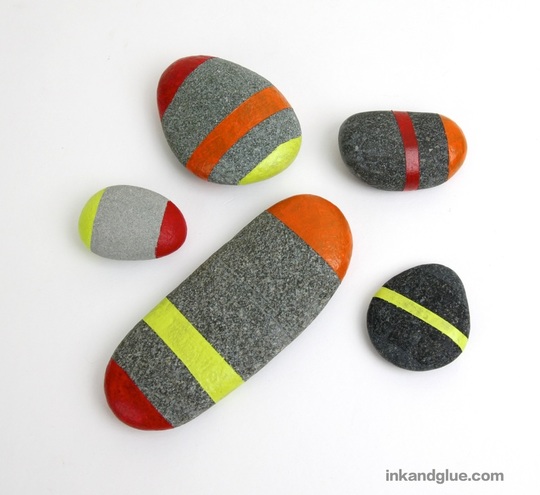 To make these color-block rocks, you'll want to choose the smoothest rocks you can. Look for smooth rocks in riverbeds and ocean beaches. You're going to be taping sections of your stone, so a smooth surface will allow for better adhesion and give you a sharper line in the end. 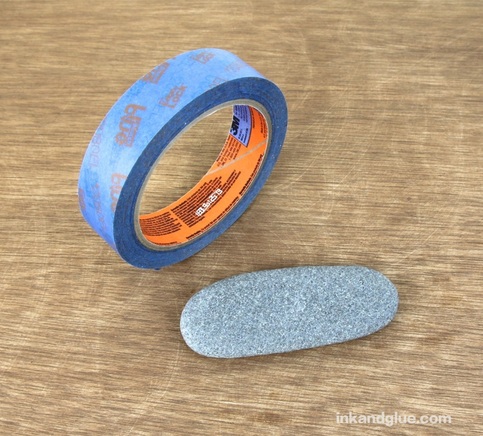 Use painter's tape to mark off a section of a stone, rubbing the edge of the tape into the rock with a fingernail. Rocks are curvy, as you may have noticed, so use multiple pieces of tape to get a "straight" line if you need to.
Repeat with the rest of your chosen stones. Paint each exposed section with acrylic paint. Try to brush from the tape onto the rock so you don't get any paint seepage under the masked areas. Note: I needed two or three coats of each color to get good coverage. I recommend doing a coat of white, first, if you can; doing so will give you much brighter colors. 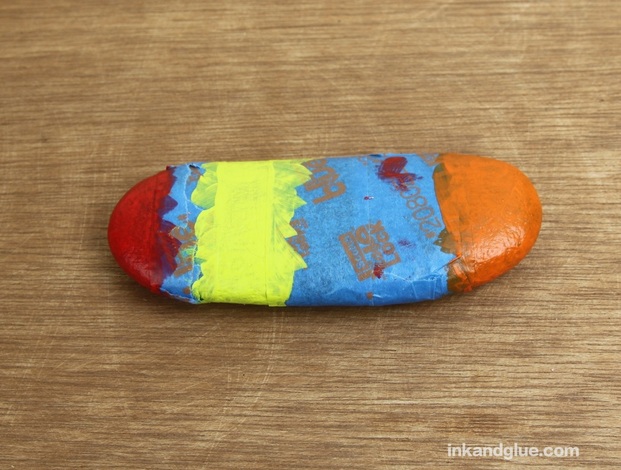 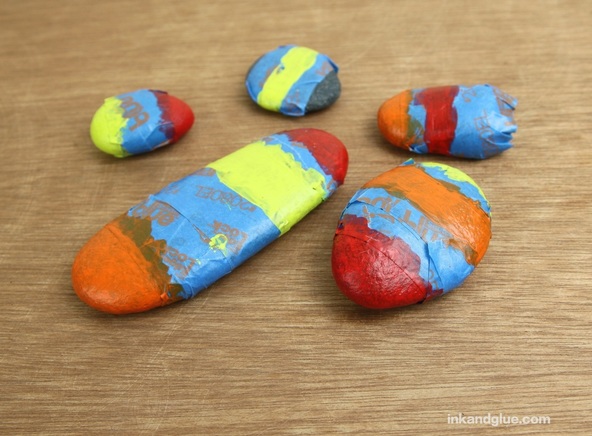 Once the paint is completely dry, peel off the tape. So satisfying! 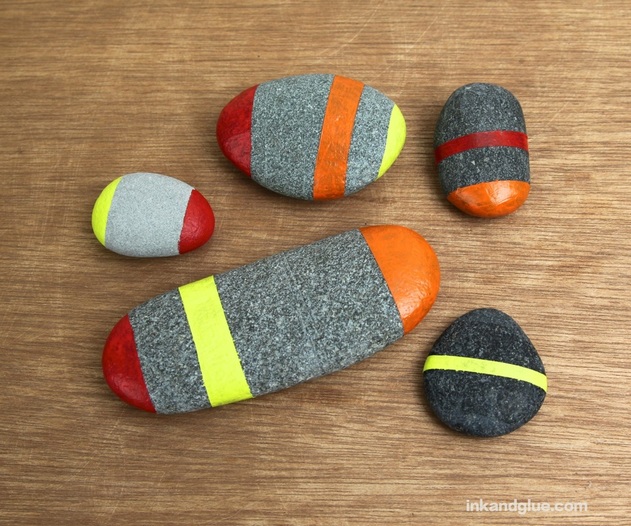 If any edges need to be cleaned up, use a small, flat brush to add a little paint. Just be conservative with it, or you'll end up expanding the painted section until it takes over the entire stone! Better to have a fuzzy edge than to lose the nice blockiness you set up.
Comments are closed.
|
Categories
All
Archives
March 2017
AuthorI'm Debbie Way, an artist and writer who enjoys making things. |
 RSS Feed