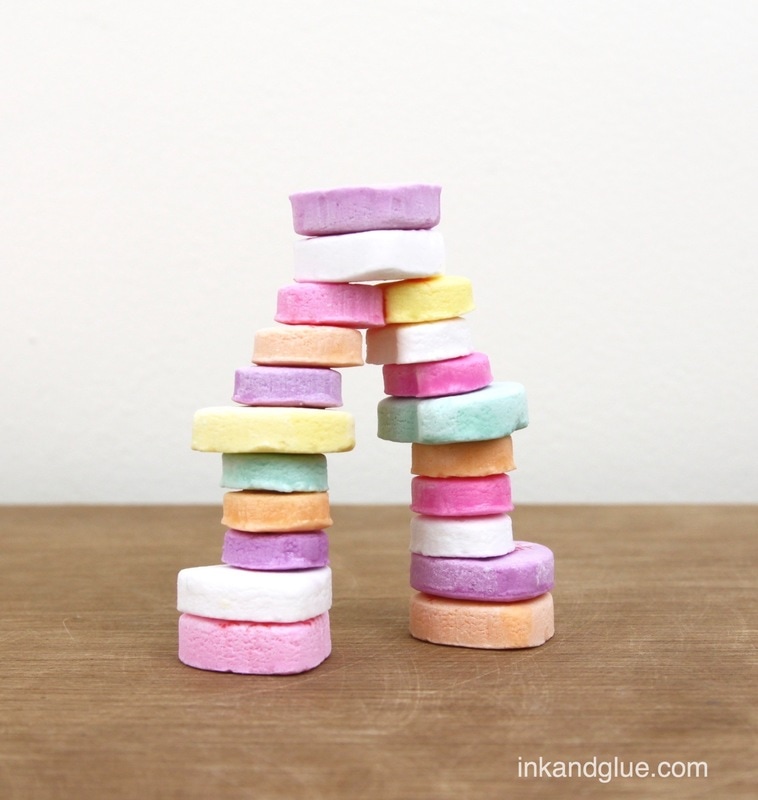
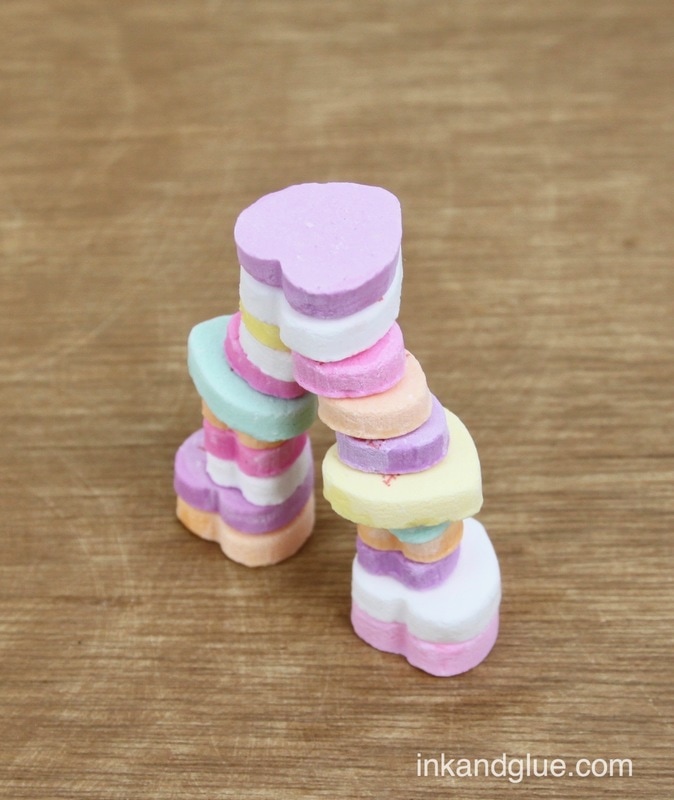
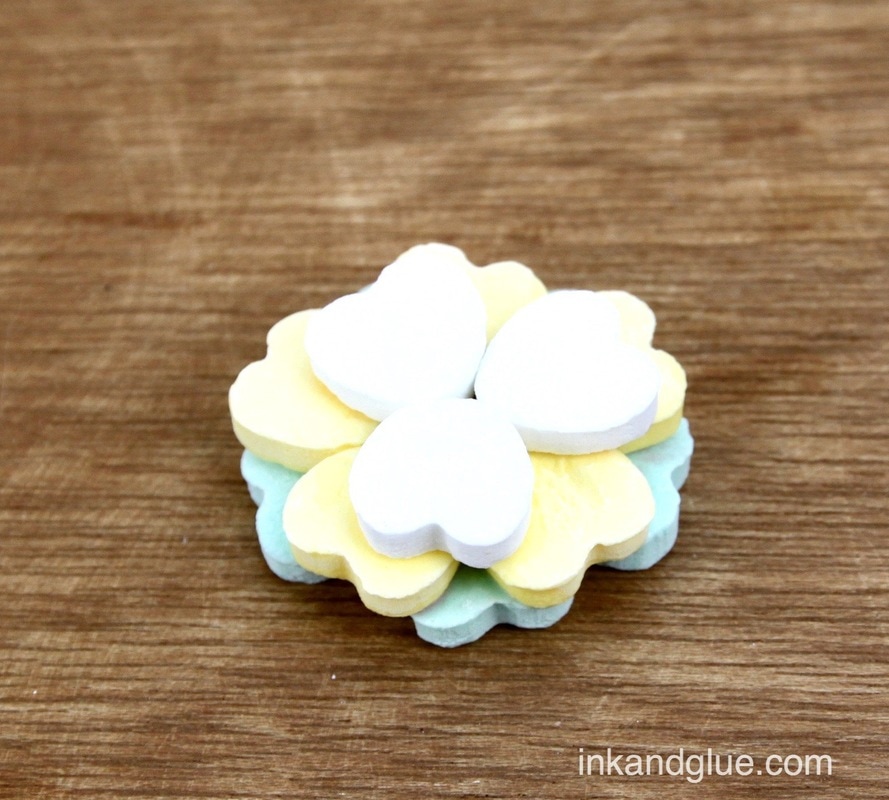
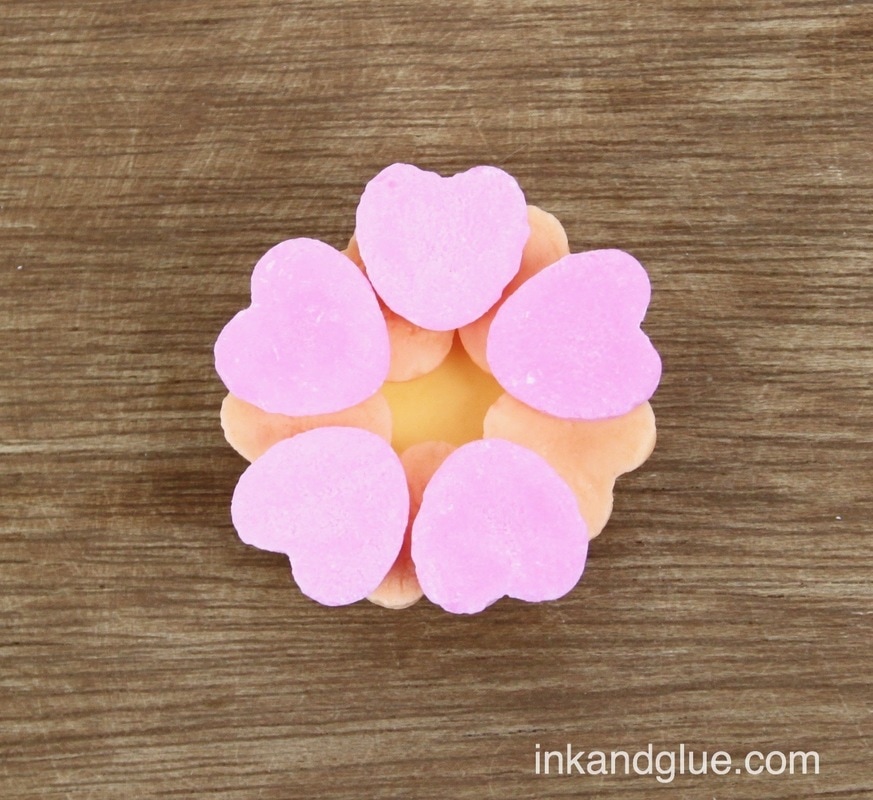
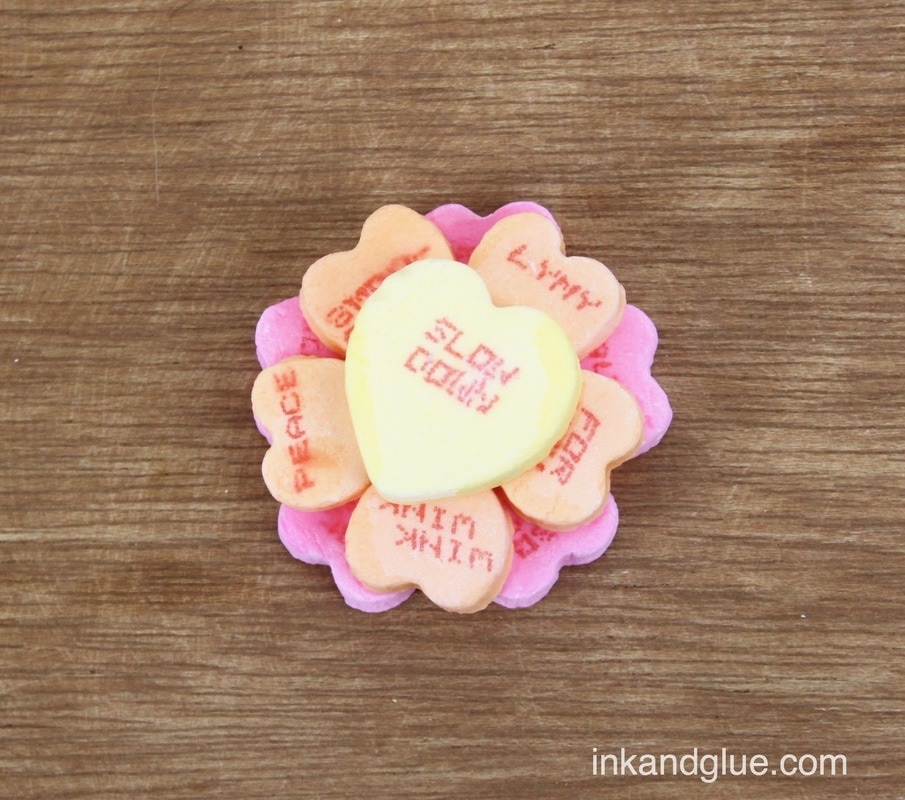
Valentine's Day was just a few short days ago, which means you either 1. have plenty of not-very-tasty conversation hearts candy around the house, or 2. can purchase bags of said candy at a deep discount. The two bags of candy I used for these little structures cost less than $2, total. And I have plenty left. PLENTY. But what to do with these ubiquitous candies? Eat them? Maybe a few, before you realize you're never going to make it through the entire bag. But they're so appealingly colorful and sweetly scented... Well, here's the magic thing that I discovered: All you need to attach two candy hearts together is WATER. Yes! Just water, which means whatever you make is still totally edible. Pour some water a shallow dish, dip a heart in it (try to only wet the side, don't dunk it — the "ink" will run), press it to another heart, and let dry. You do need to let them dry overnight, but then look what happens: 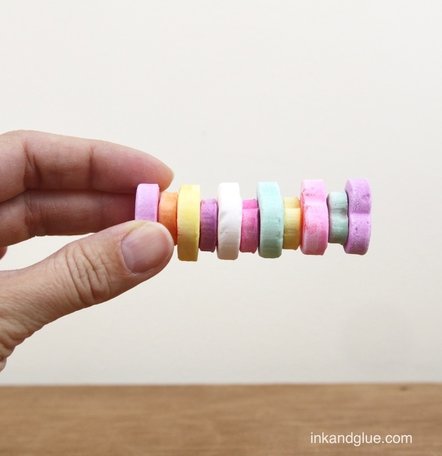 That is adhesion, friends. Here are a few more little things I made using this method. The flowers in particular would make great cupcake toppers. "Glue" green hearts together for St. Patrick's Day!
Here's to playing with your food!
xo It's a snow day here — literally everyone in the state is home, all schools/offices/stores are closed. It's been snowing hard for hours. I may have gotten a little punchy, a little silly. And I made these Valentines, suitable for the special woke person in your life.  Are these kid friendly? Well... Maybe, if you have the kinds of snarky, leftist kids I know.  Of course there are lots of protest signs that need no alteration at all. "Love trumps hate" is a good example. 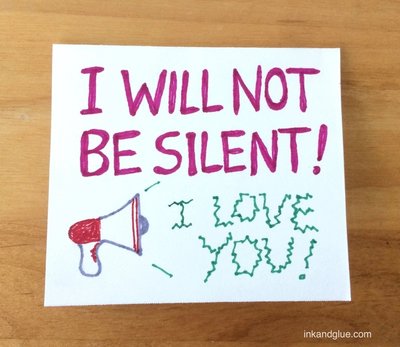 Don't worry—I didn't go anywhere near the, ah, cat-related slogans. But this last one is definitely meant for adults only. I recommend protesting with your partner, and your kids too; demonstrating your compassion and standing up for civil rights brings families together. 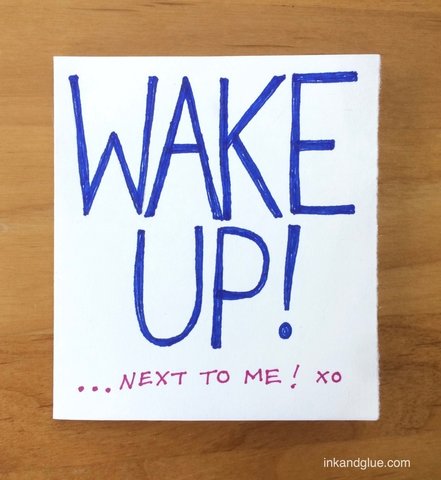 xo!
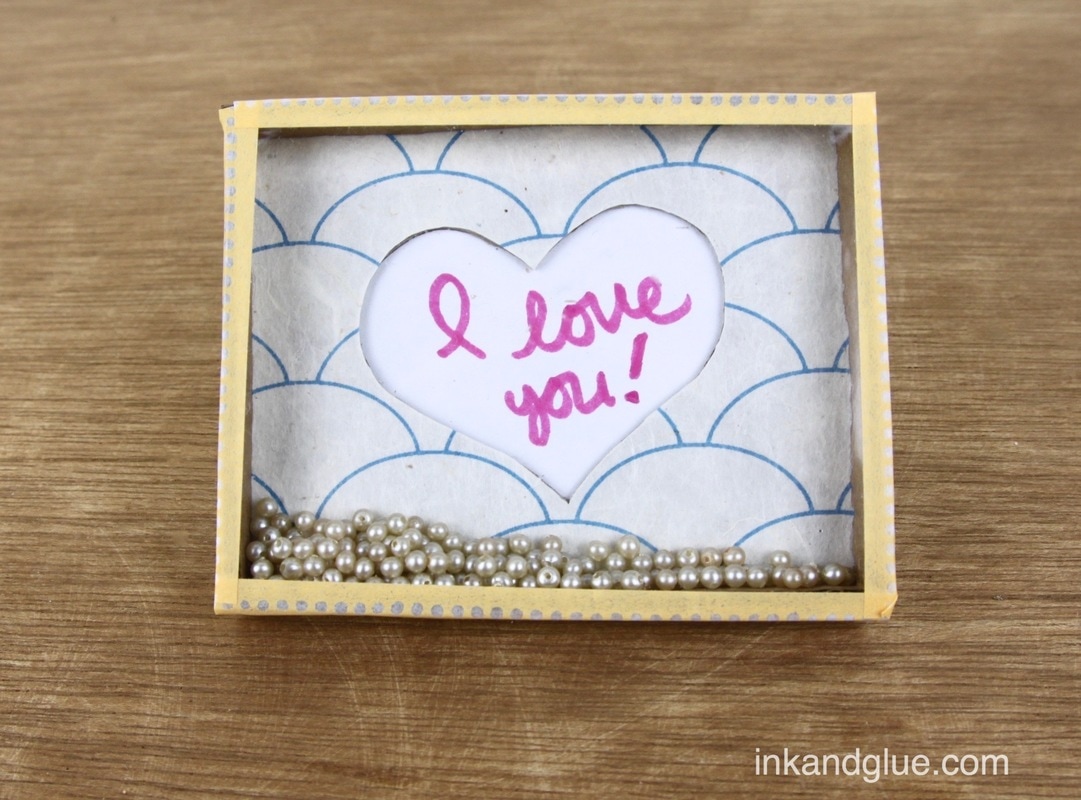
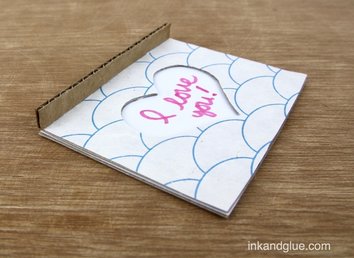
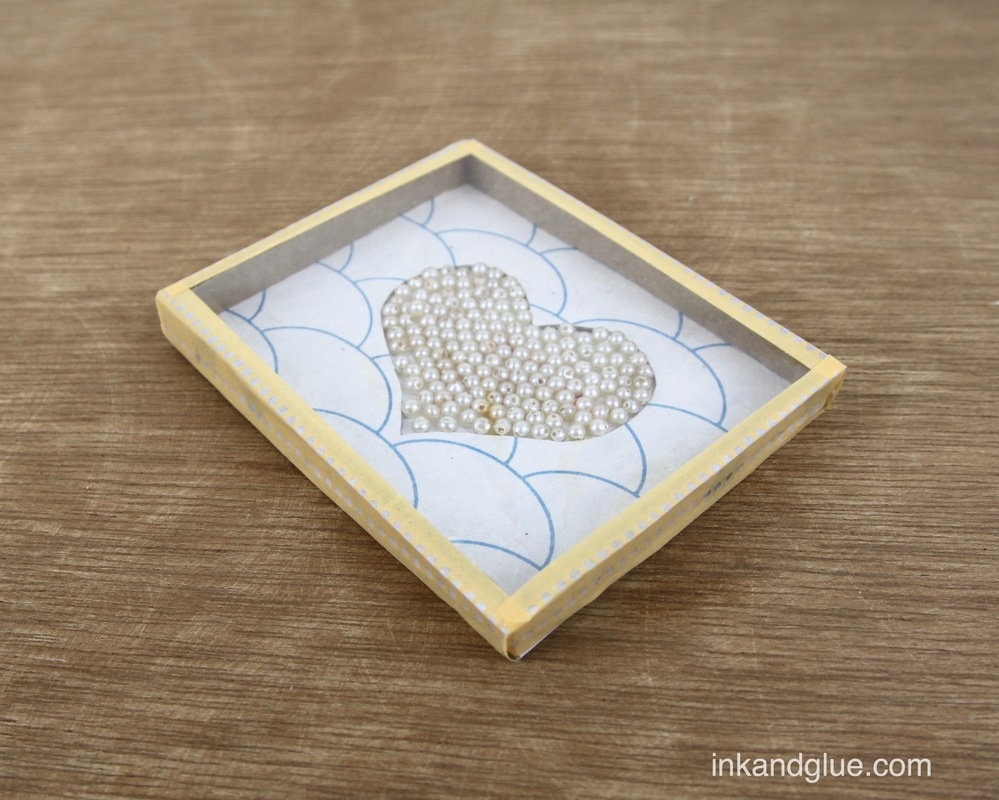
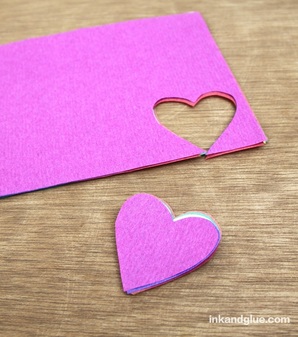
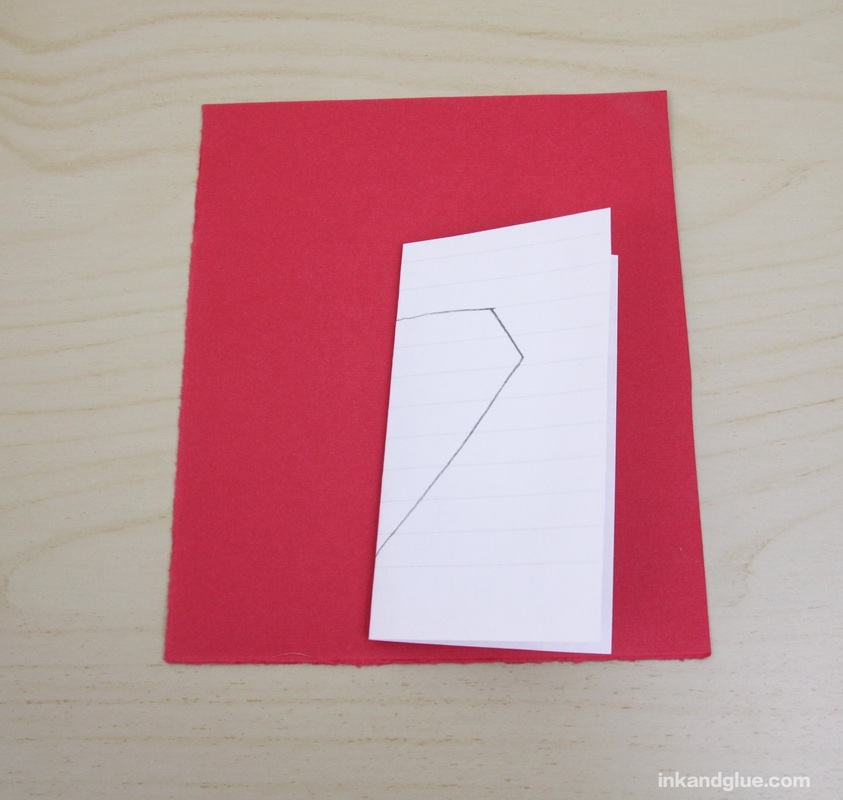
This is a tough project to write about, because who knows what these little bead/ball toys are called? Not me. I did a few google searches and "mini ball game" seemed to be a phrase that some knew, so I'm going with that. This one is a little different because shaking up the balls reveals a lovely message. But you still "play" it by tilting and shaking it until the balls all fall into place — one big area, instead of multiple single-ball spots. Here's how to make one like mine. Before you start, make sure you can source a flattish piece of clear plastic from a blister pack or a take-away container or a report cover. Mine is from a package of hole reinforcement stickers from Staples. Also, cut a couple of straight, even strips from corrugated cardboard, with the corrugations running the short way. Perpendicular to the length of the strip. I think you'll know what I mean. Now: Cut three identical rectangles from a cereal box, and one matching rectangle from a piece of white drawing paper. Cut a heart shape from one of the cereal box pieces. Align that piece on top of a second rectangle, trace it, and then cut out the second piece's heart. 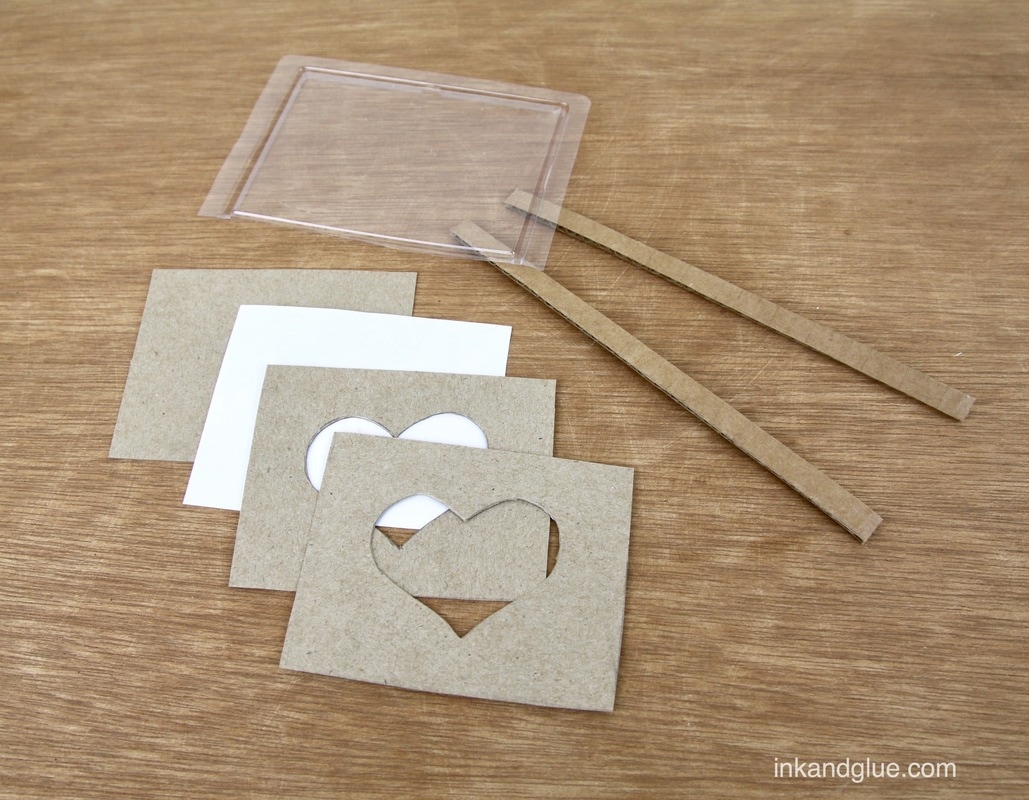 Align the heart-ed cardboard on top of the paper rectangle, and lightly trace the shape in pencil. Write your message inside the shape, then erase the pencil lines. This is what it should look like with the pieces stacked together: 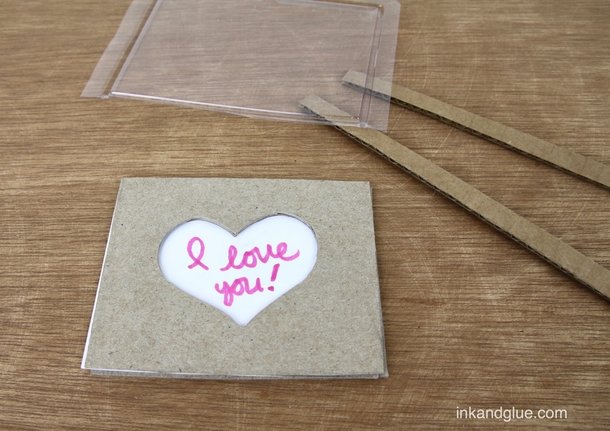 At this point it's safe to start do some gluing. Use glue stick to adhere the white paper onto the intact cereal box rectangle. Use tacky glue or glue stick to adhere the two heart-ed rectangles together, making sure the hearts align nicely. Lay the heart piece, front-side down, on top of the back of a piece of decorative paper, and trace the outside edges and the heart. Cut them out. Glue-stick this on top of the heart piece. 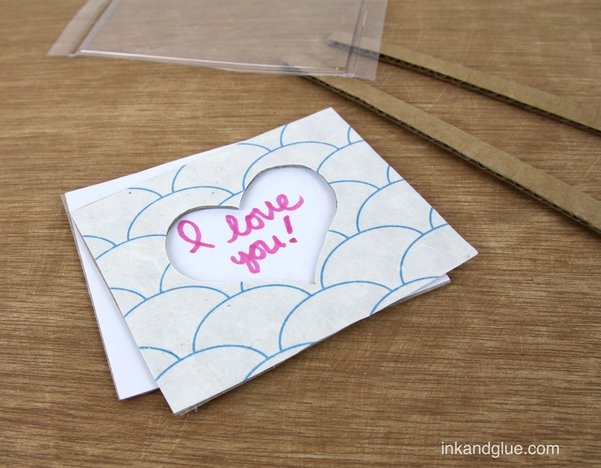
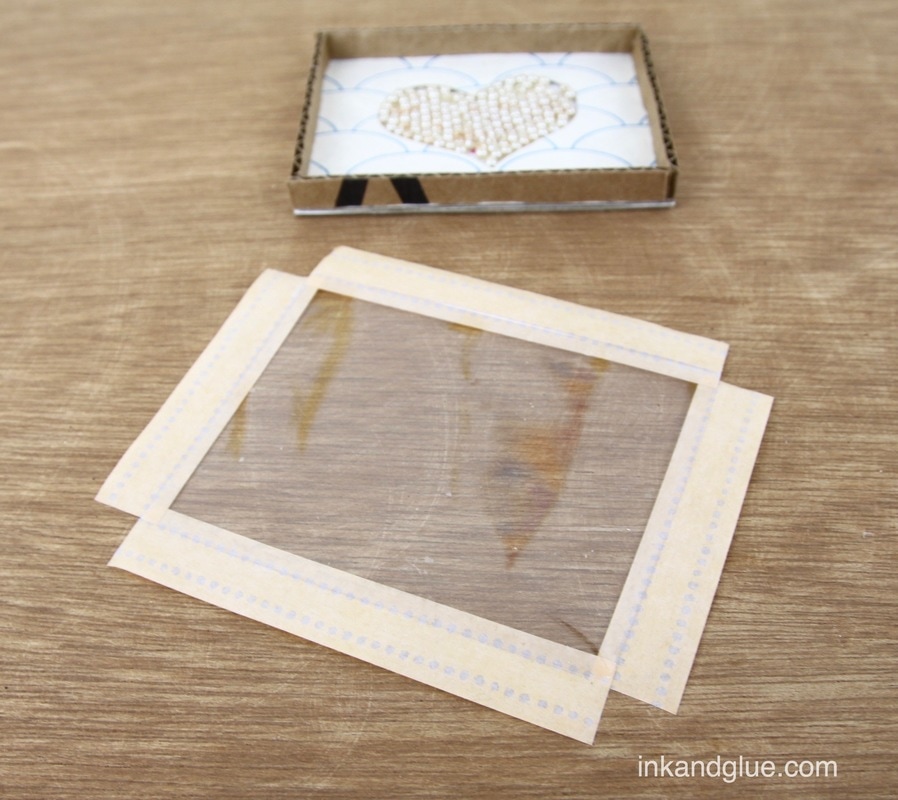
 It's time to add a bunch of tiny balls! I have an ancient strand of round, very-faux pearl beads that were just right for this purpose. Any small glass beads would work fine, even if they aren't perfect spheres. Add enough to cover the heart without being too impossibly-packed full. You want to make this a "winnable" "game." 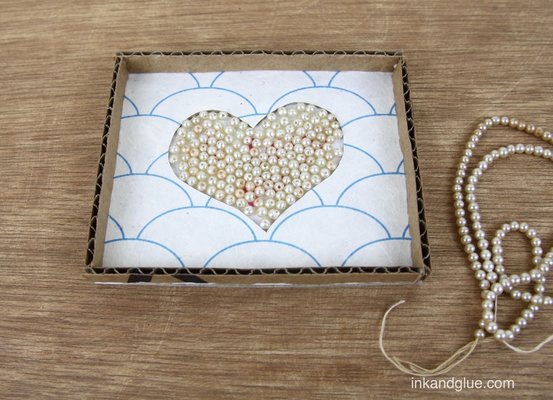 It's cover time! Place the box you've just made on top of the plastic piece and make some tiny dots with a marker to indicate where to trim it.  Tape the plastic piece to the top with washi tape (or any narrow tape you have). I did this in a finicky way: I stuck tape to the four edges of the piece, keeping the sticky-side up so it wouldn't get attached to anything, and I trimmed the four strips to fit as I added them. My sides and edges came out a bit crooked, so I assume I got the plastic piece turned around (and my box isn't perfectly even and square). So: Only do this finicky method if you're finicky all the way through.
And you're done! Have fun, then give it to a special someone. (You, yourself, count as a special someone.) xo!  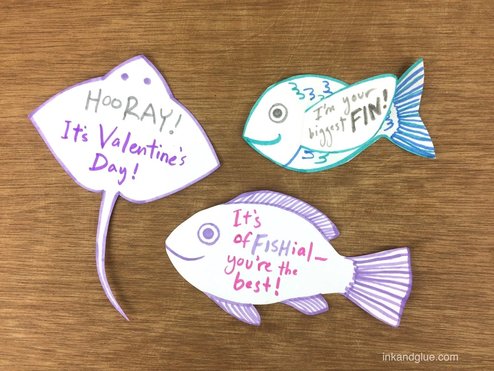 I have a fickle relationship with puns. For the most part, I'd rather do without them. However, I give puns an all-access pass to Valentine's Day. There's something about the holiday that both inspires and excuses a certain level of corniness. Who am I to turn my back on that? 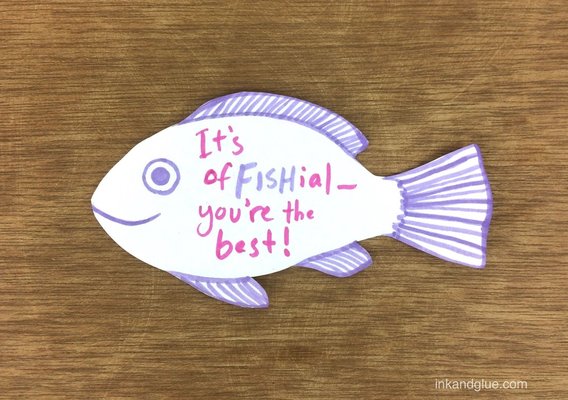 As you've probably noticed, there's not much crafting involved with these — consider them merely an invitation to draw some fish and write some silly puns. 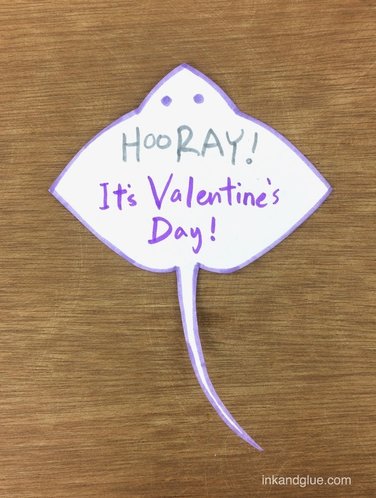 This next one does require glue-sticking a separate fin-shaped piece onto the front. It might be my favorite. 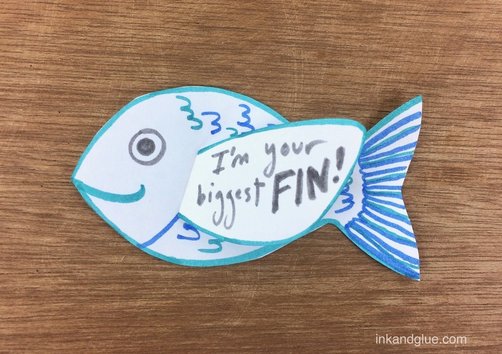 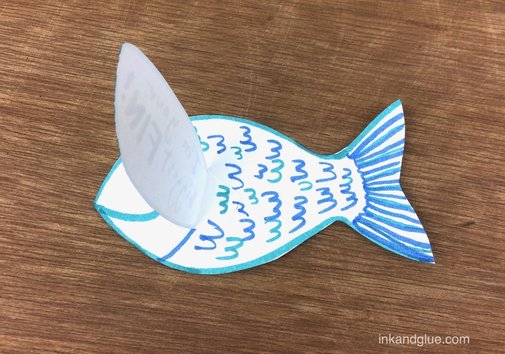 Because it's the thought that counts, not the price tag.
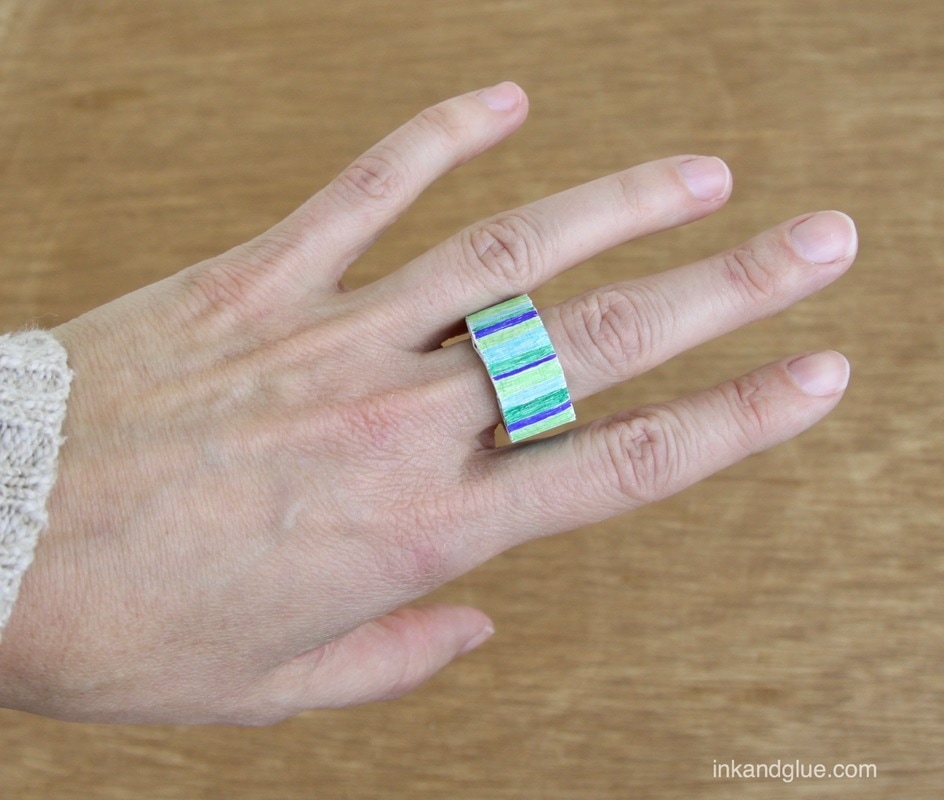
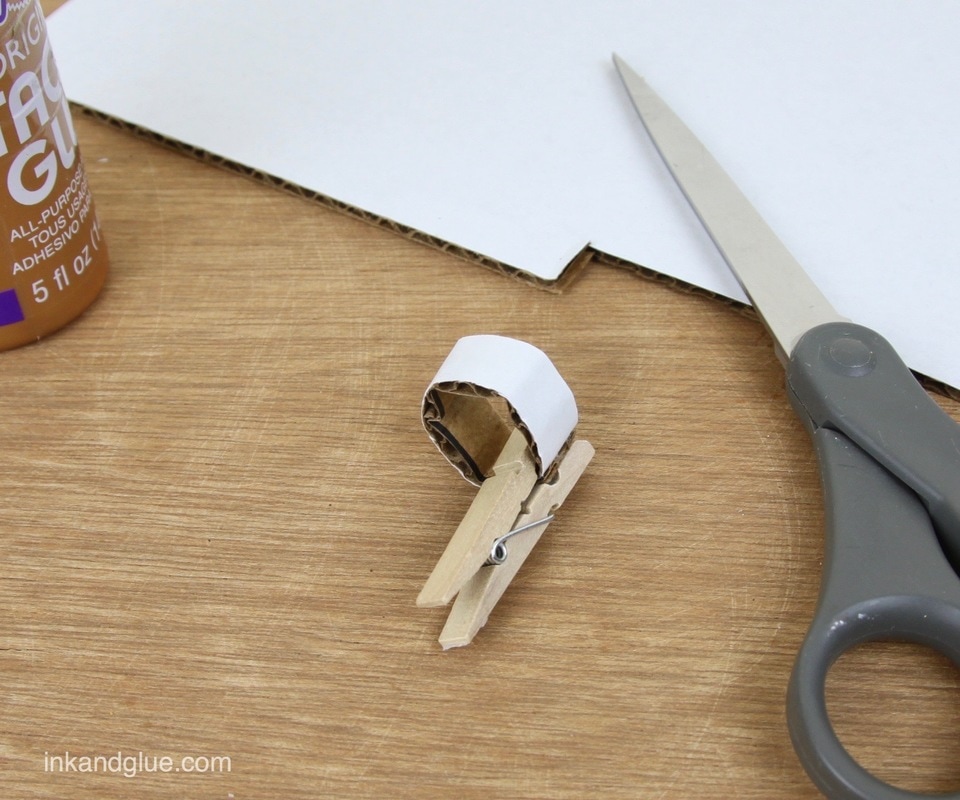
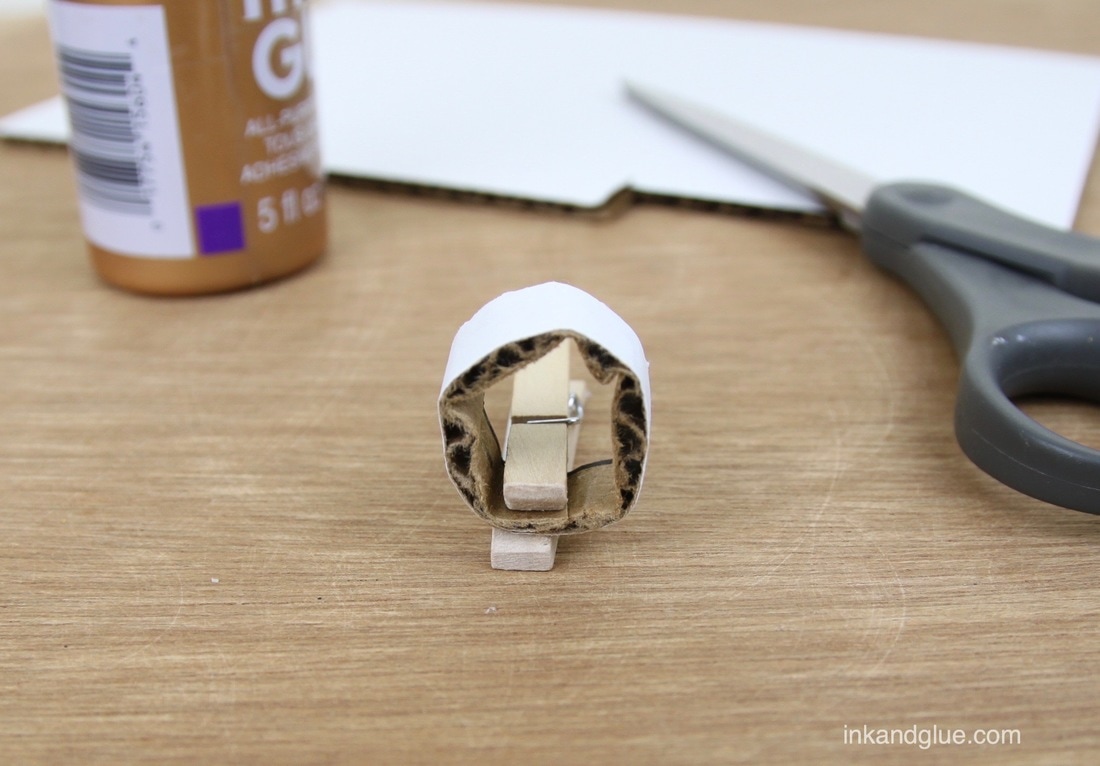
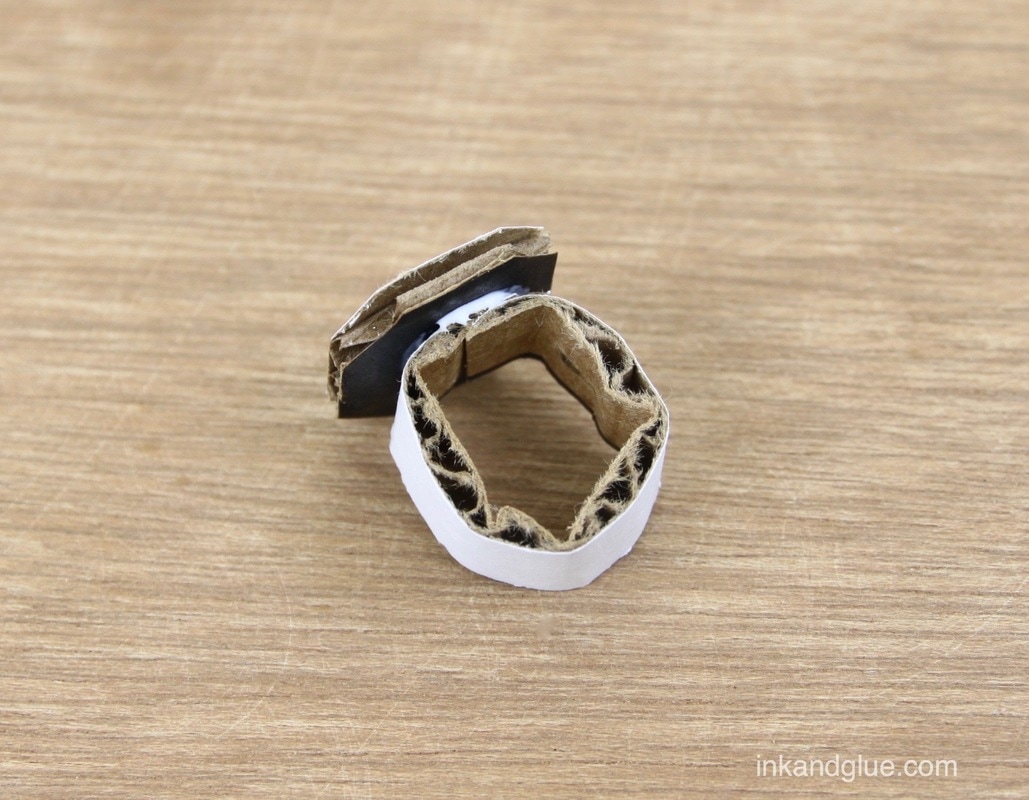
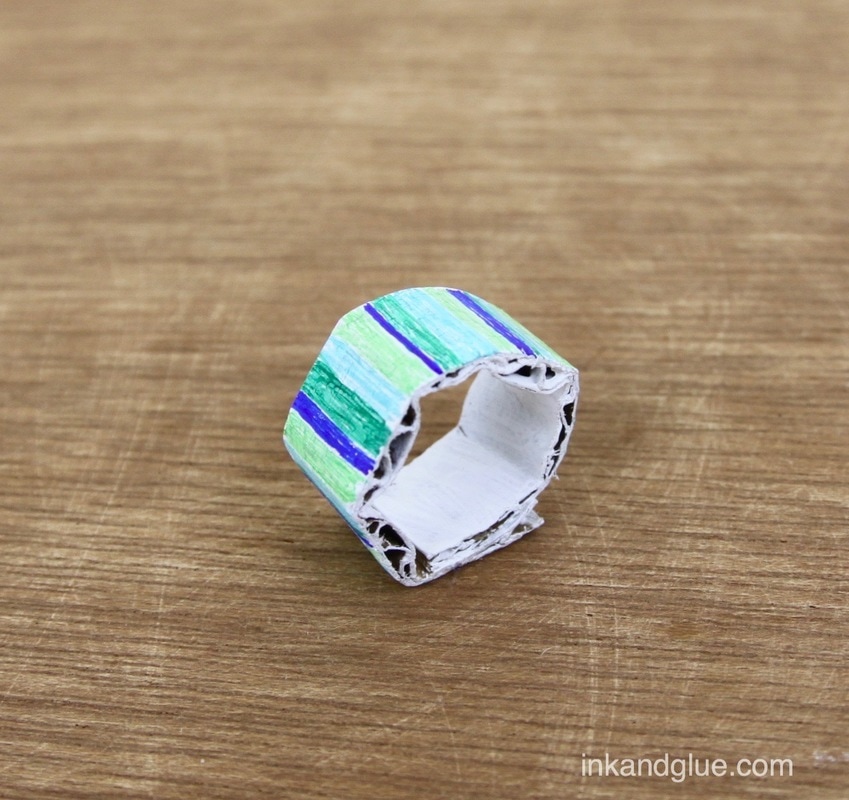
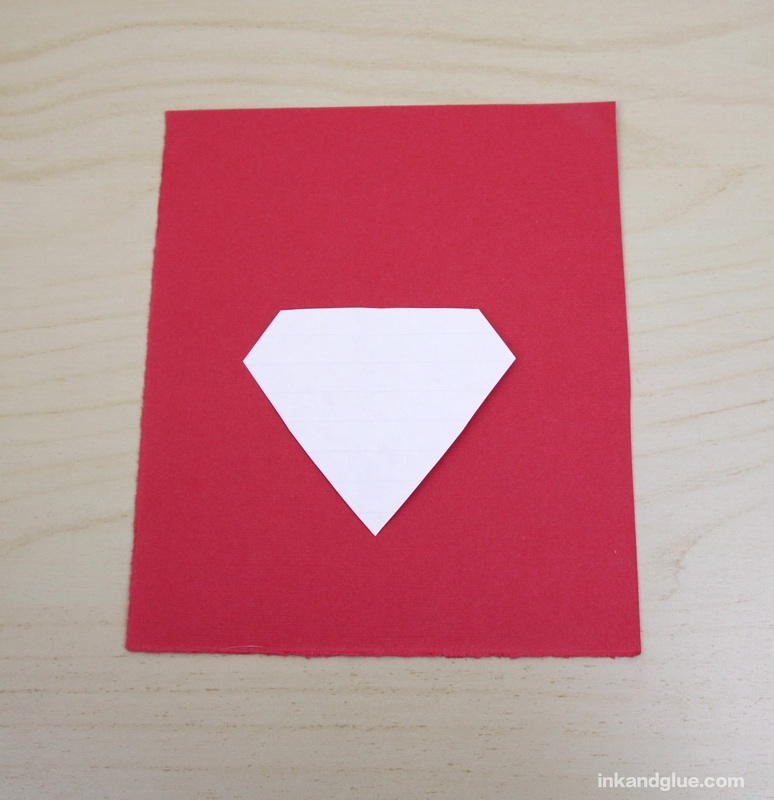
Regular readers will know I love cardboard as a craft material, for both its sturdiness and its free-ness. We still have plenty hanging around the house post-holidays, so made a couple of rings! Partly this project is in anticipation of Valentine's Day, which is a mere short month away. It's incredibly easy to make rings for everyone on your "i care about you" list. Cut a strip of corrugated cardboard against the grain (i.e. the corrugations). Loop it into an overlapping ring around a finger for a good fit, then glue the overlapping parts. Clamp with a clothespin while the glue dries.
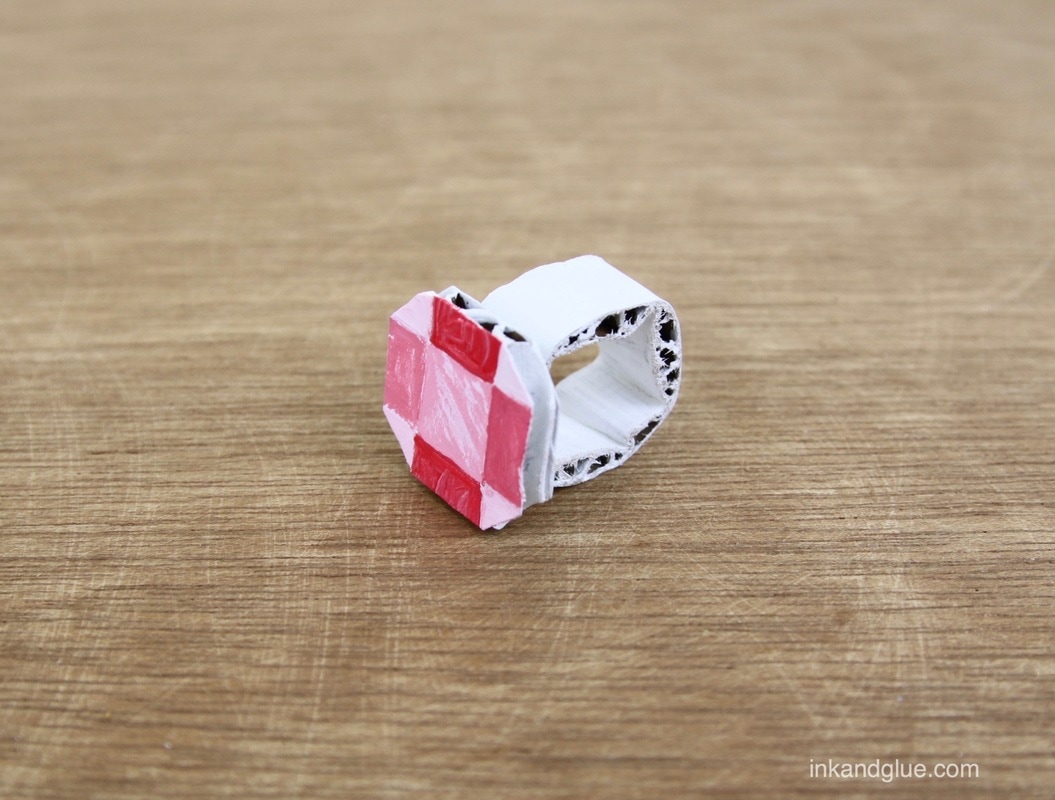
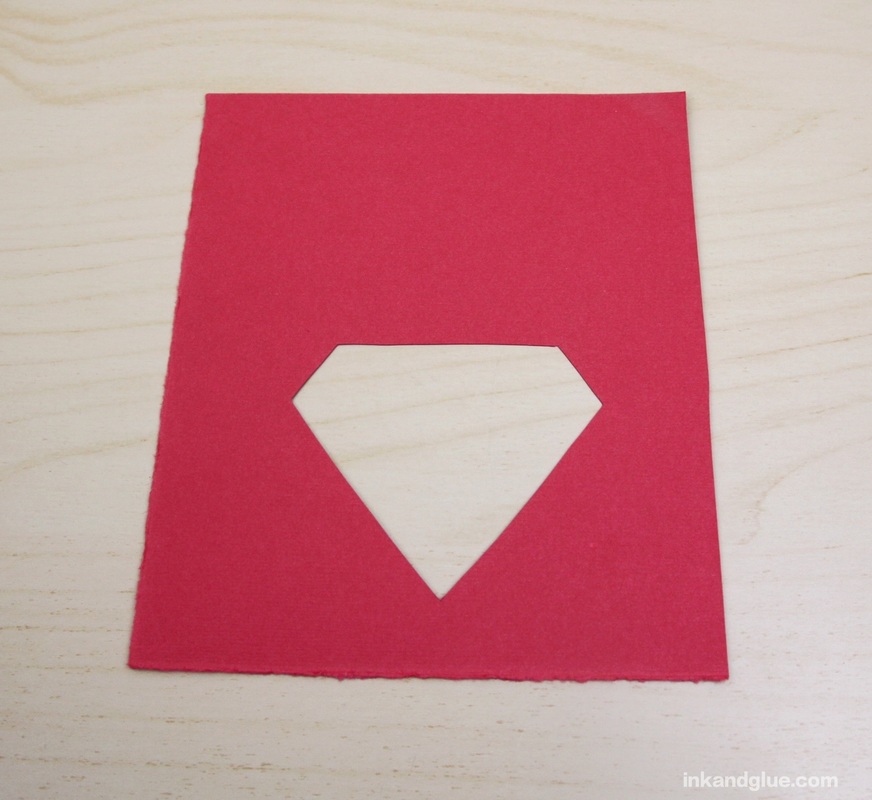
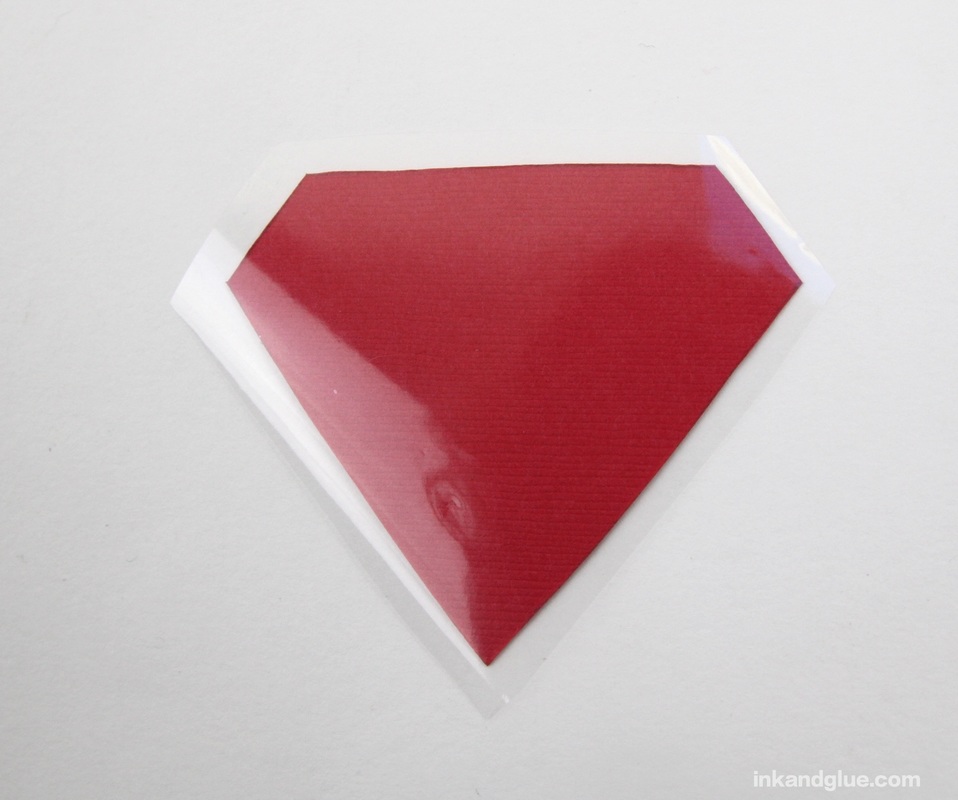
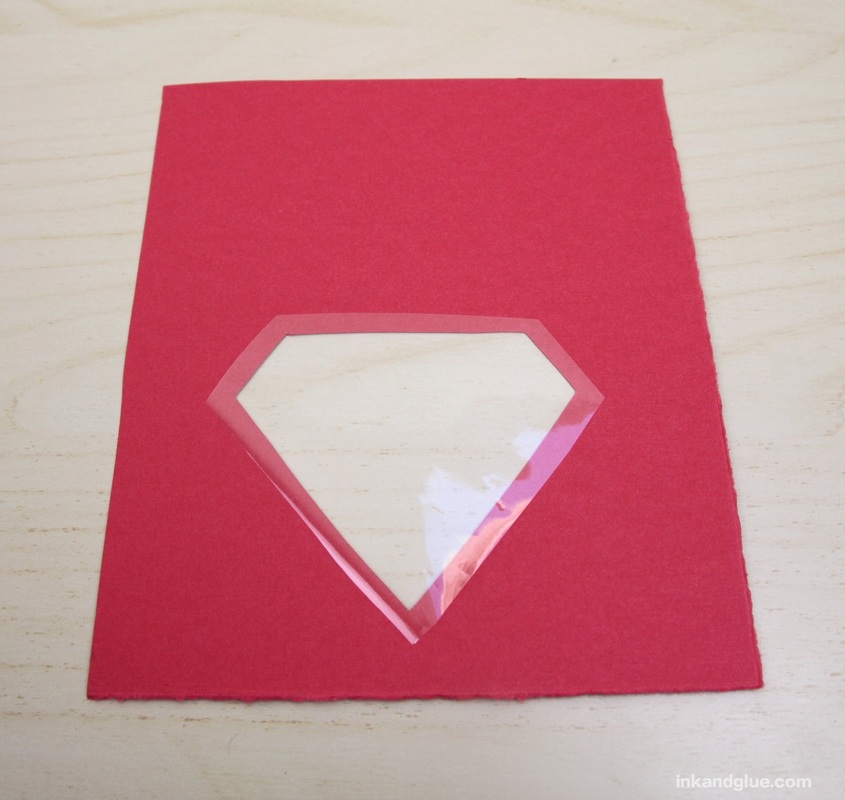
Cut a "gem" or other focal shape, if you like, and glue it to the ring.
Paint your glued ring with white acrylic or craft paint and let it dry. I tried to make my gem look sort of faceted, so after the paint dried, I marked guide lines in pencil. 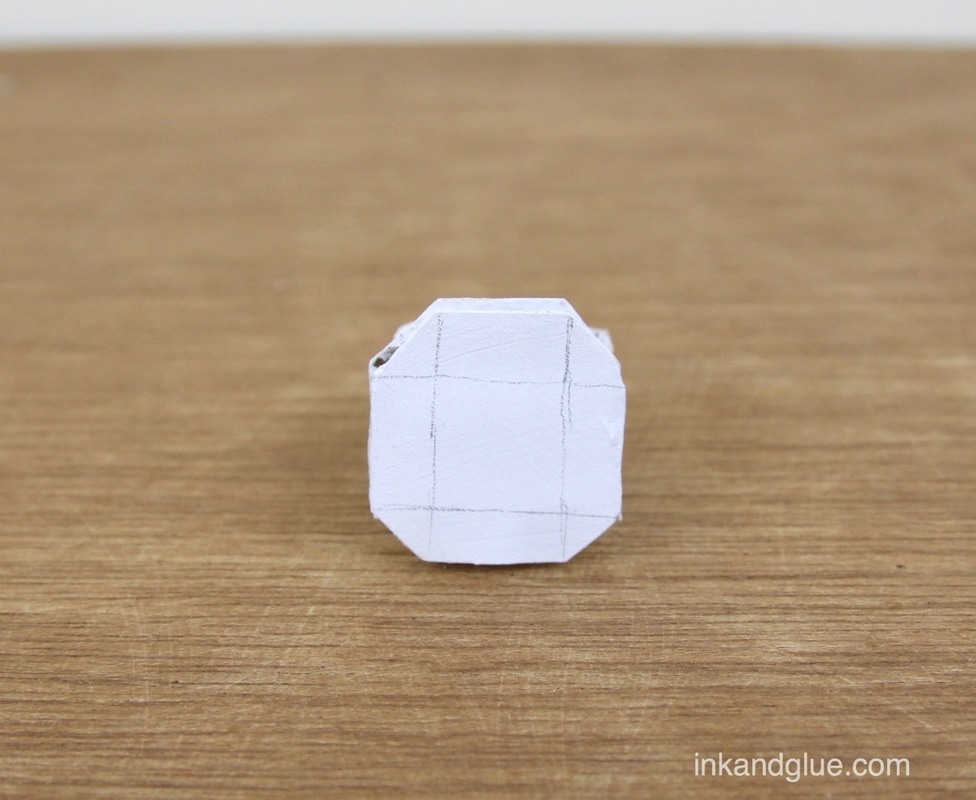
That's it! If you use permanent marker and acrylic craft paint, you shouldn't have much trouble with the color bleeding onto your skin or clothes, but I certainly would try to avoid getting these wet. Of course, you can also decorate these rings with stickers, or washi tape, or glue on fabric or beads or feathers or all of the above! They're ideal for a fun, quick party activity (make a bunch and paint them white beforehand).
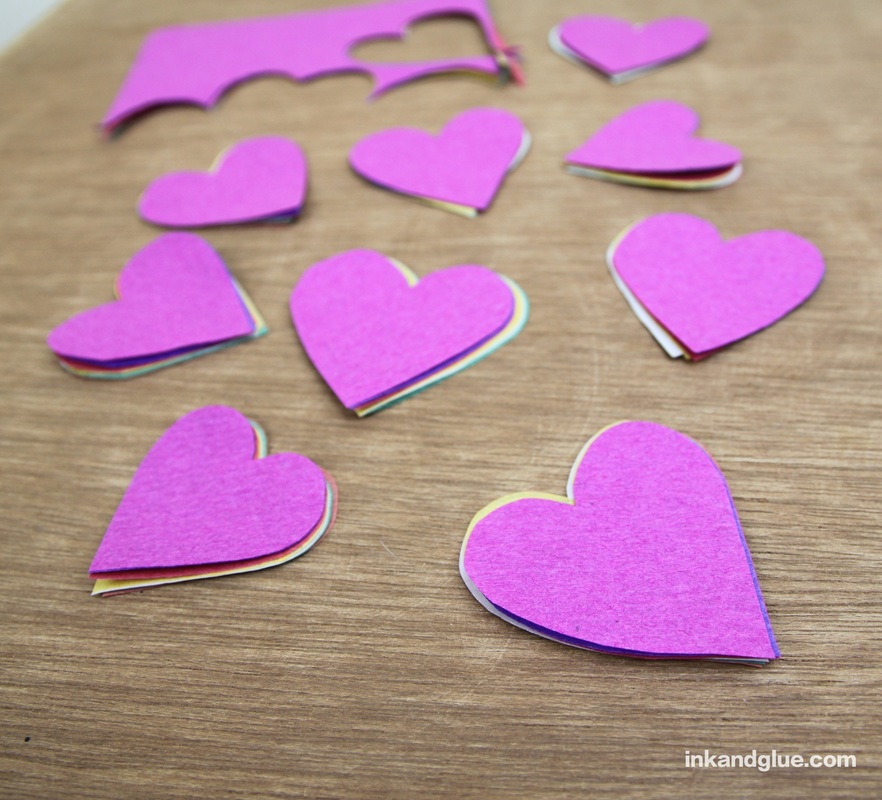
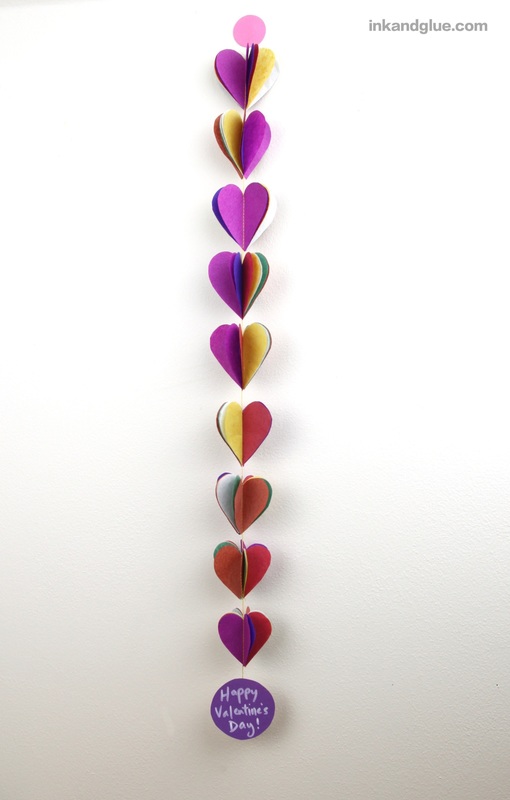
xo! 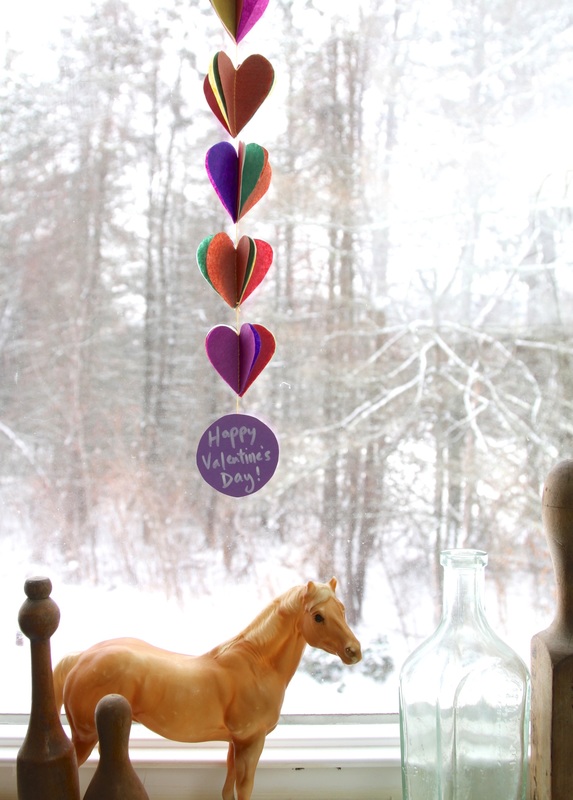 As I mentioned yesterday, I got a package of joss paper on Monday, and wanted to make something with it. This sewn-up heart garland can be made with other kinds of paper, of course (though I must note that my sewing machine doesn't handle card stock well; YMMV). To make it, first stack up several sheets of thin paper in various colors. Keep them stacked as you cut out a heart shape. Repeat until you have a bunch of heart stacks (I ended up using nine).
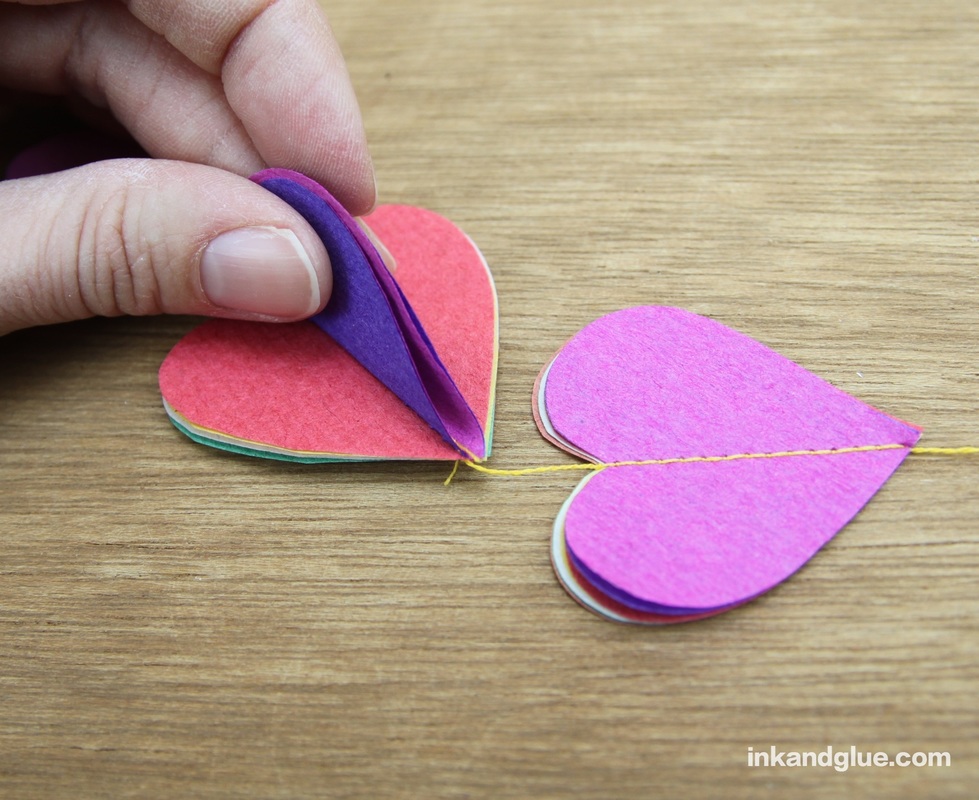
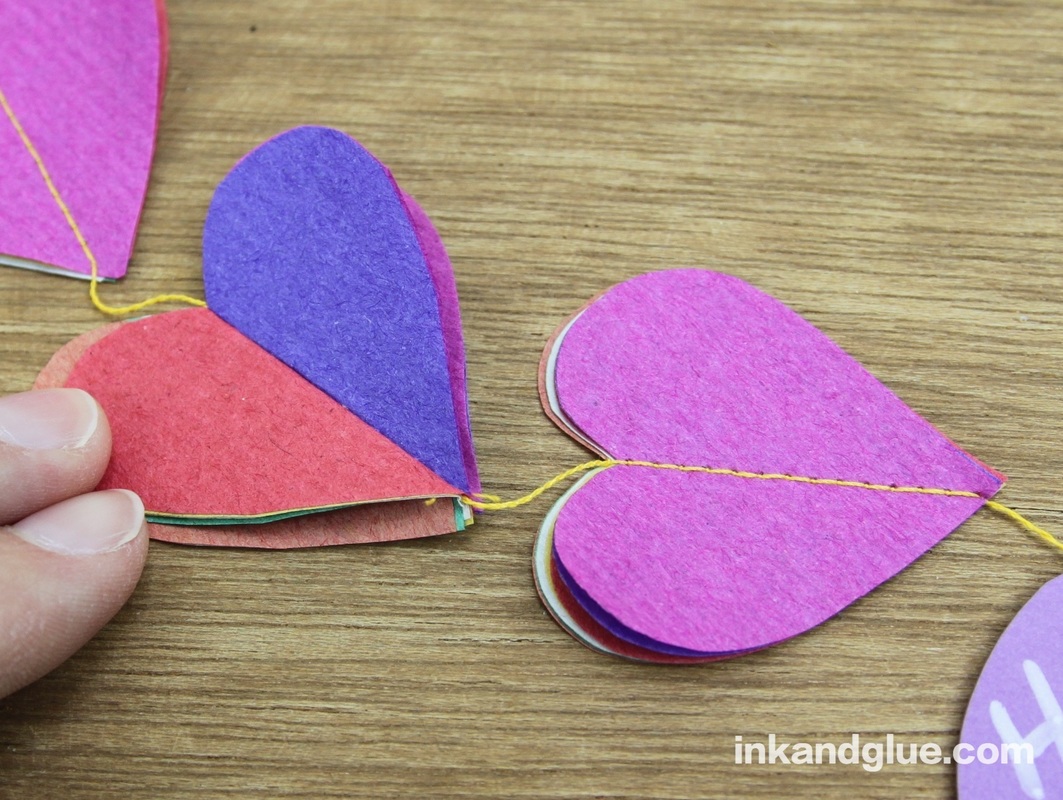
Thread your sewing machine with colorful thread. I didn't have any matching pinks, so I went a bit contrasty with yellow. Sew through the center of the heart stacks one by one, spacing them out an inch or so in one continuous line. 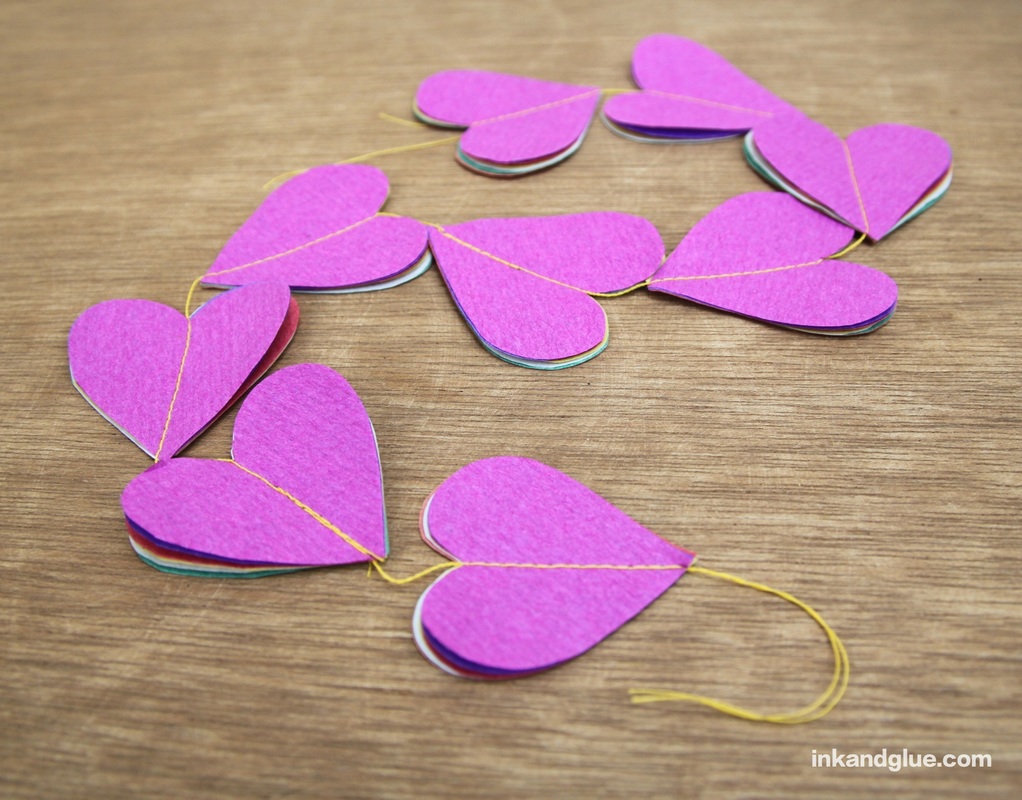 Use tacky glue to sandwich the ends of the thread between two pieces of paper. I used my one-inch hole punch for the top, and cut two free-hand circles for the bottom that were big enough to write a message on. 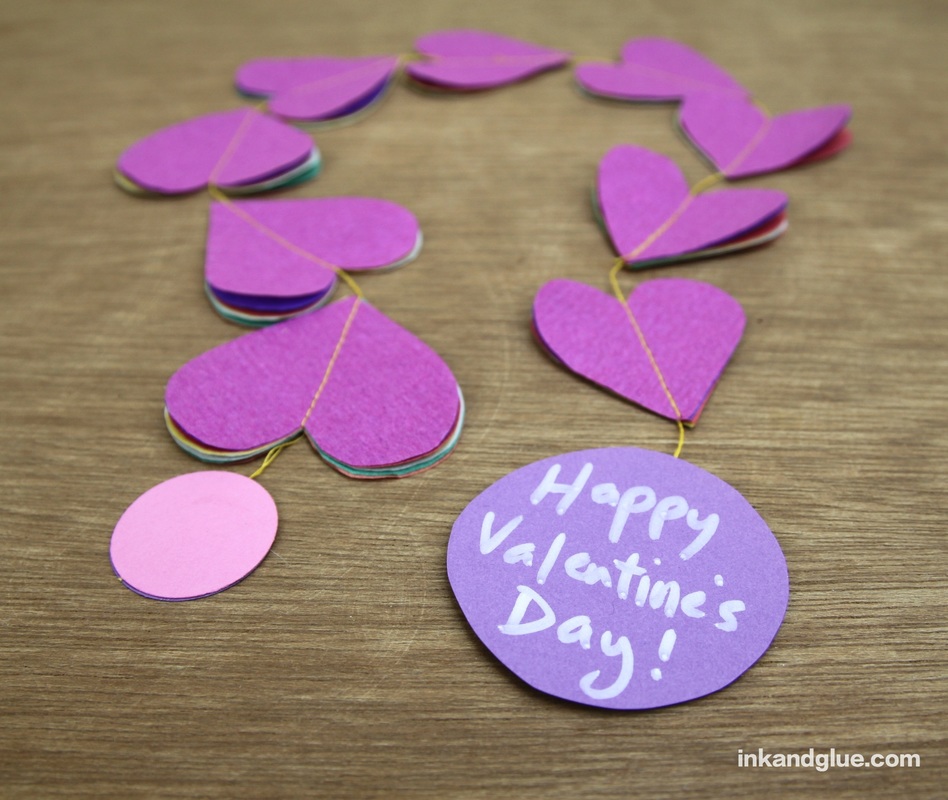 Show off the many layers of your hearts by folding them in half, this way and that.
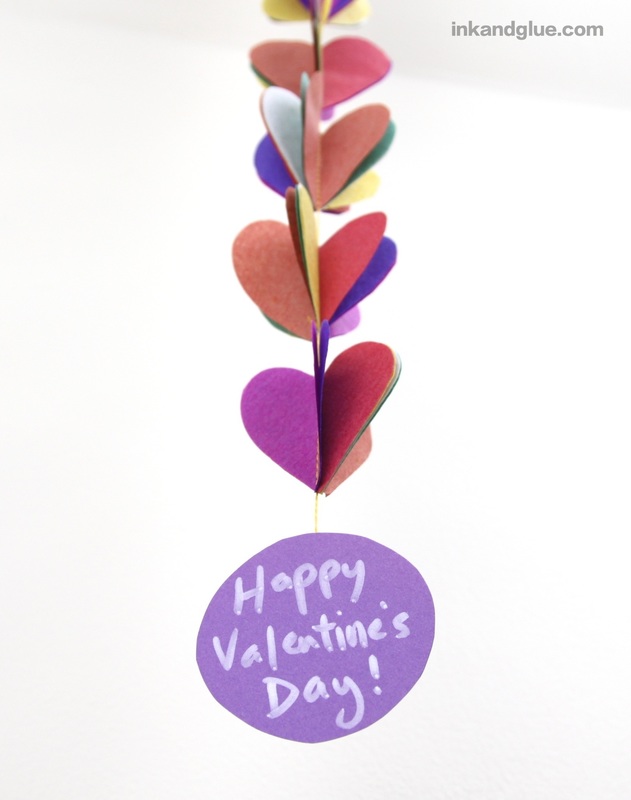
Display your garland where a loved one will see it, or carefully slip it into an envelope or a small box and present it as a gift. I hung up my garland using a single glue dot, but a tack would be more trustworthy.
Happy day to you, my Valentines!
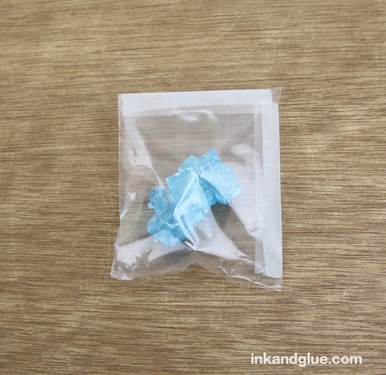
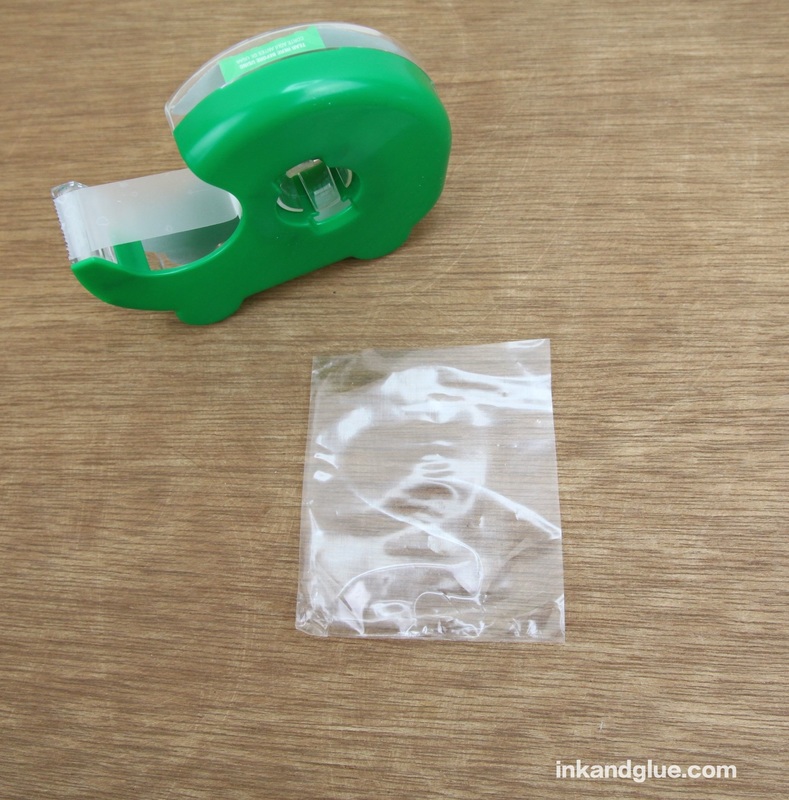
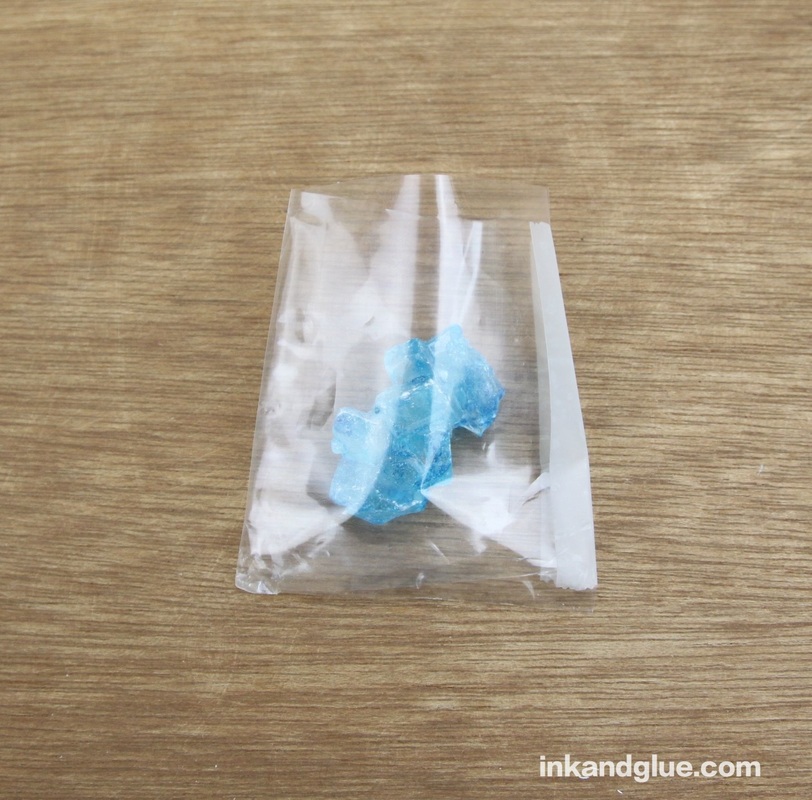
xo I am still a proud member of the rock candy fan club, so I'm back with two quick ways to use it in Valentine's Day cards. They are so easy, you could make them for an entire kids' class. Truth. The only real "crafting" part here involves making a small container for the candy. If you have access to a craft shop with an aisle of Wilton's products, you can buy small cellophane bags there that would look perfect (though the bags at that link are a bit larger than what I create below). If you don't, or would rather not make the trip or spend the money, here's the frugal version. Cut a rectangular corner piece from a plastic bag. Fold clear tape over one of the open edges, and add a hunk of rock candy. Then, fold tape over the remaining open side to seal it.
 Now to make the card part. I like a simple, one-sided postcard design, because is your child really going to write a heartfelt message inside each one of these? I don't think so. I thought of two ways to use the rock-ness of the candy in the message. I made up the names, and added a bit of a love triangle, for fun (not shown: Mary confessing her devotion to Emma). First up, a card for miners. Note the semi-on-purpose, child-like scrawl. The pickaxe is made from scraps of brown and silver paper, and the candy bag is simply taped to the back. 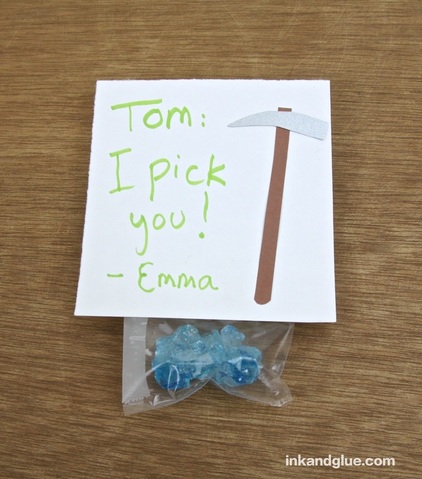 For kids who don't want a hint of romance in their cards, this one is perfect. (I must disclose that I asked my hip niece and nephew if kids still said things "rocked," and they were emphatic that they do not. Things might be swag, or "lit." At least they are in uber-hip Brooklyn.) An alternate message might be "You're ice cold," if you want to be a little mean. Or go the other way with "Facet: I love you!" (get it, 'face it, I love you'? I'll show myself out.) For this one, I used glue dots to adhere the candy and paper construction to a piece of scrapbook paper. 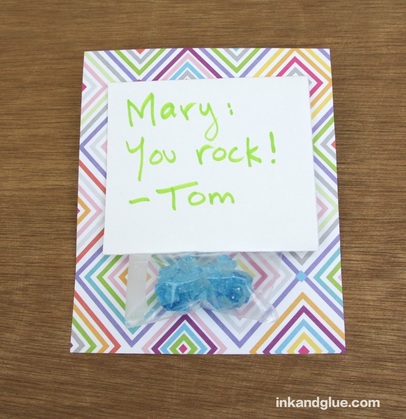 I hope you enjoy these, my sweet readers!
xo Been busy! Quick post! Here's an appropriately-pink (for Valentine's Day) party from a 1967 McCall's craft magazine! Oh my goodness it is pink! I did almost no color correction on this scan. 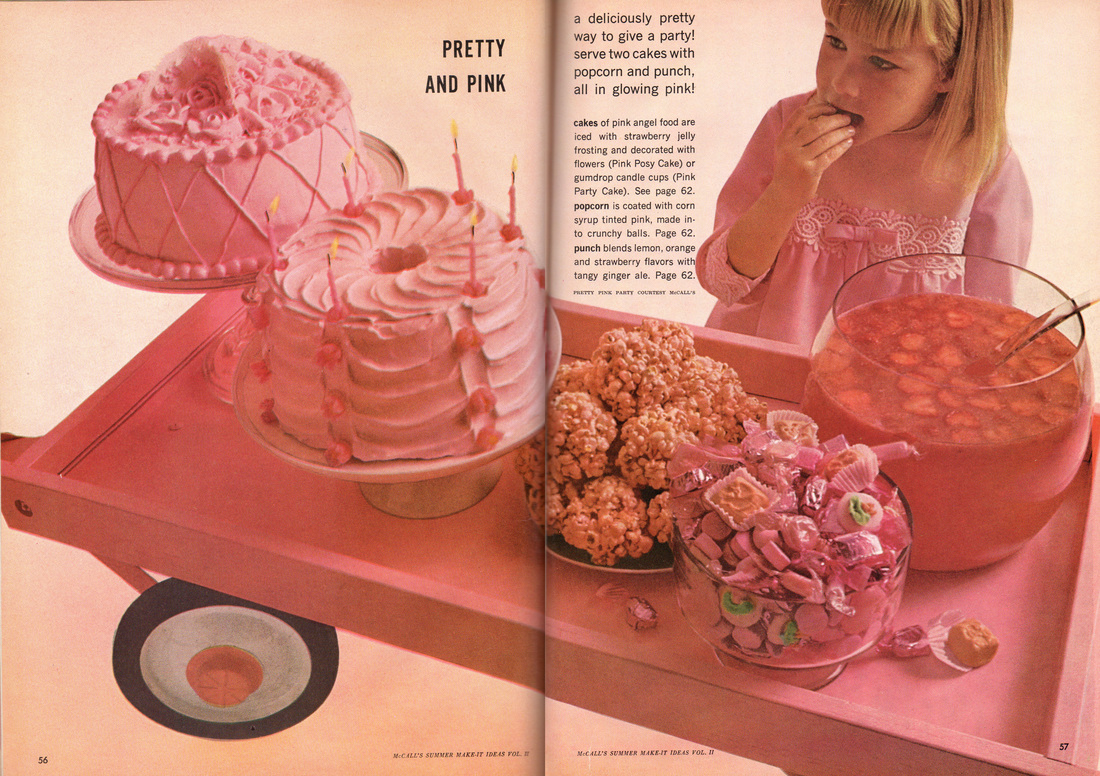 In case you find this photo mouth-watering, here are the recipes. They're actually not terrible sounding? Maybe I'm just hungry. 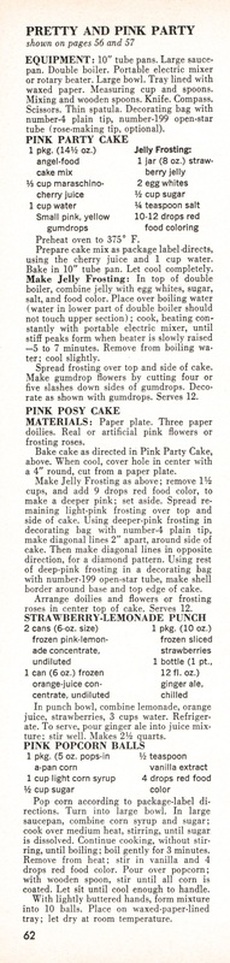 You're all pretty and pink to me, dear readers.
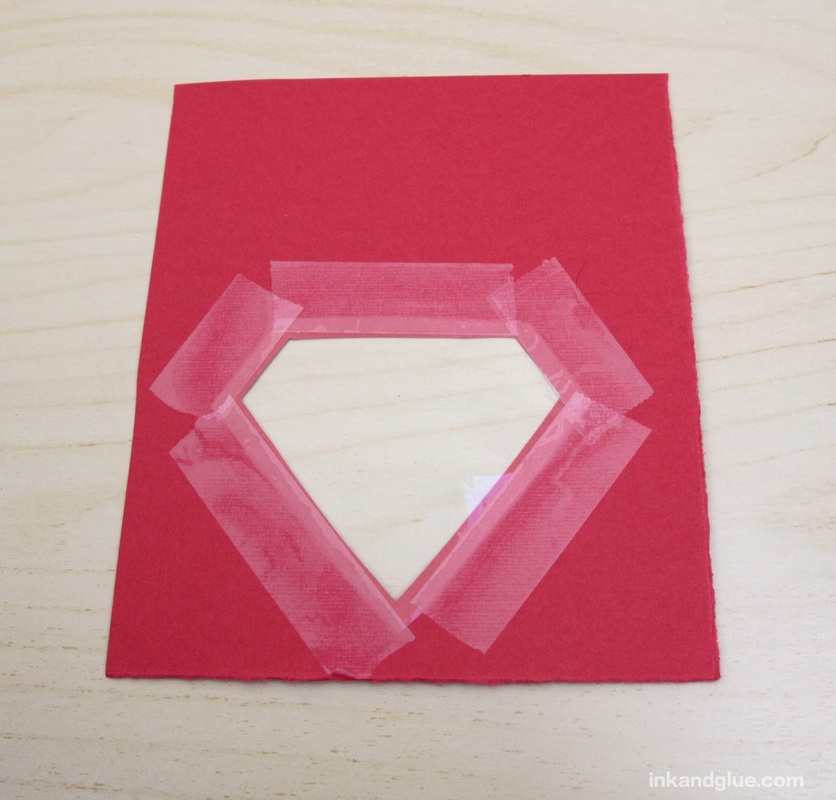
xo  This Valentine's Day card combines two things I love: rock candy, and letter stamps. I also enjoy a card with a window, but that's more of a 'strongly like' than a 'love.' Here's how you make it! First, fold and cut a sheet of card stock into quarters. You'll need two quarters for this card. (It's more of a postcard, really.)
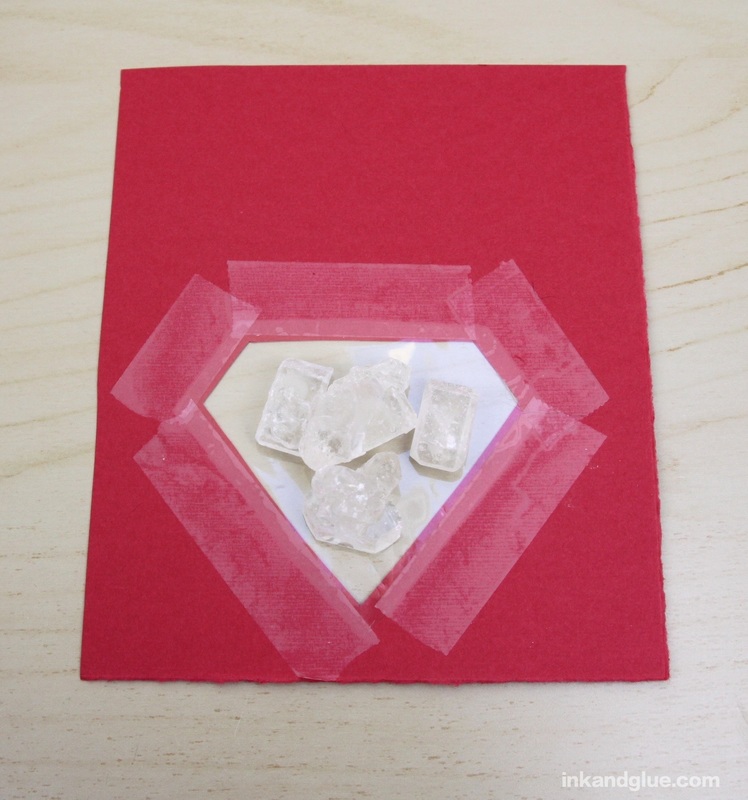
You know that diamond shape you cut from the center? Use it as a rough template to cut out a piece of cellophane or plastic bag that's about an eight- to a quarter-inch larger on each edge. Lay the plastic shape over the hole in the card, and tape it down.
 Place a few rock candy crystals in the middle. I have a local 'by the pound' candy shop that sells rock candy in bulk, but if you don't have something similar near you, Amazon has it, of course. Cut another piece of cellophane or plastic that's very roughly the shape of the diamond, but a half-inch or so bigger on every side.
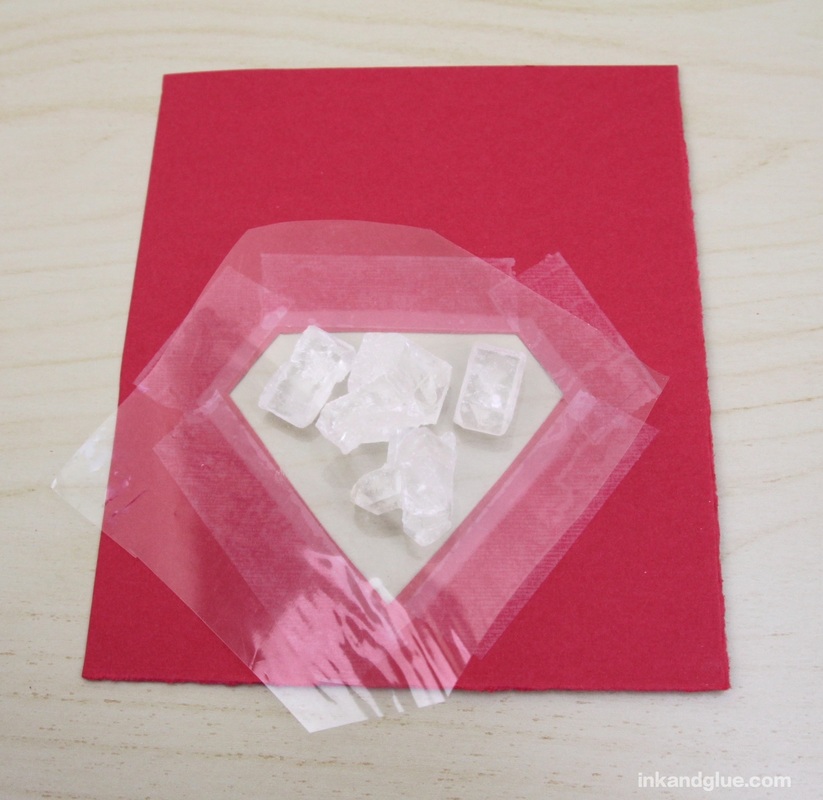
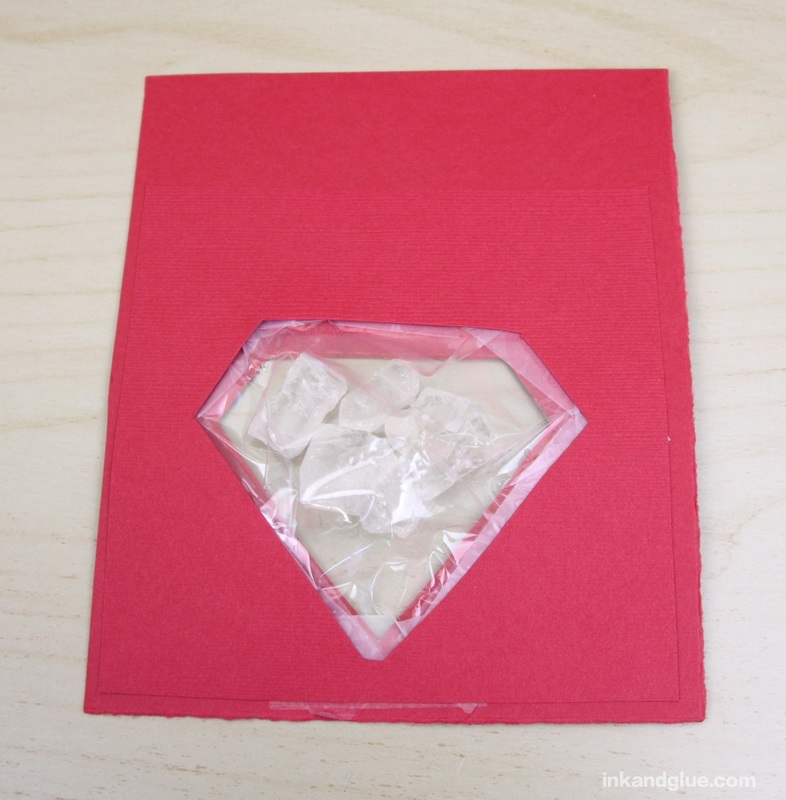
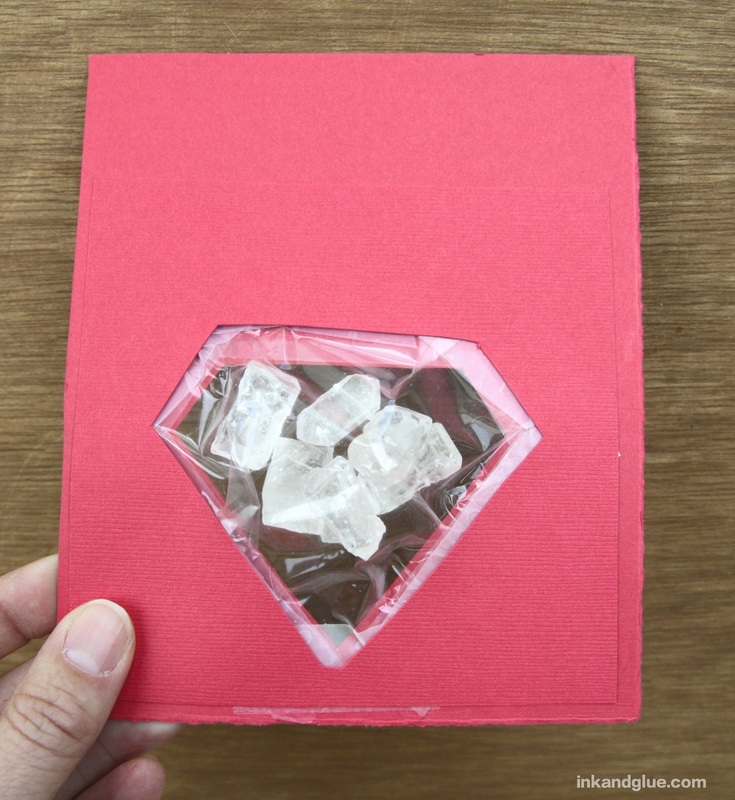
Tape down the top edges, folding and pleating the plastic as you go to fit around the bulk of the candy. Trim the plastic as needed before taping it in place. 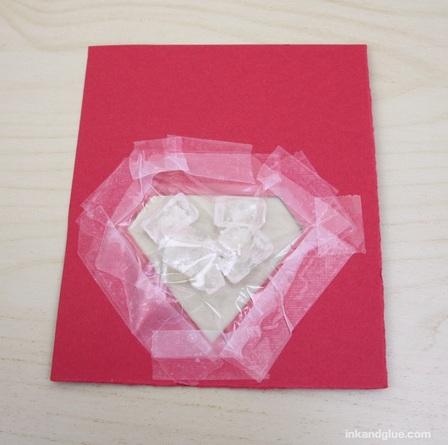 Here's how it should look from the front. 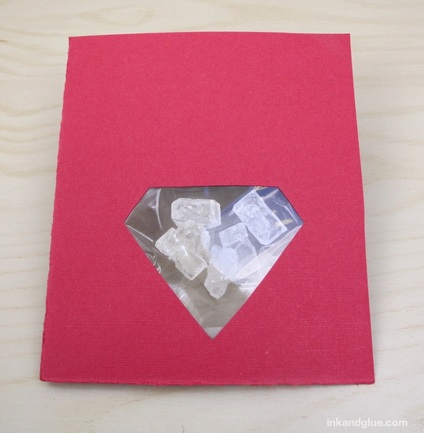 Now to add the text. I recommend trying this first on another piece of scrap paper so you get the spacing right. In general, I like to do lettering and stamping-type things on a separate piece of paper instead of right on the card, so that if you make a mistake, you can redo it without having to throw out the entire thing and start from scratch. I got these tiny letter stamps at Michael's, but there are about a gazillion different kinds out there. 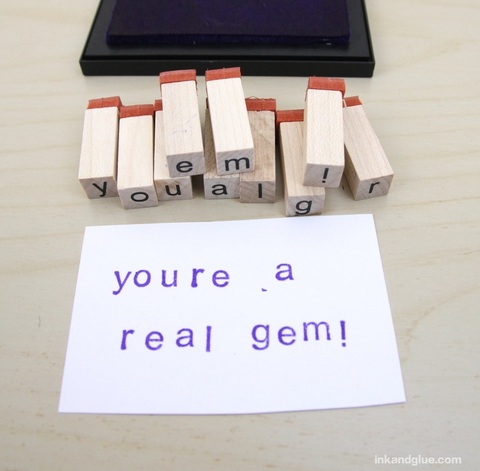 Note that the set doesn't come with an apostrophe (which makes editor-me sad) so I found a matching purple marker and added one later. Attach the final stamped message to the front with glue stick, then add a couple of pieces of washi tape, if you dig the look. I do. 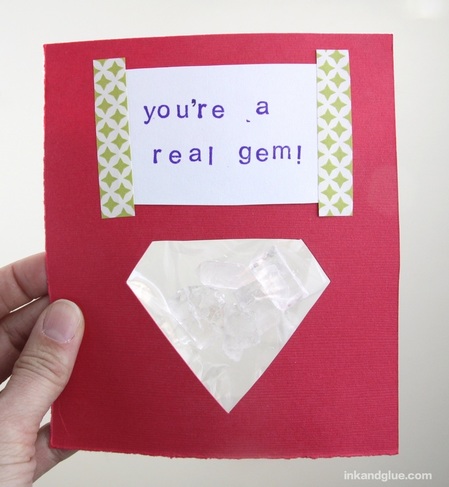 Your card is now complete, unless you wish to hide the unsightly backside with its layers of plastic and tape. You do? OK, here's how. Bring back the diamond shape you cut out from the card in the beginning, and another of the card stock quarters. Trace the diamond onto the card, but again add a border of about an eighth of an inch. Cut it out with a craft knife. (You want the opening in this card to be larger than the first so you won't be able to see it from the front.) Trim the top couple of inches from the top, just because you don't need it, and I'm paper-thrifty. 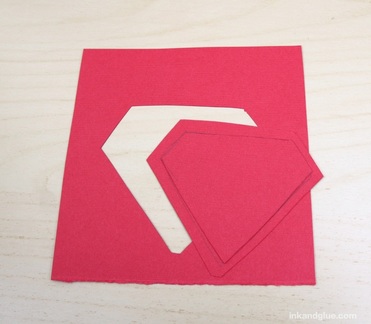 Lay this over the back of the candy-filled card, and trim anything that needs to be trimmed in order to be hidden from a frontal view. Attach it to the card with double-sided tape. Here are two views of the finished back:
Now you're actually done!
xo This Valentine's Day idea is perfect for a parent, or a kid in collusion with a parent, to leave as a surprise for another family member. It requires no artistic or crafting skill, though you do need to know how to make the shape of a heart. And how to recognize colors, I guess. That's it! 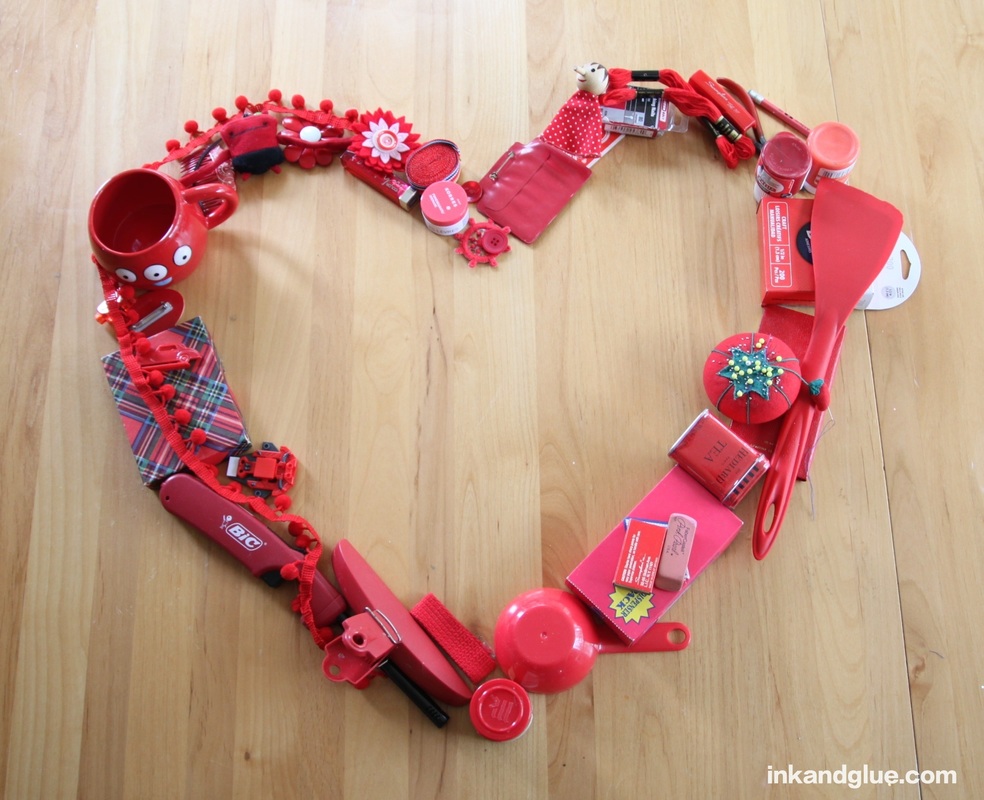 Step one: Go around the house with a bag or a basket and collect everything you can find that's red (or close to red). My collection includes a box of staples, a pin cushion, a box of small nails, a spatula, pom-pom trim, an old name tag, and a couple of pots of lip gloss. 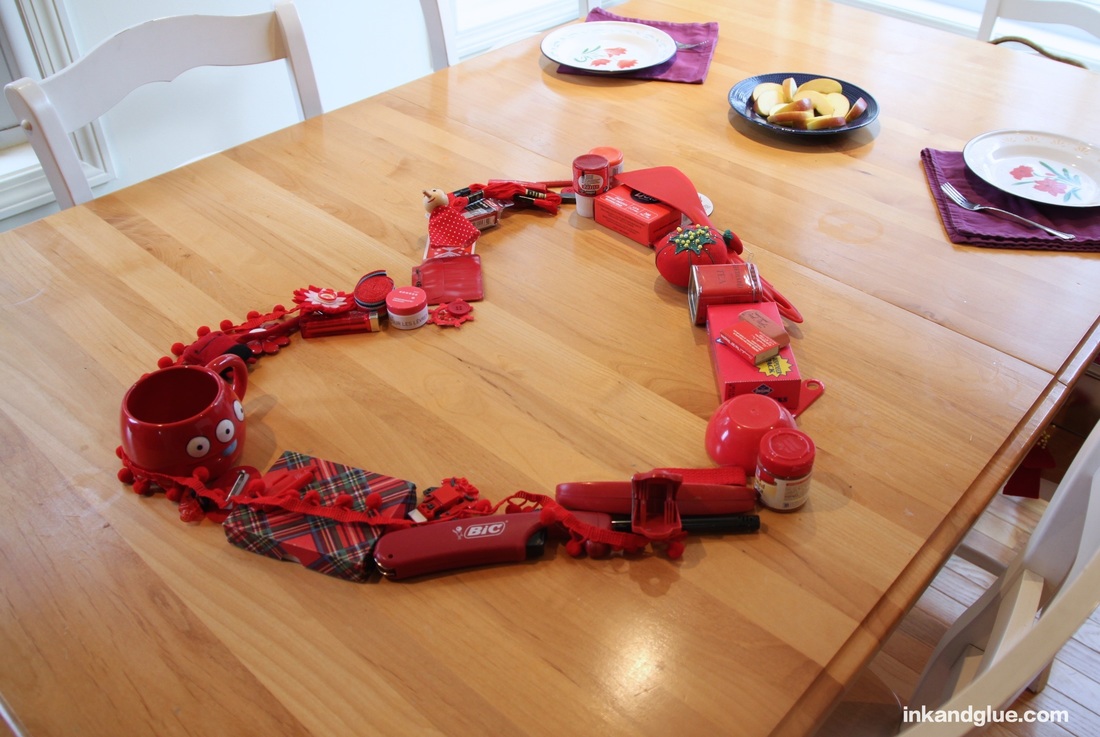 Step two: clear off half of your dining room or kitchen table (wherever you have the room AND where the heart will be noticed immediately) and arrange your red things in a heart. Done! Optional step three: Write a message on a paper heart and place it in the center. 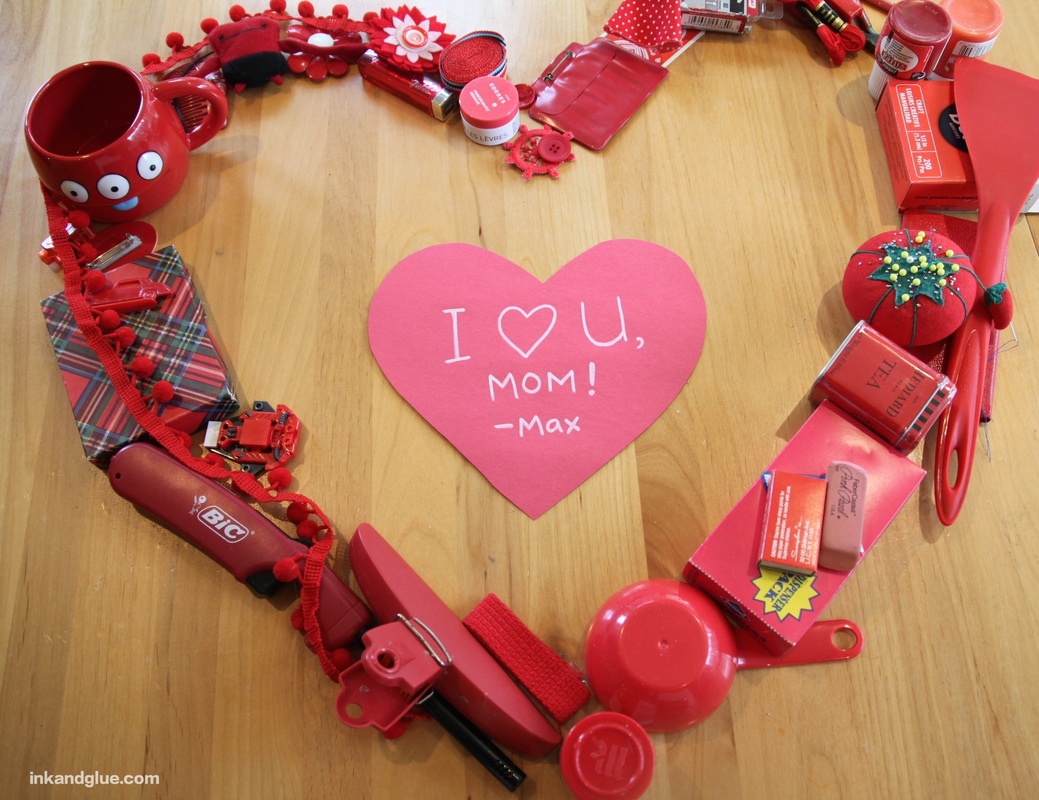 Mandatory step four: Within 24 hours of the heart's reveal, return all of the items back where they belong! Cleaning up afterwards is part of the gift. xo!
|
Categories
All
Archives
March 2017
AuthorI'm Debbie Way, an artist and writer who enjoys making things. |


 RSS Feed