|
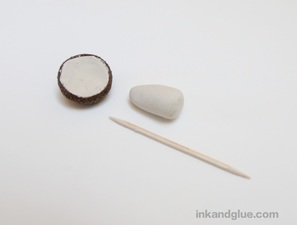
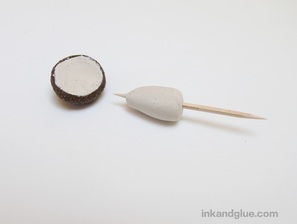
This weekend, I made my own little mushrooms to brighten up my oft-neglected houseplants. 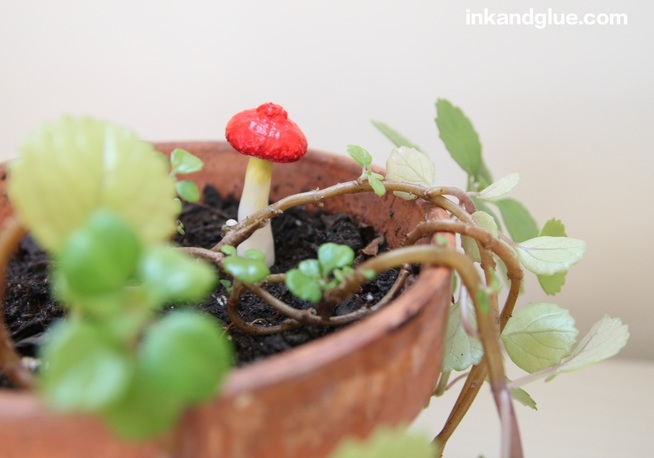 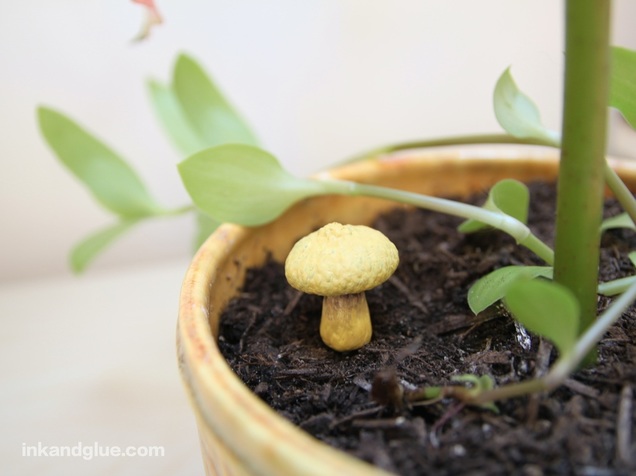 I've definitely had mushrooms on the mind. The woods where I live are full of all sizes, shapes, and colors of them. I love how they emerge so quickly from below the ground, pushing aside leaves and pine needles as they grow. I took these three photos just in the last week: 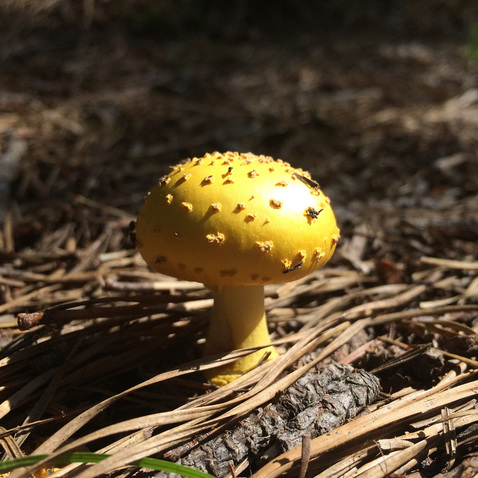 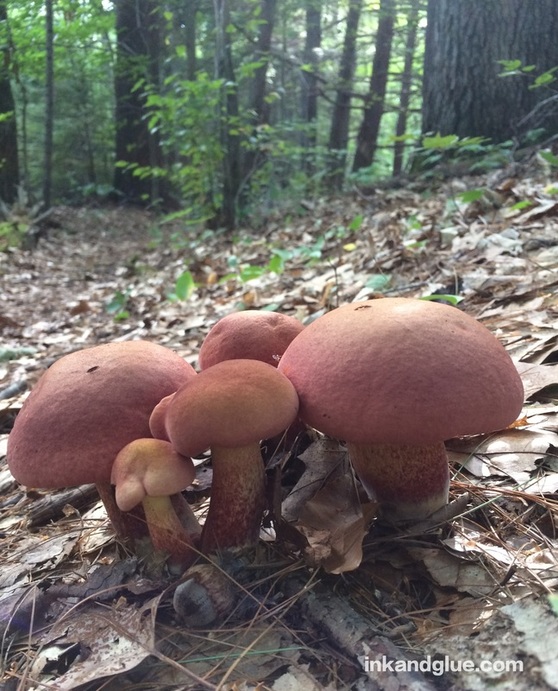 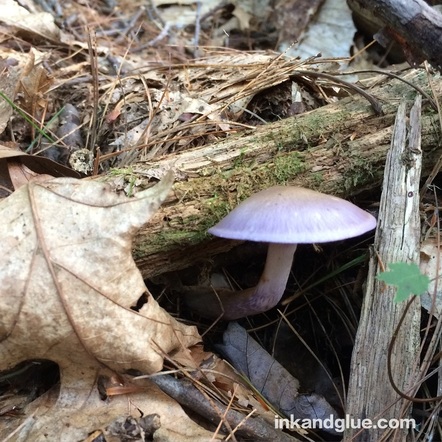 Today's project was inspired by these beautiful discoveries, and by the acorns which have been falling from the oaks the last few weeks. Pick up a few caps the next time you're walking in the woods or a park, and you're on your way to making these sweet mini-mushrooms. They're meant to be inserted into the soil of a houseplant, but if you'd rather have them sit on their own, keep reading for alternate directions. First, collect a few brown acorn caps. (If the caps are fresh and green, they'll shrink and possibly crack.) If the cap has any kind of a stem at the top, use a pair of scissors to lop it off. Then, choose a modeling material. I made this craft with both white Sculpey (though any bake-able polymer clay will do) and plain Paperclay. The main benefit to the Sculpey is that you can paint your mushroom soon after you bake it. Paperclay is a bit easier and softer to handle and sculpt, but you'll have to wait at least 24 hours (and sometimes longer) for the clay to dry before painting, and waiting is difficult for antsy kids or impatient grown-ups. Using either modeling clay, start by pinching off a blob and pressing it into the underside of a clean, dry acorn cap. 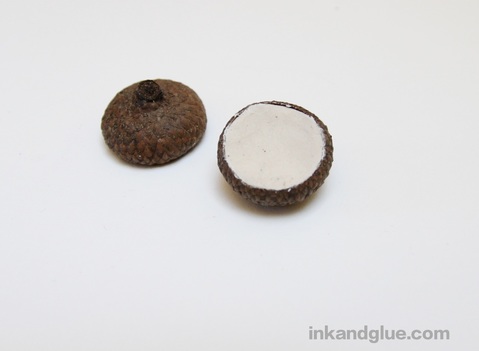 Next, sculpt the stem. Roll a piece of clay into a fat log shape. Insert a toothpick through the stem piece. Leave about a quarter inch of the pick sticking out from the top of the stem. Gently press the sides of the stem so the toothpick is gripped tightly inside.
Next, simply insert the stem into the cap. This is a Paperclay mushroom, FYI: 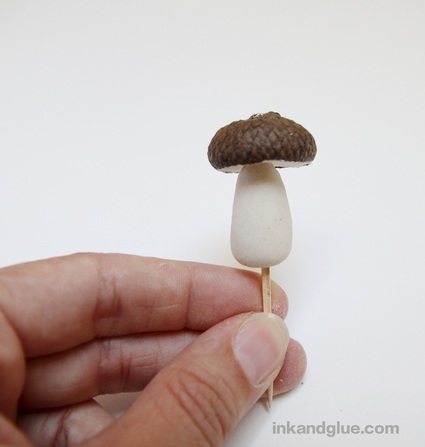 [Alternate, free-standing mushroom version: Use strong scissors to trim the toothpick at the base of the stem so it's flush with the clay. Smooth clay over the toothpick end. Set the mushroom upright, and adjust the position of the cap and stem so it can sit without help. If using Paperclay, let it dry as it sits. If using Sculpey, carefully lay it on its side to bake. Don't move it again until it's cool; the clay softens when baking.] 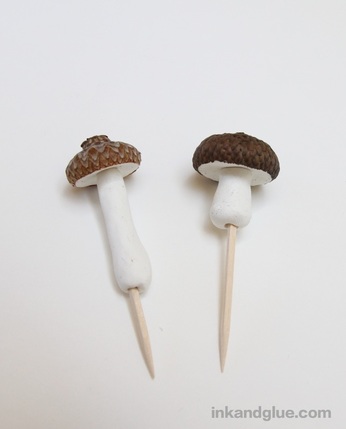 Here are two mushrooms I sculpted out of Sculpey. To bake them, lay them on their sides on a foil-covered baking pan. Don't worry: the temperature at which the clay bakes isn't high enough to scorch the toothpicks or acorn caps. Once your mushrooms are baked and/or dry, paint them as you wish with acrylic craft paint. [A tip: You may end up covering the entire mushroom with paint, only to realize you have no safe way to set it down to dry. Not that I would ever do such a thing. *ahem.* Try taping the toothpick end of the mushroom to the side of a coffee mug, with the mushroom jutting above the mug's rim.] 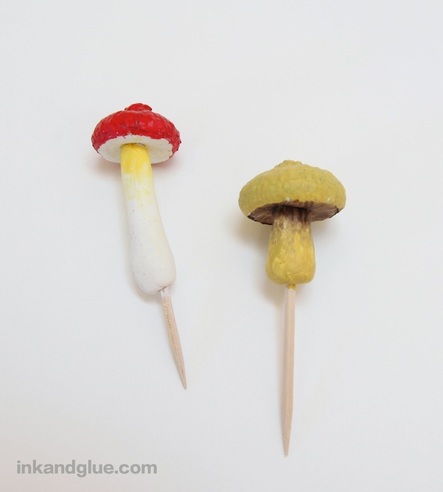 Here's another tip, though feel free to ignore it, especially if you're making stuff with kids: For the nicest, most even, and brightest results, paint the entire thing with white paint first. Let it dry, then paint on the color. Here's another angle that better shows how I painted the undersides of mine. Again, I went fancy, because sometimes I do that. 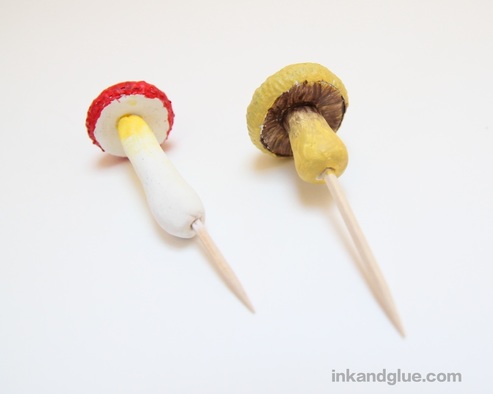 If you make acorn-cap mushrooms, I'd love to see how they turned out!
xo Comments are closed.
|
Categories
All
Archives
March 2017
AuthorI'm Debbie Way, an artist and writer who enjoys making things. |
 RSS Feed