|
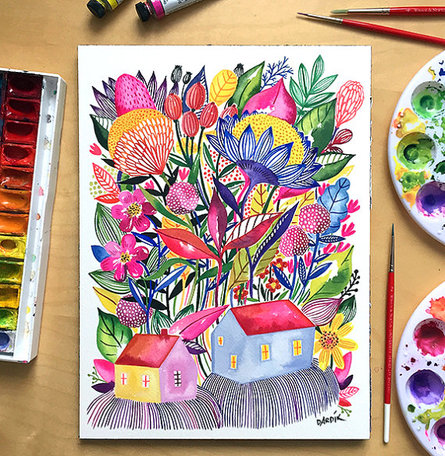
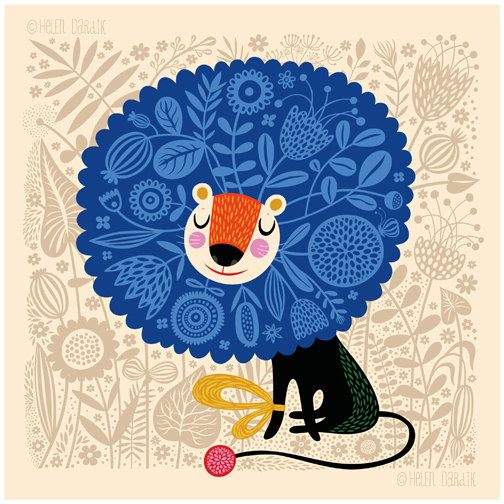
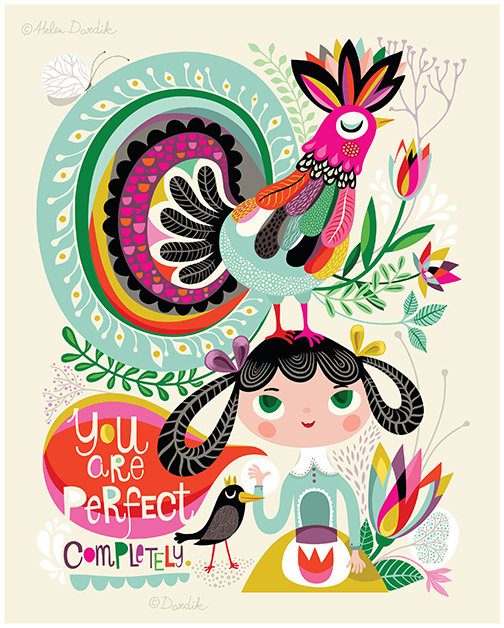
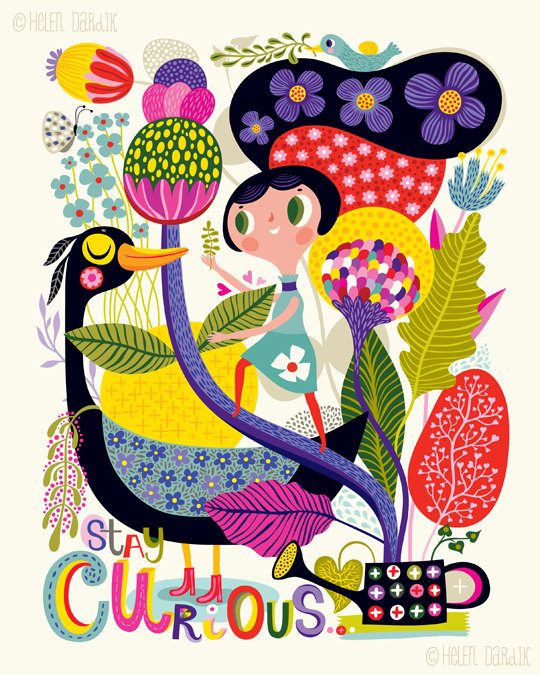
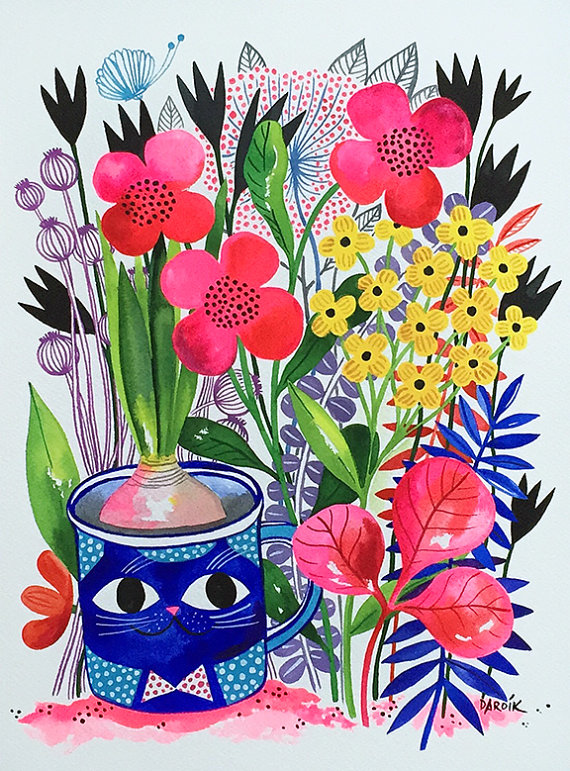
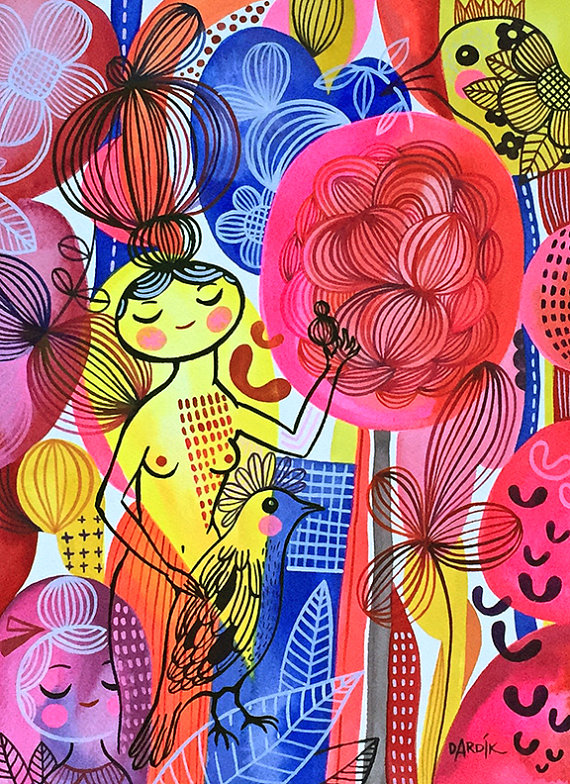
FamilyFun Magazine's art department commissioned some wonderful work from illustrator Helen Dardik when I was there. It turns out she has prints and original art that regular people can buy, too! And I do mean "regular," not super wealthy; her prints are only $20 or $25. Here are four of my many favorites of her prints. Click on each image to go to Helen's Etsy shop's page.
Helen also sells original watercolors that are just delicious. They're also affordable, with most in the $90 to $120 range.
 I am also enjoying exploring Helen's Etsy finds, which are mainly mid-century-modern-ish, Scandinavian design pieces that I totally adore. And she has a blog, Orange you Lucky.
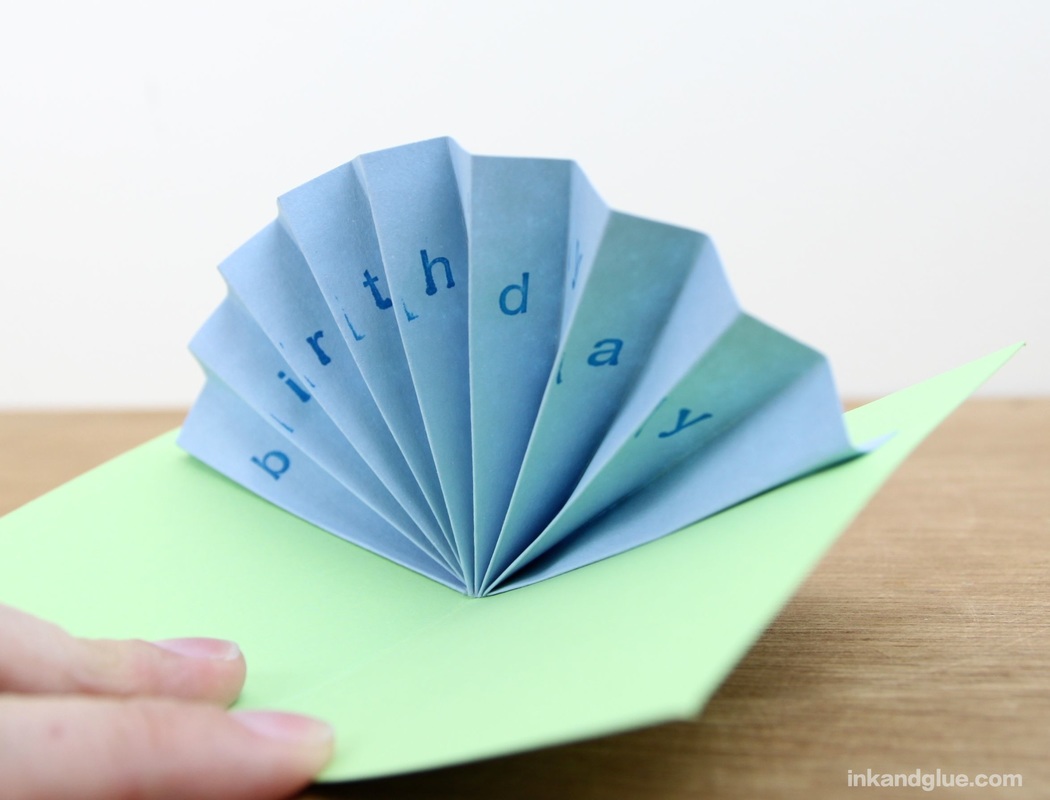
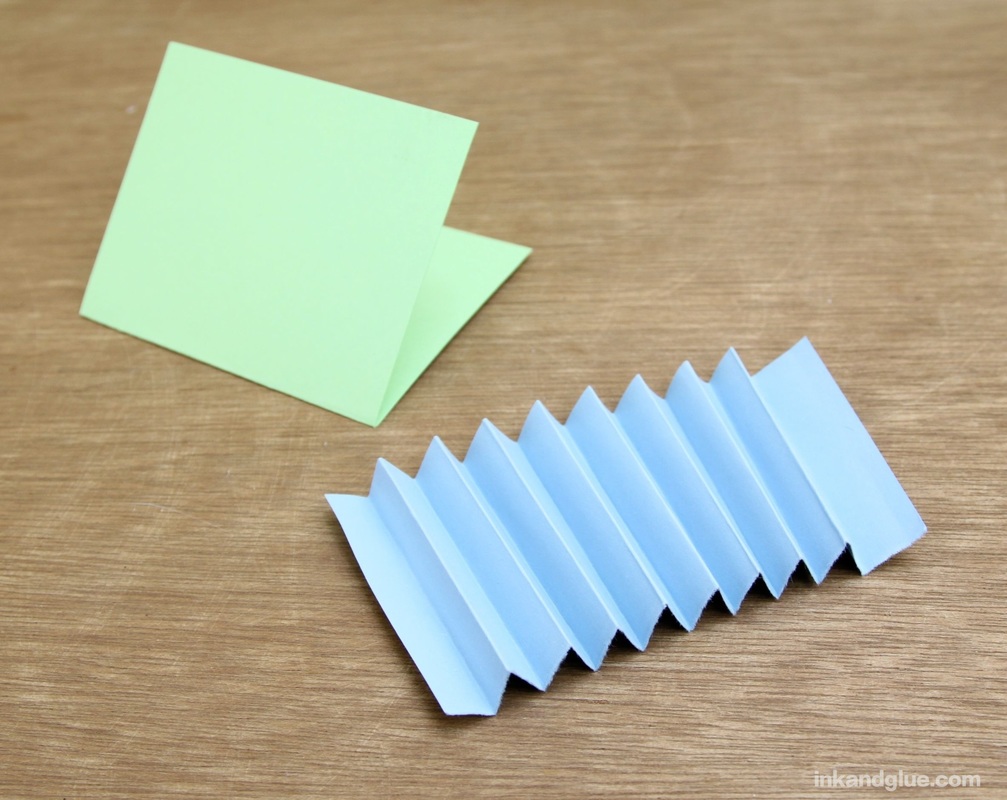
Go get some Helen into your life! xo "Lenticular" might not be the right word for it, but just like those ribbed pictures, the message in this card changes as you angle it this way and that.
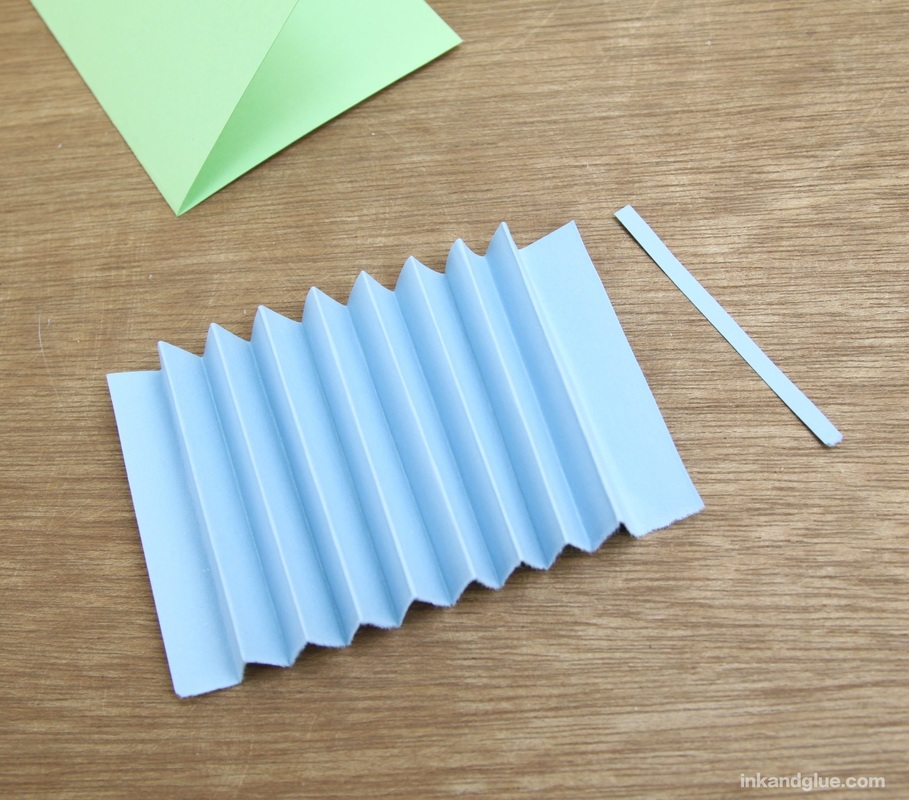
Neat, no? Here's how you do it. Start with a small card (I cut a rectangle from a piece of card stock and folded it in half). Decorate the outside of the card (I didn't do that for this demo, to keep it simple). Cut a skinny rectangle (about 8.5 by 2.5 inches) from a lighter-weight piece of paper; I used construction paper. 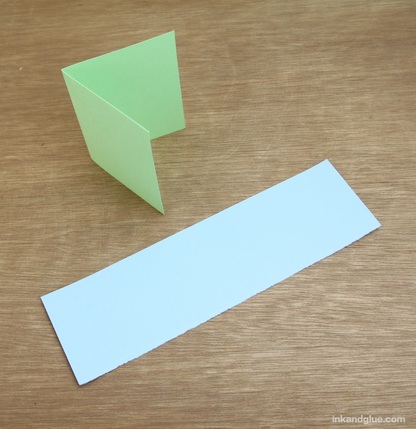 Accordian-fold the skinny rectangle, with each fold about a quarter- or third-inch wide. You'll want your last fold to result in a panel that's on the same "side" as the first one, like an M or a W with way too many peaks and valleys. If you end up with an N instead, trim off the final panel to get an M/W. My final flap was a bit too wide, so I trimmed it. No biggie.
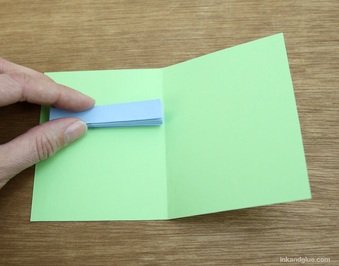
Note that you should make sure you end up with enough panels to spell out your chosen words. (In my case, I could have used another panel or two; as you'll see later, the "b" in birthday is too close to the glued-down edge, making it too visible when the "happy" is in view.) Now, add letters! I used my fun alphabet stamps, but of course you can hand-write 'em. Starting with the third or fourth panel, stamp/write the letters of your first word on every other panel. 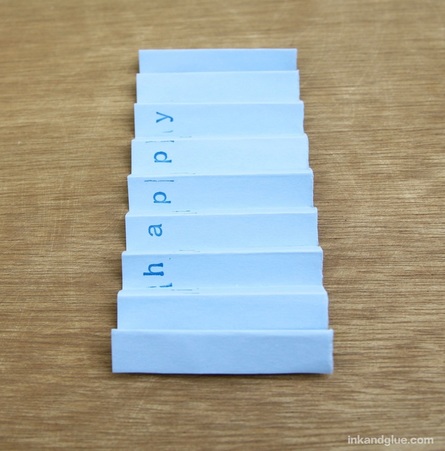 Let the ink dry, then stamp/write the letters of your second word on the alternate panels. 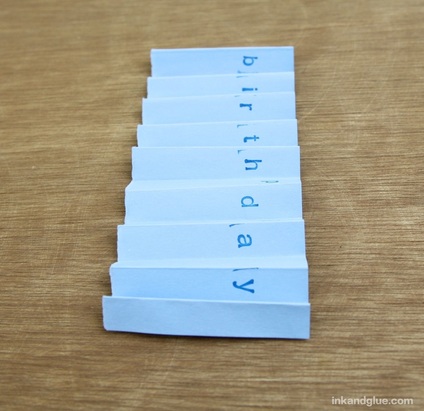 Head-on, your accordion will look something like this: 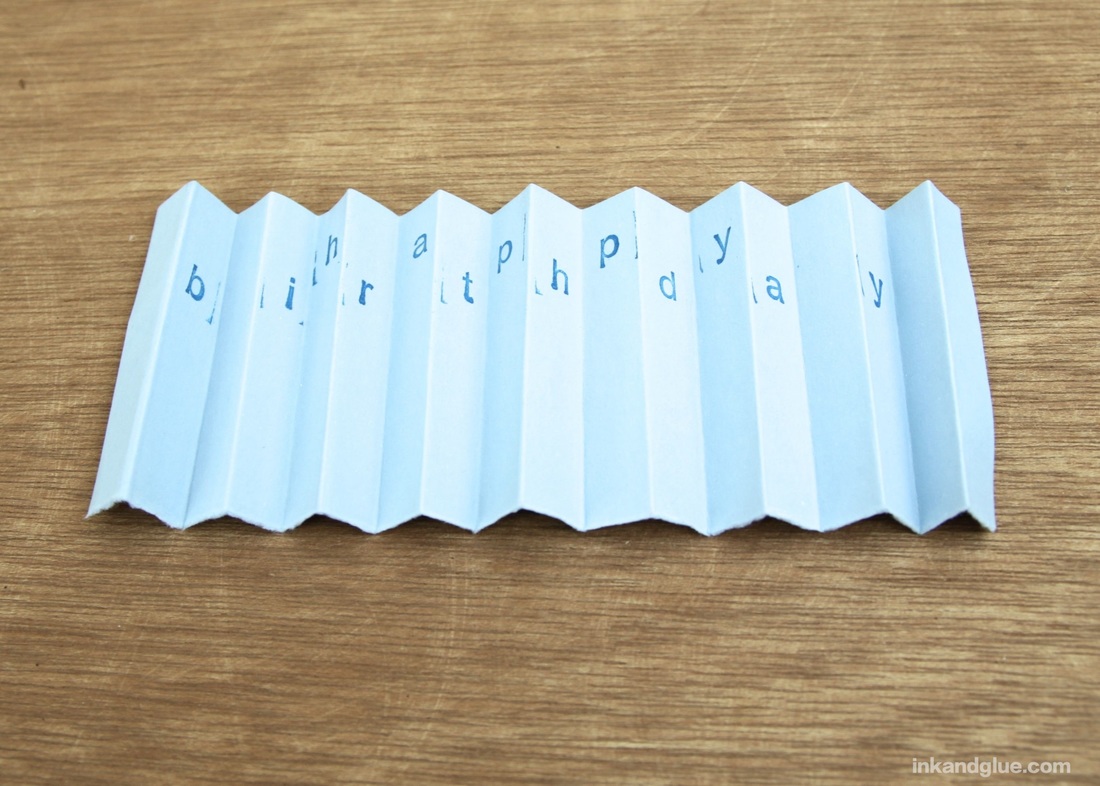 Now fold the accordion back up into a tight rectangle. Spread glue on one flap (the one near the beginning of the words) and press it against the inside left of the card, with the right side of the accordion very close to (but not in) the center fold. Add glue to the flap that's now on top, and carefully close the card. Press for several seconds to adhere.
That's all there is to it!
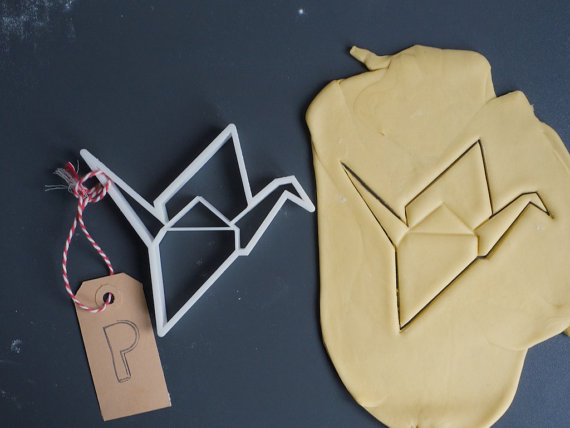
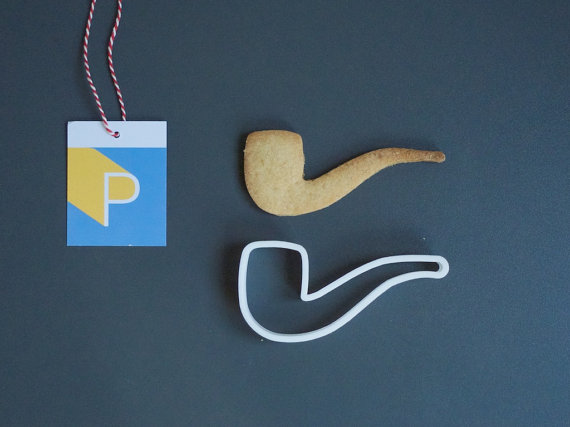
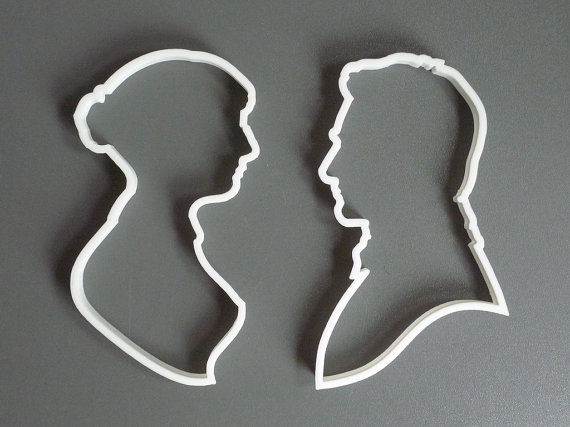
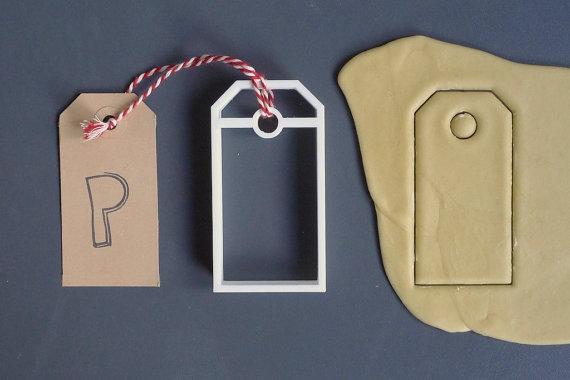
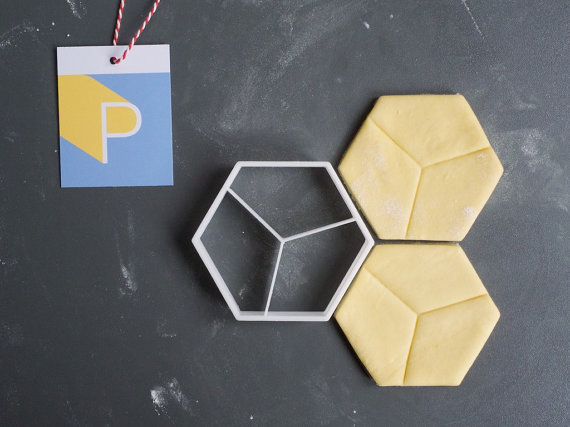
xo I love baking, especially in the winter. I am usually too lazy to do drop or cut-out cookies, but I might make an exception if I had cookie cutters like these from Printmeneer. (As always, click on the image to go to that product's shop page.)
They're made in the Netherlands, on a hand-built 3D printer that's run on solar power. Pretty neato. My favorite might be the tangram, so you can play with your food! There are a bunch of geometric cutters that can fit together, too, if you want to try making a 3D cookie assembly.
They aren't super cheap, and you have to hand-wash them. But just look at how cool they are! You can even get a letter set in Helvetica font (of the letters in "helvetica" so you can spell tea, live, velvet, cat, hella, chat...). 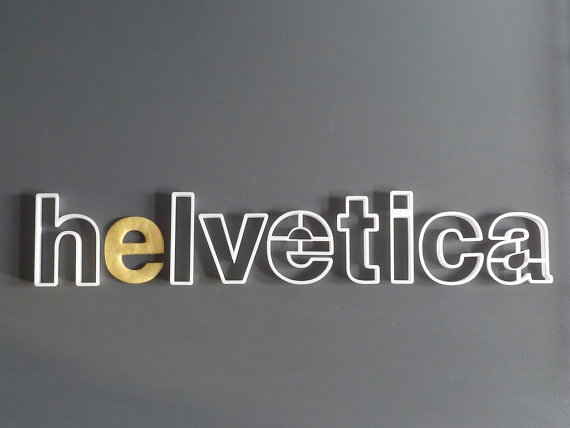 Super cool!
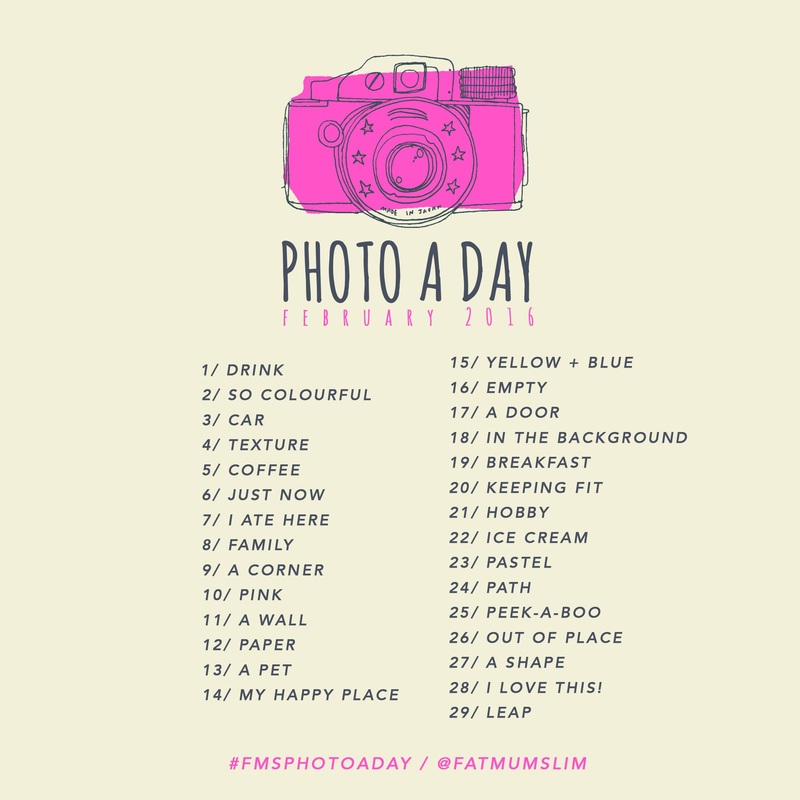
xo I confess, I was an art major in college. Like, Fine Arts. Not at all like the kid-friendly crafts I've been working on lately. I am mostly happy with the state of things right now, but I do sometimes wish I had the time to use my creative brain in a slightly different, more inward, more self-pleasing way. Enter the Daily Prompt. There are many daily creative prompt calendars out there to choose from. The two I've liked enough to actually follow through on (and can, therefore, recommend for fun, interesting, non-cheesy prompts) are FatMum Slim's Photo-A-Day, and TinkerLab's Daily Sketchbook Challenge. The idea is simple: Each day, take a photo or make a sketch (or painting, or collage) that's prompted by the day's word or phrase. If you want to share it, post the image on Instagram and tag it with the appropriate tag. You can then search the tag to see how other people interpreted the prompt.
I like to consider doing things like these a form of self-care. The prompters encourage participants to have fun, don't stress, and try not to judge your work too harshly. I might have added that last one. I just started doing the SketchBook Challenge, and I don't care that I'm jumping in mid-month. This is not a contest. Today's prompt is Rainbow, which got me to pull out a box of oil pastels I haven't touched since high school. (I have a love/mostly-hate relationship with oil pastels.) Then I did some old-fashioned collaging and hand-tearing of shapes, and came up with this idyllic scene you see below. 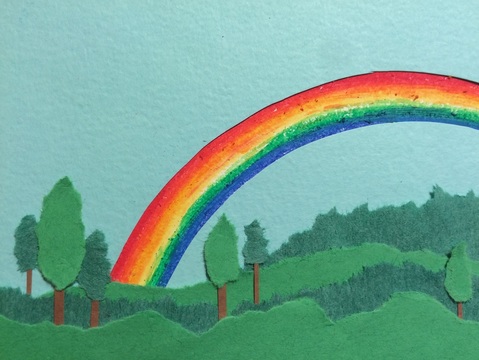 Is it a little obvious? Sure. (Did I take this photo with my iPhone, lit by just a table lamp? Naturally.) But in making it, I spent 15 minutes quietly playing around with art stuff with no expectations or self-judgment. That's a good thing for me to practice doing. By the way, here's what the above artwork looks like, uncropped. 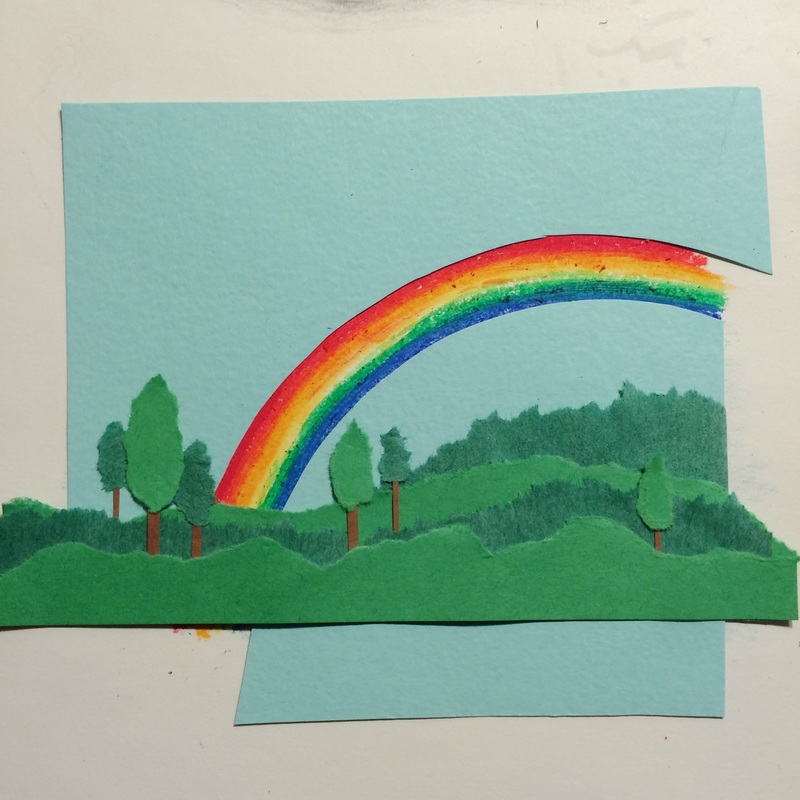 I kind of like this fourth-wall-breaking image better than the cropped version. It certainly has more directions in which I could take it. So now I have a totally new process I can explore. Bonus!
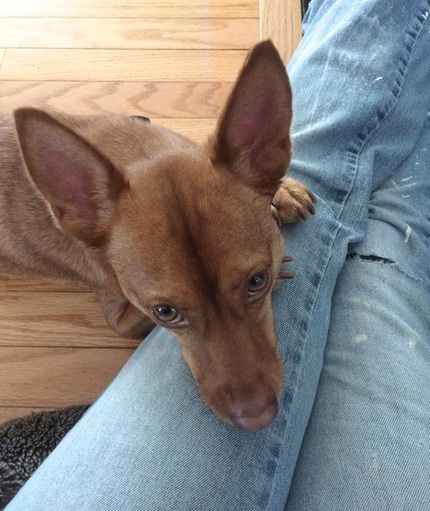
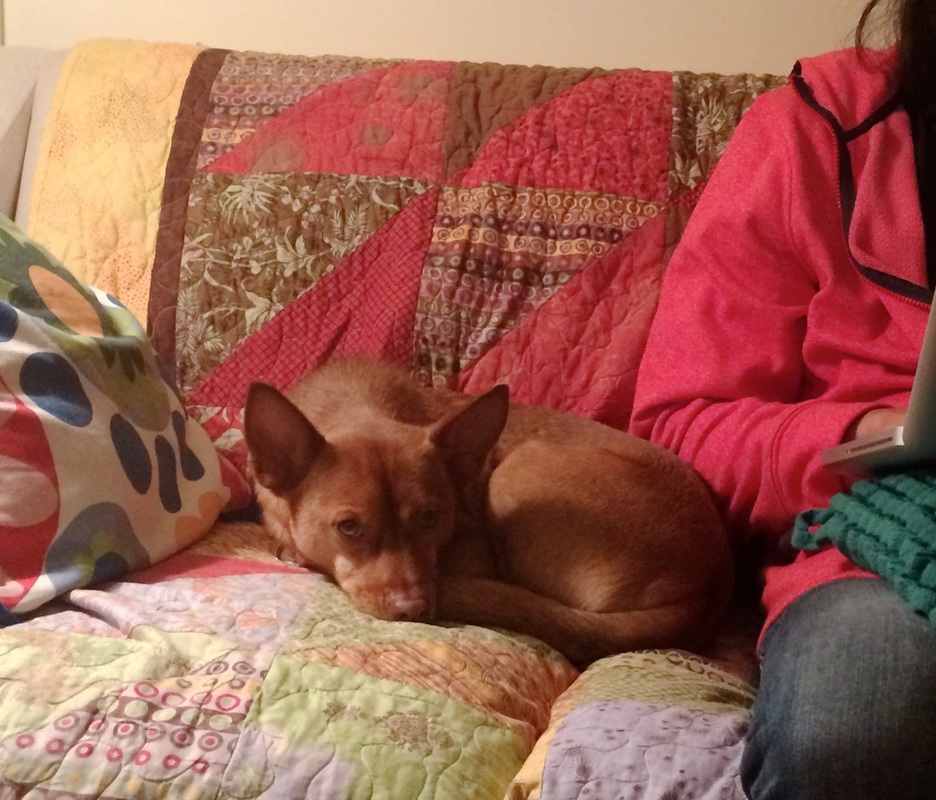
Have you tried any daily creative prompts? Which ones did you like? Let me know below! xo  Here's a nice action shot of Franklin trotting across a plank bridge in Montague, MA yesterday. Bonus shot: While taking a shot of interesting ice on the same stream shown above, I got photo bombed. 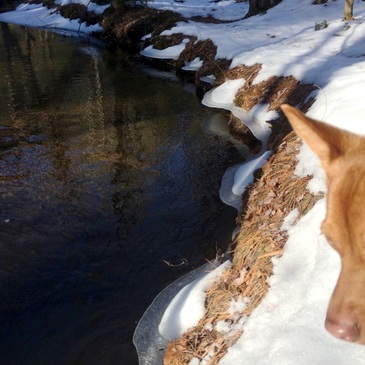 xo!
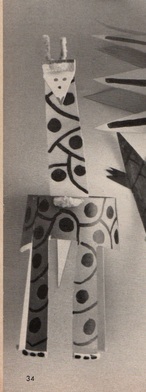
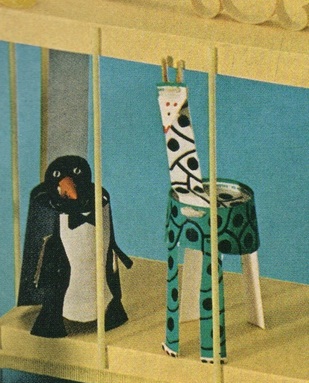
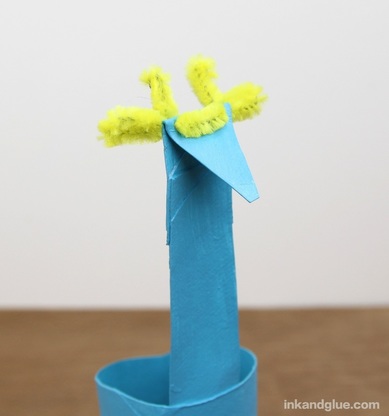
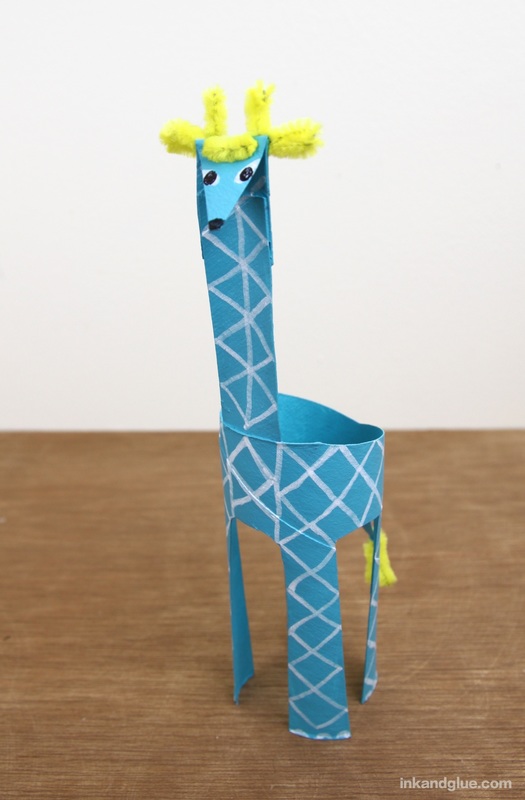 Remember yesterday? I am fulfilling my blue giraffe promise! This is another tube take on a cup-based craft from a magazine published in 1966. To refresh your memory, here's the original giraffe.
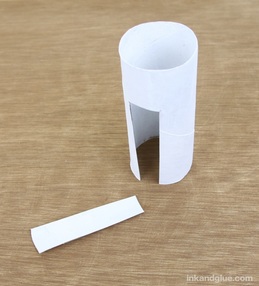
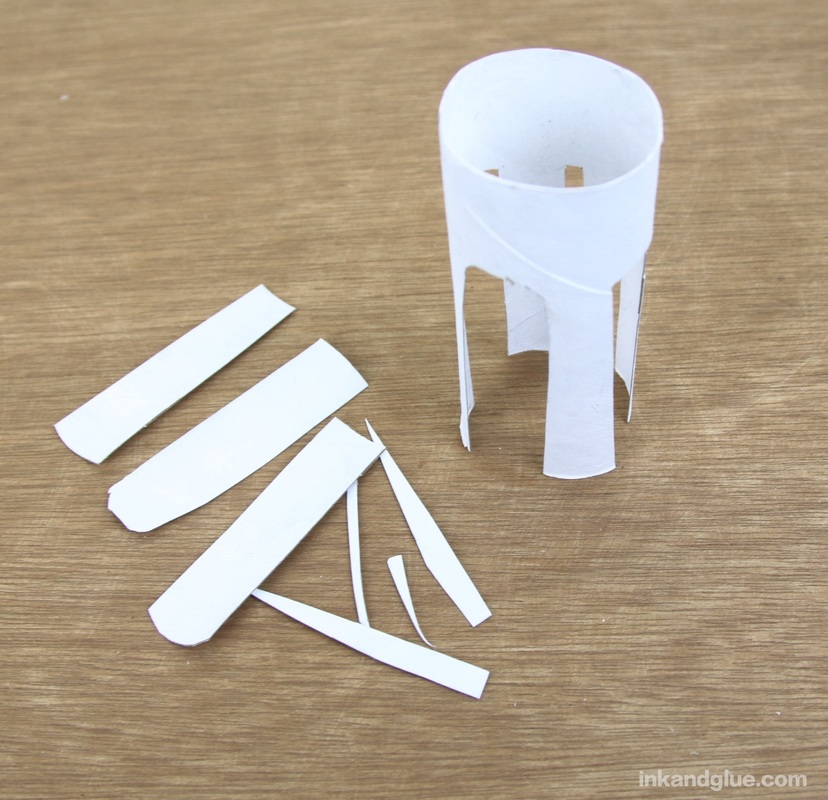
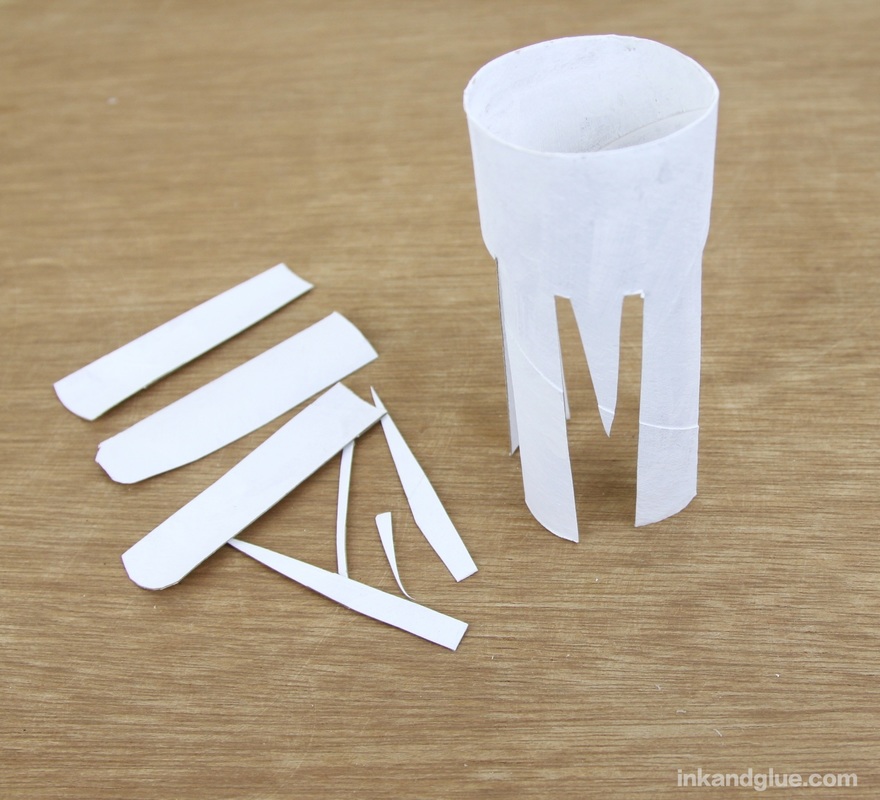
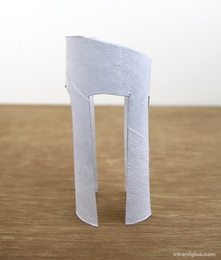
I have some problems with the styling of this, so I tried to make one more to my liking. Consider it an homage, or a tribute to its 1966 ancestor. Here's how to make it. Start with a cardboard TP tube, painted white inside and out. (The painting is optional, but it makes the final coat of color much brighter.)
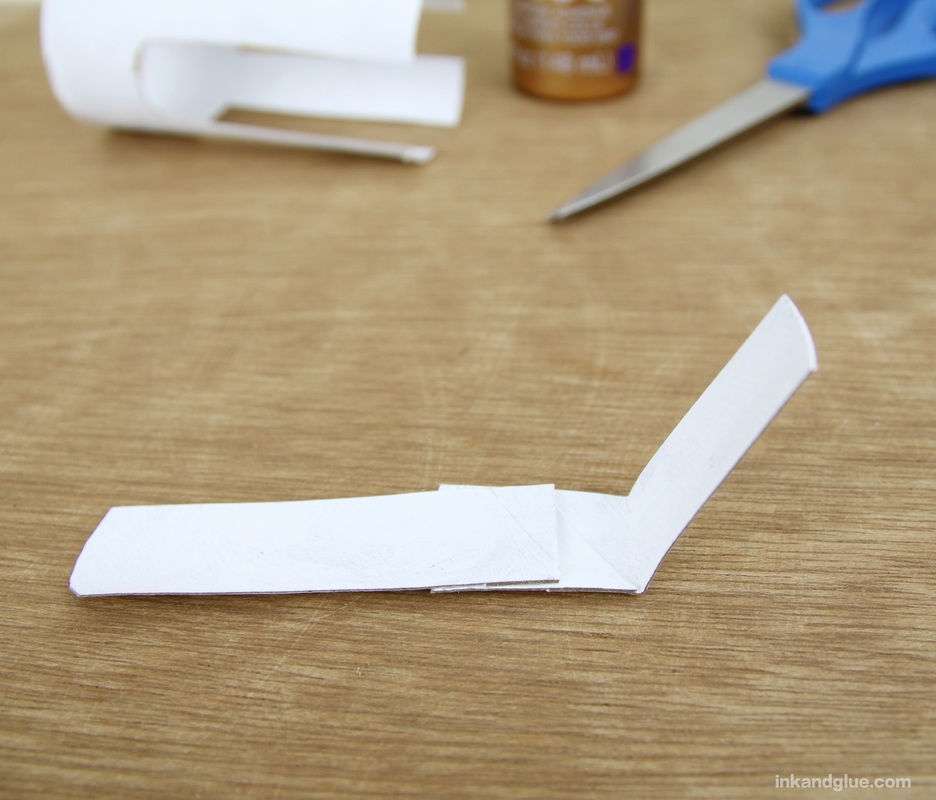
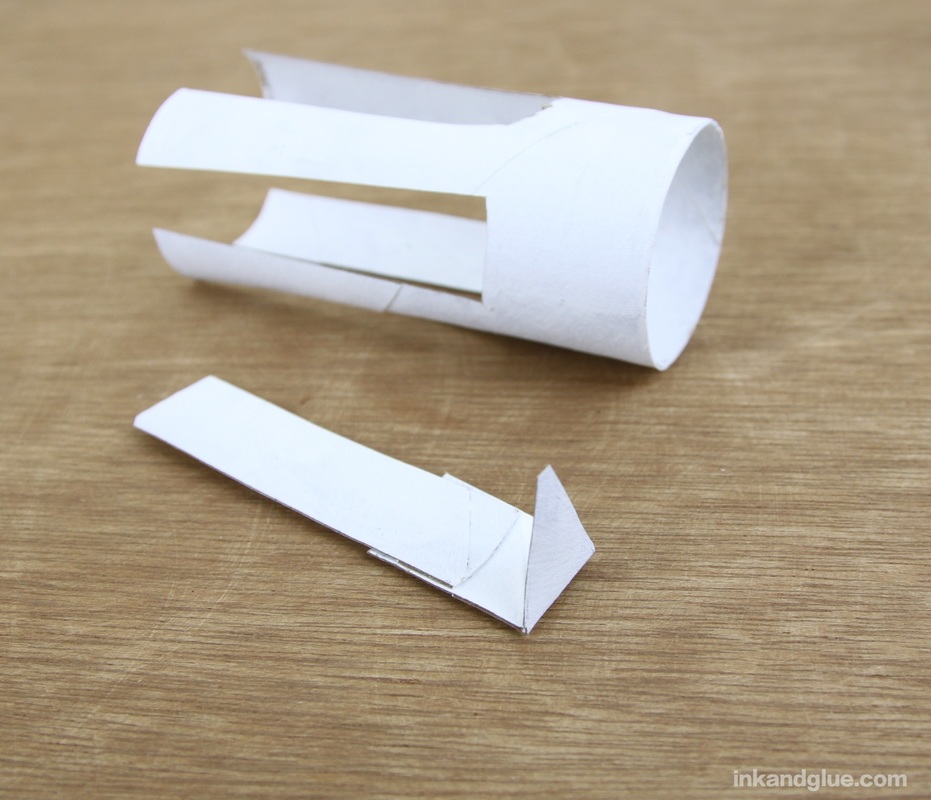
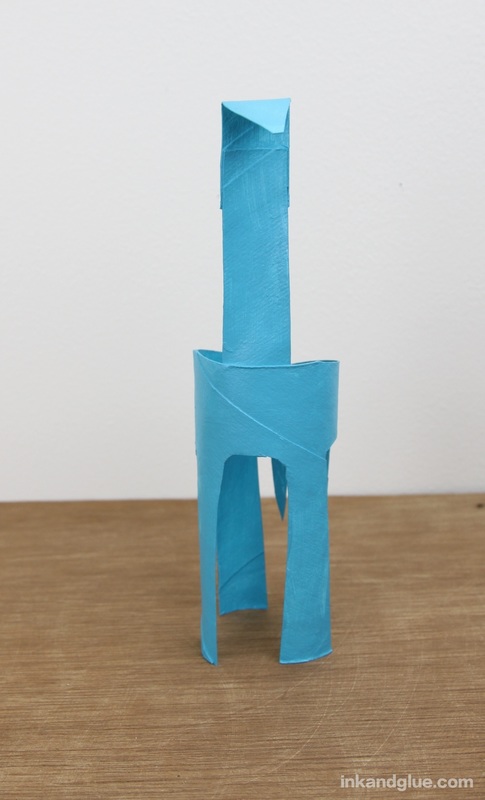
To make the neck and head, take two of the rectangles you just cut out, and overlap one with another. Secure them with tacky glue, then trim the edges so they're even. Fold up one end, and cut it into a rectangular head shape.
Glue the neck to the body with tacky glue, let it dry, and then paint the cardboard all over with acrylic paint. I used turquoise-ish blue, which is what the 1966 instructions called for.
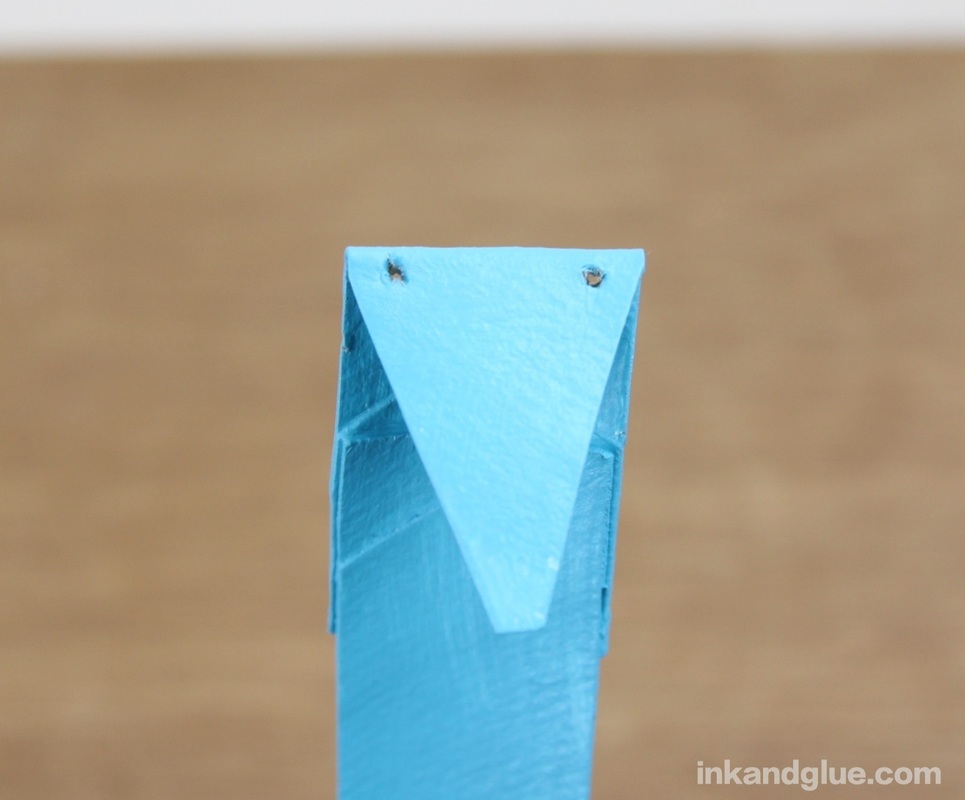
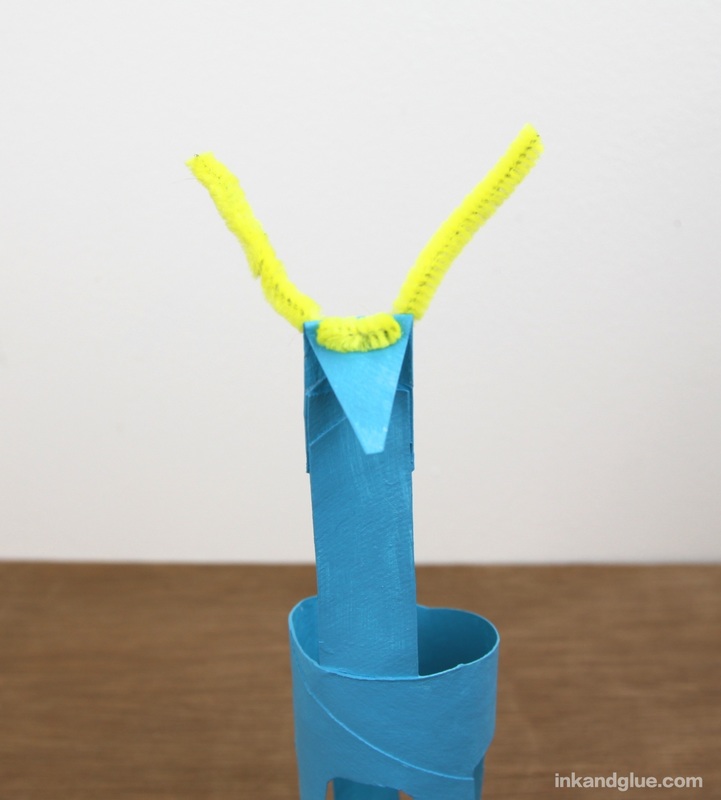
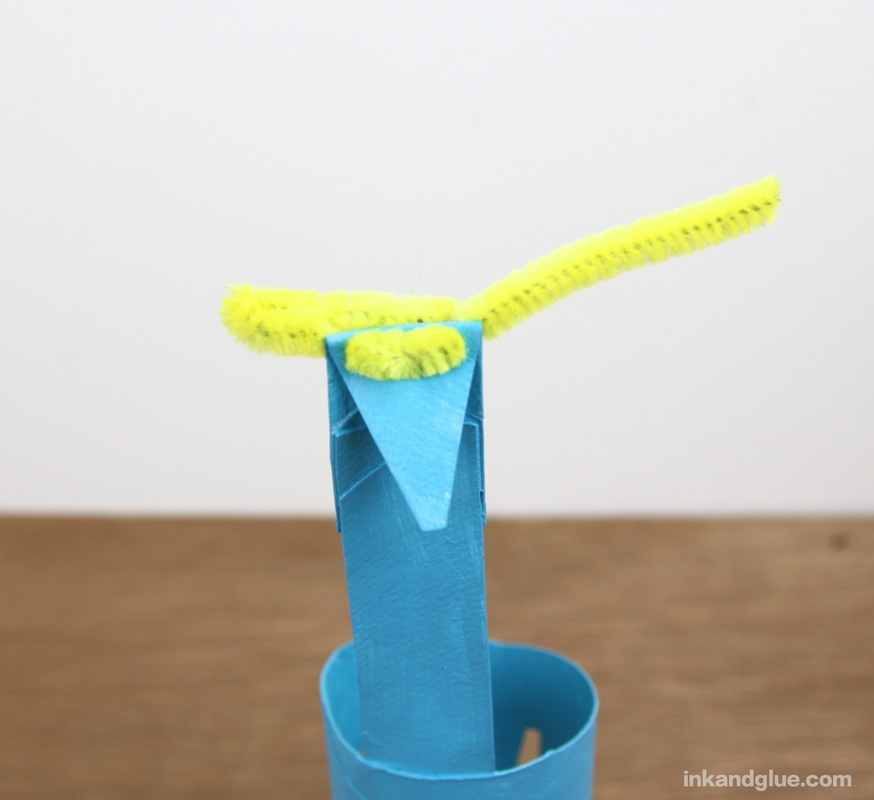
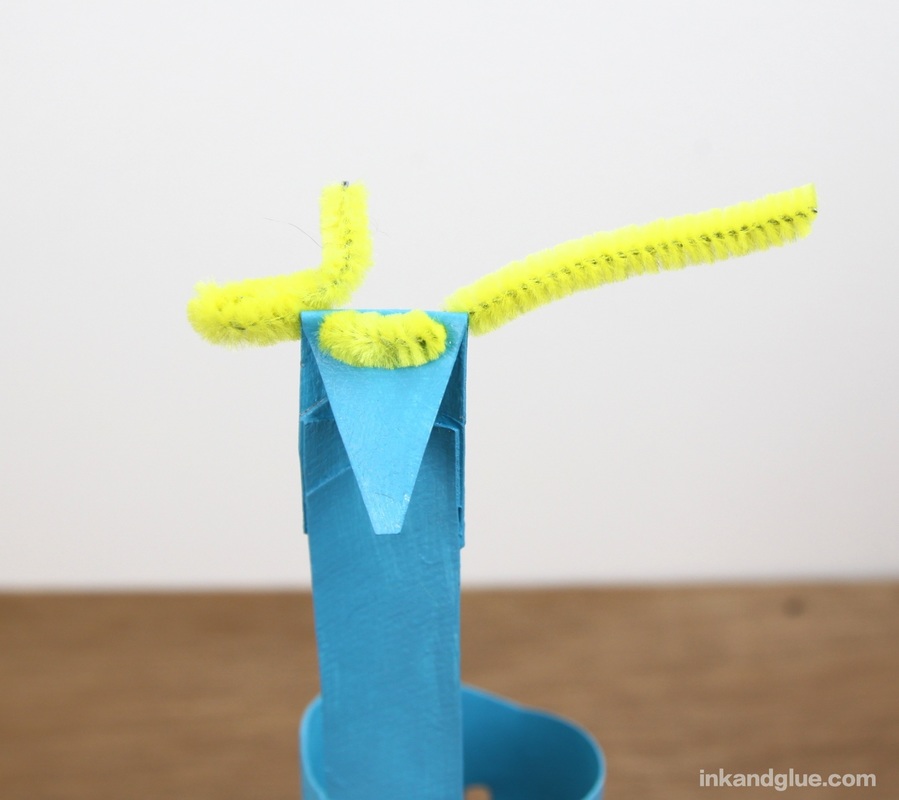
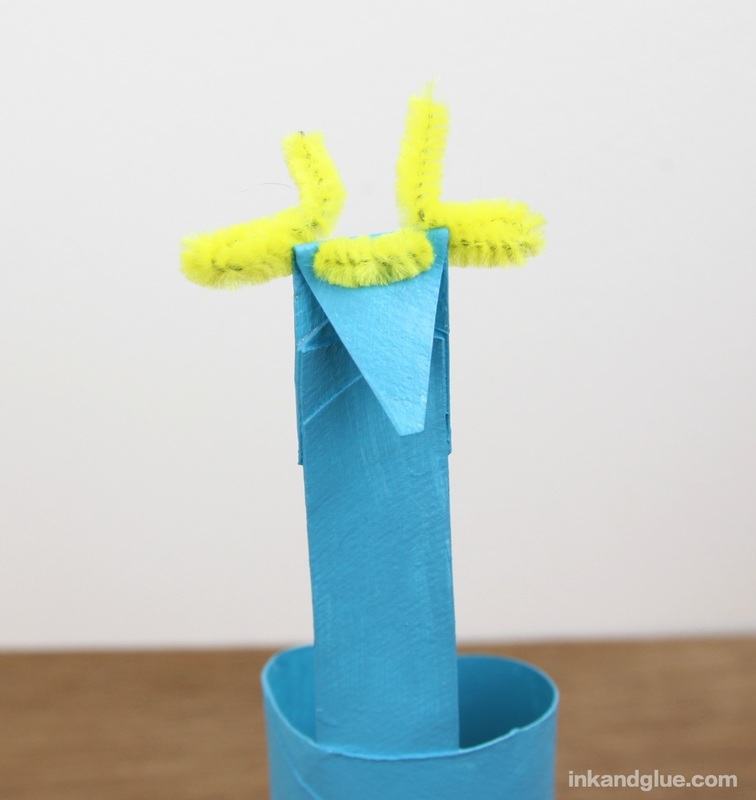
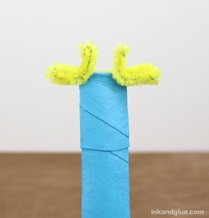
Insert the ends of a 3.5-inch piece of pipe cleaner through the fronts of the holes. Next you're going to fold each pipe cleaner end into thirds. For each, at the one-third mark from the head, fold the p.c. back towards the head. At the two-thirds mark, fold the p.c. straight up. You now have two ears and two horns!
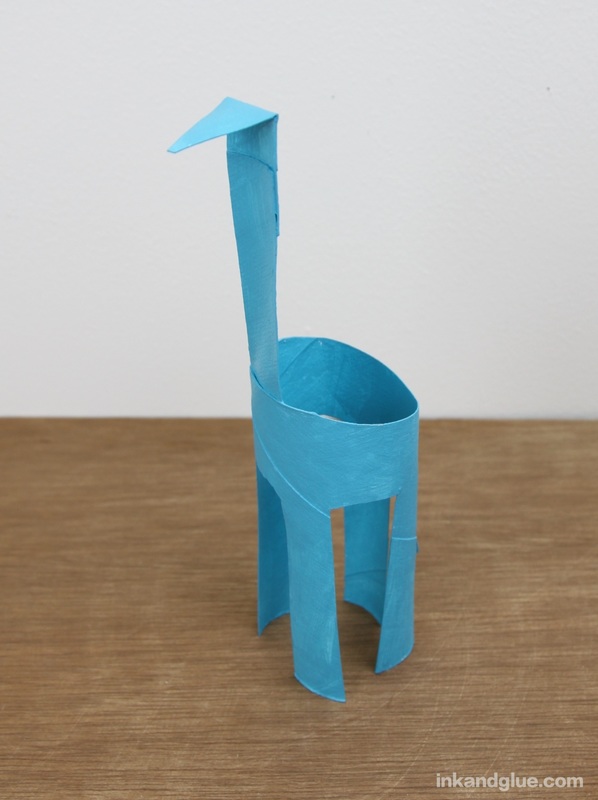
Now, on to decorating! Use markers for this. I wasn't enamored of the 1966-era craft's pattern of wavy lines with dots. So I tried a slightly-naturalistic look, using a black marker, as the magazine text asked for. I didn't like the result. 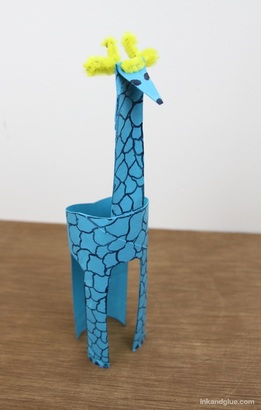 Luckily, I had used washable markers, and was able to wipe it all off with a damp paper towel. (It helped that my acrylic paint is actually fabric paint, which forms a nice, plasticky coat.) I started again with a white marker (this Recollections pen) (not an Affiliate link, and it's out of stock online, so link is for visual reference only). I went for a more geometric effect, using lots of triangles. You can draw whatever pattern you like, of course. 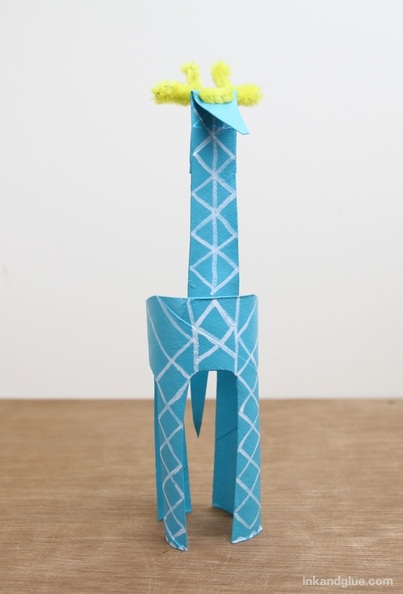 Better! I continued the pattern all over the body, and added eyes. I let the marker dry before adding black pupils and a nose. 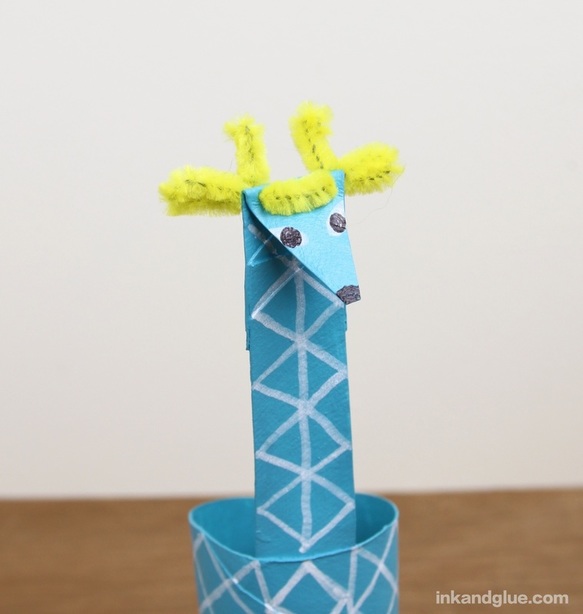
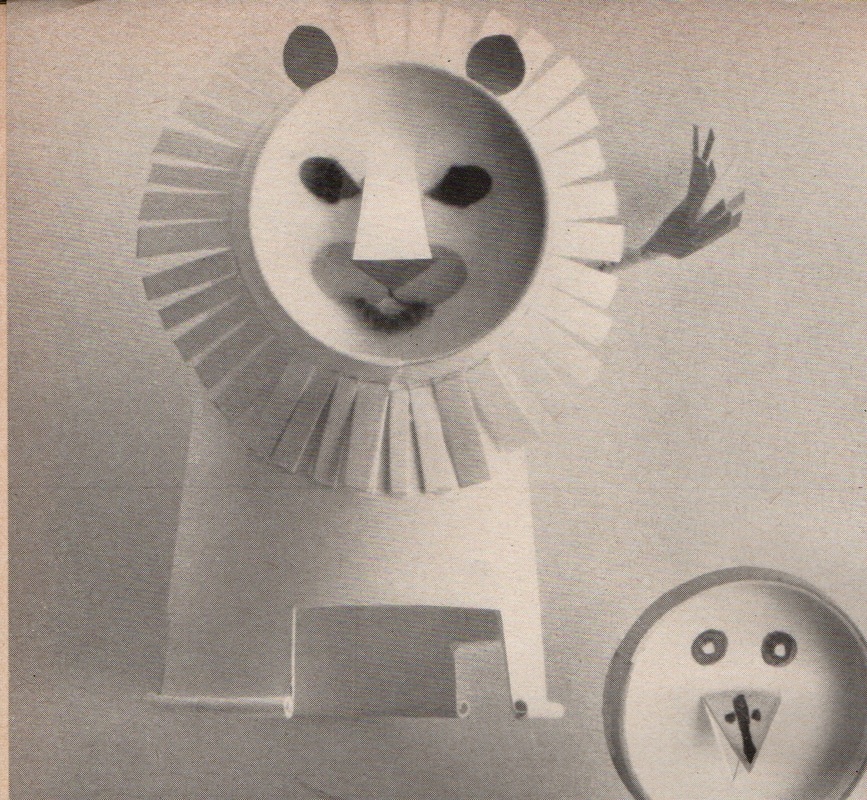
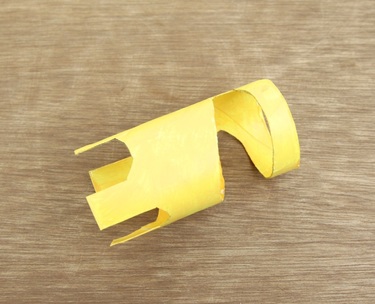
Thanks for revisiting the world of 60's kids crafts with me! xo 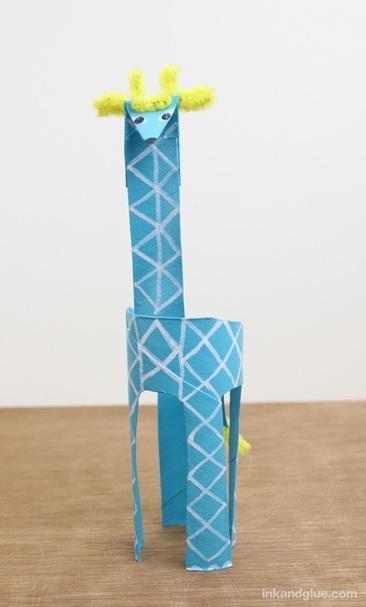 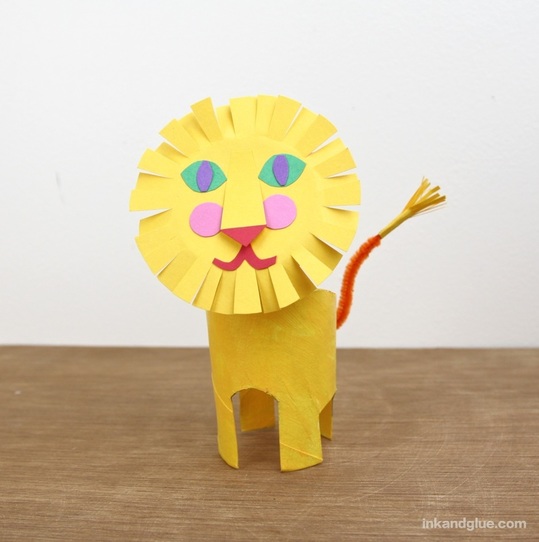 Look at this sunny-faced feline fella! He's based on the lion in yesterday's scans of a 1966 craft magazine. To refresh your memory, here's the original lion, made from paper cups:
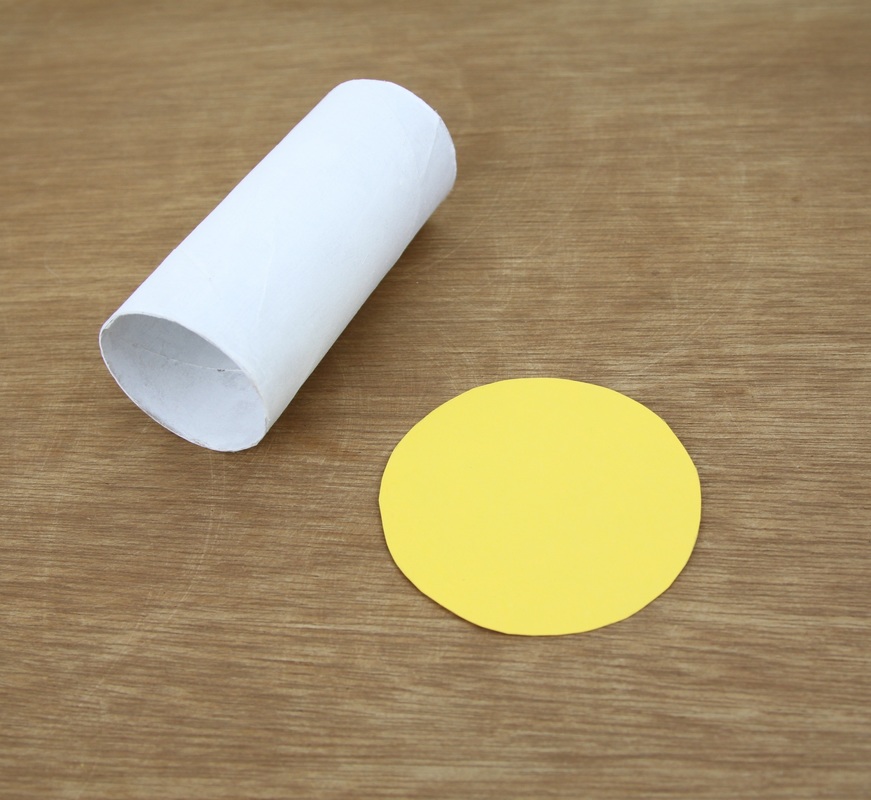
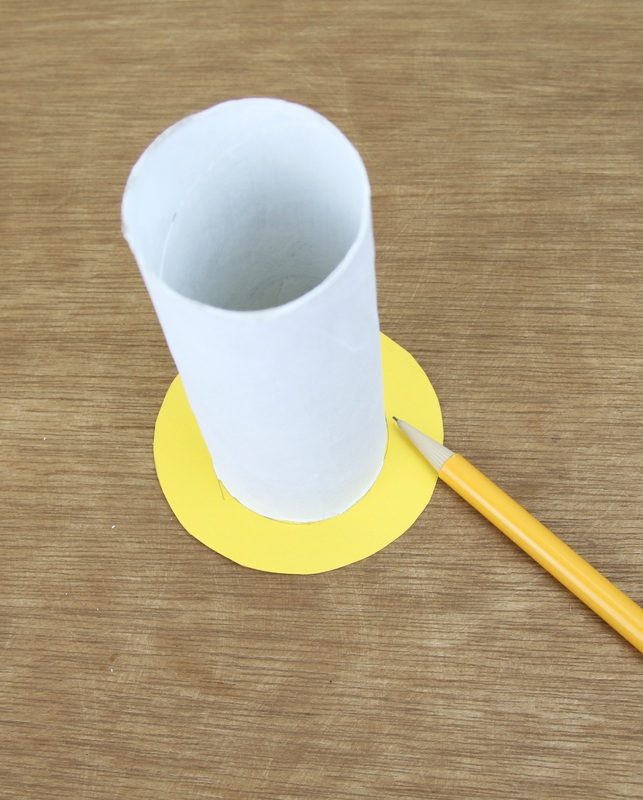
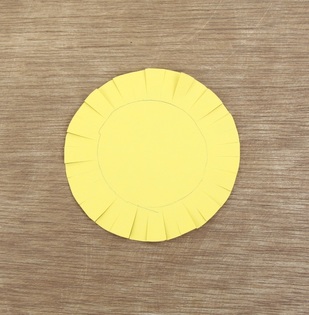
My goal here wasn't to make a replica, but to create an inspired-by version with what I had on hand (many cardboard tubes). I read through the magazine's instructions as I went, and took what I could from it. Here's how to make my version. First, paint a tube white, inside and out. From a sheet of yellow construction paper, cut out a circle that's about an inch wider than the tube. Stand up the tube, center it in the circle, and trace around it with a pencil.
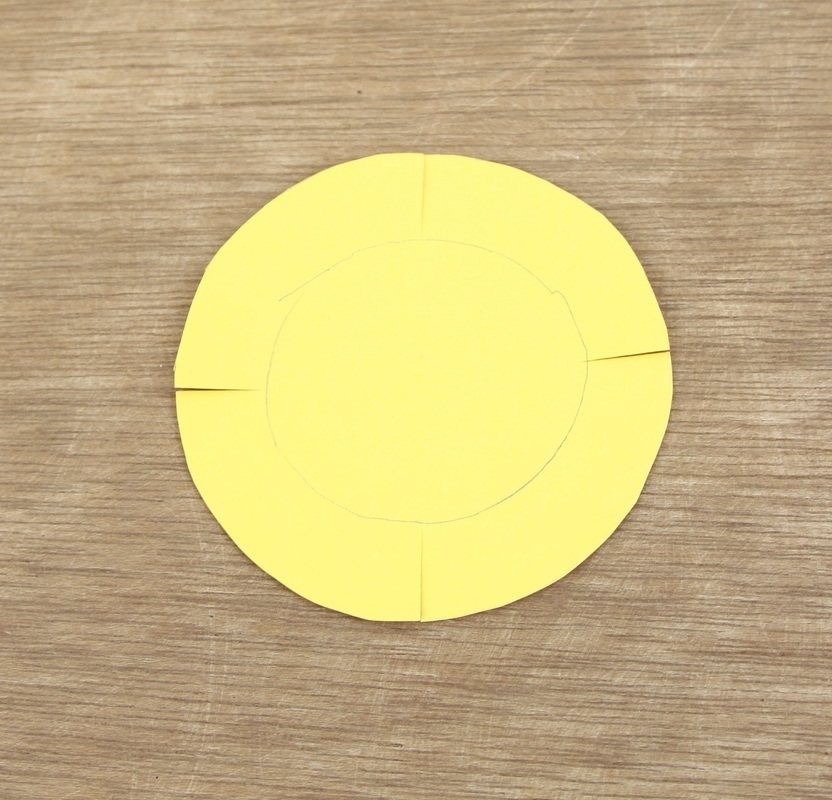
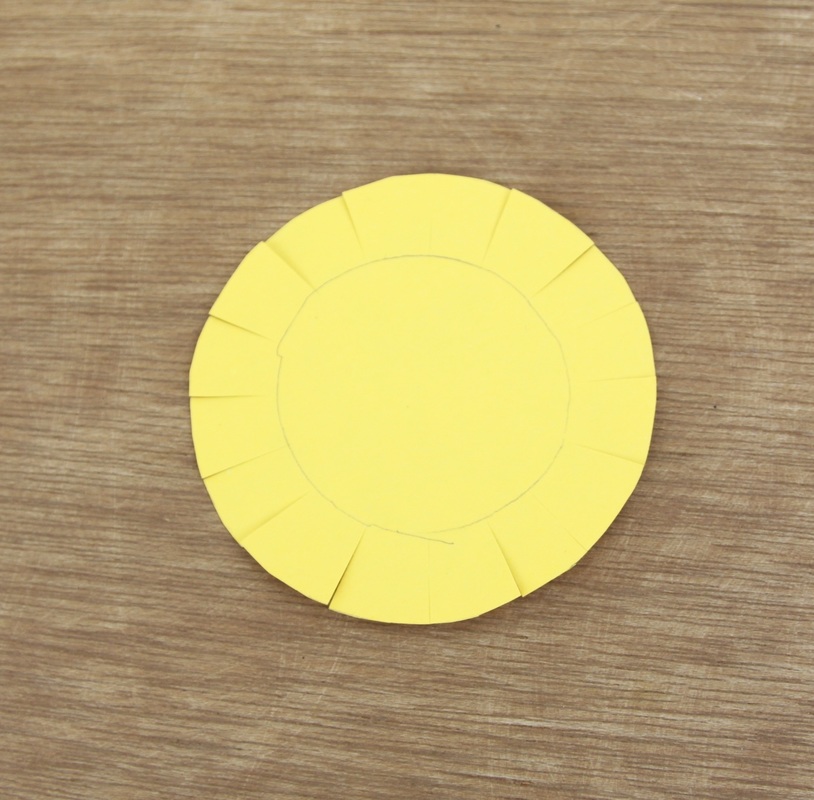
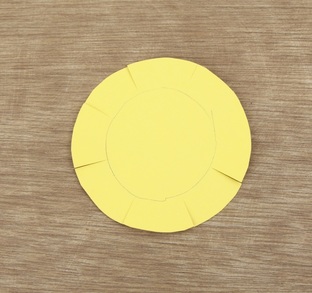
Use the circle you just drew as the stopping point for the small cuts you'll be making to create the fringed mane. Here's a trick for getting fairly evenly-spaced fringe: First, make four cuts at equal distances from each other, like the four points of a compass. Then, make a cut in between each of those cuts. Repeat two more times, just eyeballing the center point between two cuts. Easy-peasy.
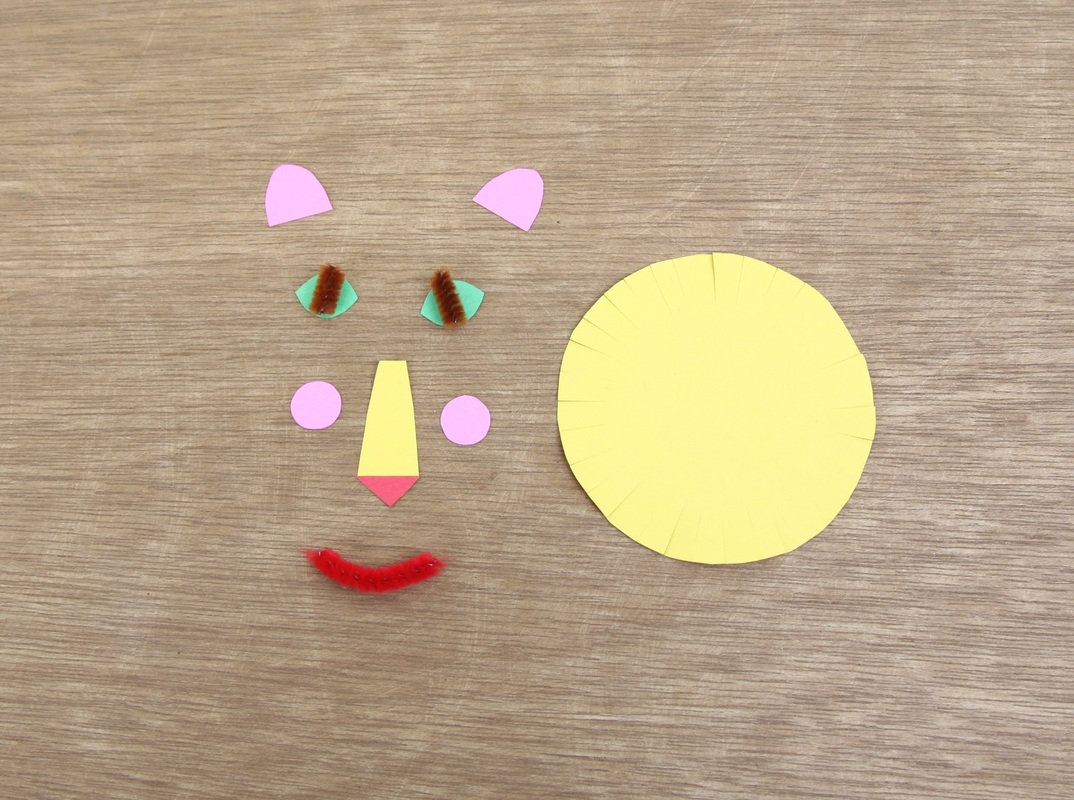
At this point, I turned to the text of the magazine for help. I followed their illustration and instructions to get the colors and shapes I ended up with. One change is that I didn't cut the nose flap out of the circle itself; I cut a separate piece of paper for that. Here's what I ended up with:
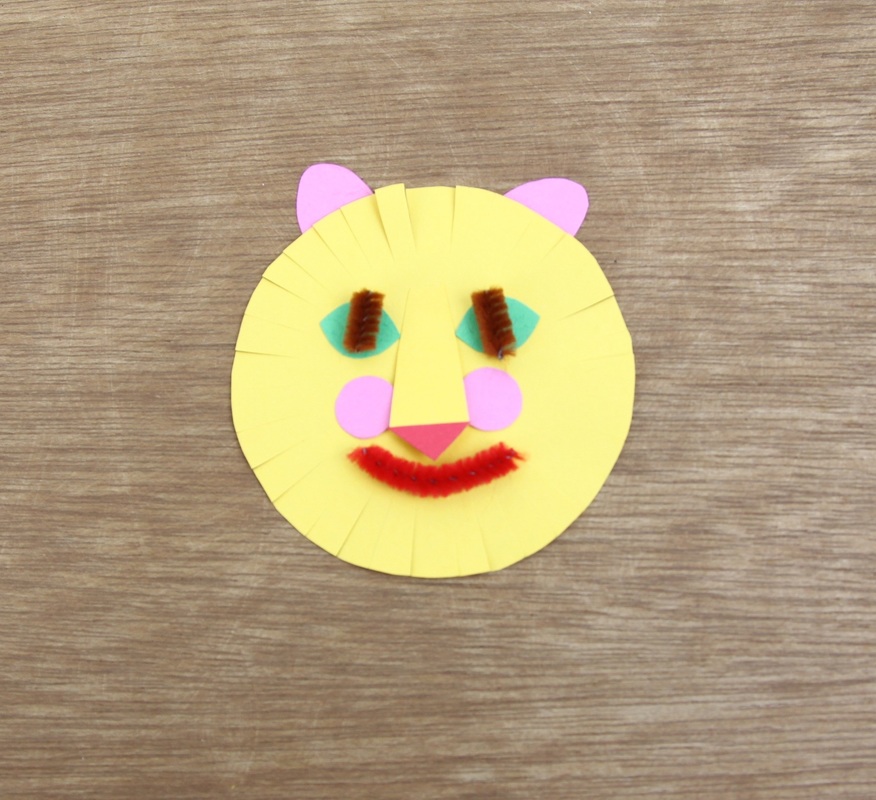
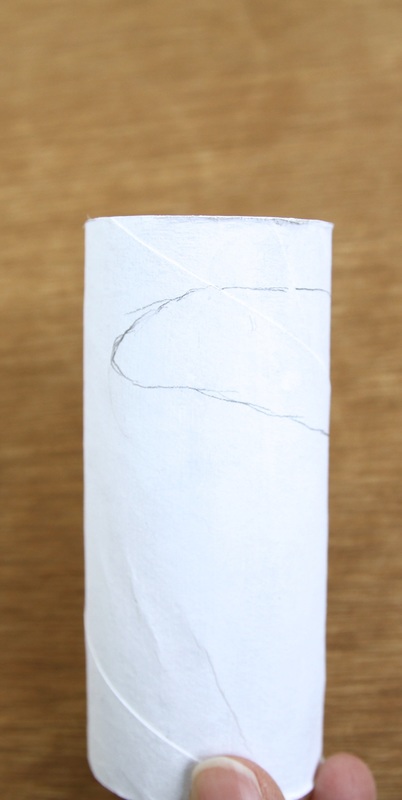
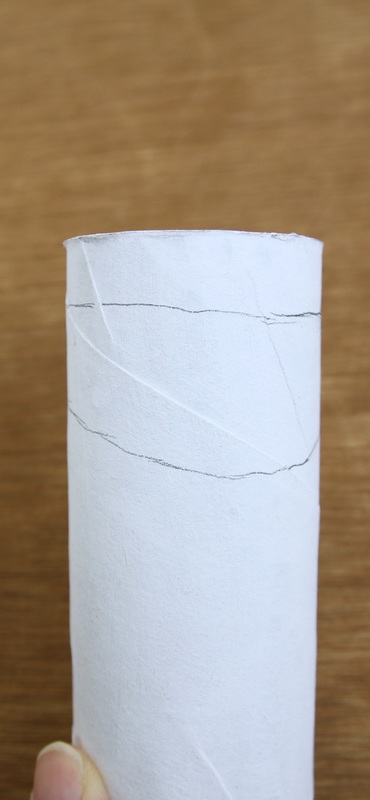
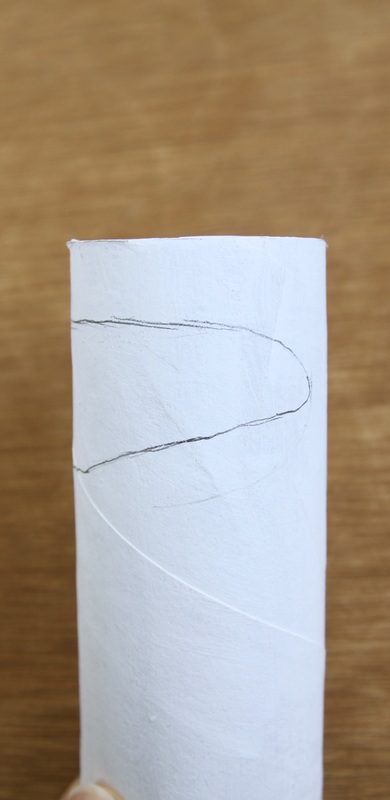
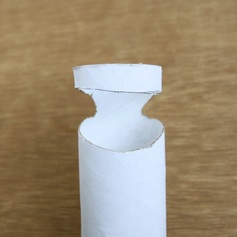
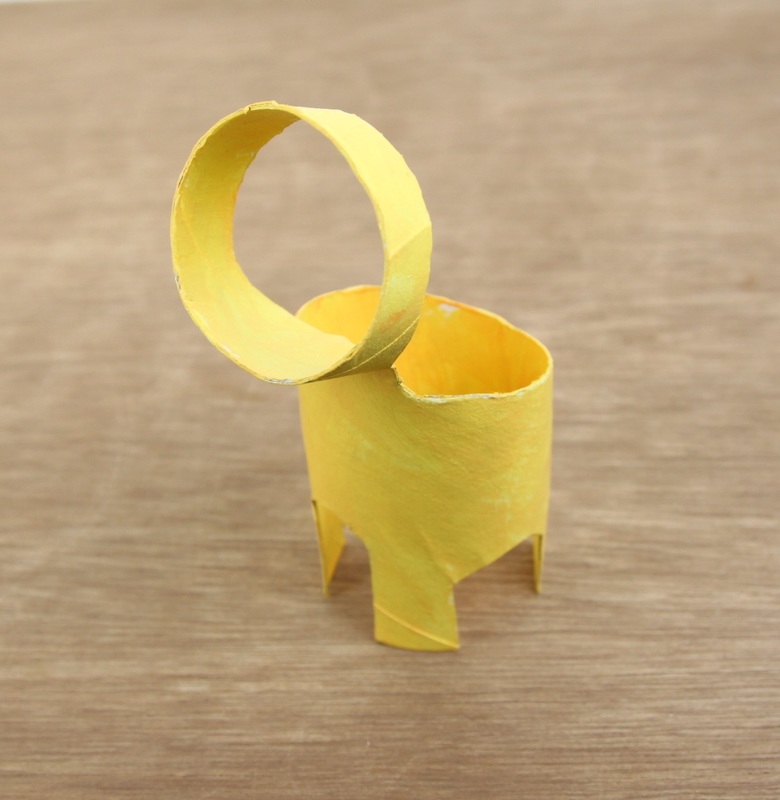
Yes, those are tiny lengths of pipe cleaner for the pupils and mouth, and no, I wasn't happy with how they were looking. Even if the pipe cleaner pieces were cut smaller, they were still a pain in the butt to work with, being tiny fuzzy round things that really wanted to roll away. So I abandoned them, and used paper instead. I glued everything down with a thin layer of tacky glue, but I only attached the top quarter of the nose piece so it could flap up a bit and add some dimension. 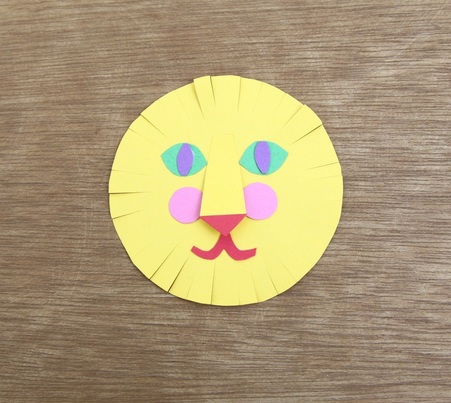 Ahh, so much better. Now on to the body. You're going to mark a sort of oval-ish lozenge shape near one end of the tube. Here's the shape, shown in three photos taken as I turned the tube. The distance between the two ends of the lozenge is about an inch. This segment will be the front of the neck of the lion.
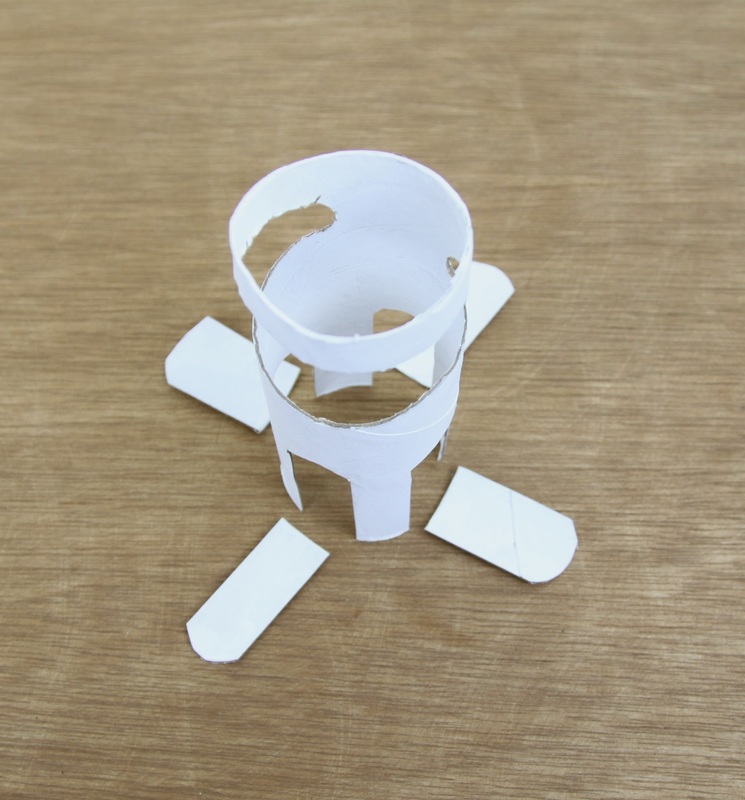
(Is it just me, or does the faceless body on the right look really cool? Like a kid's version of a surrealist sculpture.) Run a line of tacky glue along the rim of the head ring, and press it onto the back of the paper face. 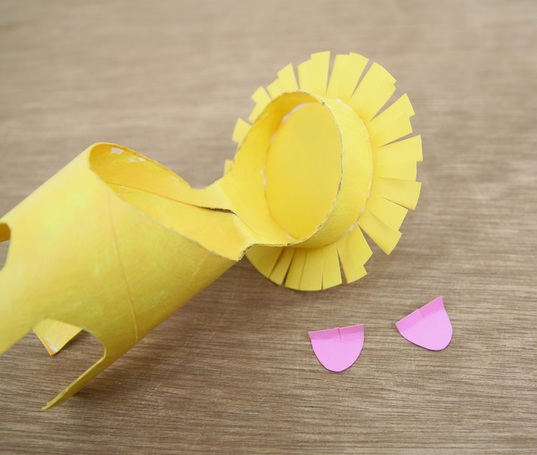 Remember those pink ears, from earlier? Make a short slit into the straight edge of each, and fold the edge over a bit. Glue the folded edge to the inside of the ring. (The slit will make them conform more easily to the curve of the ring.)  Now for the tail. I followed the magazine very closely for this part. Cut a 3.5-inch length of pipe cleaner. Cut a one-inch square from yellow paper, and fringe one edge about half-way in. Fold the square in half, then add tacky glue, and fold/roll the paper around the end of the pipe cleaner. 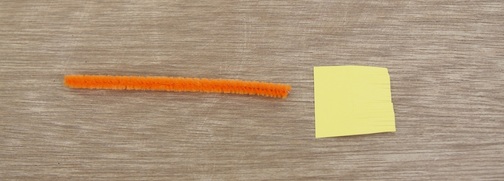 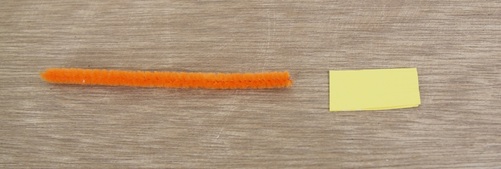 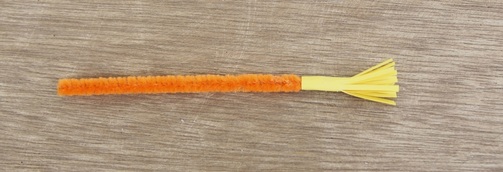 Use a large needle, a pushpin, or an awl to poke a hole in the back of the lion's body. Insert a half-inch or so of the tail. Fold it down and glue it to the inside of the tube. 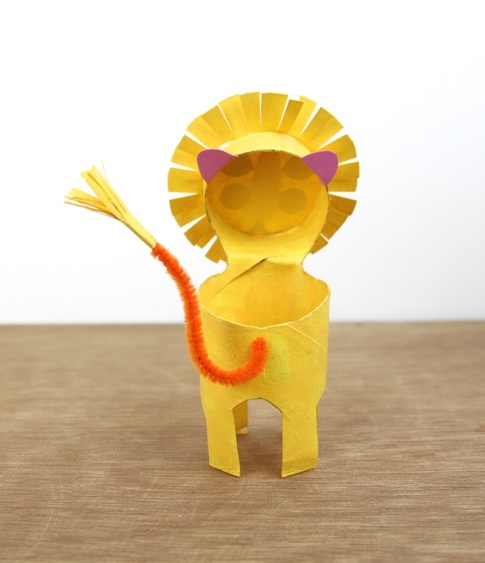 Lookin' good, my man! 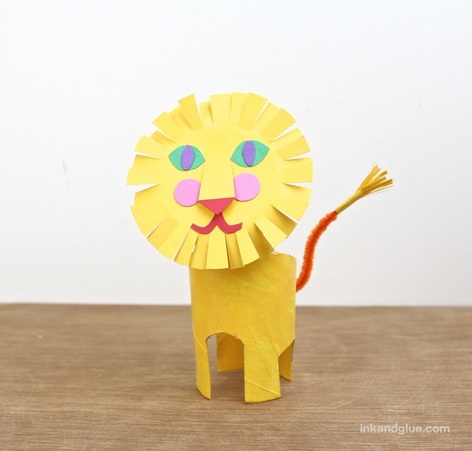 Tomorrow, might there be a blue giraffe? There might. There just might.
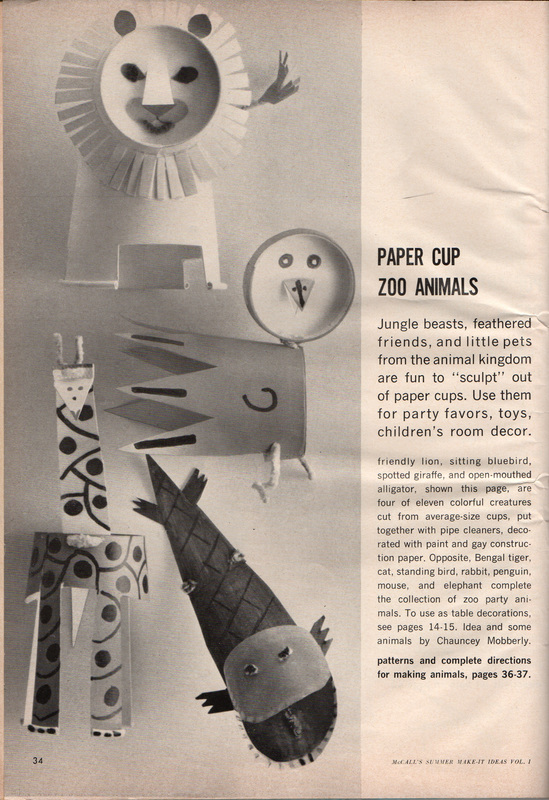
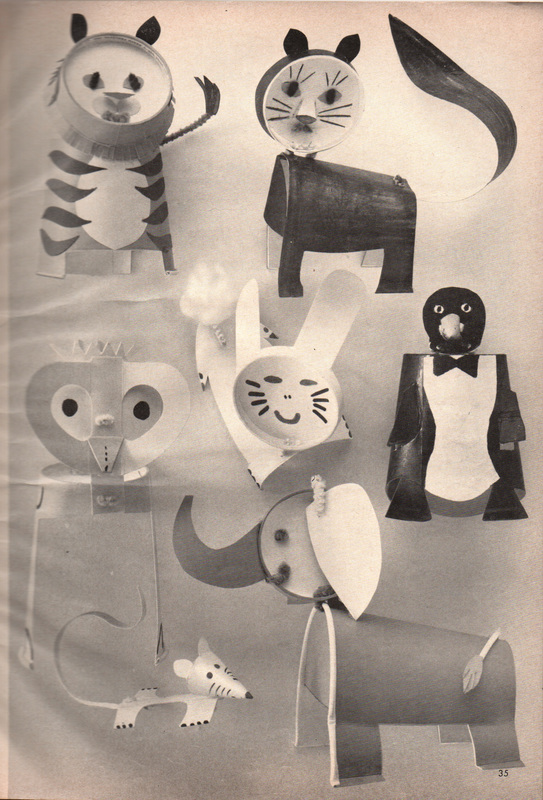
xo I'm back from the long weekend with another McCall's vintage Make-it Idea. This one's a zoo party, though it could also be called a yellow party (as an alternative to last week's pink party). I kept the images large so you can appreciate the unspecified sandwich fillings, which would be rejected from every child I have ever known. The sandwiches are... scrambled eggs with corned beef? Egg salad with shredded ham? Hard to say for sure. 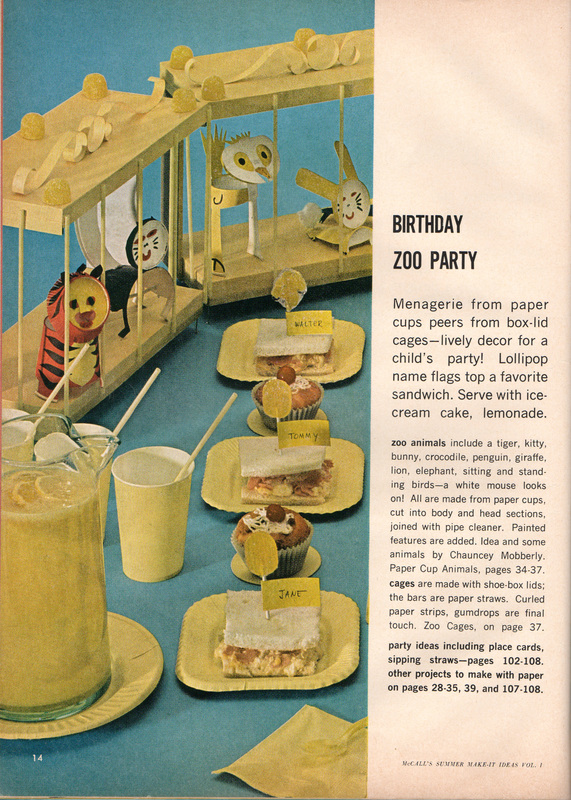 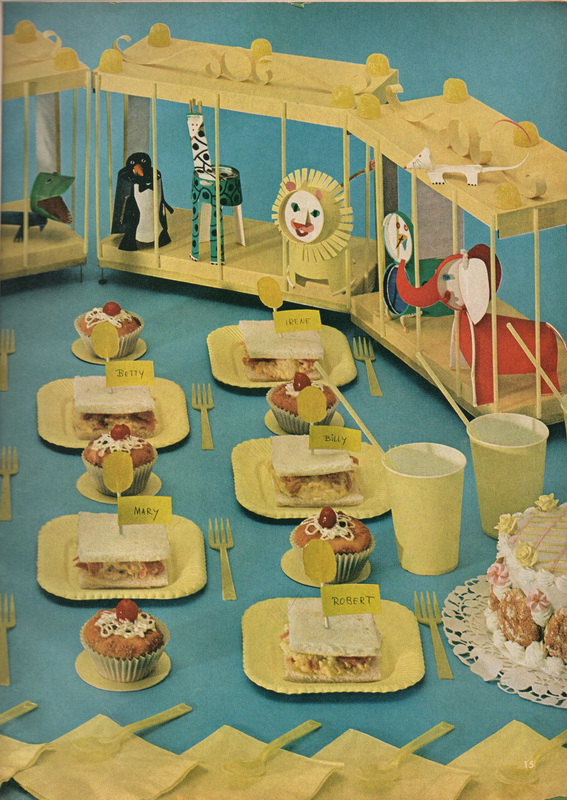 The zoo animals made from paper cups are clearly the stars, here. I don't think the cages are worth making; even as a kid, the too-wide spacing of the bars would have ruined them for me. (The animals can just walk right out!) Plus, I don't know about you, but I'd be hard-pressed to find ten shoe box lids for a craft. So, about those cup animals. They get their own spread later on in the magazine:
This is the second time the stylist, Chauncey Mobberly, gets credit in the text. He was a World War II vet who became a mailman, and created and sold children's craft ideas on the side. Sounds like an exceptionally nice fella. Anyway, if you really, really want the instructions for making the cup crafts, here they are. They are daunting in their length and specificity. 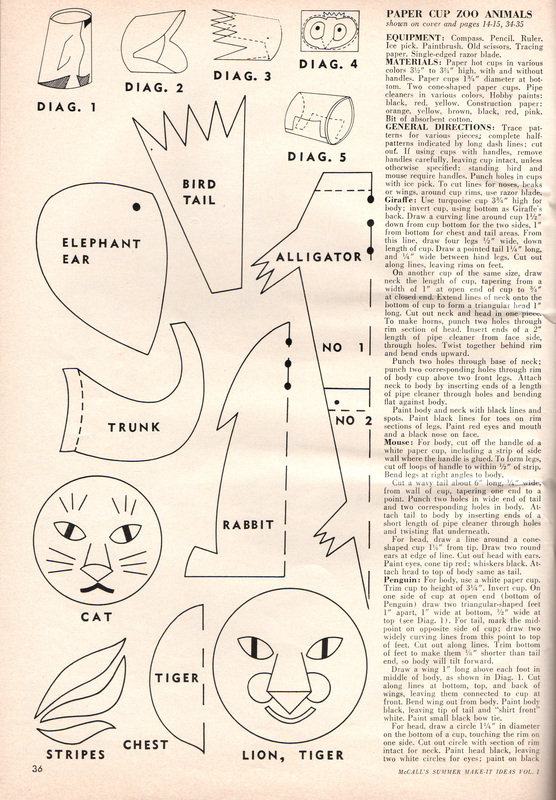  I'm sorry the left side of that page is blurry; I can't find a reason why it happened. If you are desperate to read it, drop me a line and I'll see what I can do.
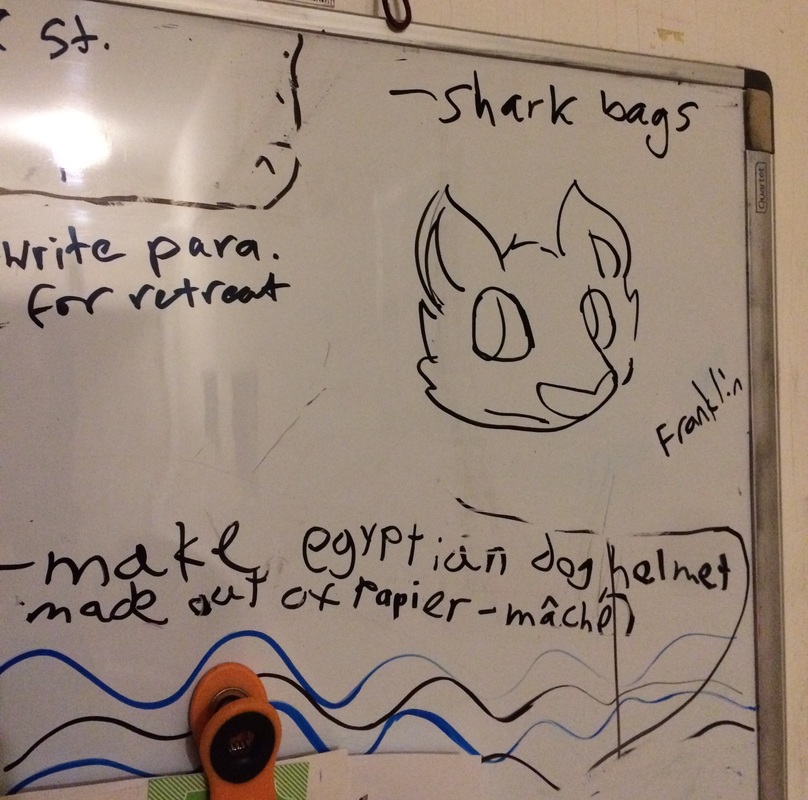
I am going to try to make these. I have no paper cups on hand, so before I hit the store, I'm going to attempt to make one or two using cardboard TP tubes instead of cups. I have a lot (like 20, maybe?) of cardboard tubes. xo! I took Franklin on my trip to NYC last weekend. We stayed at my sister's apartment in Brooklyn, and her two kids are big fans. My 12-year-old niece drew a quick sketch of Franklin on their family's whiteboard. Unfortunately I didn't get a chance to ask about the papier mache Egyptian dog helmet, or how shark bags are used. xo!
|
Categories
All
Archives
March 2017
AuthorI'm Debbie Way, an artist and writer who enjoys making things. |


 RSS Feed