|
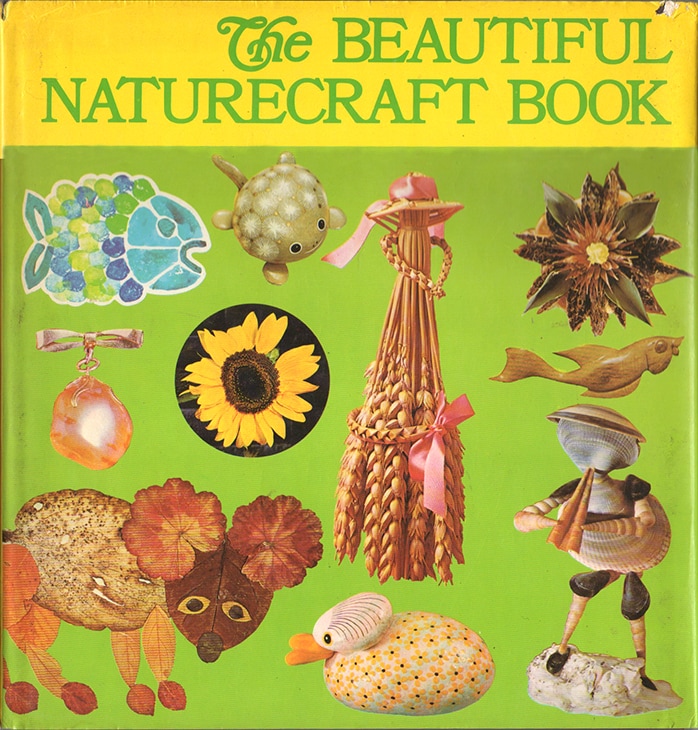
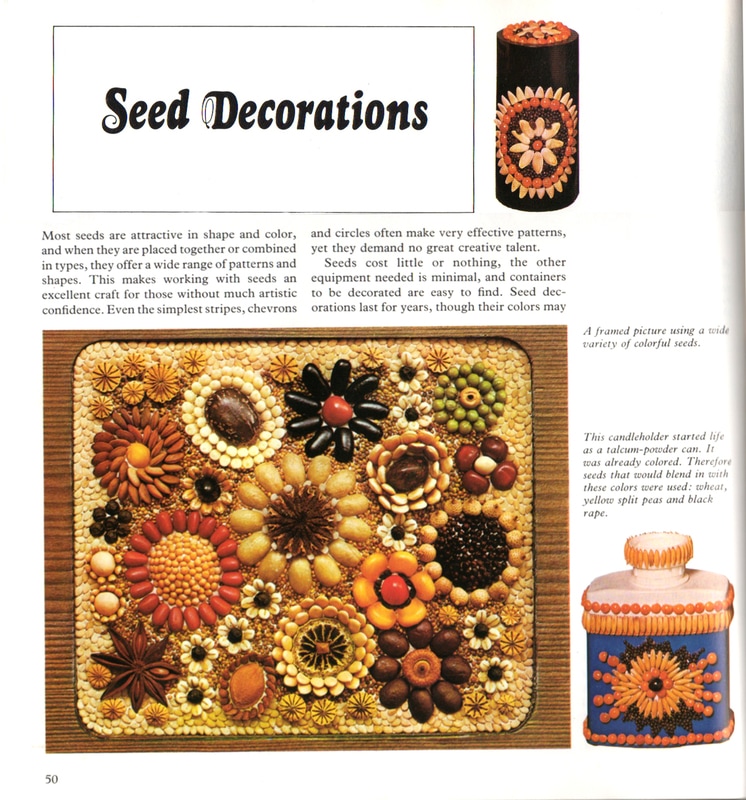
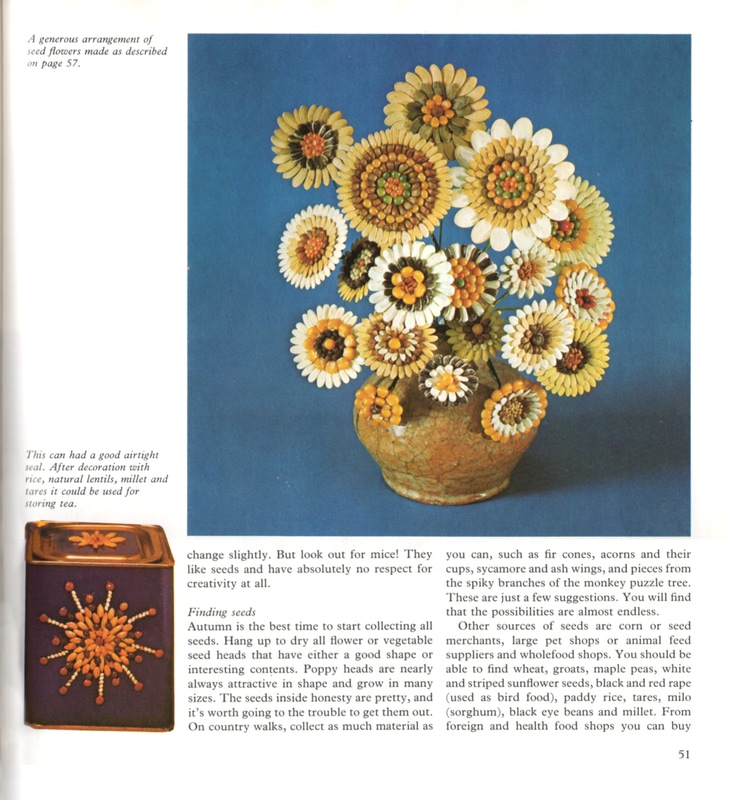
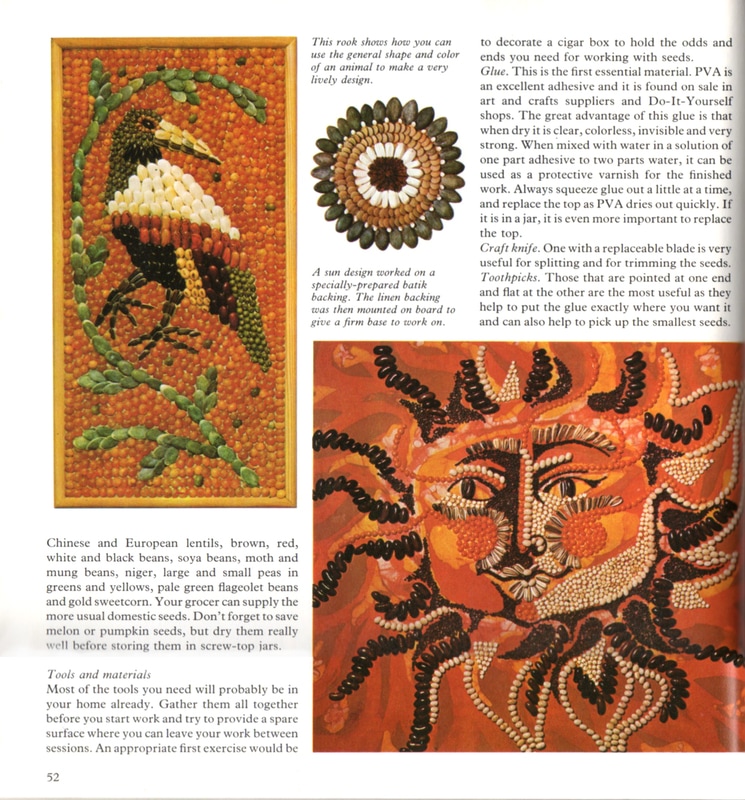
I don't like to think of any media that was produced after I was born as "vintage" but as I get older (knock on wood) I suppose I'll have to get used to it. I found this lovely book, The Beautiful Naturecraft Book, in a vintage shop this past weekend. It's from 1979, yet is in surprisingly nice condition. Some of the projects are delightfully odd, and a good portion of them hold up to this day—they're that imaginative, well designed, and do-able. I scanned a few pages from the Seed Decorations section so you can see what I mean. The somewhat stilted text is what pegs it as a vintage craft book. I love it. This book, however, has more personality than most: "But look out for mice! They like seeds and have absolutely no respect for creativity at all." Cute! Gotta love a groovy sun face. I should collect all of the vintage (and not-vintage) sun face crafts I have in one place, maybe make a giant sun face out of all of them. Ha.
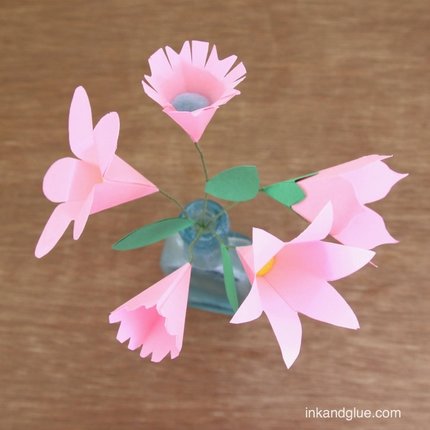
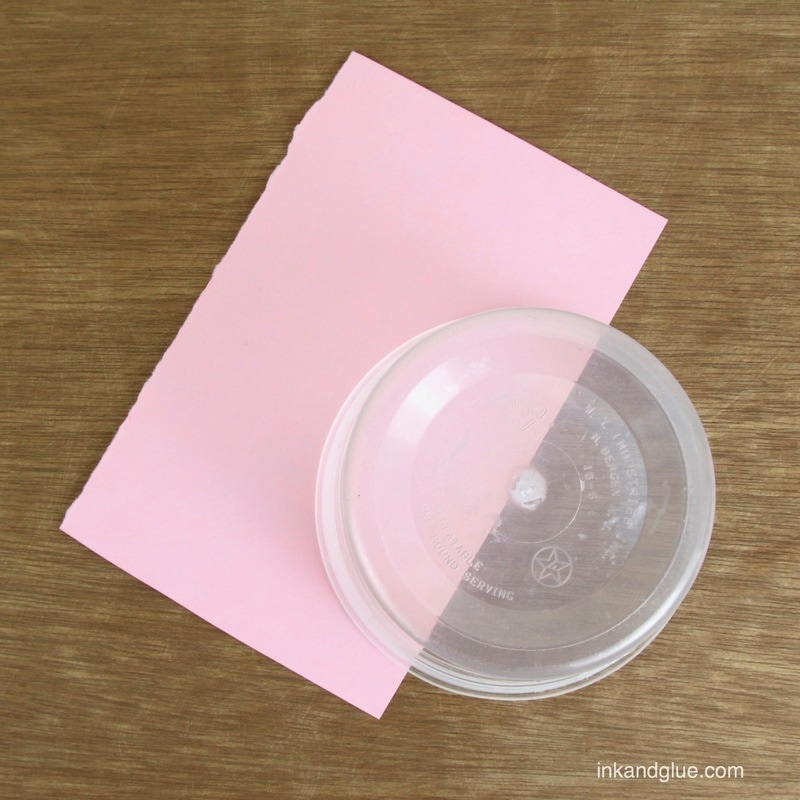
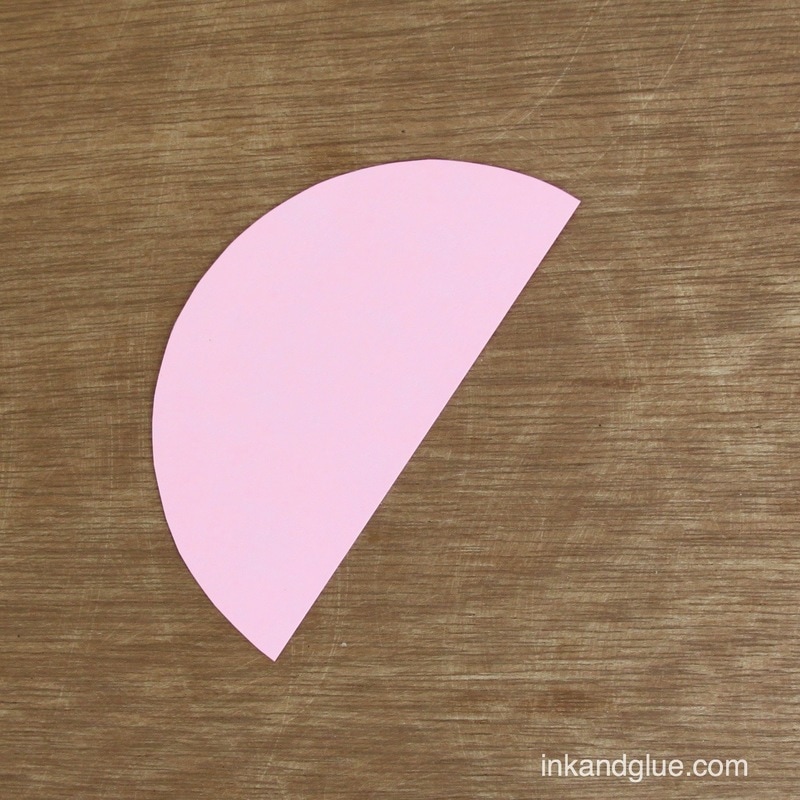
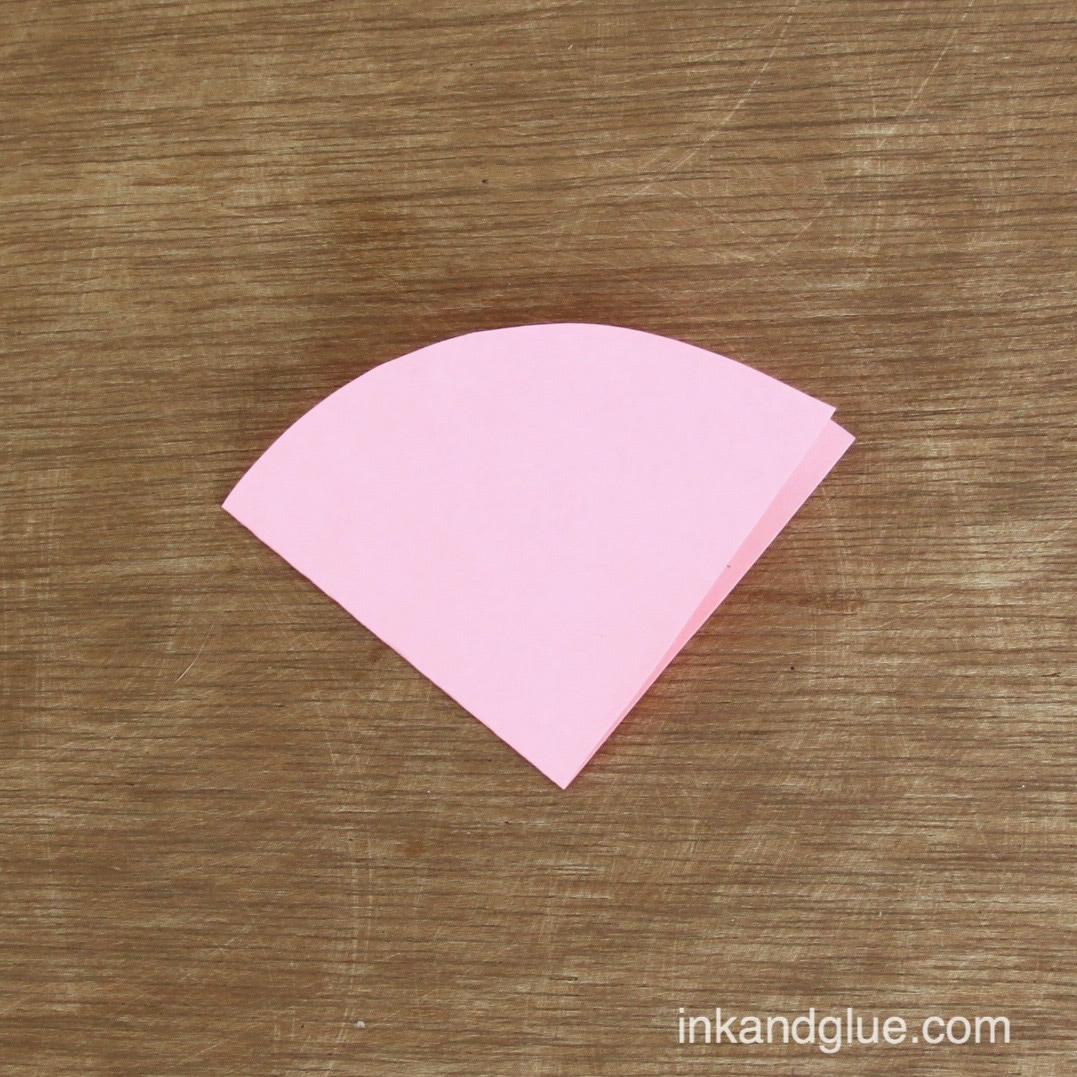
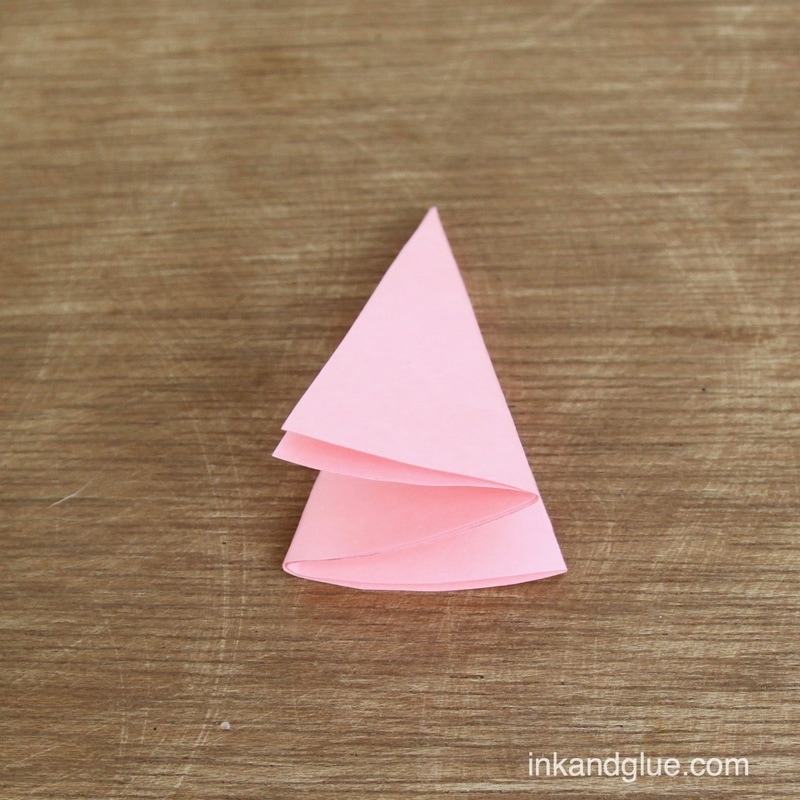
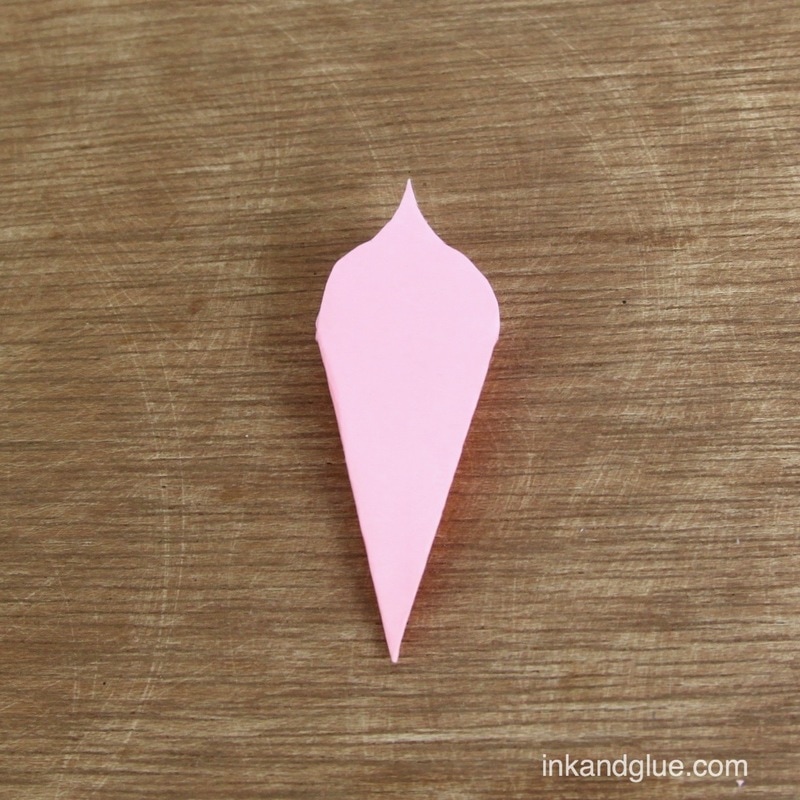
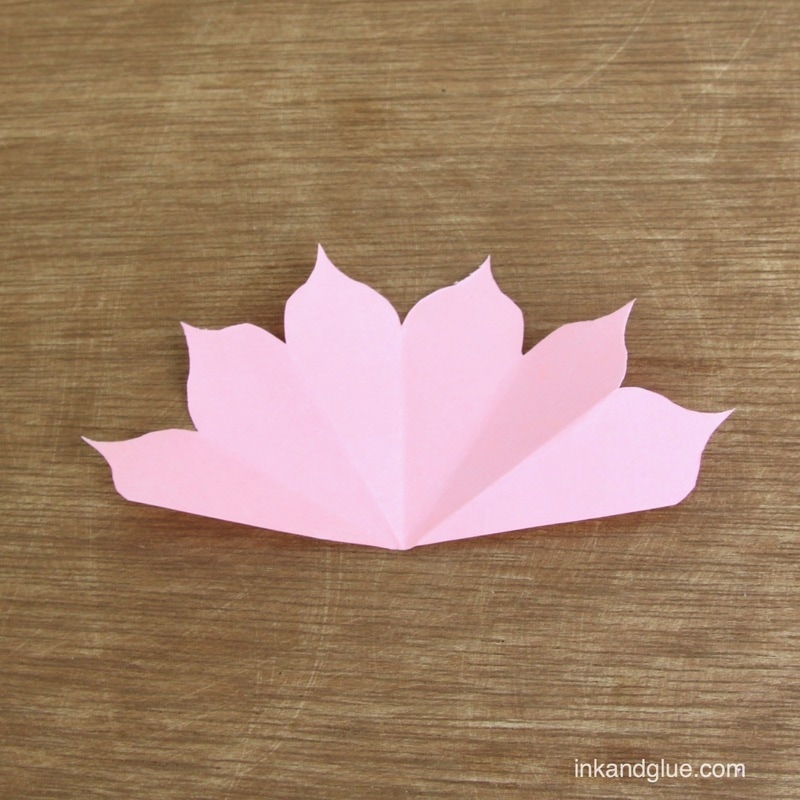
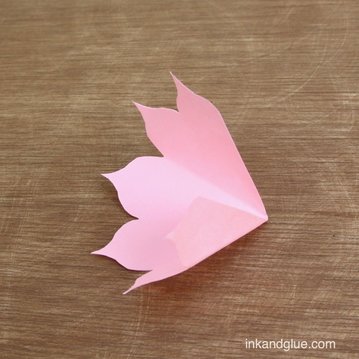
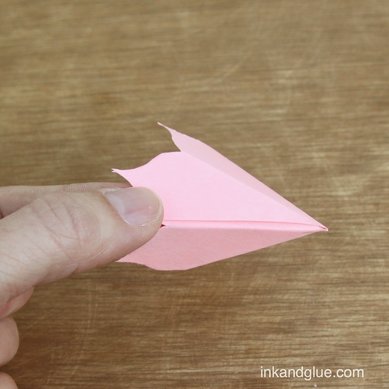
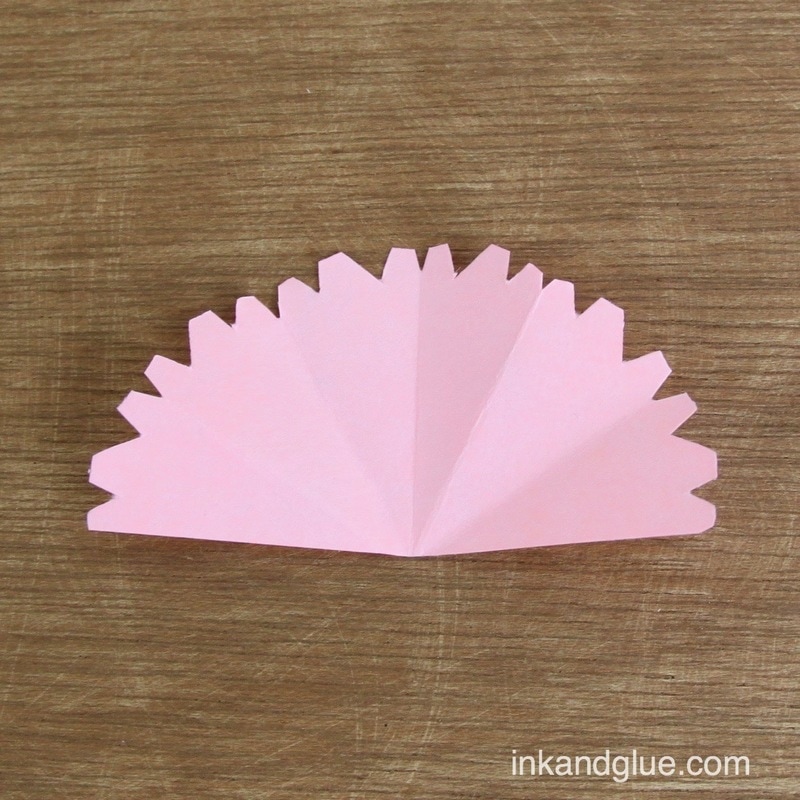
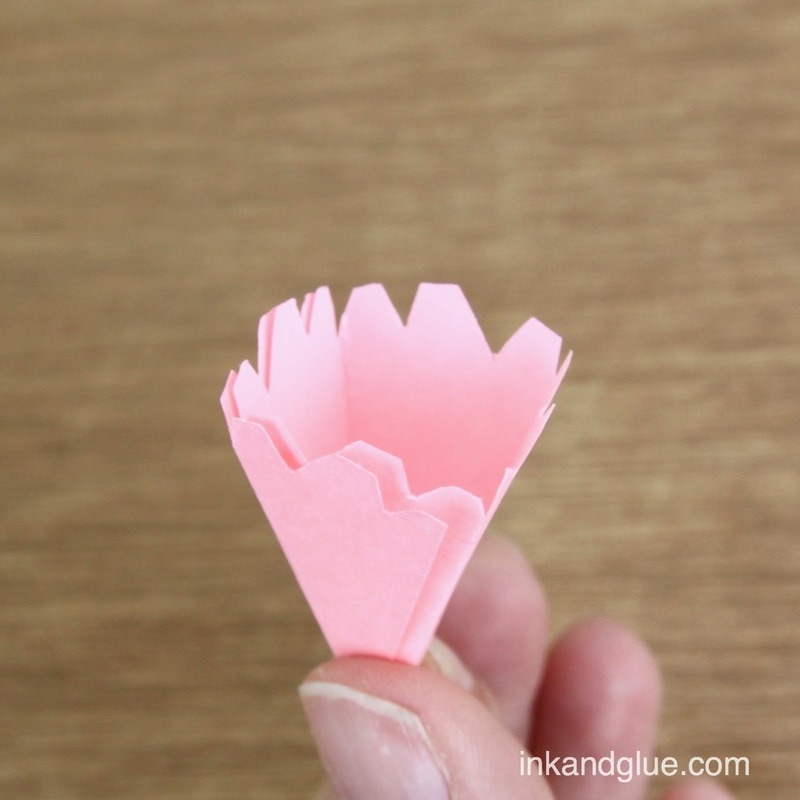
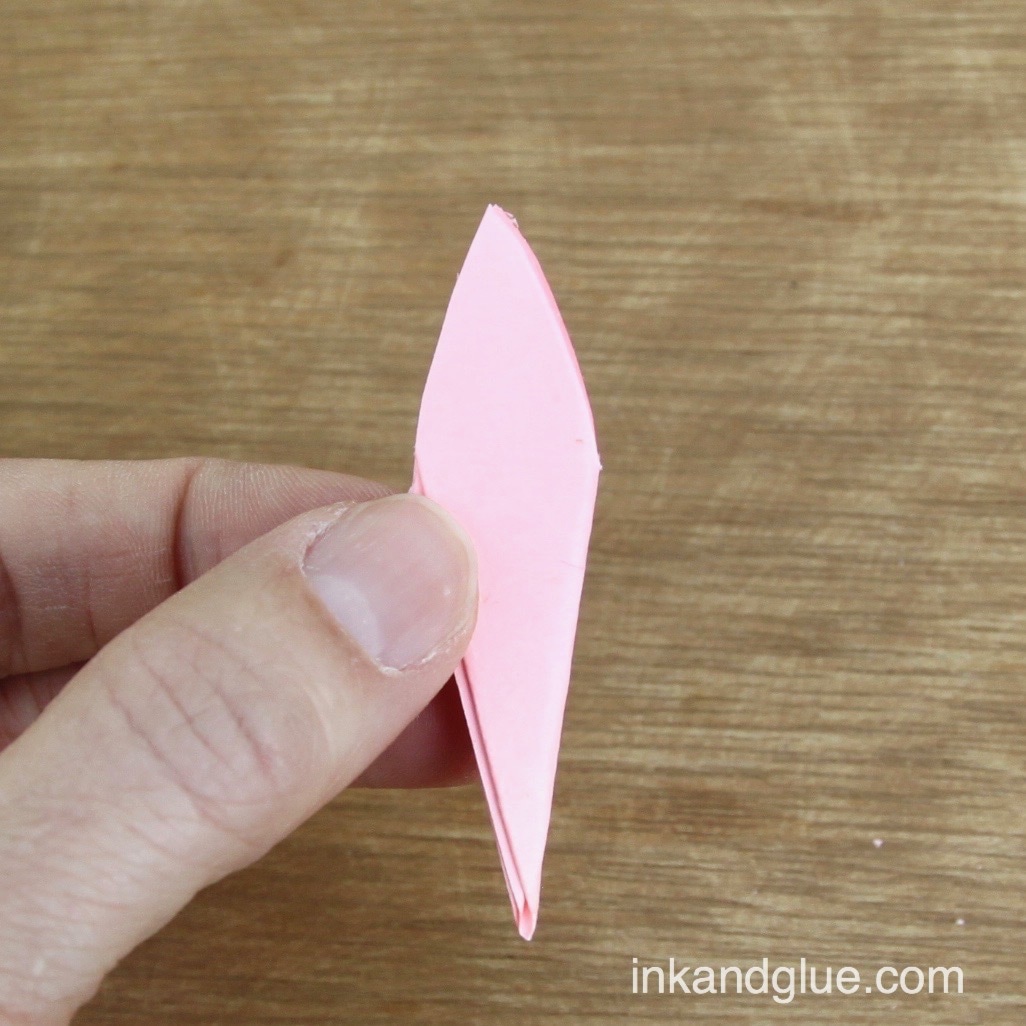
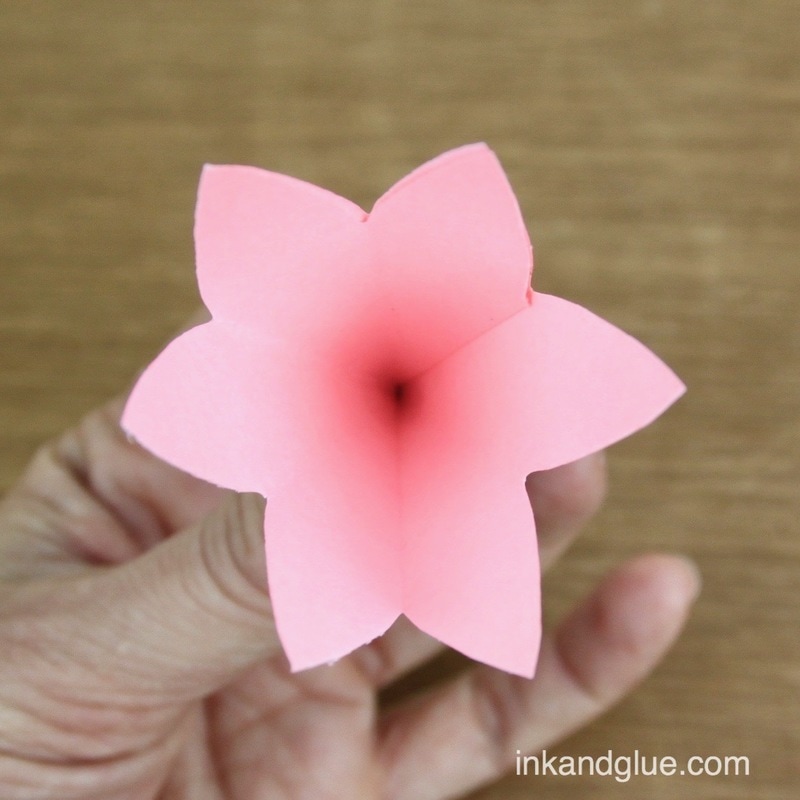
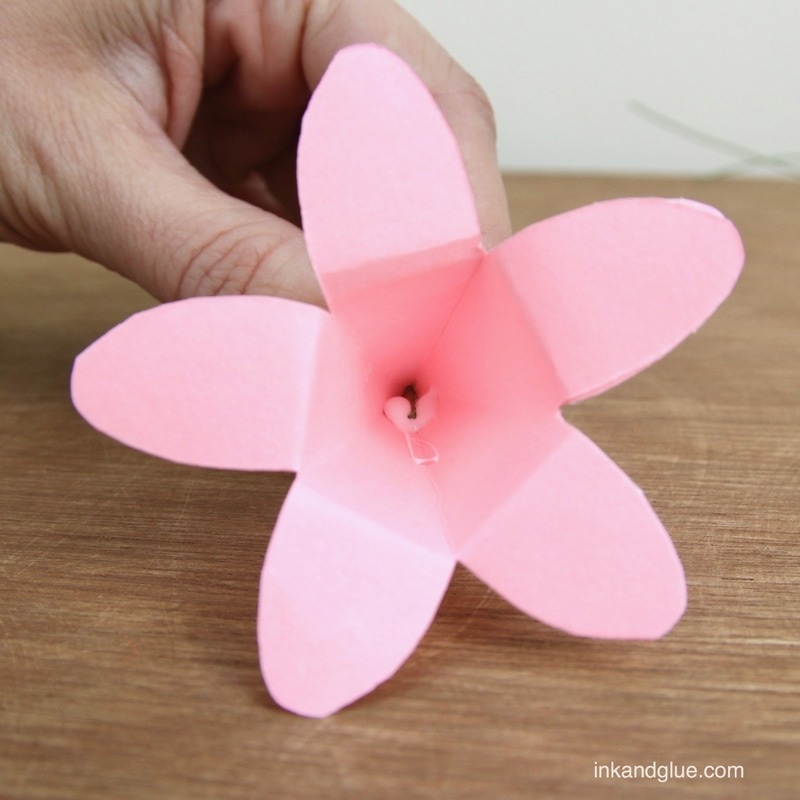
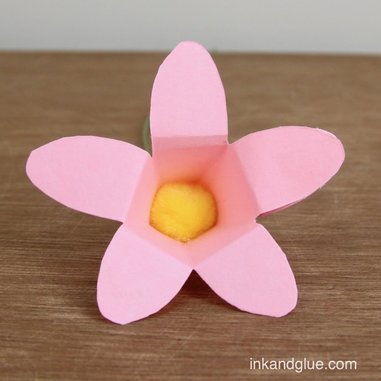
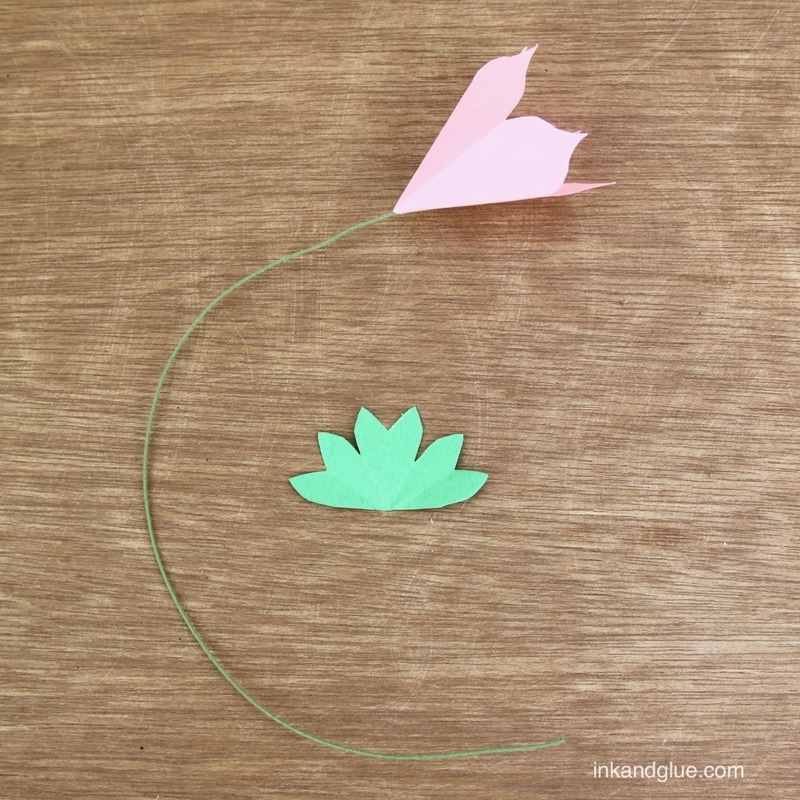
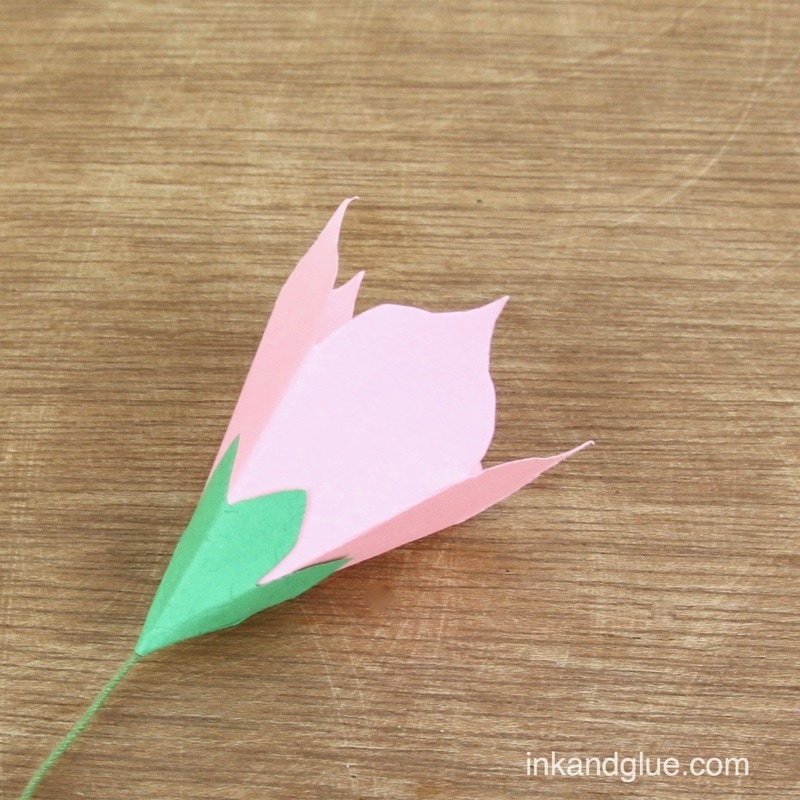
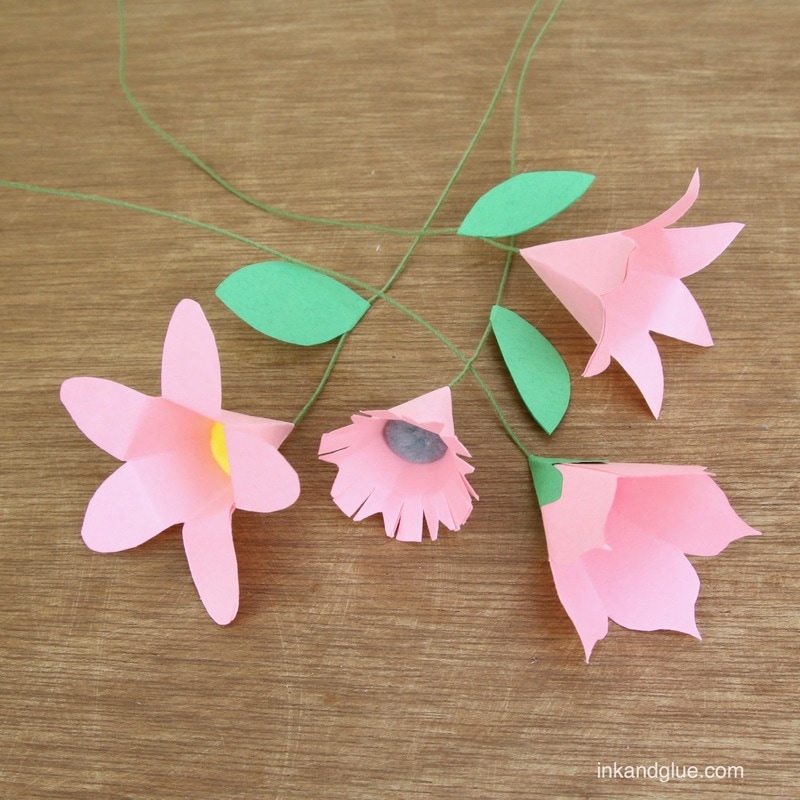
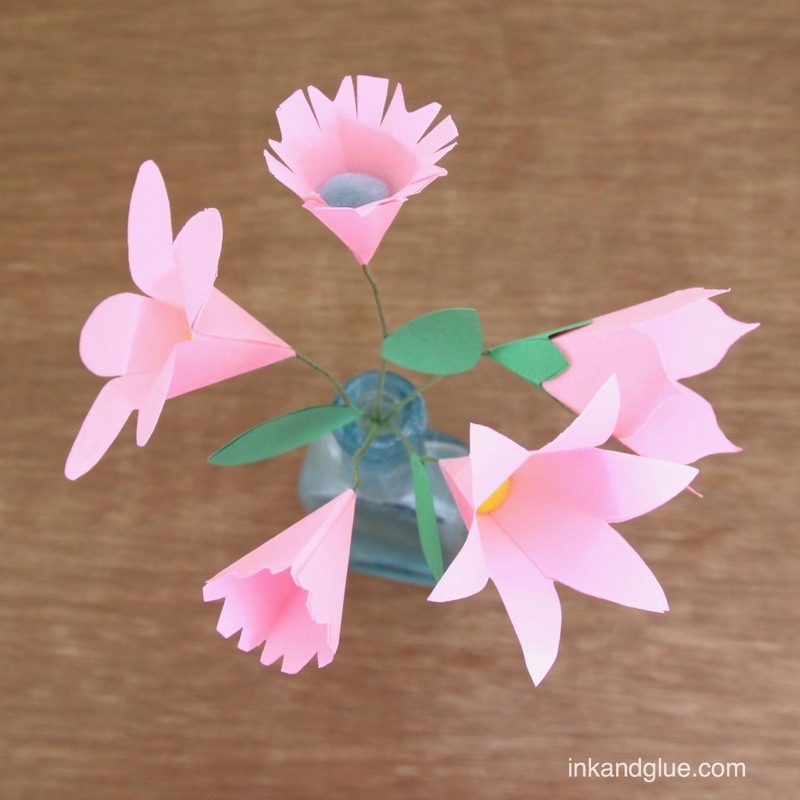
Enjoy your seed crafts, and keep them away from vermin! xo It's been spring for more than a full day, and there's still snow covering most of the ground. The wind is up, and there's a fire in the wood stove. Not very spring-like, so I thought I'd help it along with some paper flowers. These are neat and quick to make, and remind me a little bit of folded paper snowflakes — I think you'll see why if you read on. Start by using something round to trace a half-circle onto the edge of a piece of paper in a pleasing color. Cut out the half-circle. Fold the half-circle in half, then fold it into thirds, as if you're making a six-pointed snowflake. Hold the folded shape tightly as you trim the curved edge into a petal shape. It can be any shape you like, really. Unfold it when you're done. Refold a couple of the folds so they're all going the same direction — as if you could roll up the shape. The flower will start to take shape at this point. Now you simply overlap the petal shapes on either end and glue them together, ending up with a five-petalled blossom. The petals should match up well, since you cut the shapes all at once. If you cut asymmetrical petals, overlap two petals on each end; you'll end up with a four-petalled flower. Or, go back to the beginning and after folding the half circle in half, fold it in half twice more before trimming the ends. If you overlap two petal sections, you'll get a six-petalled flower. To add a stem, cut a length of floral wire and insert a quarter-inch or so into the base of the flower. You may need to cut a tiny hole for it to fit. Glob a drop of tacky glue right on in there. Press a small pompom into the gluey center. The wire will naturally be pressed against one side of the flower, where it will happily adhere. Let the glue dry. Want some greenery? You can make a little green skirt for your flower using the same method you used to make the flower itself. This time, spread glue stick all over one side of the paper shape, then wrap it around the flower (and itself, where it overlaps). Or, take a little scrap piece of green paper, fold it in half, and cut out a leaf shape, leaving part of the fold intact. Wrap the folded leaf around a stem and glue the two leaf sides together. Here's my be-leafed collection: That's it! Lots of ways to experiment and make this your own, as they say. Tissue paper would be especially fun to try. Or, use white paper and paint it! Paint is fun. Happy spring (?)! xo
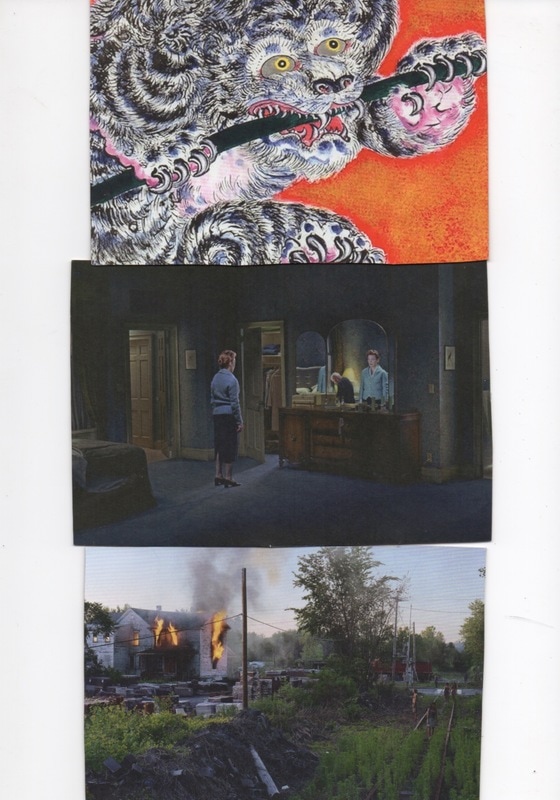
I made six postcards tonight in under half an hour, and they cost not a cent. Here's how: Cut postcard-size-ish rectangles out of an empty cereal box, and cut out bigger-than-postcard-size images from an old magazine. Glue stick the images to the printed side of the cardboard pieces, then trim the edges to make it look neat. Write on the cardboard-colored side. Easy, free (as long as you have use of a $1 glue stick), convincingly postcard-like. I happened to be mailing these cards to the president, just to let him know a few things that have been on my mind. I recommend this particular exercise for kids (and adults) who are having a hard time with the current political climate. Though the chance of anyone even close to the president reading my cards is pretty much zero, it was still cathartic to write out my thoughts. Here are three of the cards I made. Two of the photos are by Gregory Crewdson, a photographer I admire. The third artist is Unknown (I forgot to record the name, sadly). So that's what I did on my snow day yesterday. xo!
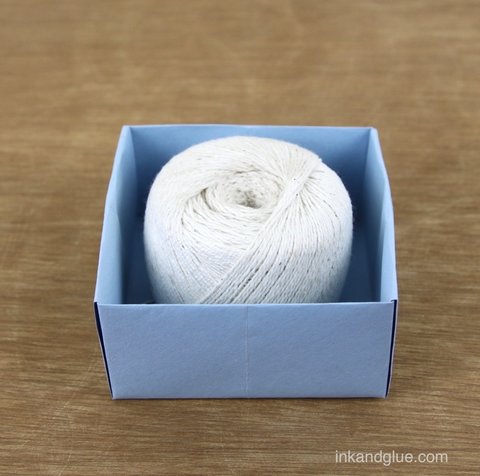
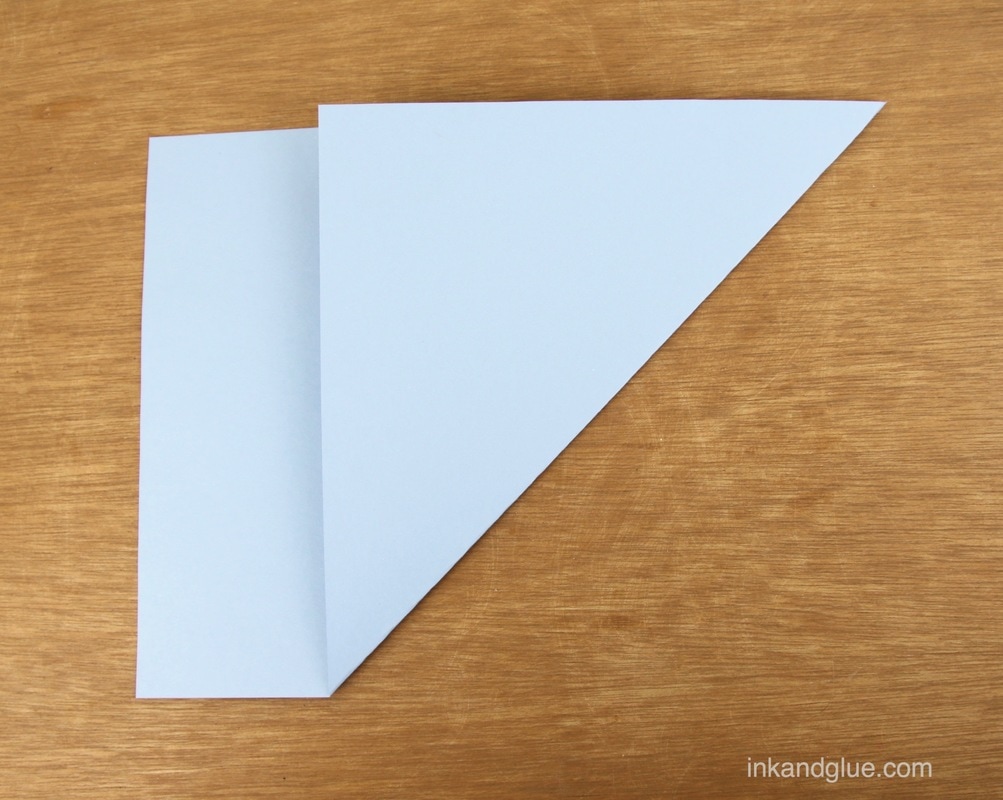
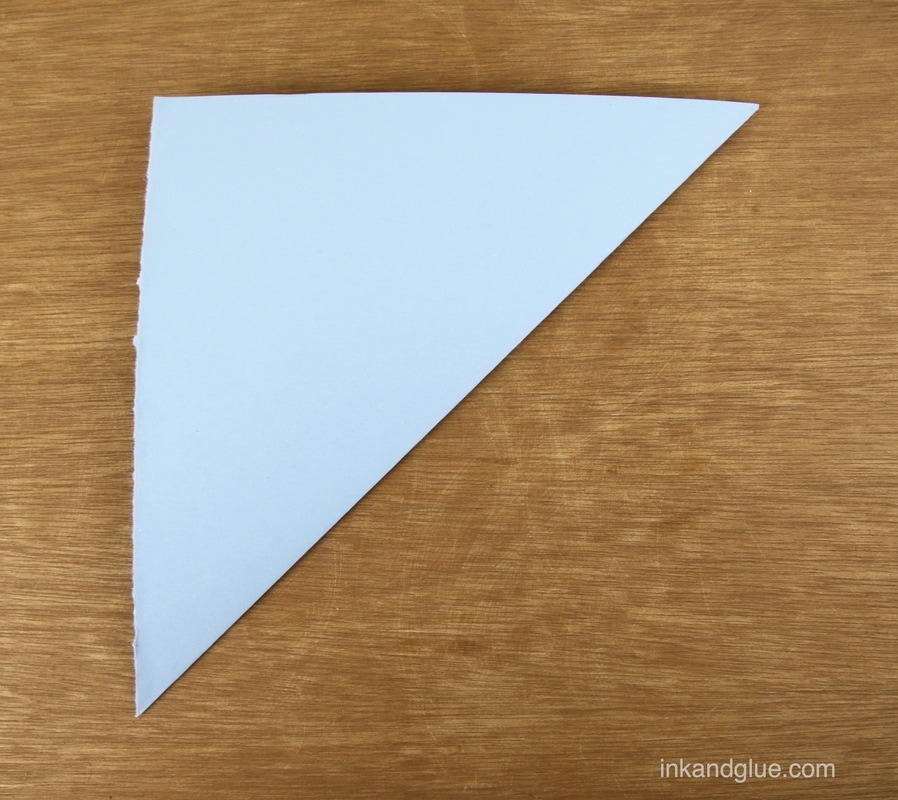
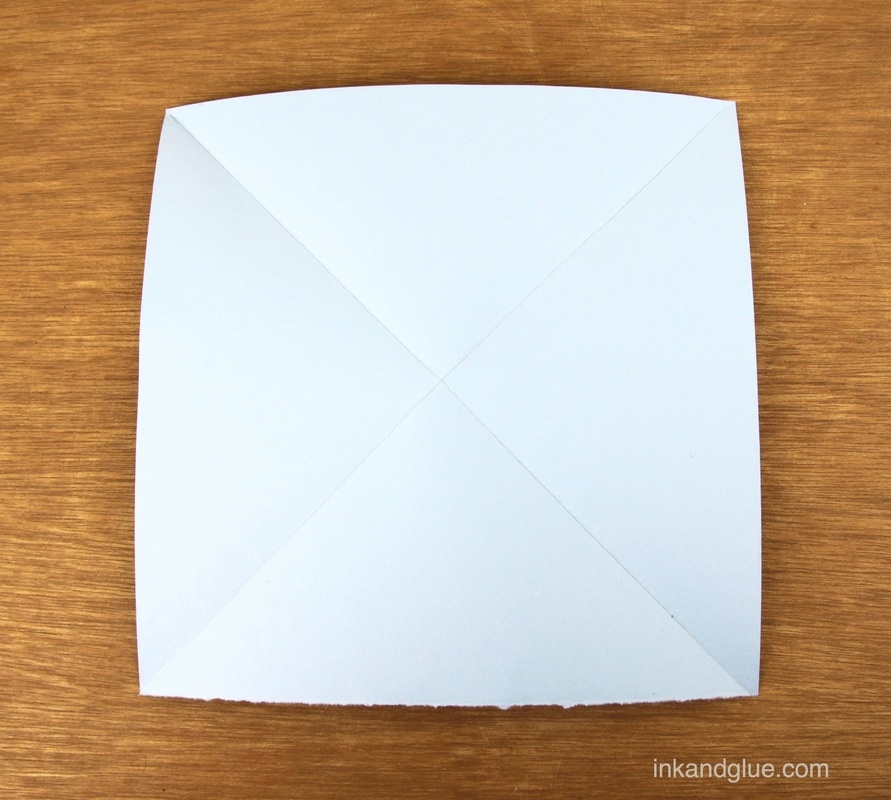
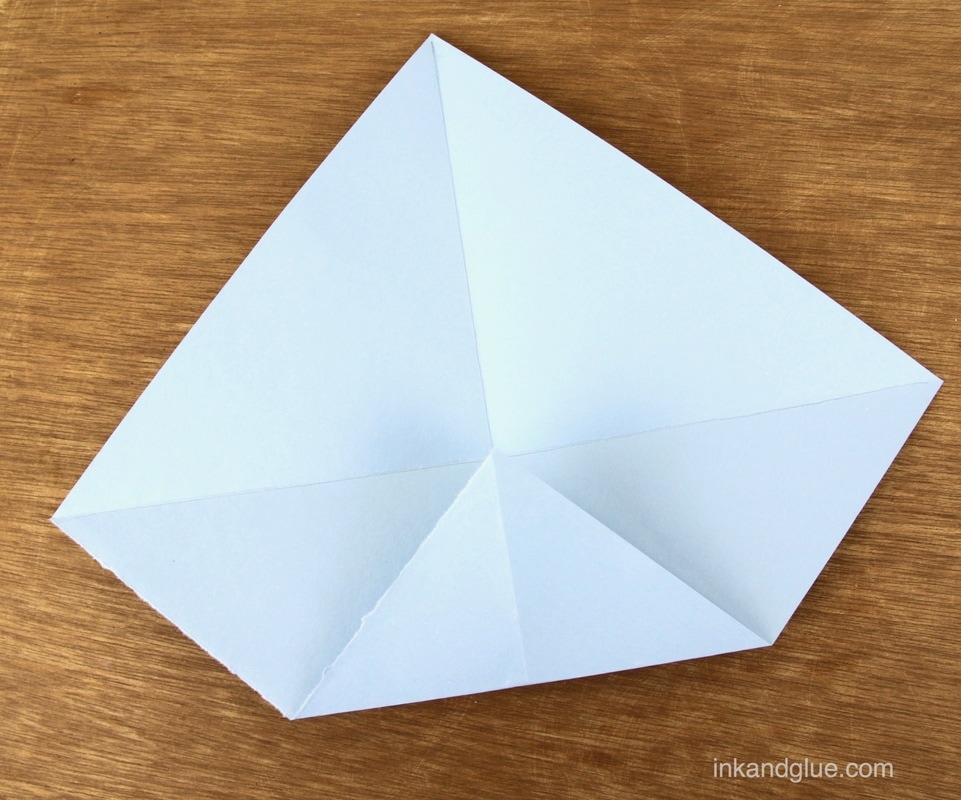
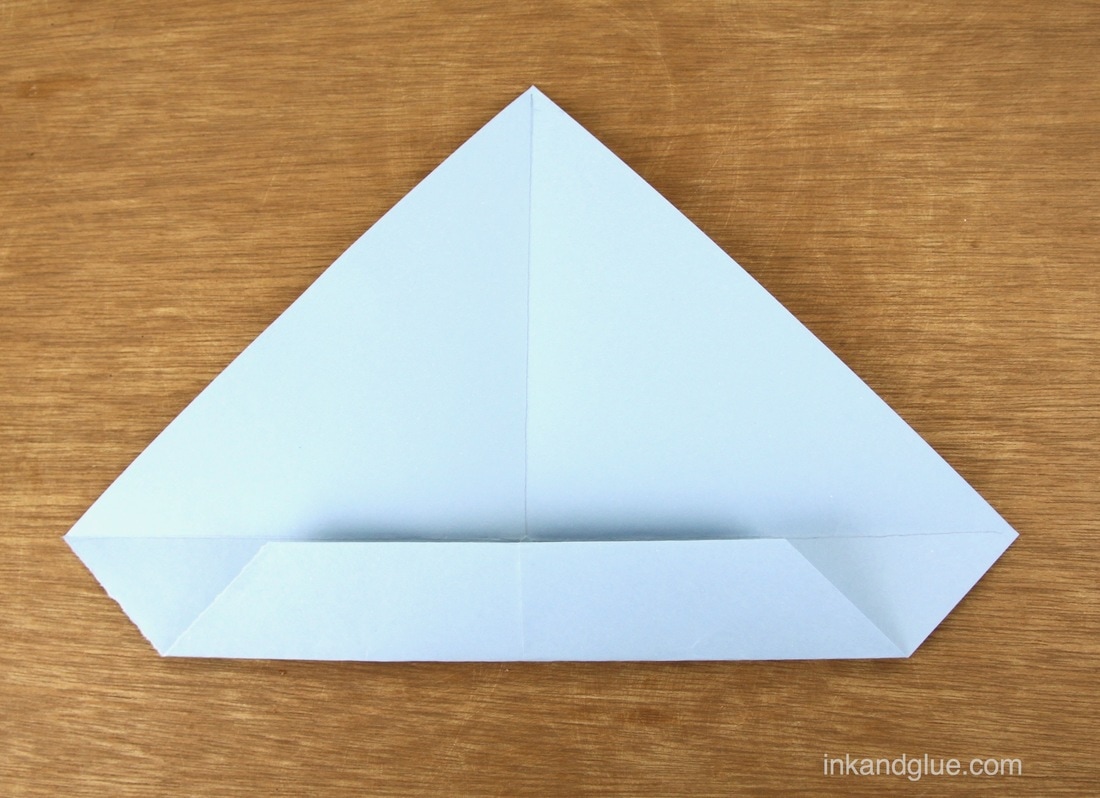
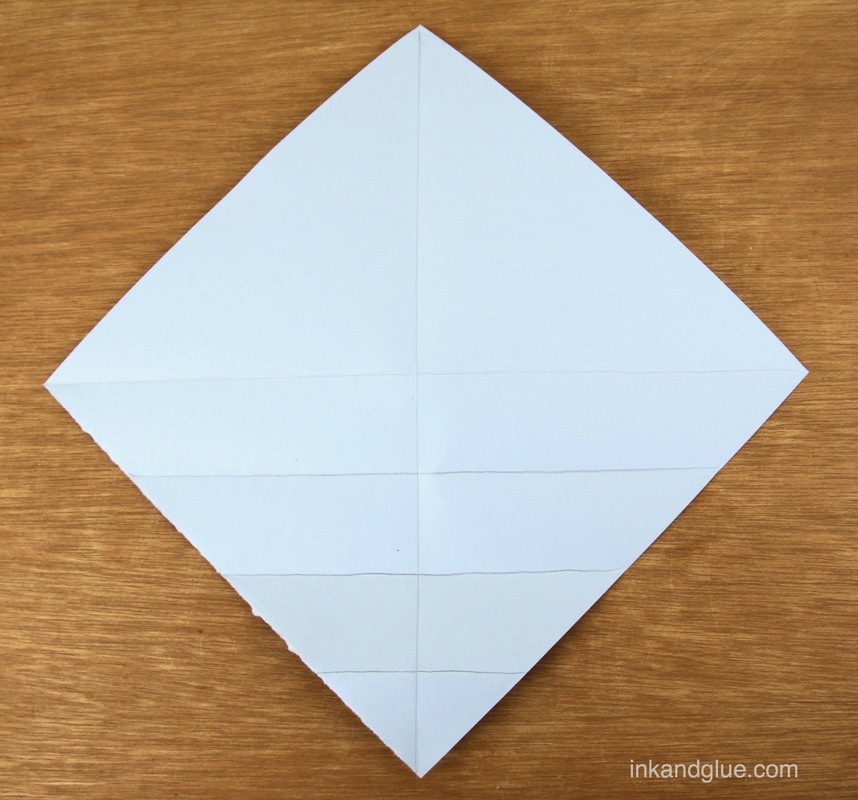
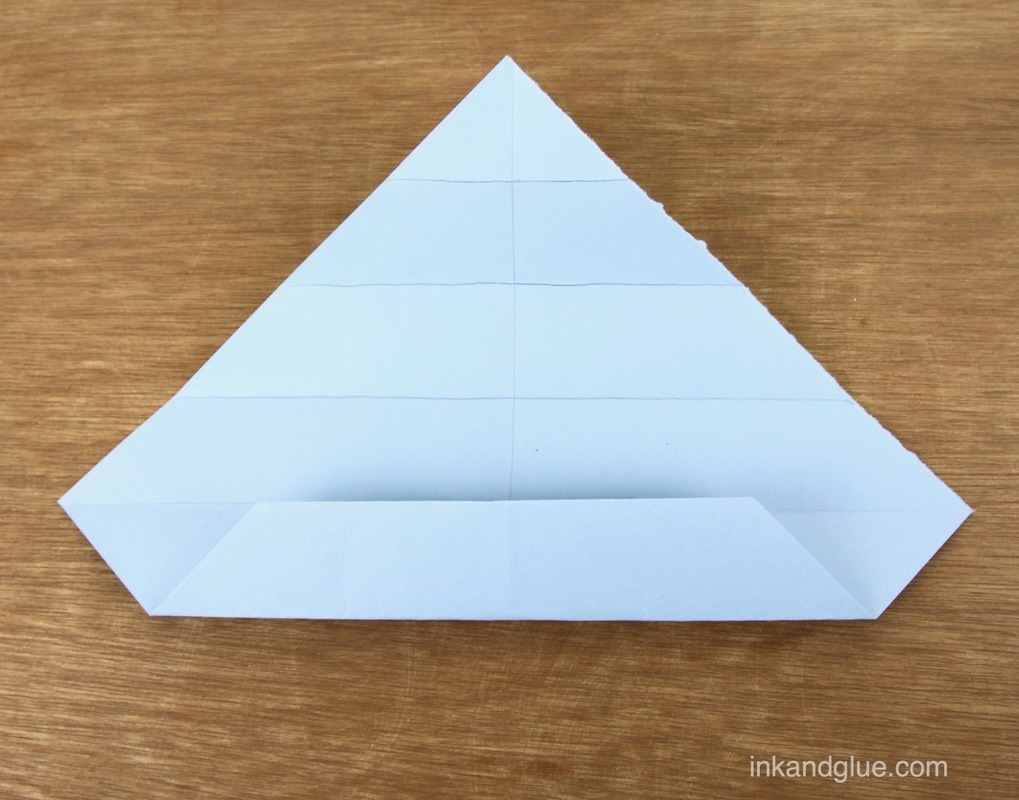
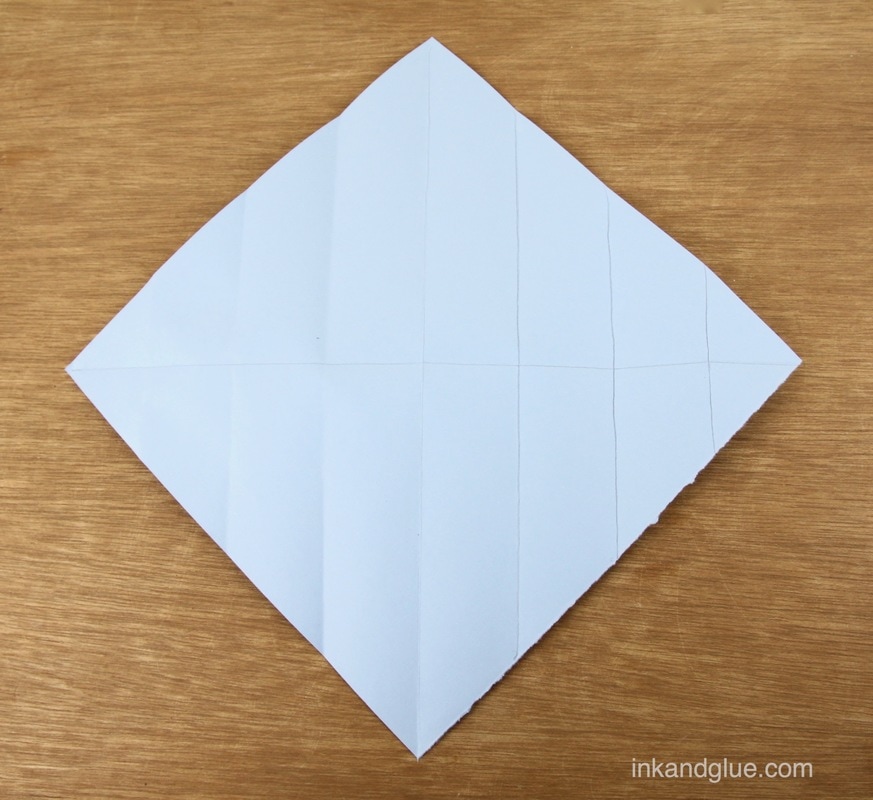
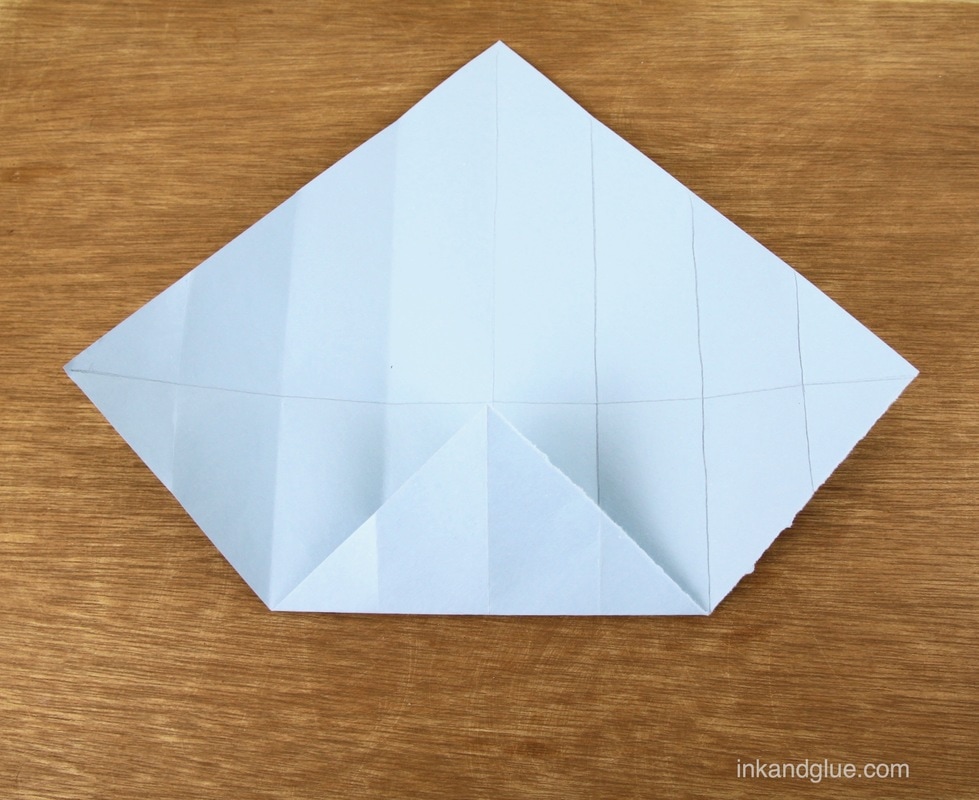
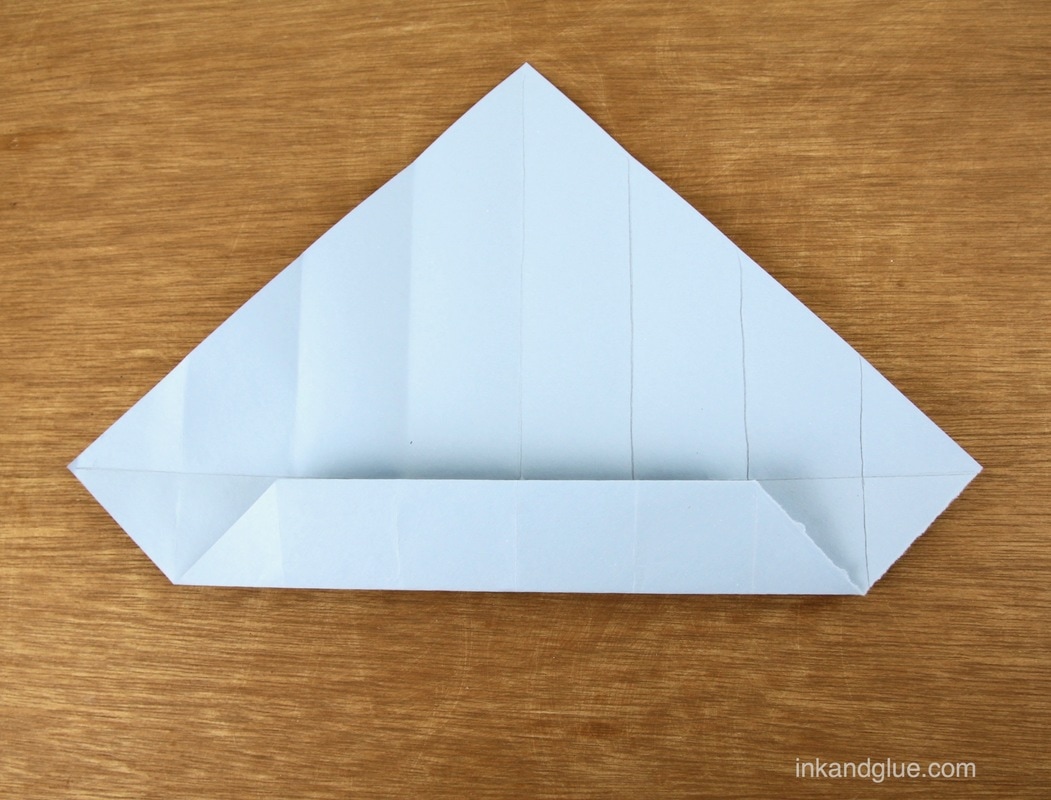
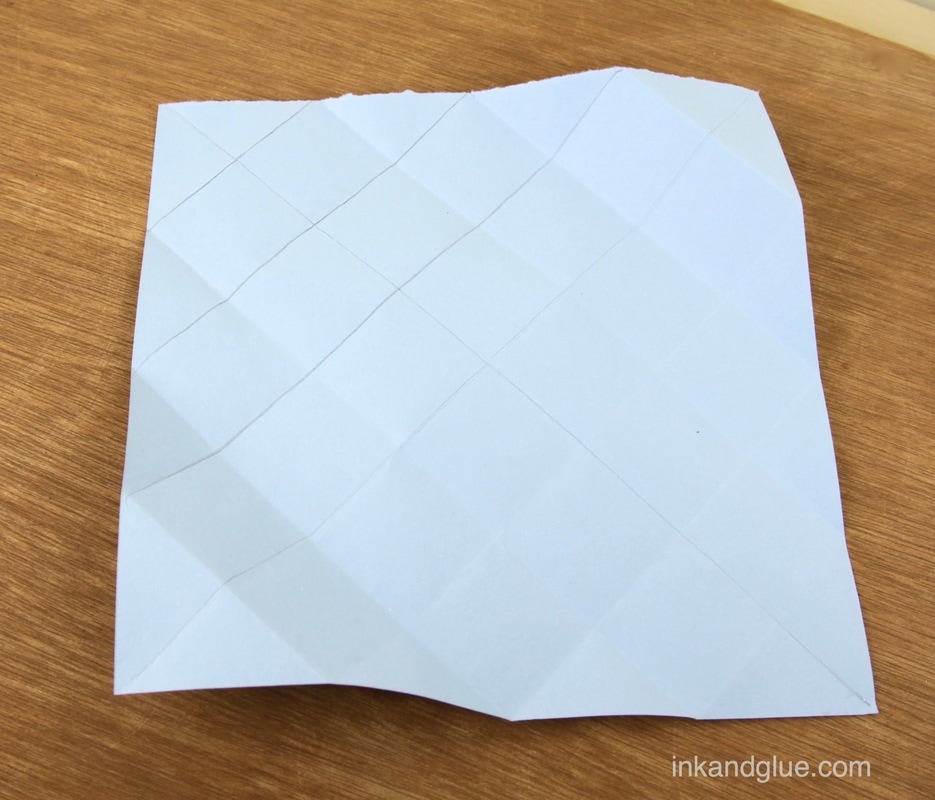
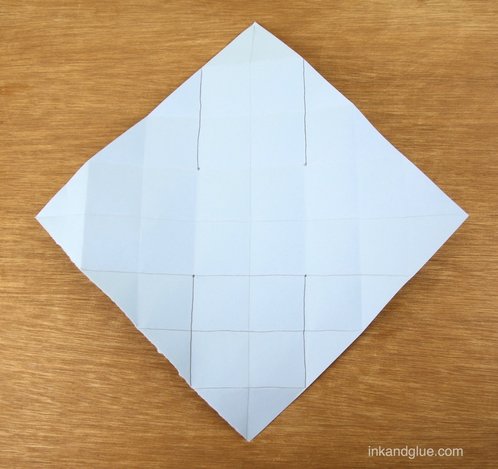
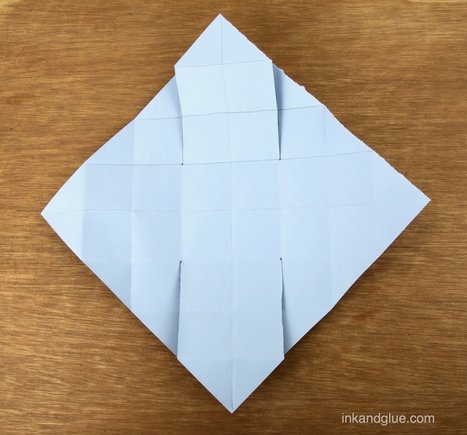
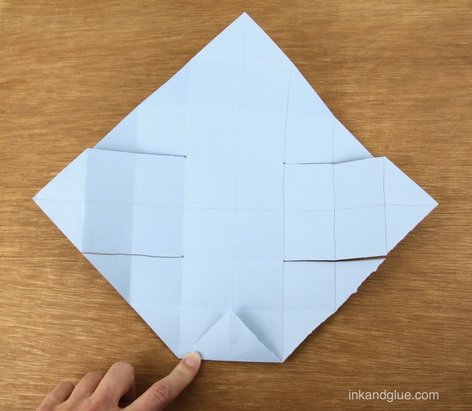
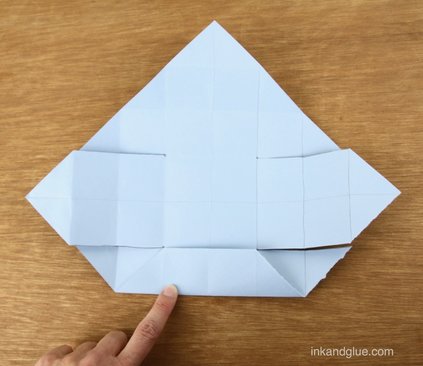
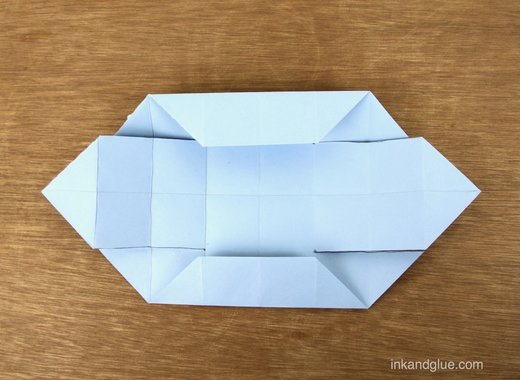
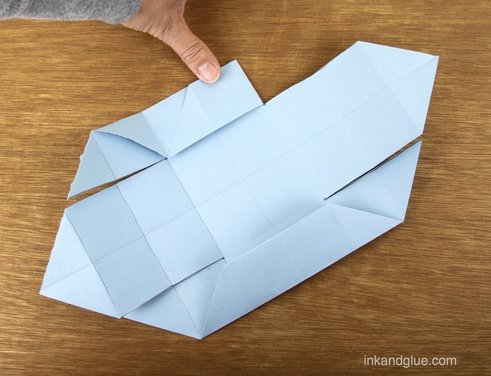
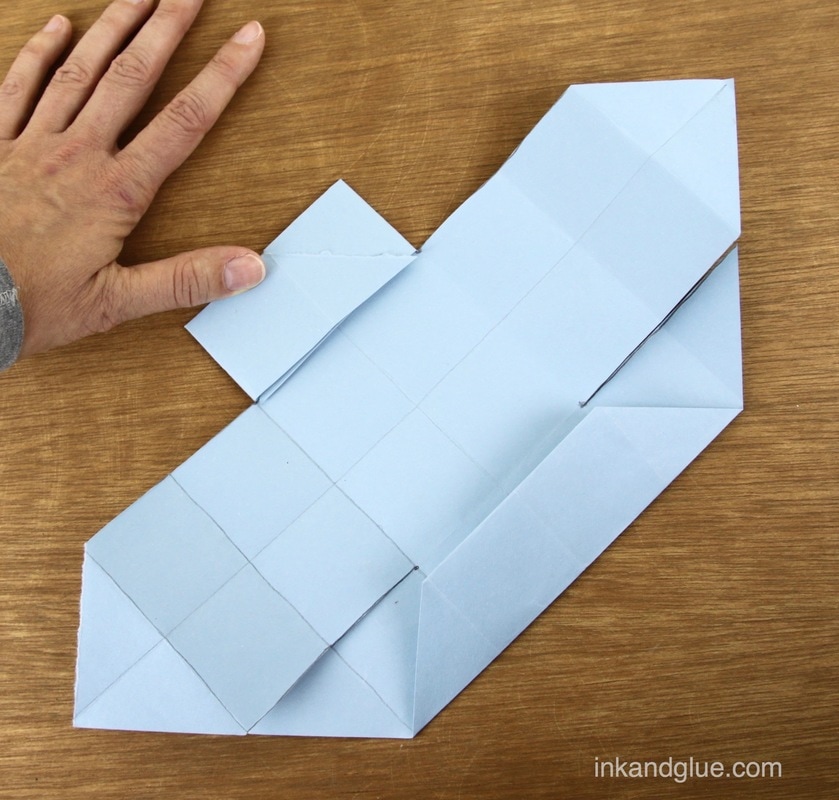
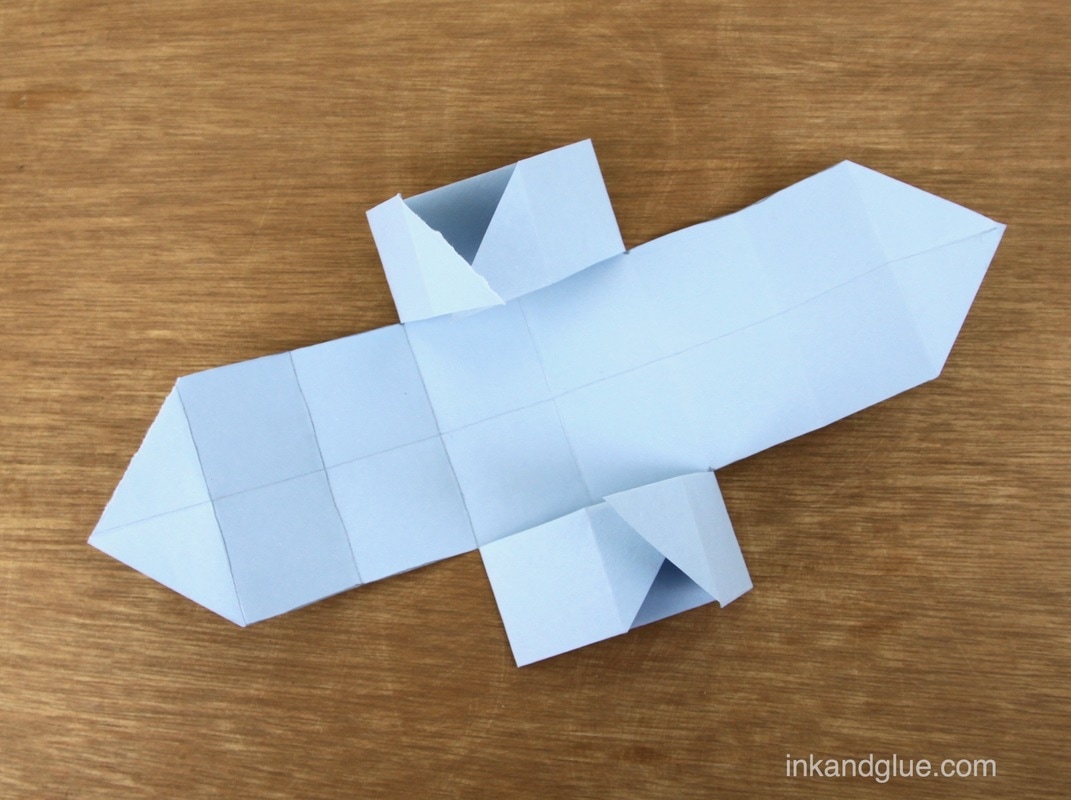
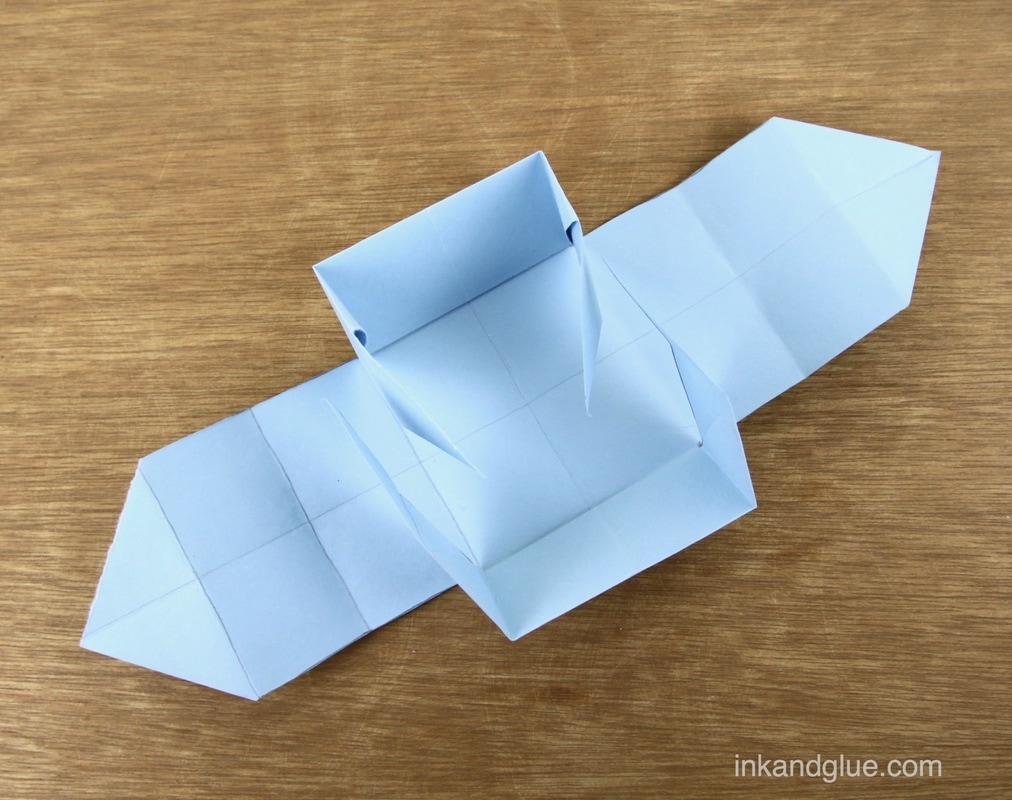
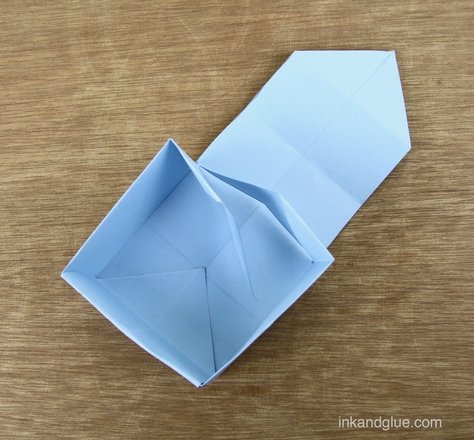
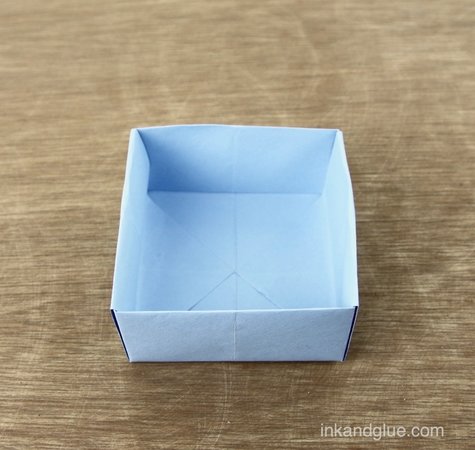
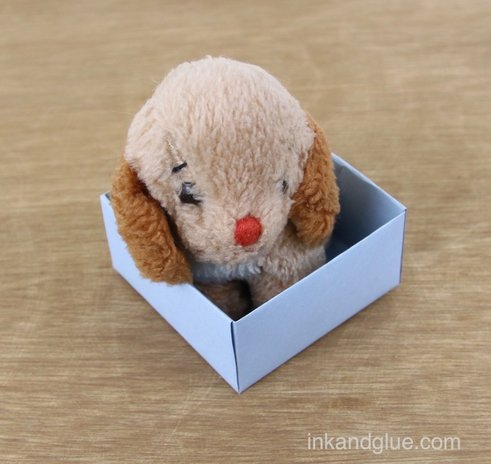
(Ball of string not included.) This one's a little different from my other projects, as it's more of a handy trick than a creative exercise. When I was a kid, I learned this method for folding a box out of a piece of paper of any size. I have used it to make gift boxes for people, as an instant bowl for peanuts while sitting at a bar, or as a holder for a collection of shells while on vacation. If you're extra handy, you don't need any tools to make one — but scissors and a couple of dabs of glue or tape will make it extra easy. Here's how you do it. First, make your paper square. You can do this by folding the paper in half at a diagonal, aligning a side edge to the top edge of the page. Tear or cut off the excess strip. Unfold the square and refold it on the diagonal in the opposite direction. Open up the paper. Bring a corner of the square to meet the center point of the page (i.e. the middle of the X you just made by doing the criss-cross folds) and crease the fold. Fold that section in half again to meet the center line, as shown. Unfold the paper again. I traced the fold lines in pencil here to show the folds more clearly. On the opposite corner of the square, do the same double-fold roll towards the center as you just did. Open the paper back up again, and rotate it 90 degrees. Do the same double-fold rolls to the center on the other two corners. Open up your square. You should see that your paper is now divided, by folds, into smaller squares. Locate the four squares in the very center of your paper: This will be the base of your box. Pick two opposite corners and mark lines from the edges to the four corners of the base square, as shown. Cut (or tear, if you're confident) those four lines, but be sure to stop each cut before you reach the center box. Rotate the square 90 degrees again; you'll be working with the big, wide flaps. Fold one corner over to meet the next fold up, and then fold it over again to meet the next fold — essentially, you're rolling up the wide flap. Do the same with the opposite flap. It should look like this, more or less: Fold in the sides of these rolled-up flaps, two squares in from the sides, as shown. Unfold these flaps a little so you can see a box shape start to materialize. Fold the other two flaps over the ends of the rolled-up sides you just put in place, magically joining them together. Ta-dah! A box! The box will usually stay together just fine without any glue or tape, but if you want it to stay straight and sturdy, add a little glue underneath the two flaps in the center of the base. If you want a top for your box, make one from a slightly smaller piece of paper. You'll be able to slide it into the first box upside-down. It's also neat to make a whole set of nesting boxes in multiple colors and patterns. Or just make one, and put a little stuffed dog in it! A perfect fit! xo
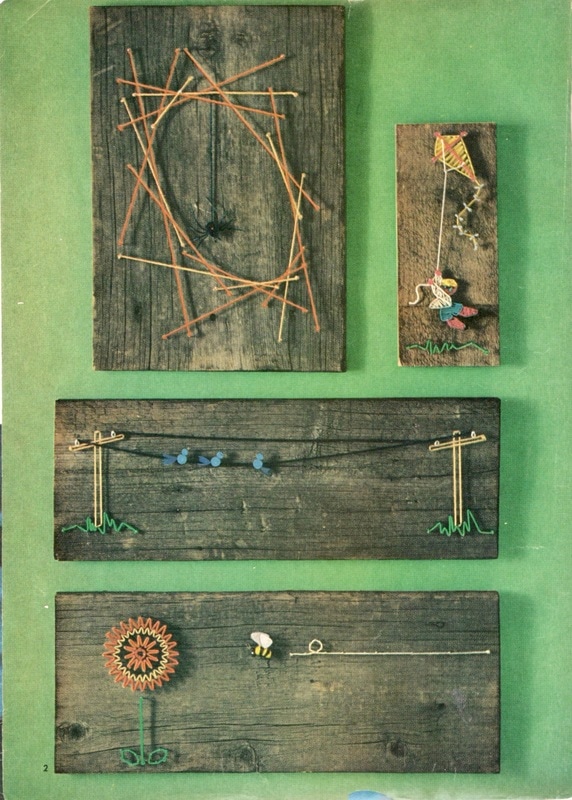
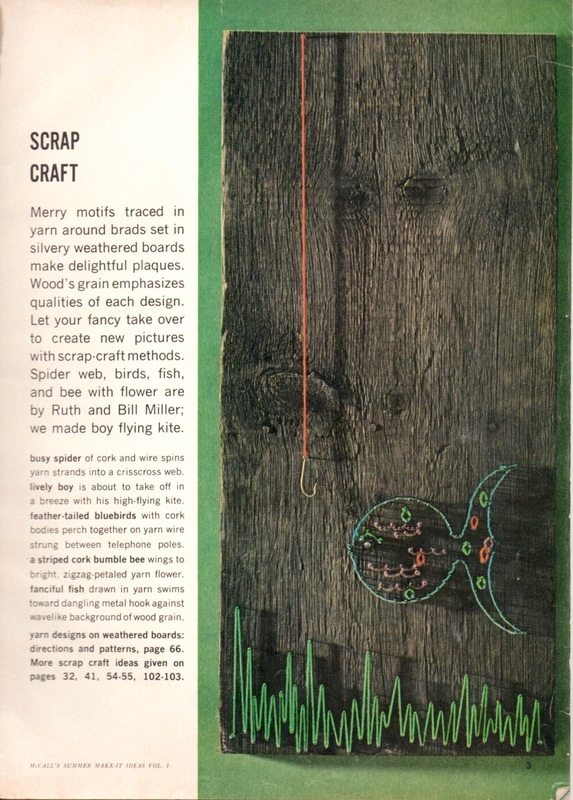
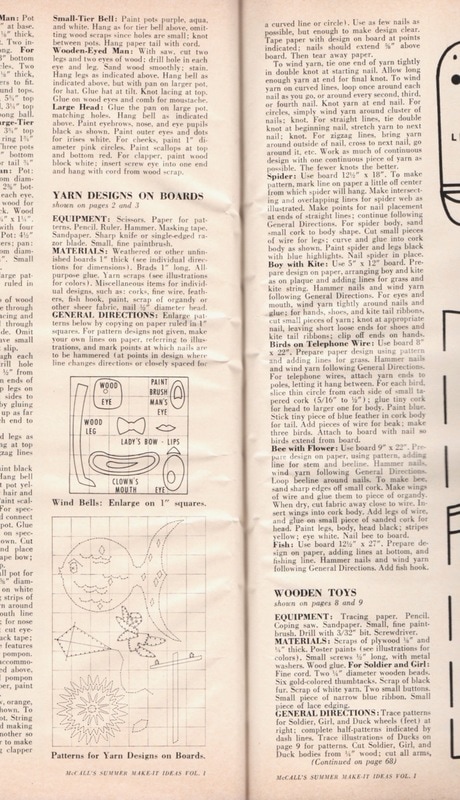
More circa 1966 vintage goodness! I don't know why this string art is called "scrap craft" except the bases are made of scrap wood (the type that only people living out in the country would ever have just lying around). "Let your fancy take over" is my new motto for living a better, happier life. Need directions? I don't think you do, but just in case: xo!
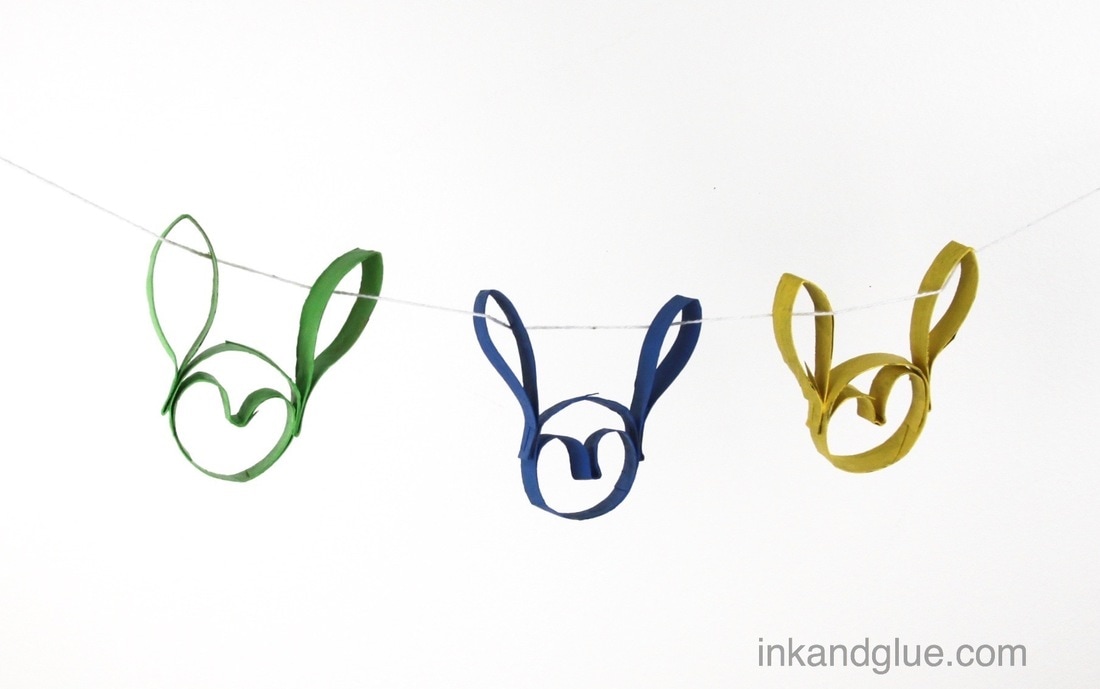
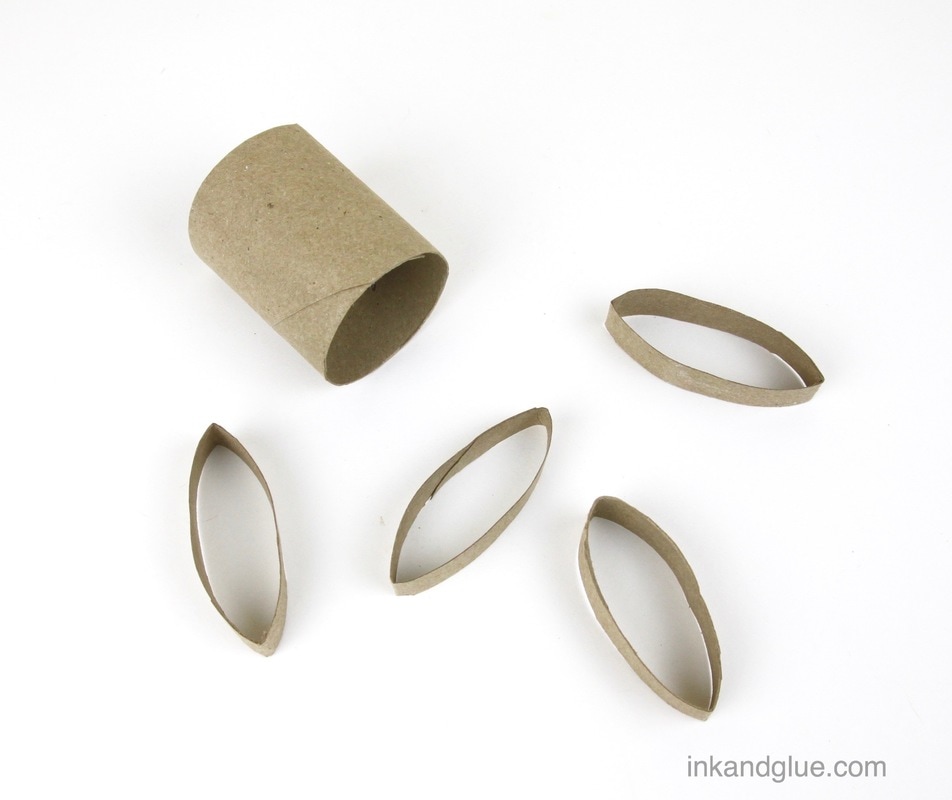
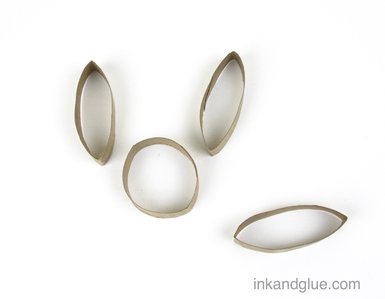
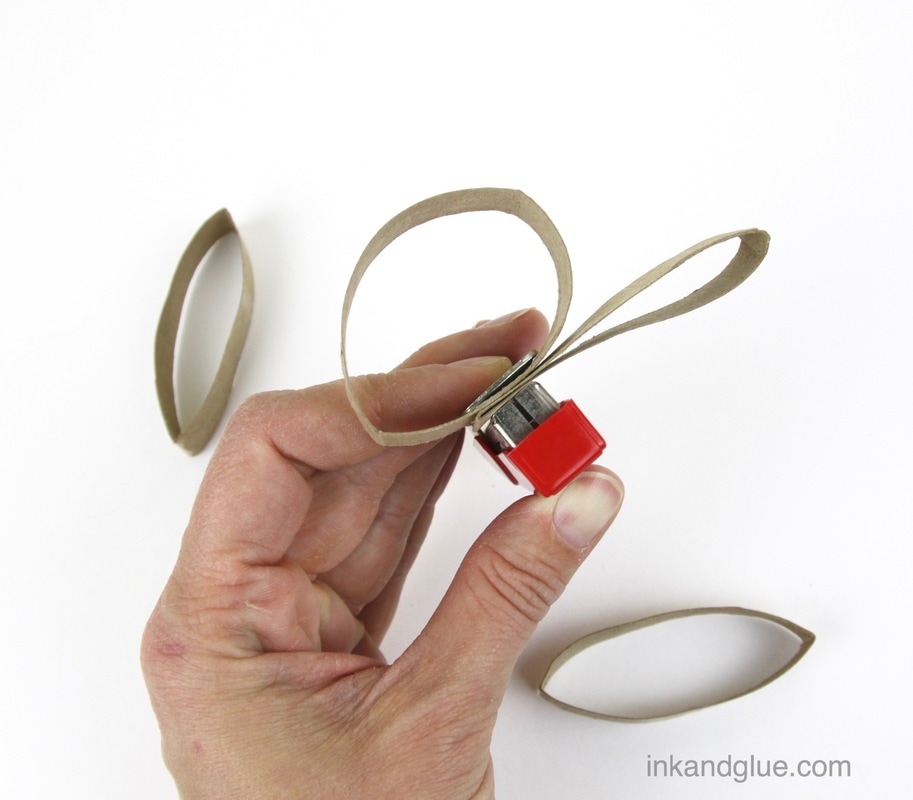
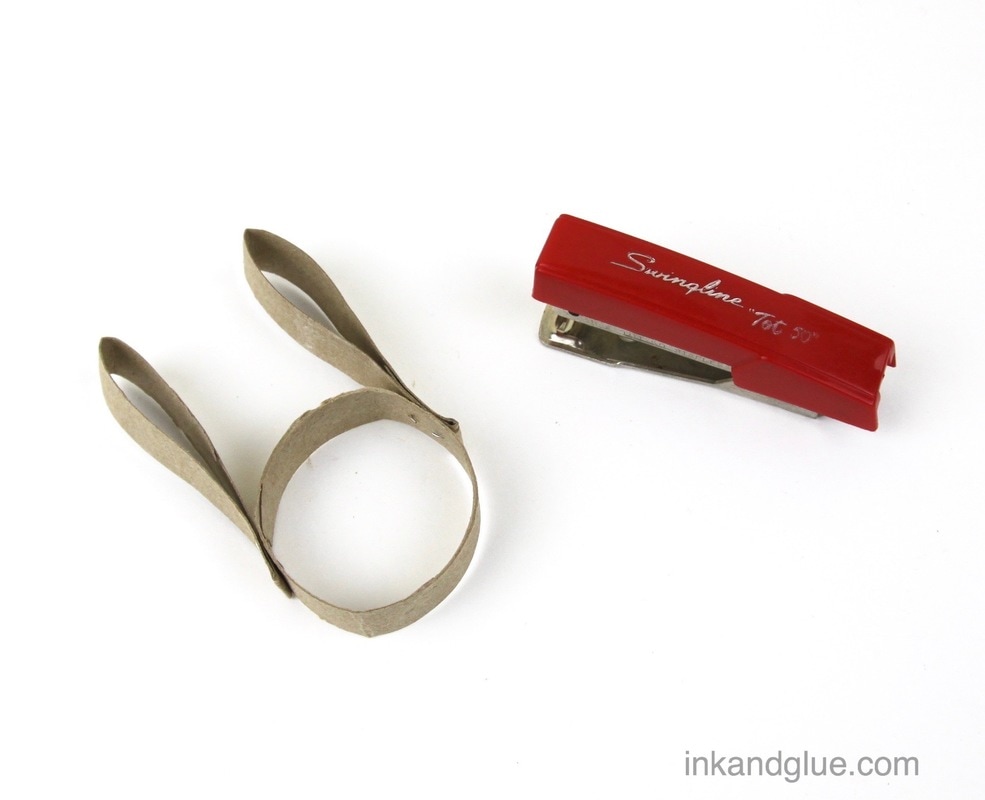
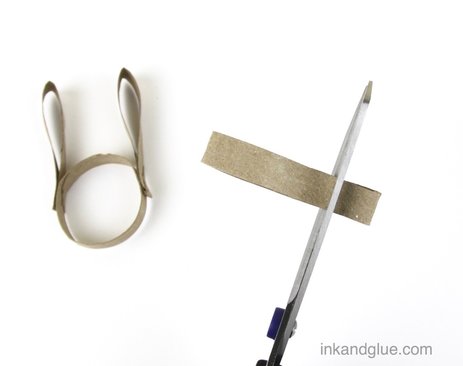
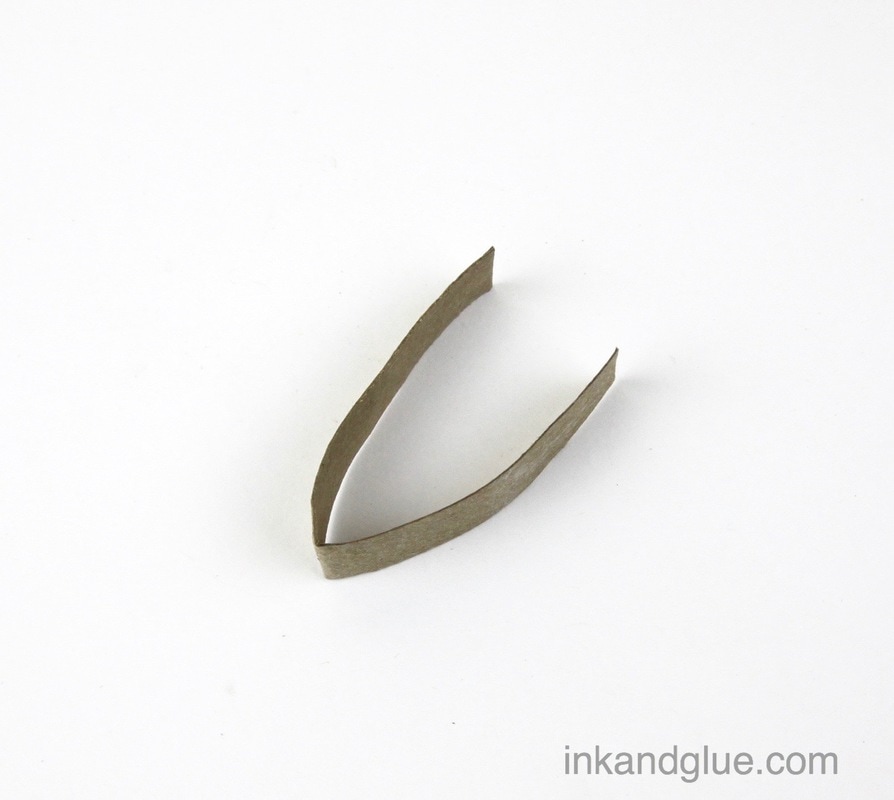
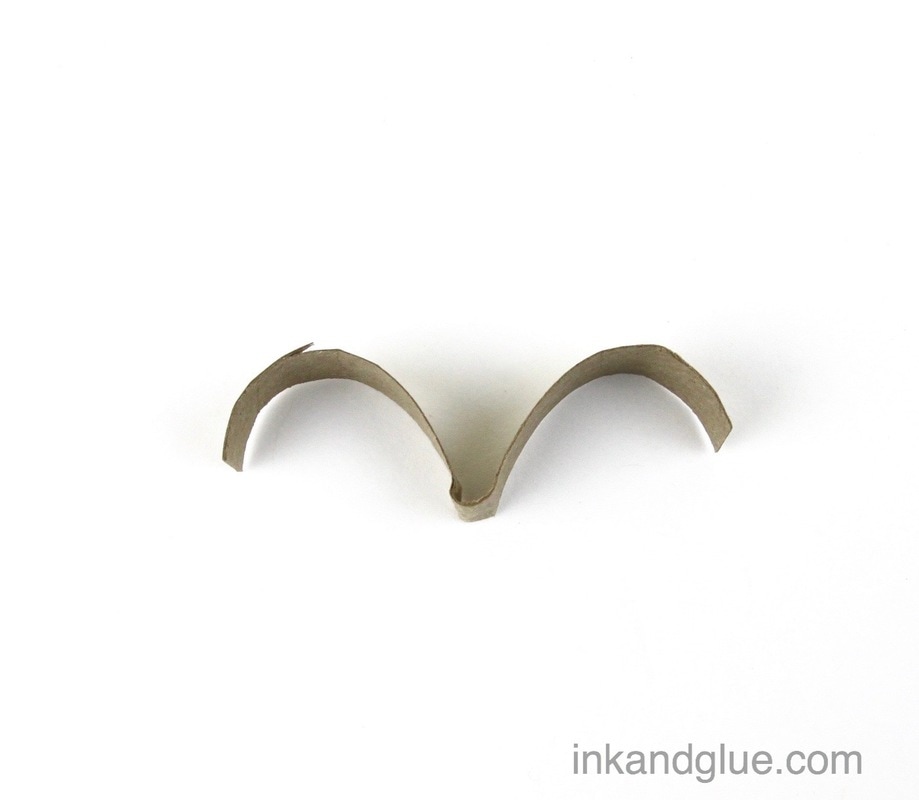
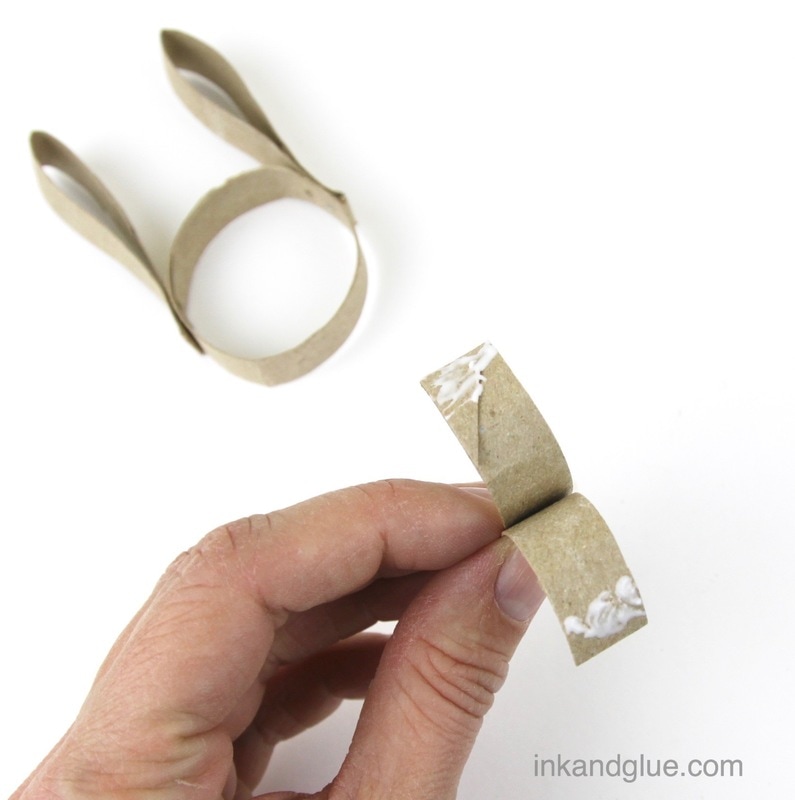
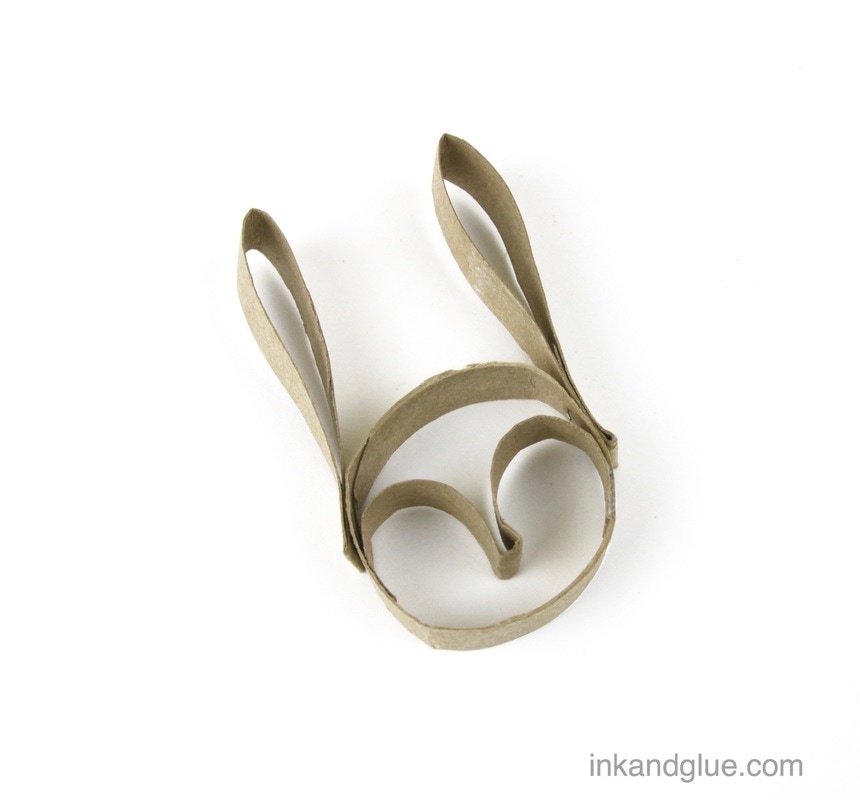
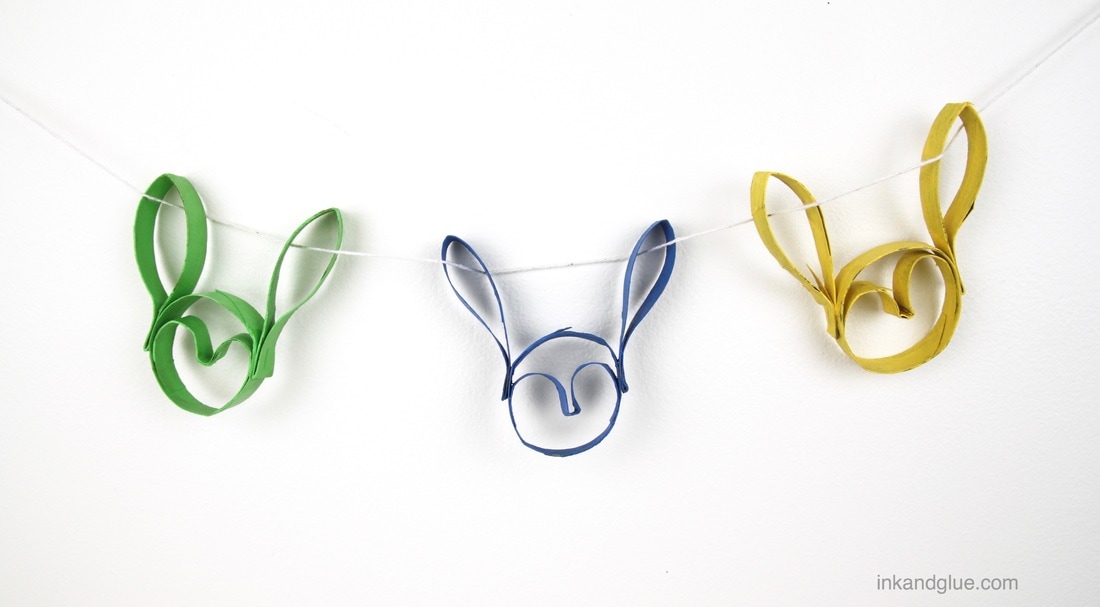
I have a stash of toilet paper tubes in my studio and from time to time they call to me. (By the way, we switched TP brands, and the new one — *cough angelsoft cough cough* — glues the end of the paper onto the roll so thoroughly, the cardboard tube is unusable for anything fun. Don't do that, tissue manufacturers. You are killing the creative dreams of children.) Anyway! I like the creative restrictions inherent in using these tubes. It's the difference between staring at a blank piece of paper, and staring at a piece of paper that already has a few lines drawn onto it — it just makes you want to take it further. Here's how you can make a bunny face like these. First, flatten a cardboard TP tube slightly and cut it in half — each half can make one rabbit head. Cut the half into sections that are each about 1/3-inch wide. Tip: If you want the rings pretty close to the same width without using a ruler, cut the half-tube in half, and then cut those resulting halves in half. For the head and the ears, open one ring back up into a circle, and flatten two of the other rings. Staple the flattened rings to opposite points of the round ring. I happen to have an adorable mini stapler, but a regular size one will work ok too. Cut about a half inch from one end of the flattened fourth ring. Below left is what the ring will look like right after you cut it. See that fold at the bottom of the V shape? Bend the two halves of the V all the way around so that it's more of an A shape (without the crossbar in the middle, of course). Use your fingers to kind of flatten the tip of the A a bit, then rotate it 180 degrees — it might look something like the picture below, right. Bend the two wings of the shape to keep them curly. Apply tacky glue to a half-inch or so at the end of each wing, on top of the curl. Insert the shape inside the head piece, and bend and press the wings in place where you want them. You are now free to decorate your rabbit head at will! As you can see, I simply painted mine with craft acrylics. To hang them, I wove a piece of thin cotton string through the ears. Easy! xo!
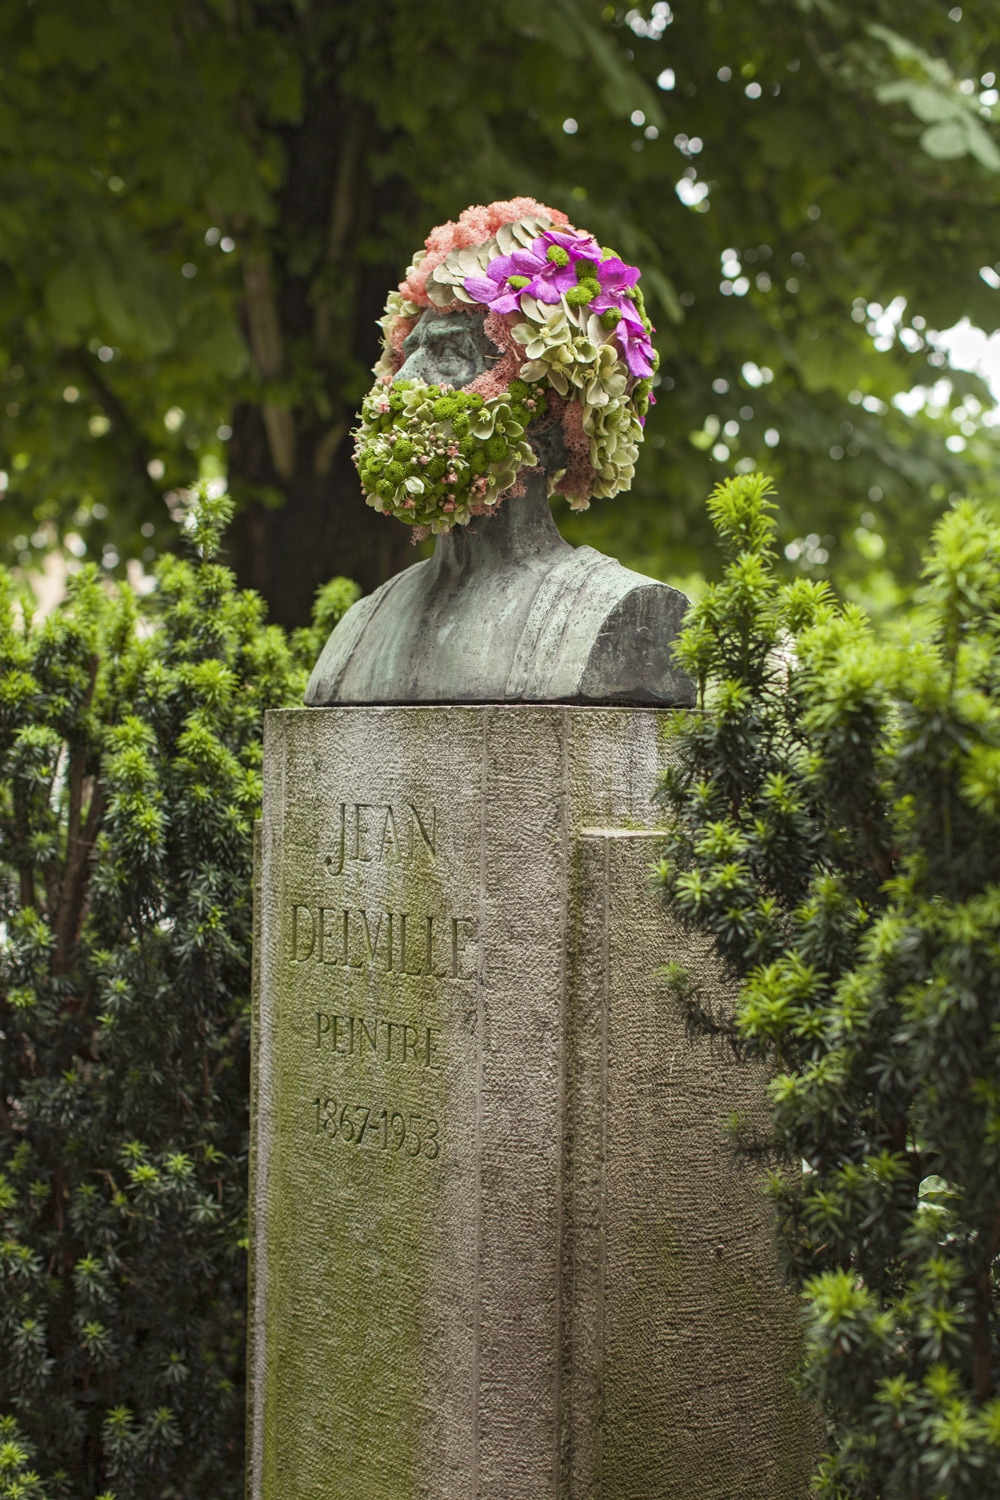
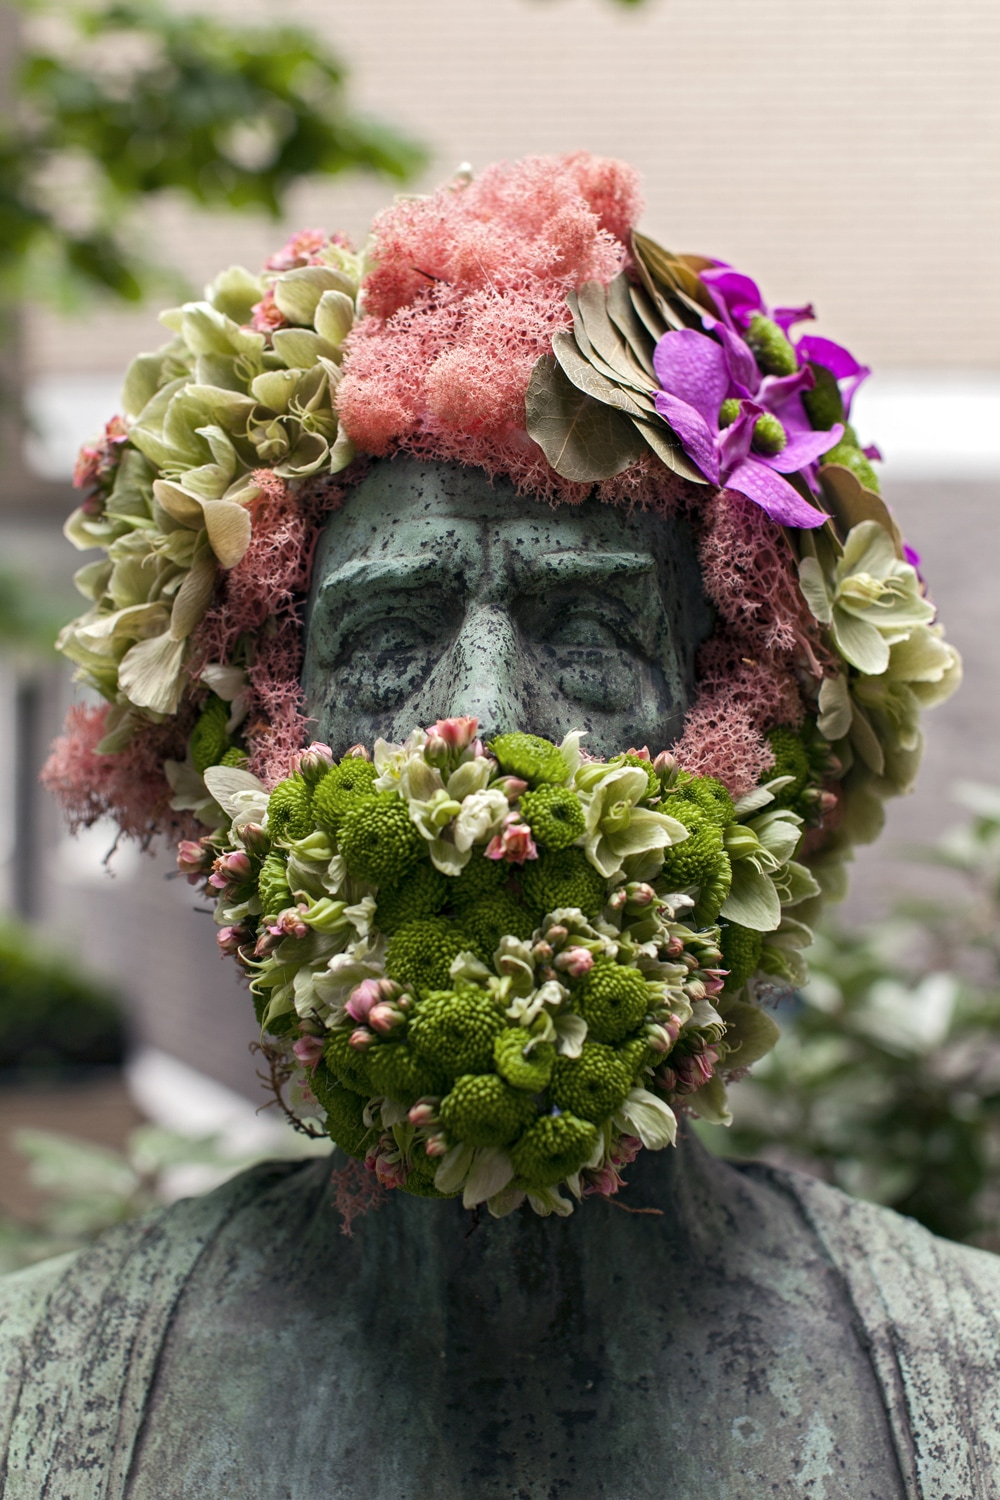
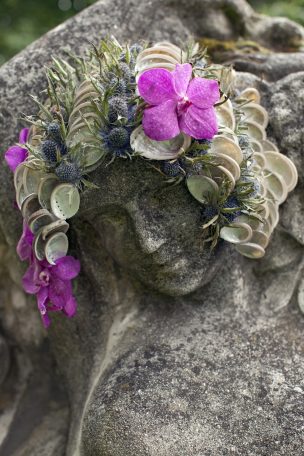
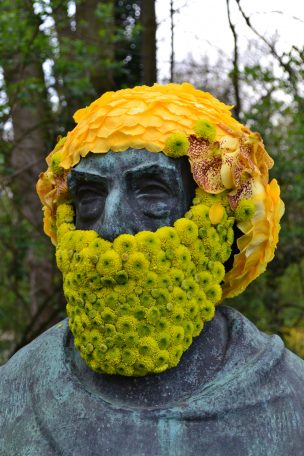
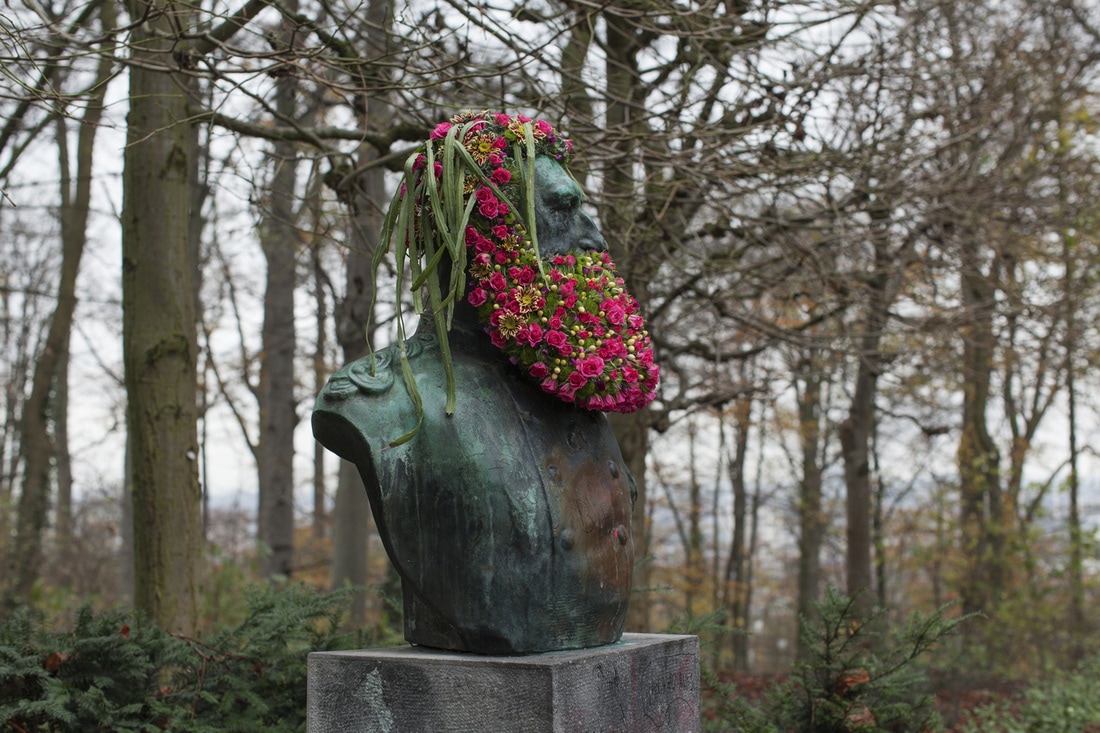
Have you met Geoffroy Mottart? He's a florist and artist in Brussels who uses his floral materials to beautify—temporarily—the often-overlooked statuary around town. I love this kind of guerrilla art, because it's ephemeral, respectful (mostly) of what's already there, and very well executed. Go to his website to see even more. (And, if you're in Brussels and can speak French, take a floral-arrangement class with him!)
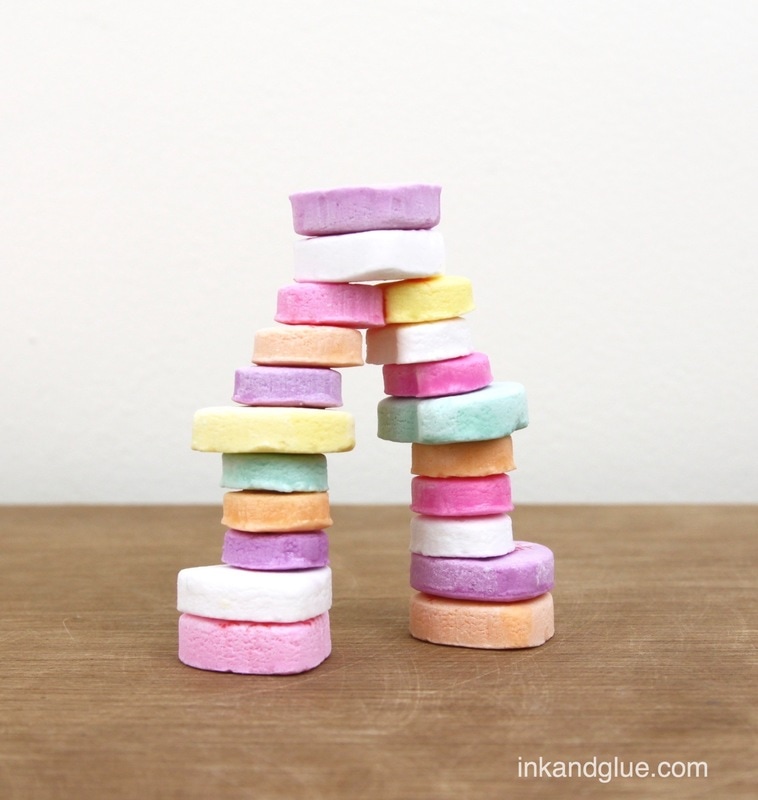
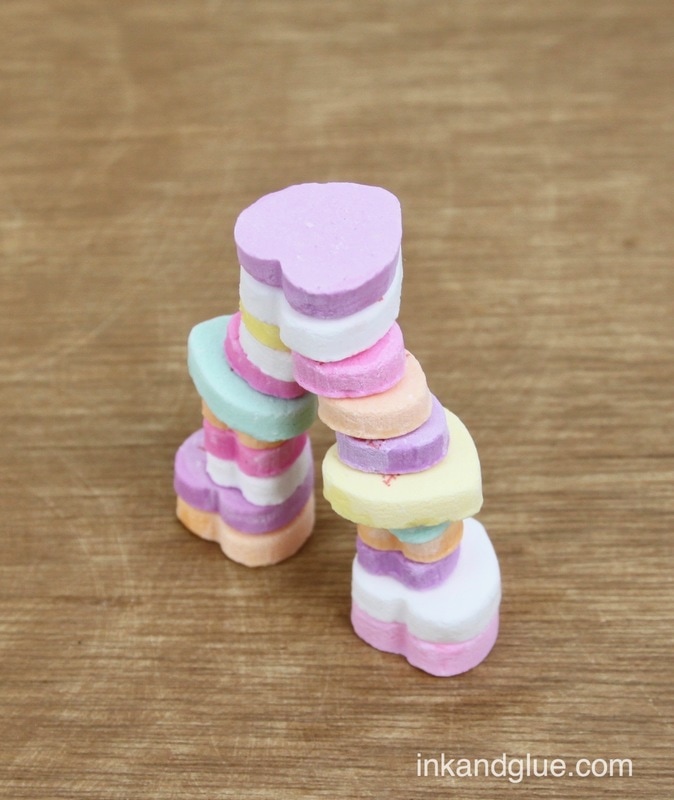
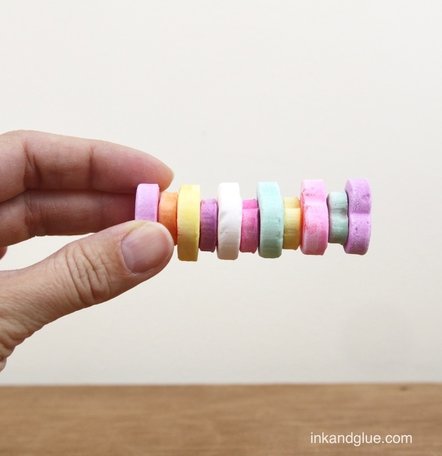
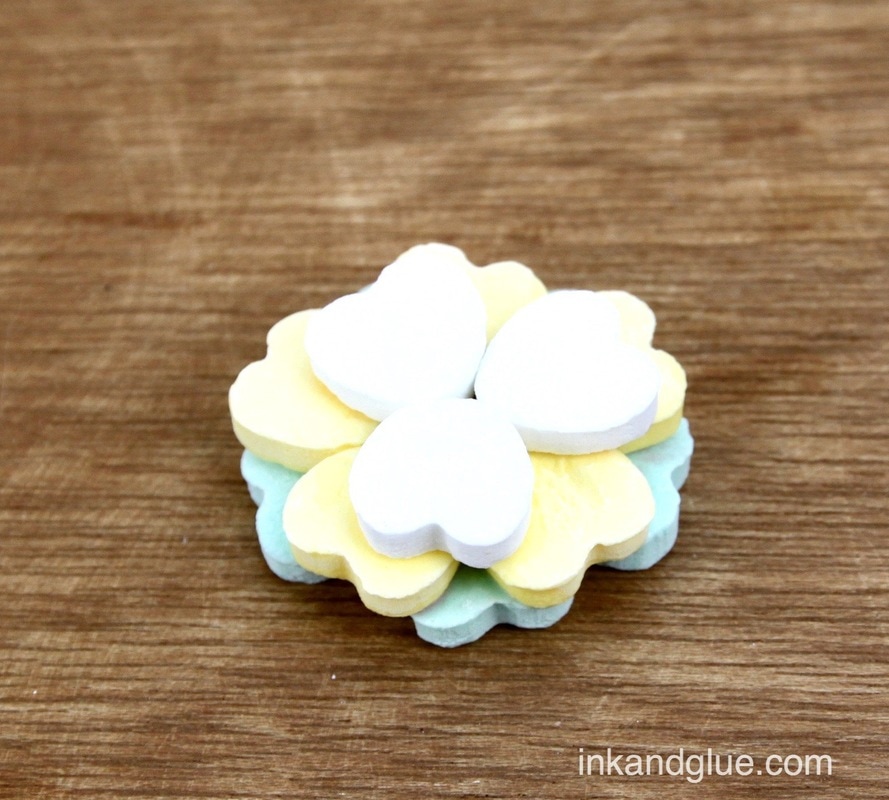
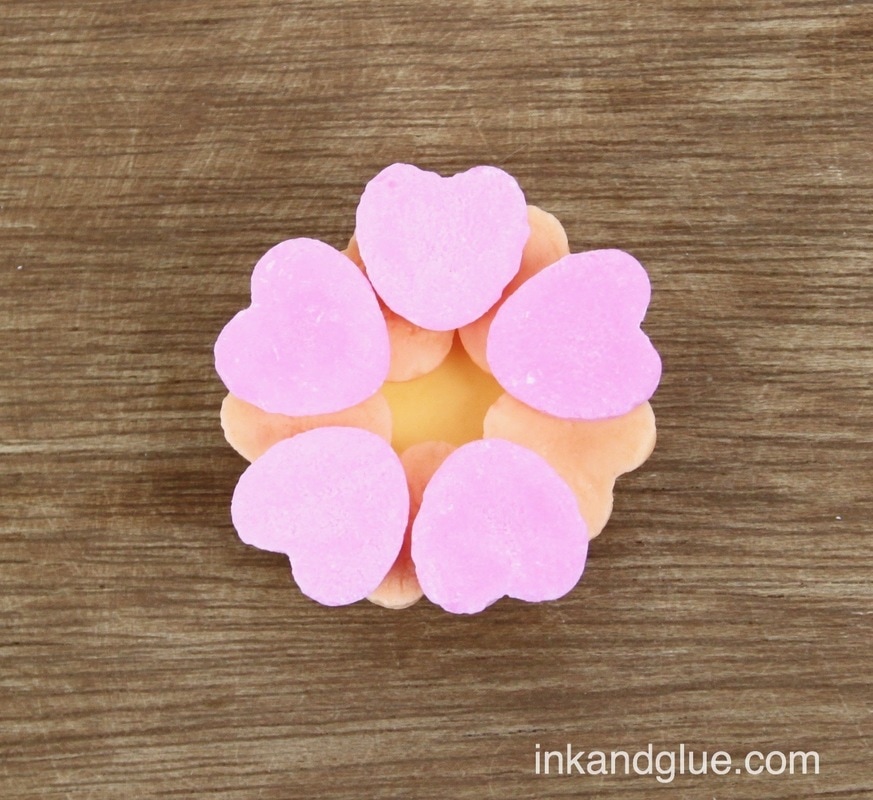
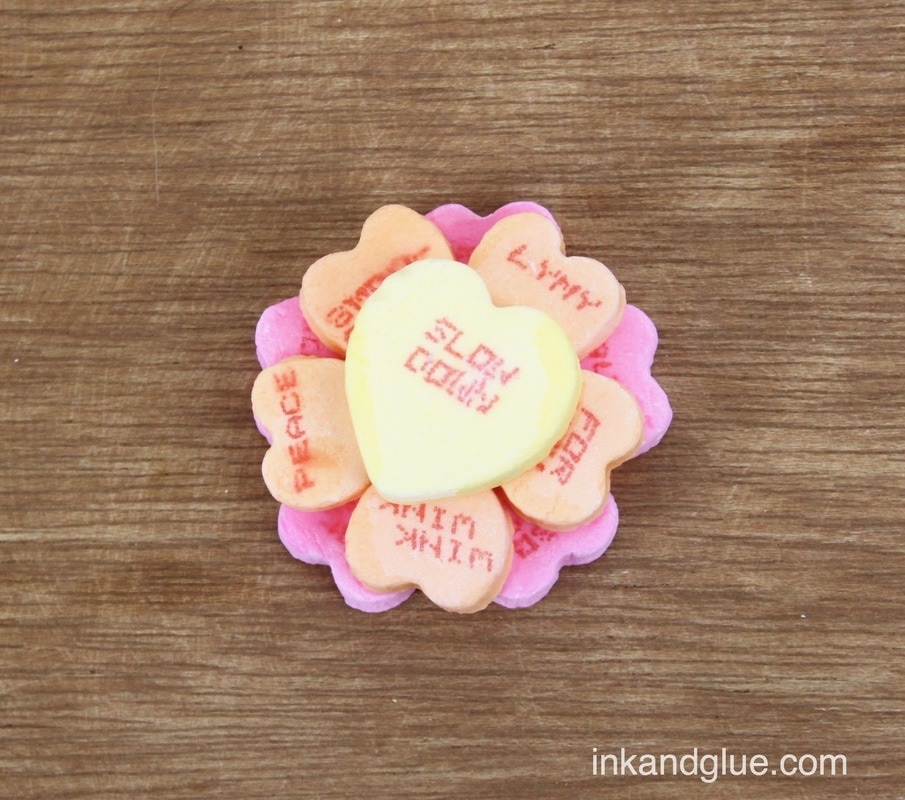
xo Valentine's Day was just a few short days ago, which means you either 1. have plenty of not-very-tasty conversation hearts candy around the house, or 2. can purchase bags of said candy at a deep discount. The two bags of candy I used for these little structures cost less than $2, total. And I have plenty left. PLENTY. But what to do with these ubiquitous candies? Eat them? Maybe a few, before you realize you're never going to make it through the entire bag. But they're so appealingly colorful and sweetly scented... Well, here's the magic thing that I discovered: All you need to attach two candy hearts together is WATER. Yes! Just water, which means whatever you make is still totally edible. Pour some water a shallow dish, dip a heart in it (try to only wet the side, don't dunk it — the "ink" will run), press it to another heart, and let dry. You do need to let them dry overnight, but then look what happens: That is adhesion, friends. Here are a few more little things I made using this method. The flowers in particular would make great cupcake toppers. "Glue" green hearts together for St. Patrick's Day! Here's to playing with your food!
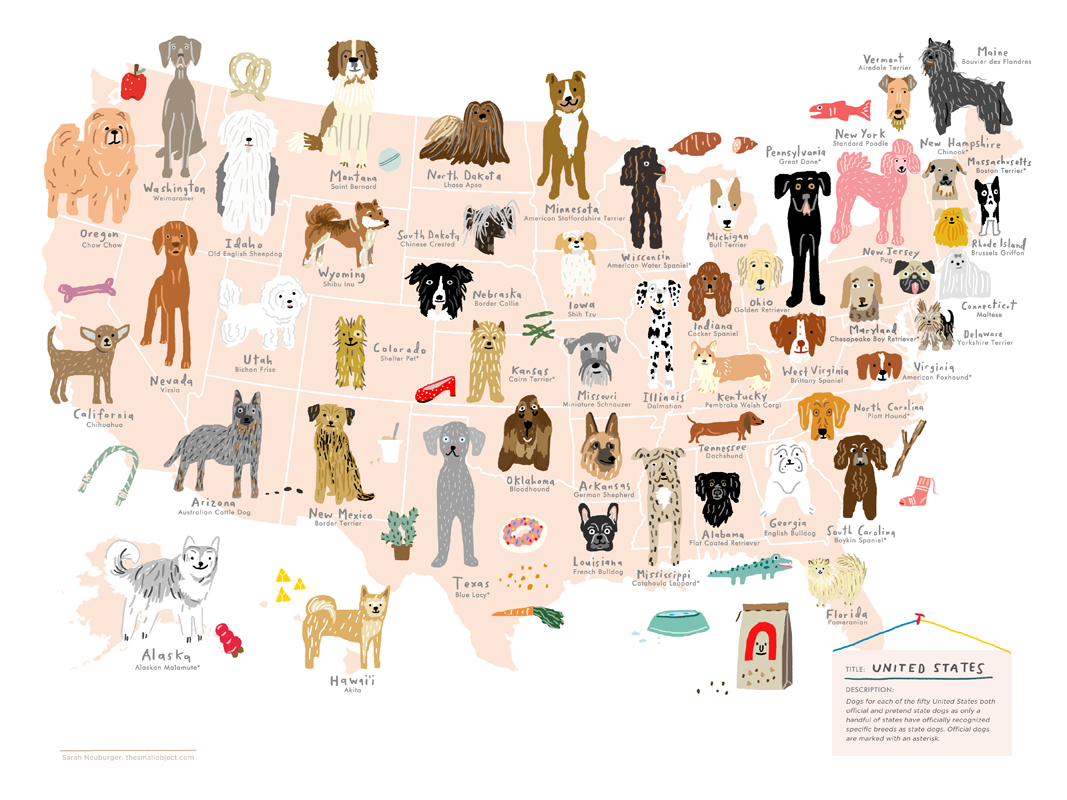
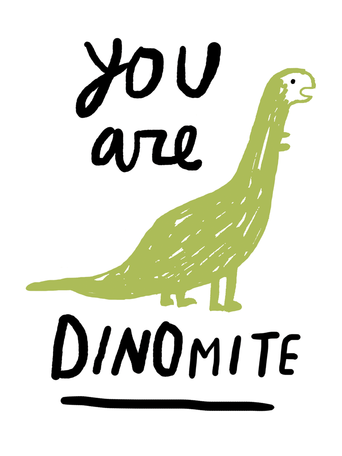
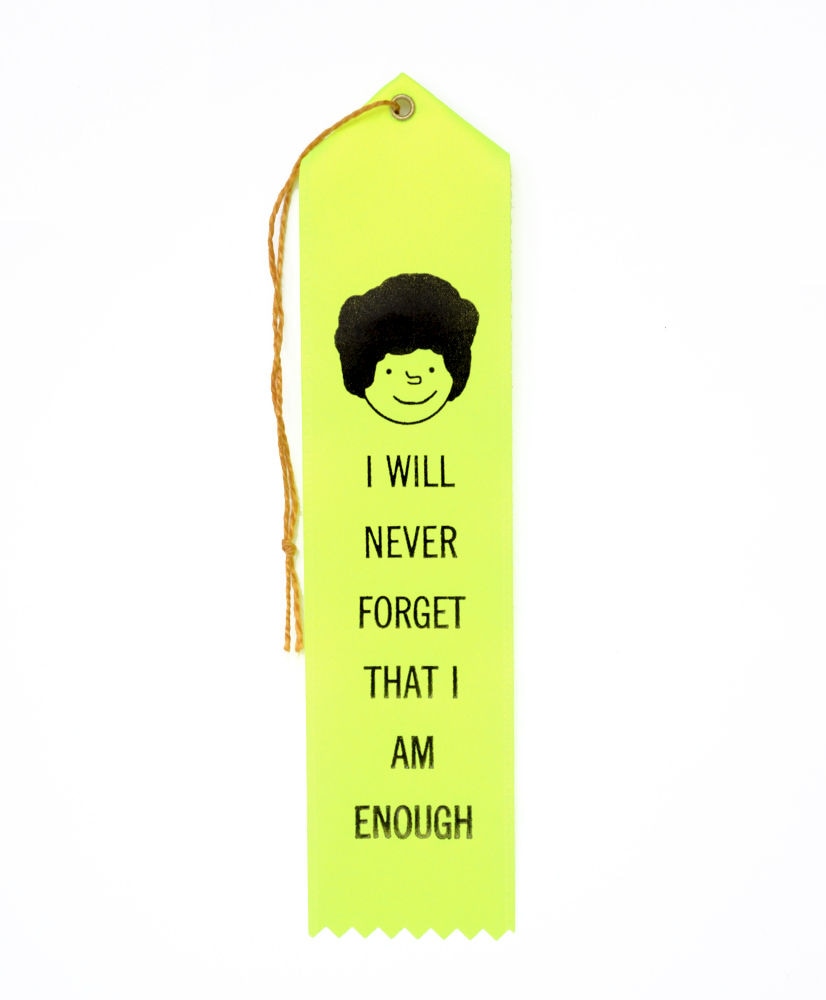
xo Have you met Sarah Neuburger? She is the artist behind The Small Object. I first encountered her work at a Renegade Craft Fair in NYC, years ago. She was mostly showing examples of her incredible custom wedding toppers and her stamp sets. She's since expanded her line to include high-quality prints of her illustration work, including this kids-room-perfect "The United States of Dogs" poster. (Some states have an official state dog, but for those that don't, Sarah chose for them!) I appreciate the simplicity of this inspirational print, below. Way better than a "hang in there" kitten poster.
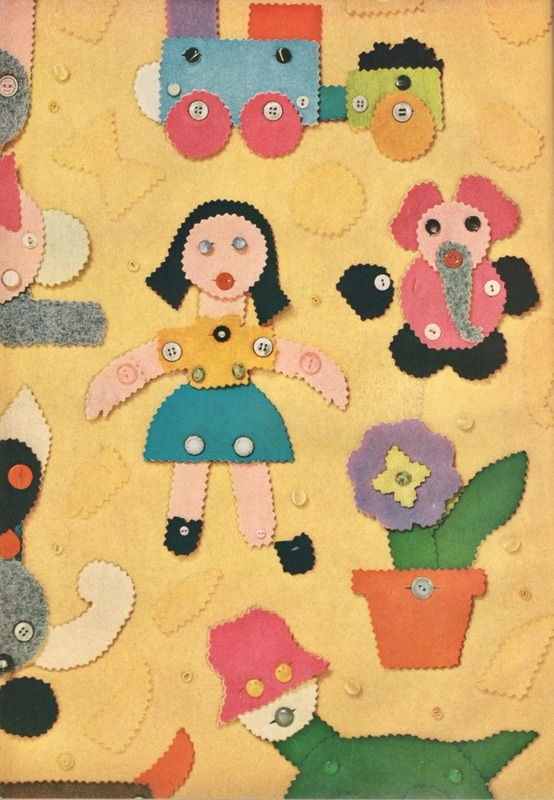
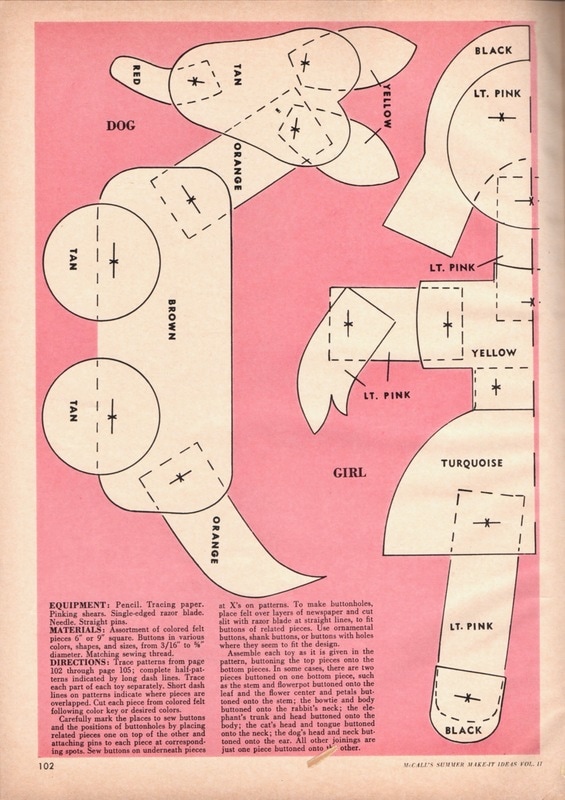
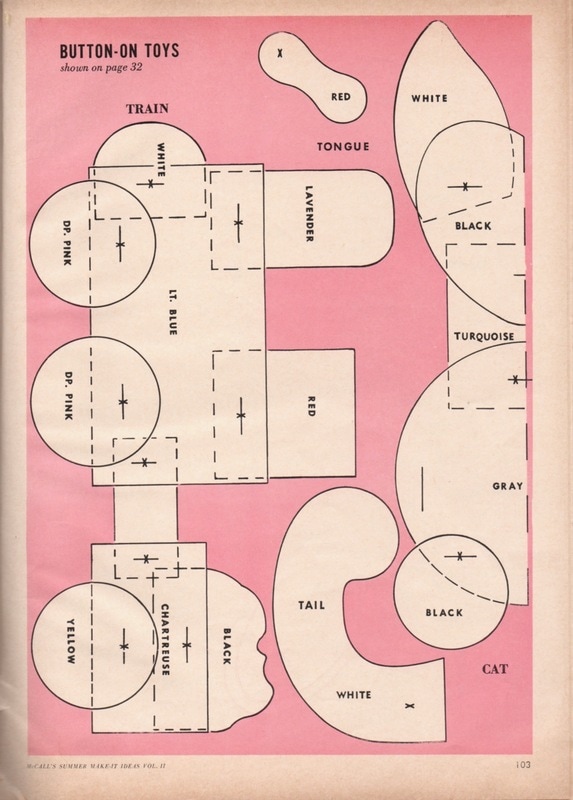
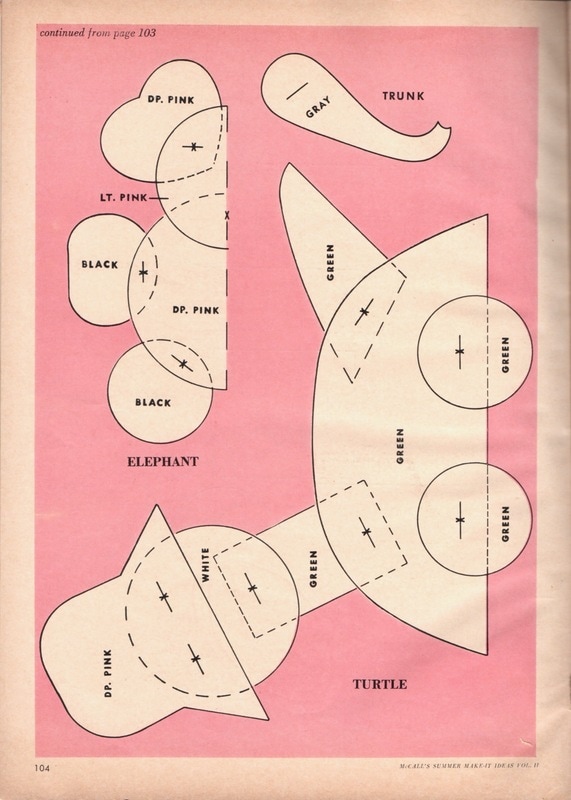
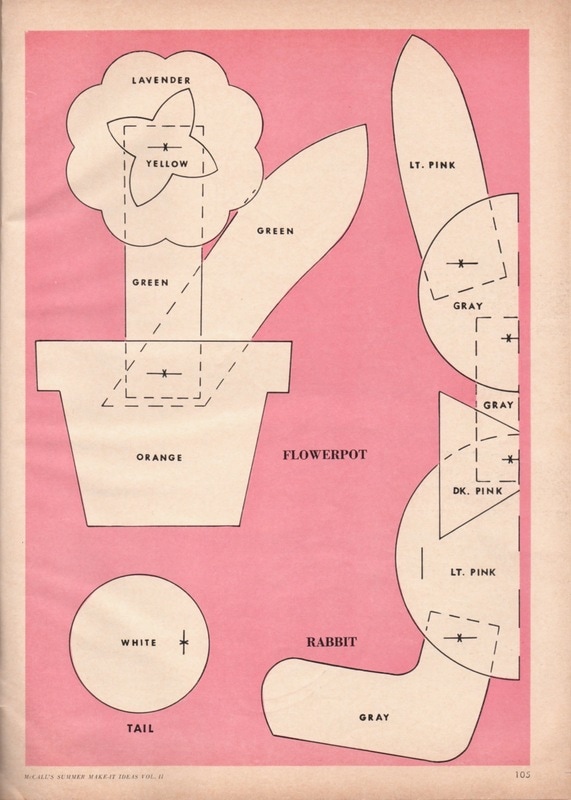
It's Valentine's Day today, which means you're probably (hopefully?) done with all of your Valentine crafting needs. So I'm moving forward, to the past, with this circa 1967 idea. The idea is a simple one, easy to reproduce yourself: Cut shapes out of felt, and sew buttons on and/or add slits for buttonholes. The only problem I see here is that you have to be comfortable with sewing on a seemingly unending number of buttons. And, you need to be mildly strategic about your button/buttonhole placement. So, two tricky areas. Once you have everything made, you can swap limbs and heads and tails and everything, and create your own version of The Island of Dr. Moreau. There are many, many pages of patterns in the back of the magazine, so I only scanned a portion of them so you'll get the idea. Simple shapes, simple idea, super cheap, potentially fun. I'll take it!
xo |
Categories
All
Archives
March 2017
AuthorI'm Debbie Way, an artist and writer who enjoys making things. |
Proudly powered by Weebly




 RSS Feed