|
My local library had a big book sale this past weekend, and I scored big. One of my finds is a Golden Nature Guide about sea shells. 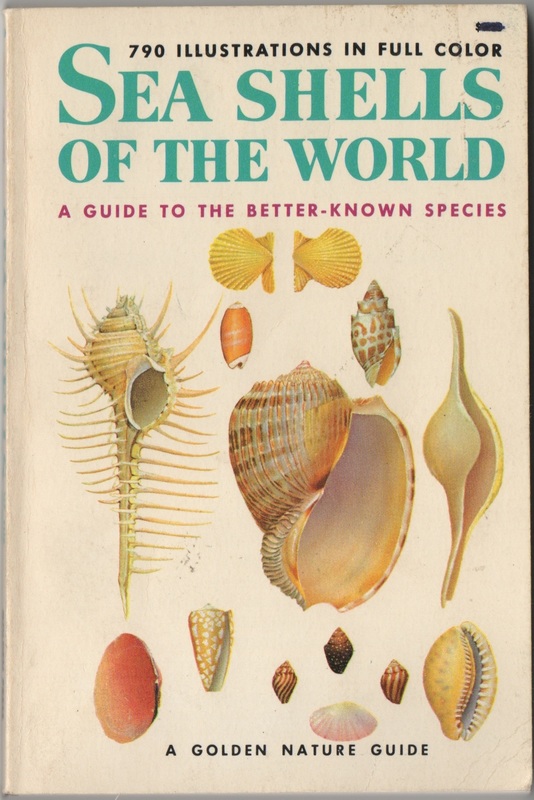 I see Golden Guides frequently in used book stores and tag sales. Usually, they're soft-cover and pocket-sized at 4 by 6 inches, though I have a 6 by 8 inch hardcover that says it has "Library Binding." I own GGs about Weather (1987), Zoology (1958), Stars (two editions, 1956 and 1975), and Botany (1970). All of the ones I've seen are illustrated in a very distinctive style. I consider it "mid-century" but I don't have the language to explain why. Having the entire book illustrated does give it a pleasingly cohesive feel. Though Golden Guides are still being printed today by St. Martin's Press with updated, photographic cover images, the insides appear to share the old illustration style. 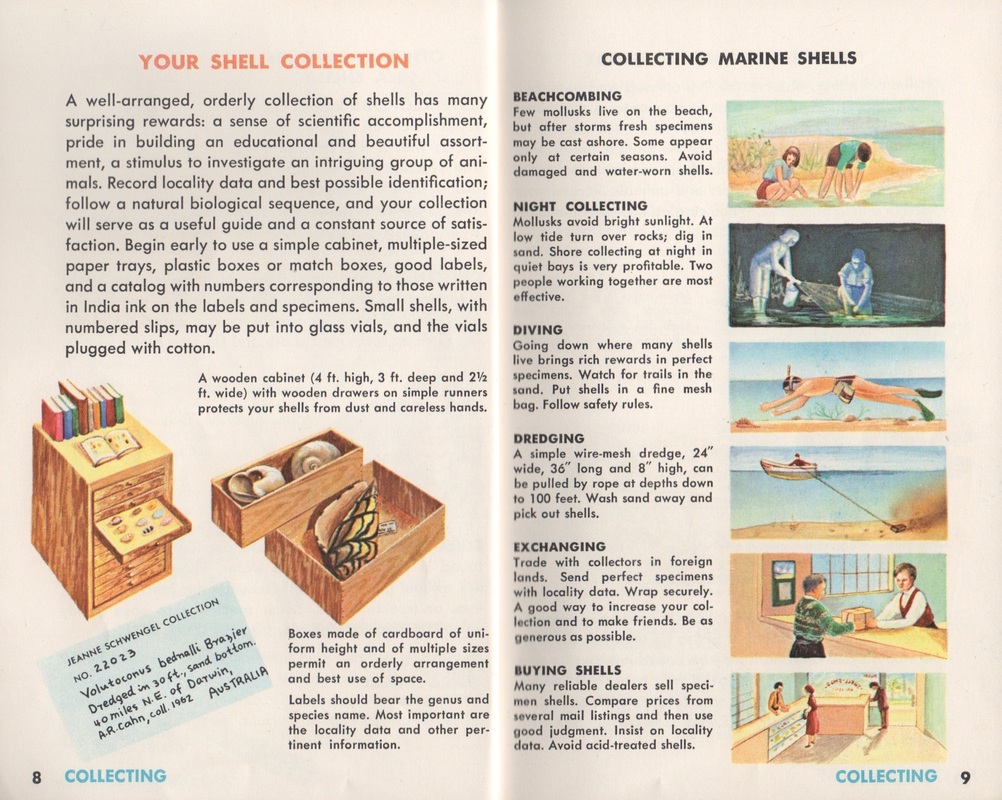 Any depictions of humans and their belongings will tend to date a book, but so will references to ordering things via "mail listings." Sea Shells of the World was printed in 1962, but there's a gift inscription ("To Christine from Linda") dated 11/2/68. I assume Linda was about to head to a tropical beach.  I used to cut up these books and use the images in collages, but I've grown too fond of them to do that now. I have actually used them as guides, to find the name of a moth, or a type of cloud.  I'm not exactly a collector; I'm picky about which ones I'll buy. Most of all, they have to not smell musty, and they need to be cheap (they are seriously abundant, so no need to spend more than $2-3 on one). Sea Shells was in a "fill a bag for $3" haul. 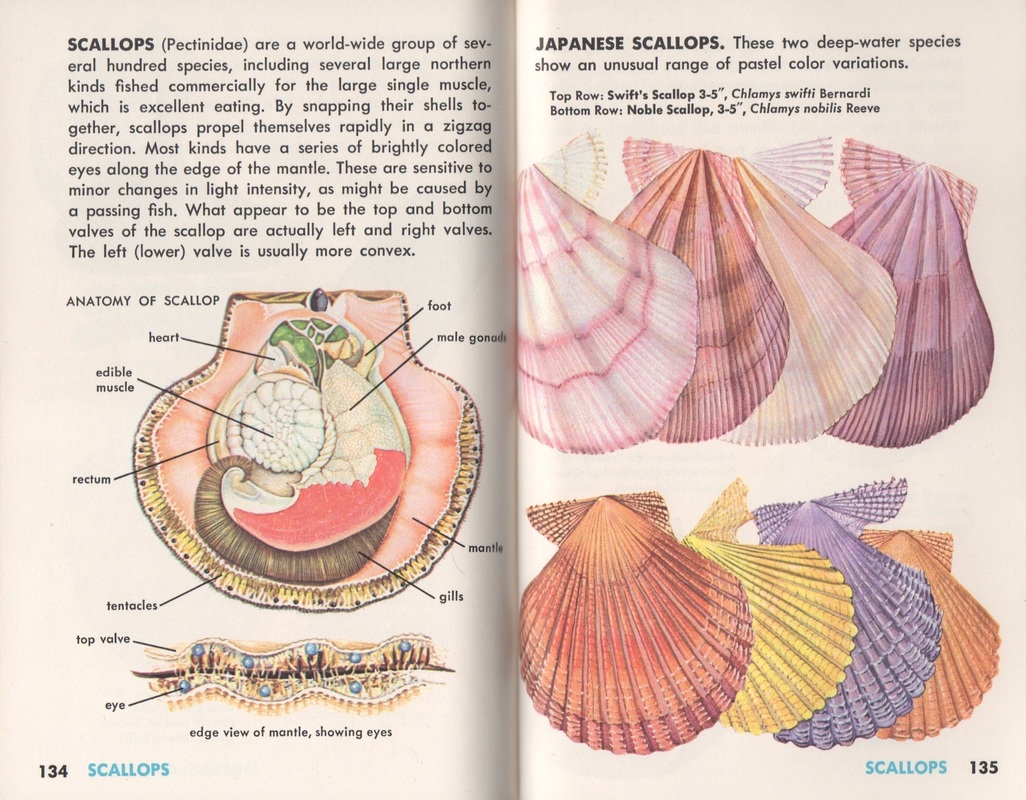 Have you come across a Golden Guide?
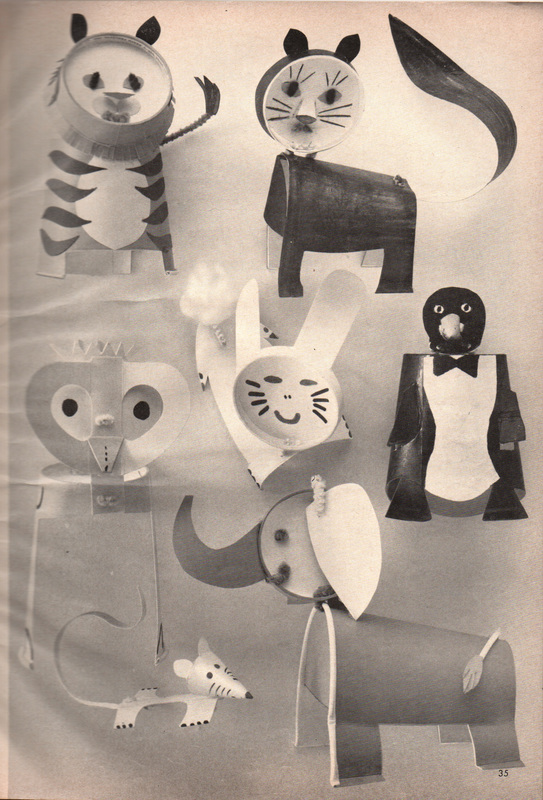
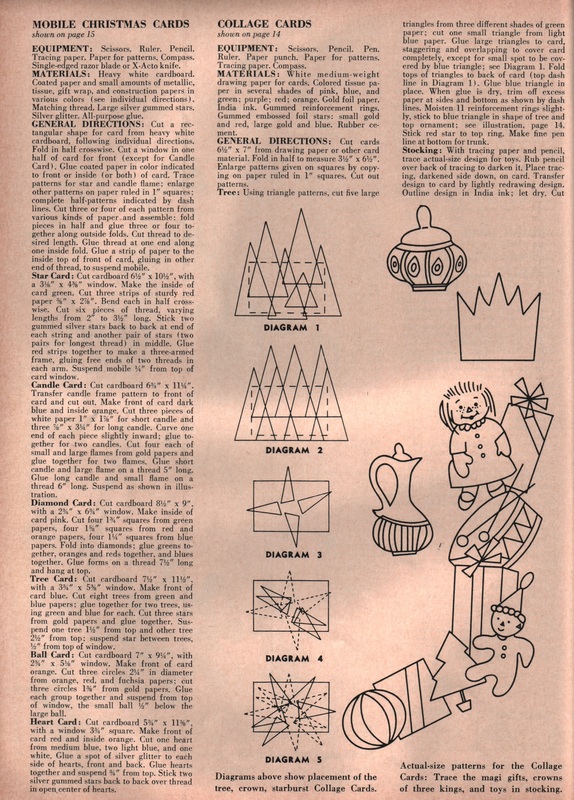
xo I went looking for Easter-ish content in my vintage McCall's magazines, and found this collection of party table decorations. I rather like the pasta place cards and the bunnies made from actual eggs (duck and chicken, to get two different sizes). The six standing animals have bodies made of what they call "plastic zipper boxes," so, good luck finding those. Not a huge fan of the seashell-head couple on the top left, but I do like being reminded that once upon a time, any vacation or trip that required an airplane or ocean liner was rare enough that it was cause for celebration. 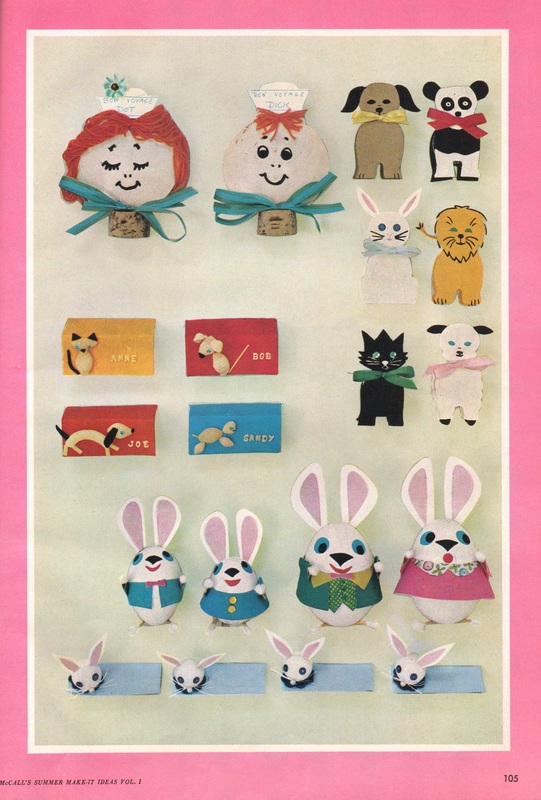 As always, for the truly committed, here are the directions. There's also a helpful (?) side-view of a plastic zipper box cat. 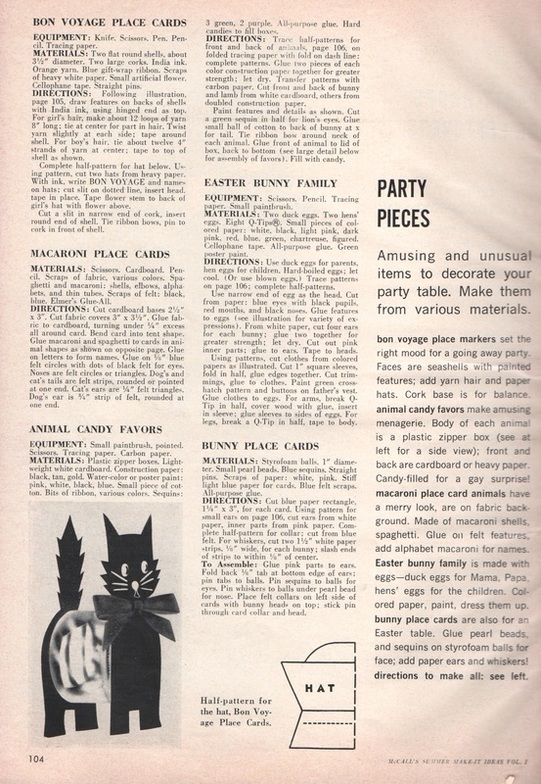 xo!
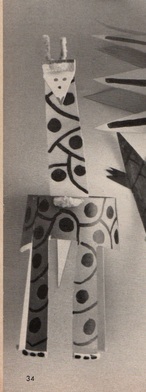
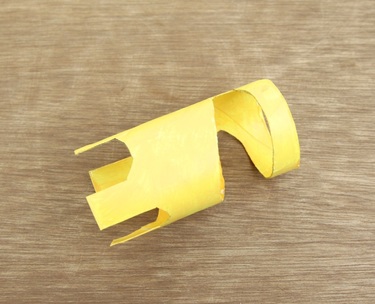
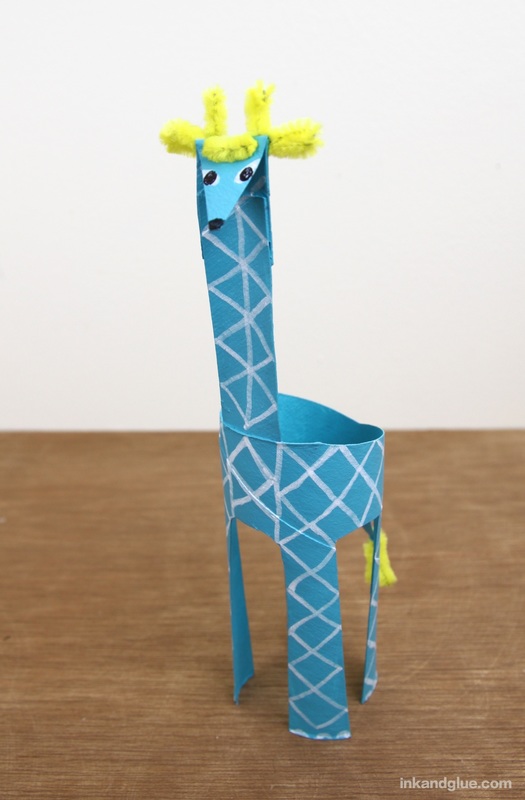 Remember yesterday? I am fulfilling my blue giraffe promise! This is another tube take on a cup-based craft from a magazine published in 1966. To refresh your memory, here's the original giraffe.
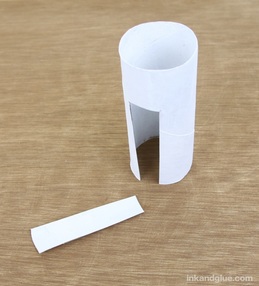
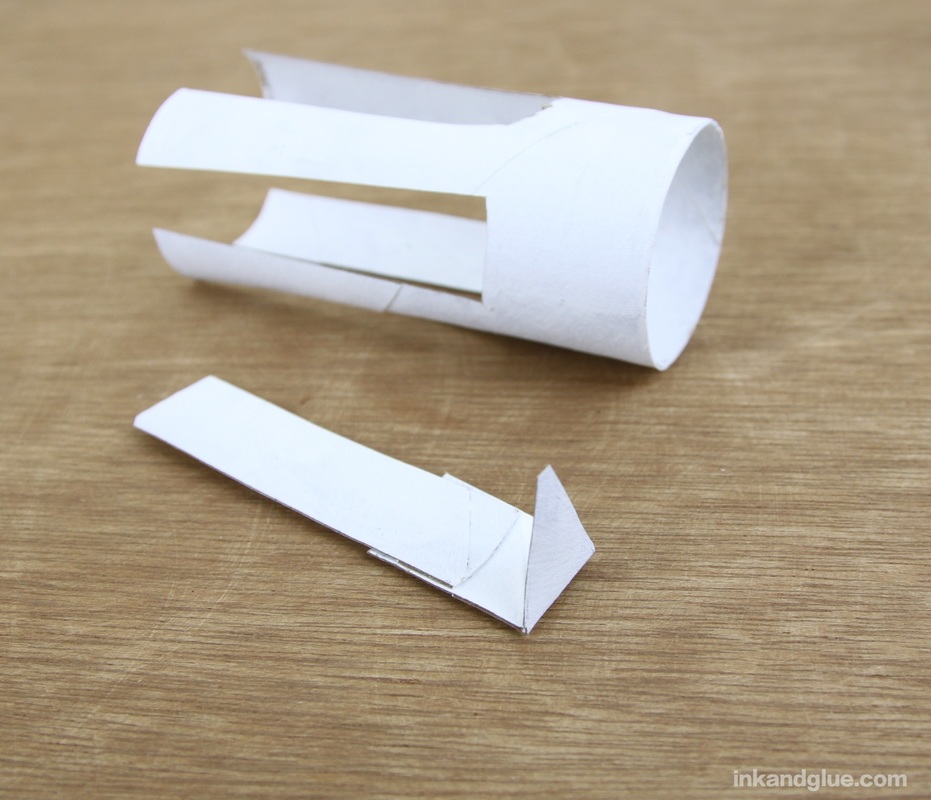
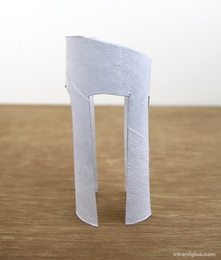
I have some problems with the styling of this, so I tried to make one more to my liking. Consider it an homage, or a tribute to its 1966 ancestor. Here's how to make it. Start with a cardboard TP tube, painted white inside and out. (The painting is optional, but it makes the final coat of color much brighter.)
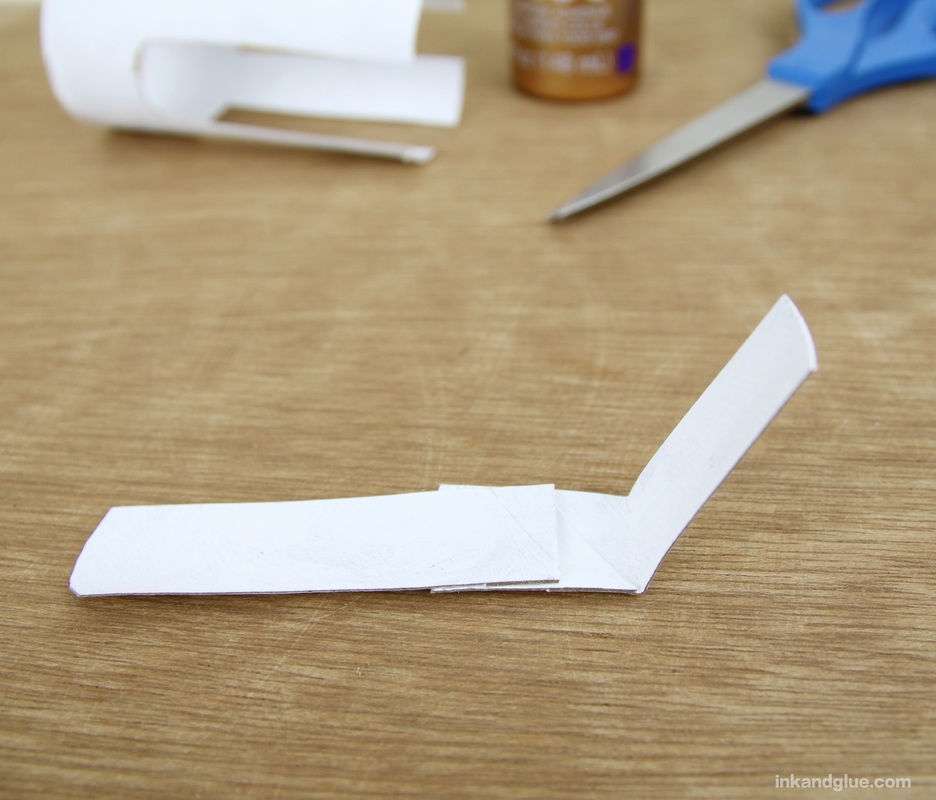
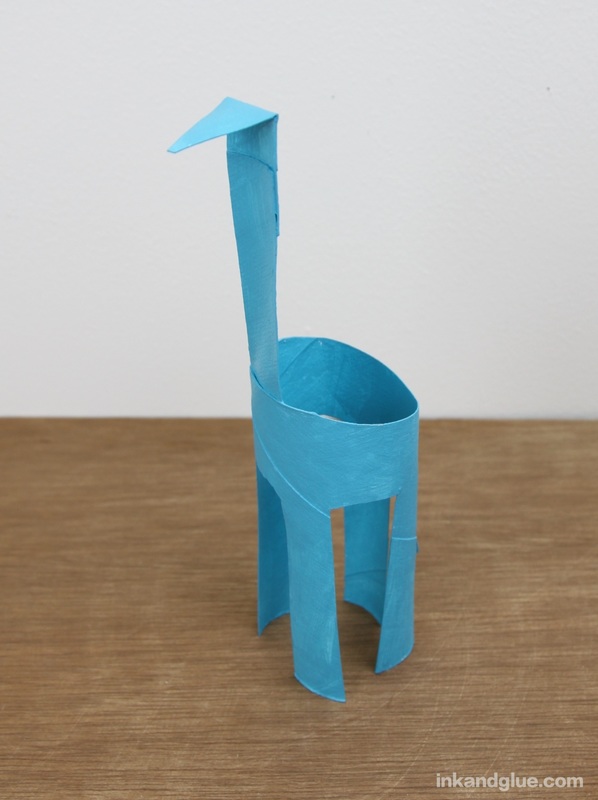
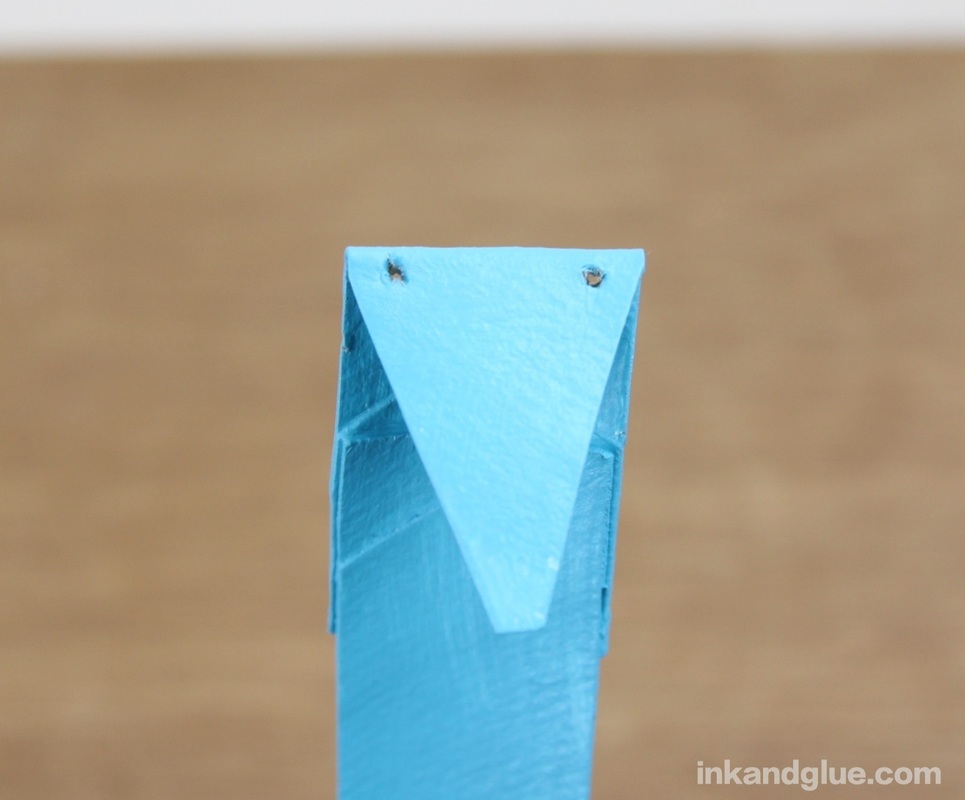
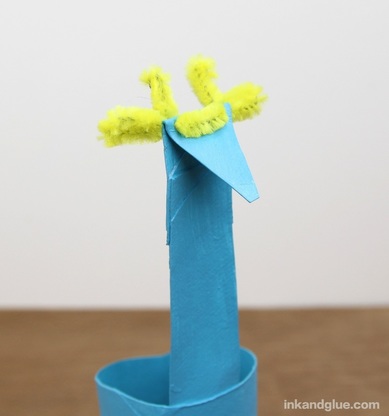
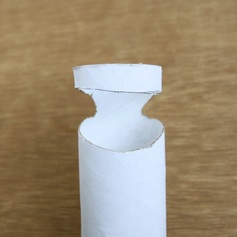
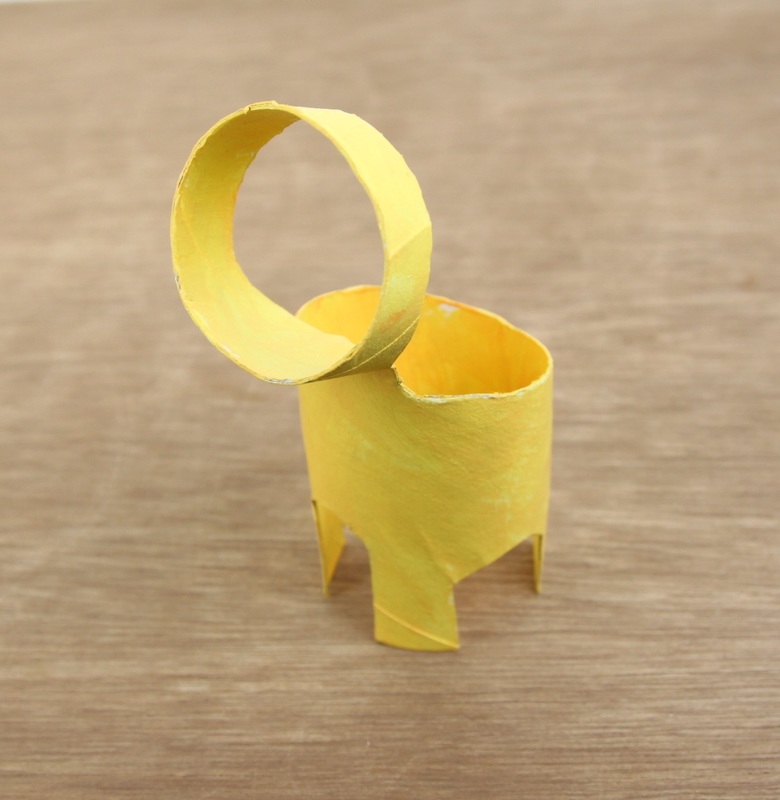
To make the neck and head, take two of the rectangles you just cut out, and overlap one with another. Secure them with tacky glue, then trim the edges so they're even. Fold up one end, and cut it into a rectangular head shape.
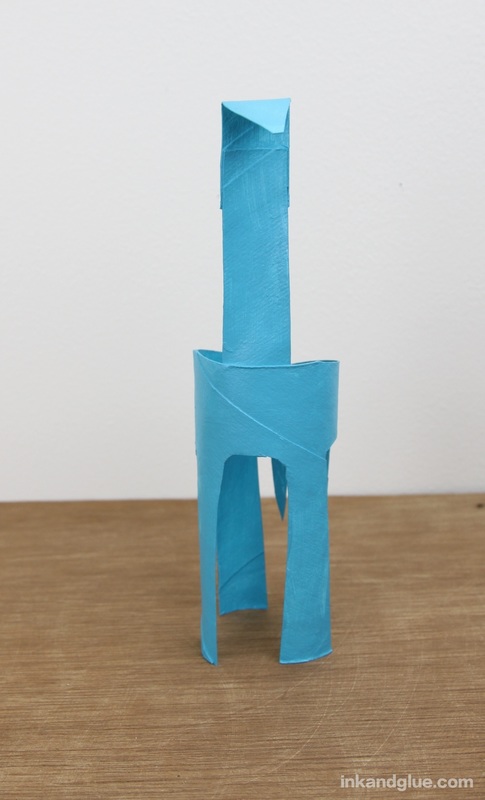
Glue the neck to the body with tacky glue, let it dry, and then paint the cardboard all over with acrylic paint. I used turquoise-ish blue, which is what the 1966 instructions called for.
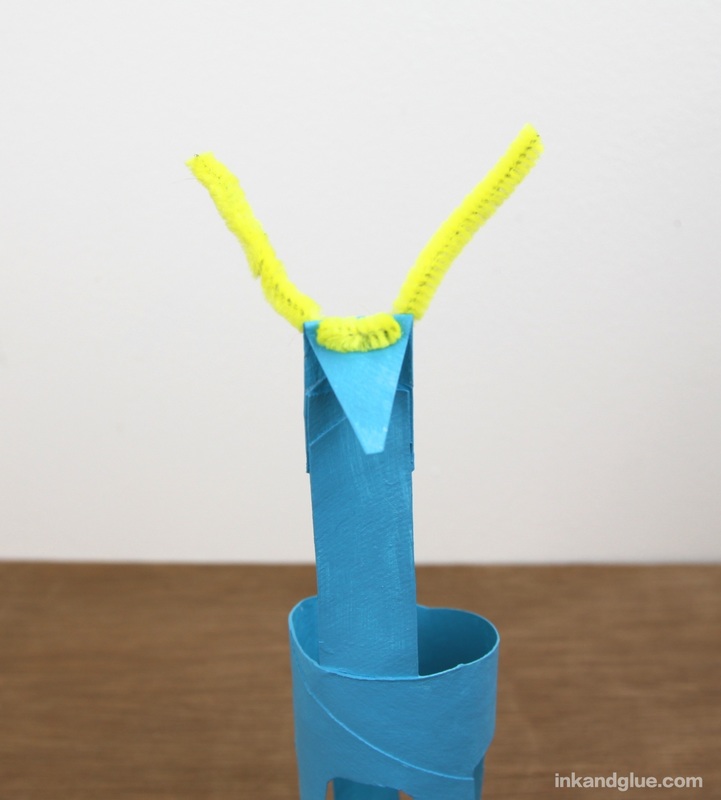
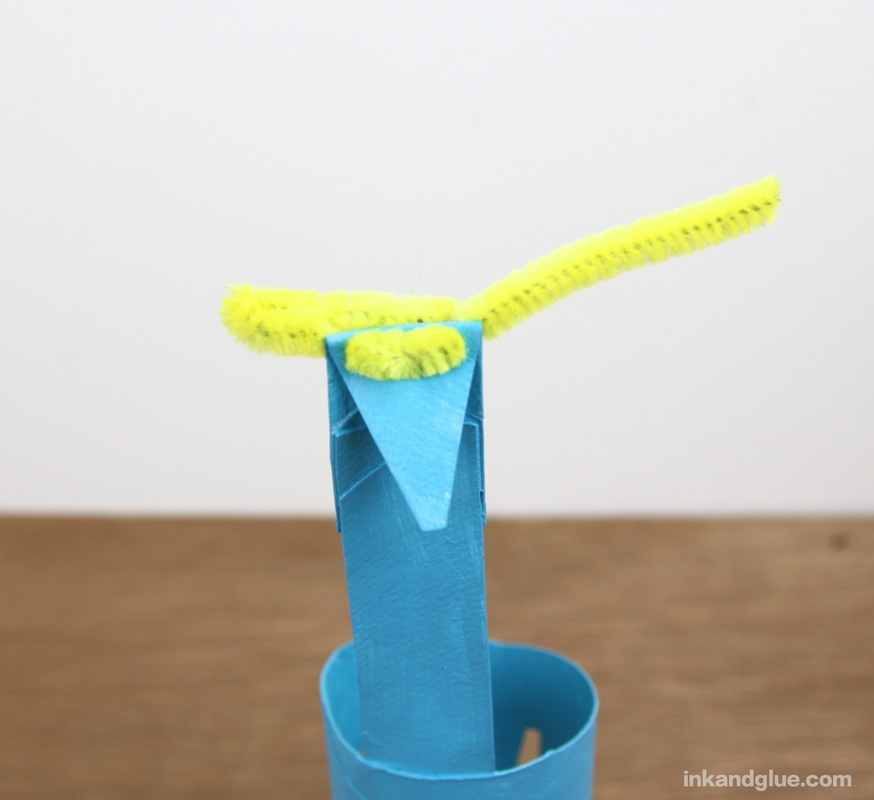
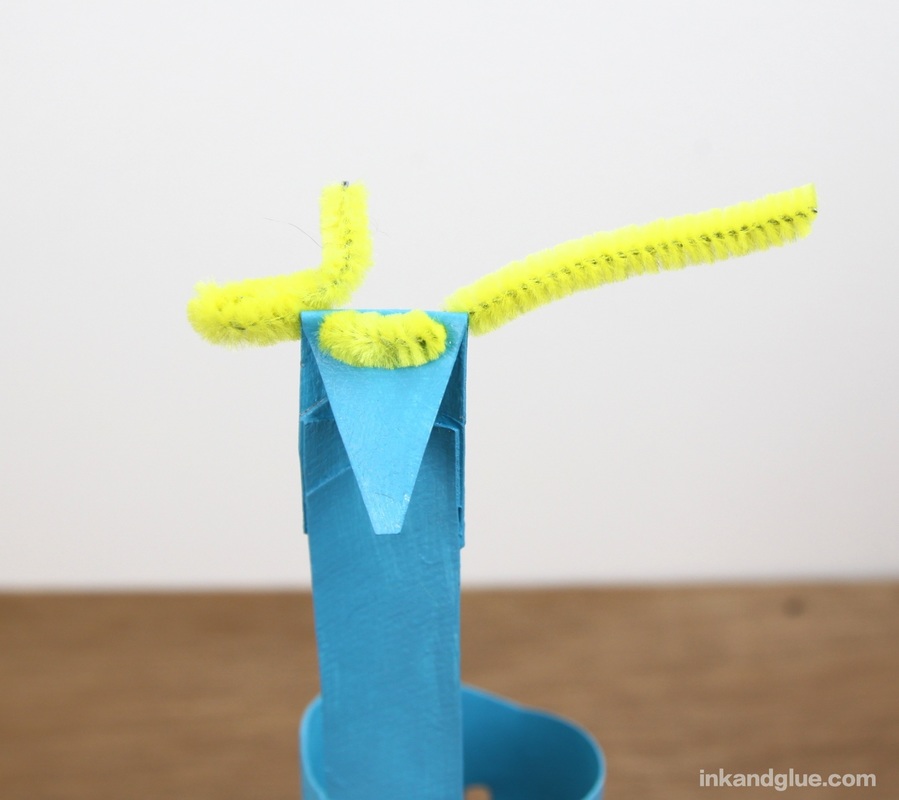
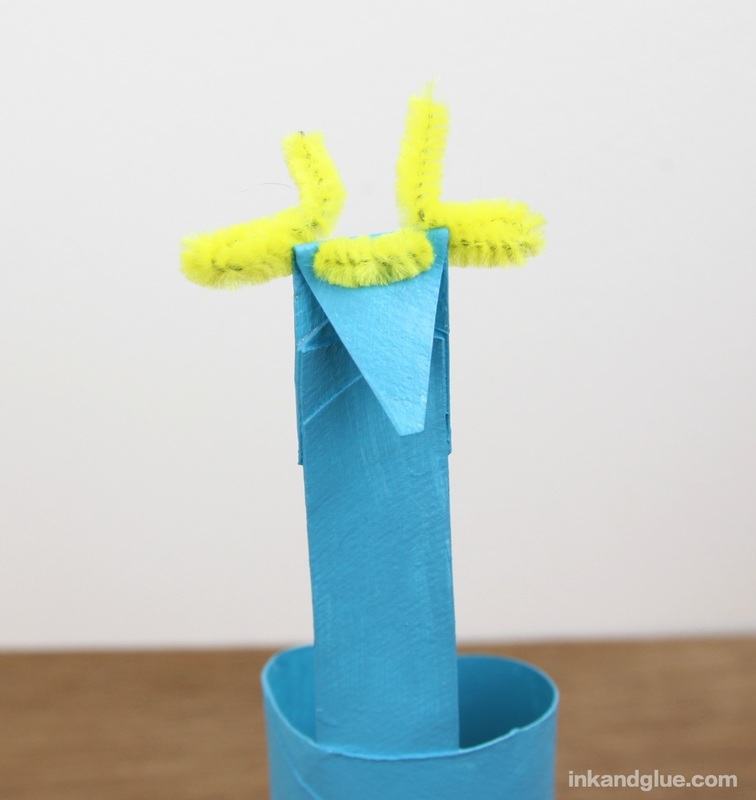
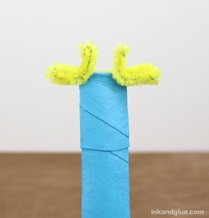
Insert the ends of a 3.5-inch piece of pipe cleaner through the fronts of the holes. Next you're going to fold each pipe cleaner end into thirds. For each, at the one-third mark from the head, fold the p.c. back towards the head. At the two-thirds mark, fold the p.c. straight up. You now have two ears and two horns!
Now, on to decorating! Use markers for this. I wasn't enamored of the 1966-era craft's pattern of wavy lines with dots. So I tried a slightly-naturalistic look, using a black marker, as the magazine text asked for. I didn't like the result. 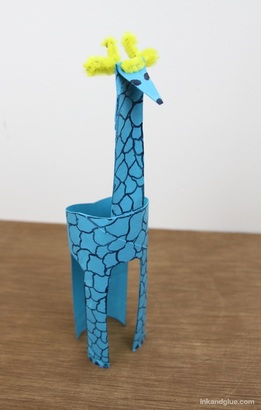 Luckily, I had used washable markers, and was able to wipe it all off with a damp paper towel. (It helped that my acrylic paint is actually fabric paint, which forms a nice, plasticky coat.) I started again with a white marker (this Recollections pen) (not an Affiliate link, and it's out of stock online, so link is for visual reference only). I went for a more geometric effect, using lots of triangles. You can draw whatever pattern you like, of course. 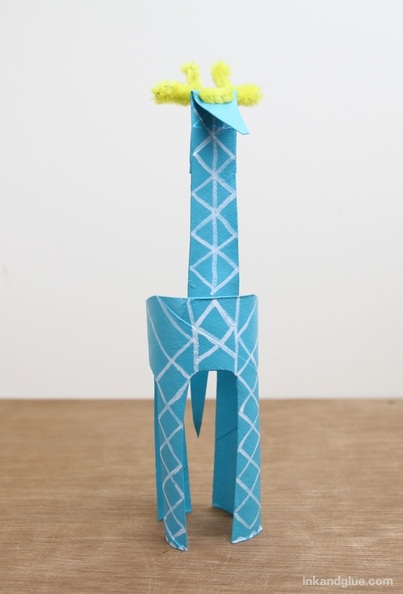 Better! I continued the pattern all over the body, and added eyes. I let the marker dry before adding black pupils and a nose. 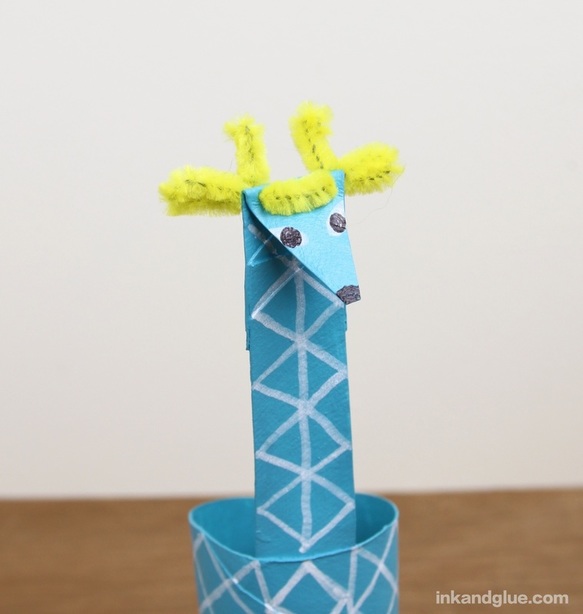
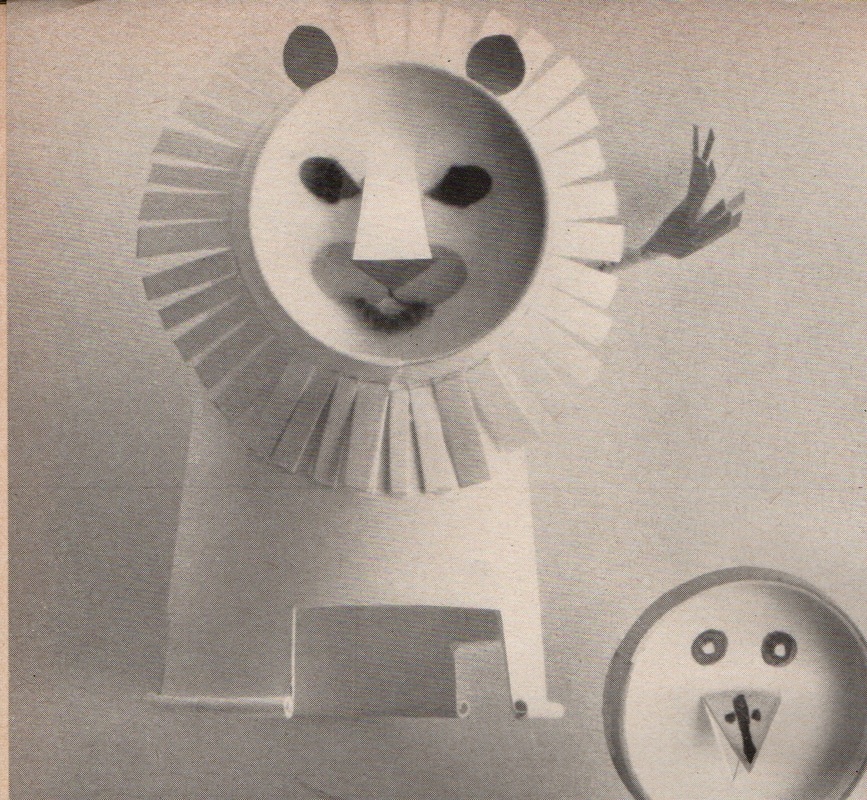
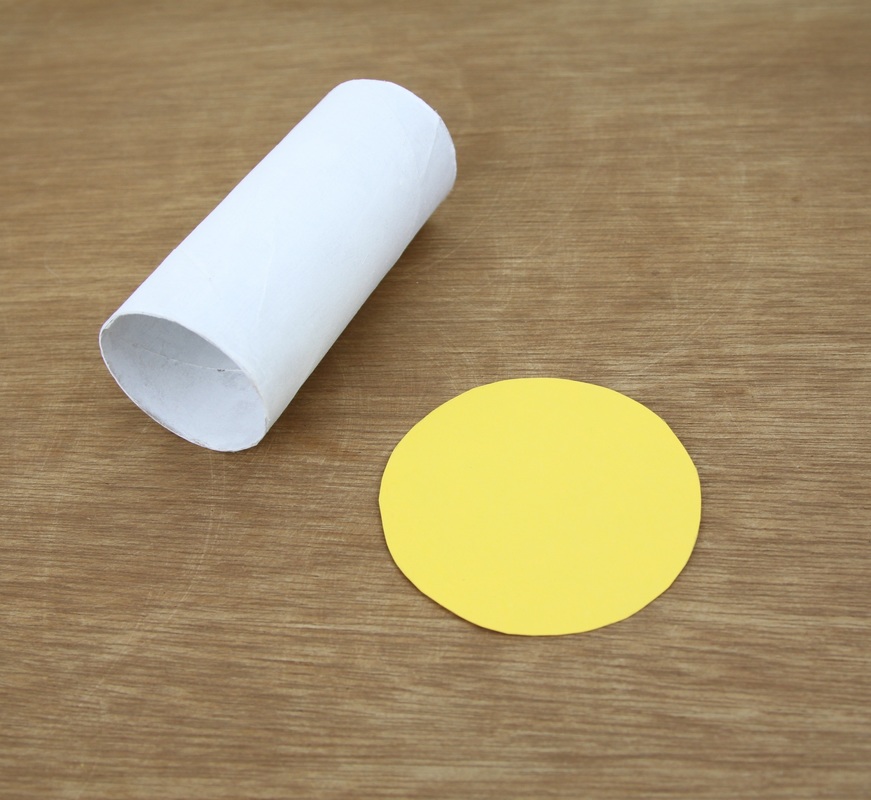
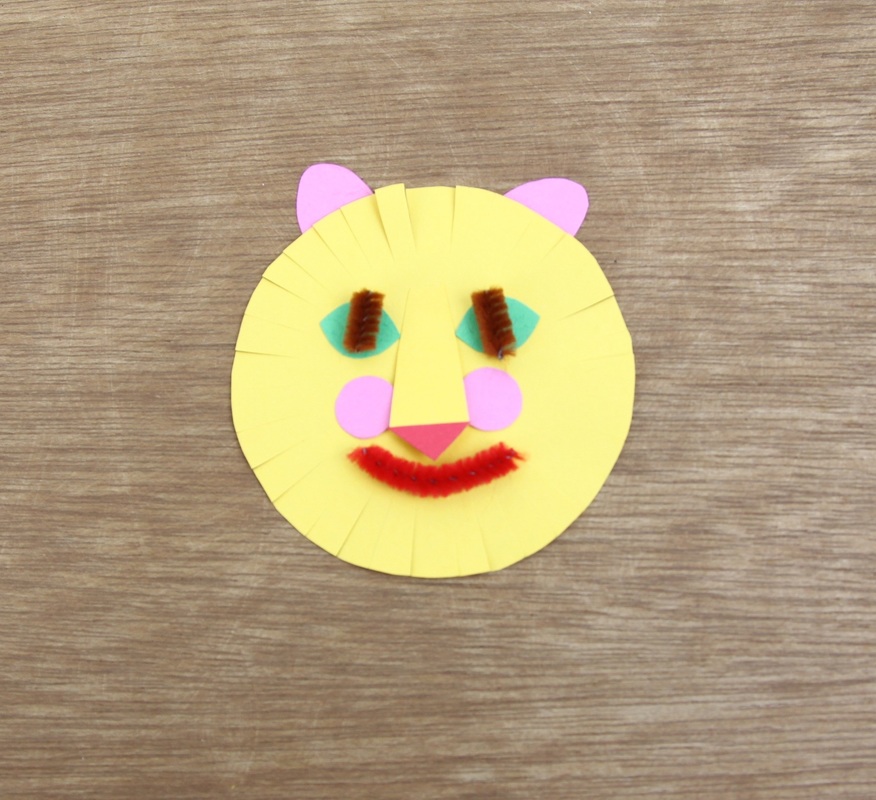
Thanks for revisiting the world of 60's kids crafts with me! xo 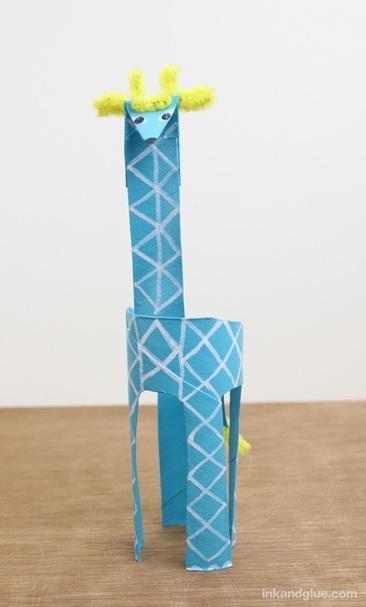 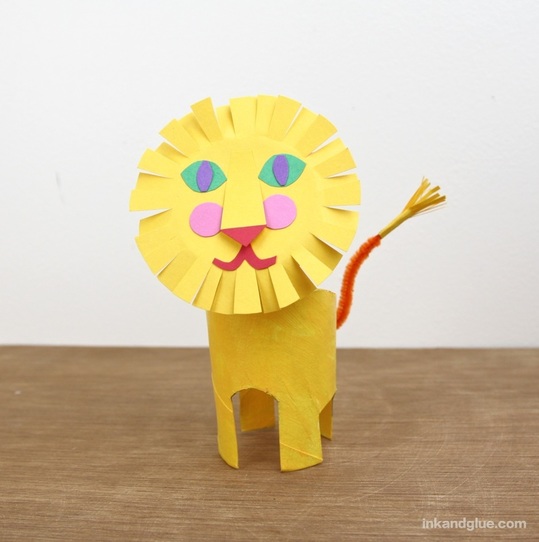 Look at this sunny-faced feline fella! He's based on the lion in yesterday's scans of a 1966 craft magazine. To refresh your memory, here's the original lion, made from paper cups:
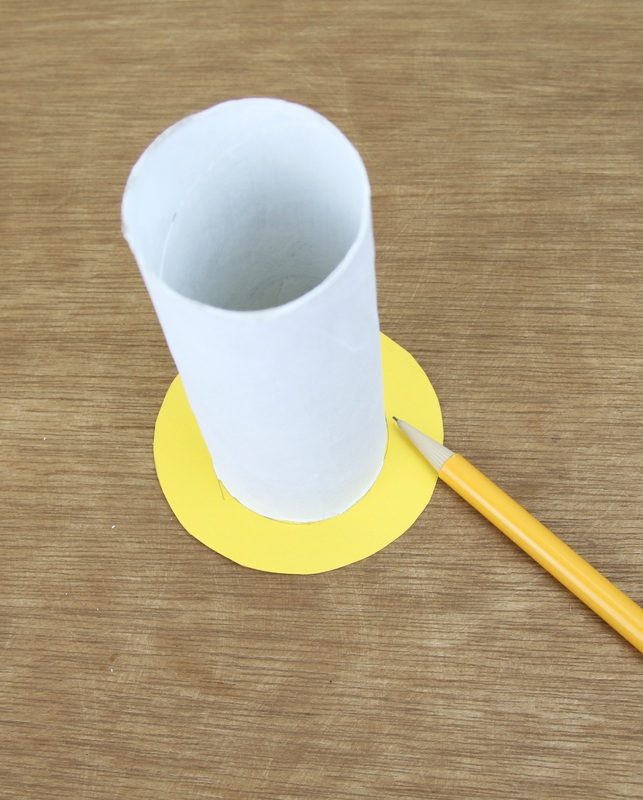
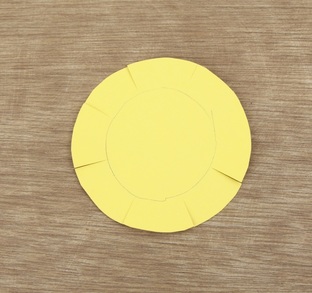
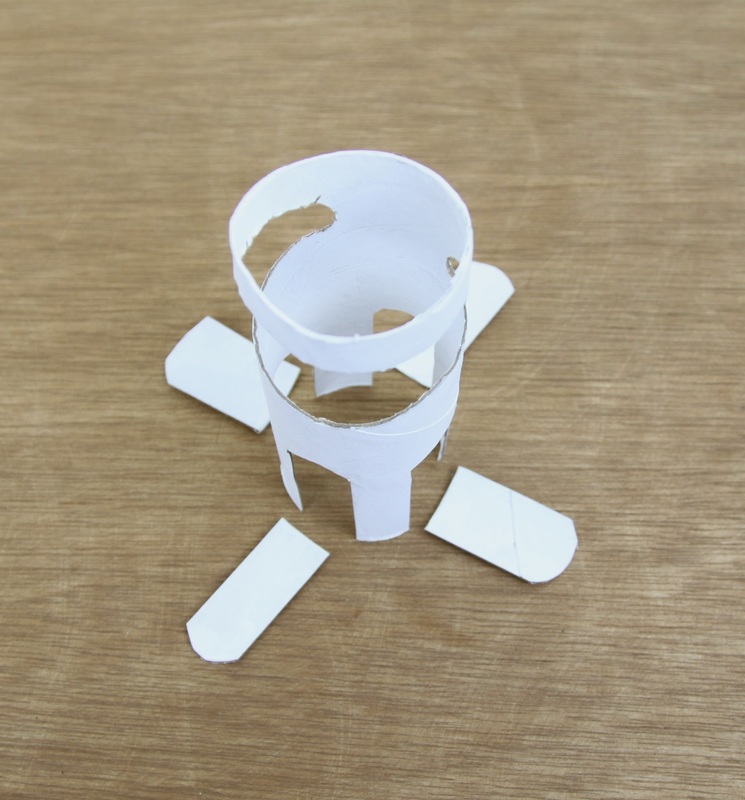
My goal here wasn't to make a replica, but to create an inspired-by version with what I had on hand (many cardboard tubes). I read through the magazine's instructions as I went, and took what I could from it. Here's how to make my version. First, paint a tube white, inside and out. From a sheet of yellow construction paper, cut out a circle that's about an inch wider than the tube. Stand up the tube, center it in the circle, and trace around it with a pencil.
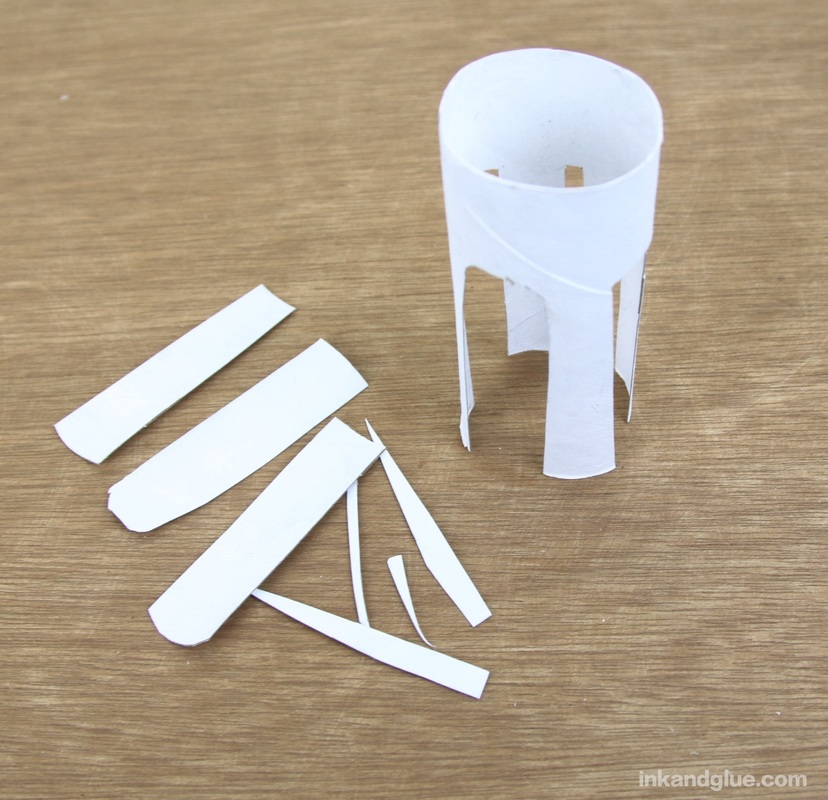
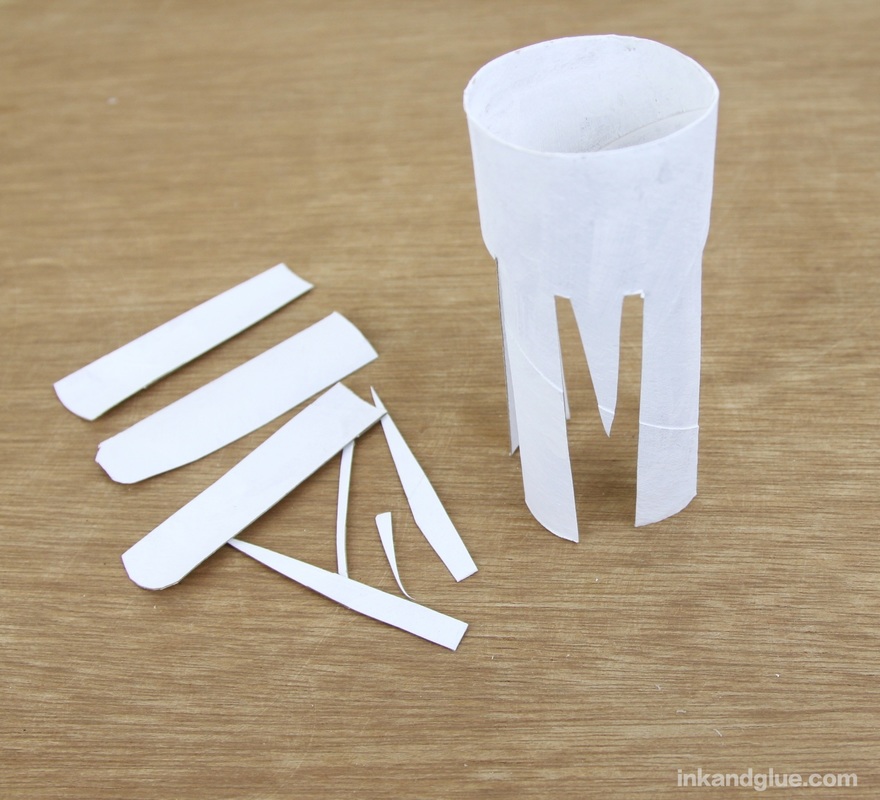
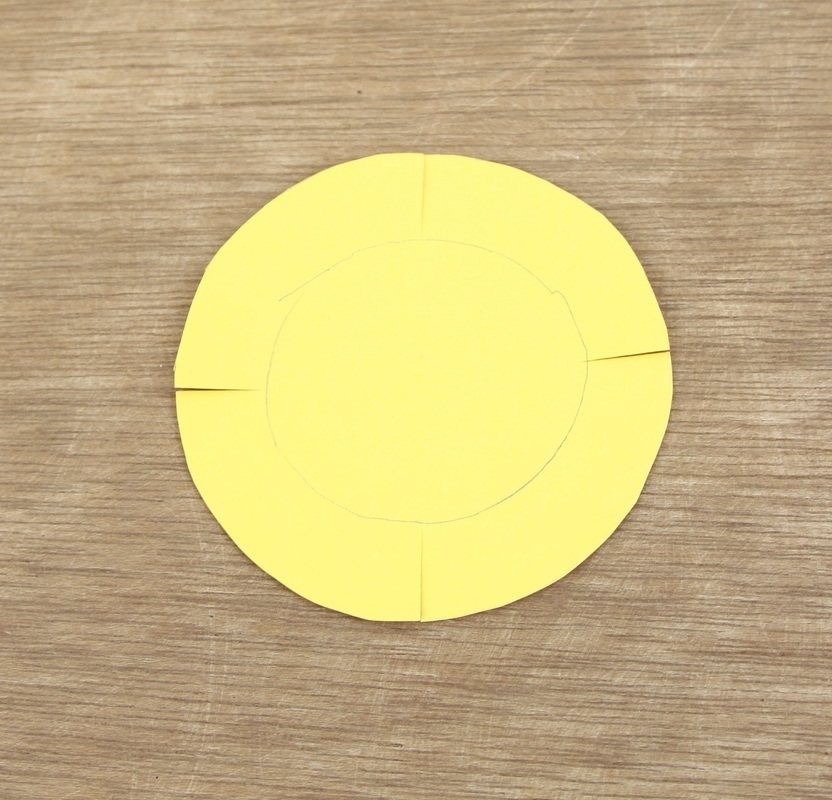
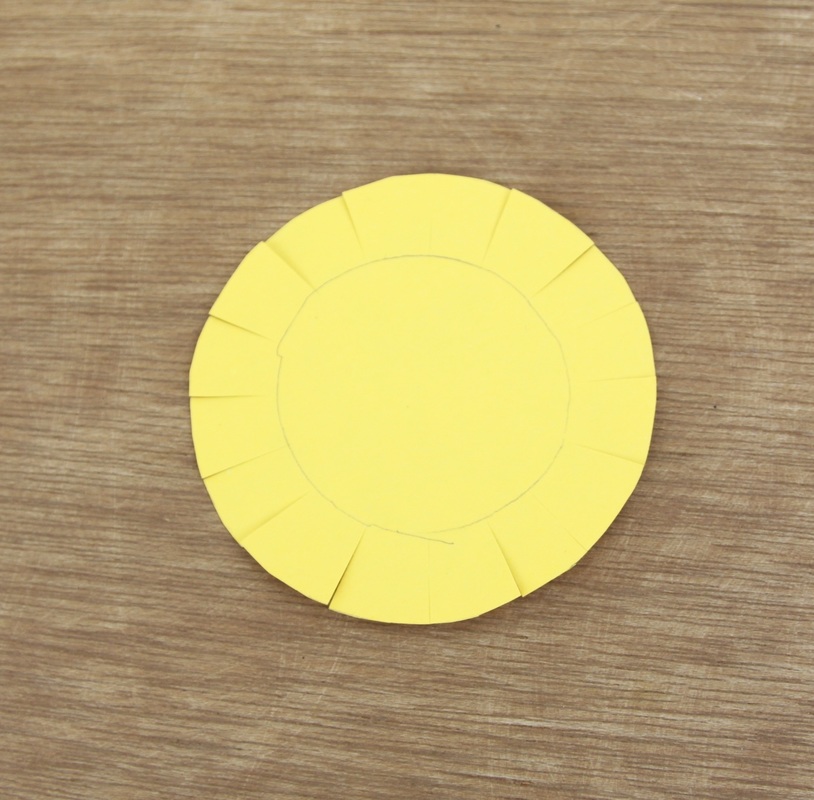
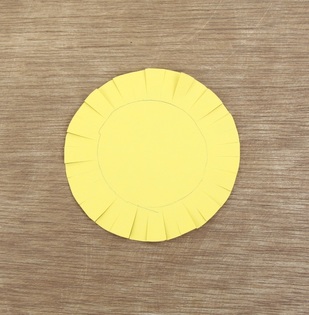
Use the circle you just drew as the stopping point for the small cuts you'll be making to create the fringed mane. Here's a trick for getting fairly evenly-spaced fringe: First, make four cuts at equal distances from each other, like the four points of a compass. Then, make a cut in between each of those cuts. Repeat two more times, just eyeballing the center point between two cuts. Easy-peasy.
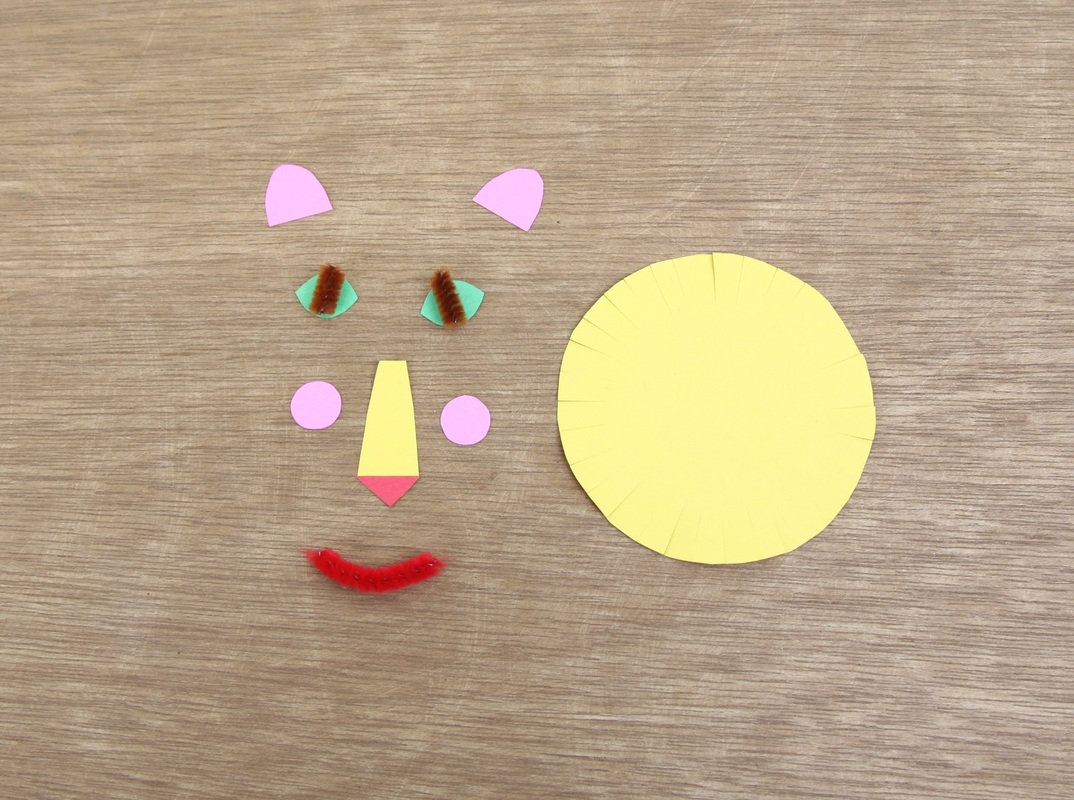
At this point, I turned to the text of the magazine for help. I followed their illustration and instructions to get the colors and shapes I ended up with. One change is that I didn't cut the nose flap out of the circle itself; I cut a separate piece of paper for that. Here's what I ended up with:
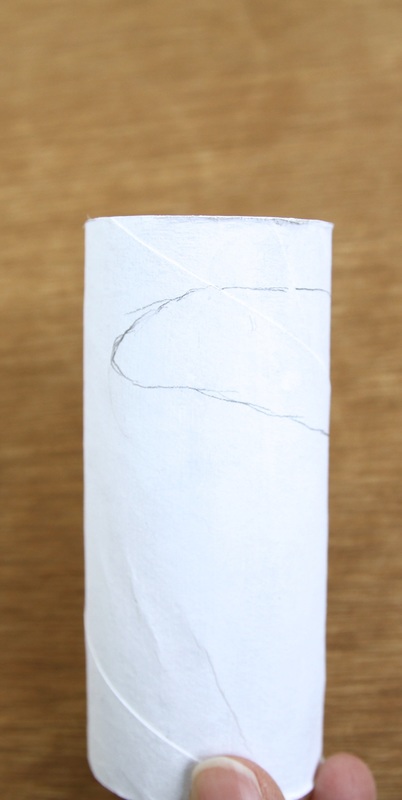
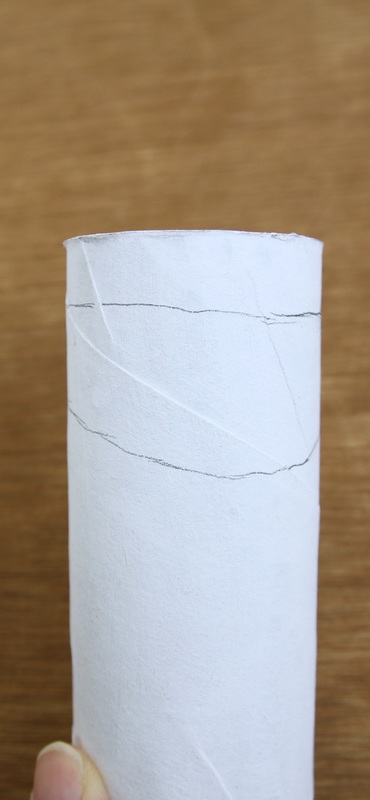
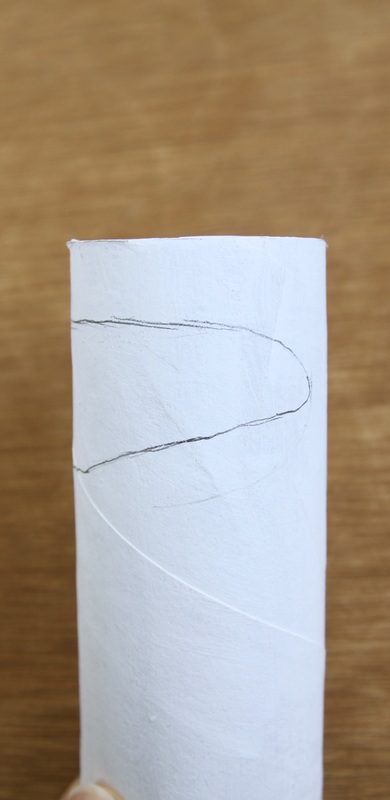
Yes, those are tiny lengths of pipe cleaner for the pupils and mouth, and no, I wasn't happy with how they were looking. Even if the pipe cleaner pieces were cut smaller, they were still a pain in the butt to work with, being tiny fuzzy round things that really wanted to roll away. So I abandoned them, and used paper instead. I glued everything down with a thin layer of tacky glue, but I only attached the top quarter of the nose piece so it could flap up a bit and add some dimension. 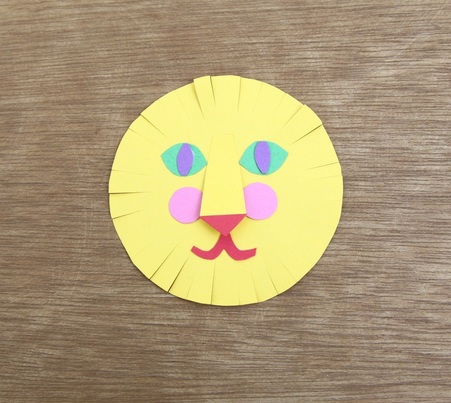 Ahh, so much better. Now on to the body. You're going to mark a sort of oval-ish lozenge shape near one end of the tube. Here's the shape, shown in three photos taken as I turned the tube. The distance between the two ends of the lozenge is about an inch. This segment will be the front of the neck of the lion.
(Is it just me, or does the faceless body on the right look really cool? Like a kid's version of a surrealist sculpture.) Run a line of tacky glue along the rim of the head ring, and press it onto the back of the paper face. 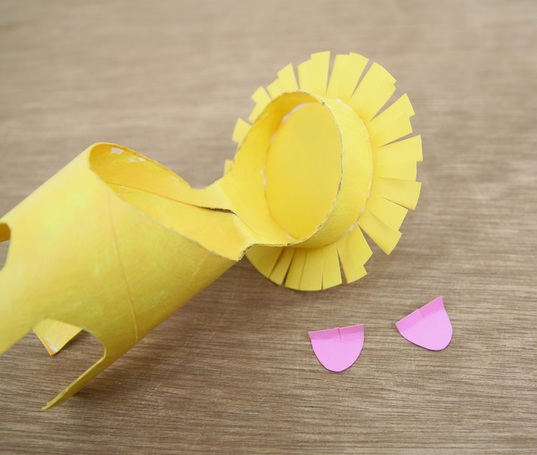 Remember those pink ears, from earlier? Make a short slit into the straight edge of each, and fold the edge over a bit. Glue the folded edge to the inside of the ring. (The slit will make them conform more easily to the curve of the ring.)  Now for the tail. I followed the magazine very closely for this part. Cut a 3.5-inch length of pipe cleaner. Cut a one-inch square from yellow paper, and fringe one edge about half-way in. Fold the square in half, then add tacky glue, and fold/roll the paper around the end of the pipe cleaner. 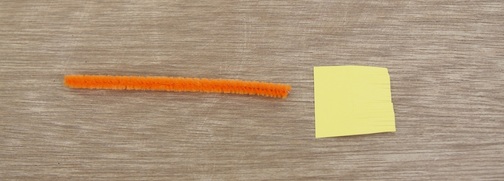 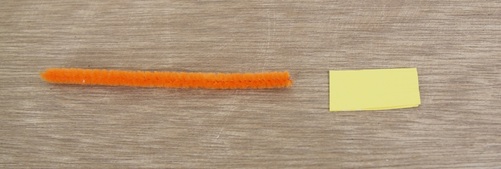 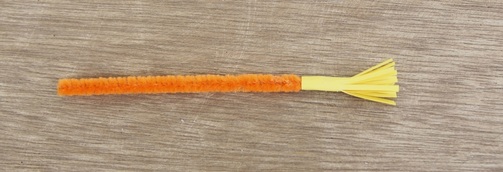 Use a large needle, a pushpin, or an awl to poke a hole in the back of the lion's body. Insert a half-inch or so of the tail. Fold it down and glue it to the inside of the tube. 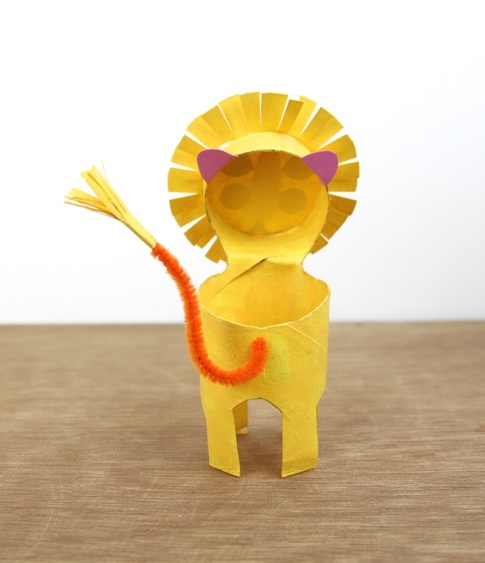 Lookin' good, my man! 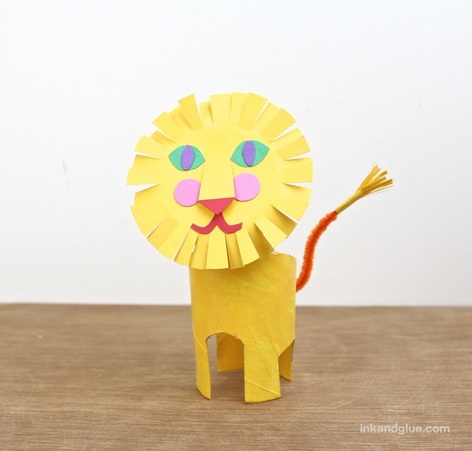 Tomorrow, might there be a blue giraffe? There might. There just might.
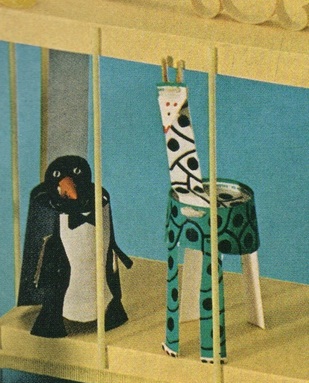
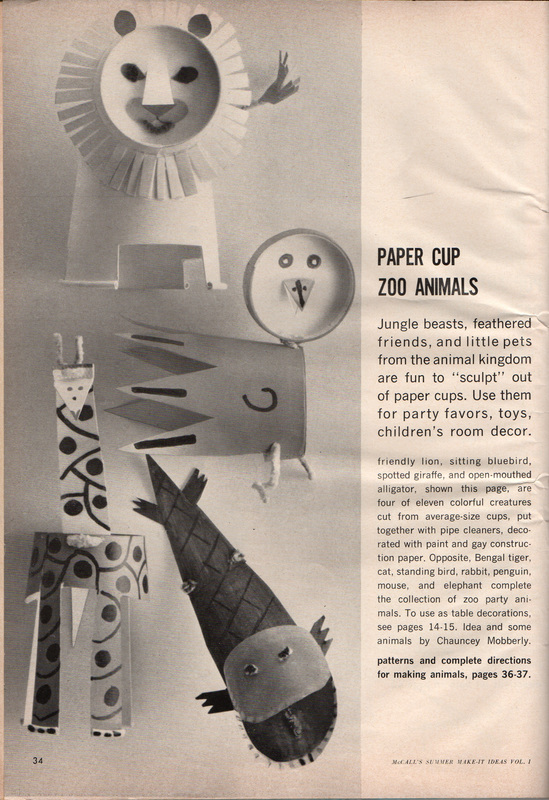
xo I'm back from the long weekend with another McCall's vintage Make-it Idea. This one's a zoo party, though it could also be called a yellow party (as an alternative to last week's pink party). I kept the images large so you can appreciate the unspecified sandwich fillings, which would be rejected from every child I have ever known. The sandwiches are... scrambled eggs with corned beef? Egg salad with shredded ham? Hard to say for sure. 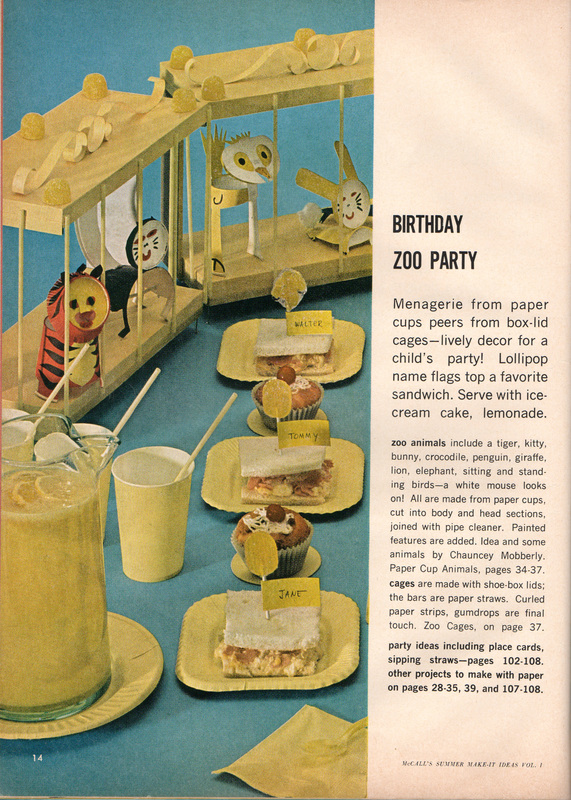 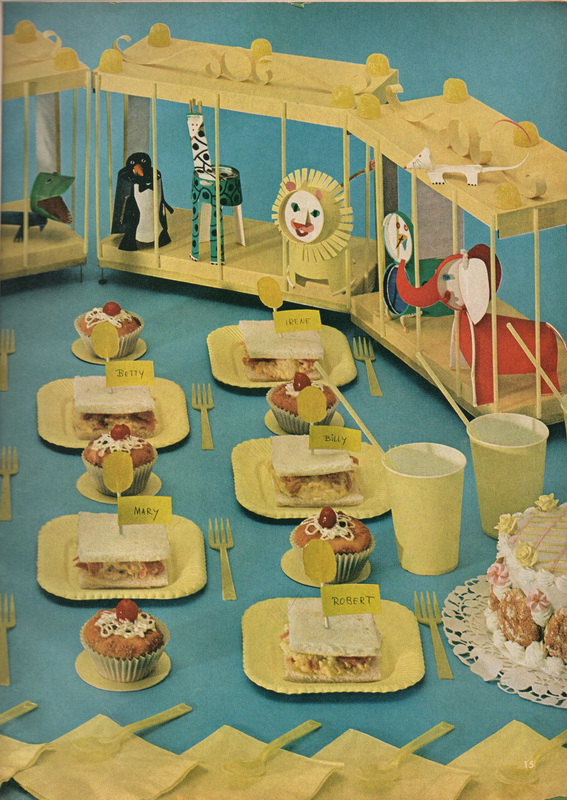 The zoo animals made from paper cups are clearly the stars, here. I don't think the cages are worth making; even as a kid, the too-wide spacing of the bars would have ruined them for me. (The animals can just walk right out!) Plus, I don't know about you, but I'd be hard-pressed to find ten shoe box lids for a craft. So, about those cup animals. They get their own spread later on in the magazine:
This is the second time the stylist, Chauncey Mobberly, gets credit in the text. He was a World War II vet who became a mailman, and created and sold children's craft ideas on the side. Sounds like an exceptionally nice fella. Anyway, if you really, really want the instructions for making the cup crafts, here they are. They are daunting in their length and specificity. 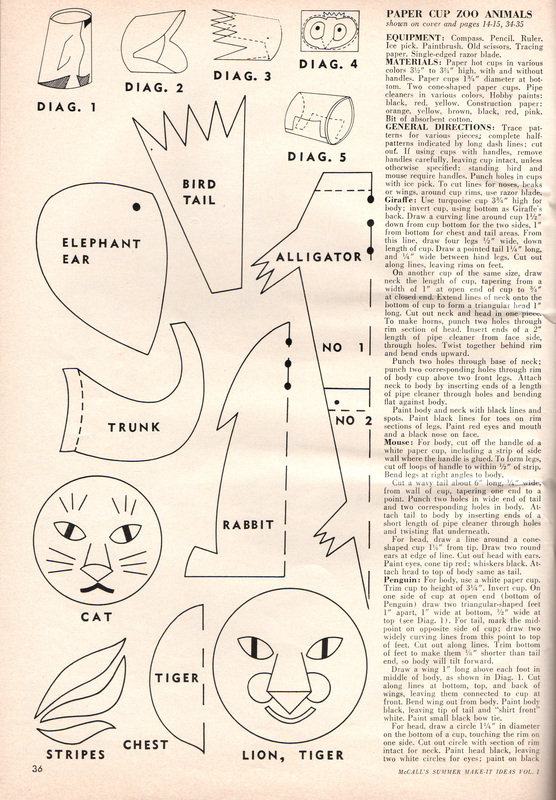  I'm sorry the left side of that page is blurry; I can't find a reason why it happened. If you are desperate to read it, drop me a line and I'll see what I can do.
I am going to try to make these. I have no paper cups on hand, so before I hit the store, I'm going to attempt to make one or two using cardboard TP tubes instead of cups. I have a lot (like 20, maybe?) of cardboard tubes. xo! Been busy! Quick post! Here's an appropriately-pink (for Valentine's Day) party from a 1967 McCall's craft magazine! Oh my goodness it is pink! I did almost no color correction on this scan. 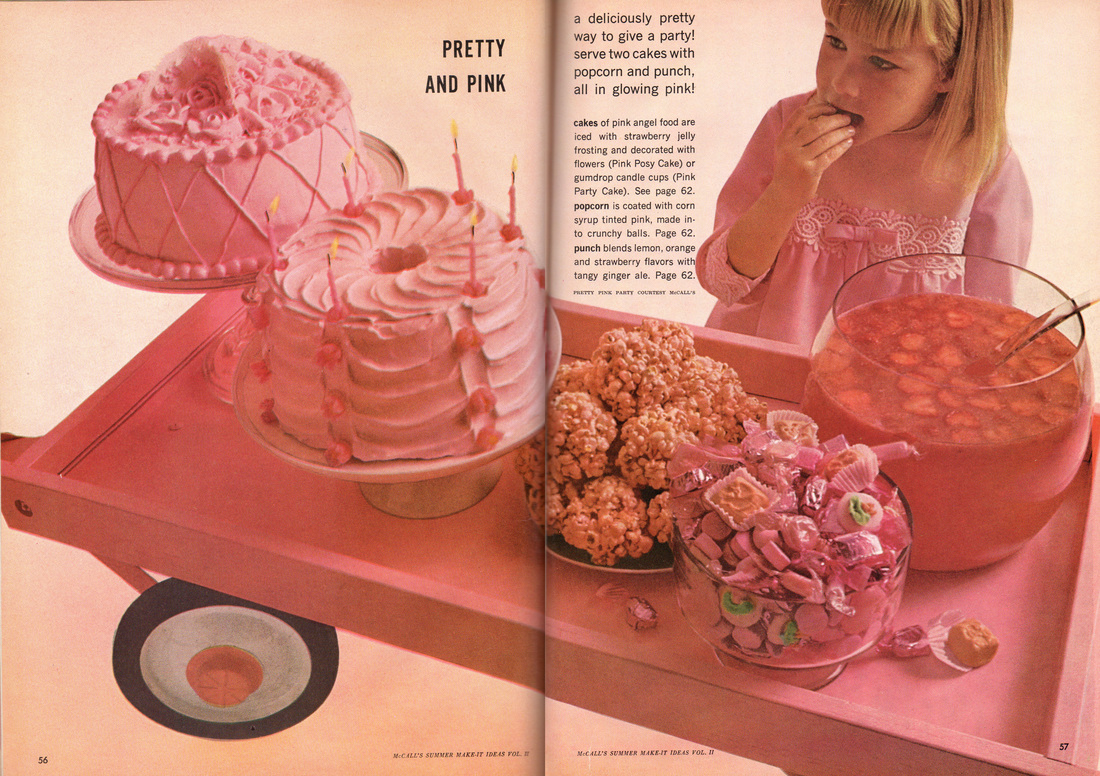 In case you find this photo mouth-watering, here are the recipes. They're actually not terrible sounding? Maybe I'm just hungry. 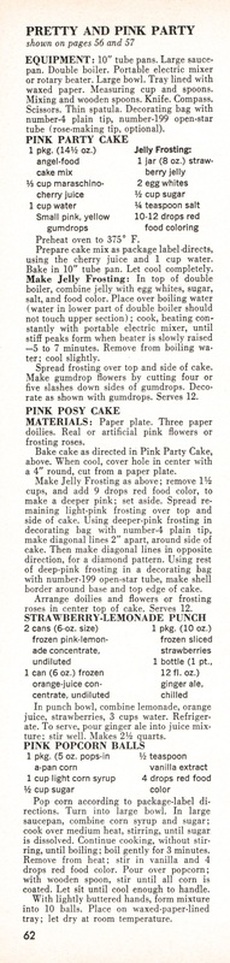 You're all pretty and pink to me, dear readers.
xo I think this one-pager from a 1969 issue of McCall's needs no directional text, but as a hint, I'll tell you that the main ingredient is dried milkweed pods. 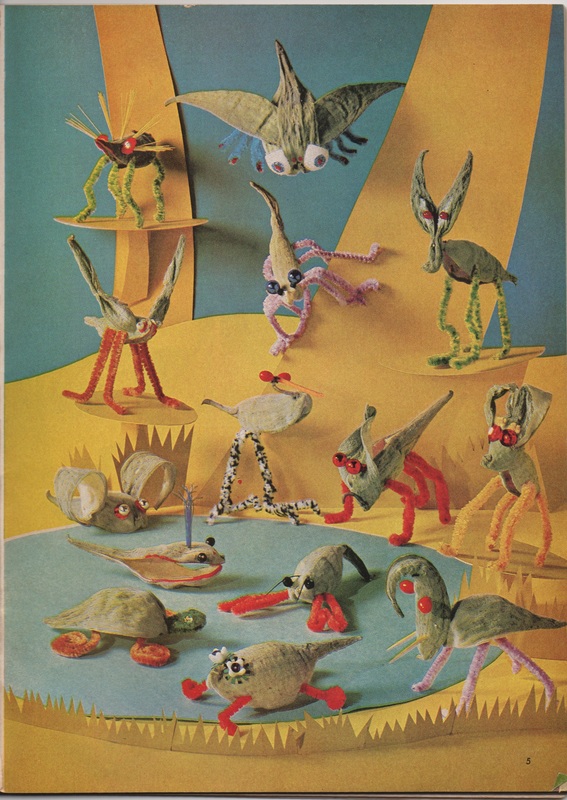 I think my favorite is the whale.
xo 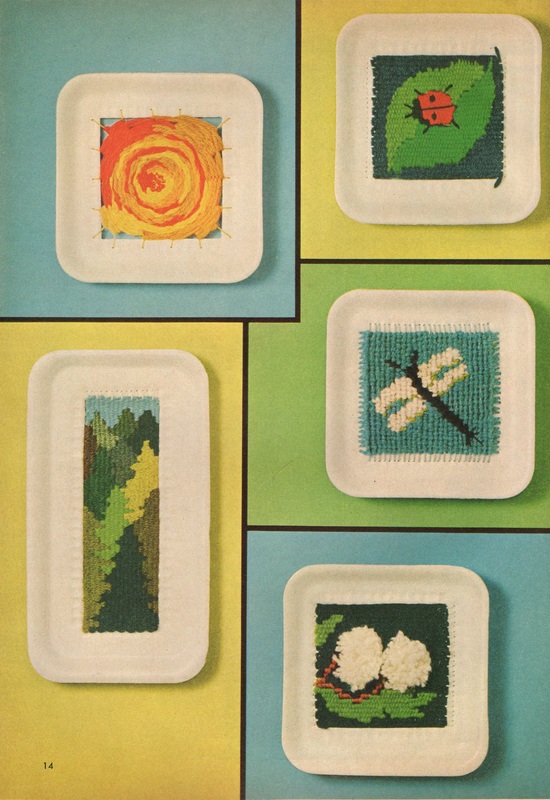 After a several-week period of mourning my old, seemingly-deceased scanner, I again have access to one that works. Which means I can bring you more McCall's Creative Handcrafts! This tray-loom idea is from 1969's Annual.  I love this craft idea and think it looks great today. The main problem with translating it to a 2016-era craft is the relative unavailability of styrofoam trays. I think the last tray I got was at H-Mart, where it was holding a half-dozen Asian pears (so delicious). I am far too paranoid of e coli and salmonella to use a meat-containing tray for crafts. It's been a while since I looked, but my local supermarket used to sell their half-price, over-ripe produce wrapped in styrofoam trays, so that would be a safe way to get some. I'm working on a variation of this craft that doesn't use styrofoam at all. In the meantime, here are the directions, beamed to you from way back in 1969. 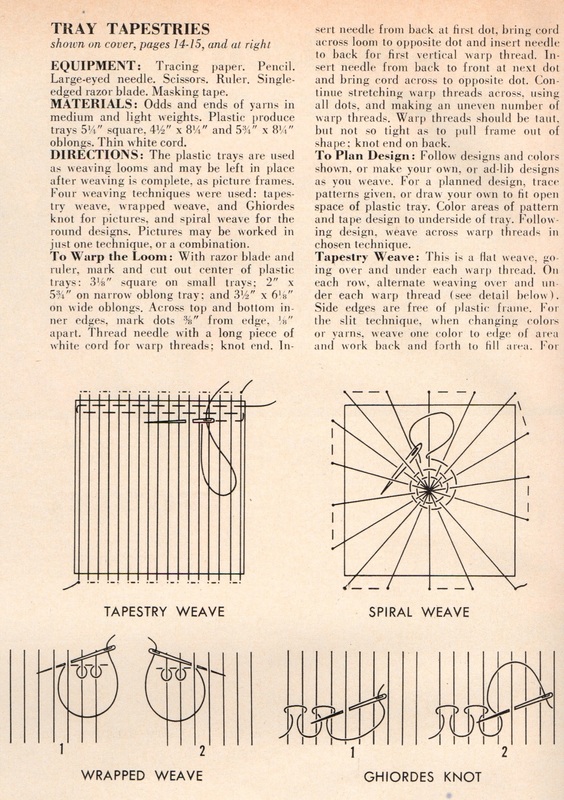  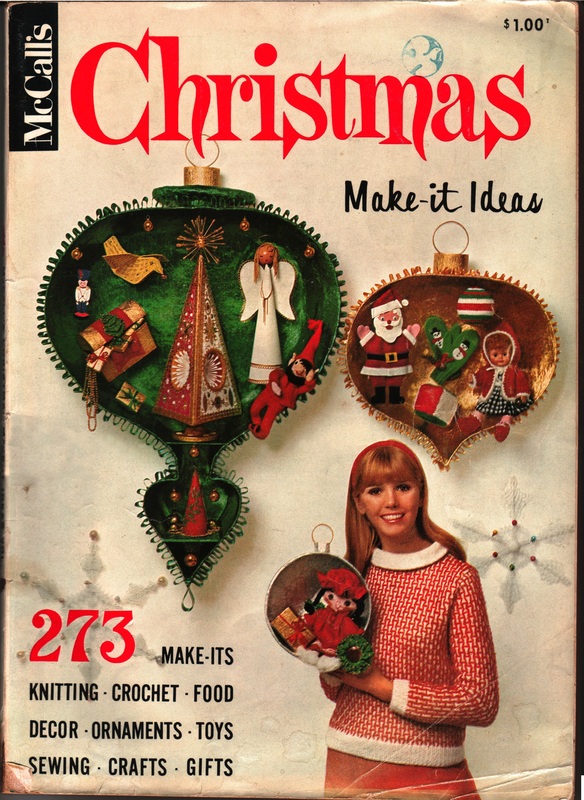 Guys, I couldn't help myself; I went back to the place (the wonderful, inspiring Knack) where I got my McCall's crafts annual magazine and bought several more, including this issue from 1967. I find the ideas in these old craft mags frequently inspiring, often strange, and occasionally disturbing. For an example of the latter, see this page of children's ski masks to knit, which includes a gently-racist Indian option (though the little girl's one is more nightmare-inducing). 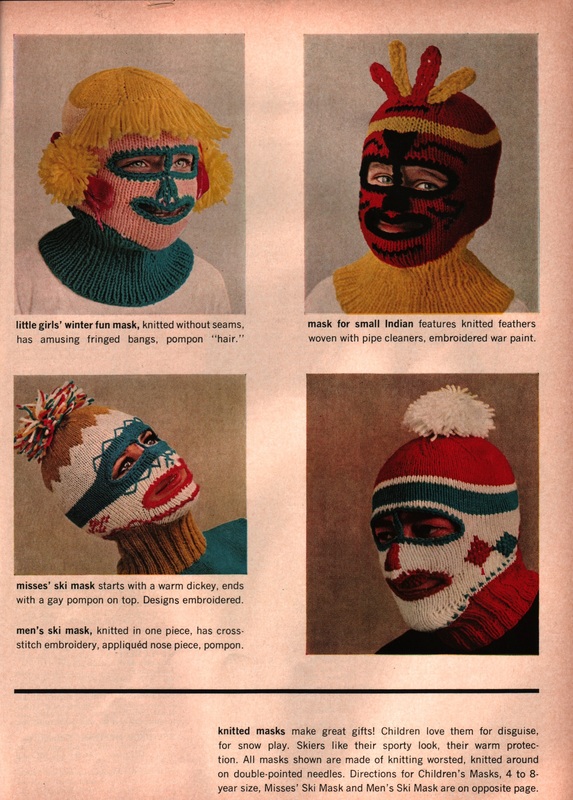 Anyway, today I wanted to share a couple of pages of truly wonderful Christmas/holiday cards. Some of them are reminiscent of the Tiny Fawn artwork I linked to yesterday! 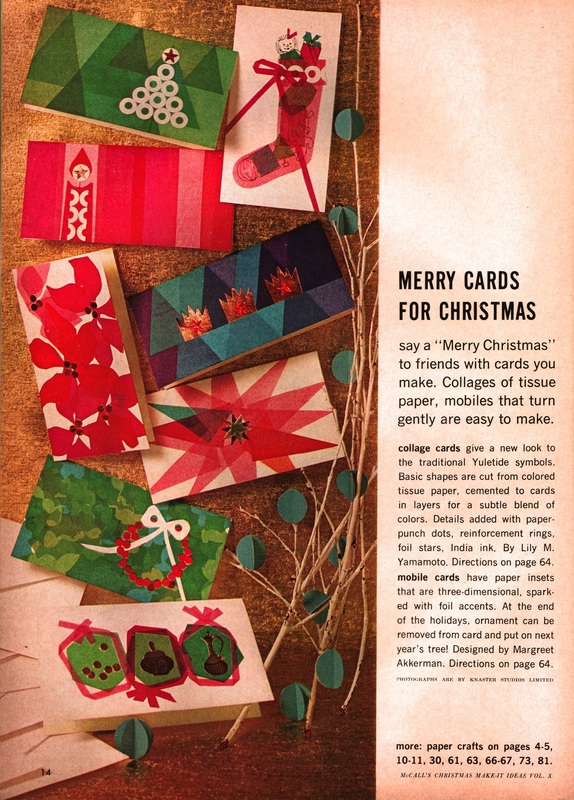 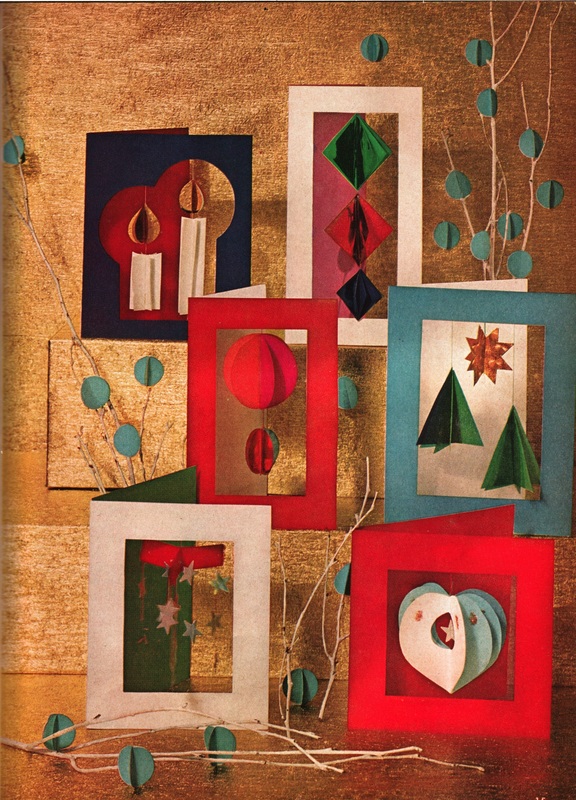 And, the directions, which I believe you can enlarge by clicking on 'em.
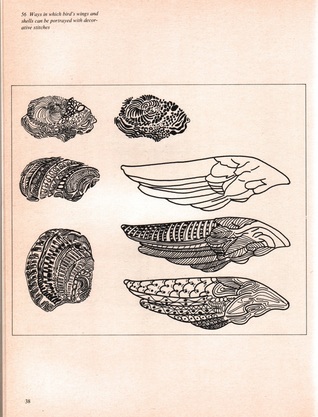
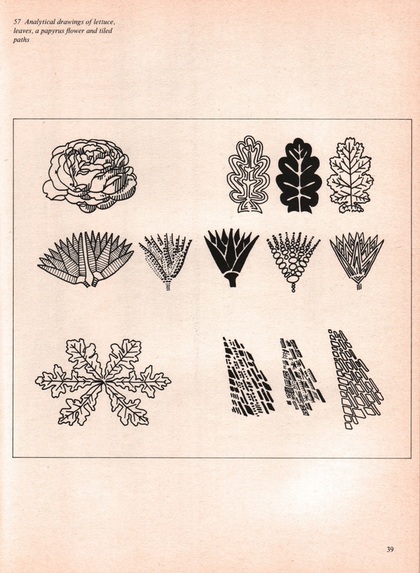
Hope you get inspired to try one or two of these, with or without kids!
xo 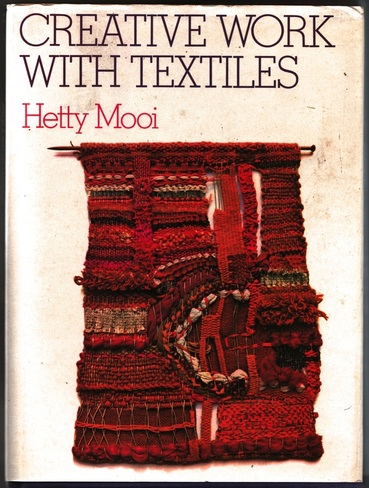 I scored this hardback at an artists' studio sale for a mere 25 cents. It was published in 1975, which is still inside, but nearing the edges of, my design sweet spot. All of the macrame, and macrame-like projects, give off a sweet hippie/groovy earth-mother vibe. You can buy a vintage copy here; it looks as though it only had one printing. 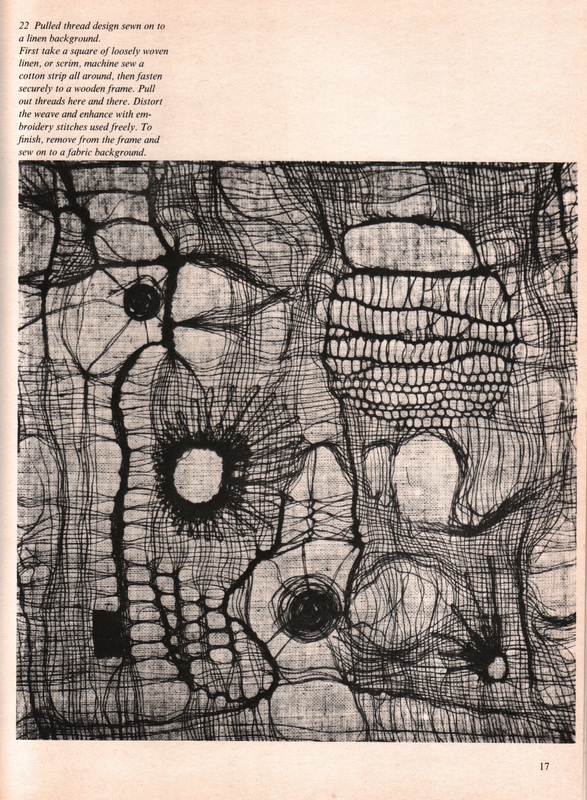 Most of the photos and illustrations are in black and white, and the projects are, for the most part, meant for the adult with serious amounts of focus and free time. However, I found a couple of projects and exercises that would be both fun and thought-provoking for a child to do. One is shown above. You could simplify the project by using duct tape to secure the edges of a square of cheesecloth to a board or a canvas, then play with the weave by cutting and pulling out some strings, tying others together... It might look terrible, but the worst that can happen is you decide to not to keep it, and peel off the tape and toss the cheesecloth. Not too terrible an ending for an hour or so of creative exploration. Then there's this idea, which could be done with any medium. 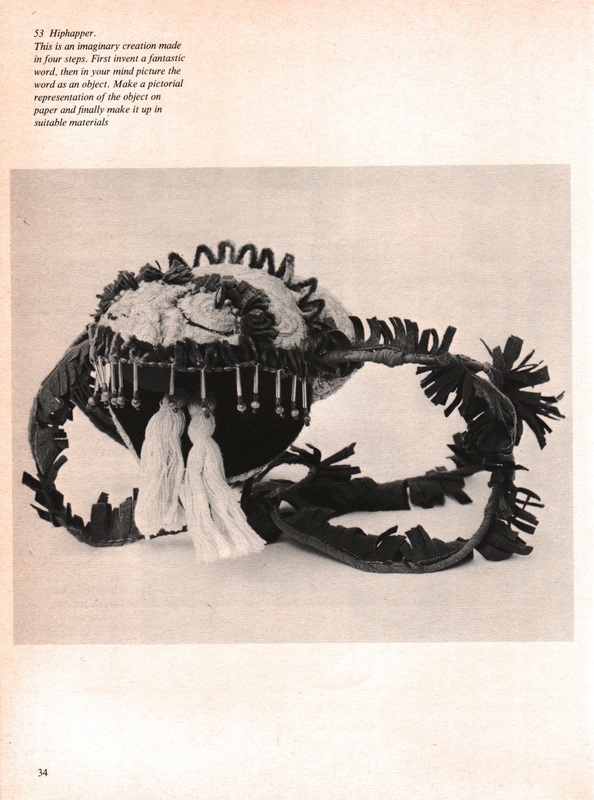 If you can't read the above caption, it says, "Hiphapper: This is an imaginary creation made in four steps. First invent a fantastic word, then in your mind picture the word as an object. Make a pictorial representation of the object on paper and finally make it up in suitable materials." That project is in a chapter called "Design" which has some great ideas for ways to start looking at the world as an artist. It also suggests some exercises that gets the reader practicing making images more abstract, distilling them to their cores. All of the is written in this oddly formal, passive voice, so I'll try to distill the basic messages at the end. A few excerpts: "Try out the following exercise. Look closely at the leaves of a tree, noting the outside shape and the pattern of the veining within that shape; touch and appreciate the texture of the bark; study the changes of colour within an area. Now make a small sampler in any medium to bring out the character of some aspect of the tree which you have observed. Repeat the exercise with a stone, noting its overall shape, whether the surface is smooth or pitted like a crater. Find a suitable technique in which to convey your impressions. Man-made objects, too, can serve as a starting point for design: for instance a wrought iron gate, the pattern of tiles on a roof or windows on a wall. The main thing is to always be aware of one's surroundings, making mental notes to be filed away for future reference." ... "After an object has been looked at and touched, an attempt should be made to transfer the experience to paper (ie to make a design based on impressions gained while handling the object). This will not be easy at first, but a start can be made in quite a simple way and confidence will grow with practice. "Start by basing a design on the veining in a stone or the grain in a piece of wood. Although it may seem alarming at first, make the drawing boldly, say with a felt tip pen on a large piece of paper. Start in the centre of the paper with one firm, unbroken line. If this proves to be incorrect resist the temptation to start again, and put in the next line, and the next, until the drawing is complete. The original piece of wood or stone serve only as a starting point and need not be copied slavishly. Keep your mind open to any chance effects which may be produced and learn to make use of them. [...] As a more advanced exercise take, for example, a thistle, and try to convey in stitches not the actual appearance of the thistle, but the prickly feeling which it suggests. This will entail finding the right materials and searching for the most expressive stitches to convey the prickly sensation." A simplified version of the above: Look at and touch a chosen object such as a leaf, or a stone. Examine the texture, colors, surface, patterns. Make a piece of artwork (in any medium: drawing, painting, collage, etc.) depicting one aspect of your object. Next, after further studying the object, draw it in marker using big, bold lines. Finish the drawing even if you feel like you've messed it up. The key point is to treat the object as just a starting off point; don't try to faithfully reproduce it . I like how the patterns the author comes up with are so Zentangle-ish:
"Another way of building up a design is to cut out a few geometric shapes, such as circles, and arrange them on a background, sewing [or gluing] them down when a satisfactory arrangement has been found by trial and error. A more complex pattern could then be evolved superimposing a linear pattern on the solid circular patches. Full use should be made of any chance effects which occur in the development of the work. " There aren't any images given to accompany this activity, so I chose a couple of inspiring images that could, conceivably, be the end result: 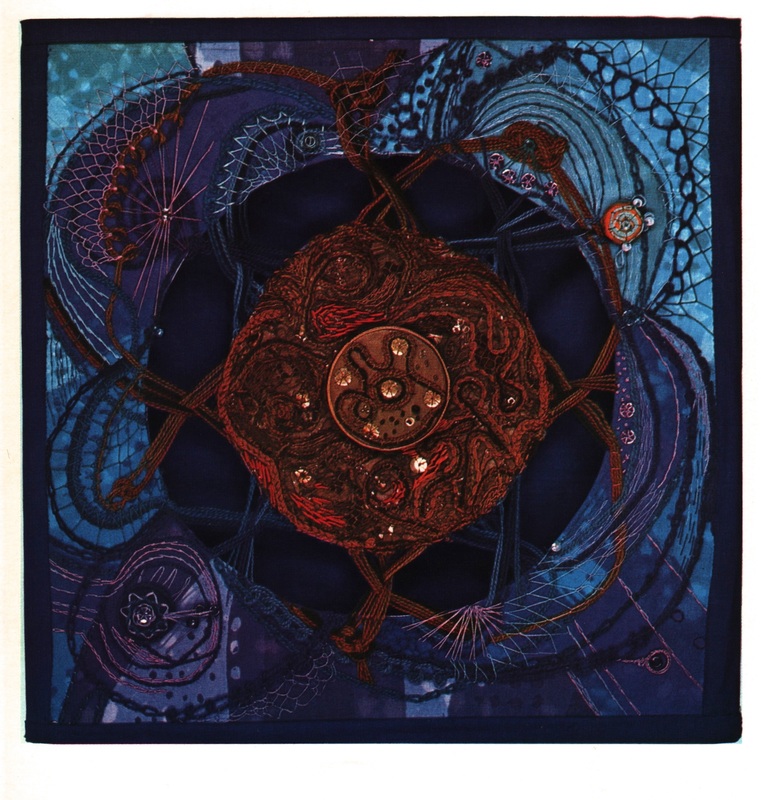 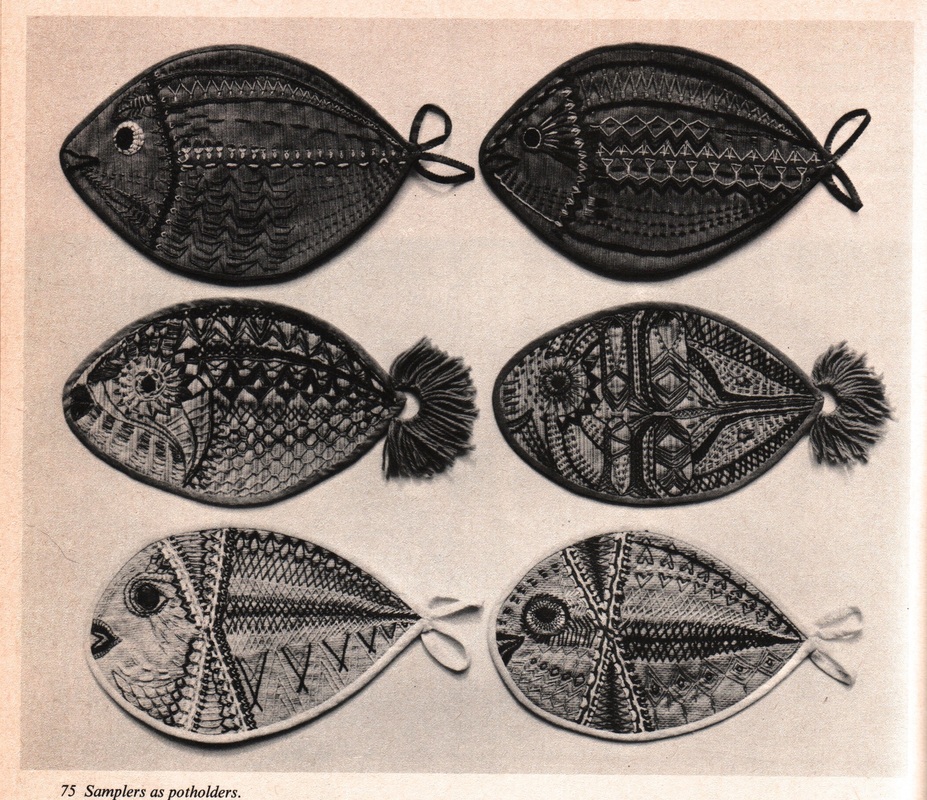 I hope you get a chance to do some creative exploration today!
xo |
Categories
All
Archives
March 2017
AuthorI'm Debbie Way, an artist and writer who enjoys making things. |


 RSS Feed