|
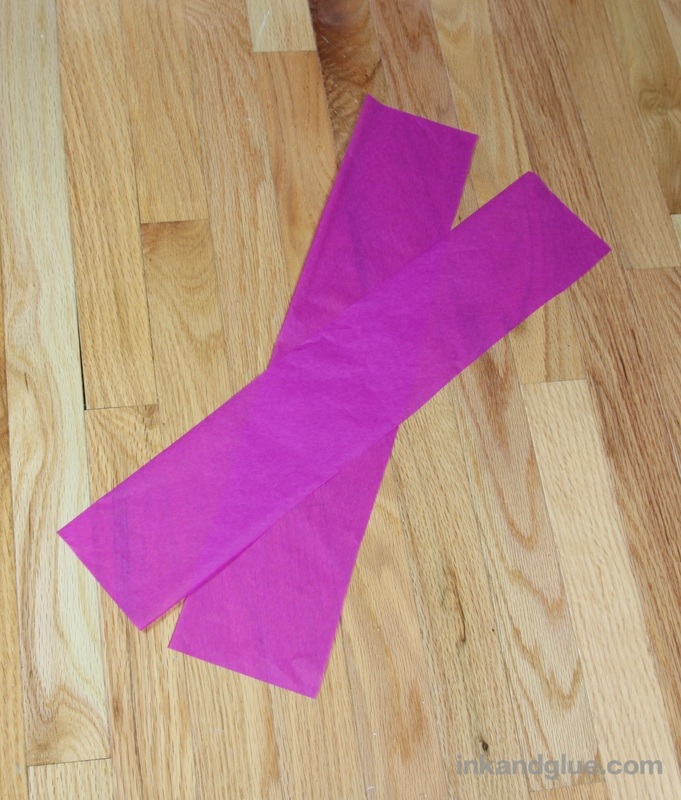
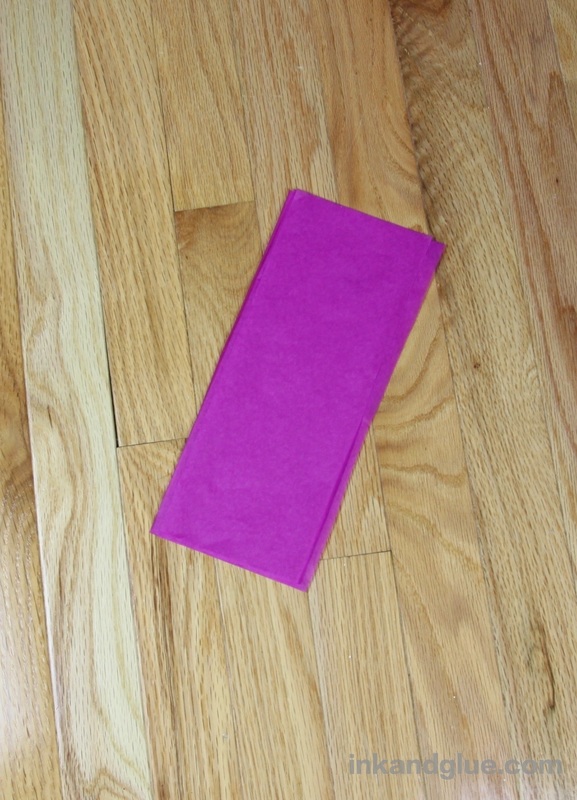
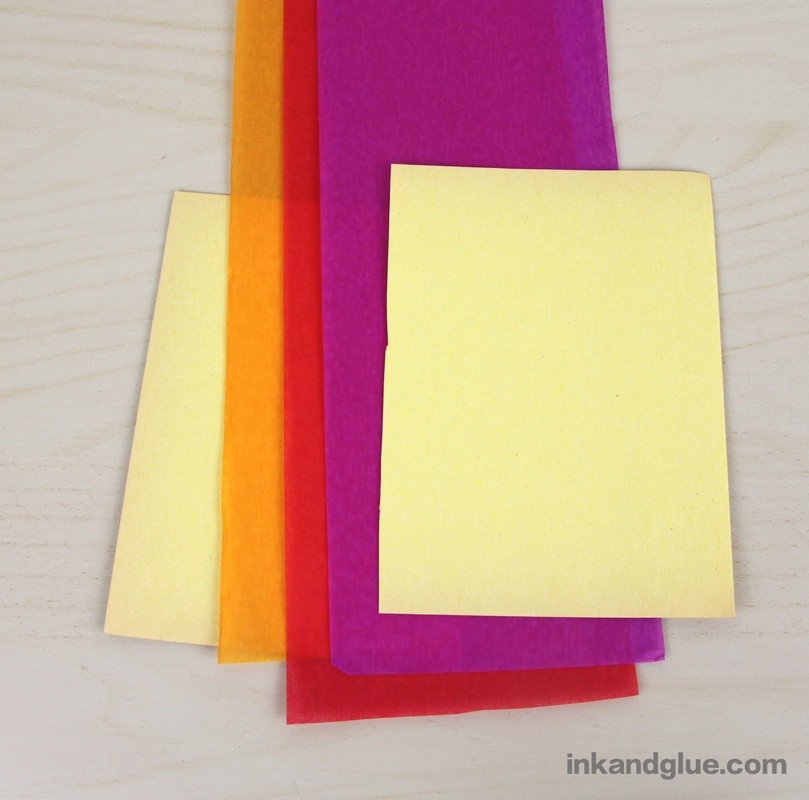
While making the pajaki, I refined the tissue-paper pompom-creating process to make more sense to me. Maybe it'll help you, too! Here's how to make a small, fluffy pom that's about three inches wide. I had a pack of folded, multi-colored tissue paper, which seems to me the most common way to buy it. Pull out one sheet, and cut along the fold lines to get two sections with roughly equal widths. Cut those two long rectangles in half, to make four shorter rectangles. Stack them up, aligning the edges as best you can.
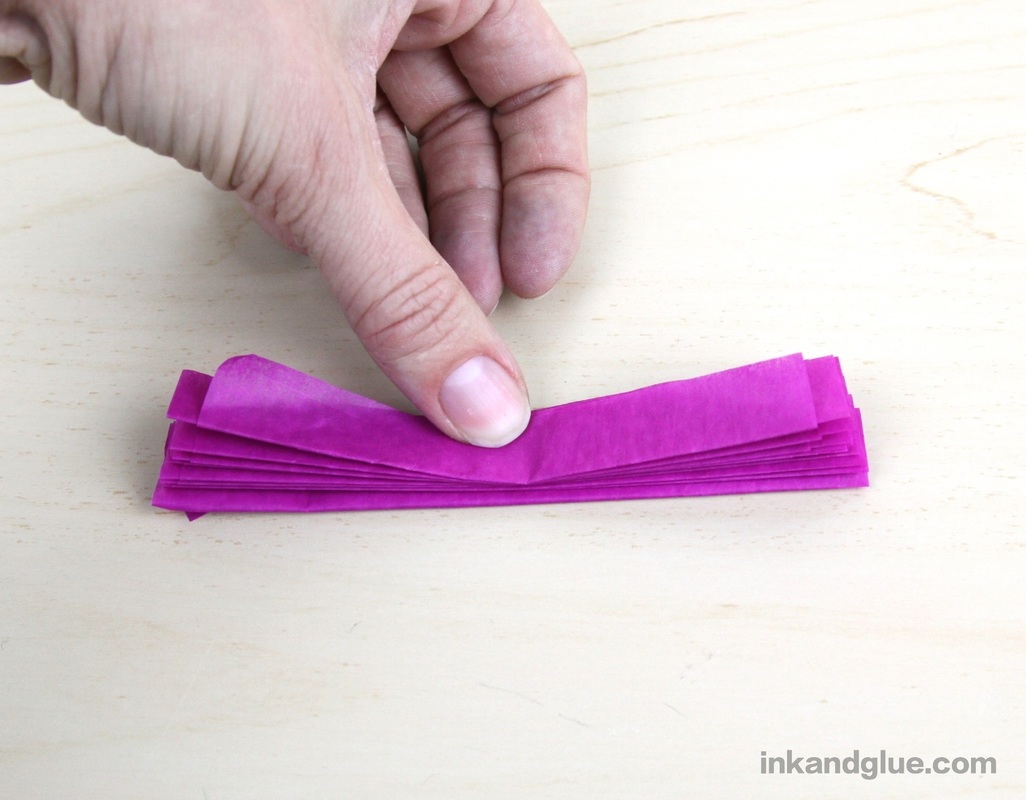
Starting at a short edge, accordian-fold the four sheets. Each fold should be about a half-inch wide, or a bit less.
Use strong scissors to trim the ends and round them off. Mark the center of the folded-up packet by folding it in half. Loop a length of cord, string, or yarn around the center, and tie it snugly. (You can cut the ends into points instead, but I found that made the paper more prone to tearing during the fluffing part. YMMV.)
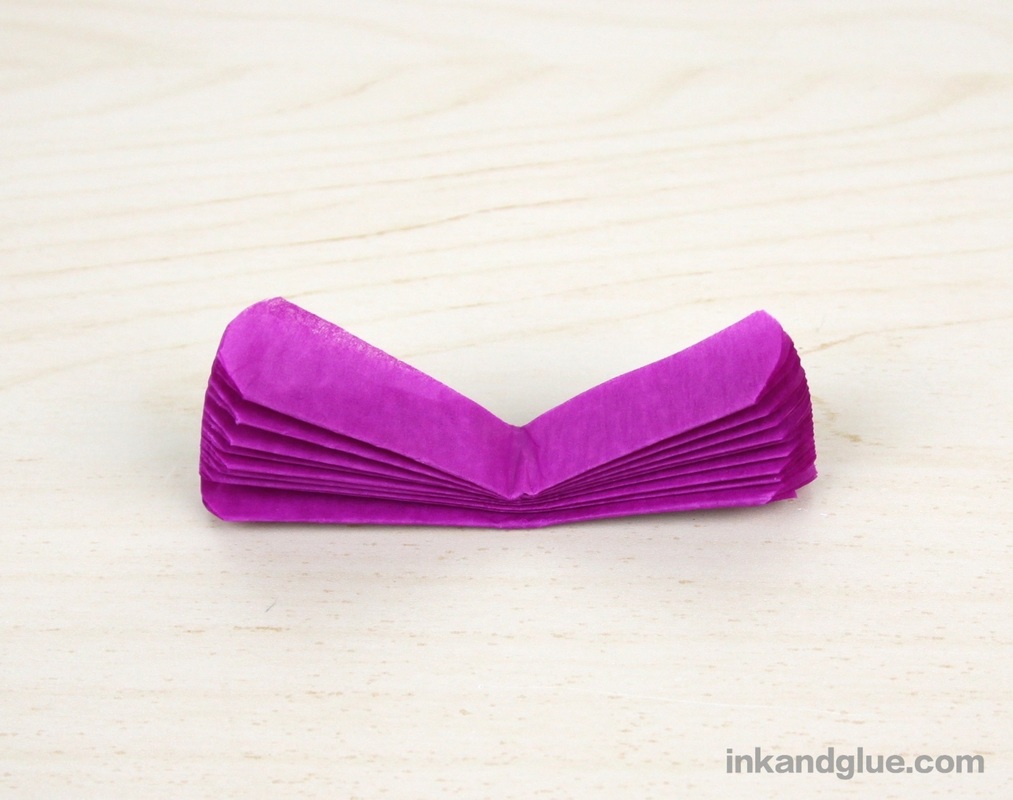
Now, to fluff! Spread open both halves of the paper, like a fan. Or like two fans, to be precise. 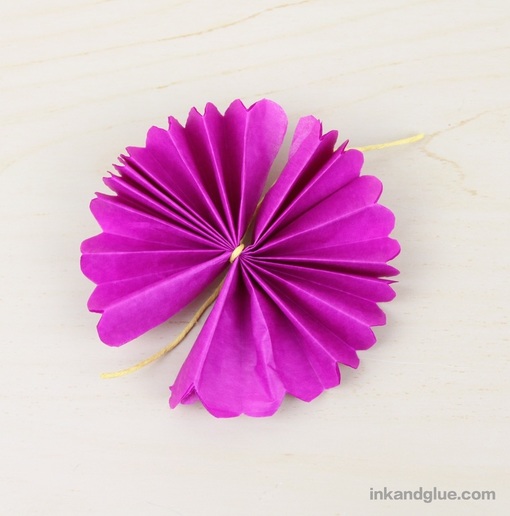 Carefully get a hold of the top layer of paper, and gently, but firmly, pull it up and away from the rest. Do this with each of the two 'fans'. 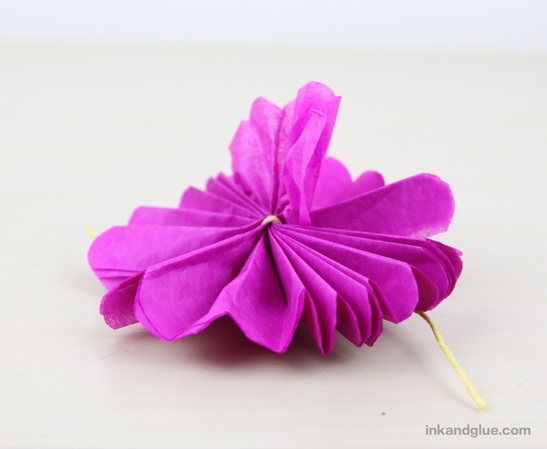 Here's what it looks like after both halves of the top layer have been pulled up: 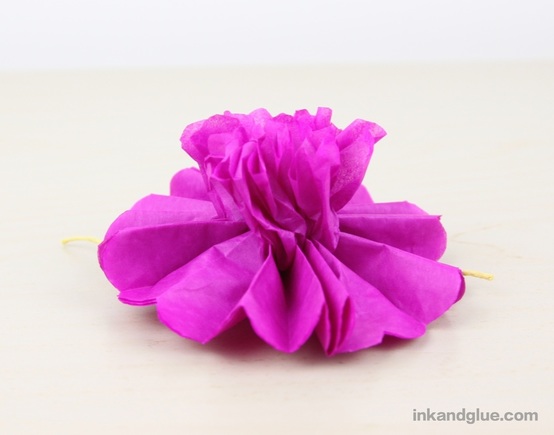 Do the same with the next layer of paper. Here's how it looks after two layers have been pulled up: 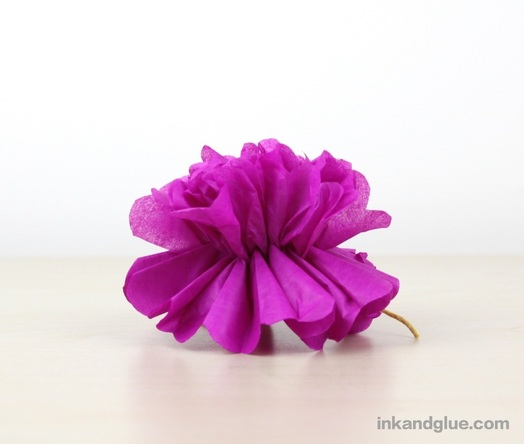 Repeat with the third layer, then fluff the last one by spreading and smoothing it open. I wanted a round-ish puff, so I let this last layer point downward. For a more cup-like shape, pinch the center of the flower and fluff the last layer upward. You're done! 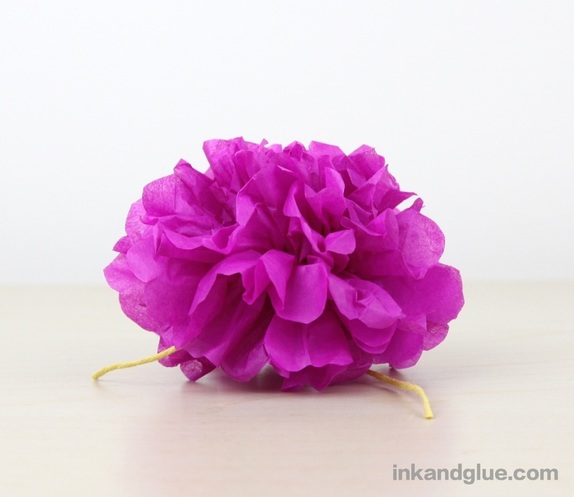 Enjoy festooning with flowers!
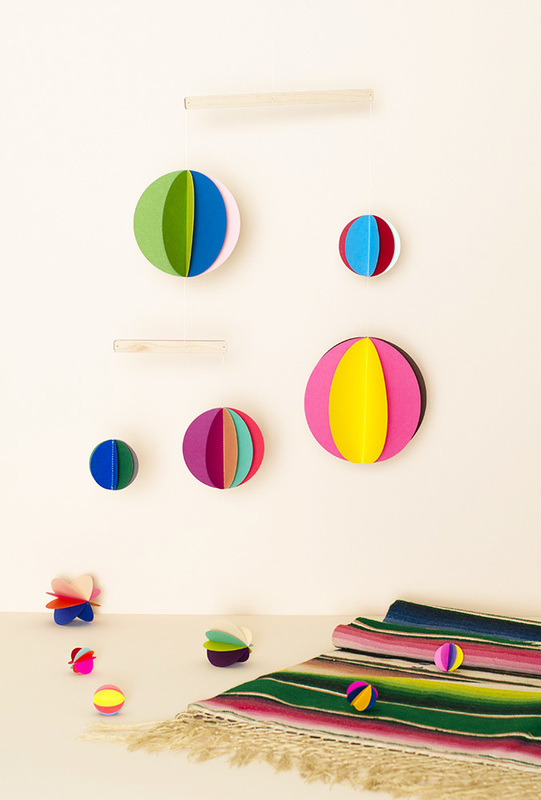
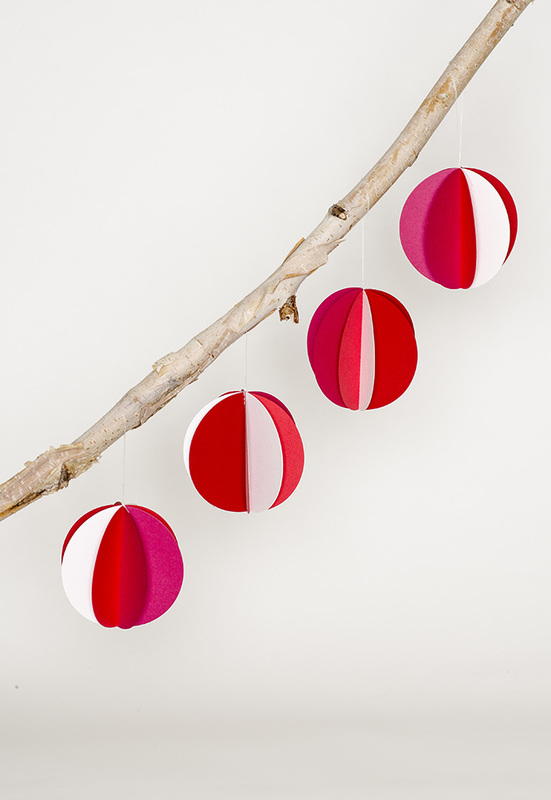
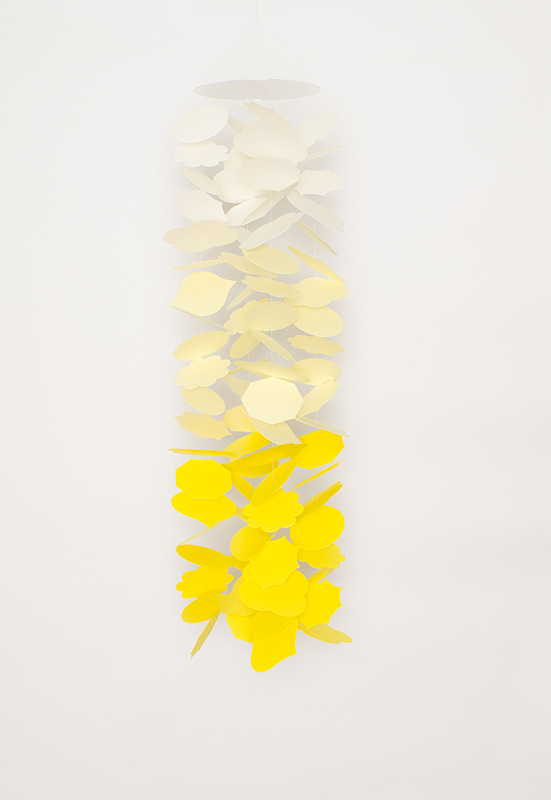
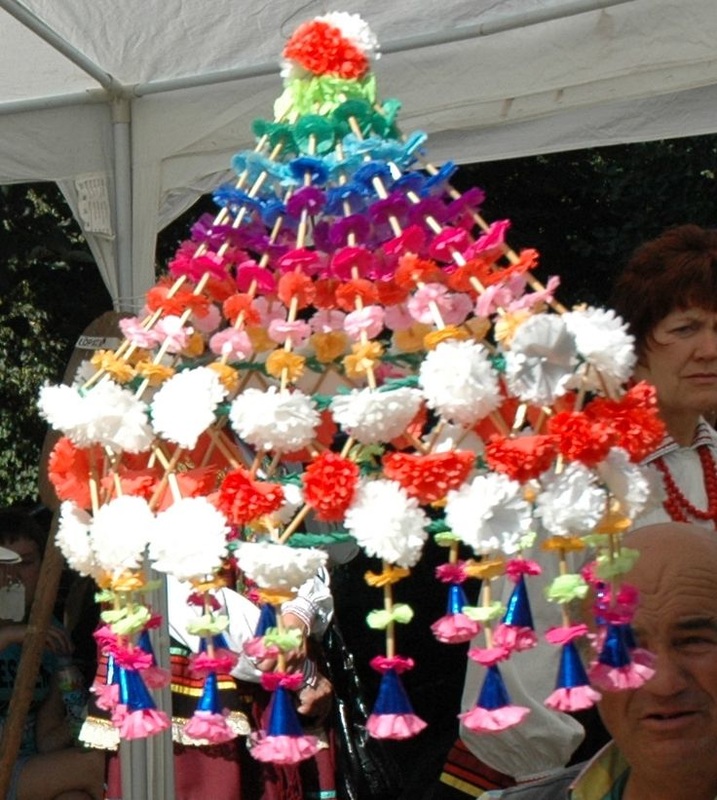
xo I came across these beautiful, precise paper decorations for sale from Frazier + Wing, and thought they'd be a nice companion (and contrast) to my somewhat rough pajaki adventure. As always, click on each image to be taken to the item's page.
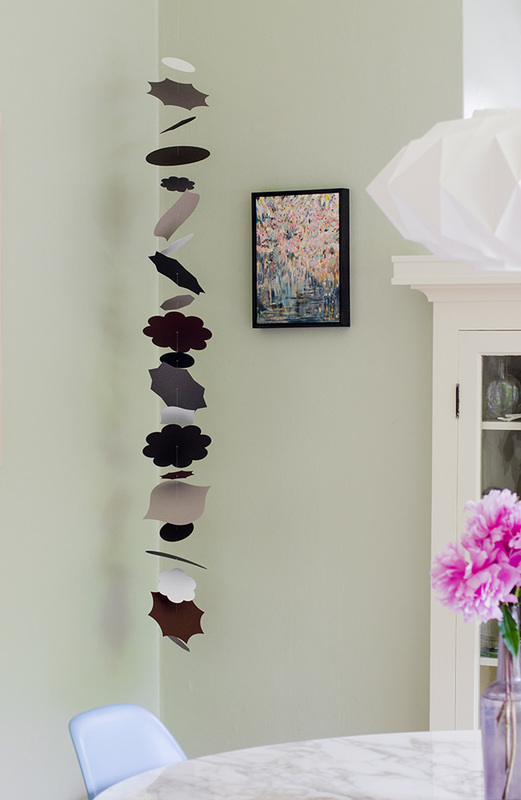
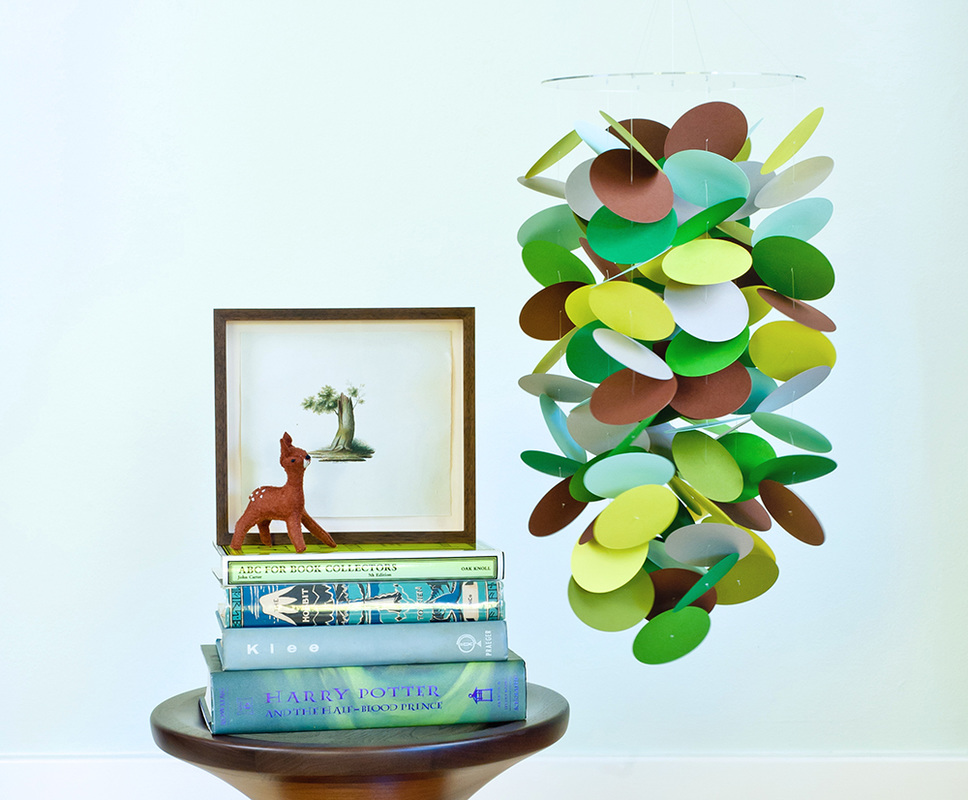 These paper sculptures are inspiring, but I could not reproduce them myself without many trials and errors and hours and tears. The paper pieces are die-cut, and each one (and there are more than a hundred in the piece above) is hand-knotted in place. But, an amateur-level DIY version of one of these mobiles may have to happen, once my pajaki fever has died down.
Gorgeous!
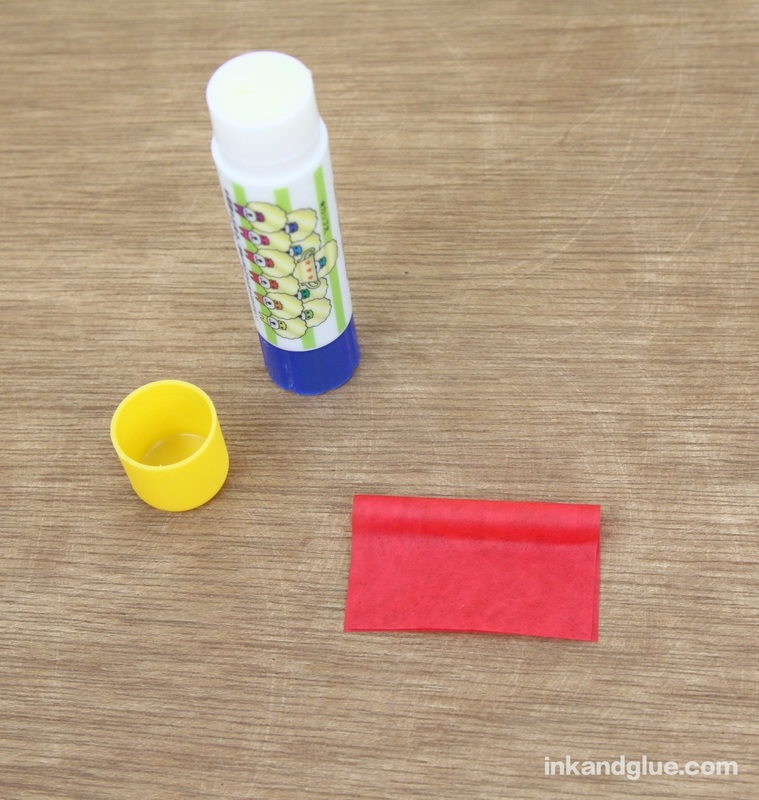
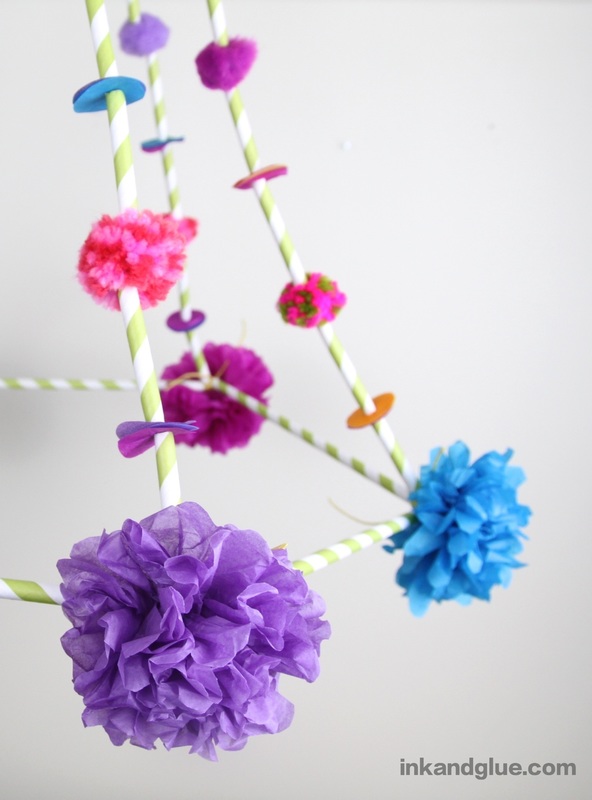
xo 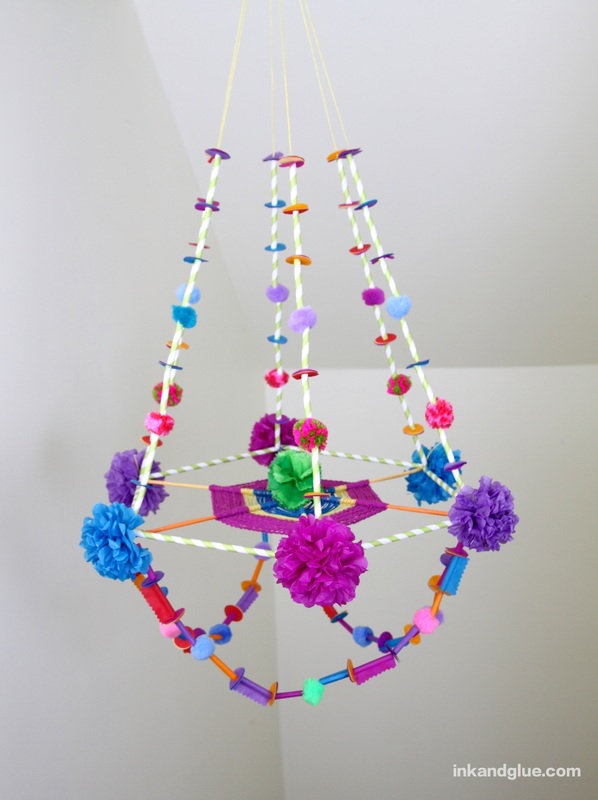 I added some swags to the bottom of my pajaki, and I'm going to call it "done for now." As you can see, I used more of the pompoms and the tissue and construction paper discs, as well as paper-covered straw sections, and rolled paper "beads." Here's how to make the paper-covered straw pieces. First, grab a handful of drinking straws from an unattended concession counter at a movie theater. 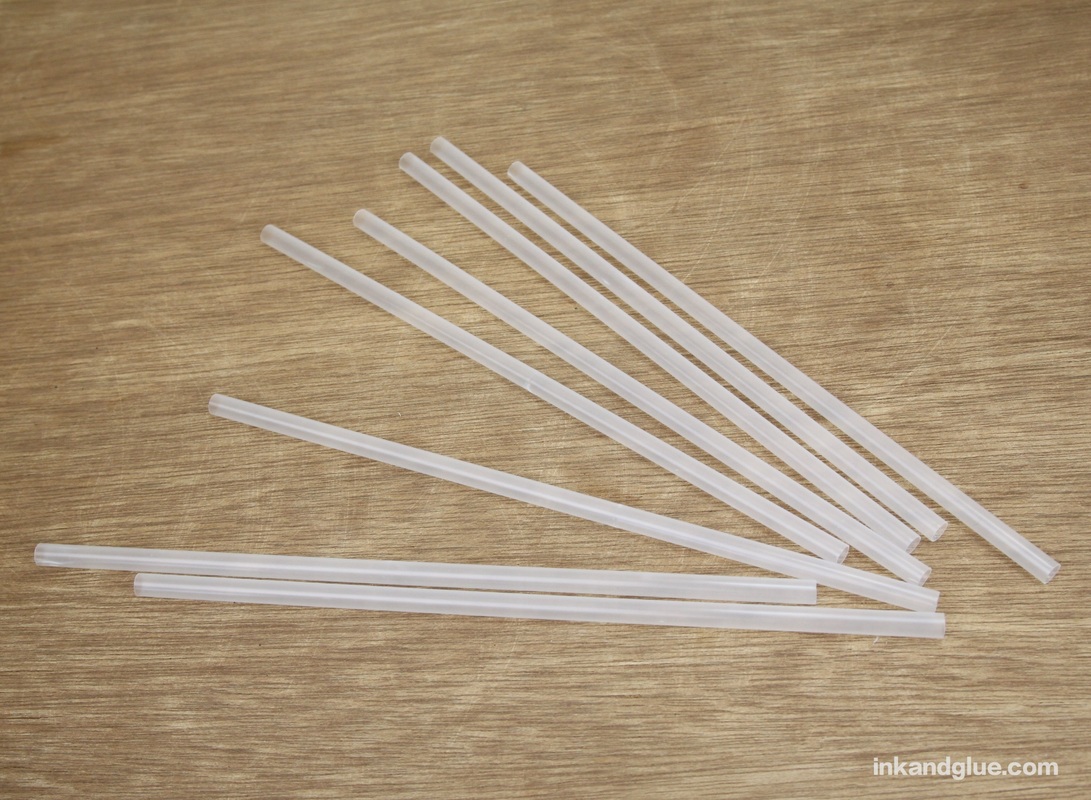 Cut the straws into sections. I cut each one into five roughly equal lengths. Cut a rectangle from tissue paper that's about the same width as a straw section but a big longer than it is wide. Spread glue stick on the upper half of the rectangle. Place the straw section in the middle, then roll and press the two halves of the paper together around the straw.
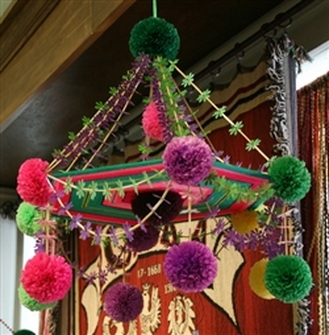
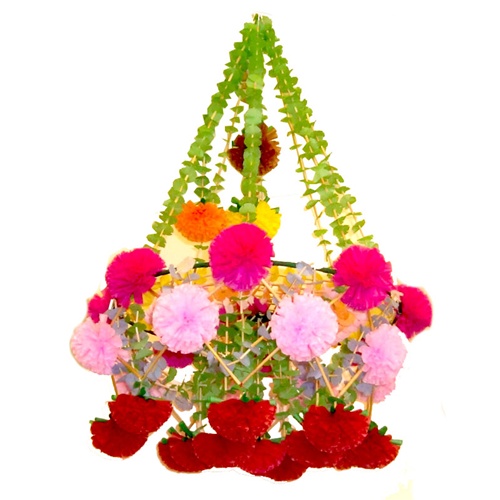
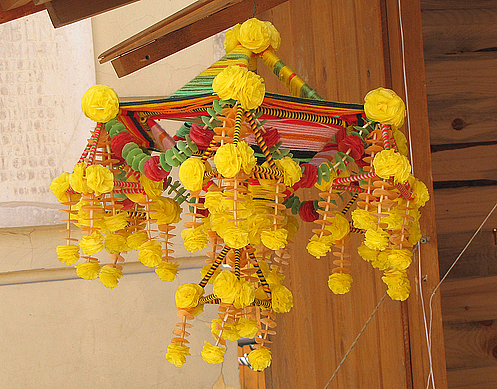
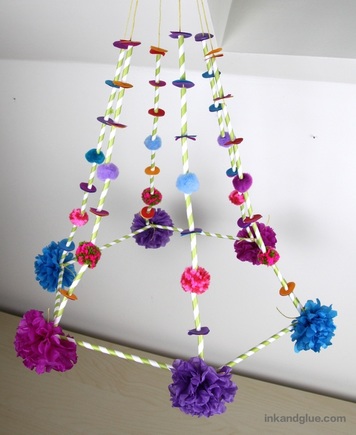
Cut the paper edge with pinking shears. Shredding scissors would make for great fringe, here; unfortunately, I don't own a pair. 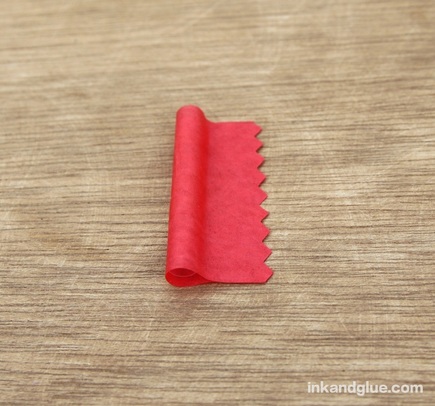 For plain, cylindrical "straws," I used tissue paper. Use a round, untapered pencil for this. I have a skinny pencil that works perfectly. Cut a rectangle of tissue paper that's about as wide as the pencil is long, and 4 or 5 inches tall. Spread glue stick onto the top inch or two of the rectangle. Place the pencil along the bottom edge, and roll it up in the paper. 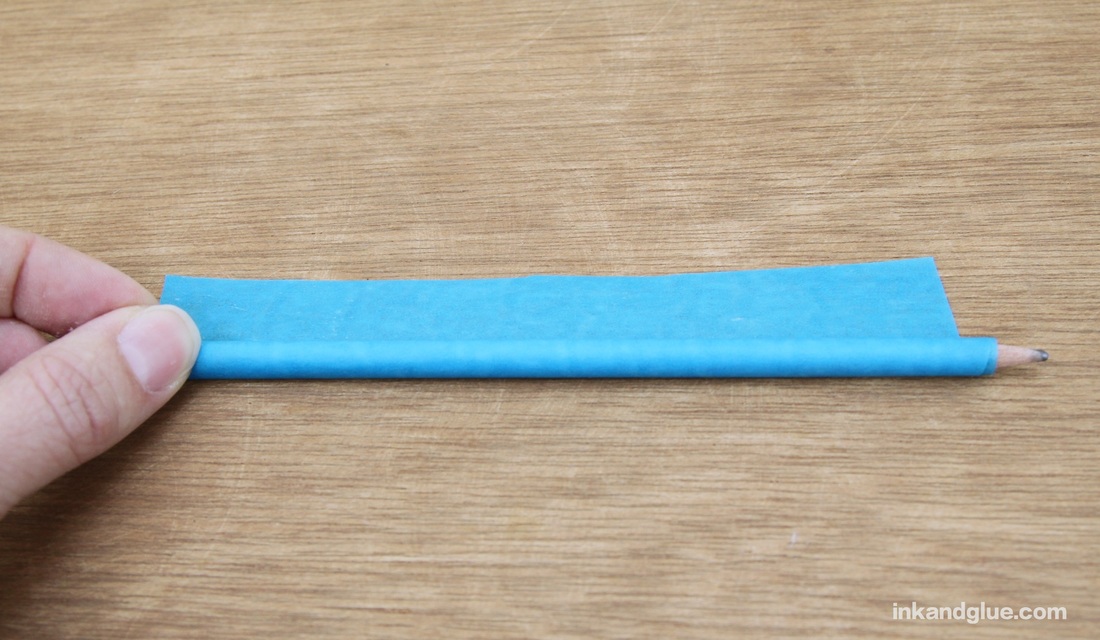 Push the pencil out of the cylinder, eraser-end first. Cut the tube into whatever lengths you desire. 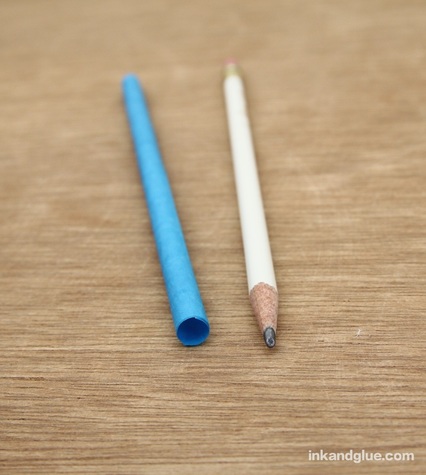 Thread a yarn needle with a length of cord. Mine was about 2.5 feet, and I had plenty of excess for tying. Clip the other end with a binder clip to act as a stopper. String your elements on the cord in a pattern. Repeat this twice to make three roughly equal strands. Tie each end to a corner of the hexagon. (I tied the second end two corners away from the first.) 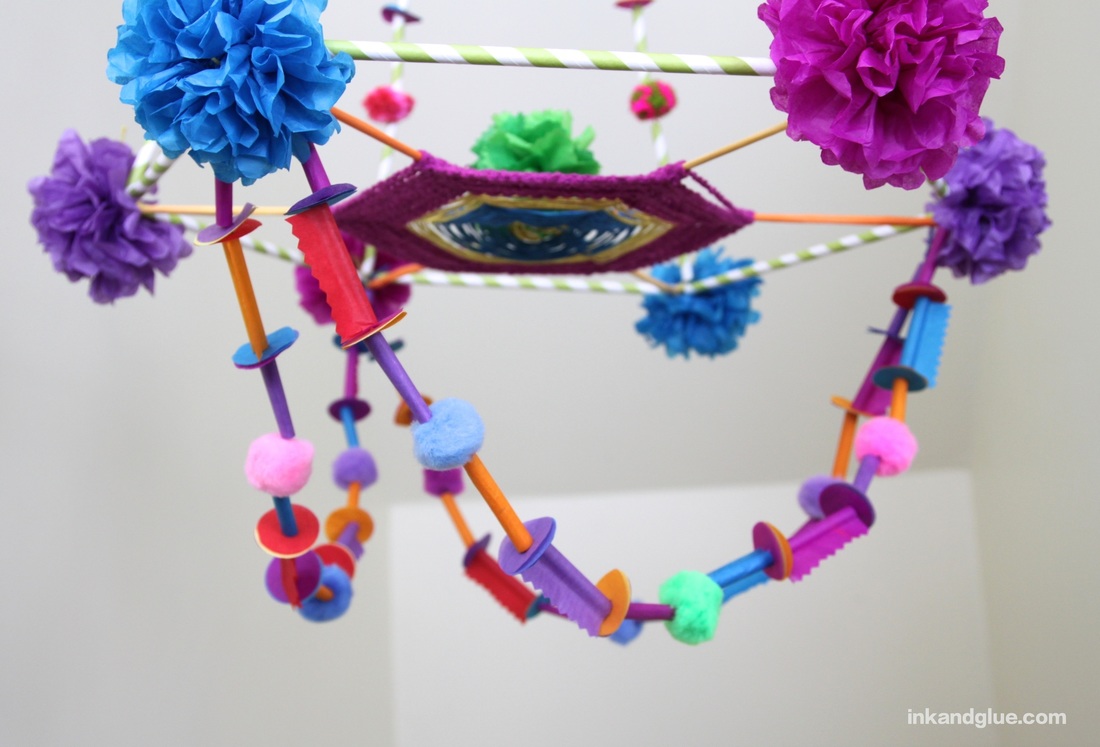 I'm pretty happy with how it turned out, though I can see myself adding more elements in the coming weeks, just to make it look fuller and richer. It will be my chromotherapy for the winter months. xo 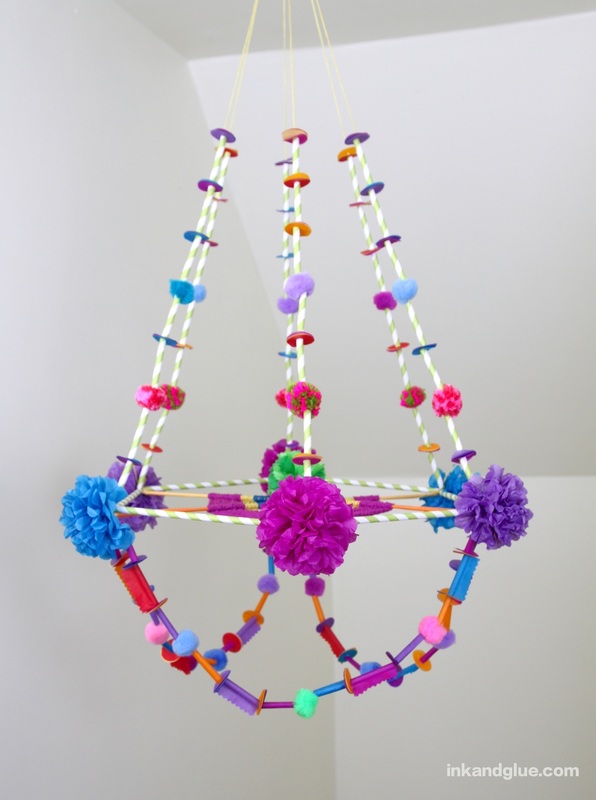 ...but not yet finished. Getting there, though! I ended up using the traditional pom-pom flower method, and made six small-ish ones. I tied the centers with cord, and I left the ends long so I could tie the poms to the pipe-cleaner corners of the hexagon I made in yesterday's post.  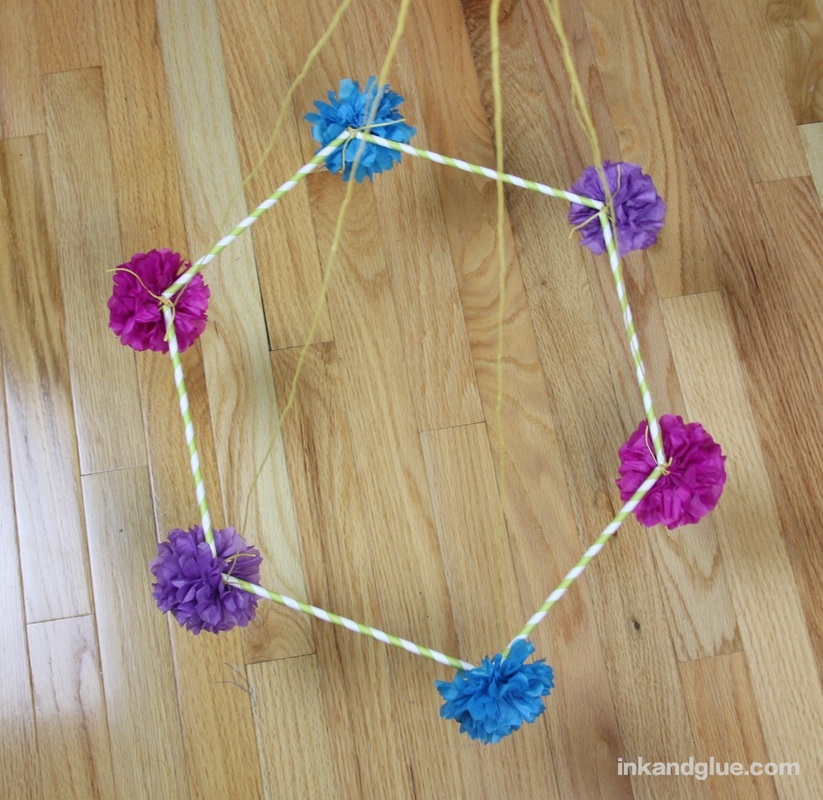 And now I will reveal what I am attempting to make: A pajaki, which is a colorful Polish decoration made of paper, straw, and yarn/string, and that seems to have no significance or religious sentiment behind it; its purpose is simply to add color to your home. Which is why I wanted to make one in January, when it is getting quite monochromatic outside. Here are a few images of traditional pajaki; click on the image to be sent to the source for each one.
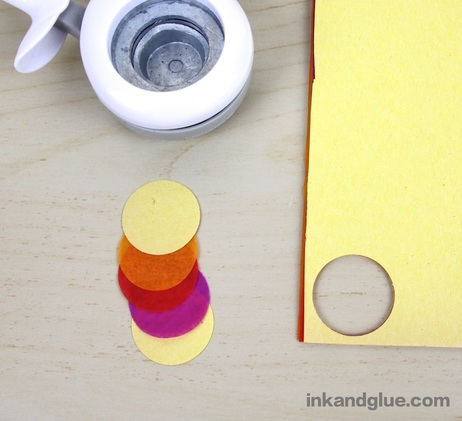
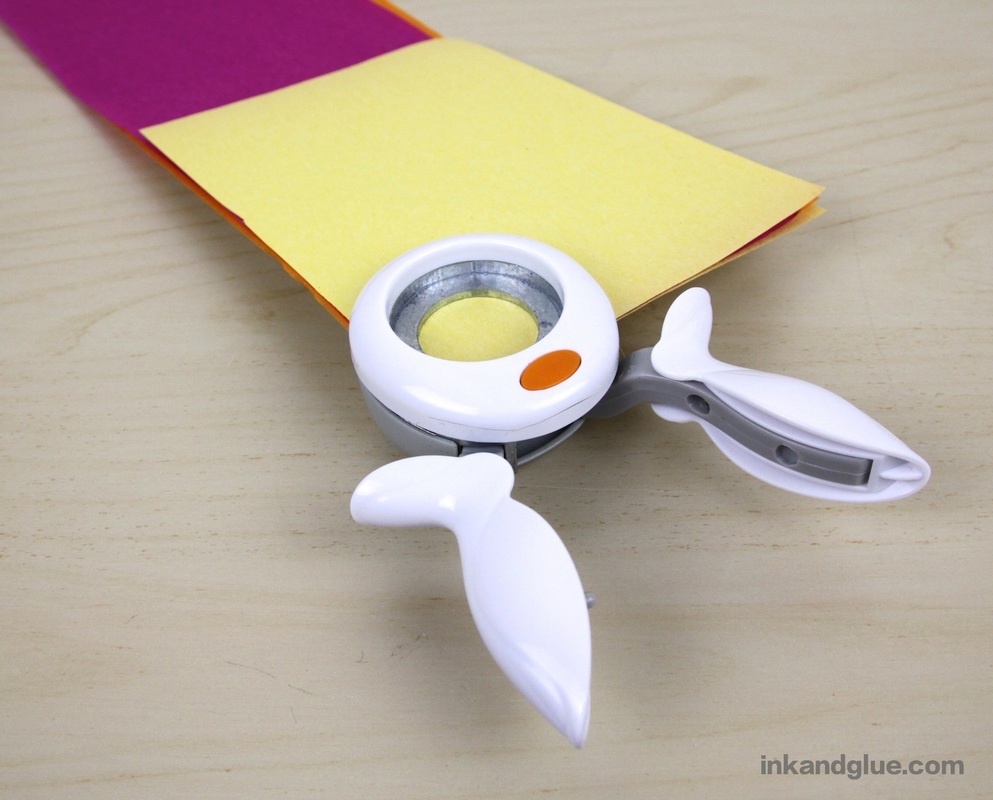
Totally gorgeous, yes? It turns out that the reason they cost $125 is that they take for-freakin'-ever to make. Not that I'm complaining, as I enjoy this kind of work, but I want you to know what you're getting yourself into, should you choose to attempt to make your own. I am also a fairly stubborn person who didn't want to follow another crafter's directions on a DIY version, so i mostly just glanced at a few examples (such as Martha's, Vintage Movement's, and A Beautiful Mess's), studiously avoided any how-to information, and then just started putting things together. Here's a look at where mine is at, again: 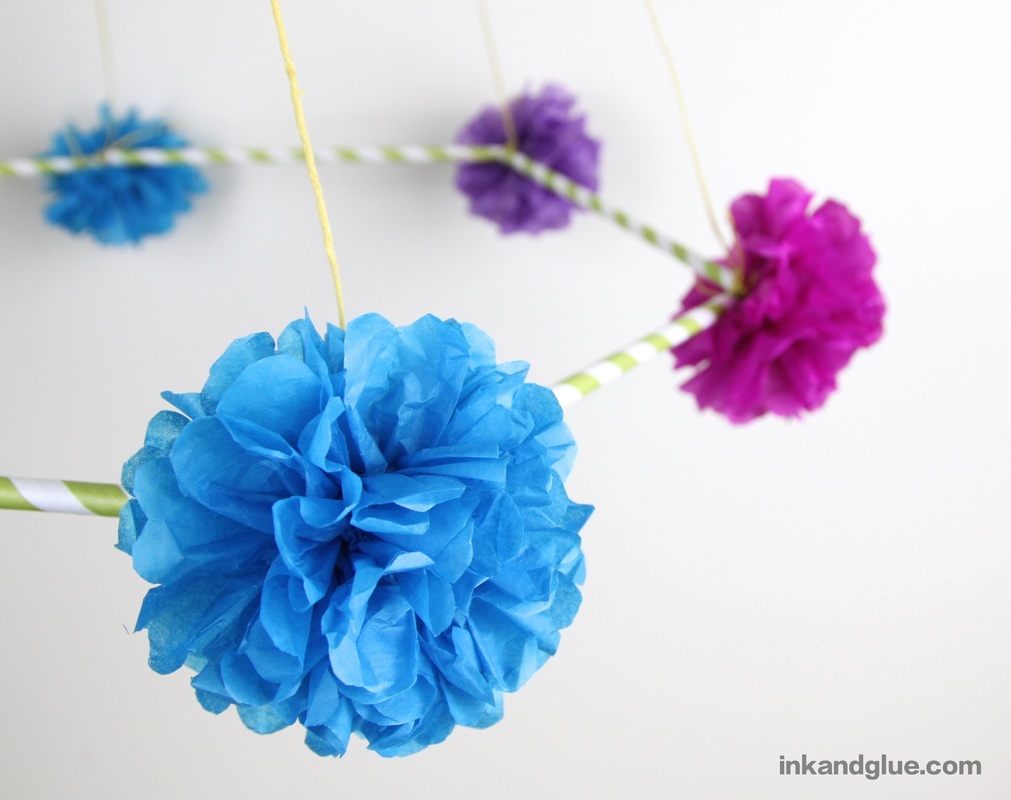 It was time to string some fun fripperies onto the six cords that hold up the shape. You'll definitely want a paper punch for this, as it made everything a whole lot faster. I got mine using one of those nearly ubiquitous 40%-off coupons at either JoAnn's or Michaels. Using a paper punch such as mine on tissue paper is a recipe for frustration, as the paper just tears or gets mangled. Here's the trick to getting perfect tissue paper shapes. Sandwich two or three pieces of tissue paper between two sheets of construction (or other) paper. Stack them up all tidy, and punch out lots of circles (or flowers, or stars, or whatever you like).
 Now, make a bunch of mini-sandwiches with tissue paper tops/bottoms and a construction paper center. Poke a hole in the middle of each sandwich using a yarn needle. I used a piece of a styrofoam tray as a work surface for the poking; if you don't have styrofoam, try a short stack of corrugated cardboard. Anything that you can stick a large, blunt needle into will do. 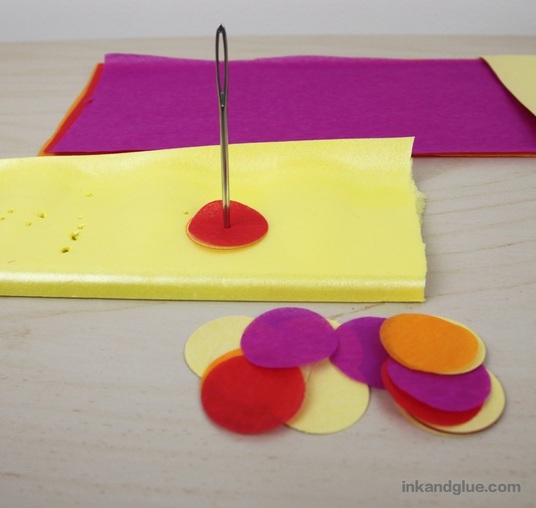 Cut straws into quarters (I just eyeballed it; having each segment identical in length is unnecessary). Thread your yarn needle with one of the six hanging cords, and string on straw sections, tissue paper sandwiches, and pom-poms. I had some fancy ones from eeBoo mixed in with the regular major-retailer poms. Repeat the stringing-on with the rest of the cords, using the same pattern of straw-paper-straw-pompom-straw-paper (or whatever) that you used for the first cord.
Now it's starting to look like a pajaki! When I was messing with the stringing, I realized my pipe cleaner joinery needed reinforcement, so I took each joint apart, one at a time, and smeared some tacky glue on the pipe cleaner ends before reinserting them. Much better. 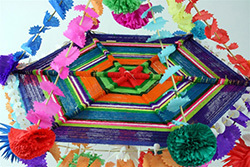 Many of the traditional pajaki I saw had a woven center, like this one at right. I happened to have a couple of yard-long, skinny (maybe 1/8-inch) dowels on hand, so I measured the distance from the opposite corners of my hexagon and used that measurement to cut three lengths from the dowels. (Actually, I cut them a bit bigger than needed, so I could trim it to fit tightly when I was adding it to the hexagon.) I used a white pipe cleaner to sort of lash the centers together into as asterisk shape. 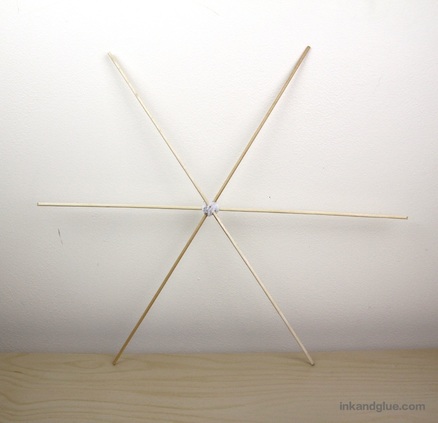 I used washi tape to attach each end to one of the untrimmed ends of the paper pom tied to each corner. I tried to keep the end of the dowel tight against the corner. Although the process doesn't feel like an elegant solution, it seems to have worked well, and the resulting structure feels sturdy. 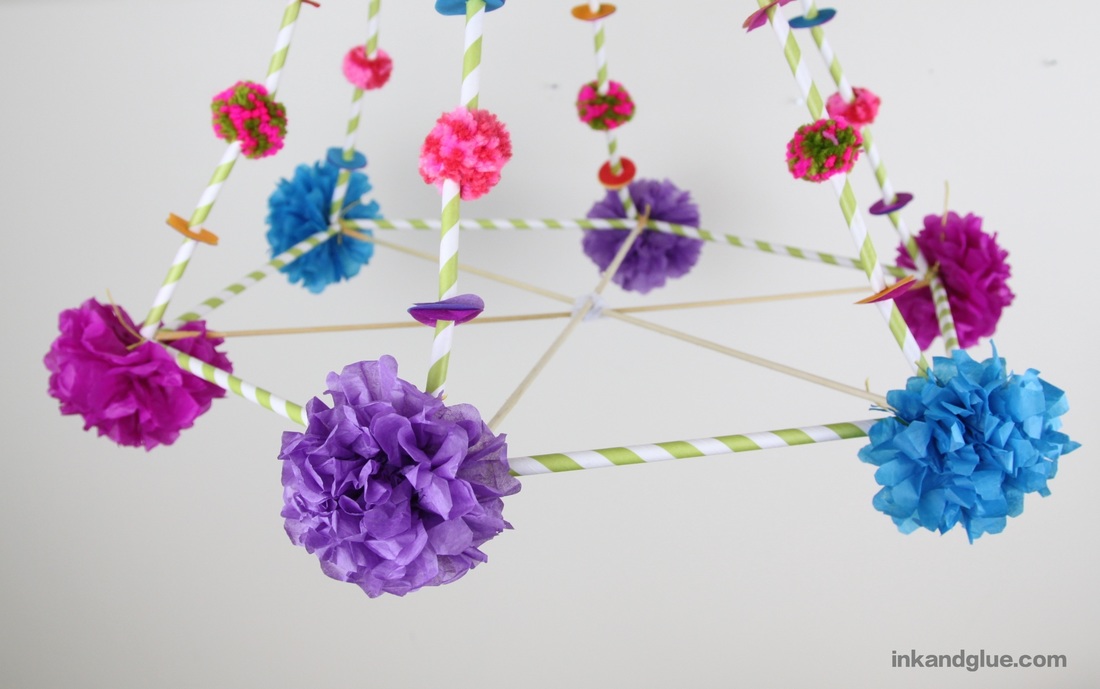 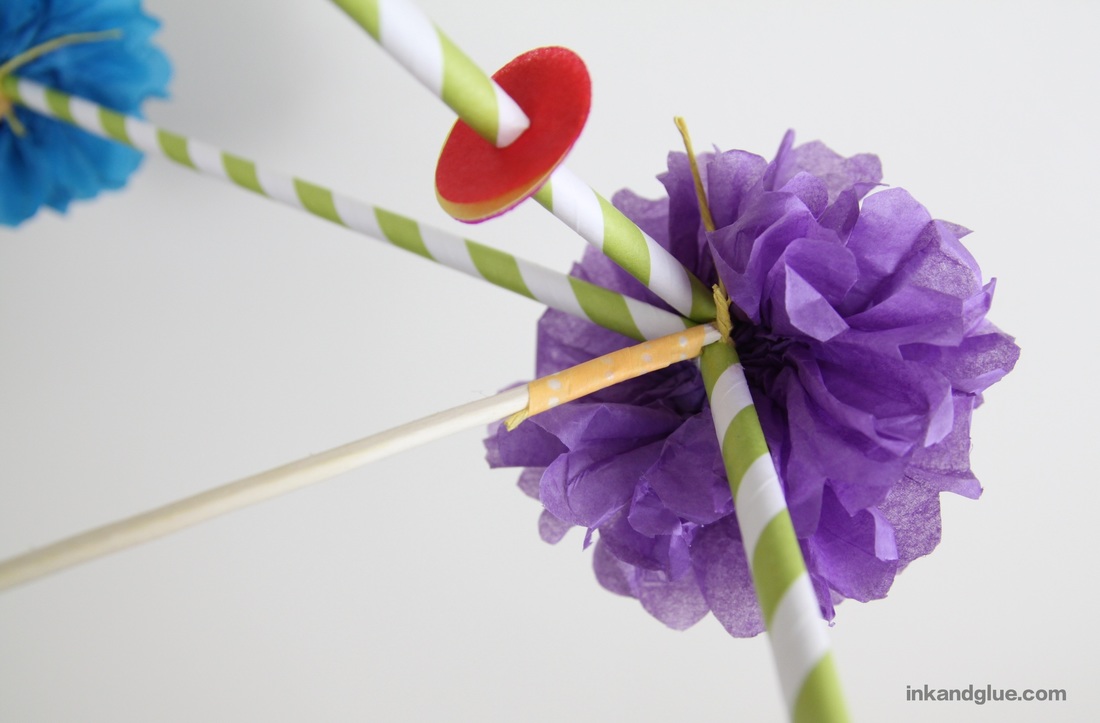 After that, I covered the naked dowels with strips of washi tape. Note the ugly lump of white pipe cleaner in the center; we'll get to that. 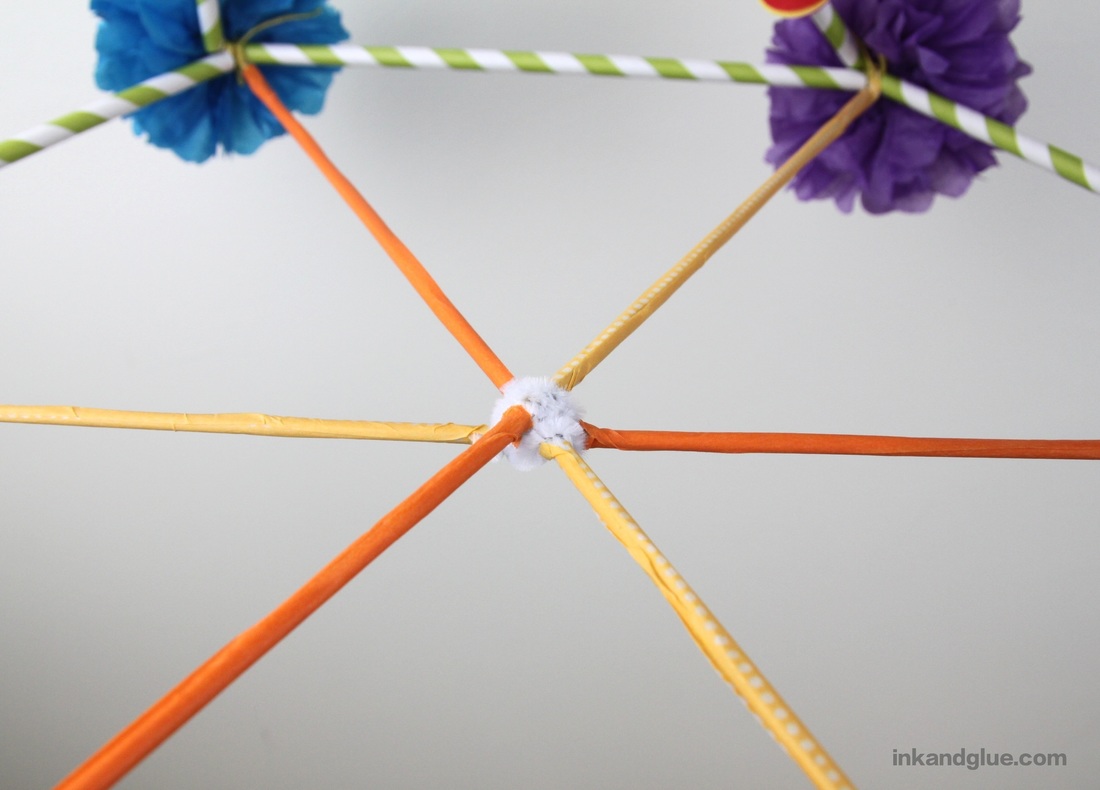 Now it's just a matter of weaving cord and yarn around the spokes, starting in the center. Tie an end of a ball of cord to the middle junction, and begin looping it around each spoke as you move around the "wheel." When you want to change colors, knot the ends together, and hide the knot ends in the subsequent wraps around the spoke. 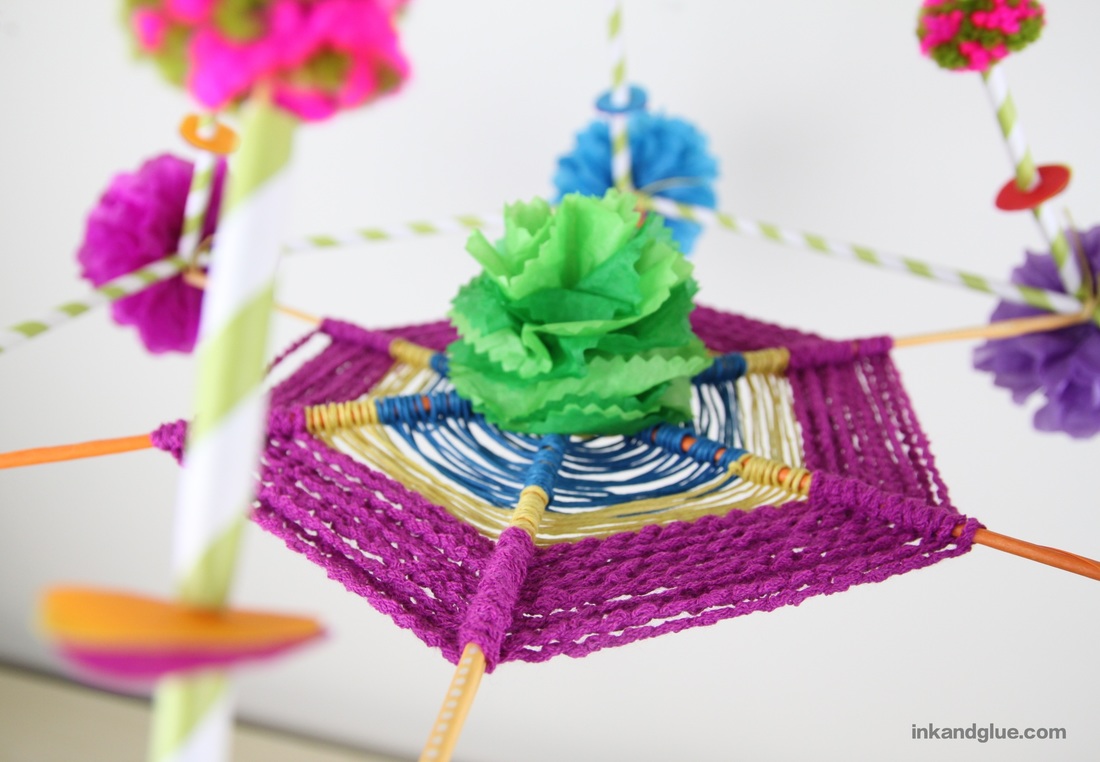 I might end up wrapping yarn and cord all the way to the edge of the spokes, but I was still weaving as midnight approached last night, so I simply had to stop from finishing. As you can see, I took one of the practice tissue paper flowers and tied it to the middle, effectively hiding the pipe cleaner blob. Here's how it looks, now. 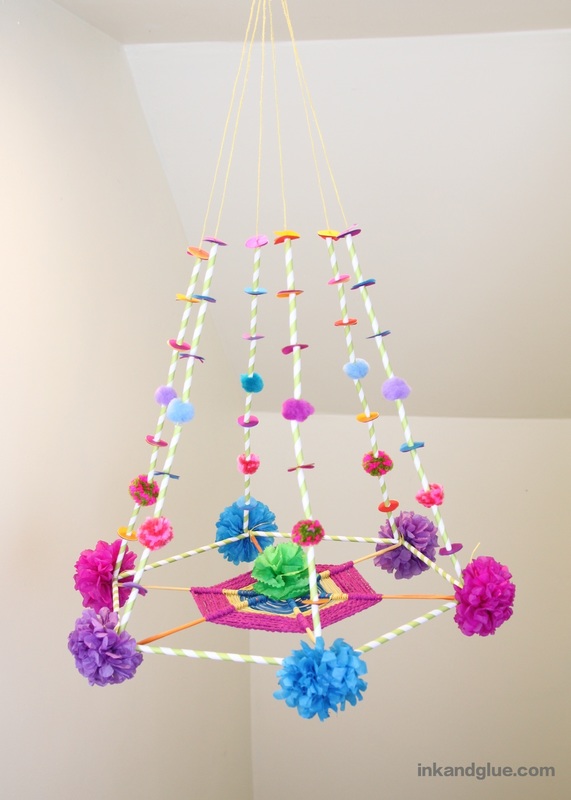 My next step will be to add hanging garland things to drape down from the hexagon frame. I could make more straw-section garland strands, but I have finally come to the end of my pack of paper straws, so I must find more. Or, I could make my own cylindrical beads out of rolled paper. It would be nice to incorporate my embarrassingly-large collection of toilet paper tubes. However, I think this project, like most, benefit from sticking to a limited number of materials. This is my task for the weekend, to figure out which way to go. (I love this kind of task. Love. It.)
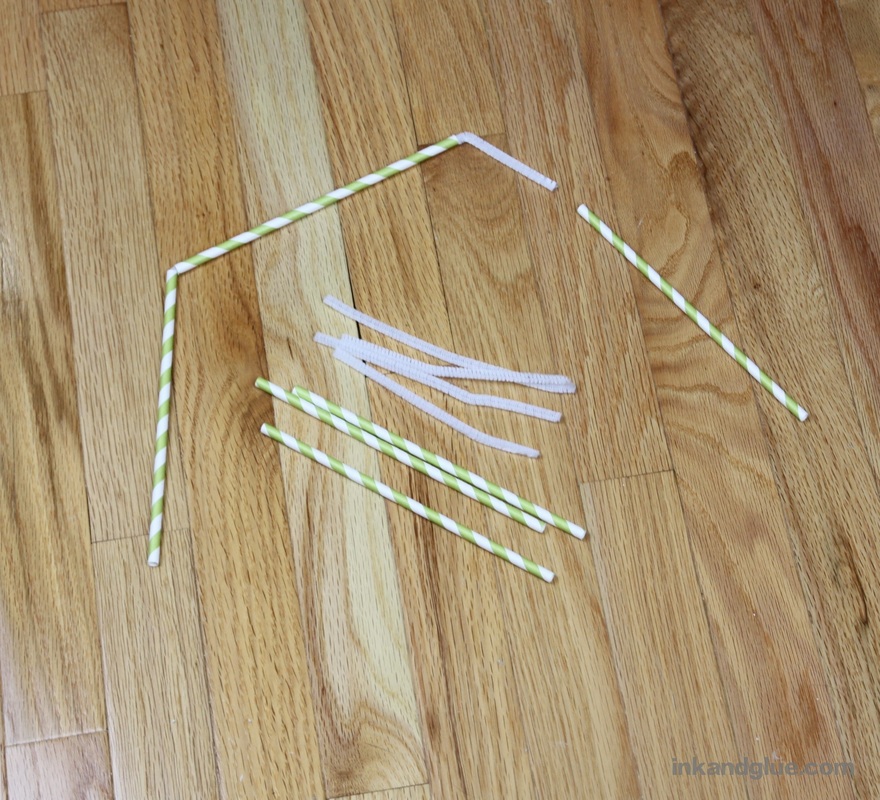
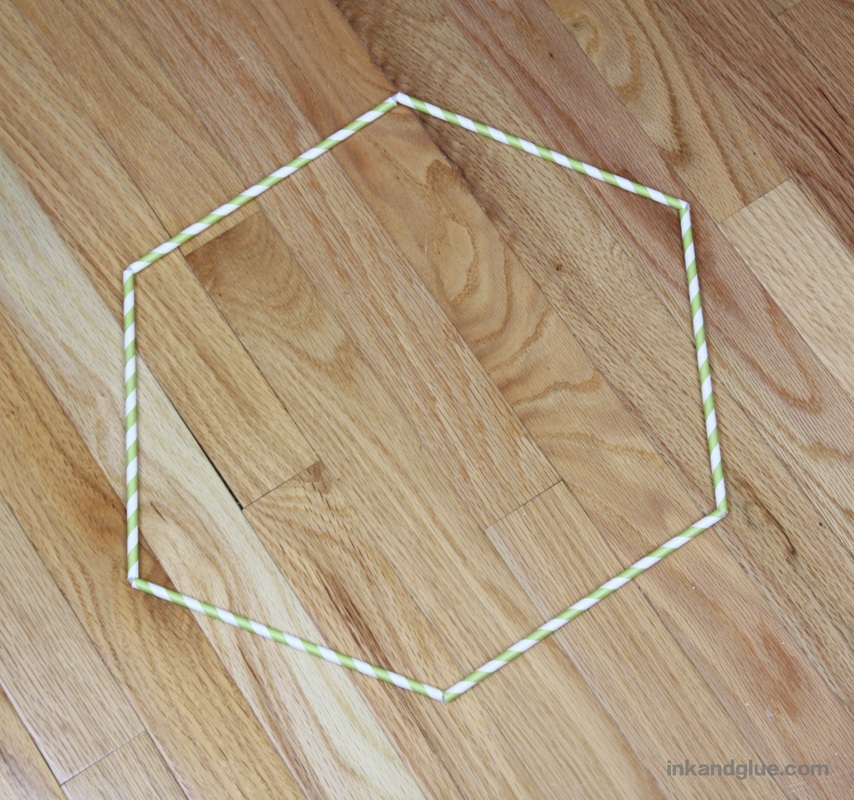
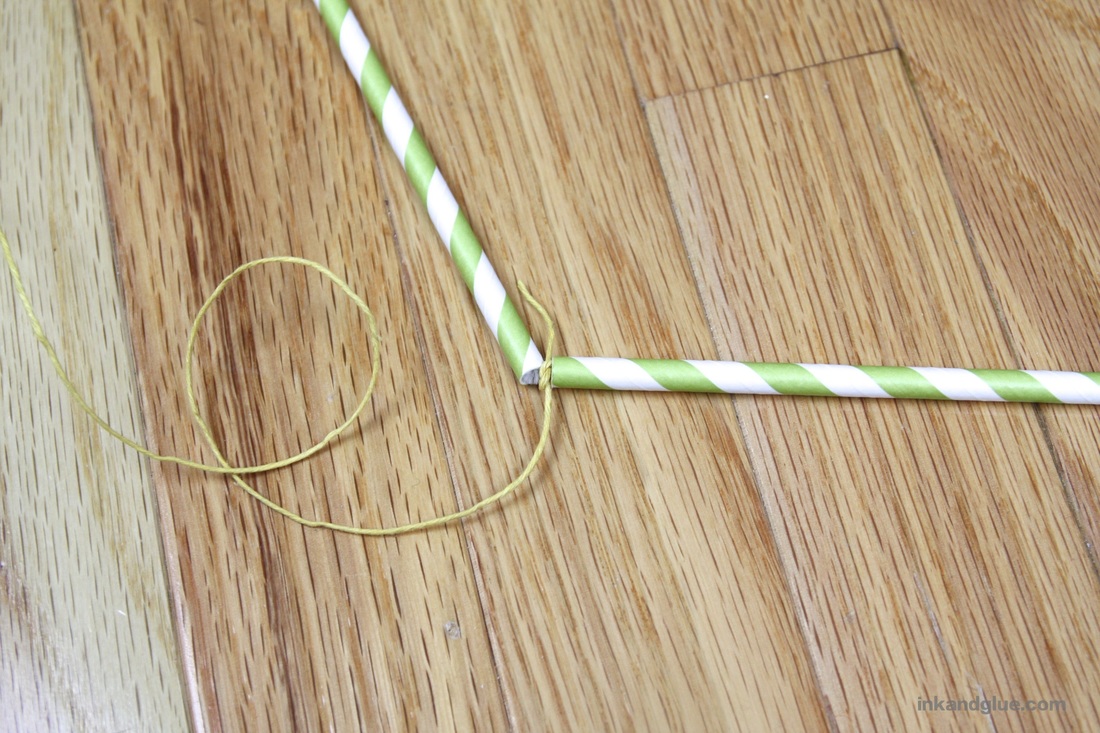
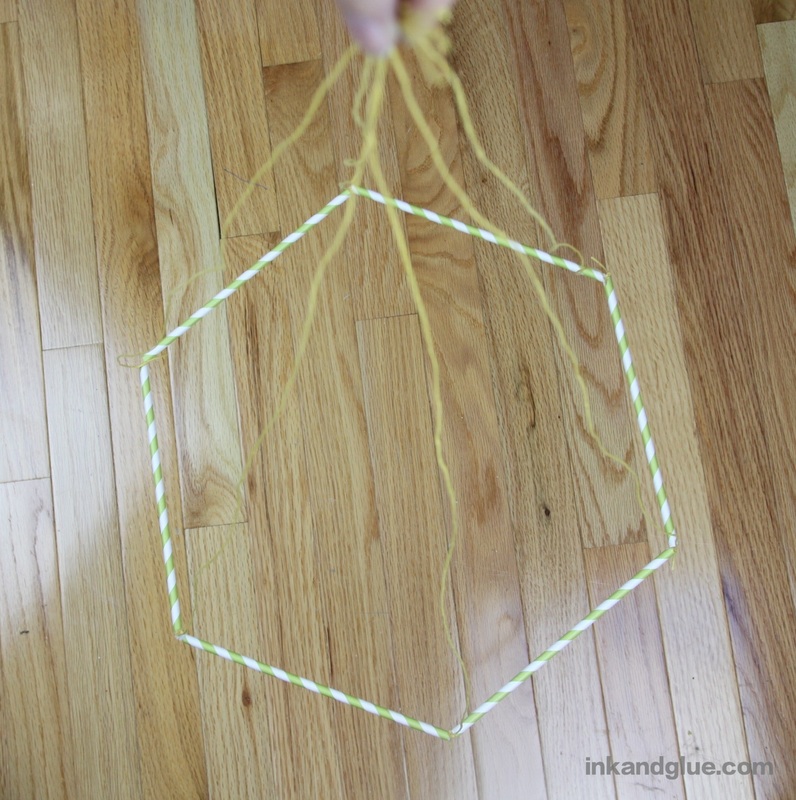
xo! The project I'm (still) working on is a hanging thing, and needs a round-ish shape from which to hang things, chandelier-style. I adapted the pipe-cleaner-and-straw method to put a hexagon together; here's how you do it. First, cut three pipe cleaners in half, and collect six straws. Any straight straw will do; I'm still working through a package of paper straws I got on clearance months ago. 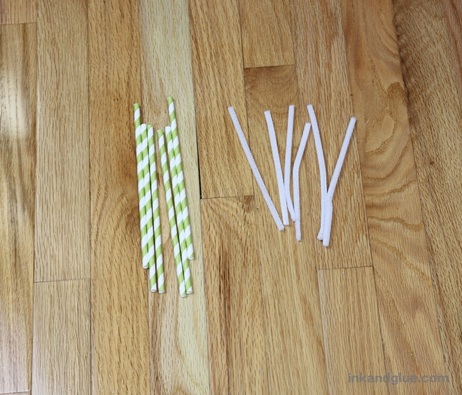 Slip a pipe cleaner into a straw halfway, then slip a second straw on the other end. Bend the pipe cleaner slightly at the junction. Add the rest of the straws the same way, joining the last two together to form a complete hexagon.
Cut six equal lengths of string or cord (my chosen length is about a yard). Tie one end of each length to the pipe cleaner at each straw junction. Gather up the other ends together, and the hexagon should hang somewhat evenly and parallel to the ground.
More tomorrow, including the dramatic conclusion!
xo I'm working on a bigger-than-average project right now, and it's a multi-piece contraption that's not blog-ready yet. Here's what I've been focusing on today. 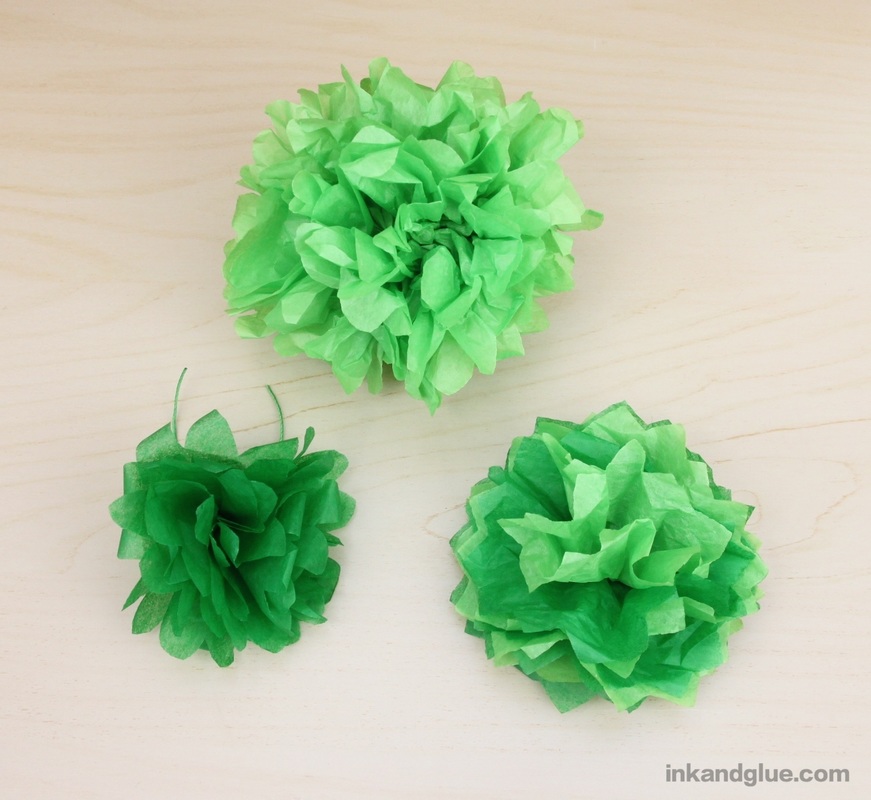 Tissue paper flowers! Or, pom-poms. I haven't decided yet which way to go. These will ultimately be hanging, so ideally the chosen design will be round-ish and have string or cord involved. The top/middle one is made the traditional pom-like flower, whose directions can be found many places online, such as here. The other two are variations of this kind (link goes to a short how-to video). See how they have convenient cords I can tie them to things with? 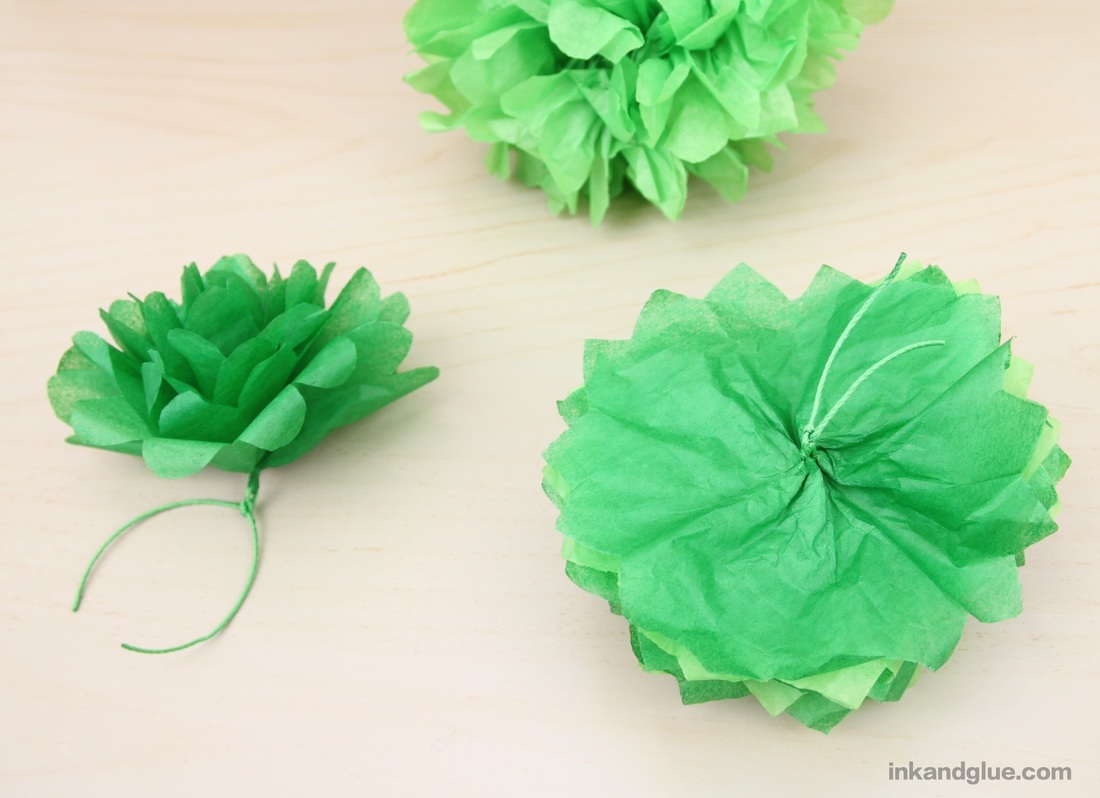 More later! xo
Have you met Bartek Elsner? He's a Berlin-based freelance art director/designer who does mostly commercial work. He also makes truly impressive sculptures out of cardboard. 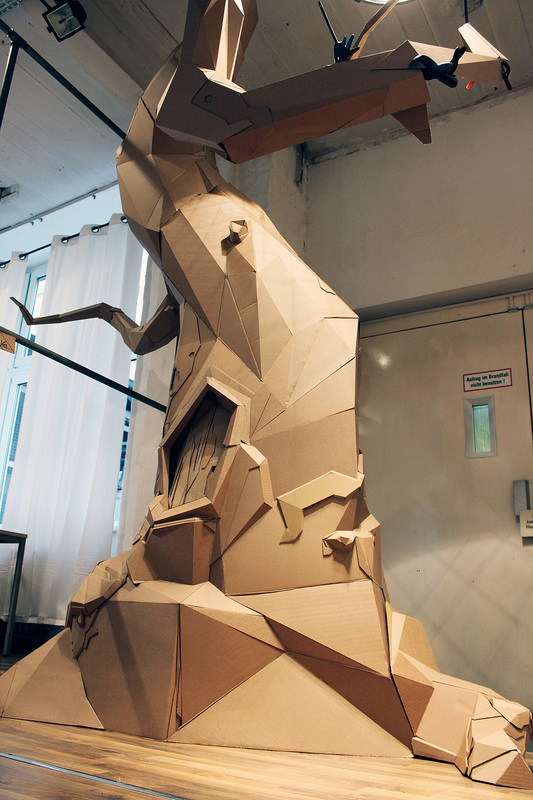 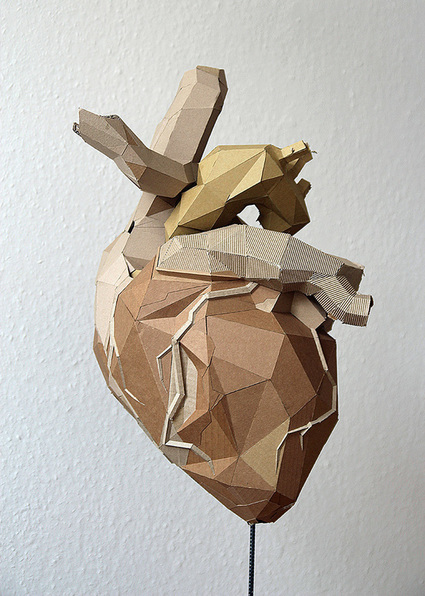 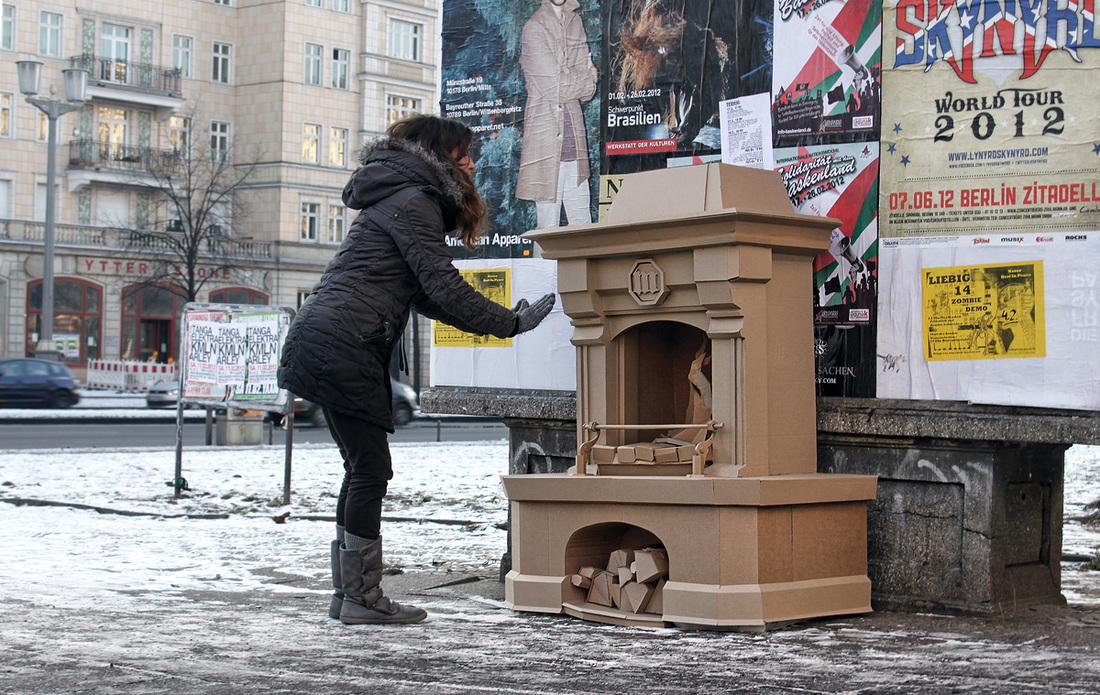 I like this steampunk-ish take on "the internet" (turns out, it's a series of cardboard tubes). 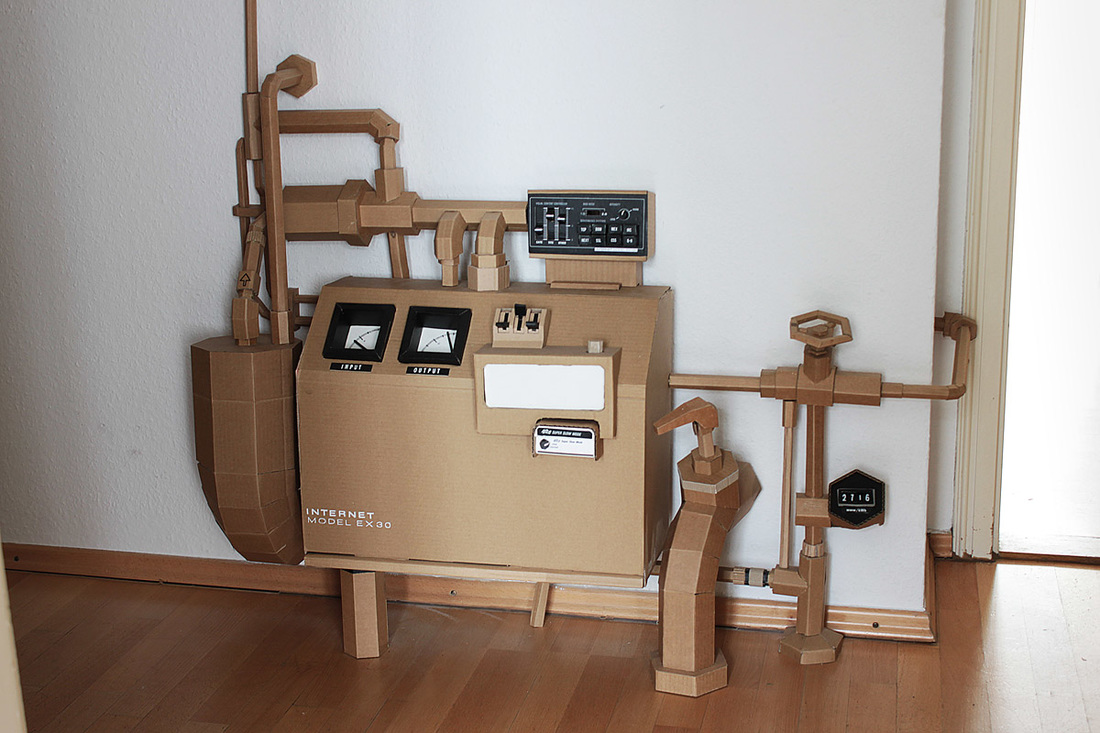 If you click on the image of the creepy car thing below, you'll find a video that shows glimpses of Bartek's working process. Unsurprising spoiler: It involves sharp utility knives and duct tape. 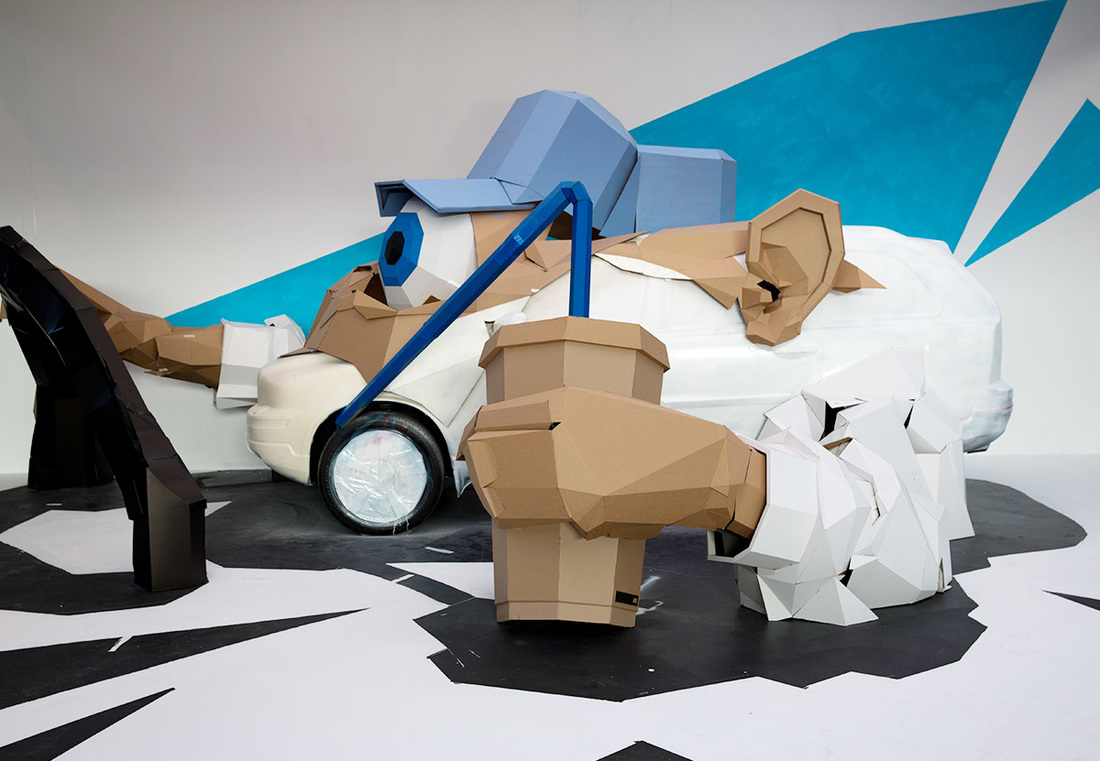 Today's take-home lesson: Don't be afraid to Go Big, especially with materials you can scrounge up for free and can dispose of ethically (cardboard is recyclable!).
xo Hello! I took a bit of a holiday break/staycation, there. I hope you were able to find some time to relax and enjoy yourself. To ease back into things, I wanted to share one of the cool, crafty gifts I got, a tiny jar of Bad Luck Cats: 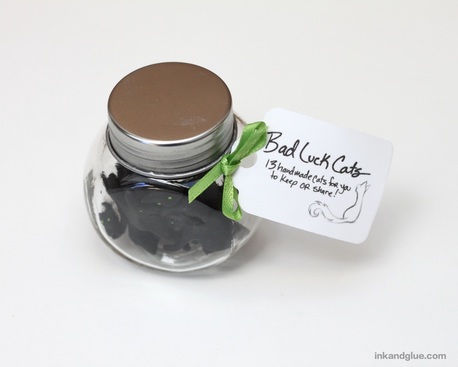 Before opening the jar, it didn't seem possible that there were 13 inside. I am still in awe. It would be one thing if these were mass-produced plastic things, but each cat is hand-sculpted in polymer clay. 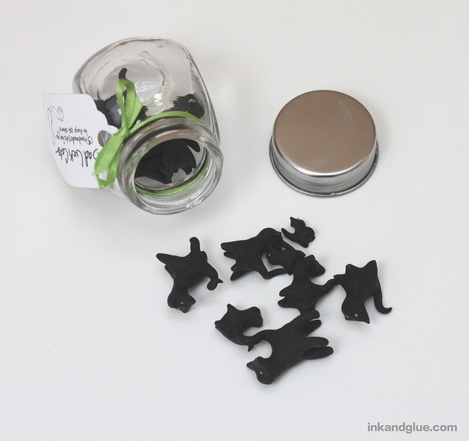 How tiny are they? Take a look at the dime in this photo. 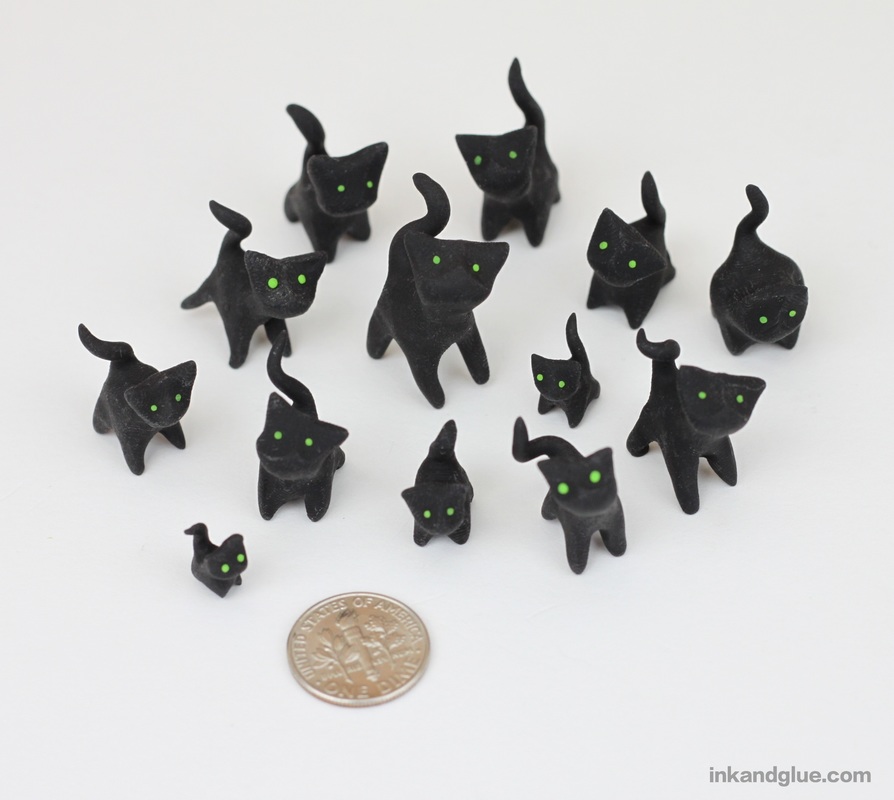 I love the teeniest one. Making something this small takes serious patience. 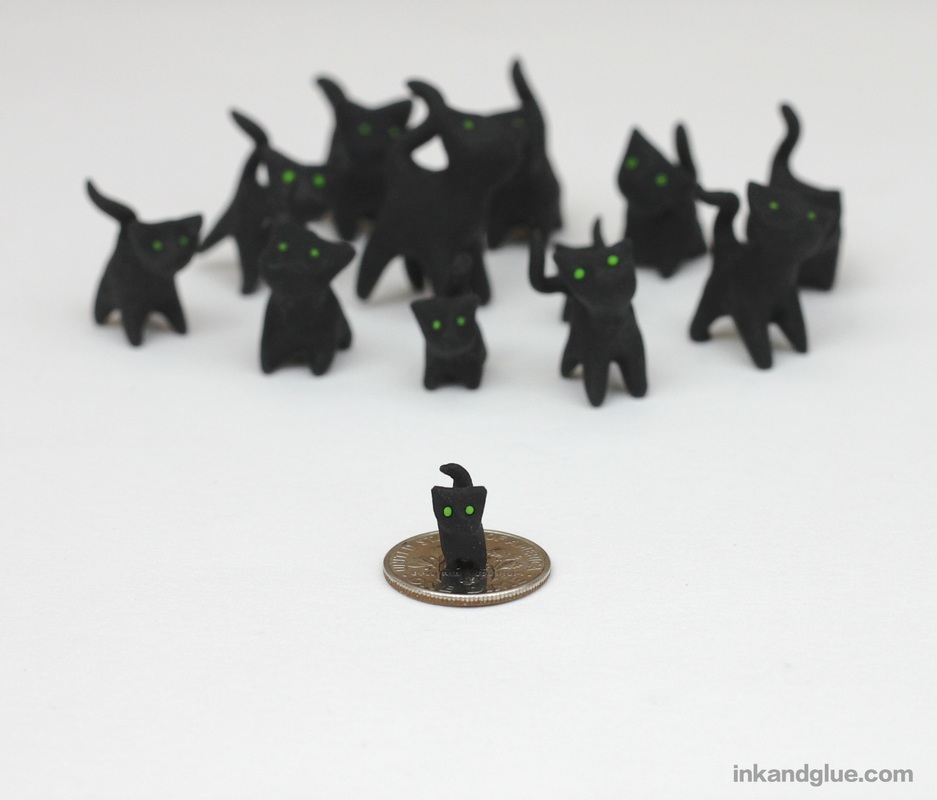 My brother-in-law gave them to me, though my 11-year-old niece was a big influencer in the selection process. They bought the jar at the Bust Magazine Holiday Craftacular. The brand name is Timid Monsters, which has a slogan I can really get behind:  Timid Monsters is sold via Trish Czech's etsy site, and she's still on holiday break. Check back in a day or two to see everything she has going on.
xo |
Categories
All
Archives
March 2017
AuthorI'm Debbie Way, an artist and writer who enjoys making things. |


 RSS Feed