|
Just a short note to say that I'm alive, after barely surviving the rush of the holidays and a nasty head cold (which I am still trying to get out of). More fun and creative times are coming up soon! xo
Consider this a time-traveling companion piece to yesterday's gift tag/cards. First, there's a "frothy" Christmas tree wall hanging: 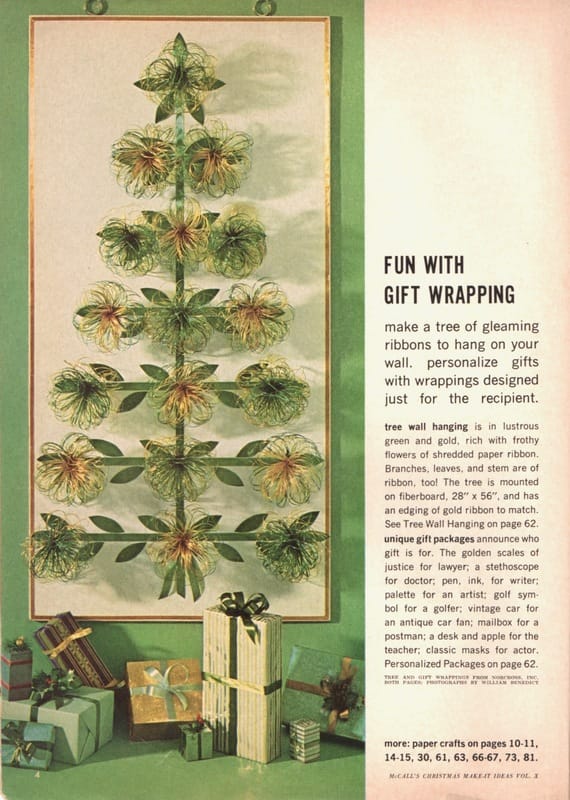 And then, the unique gift packages, which are decorated — very specifically — for each recipient. This pic gave me a double-take at first, as the pink gentleman seems to be wearing earbuds (and listening to something very embarrassing, I guess). Turns out the earbuds are supposed to be a stethoscope.  Directions? Sure. 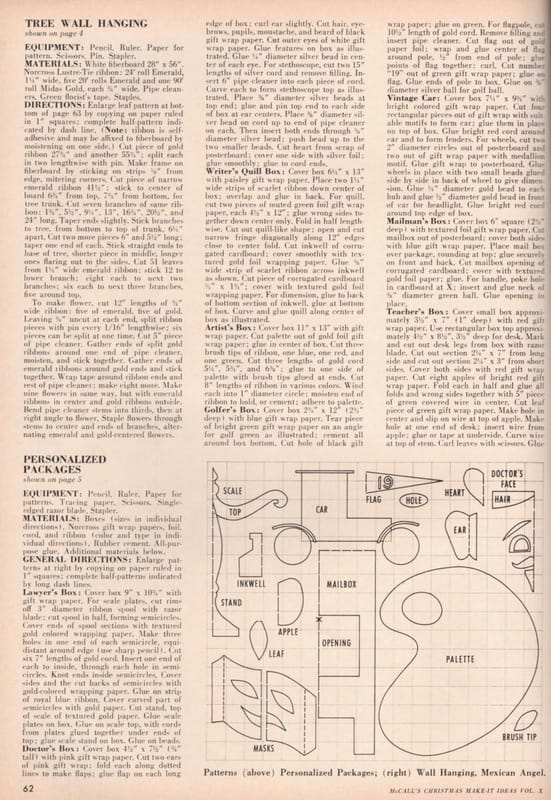  I hope all of your holiday gift wrapping is going smoothly and enjoyably!
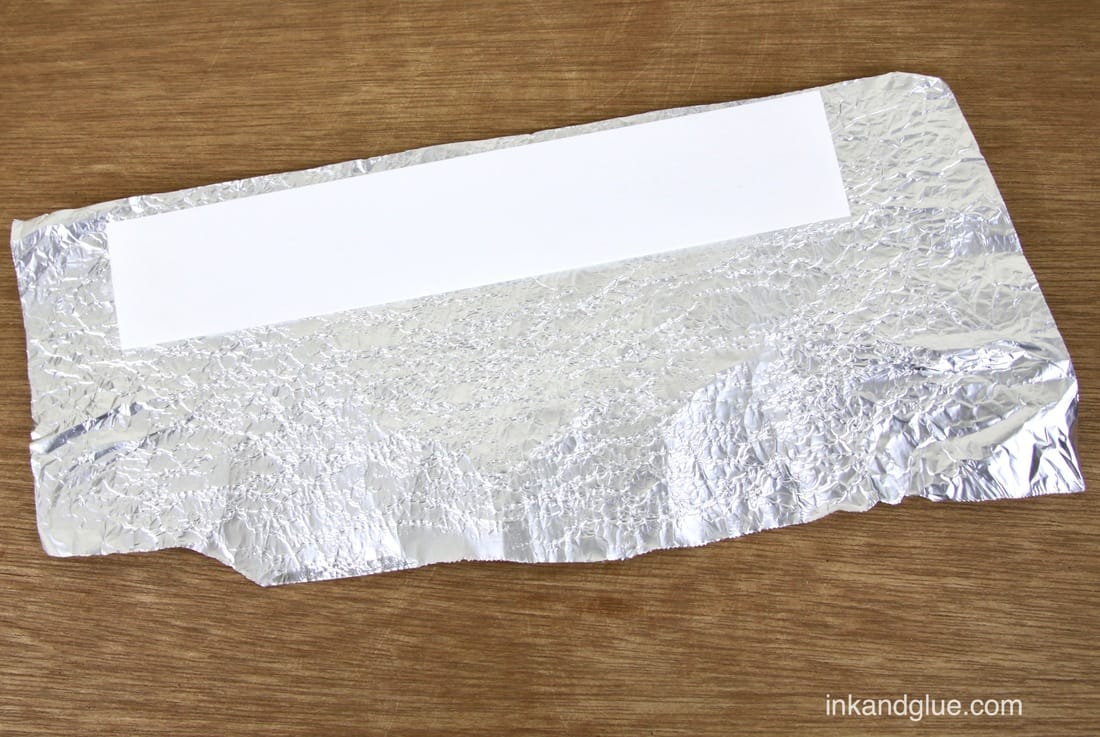
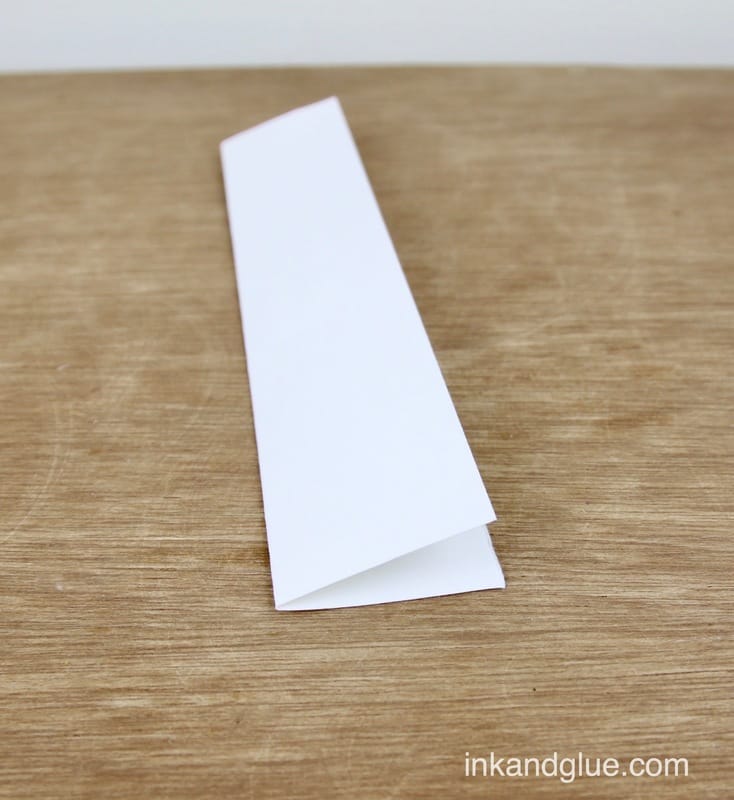
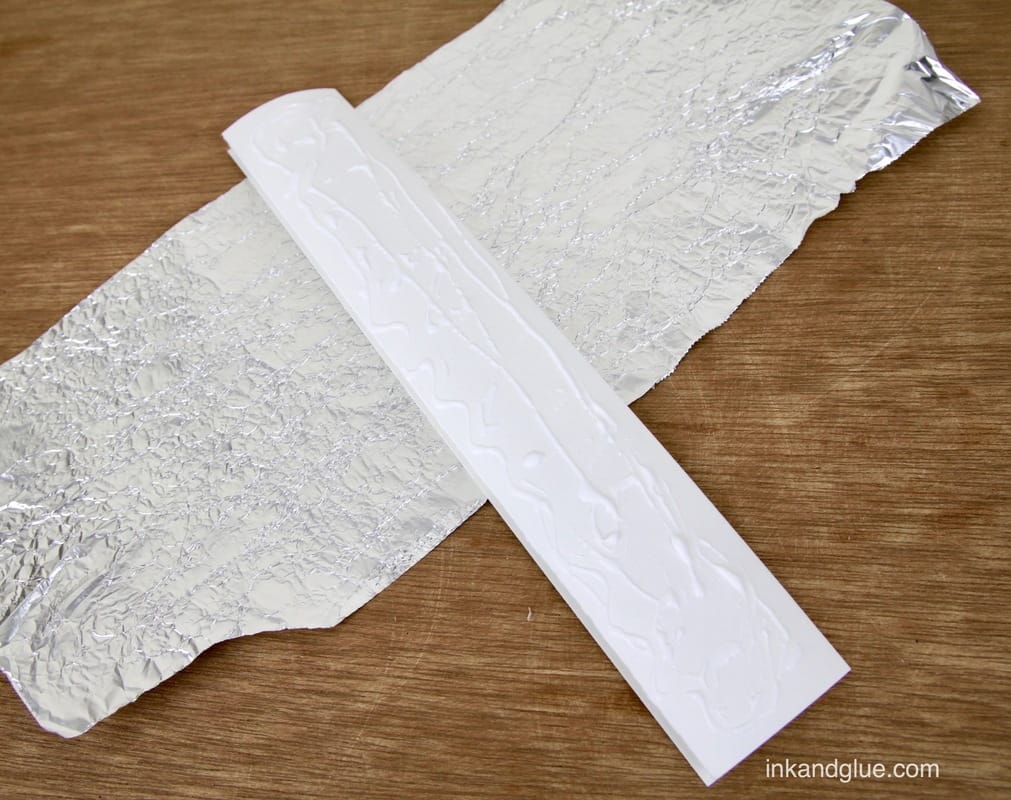
xo 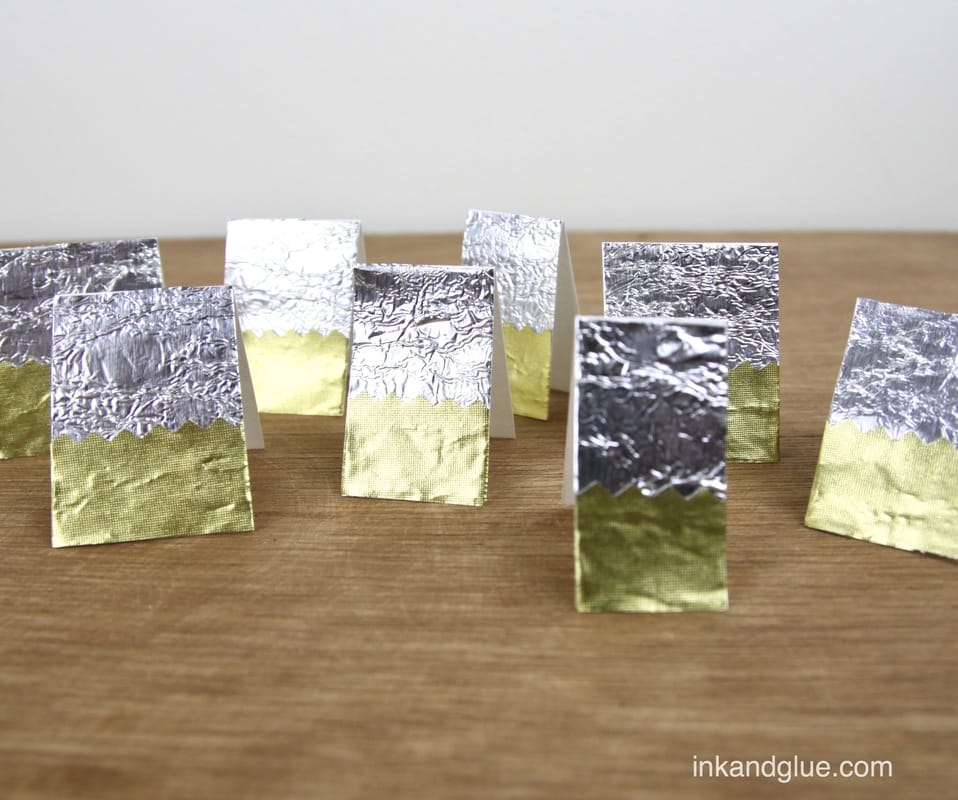 I have been in the depths of Christmas prep, which (naturally) includes wrapping presents. I try to be thrifty with wrapping gifts, because the paper etc. will end up being thrown away or recycled in one way or another anyway—it feels wasteful to invest actual money into it. Instead of gift tags or stickers, I like to tape simple little cards to each gift. Here's how I make a whole bunch of little cards in a row. Mine are decorated with aluminum foil and gold metallic paper, but of course you can use any paper (or wrapping paper) you choose. First, fold a 4-inch-wide (or so) strip of plain white drawing paper in half like you're making one really tall, narrow card. Apply glue to one side of the folded strip, and press it onto a piece of aluminum foil. (I first crumpled up and smoothed the foil to give it some texture.)
 Trim the excess foil from the paper.  The front will look like this. Ooh, shiny! 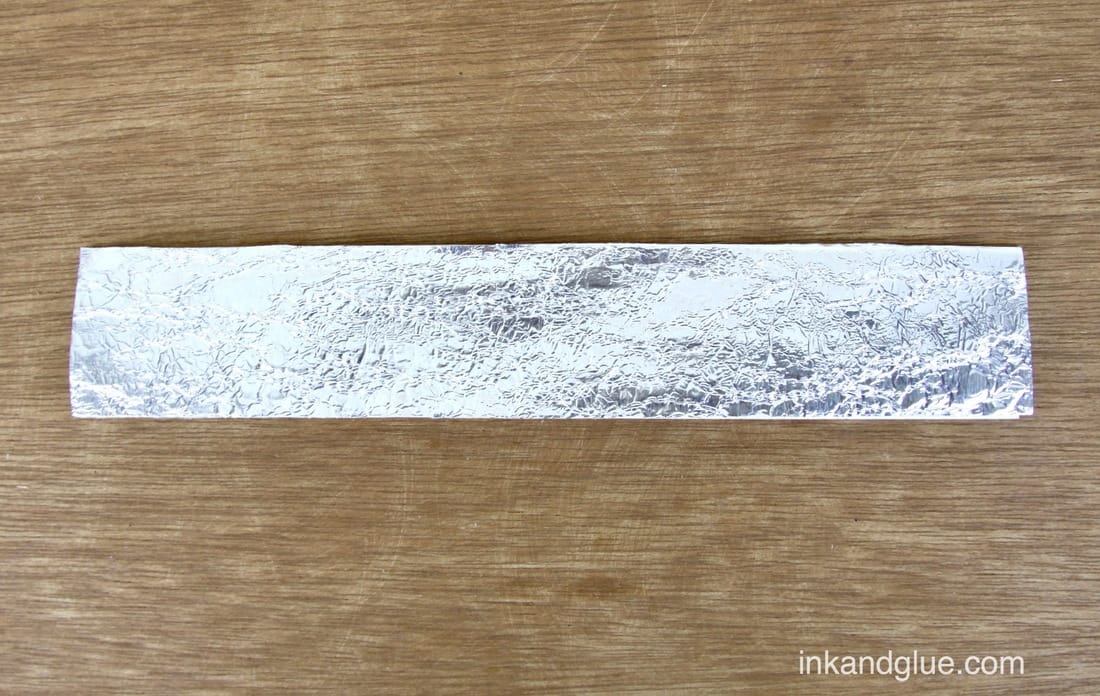 Apply glue to a second strip of decorative paper, then smooth it onto the be-foiled paper. Trim the edges as you did the first go-round. 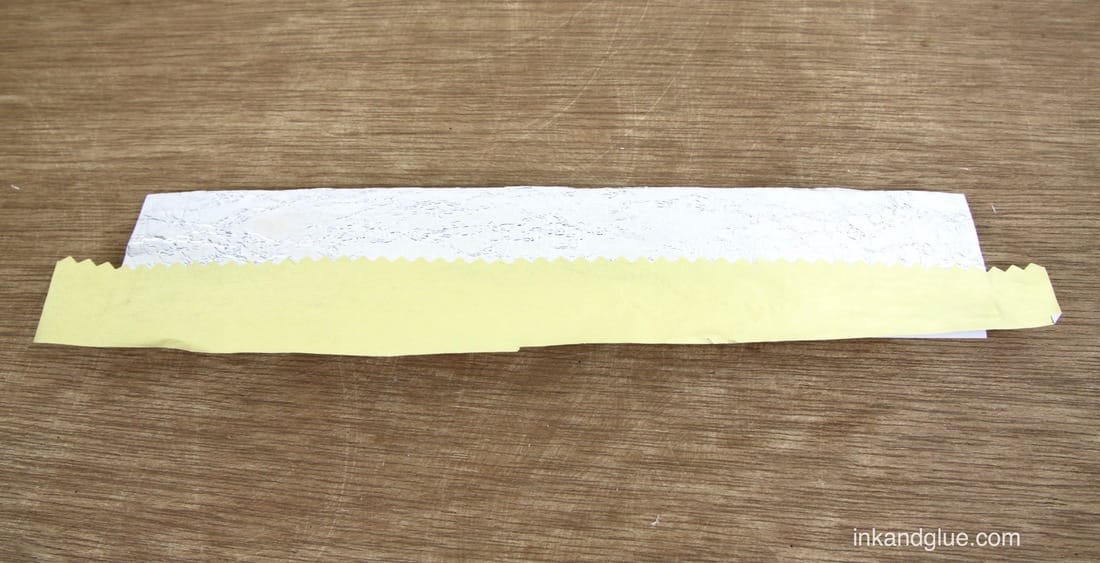 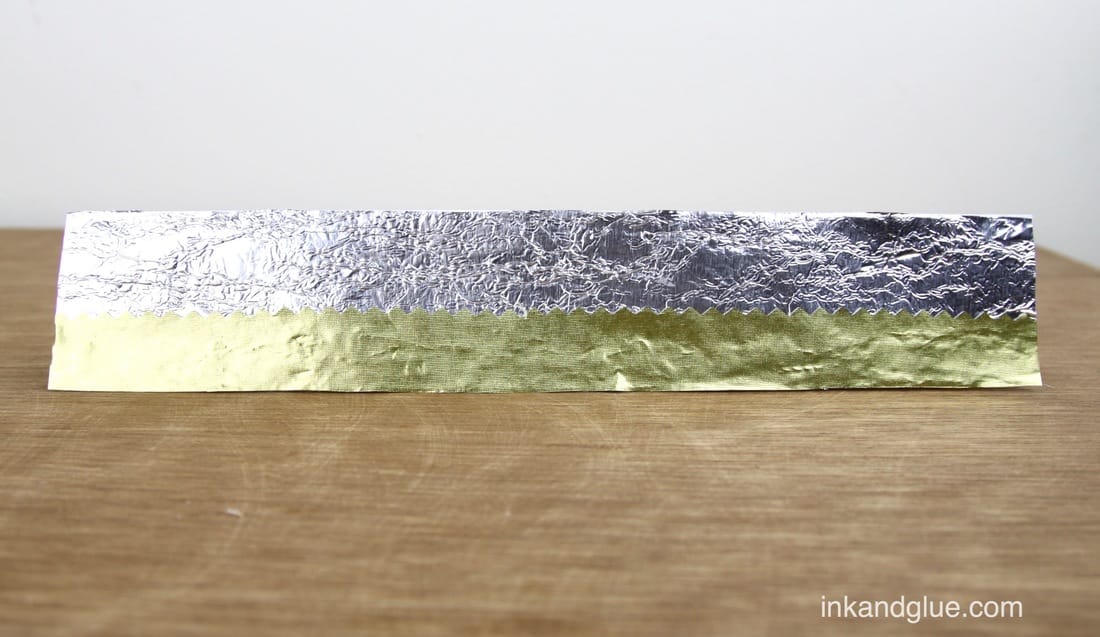 Let the glue dry, and then cut the strip-card into a bunch of little guys—eight, in this instance. 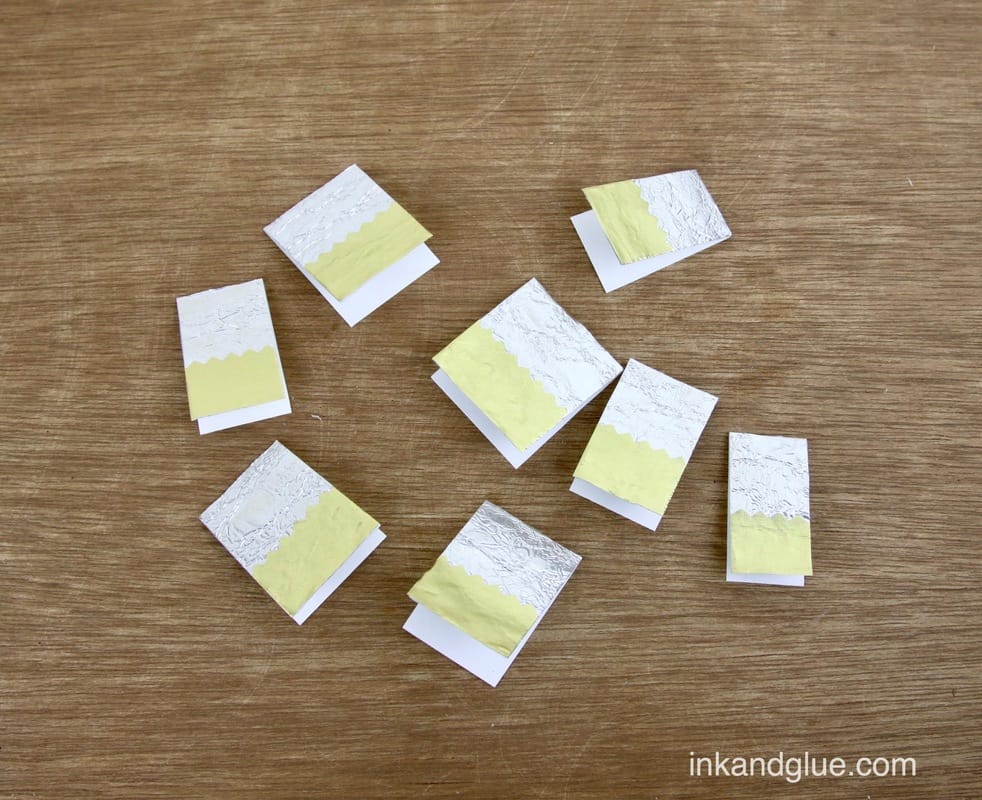 So easy! I hope your holidays are going easily and smoothly, too.
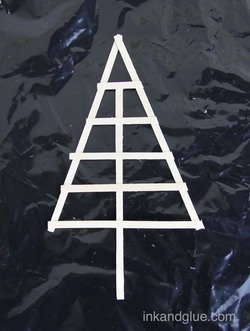
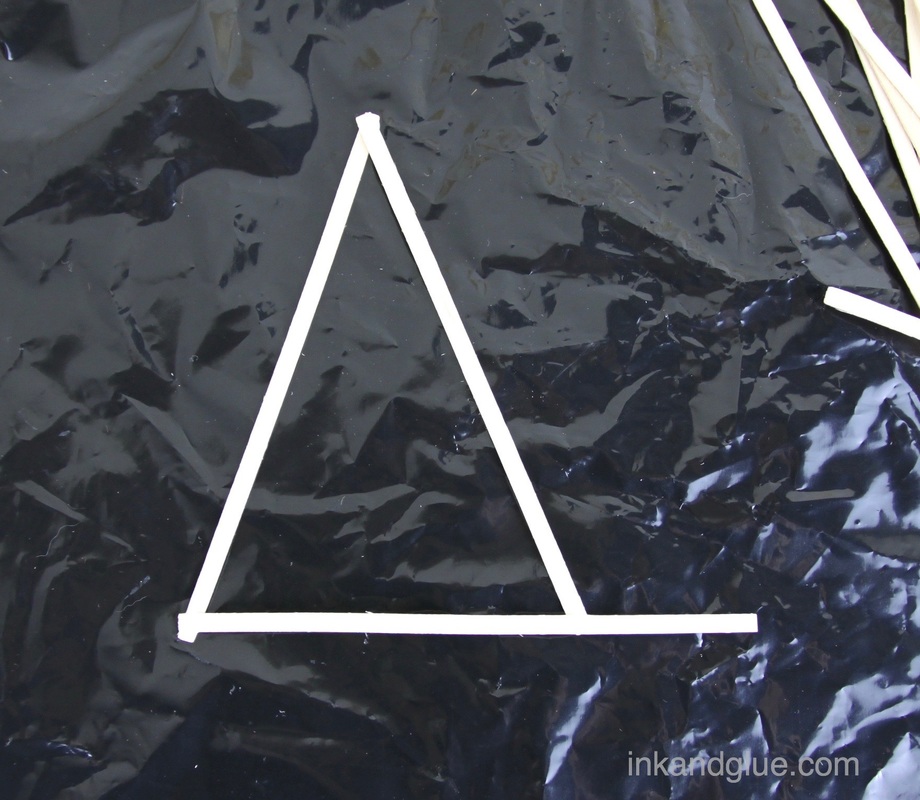
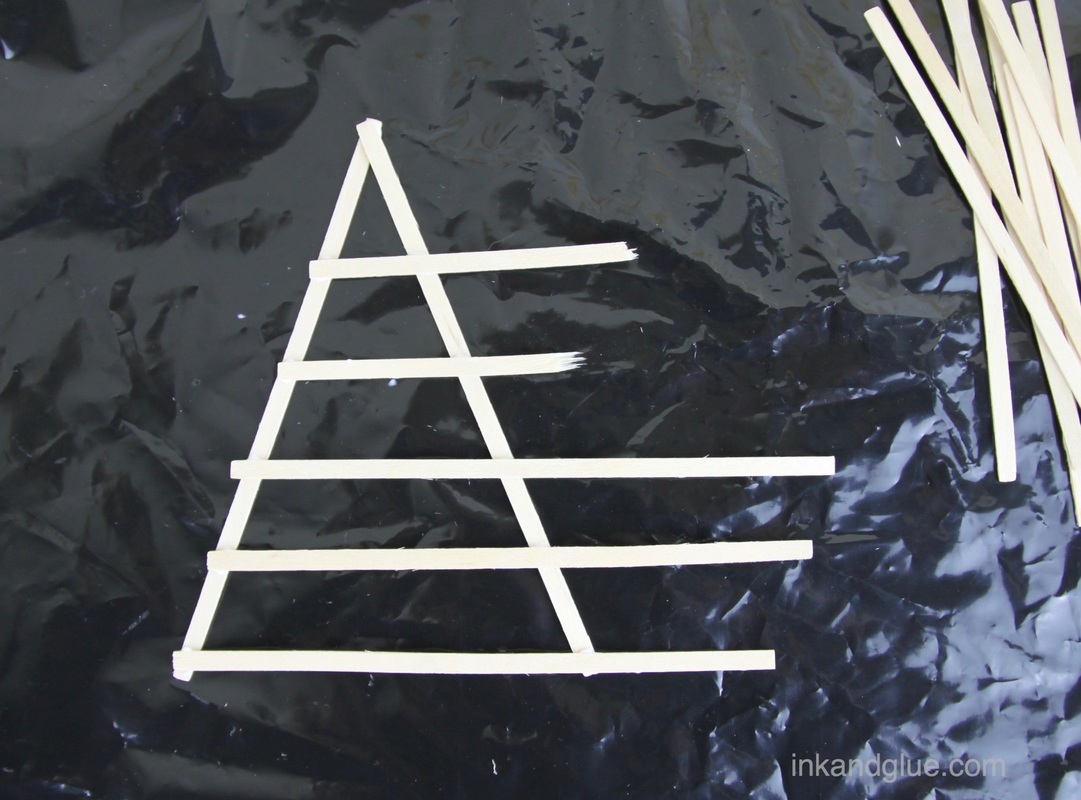
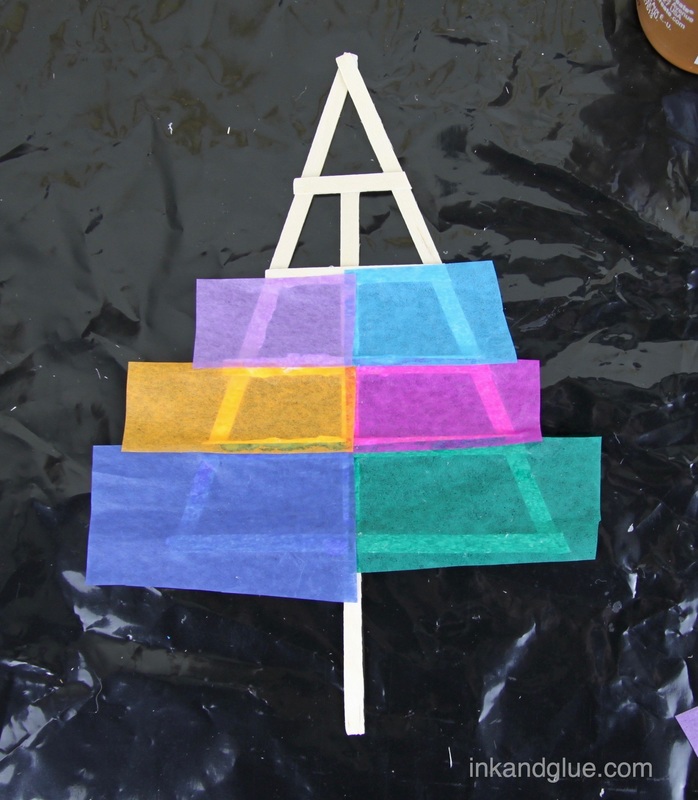
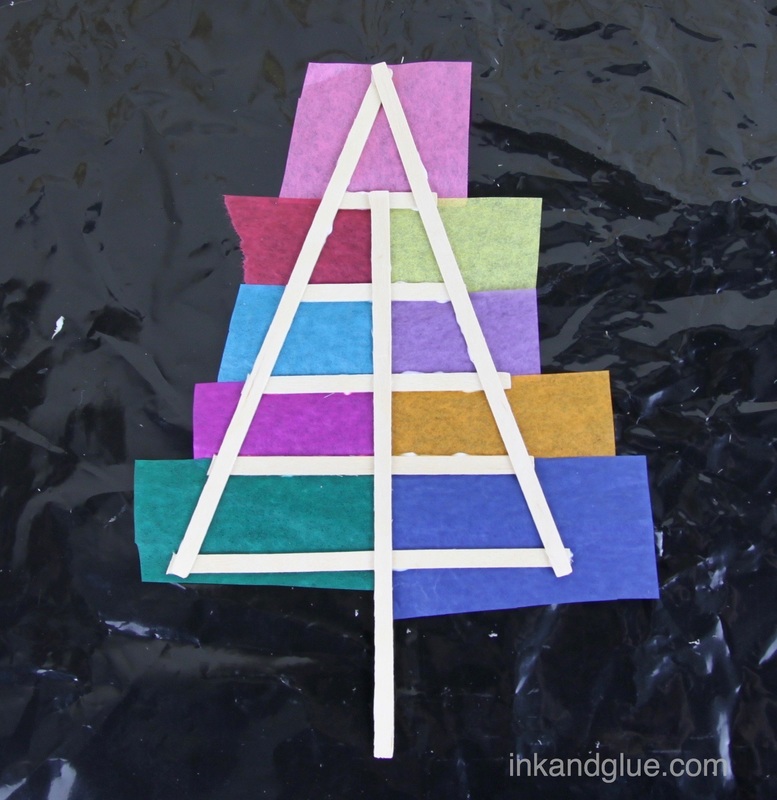
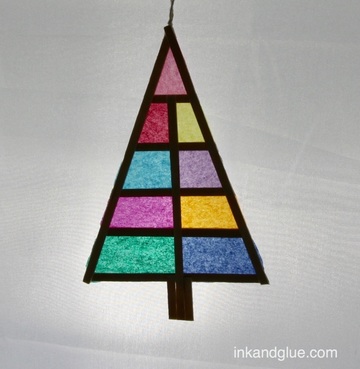
xo 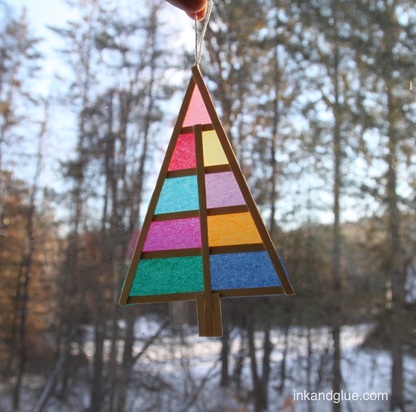 Ok, I admit — this ornament/sun catcher is not made of stained glass. It is made of tissue paper, and wooden coffee stirrers. Isn't it grand? I love colorful holiday decorations; anything other than the usual green and red is alright with me. You may feel differently, and if so, feel free to customize the colors of your tree to your liking. To make one, gather a few coffee stirrers. I probably didn't need to borrow quite so many; I think I ended up using 7 or so. 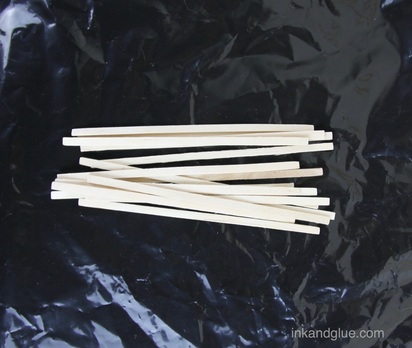 Lay three of the stirrers in a triangle shape on a piece of plastic or waxed paper. With tacky glue, adhere the three stirrers together at the corners. Then, glue several more stirrers, evenly spaced, parallel to the skinny side of the triangle as shown. Break the sticks in half for the shorter pieces, to save wood.
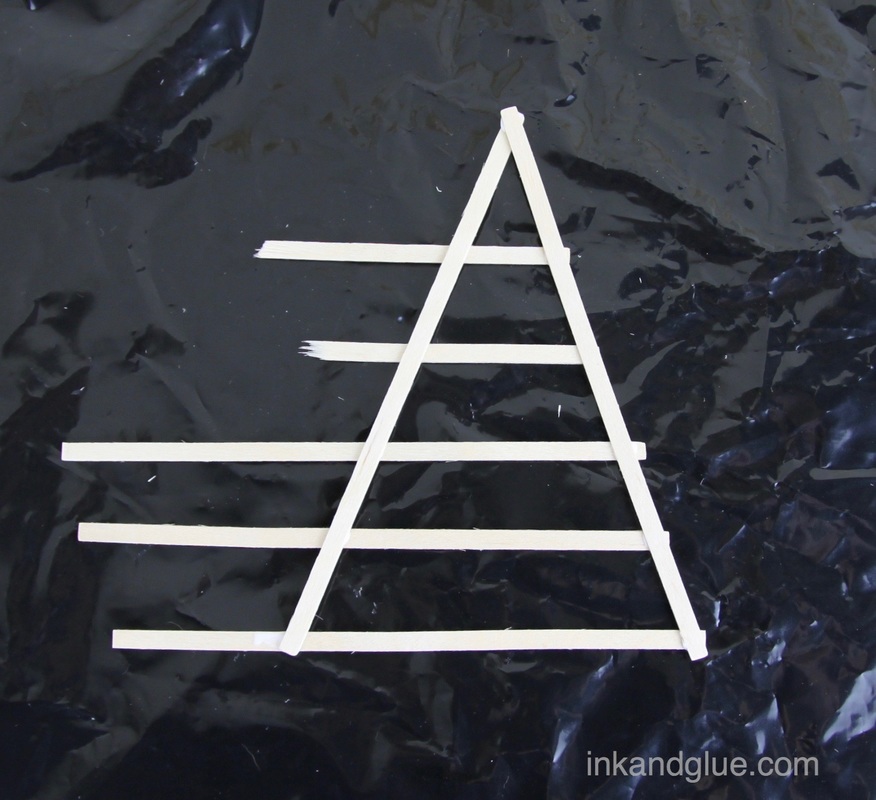
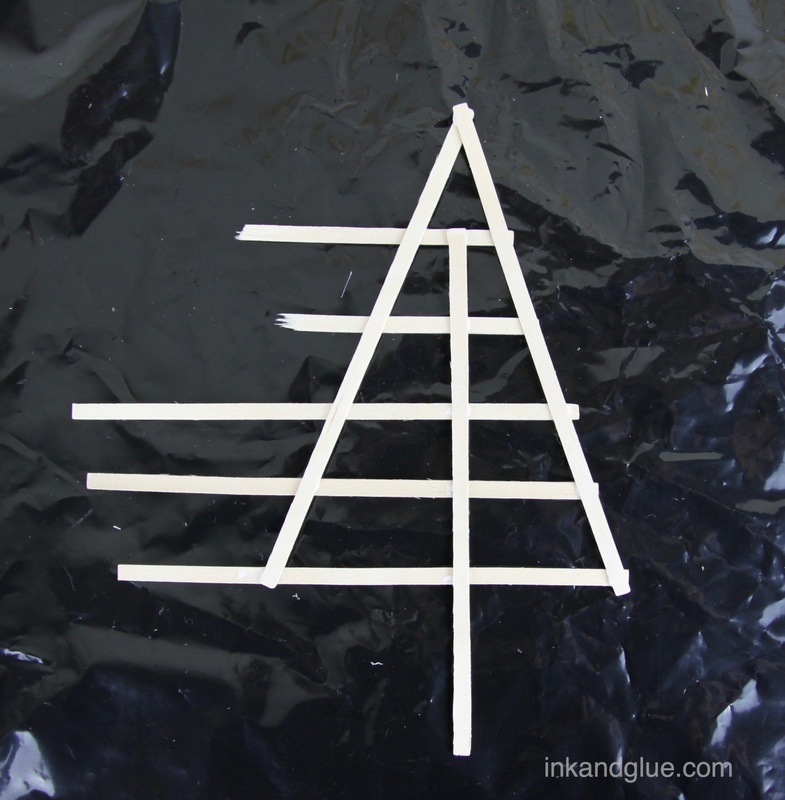
Once the glue is dry enough, flip over your stirrer set-up. Glue a stirrer to the center of the inner lines, as shown.
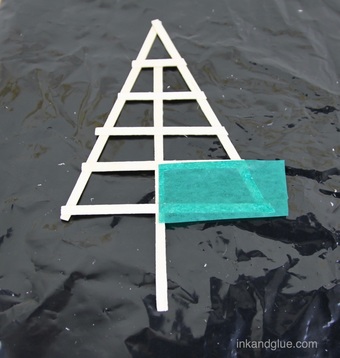
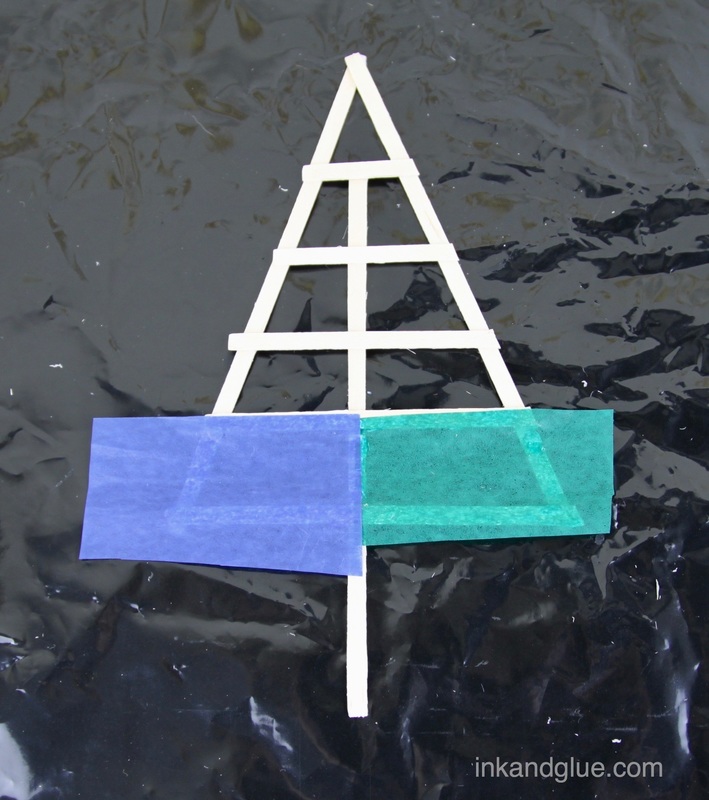
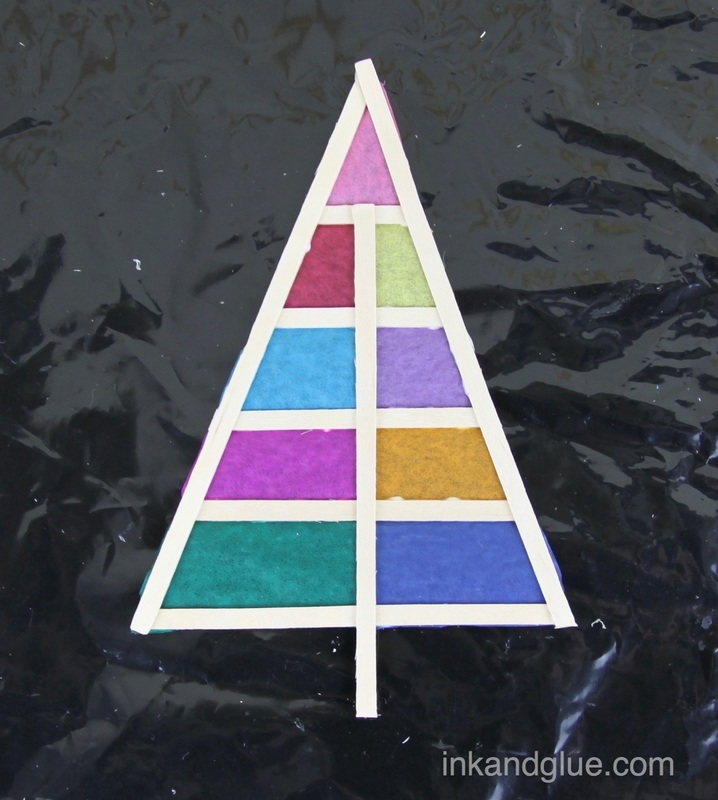
 Use strong scissors to trim the excess lengths of the stirrers. Now it's time to add color! Choose a scrap of colored tissue paper and trim it into a rectangle or strip that's basically the same width as the space where you'll be gIuing it, plus a little extra. Don't worry about getting the paper the perfect size; just making it the right width will be enough. Align the paper over the stirrers so its interior edges won't need trimming further down the line. Spread a thin amount of glue onto the stirrer window, then smooth on the paper piece. Do the same with a second color, again lining up the interior edges neatly.
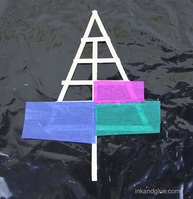
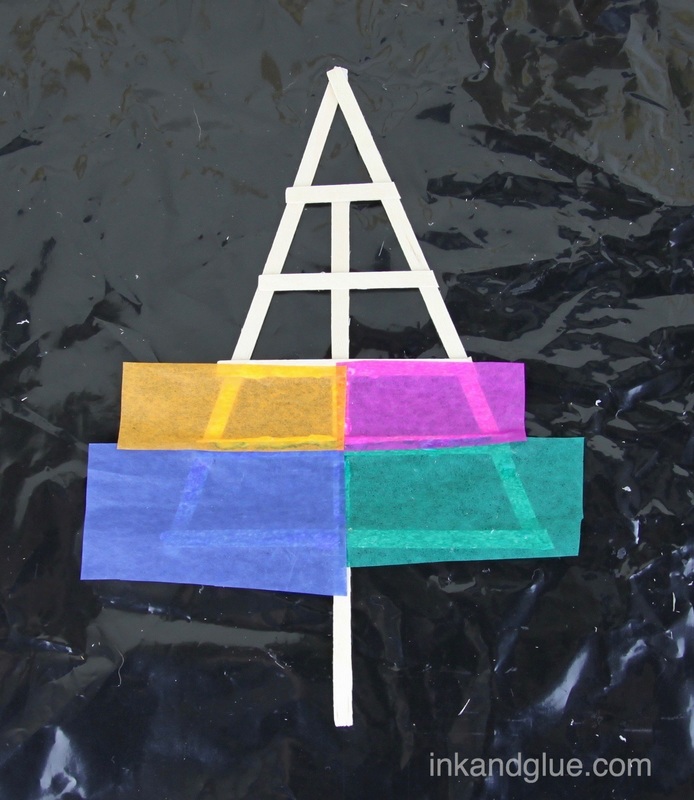
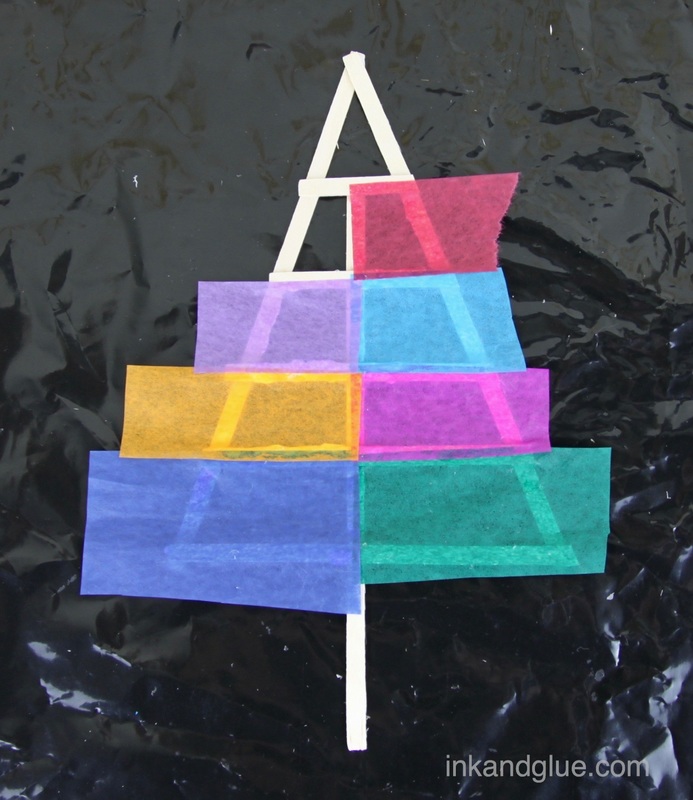
Keep adding trimmed pieces of paper to the windows, as shown.
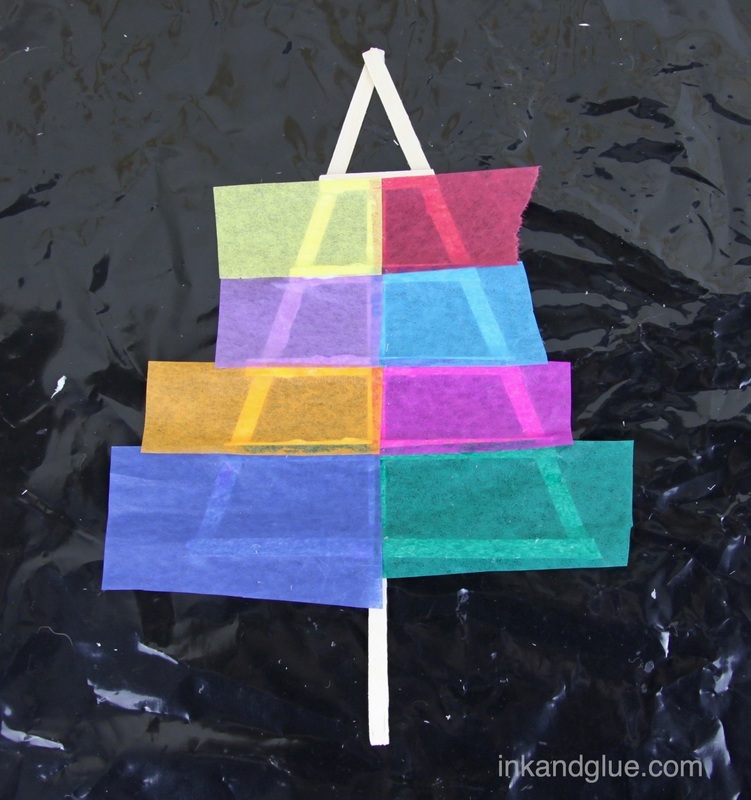
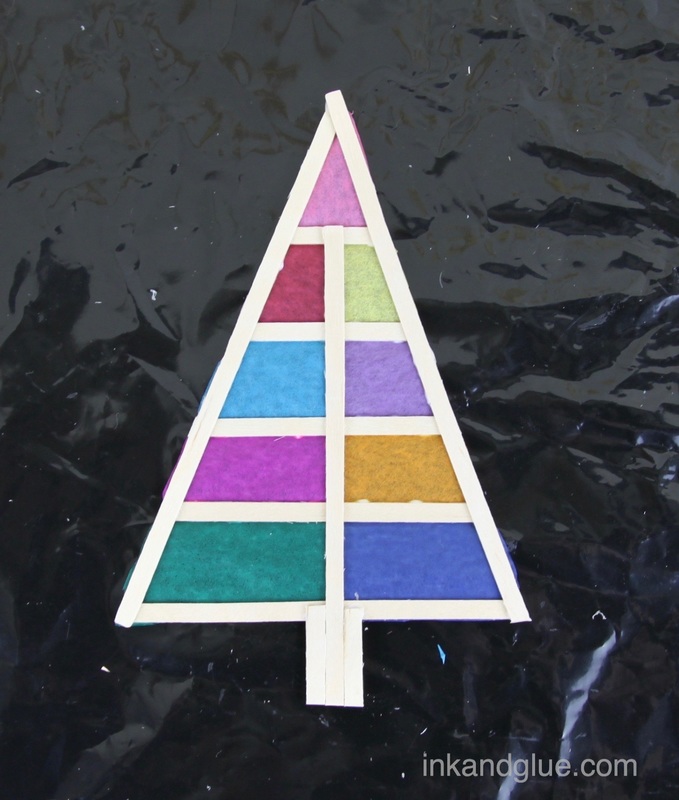
After you glue on the last piece of paper, flip the tree over.
This part's totally optional, but I made my trunk wider by cutting and gluing two lengths of stirrer to fit against the center one in the tree. Here's a shot of both sides of my tree, at this point of the process (i.e. almost finished!).
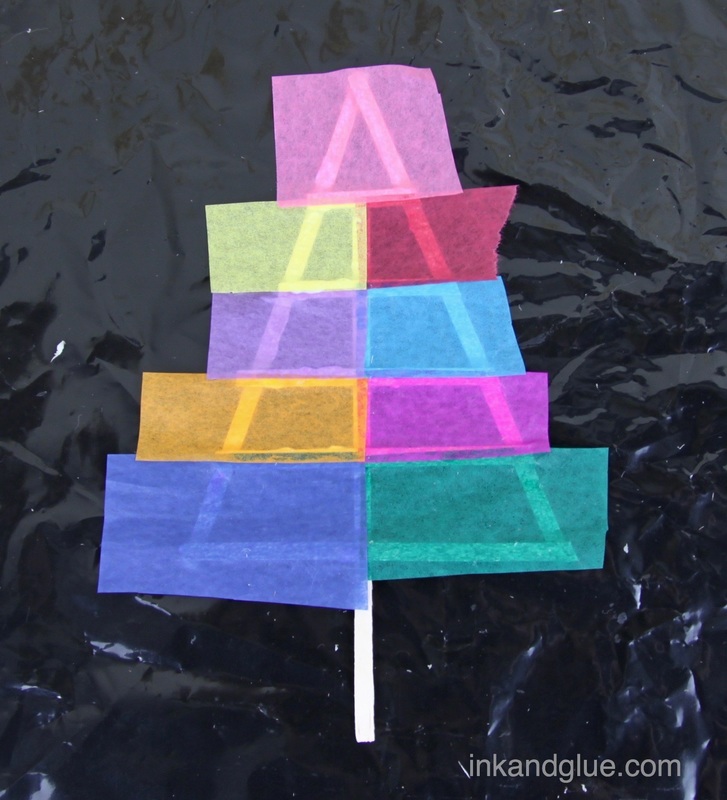
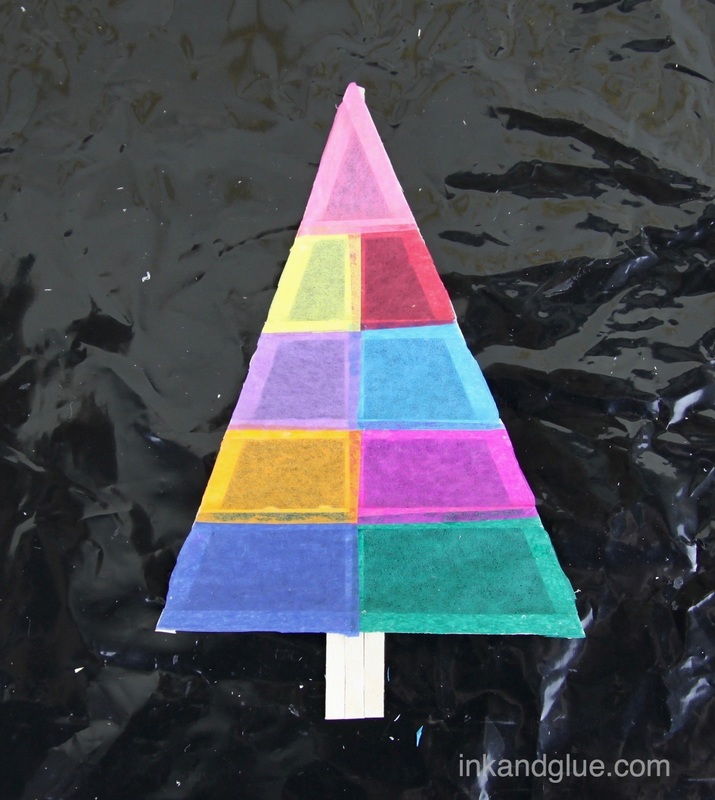
Tie a simple loop in a piece of string, and trim the ends so you have about a quarter-inch of excess from the knot. With the tree paper-side up, put a little glue on the (paper-covered) stirrers at the very top point of the tree, and press the knot ends onto the glue. 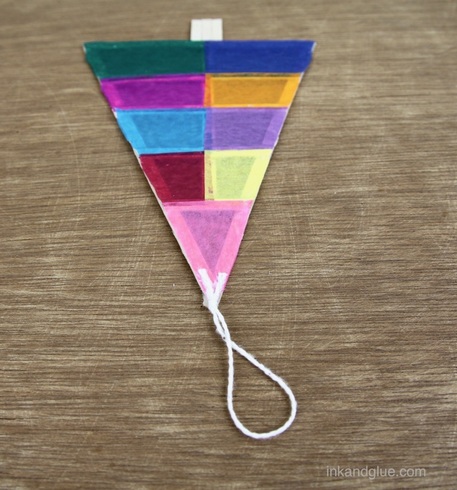
xo!
Franklin figured out that an electric guitar case with molded foam fits him just perfectly, both physically and attitude-wise. Rock on, my little doggo. 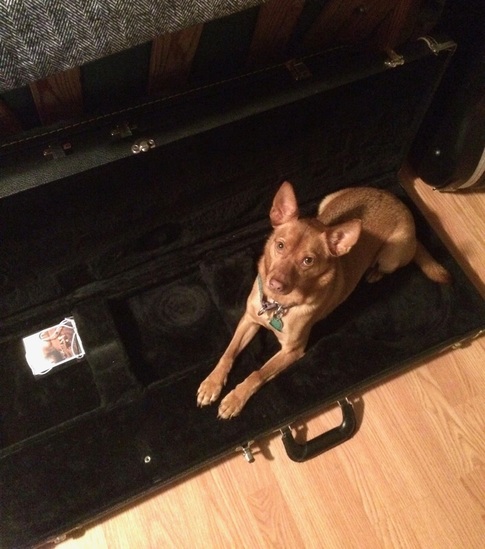 Have you met Rohan Sharad Dahotre? He's an artist and illustrator in Pune, India. One of his many projects is adding line illustrations over photos of animals. 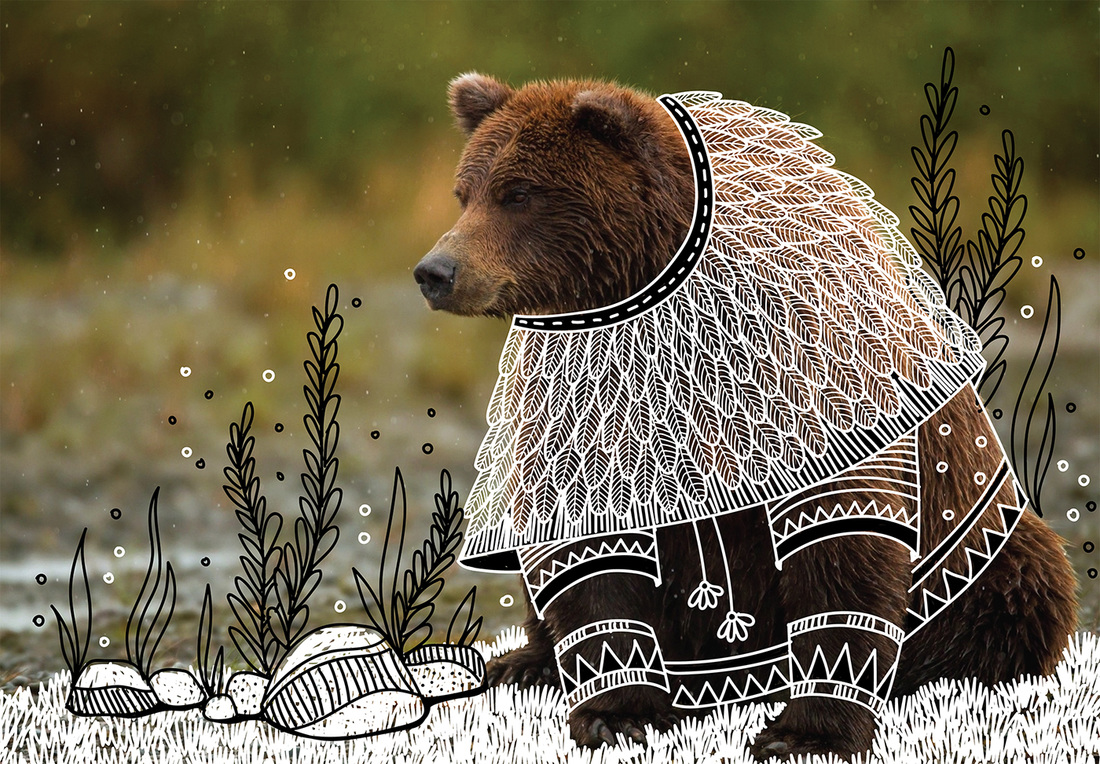 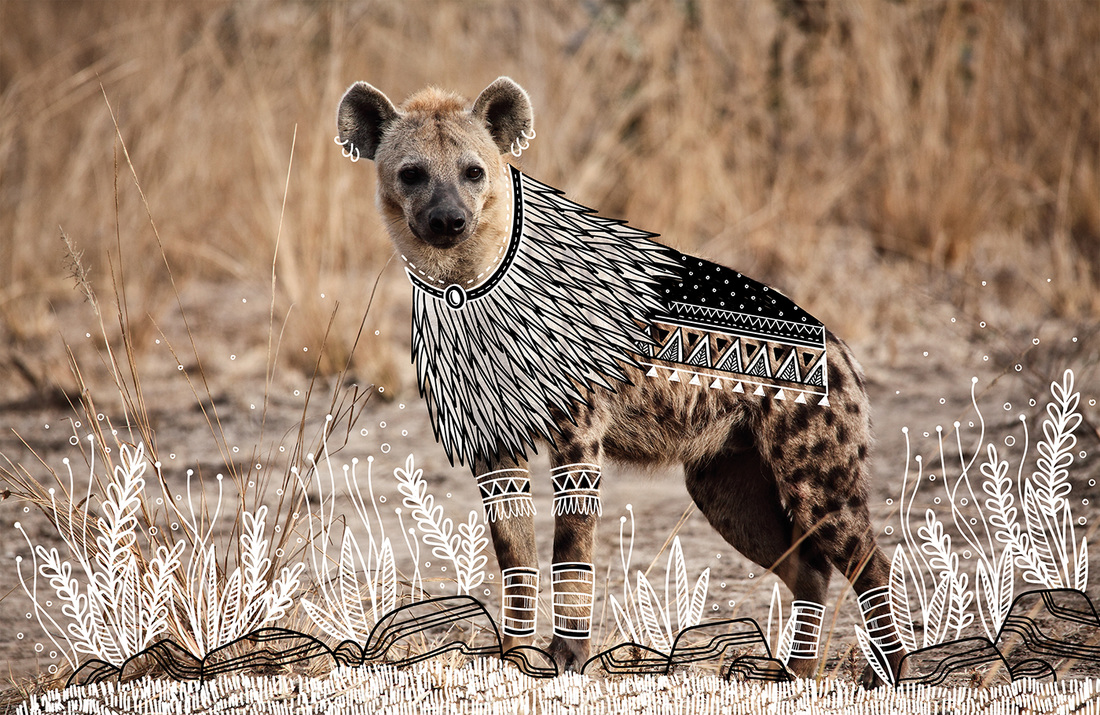 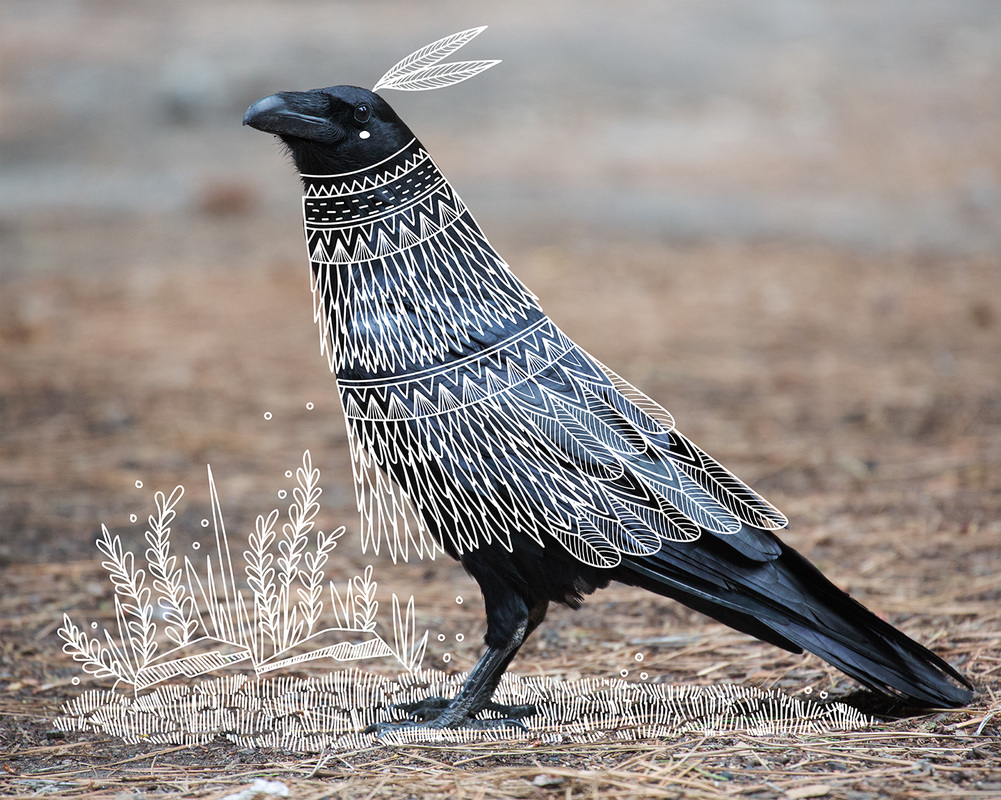 As always, click on the image to be taken to the artist's website, where you can find more of his work.
This is an idea you can definitely try with the kids (or by your own grown-up self), whenever a sudden attack of "I'm bored" sets in. All you need is an animal-ish magazine (old National Geographics, or Ranger Ricks) and some paint pens. Prompt them/yourself with "what should this animal wear?" or "design the perfect outfit for this particular animal" or "draw a place for this animal to relax/live/eat dinner" and watch the creative magic happen. xo! That odd turn of phrase above is from today's i love vintage: another project-and-a-half from 1967! 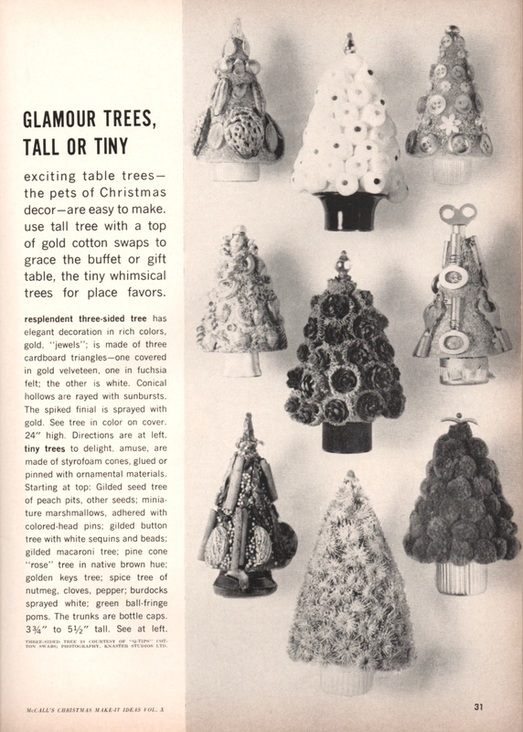 I'm not sure what makes those tiny trees glamorous, especially the one that's just some glued-on peach pits and pumpkin seeds. But this tall 3-sided tree certainly is. Why, you can almost not tell that the crowning star is made from cotton swabs! (Just kidding, you can 100% tell.) 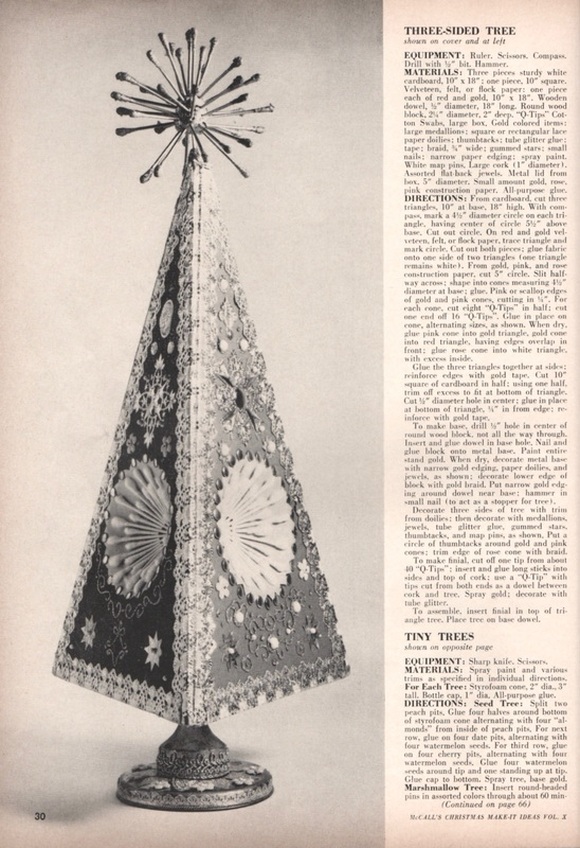 The conical insets of the 3-sided tree are very cool. Might have to apply that idea in some project or another...
xo! That odd turn of phrase above is from today's i love vintage: another project-and-a-half from 1967! I'm not sure what makes those tiny trees glamorous, especially the one that's just some glued-on peach pits and pumpkin seeds. But this tall 3-sided tree certainly is. Why, you can almost not tell that the crowning star is made from cotton swabs! (Just kidding, you can 100% tell.) The conical insets of the 3-sided tree are very cool. Might have to apply that idea in some project or another...
xo! (Just a little editor's alliteration joke, up there. Heh.) Hey look, it's 1967 with some holiday crafts that kids can make! The environmentally-gross styrofoam balls used as heads in the dolls are offset by the reusing of newspaper as wrapping paper (instead of buying new). Well played, McCall's. 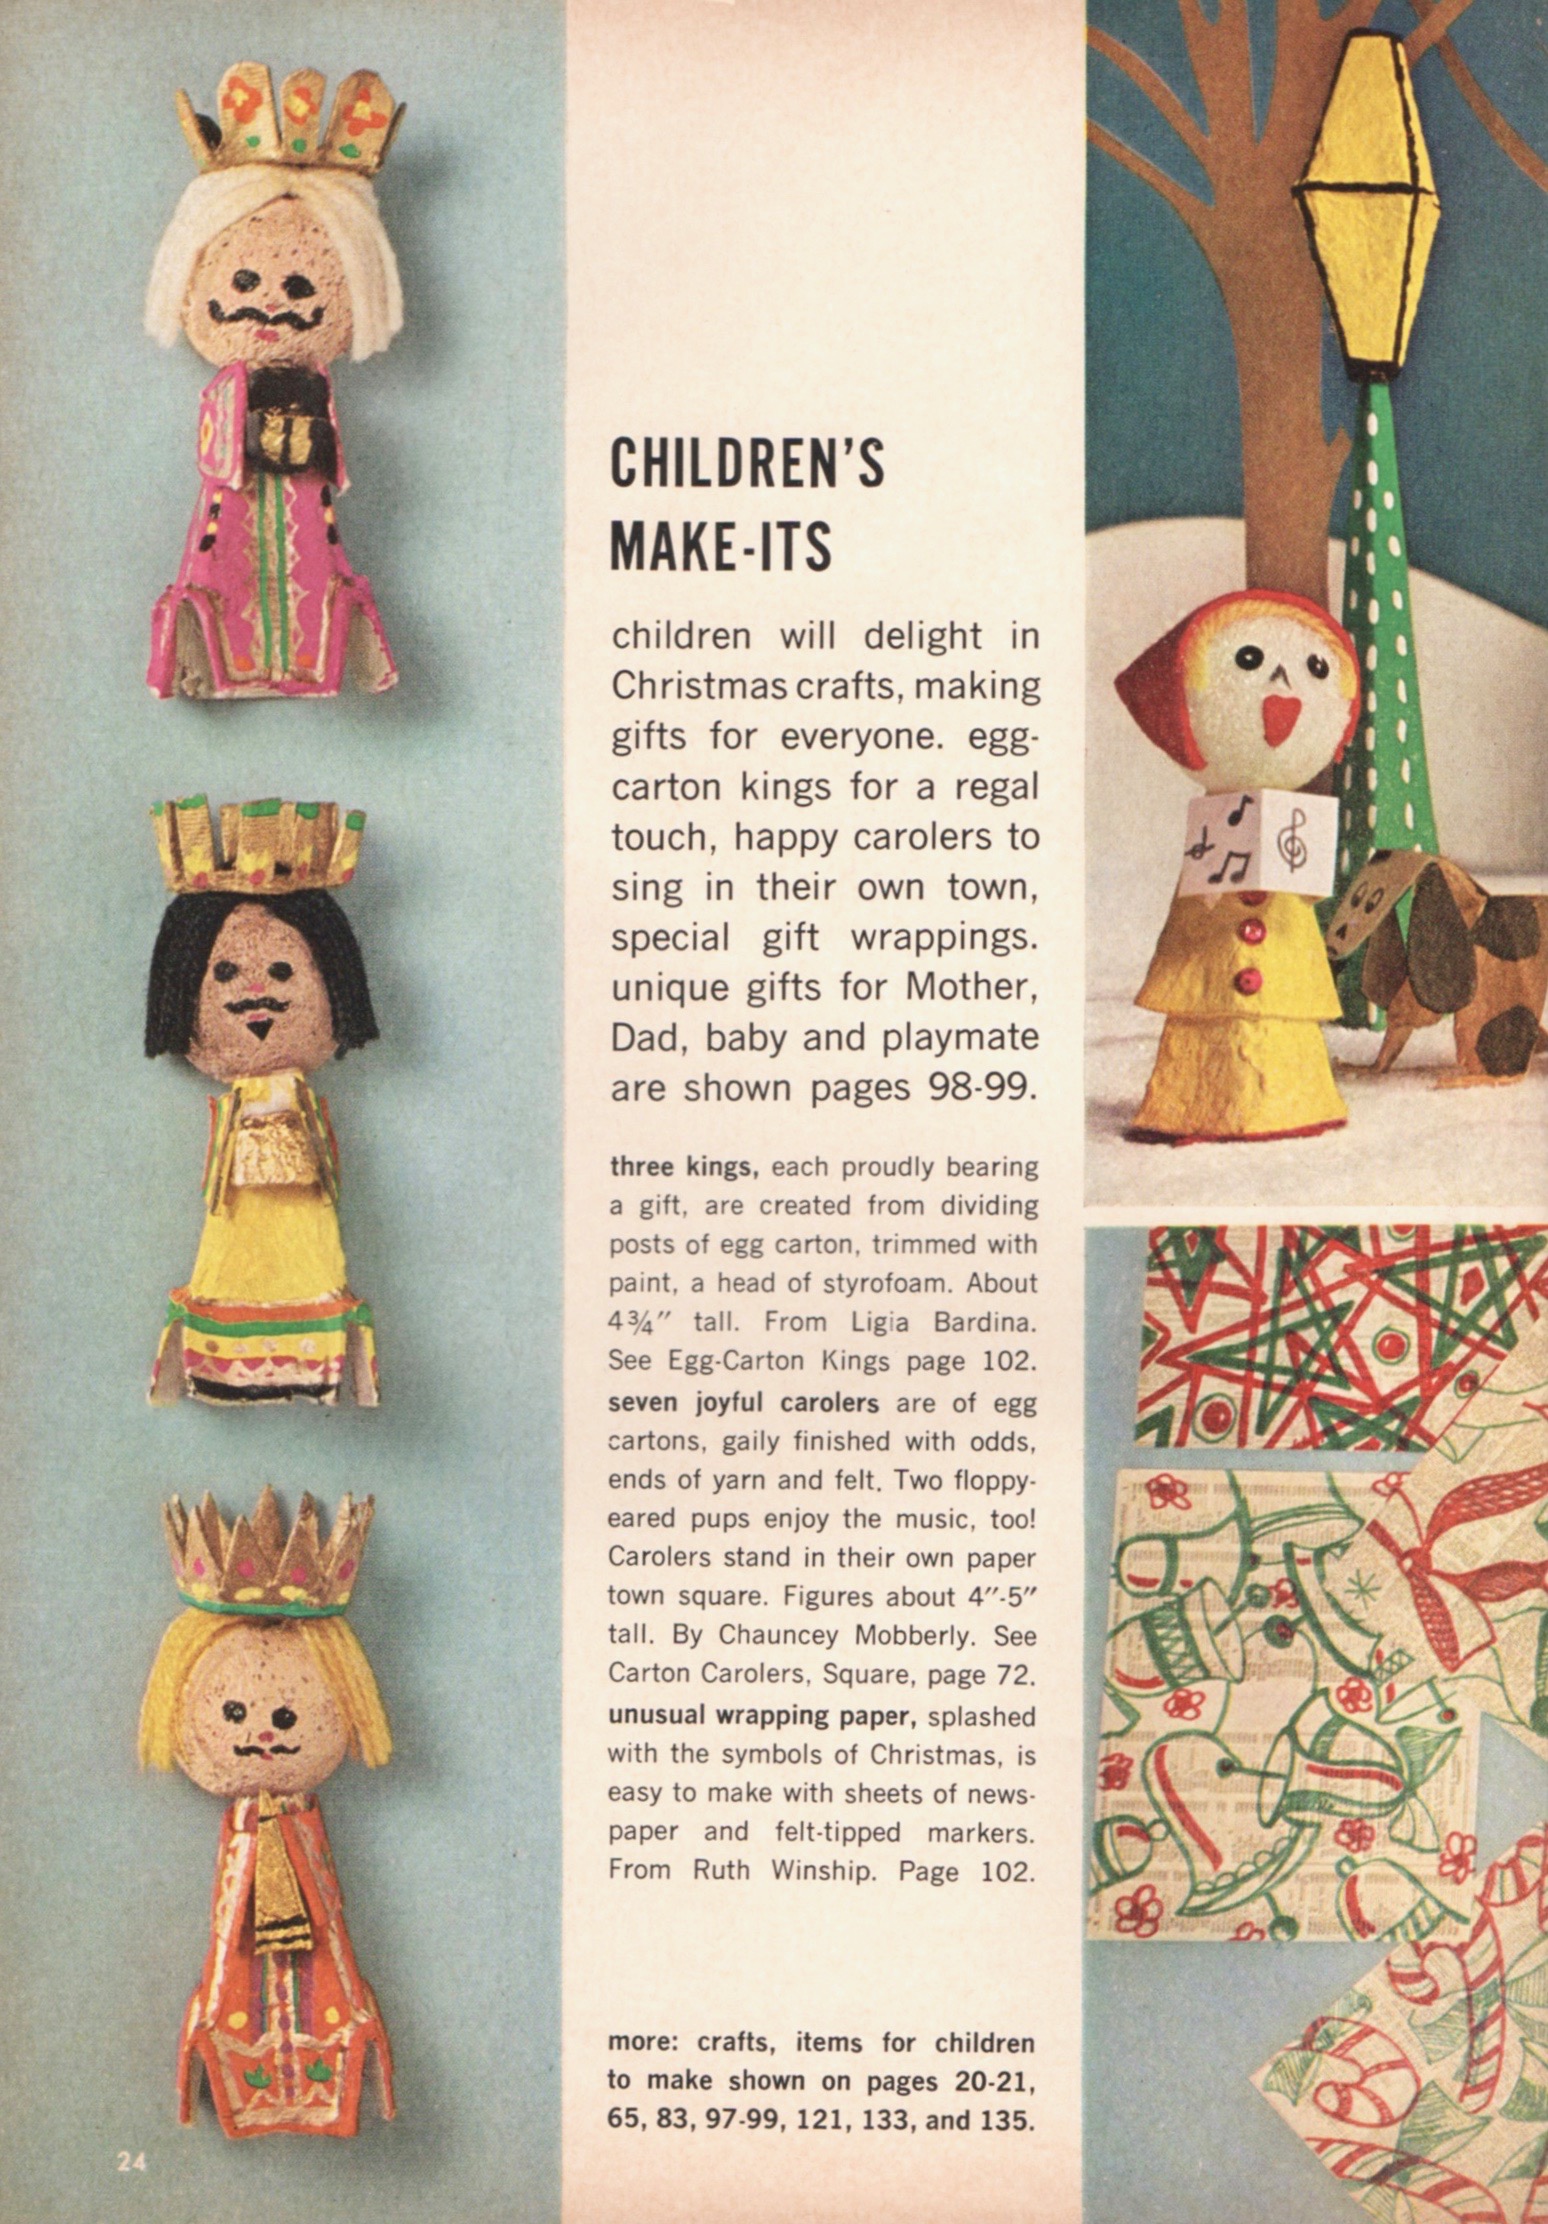 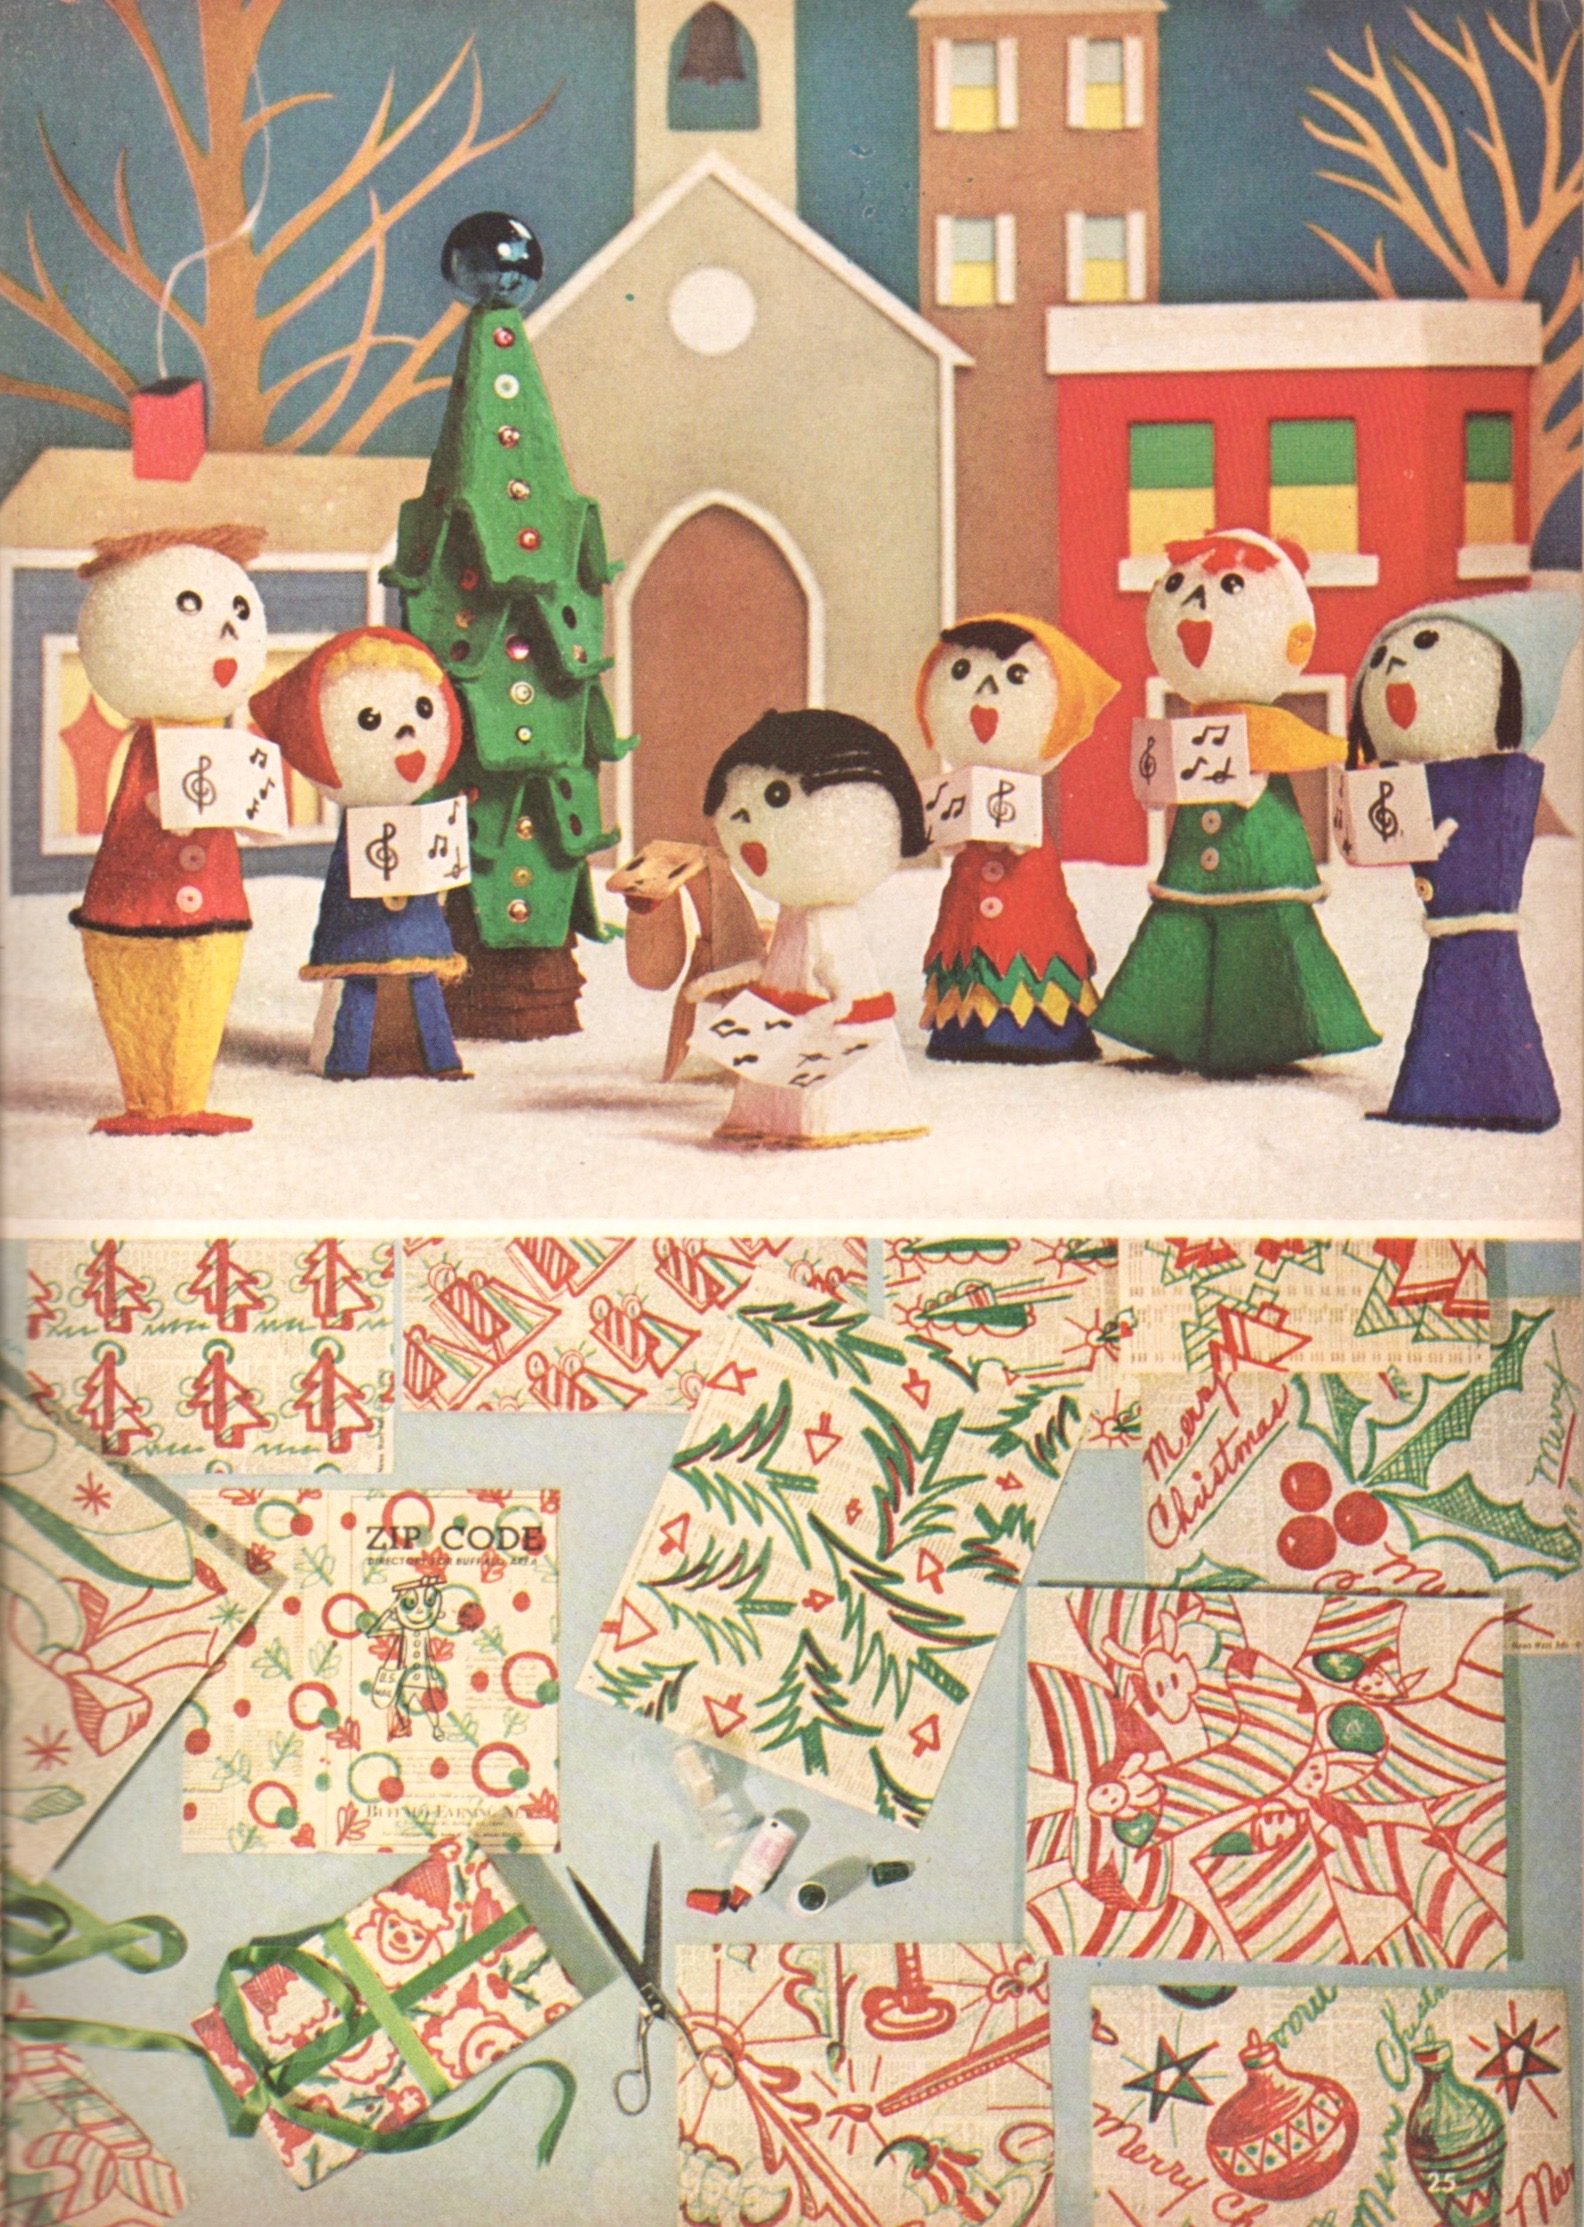 xo!
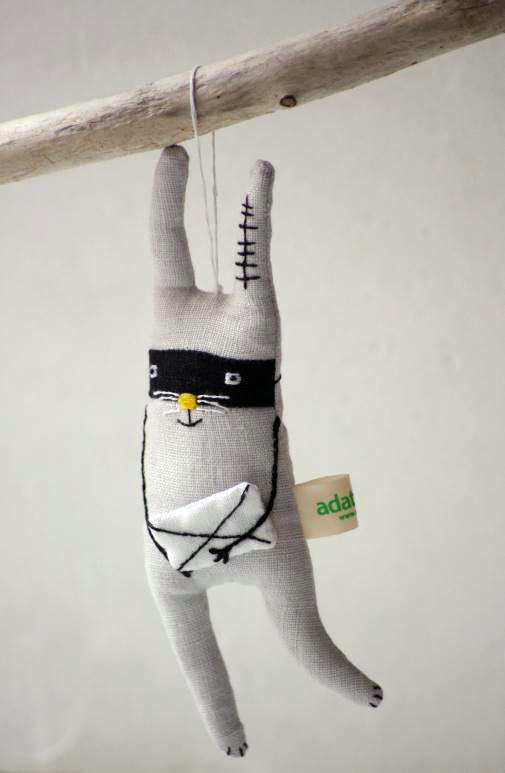
Adatine is an etsy maker and seller from Lithuania. She hand-makes expressive stuffed toys and brooches out of natural linen cloth. They are also totally affordable. And adorable. Here's an otter: 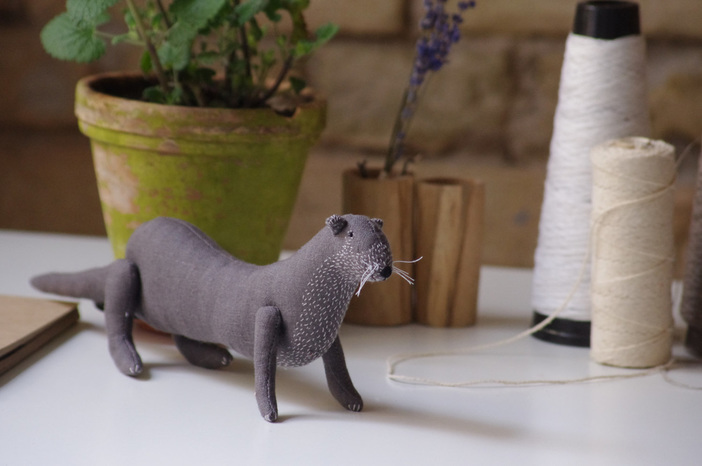 I love these sneaky bandits: a postman rabbit, and a pair of fox brothers.
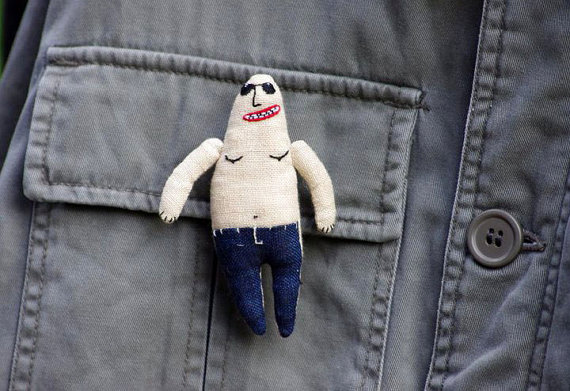
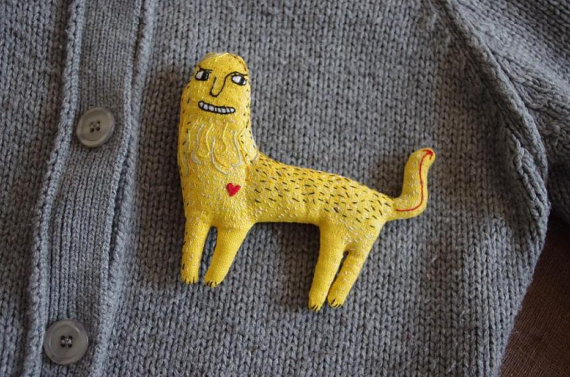
And then there's this serious bunny. She... she speaks to me. Her little arms! Don't worry bunny, we'll make it through somehow.  And then there are her brooches! The bare-chested guy is a secret agent (don't tell anyone) and the lion is a Leo. (Of these brooches, she says they are "original and courageous accent[s] that may decorate not only your cloths, scarves, bags, but also make others more cheerful." So true.
The cherry on top is that each item I've shown here is no more than $40! You really should go see the rest of adatine's shop for yourself.
xo |
Categories
All
Archives
March 2017
AuthorI'm Debbie Way, an artist and writer who enjoys making things. |


 RSS Feed