|
The holidays are always an incredibly busy time for me. I need to find the perfect gifts for my loved ones (I usually end up making at least a couple of them), there are events to attend all weekend long, and because it's getting colder outside and that makes me feel cozy inside, I end up deciding to bake (granola, this week). All of this is to say, yes, Franklin's a bit late this week. The fault is entirely mine. Here he is, in a rare snuggly moment. 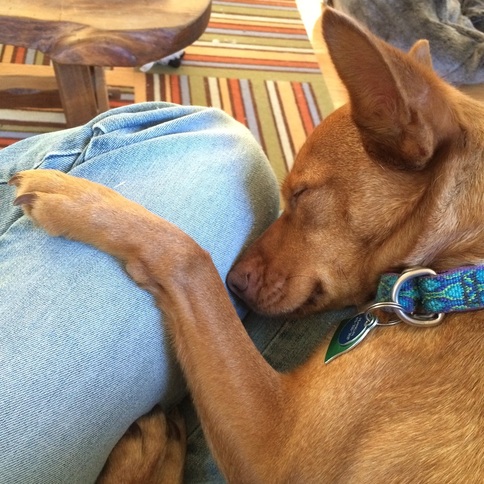 Happy lap naps to you and yours!
xo I was incredibly lucky to work with a highly talented, driven, and creative group of people for over 7 years, and one of the most creative and driven (and driven crazy by editor-me, I know) is Kimberly Stoney. She's been posting an ornament idea on her blog, The Tiny Funnel, and on Instagram EVERY DAY this month. And like all of her work, they are cleverly constructed, easy for people of all ages to make, and totes adorbs.
Remember my straw ornaments from yesterday? Kimberly was on the same wavelength a few days ago, unbeknownst to me; and, dare I say it, her pipe-cleaner joints are simpler than mine. Because she is the craft master.
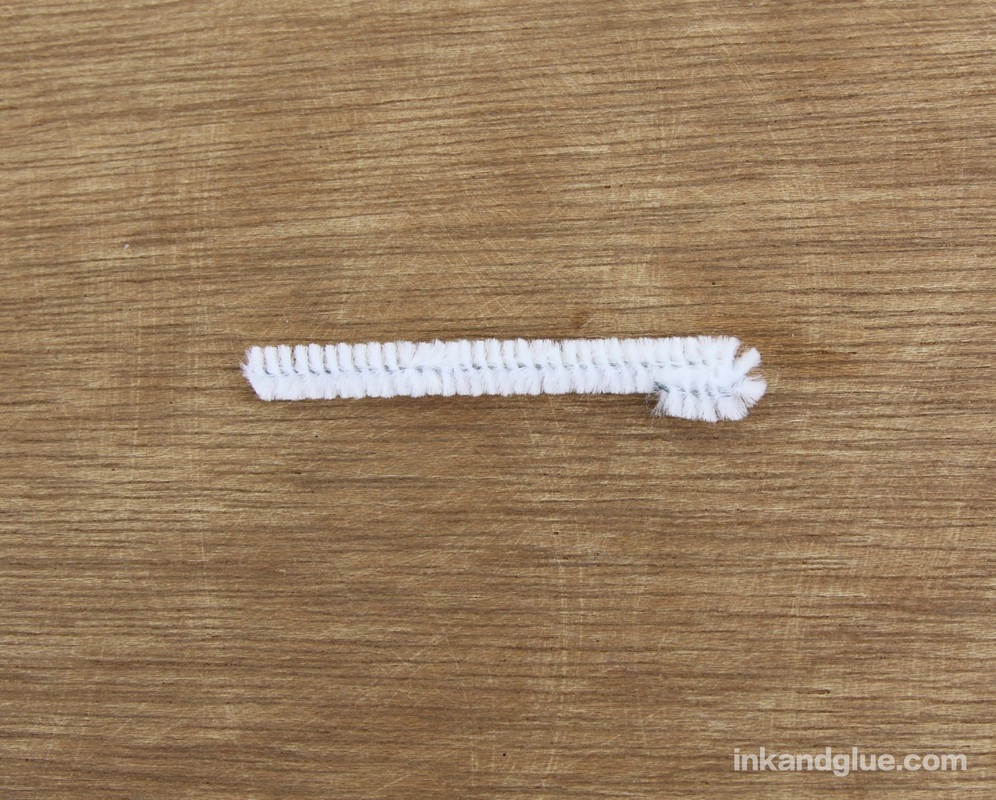
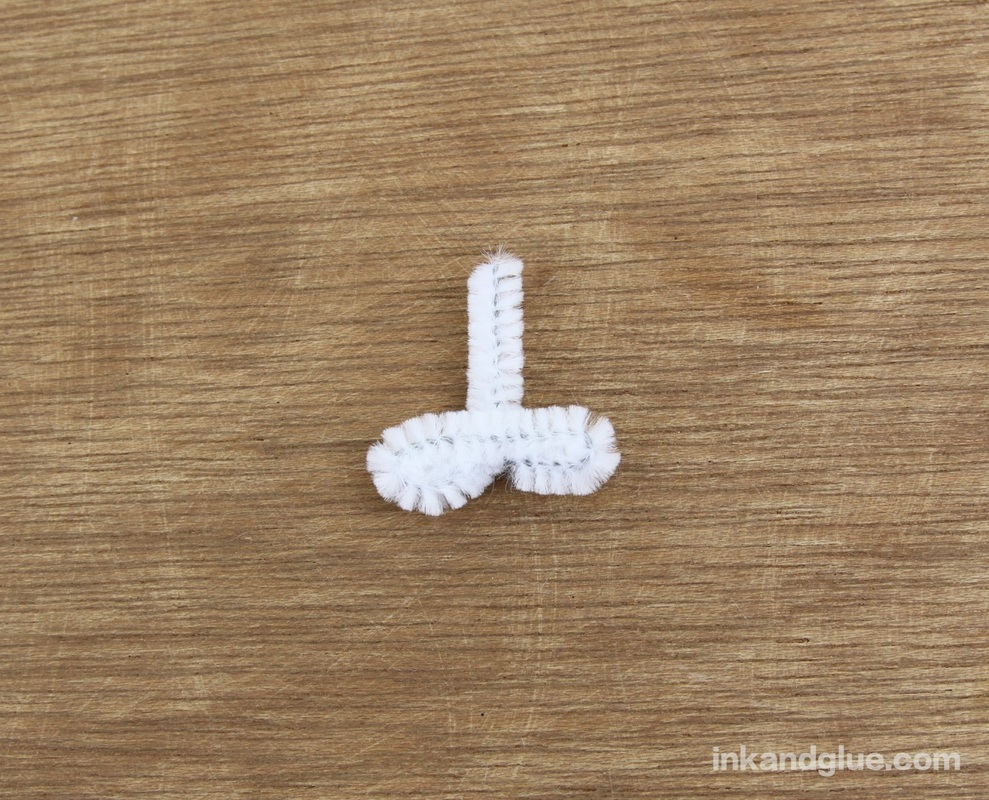
Go to her site now, and be inspired by the possibilities! xo 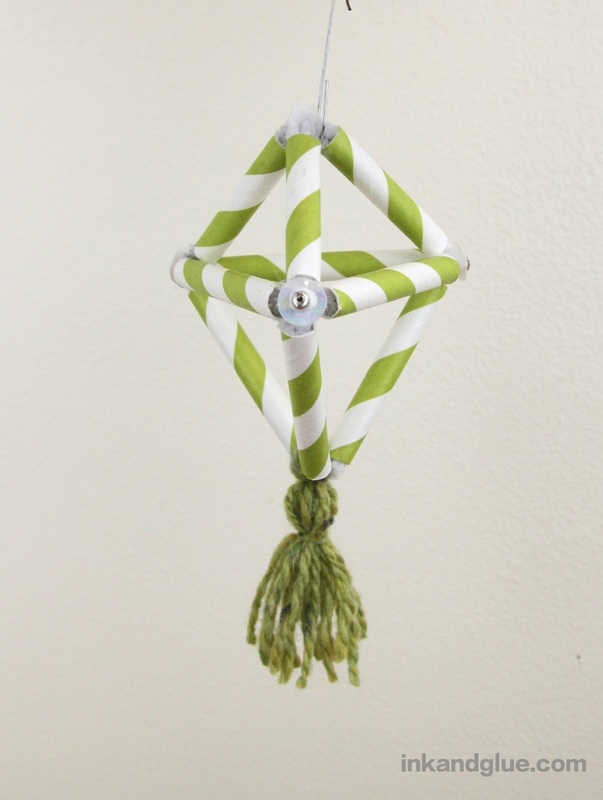 I can't stop making ornaments. I need an extra tree for them. (Actually, my family might end up with a few tied to their gifts...) The construction of this one is based on a learning activity from FamilyFun Magazine, though mine is much smaller. It's fairly easy to make, and once you prep the pipe-cleaner joints, your kids can experiment with different shapes for as long as they like. In fact, if DIY ornaments aren't your thing, this could be a building toy in and of itself; just leave out the glue. Start by cutting some straws into quarters. I had fancy paper straws I'd bought on clearance; plastic works just as well. 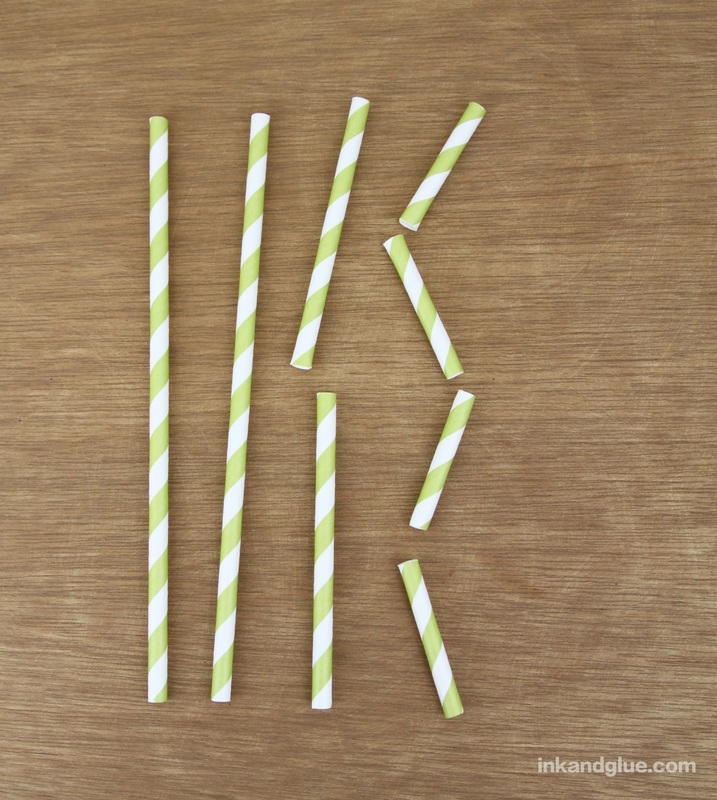 Once you have a bunch of straw segments, make the pipe cleaner joints. First, I'll show how to make a three-pronged joint: Cut a 3 (or so) inch length of pipe cleaner and bend over one end. Bend the remaining length in half, as shown.
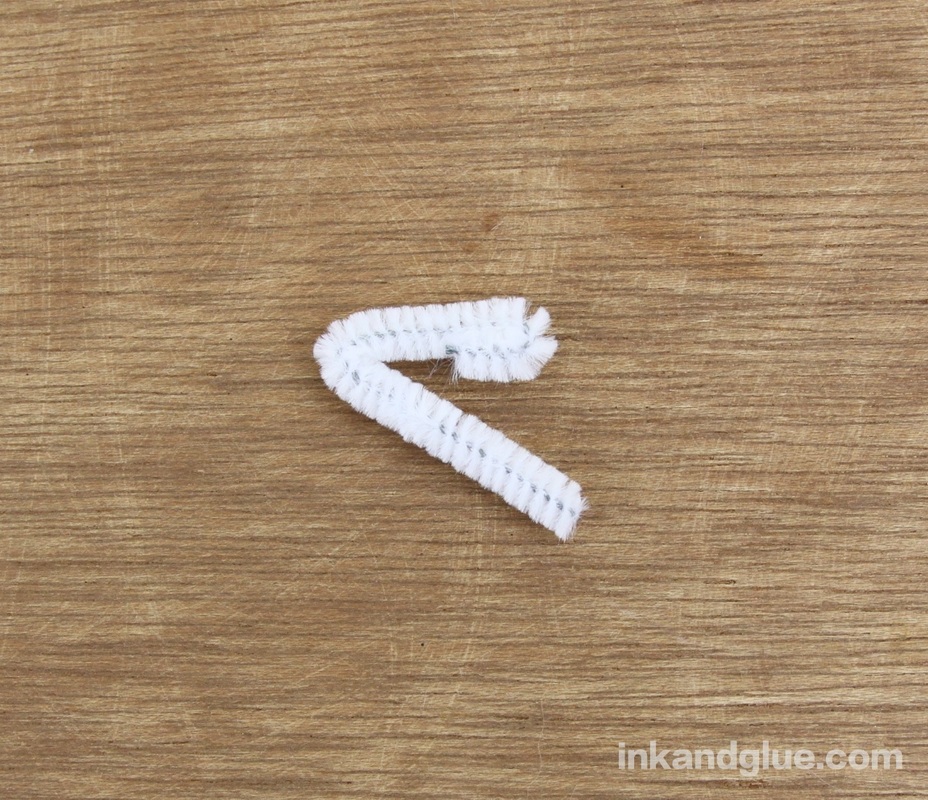
Bend the end up to form an upside-down T shape, then bend the very tip of it back.
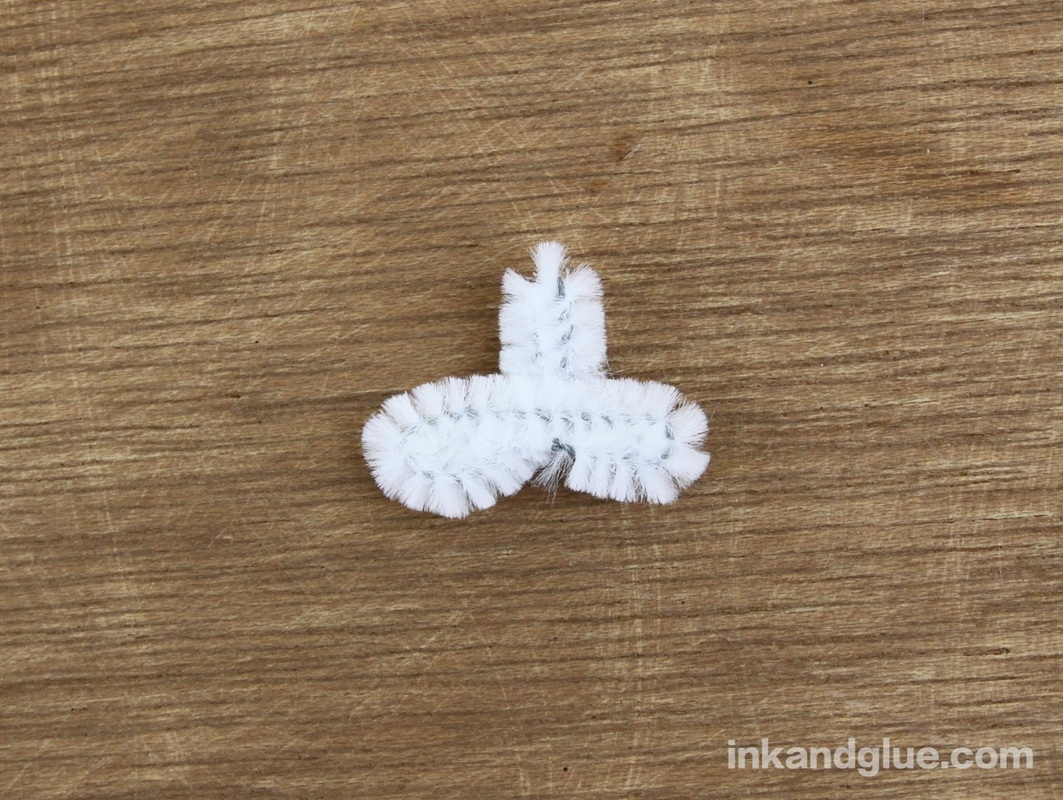
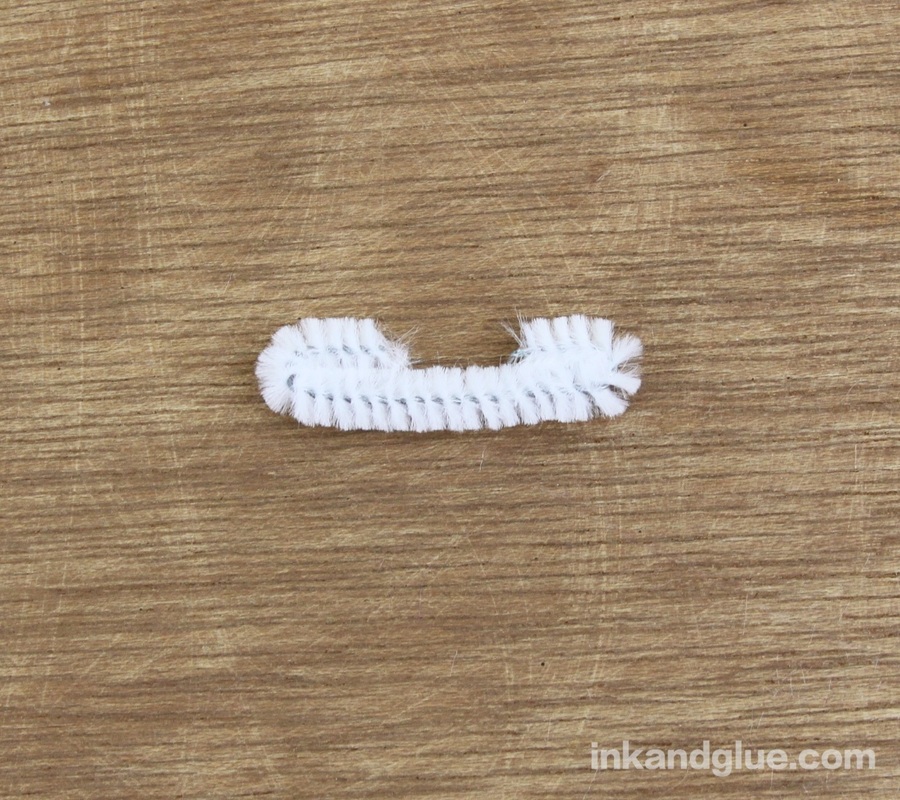
Slide a straw segment onto each of the three ends, and it'll look like this. 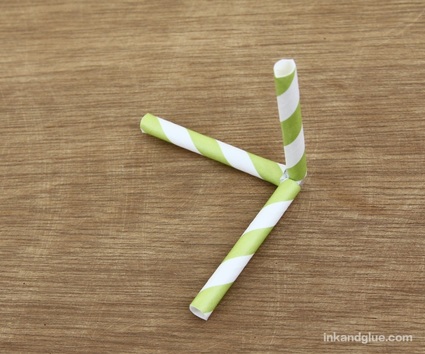 I found that the four-pronged joints were more useful for the shapes I wanted to make. Here's how to make those. Start with a 2-inch length of pipe cleaner, and bend over both ends. Do the same with a second 2-inch piece, then twist the two together at their centers. Easy-peasy!
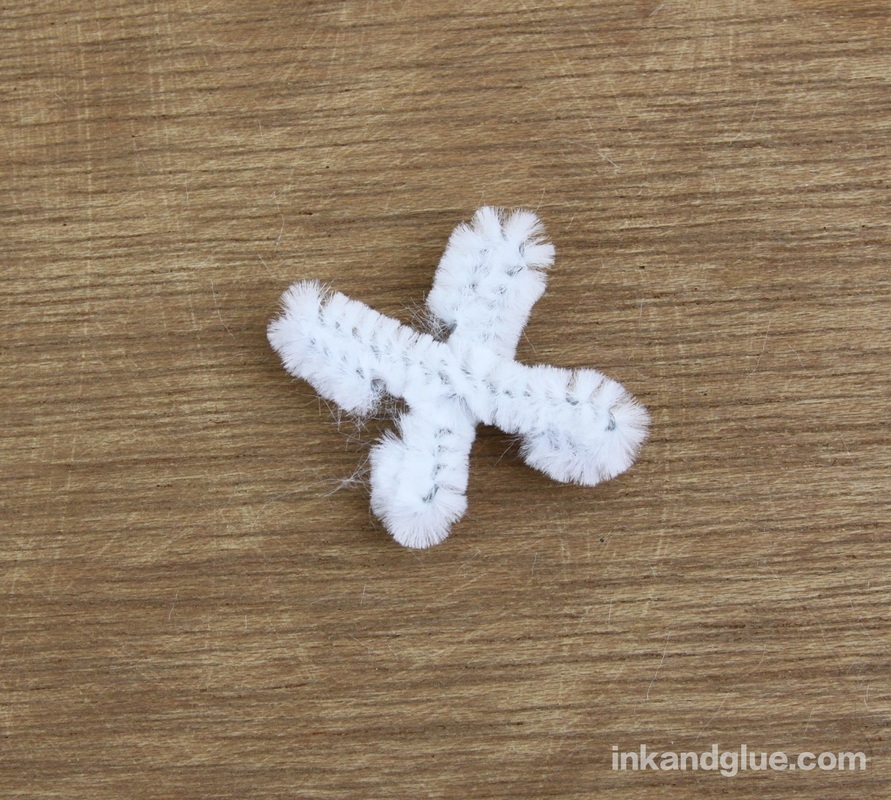
Here's what that four-pronged joint looks like when ensheathed by straw pieces. 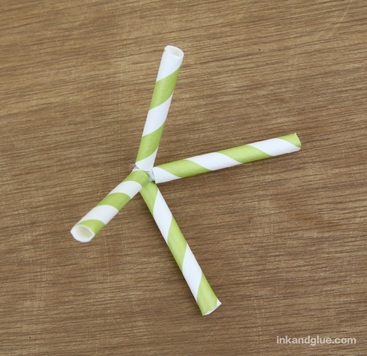 I used two 3-pronged joints and three 4-pronged joints to make my simple diamond shape. 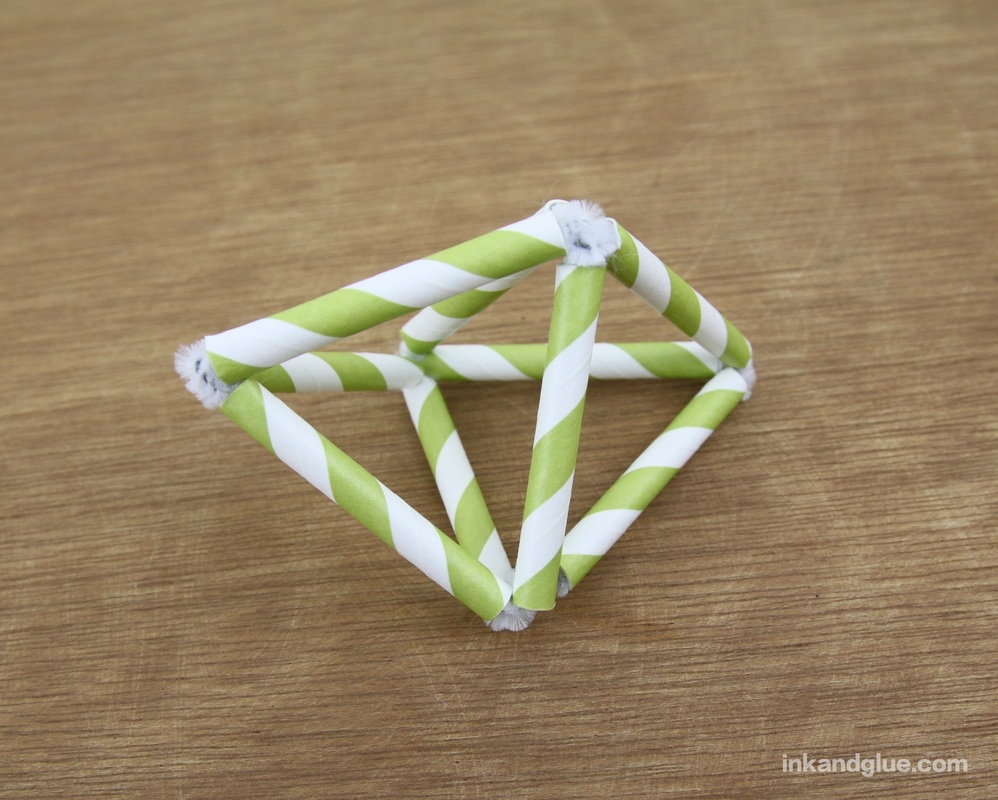 It actually felt too symmetrical, so I removed and trimmed the three straws at (what I decided was) the tip, and did the same, but a little shorter, on the three at the top. Better! Except, hmmm... Missing something. I had a spare tassel (made in the security envelope ornament post) so I tied it to the bottom tip. 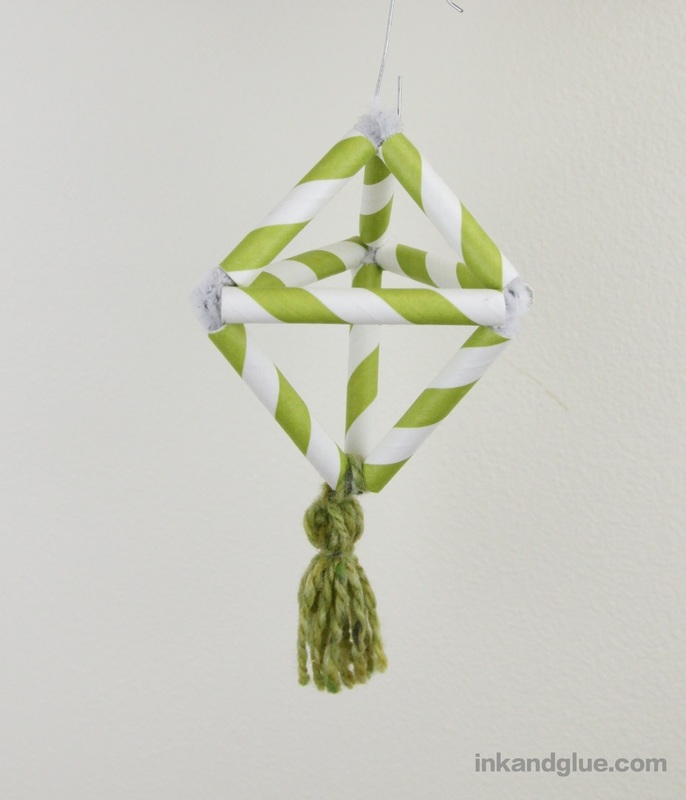 Getting there! I wanted to add some sparkle, so I glued white sequins and silver beads to each of the center joints. Now it's tree-worthy. 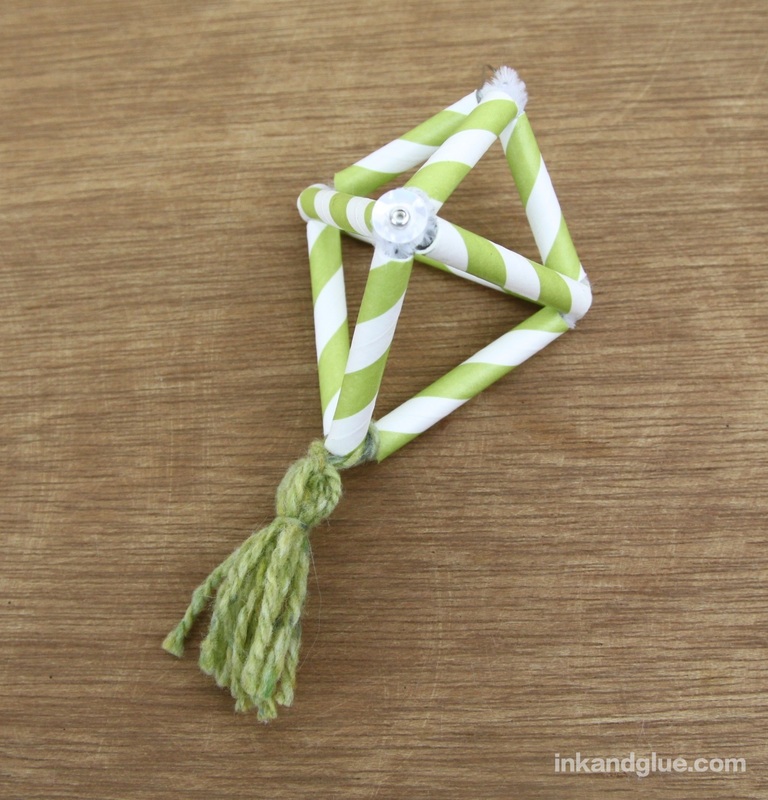 You really can make a lot of different shapes by varying the number of prongs in your joints and changing the length of your straws, though I'd recommend trimming straw lengths as a final step, just so they don't get mixed up with your regular length straw pieces. Nothing sadder than an accidentally dented-looking straw construction.
Have fun! xo My intention was to style this ornament in a super simple way for little kids, and I think it certainly can be that. But sometimes I can't help myself from adding some sparkly embellishment. And is there a more appropriate time to add excess sparkle to things than the winter holiday season? No, I say. No there is not. 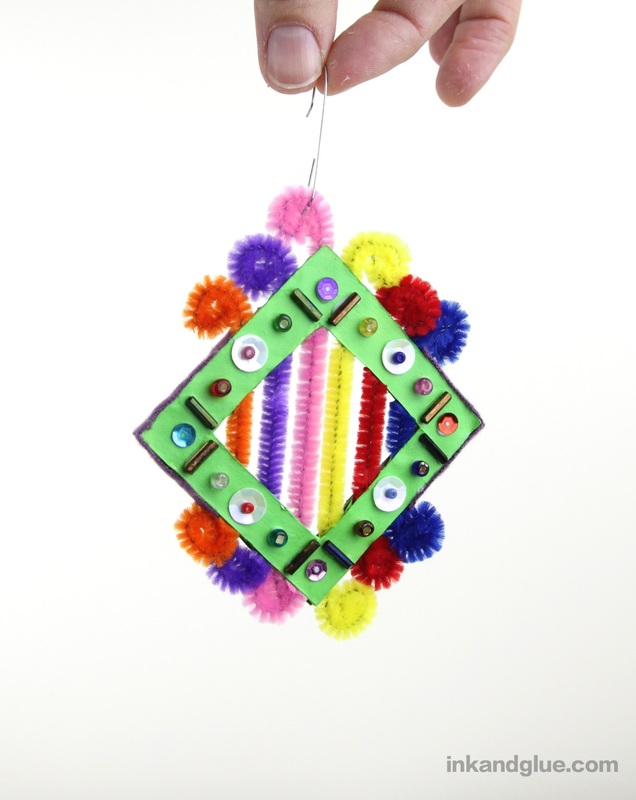 (The dried glue on my fingers is for extra realism.) To make this, start with a painted frame like the ones shown in my previous post about cardboard ornaments. You can sort of see that I painted the cardboard white first, before adding a coat of light green; you get better opacity and brighter colors that way. 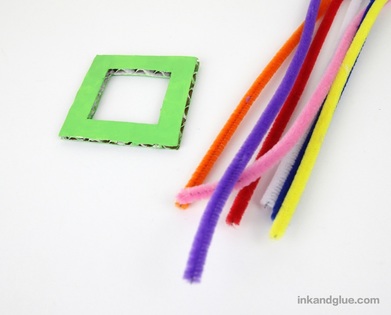 Insert the pipe cleaners into the corrugations/channels however you like. Bend one end of each pipe cleaner into a small loop or spiral. (I do this with just my fingers; pinch the end, then bend it by rotating your hand, then re-pinch and rotate your hand again, until you've got a spiral.) 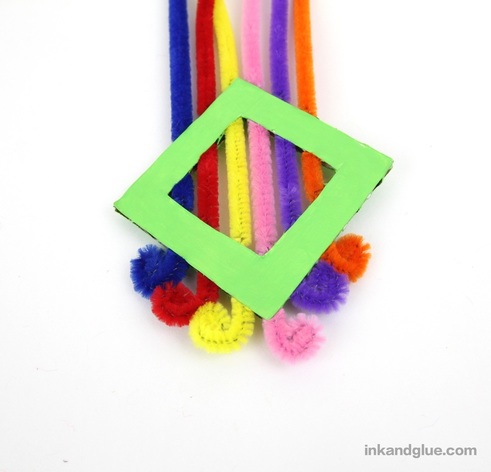 Cut the other ends of the pipe cleaners so that they're roughly the same length as measured from the cardboard frame, as shown. Pinch them into spirals like you did before. You can stop right now, if you like, or you can add stickers, glue on a collage of bits of paper, add adhesive-backed foam shapes -- whatever you have on hand.
I happen to have a decades-old stash of small glass beads and assorted sequins whose origins are lost to the mists of time. I find similar stashes at flea markets and tag sales, however, if you're into that kind of shopping (and you know that I am). So I made a simple pattern with them, using tweezers and tacky glue to place and adhere them. I also cut a scrap of purple flannel into strips and glued them onto the open sides of the cardboard shape. 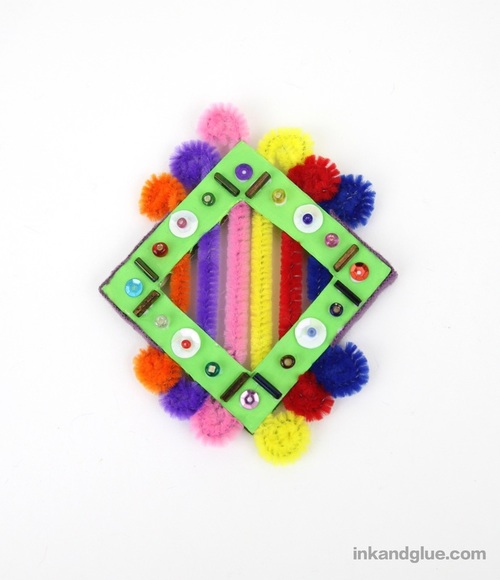 I could happily make fifty more of these and each one would be completely different. For an engrossing holiday party craft, make a dozen or so of the painted cardboard "frames," and set out bottles of tacky glue and bowls of paper and fabric scraps, yarn, beads, pipe cleaners, pompoms, felt... whatever you have. Leave it open-ended, and you'll be pleasantly surprised at what your young guests create.
xo
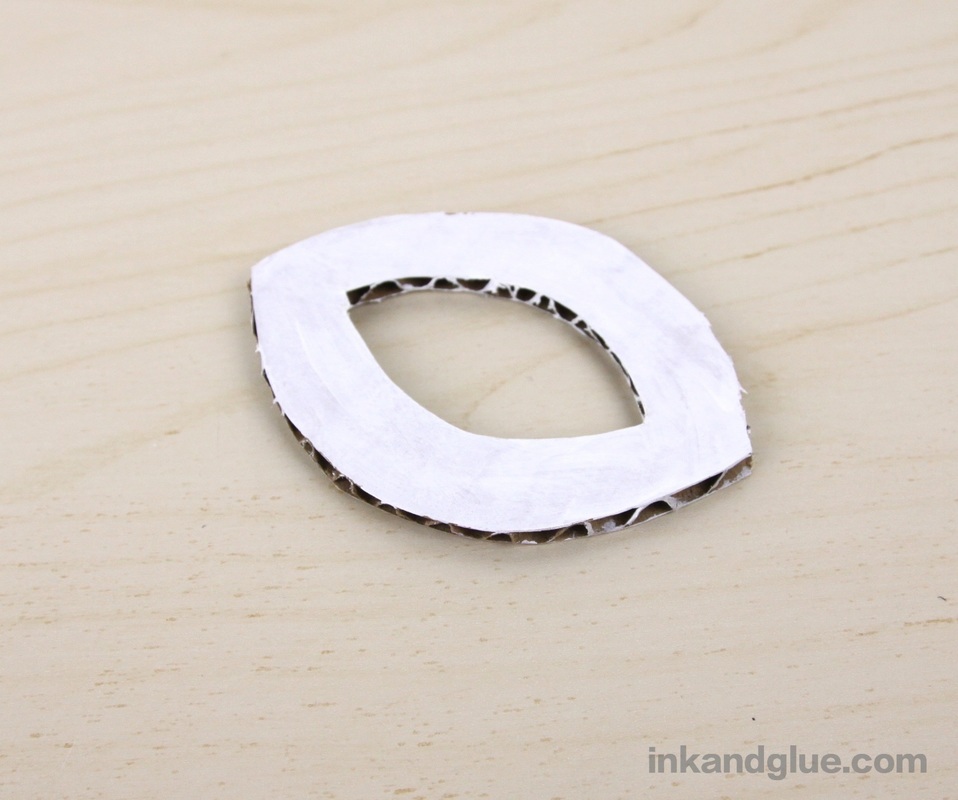
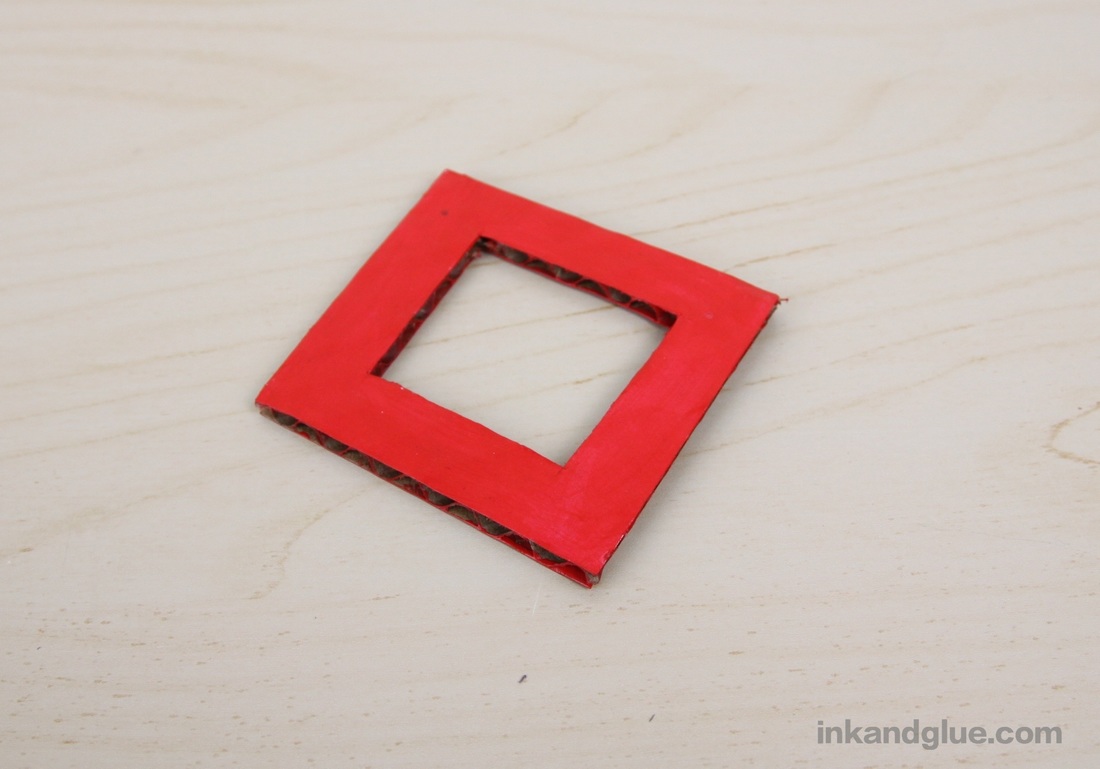
These ornaments are loosely based on an ornament my sister made when she was a kid, though these ended up quite different from hers. Inspired by the menorah craft, I wanted to use the corrugations (channels) in the cardboard to create a kind of miniature loom. Note that these are both best for older, more advanced kids; I have a younger-child friendly cardboard ornament that will be ready to share with you soon. First, I drew some shapes on cardboard; one is shown below. I added an arrow to show you which way the corrugations run, as this will be important later. You're essentially making a frame, so you'll need an inner and an outer shape. Use a craft knife (adults, or fearless and skilled older kids, only) to cut out the shape. 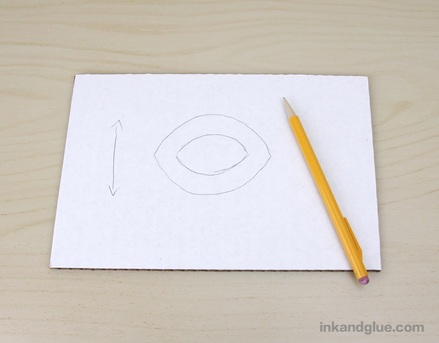 Paint the shape all over. Here are two of mine:
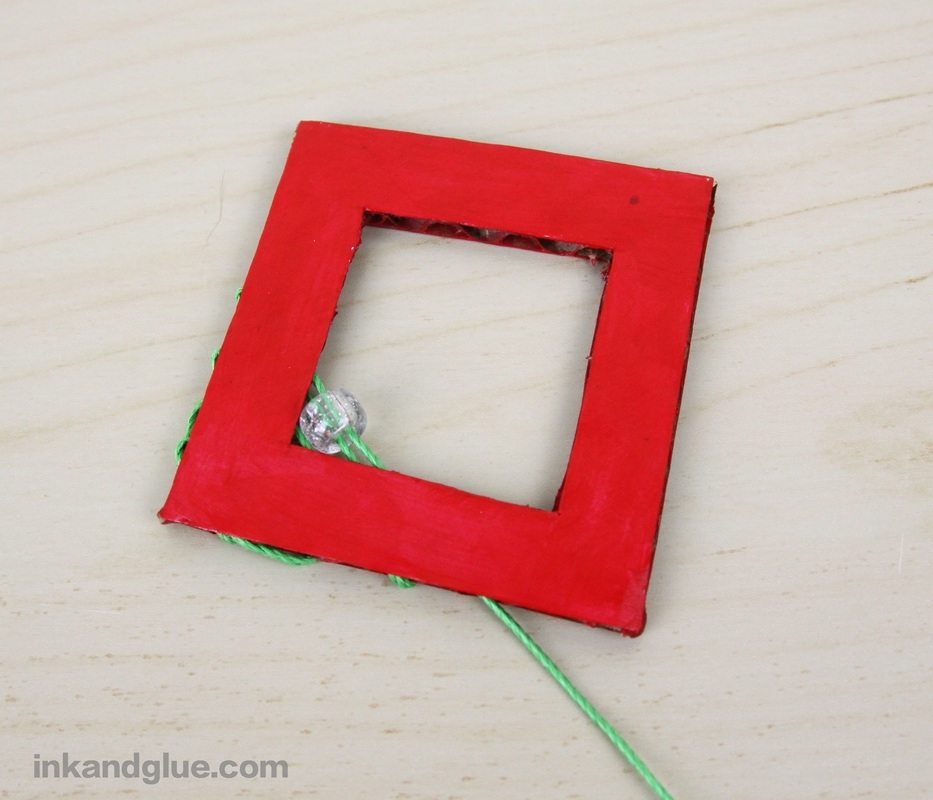
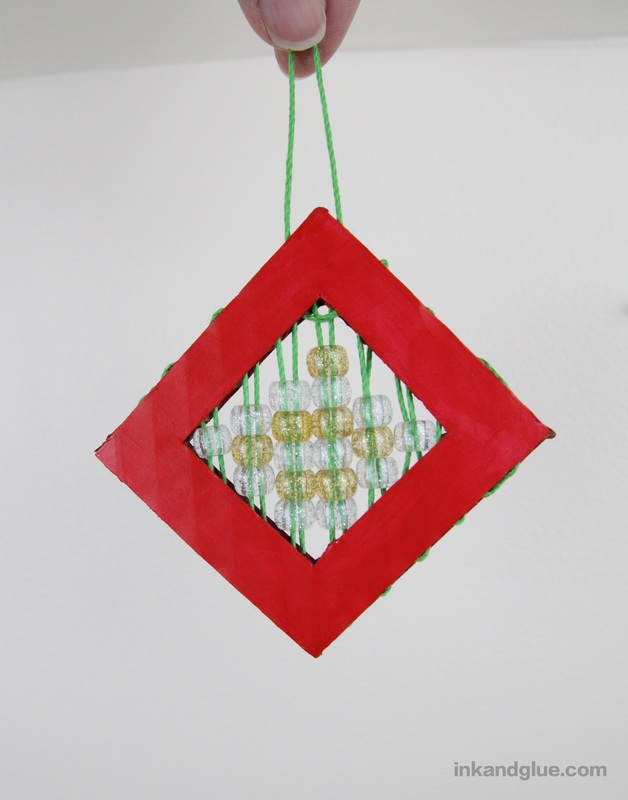
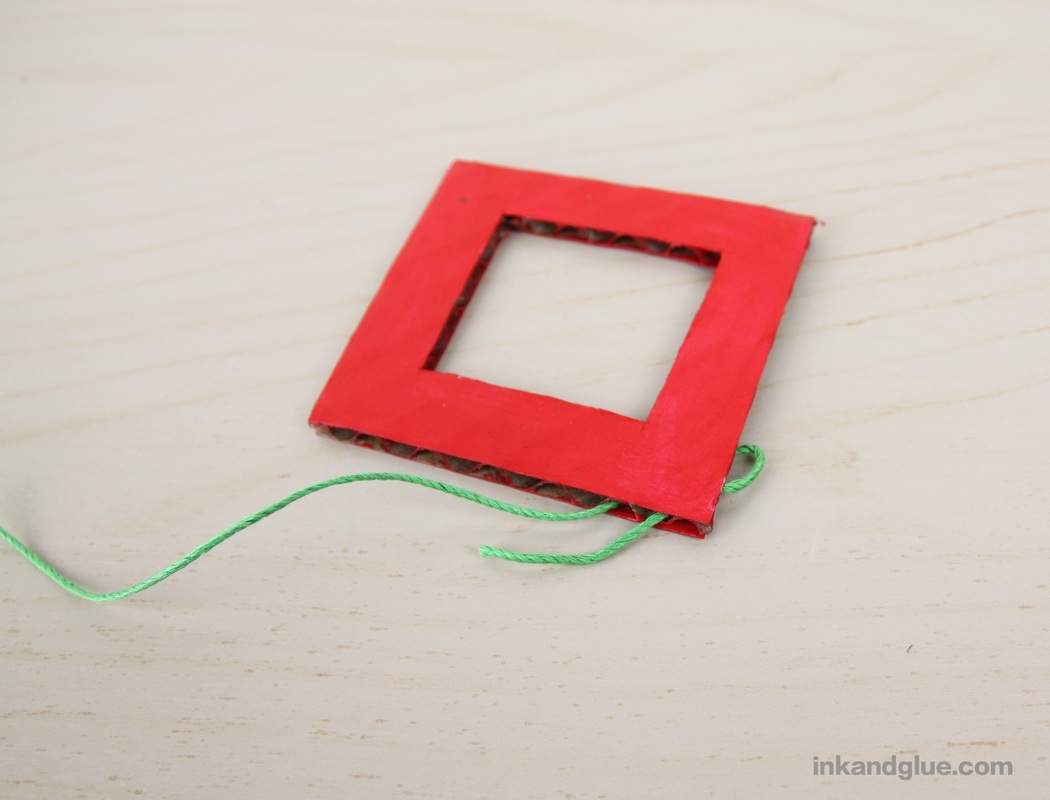
Now you're ready to weave! I'll show you how to make the red beaded square, first. Get a long, blunt yarn needle, and thread it with a few feet of cord. Insert one end of the cord through a corner channel, and out the neighboring one. Tie the end to itself to anchor the cord, then slip the excess cord into the channel.
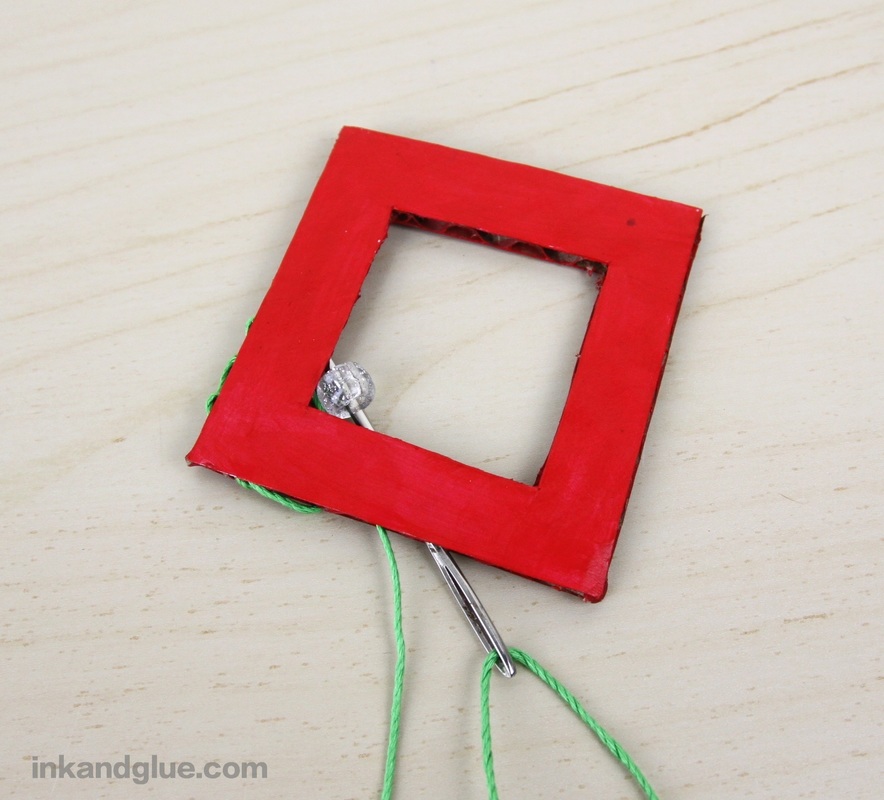
Slide the needle into a channel that travels through the closest corner of the open square. Thread on a pony bead, then pass the needle through the rest of the channel. Turn around and pass the needle through the next channel over, going through the bead again.
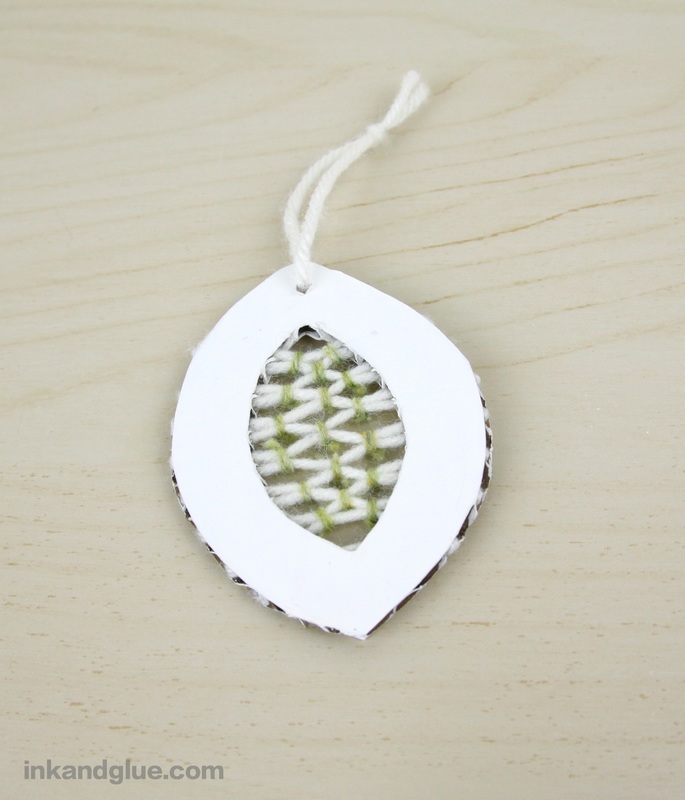
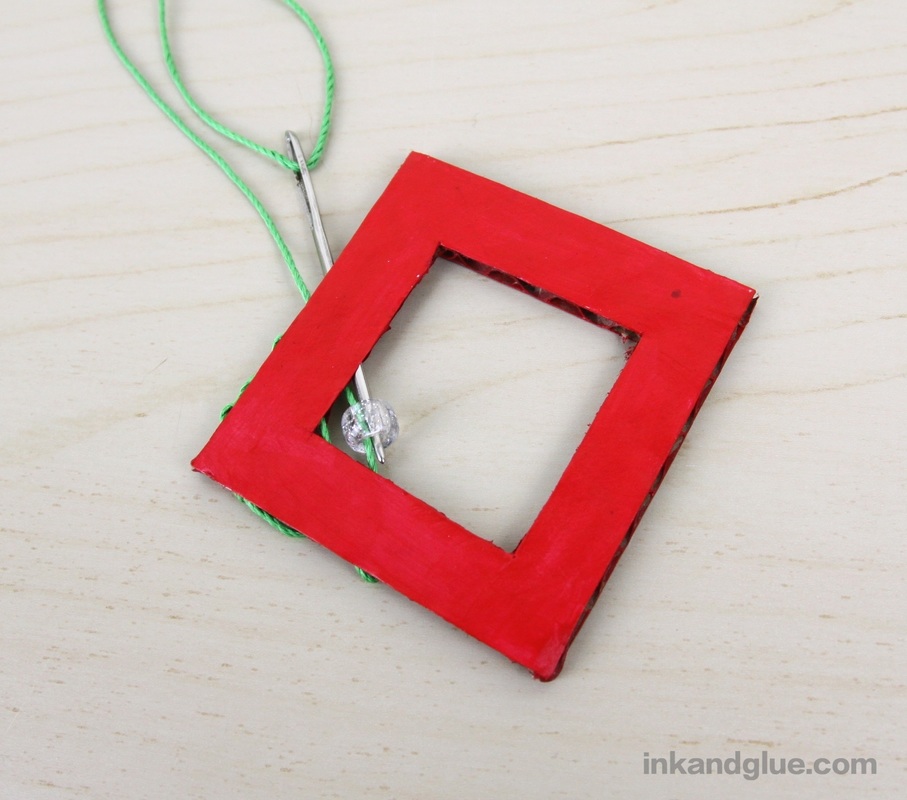
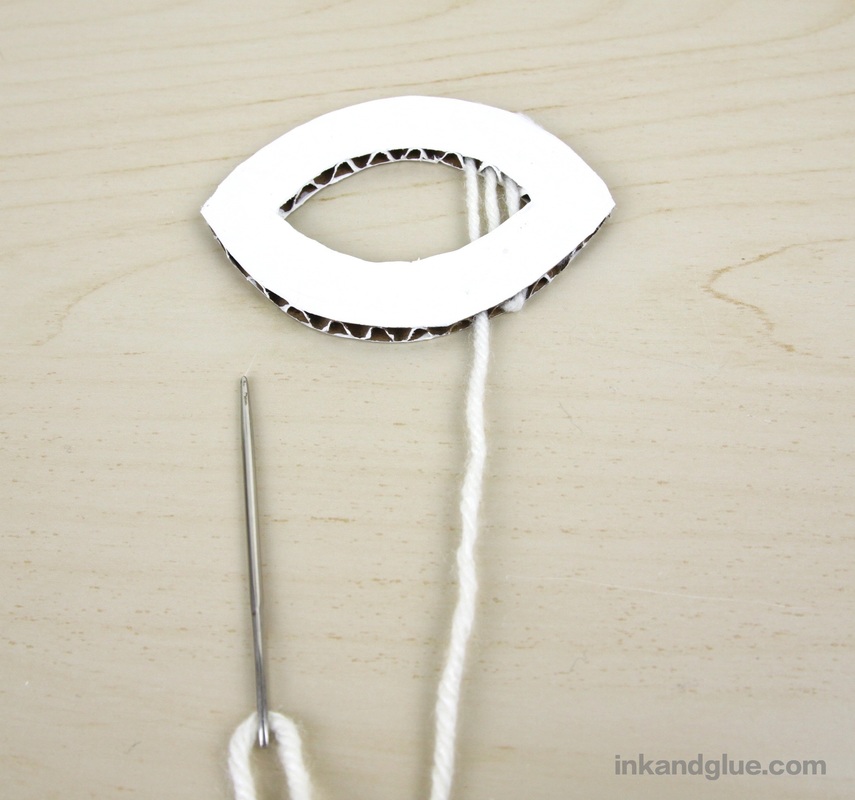
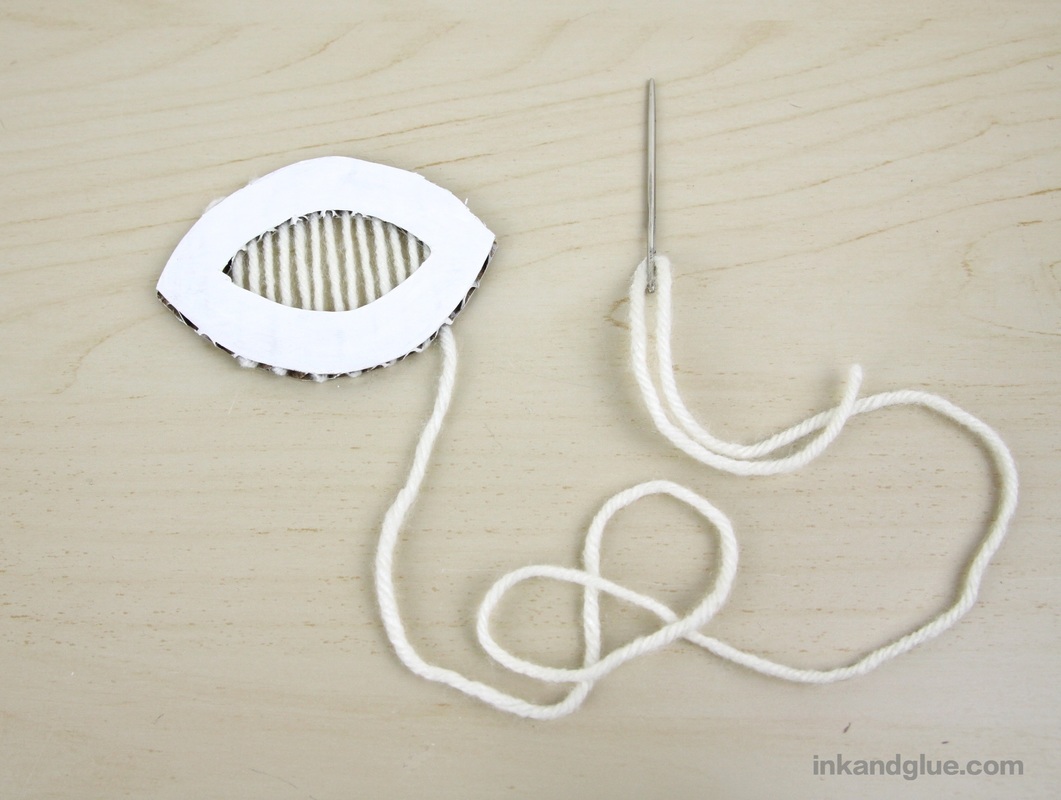
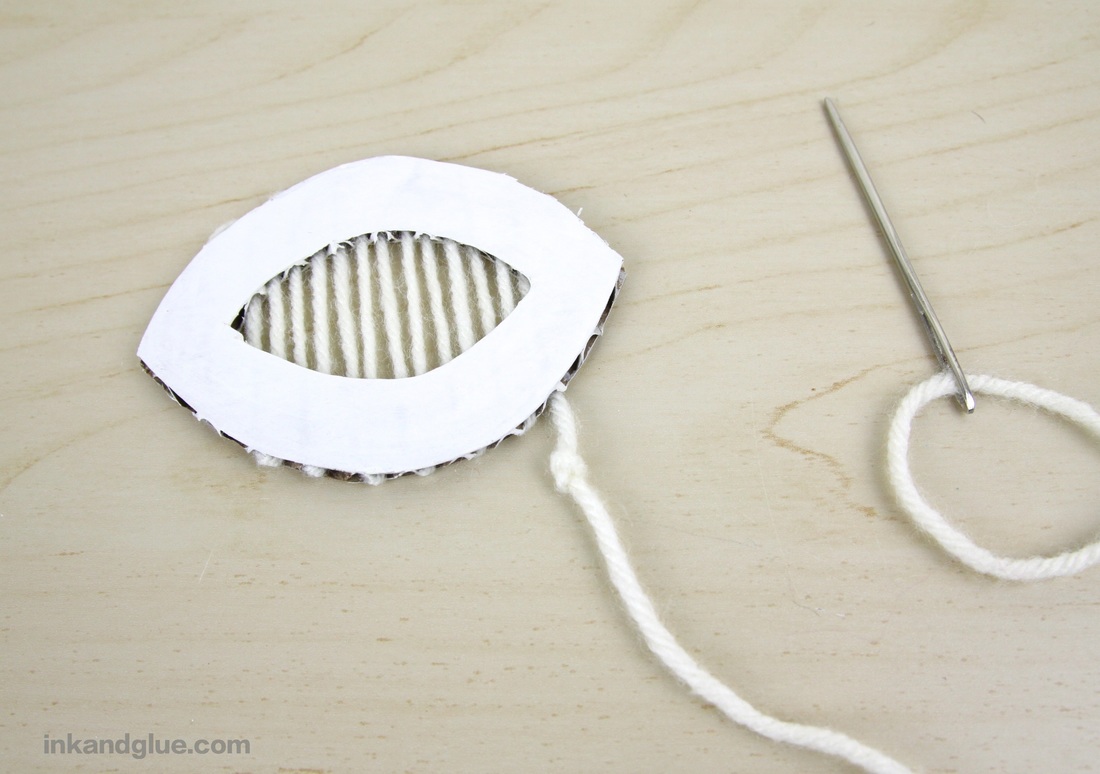
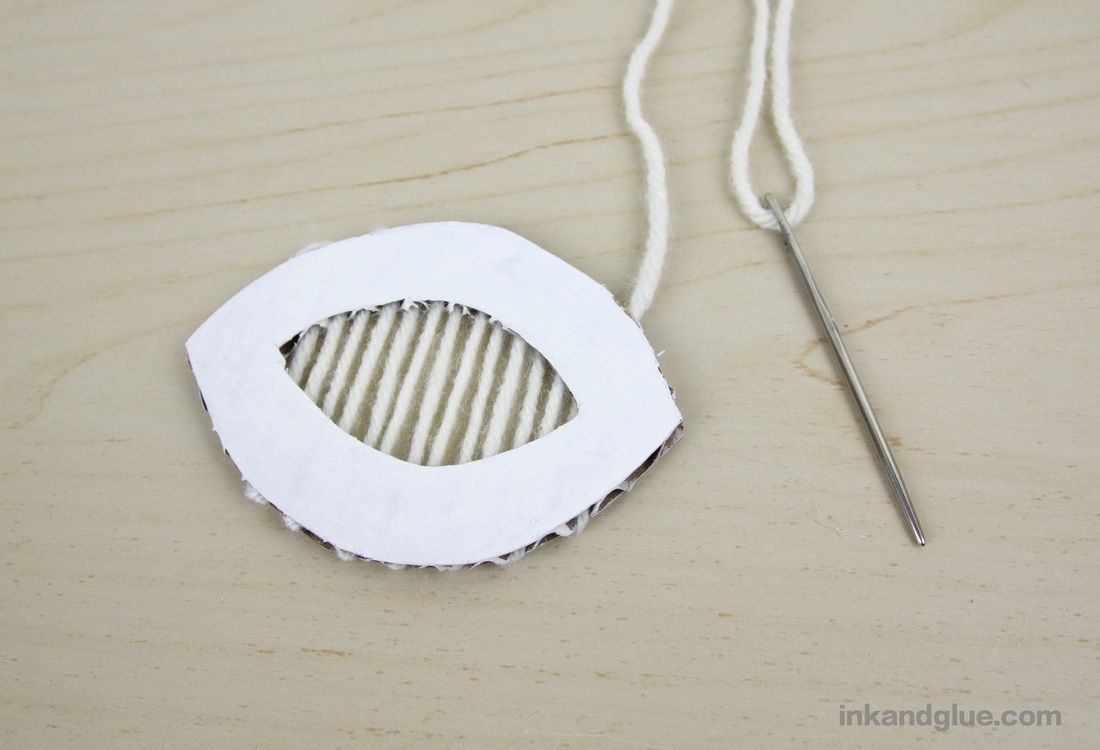
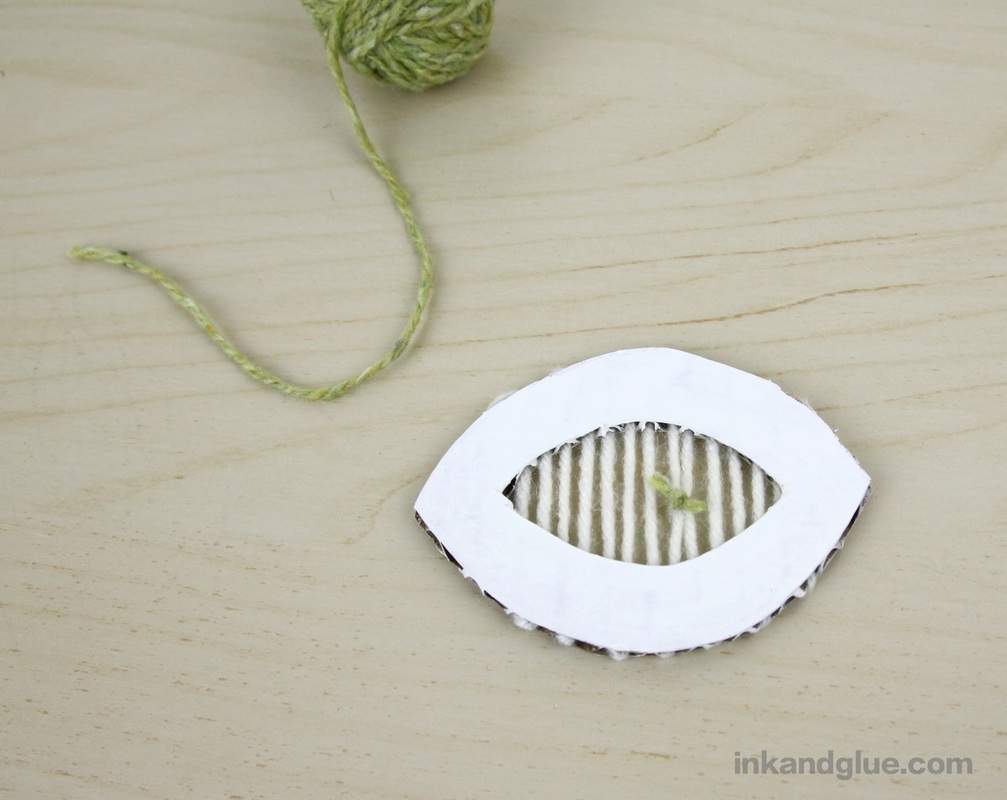
 Continue on in this way, adding two or three more beads as the space gets wider, then decreasing as it narrows. 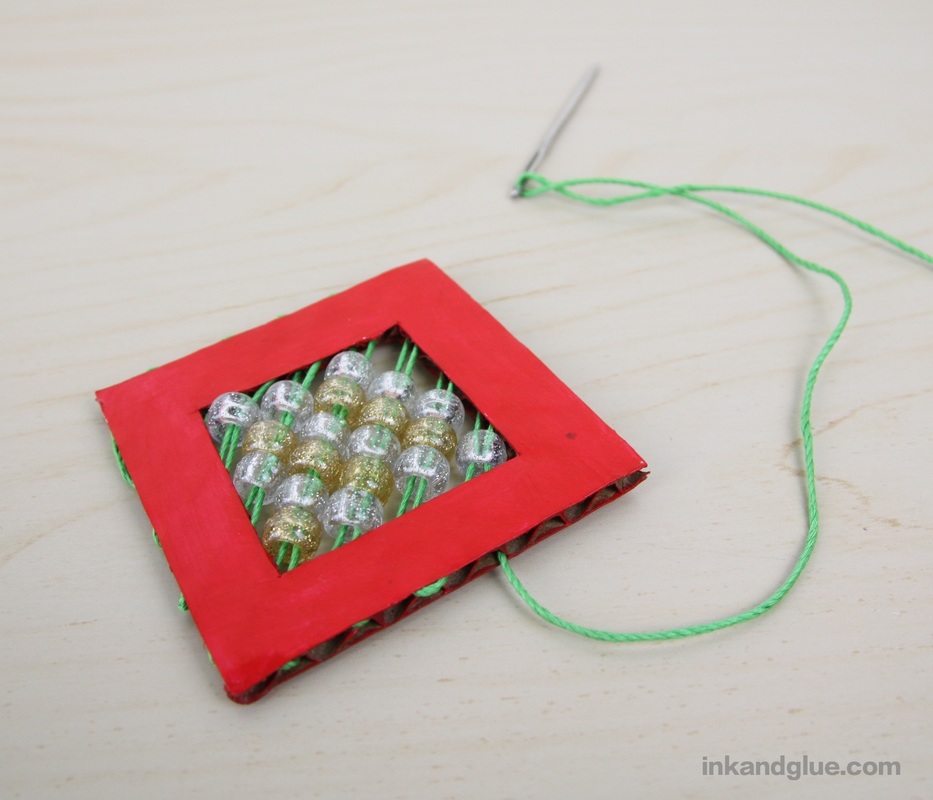 To finish, make a loop around a channel near the corner, knot it, and cut the excess cord. Tuck the end of the knot into the channel, and smoosh a bit of tacky glue inside. Tie on a loop for hanging, and you're done! 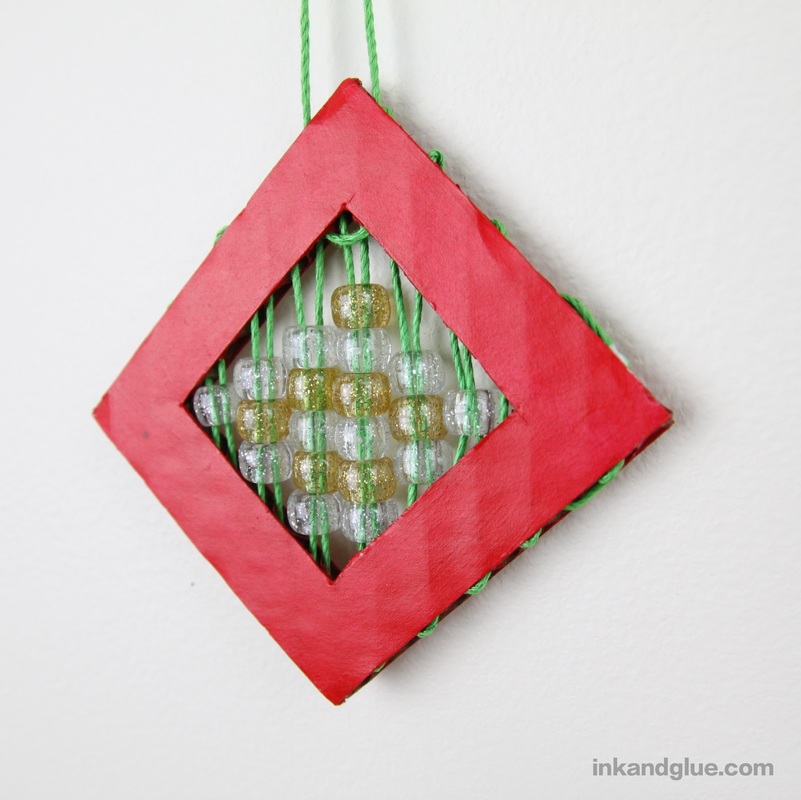 Now for the woven white oval. Thread a yard needle with about 3 feet of yarn, and knot the end. Pass the needle through a channel near an end of the shape, pulling through the yarn until the knot is a couple of inches from the cardboard. Dab some glue on the knot, and pull it into the channel. Let the glue dry (or keep going, but try to not dislodge the knot). 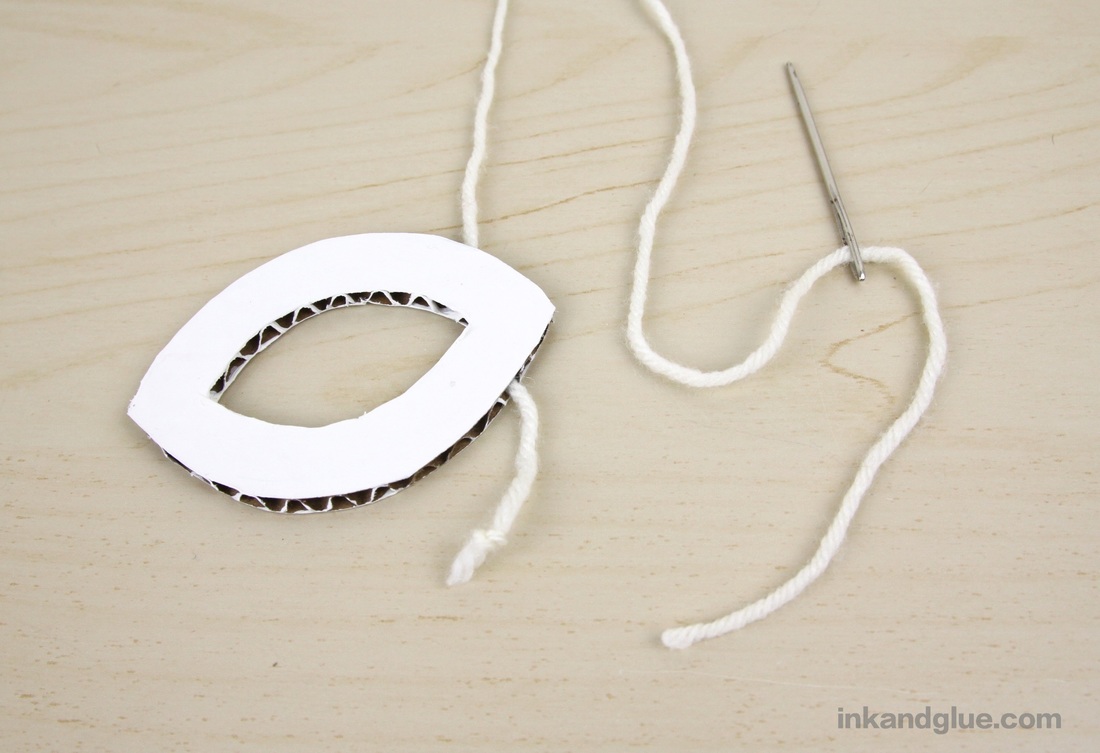 Pass the needle back and forth through the channels until the center is covered.
Tie a knot in the yarn an inch or so from the cardboard. Again, dab glue on the knot, and pull the yarn through a channel so the knot is hidden inside. Trim the excess yarn.
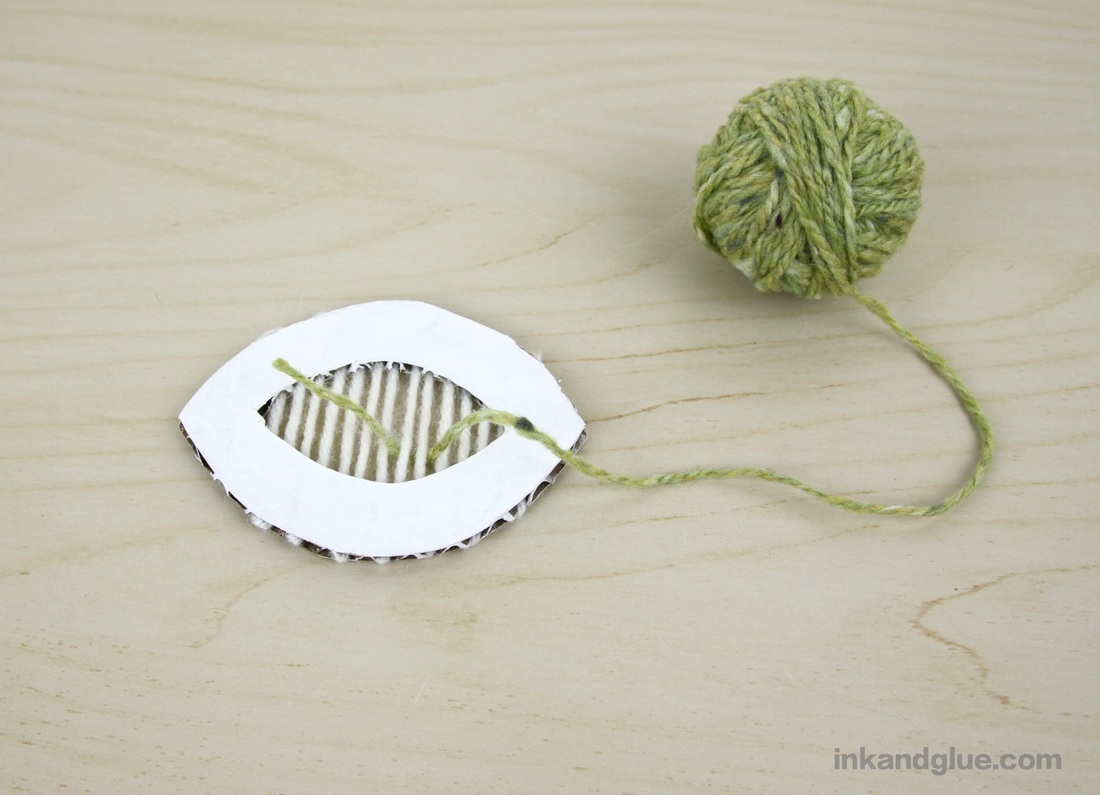
Now, you could stop right here, or embellish what you have in all sorts of ways: paint the cardboard, glue or tie fabric scraps to the yarn, glue on some beads or sequins. I decided to try a simple knotted design for a rustic and natural look. Slip yarn under two of the strands on the ornament, then double knot it, essentially tying the two strands together. Trim the yarn ends very close to the knot.
Add more knots to pairs of strands. I alternated which strands I tied together, which ended up giving me a fishnet pattern. Note, you can slide the knots up and down on the yarn strands, which makes slipping the tying-yarn into the ornament easier. 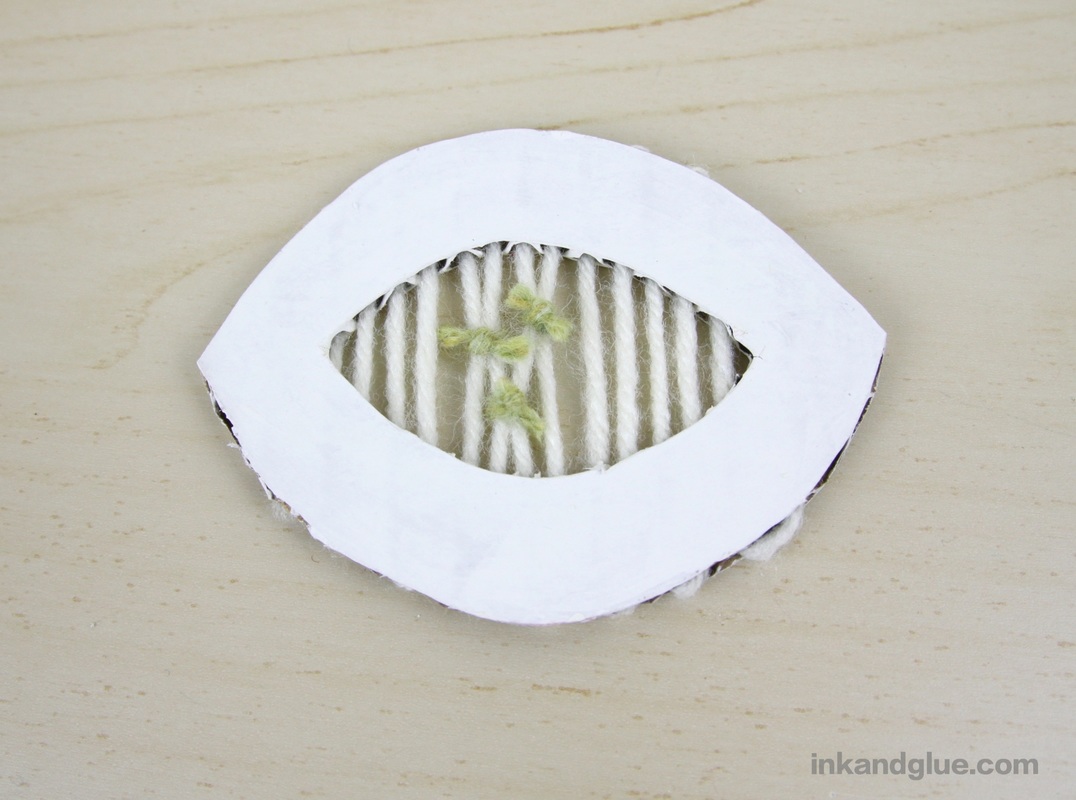 When I had tied to my satisfaction, I used the yarn needle to poke a hole at the top of the cardboard and thread a piece of yarn through it, so I could tie it into a loop for hanging. Here's how it looks, knotty-side up, all nobbly and wooly: 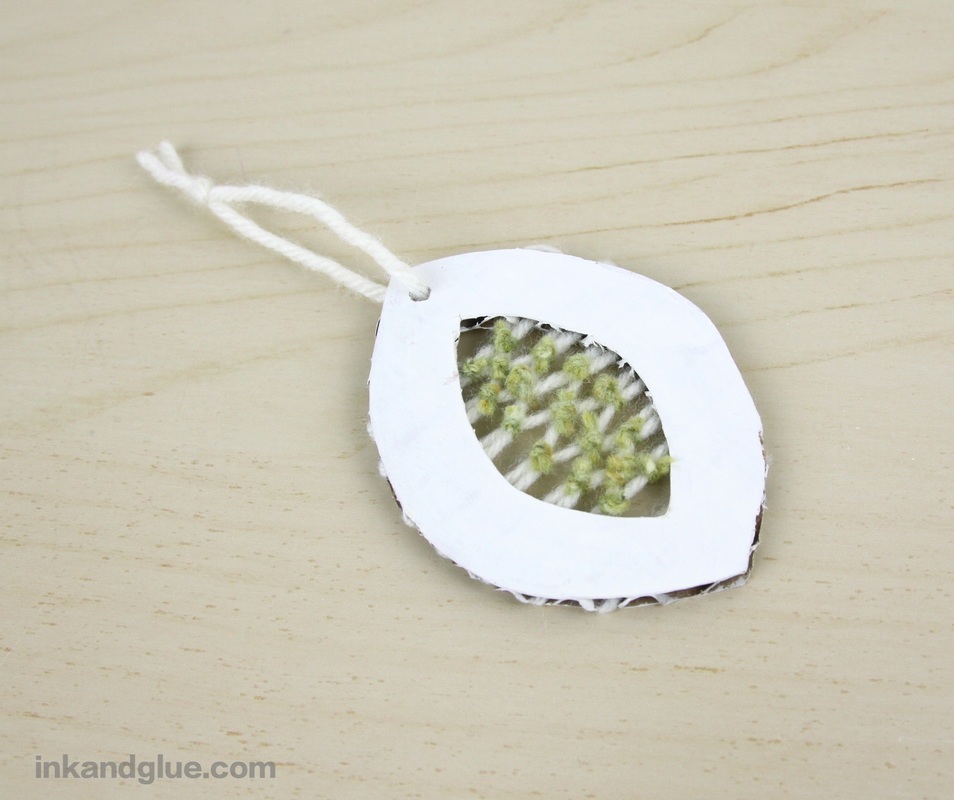 And here's the other side, which looks smoother and neater.  I hope I've inspired you to play with cardboard in a new way!
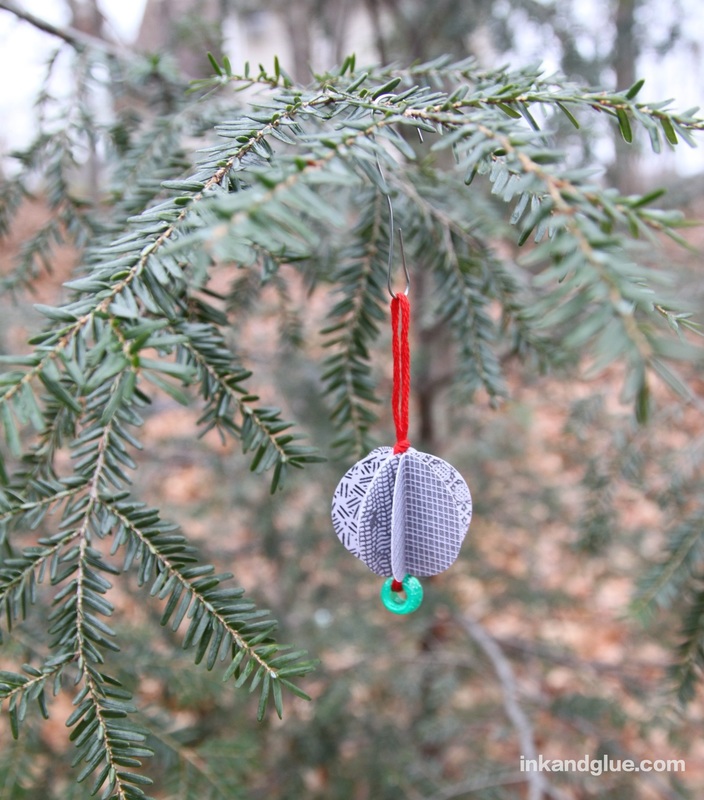
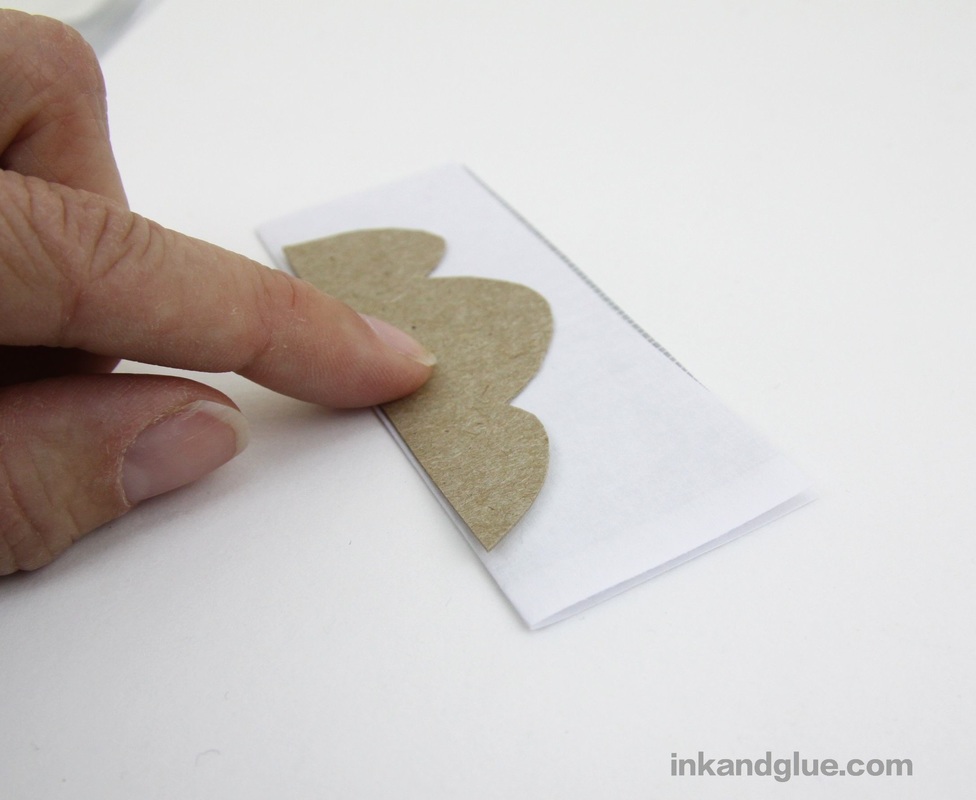
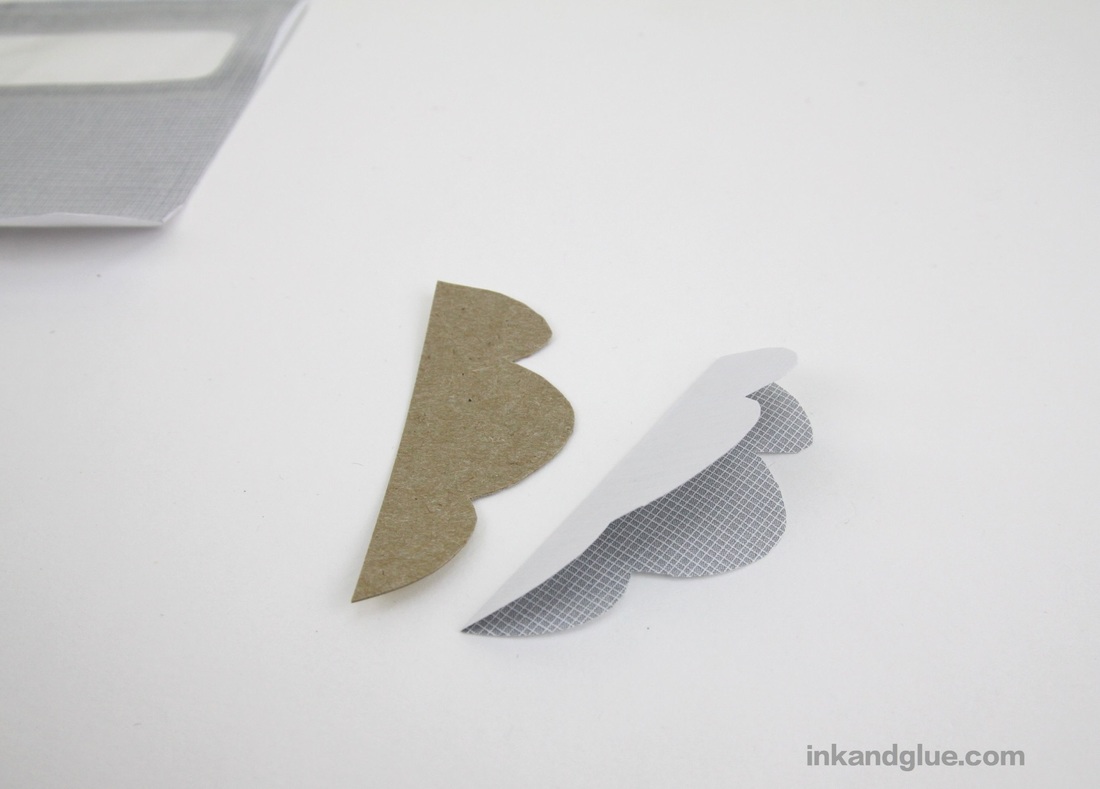
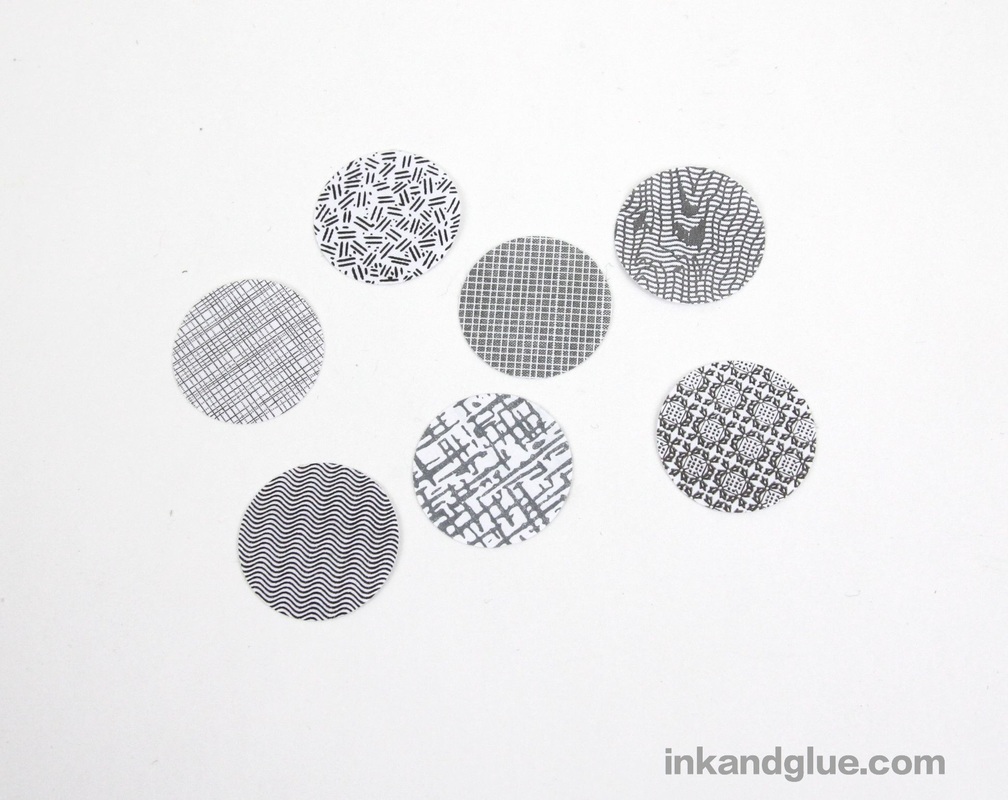
xo 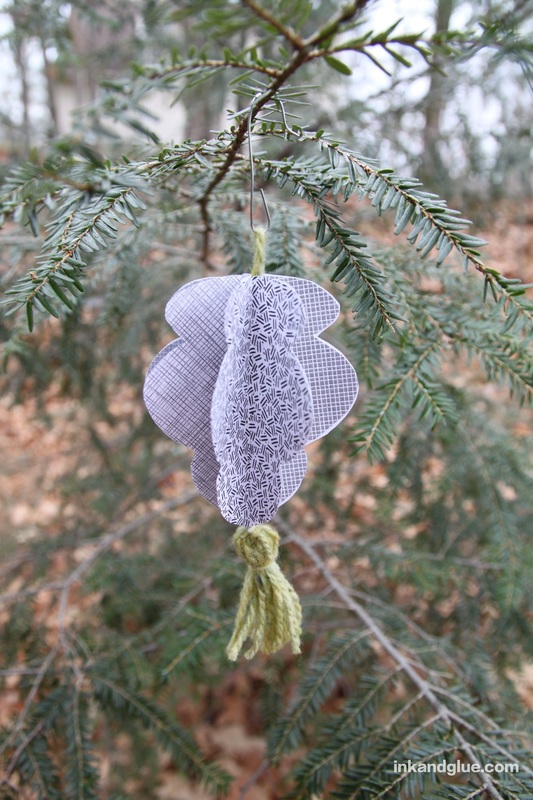 This easy-to-make paper ornament is made solely from cut-up security envelopes (and a bit of leftover yarn I had on hand). I always love a craft made with free materials, but never more than around the holidays, when everything around you is shouting BUY BUY BUY. You can make this ornament with any paper, but I like the treasure-hunt aspect of collecting these hidden patterned envelopes. I'd say at least 50% of the mail I get are bills and financial statements of one kind or another, so it didn't take me long to accumulate this stack.  Make a template by cutting out a shape with one straight edge from a scrap of cereal box cardboard. I went with a three-lobed, free-form shape. Alternate shape ideas: A triangle, a spiky star, an oval, a circle ... (Scroll to the end of this post to see a version made with a circle punch!) 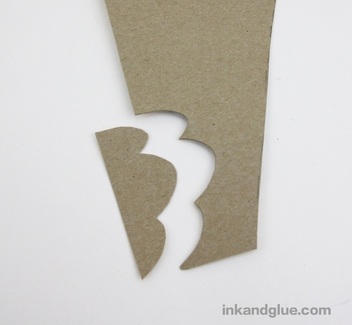 Next, cut open the envelopes, and cut squares from them (I used 7) that are as big as twice the size of your template. Fold a square in half, with the pattern on the inside. Lay the template on top, with its straight edge aligned with the fold. Trace it lightly in pencil, and cut out the shape.
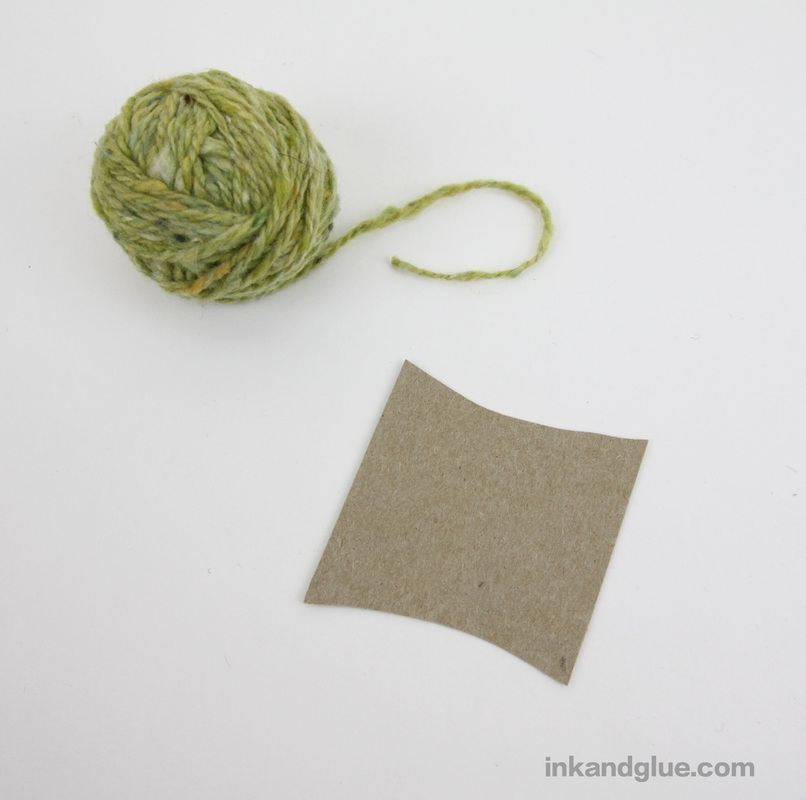
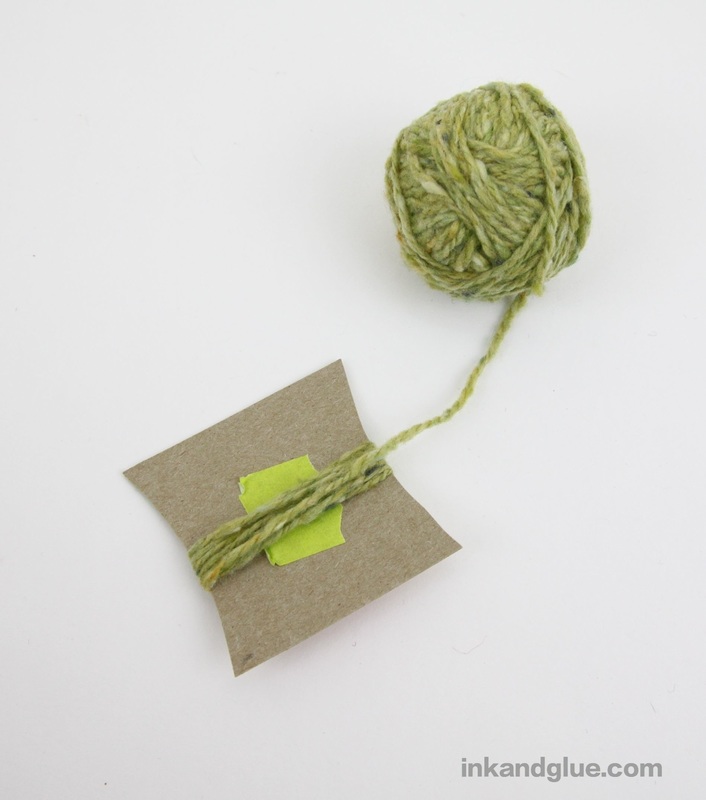
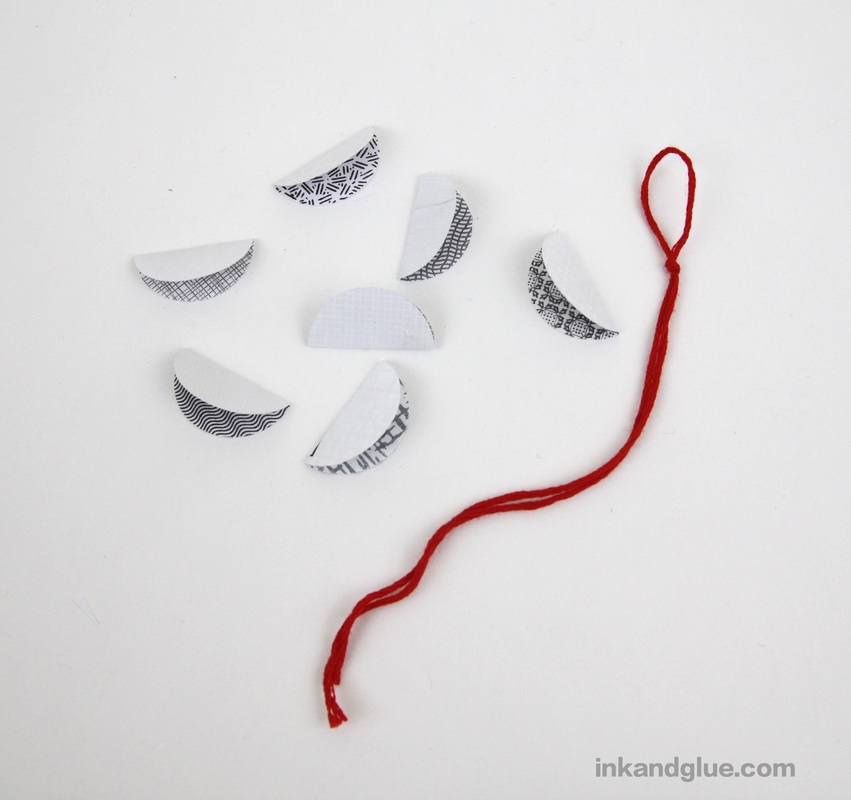
Repeat with the rest of your envelope squares. Piled up, they'll look something like this: 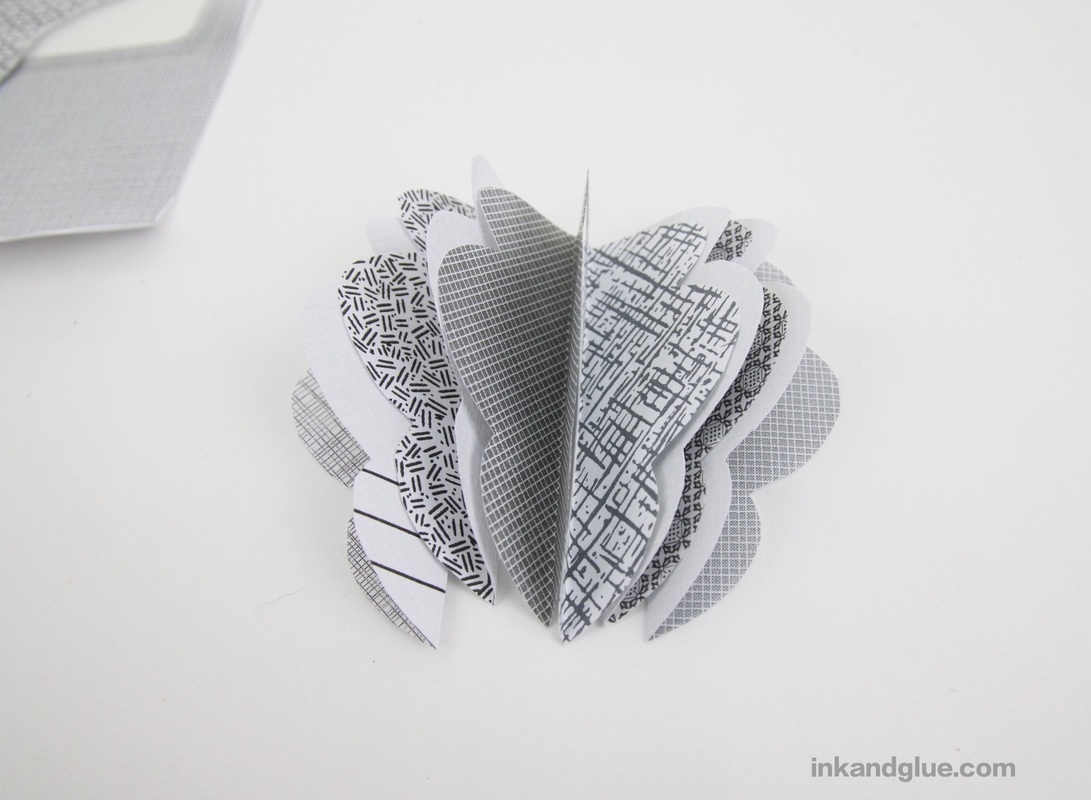 Next, make the tassel. It's likely there are many other ways to make a tassel, but this is what I do. From cereal box cardboard, cut a pinched square shape that's about as tall as you'd like your finished tassel to be. Tape one end of a ball of yarn to the shape, and wind the yarn around several times. Cut the wound-up yarn free from its ball.
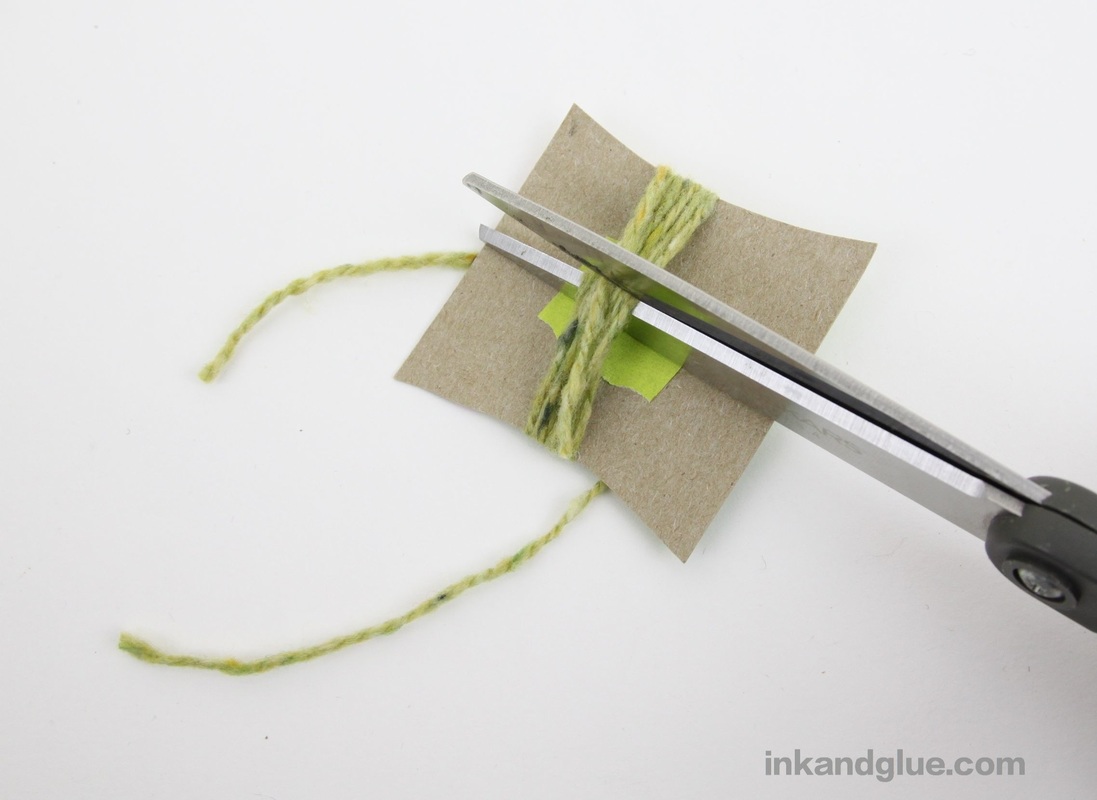
Flip over the card, and tie a long piece of yarn around the center of the gathered yarn. Flip over the card again, and cut through the gathered yarn.
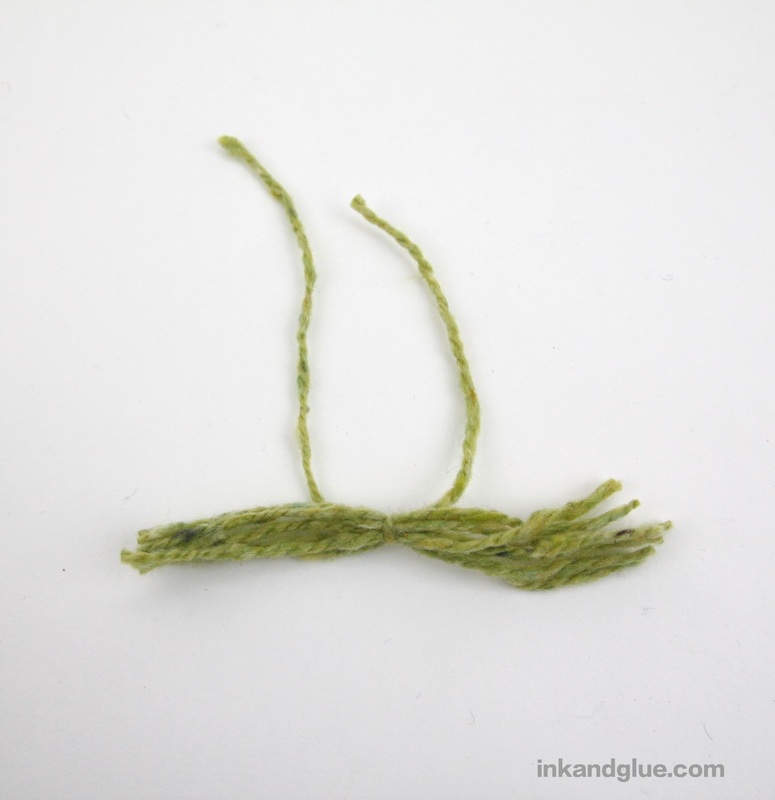
It'll look like this (below, left), and when you smooth the cut sections together, like this (below, right).
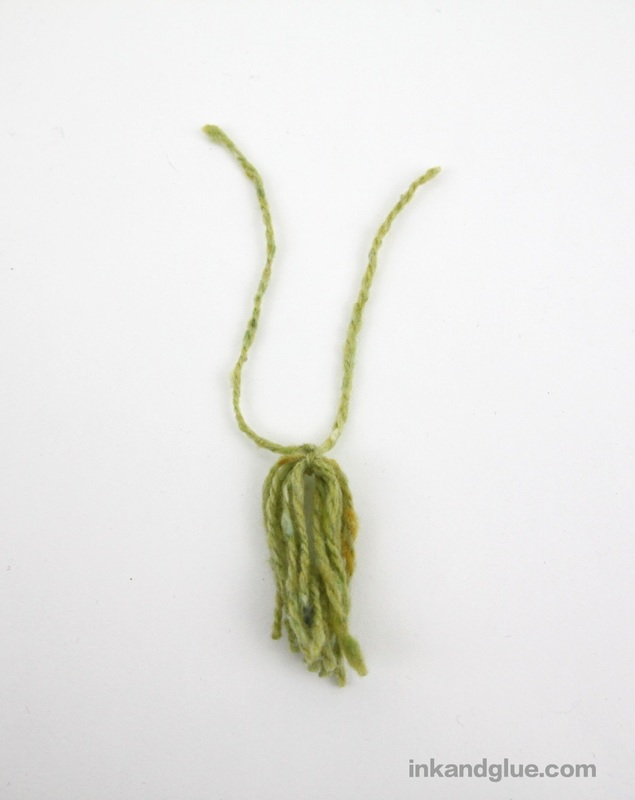
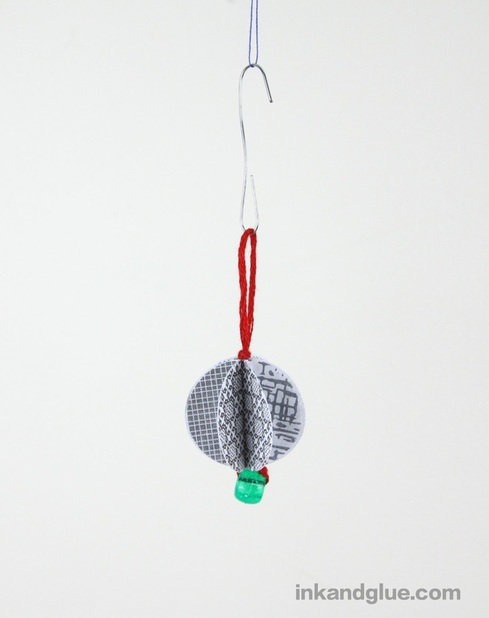
Cut another few-inch-long length of yarn, and tie it about a half-inch from the top of the folded bundle. 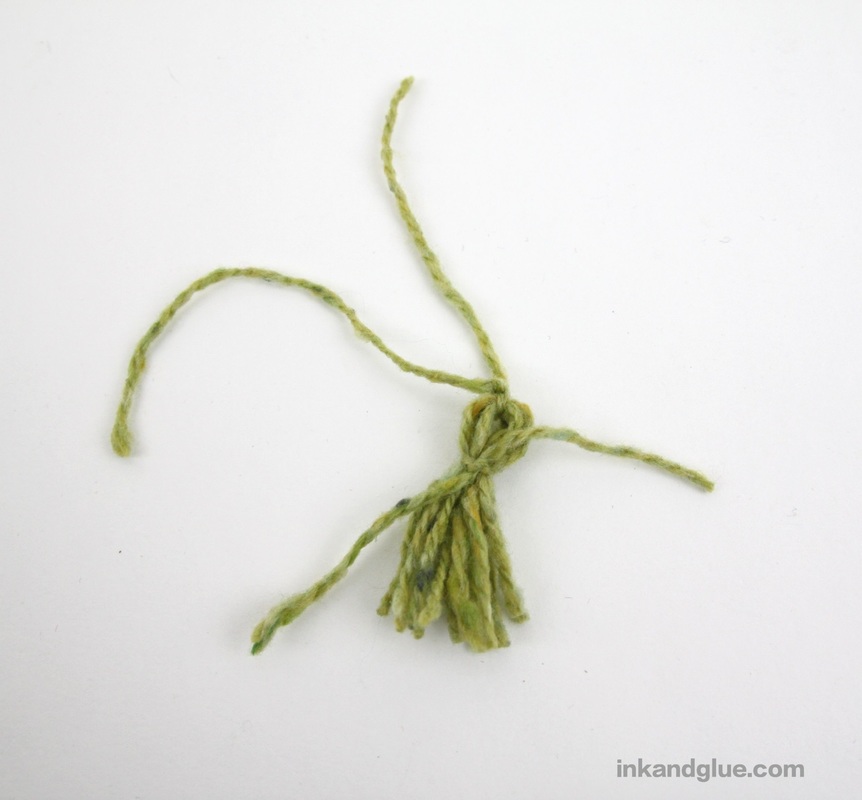 One of the ends of the piece you just tied can become part of the hanging-down section of the tassel. Tuck the other end through the loop above, then trim it; it'll stay hidden. 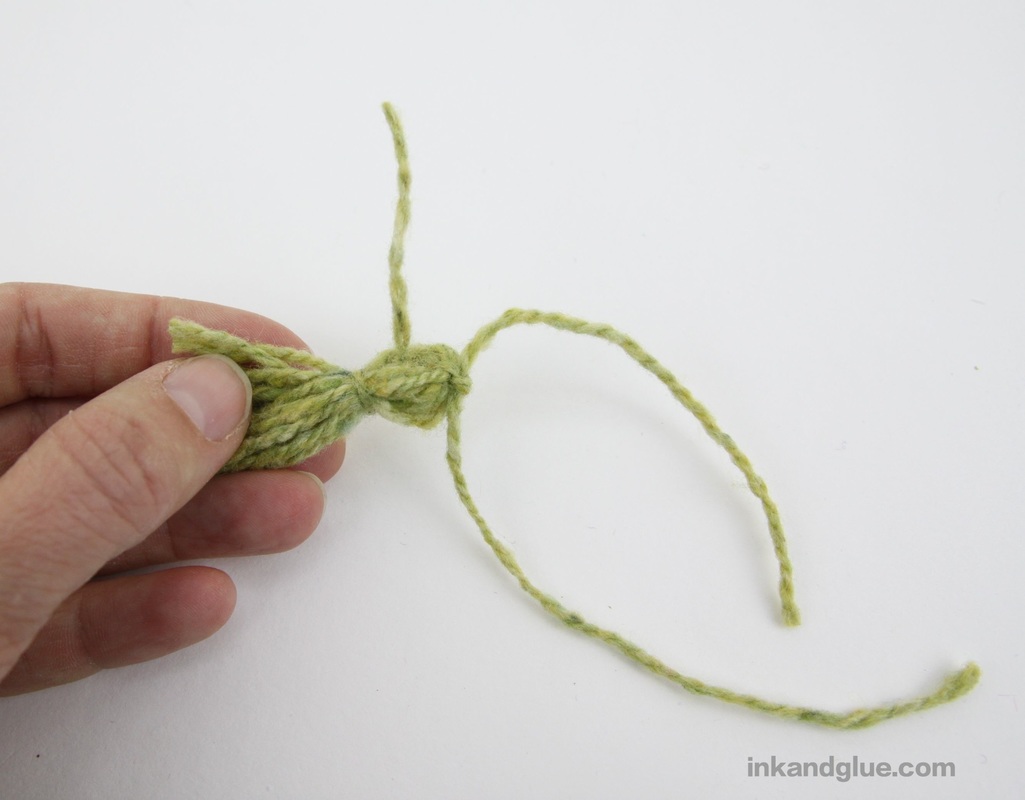 Now, assembly! Back to your folded envelope pieces, spread glue stick over one side of one folded piece, and align another folded piece on top. Continue until all of your pieces are glued and stacked. Tie a hanging loop into one end of your tassel-bundle-tying yarn piece, leaving just enough space between the loop and the tassel to fit the length of the papers' folded edge. Trim the other end of the yarn piece close to the knot at the top of the tassel. 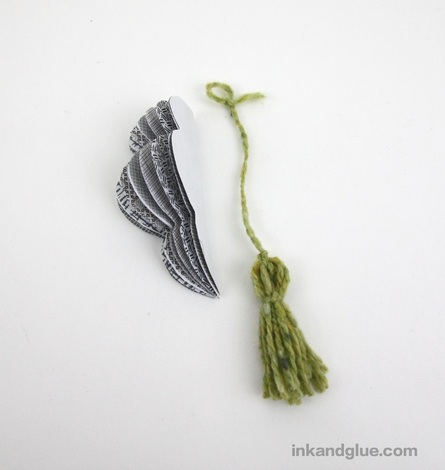 Apply glue stick to the top of the stack of folded papers, then fan out the sections so the glue-y side meets the not-gluey side, with the looped piece of yarn captured in the center.  That's it! Add an ornament hanger, and admire your thrifty and beautiful work. 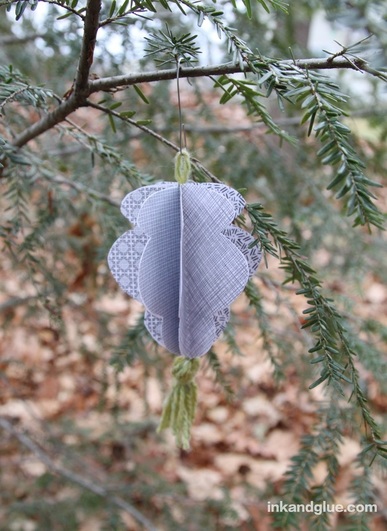 Here's a different angle, showing how the top should look, with the yarn loop in the center of all of those folds. 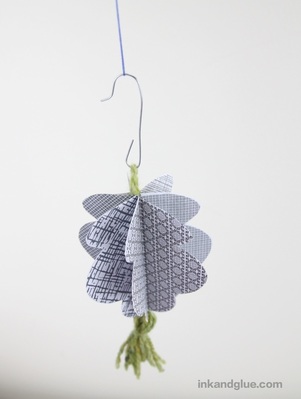 Want an even simpler ornament? Instead of cutting out pieces using a template, use a circle hole punch to make your shapes. My hole punch makes inch-wide circles, so they're pretty tiny; 1.5- or 2-inch circles would be better, I think. Fold each circle in half, with the pattern on the inside.
Instead of making a tassel, I just cut a length of embroidery floss, folded it in half, and tied it into a loop. Assembly is the same as above, with the floss captured in the center as the final two sides are joined with glue stick. 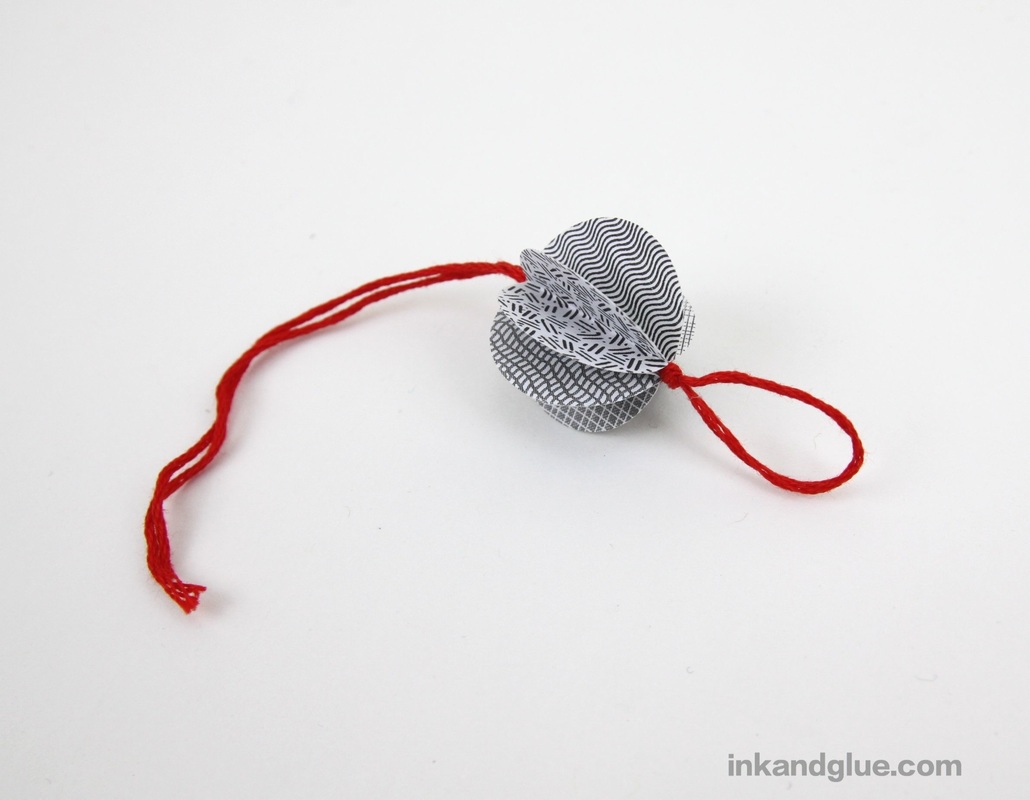
 Happy holiday making! xo
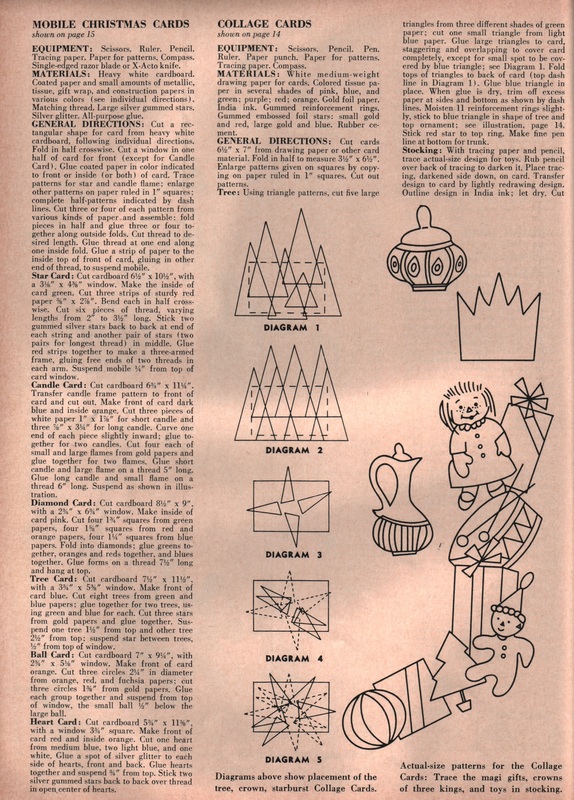
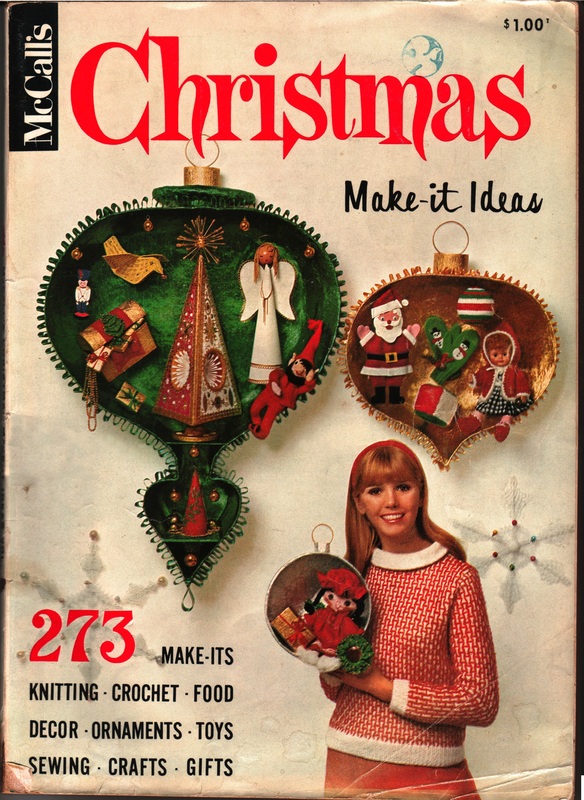 Guys, I couldn't help myself; I went back to the place (the wonderful, inspiring Knack) where I got my McCall's crafts annual magazine and bought several more, including this issue from 1967. I find the ideas in these old craft mags frequently inspiring, often strange, and occasionally disturbing. For an example of the latter, see this page of children's ski masks to knit, which includes a gently-racist Indian option (though the little girl's one is more nightmare-inducing). 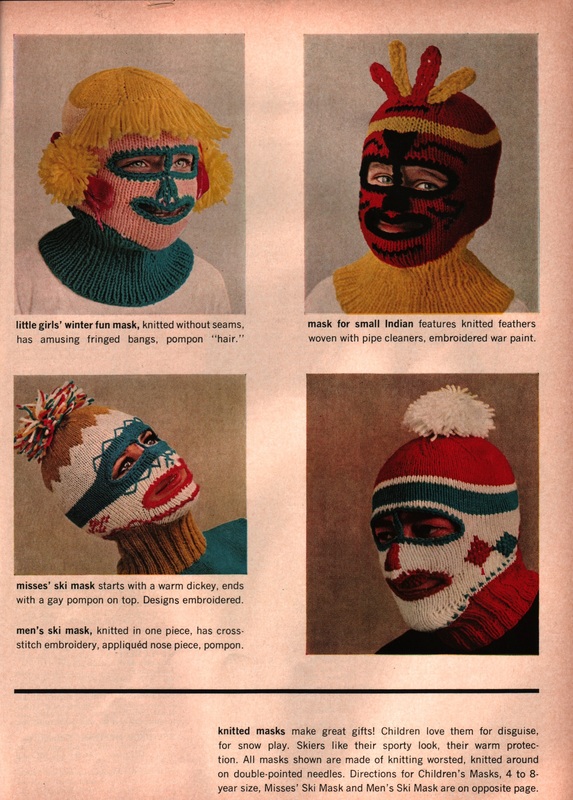 Anyway, today I wanted to share a couple of pages of truly wonderful Christmas/holiday cards. Some of them are reminiscent of the Tiny Fawn artwork I linked to yesterday! 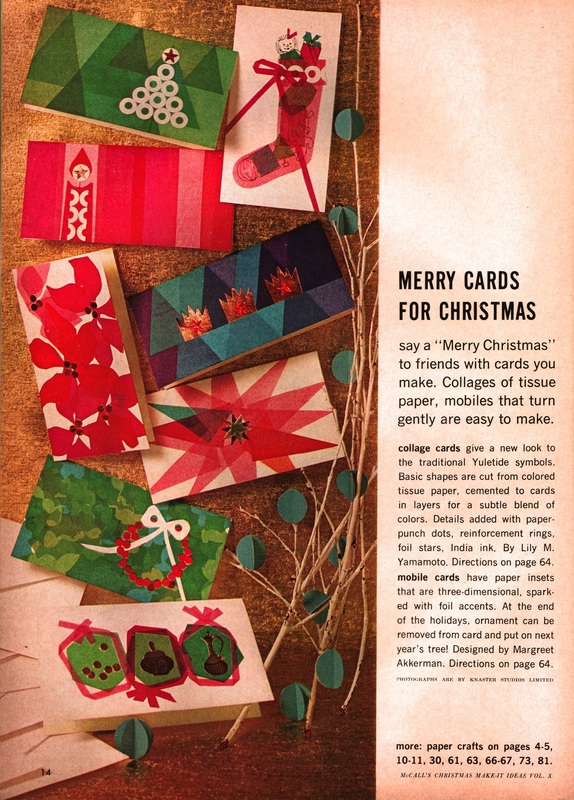 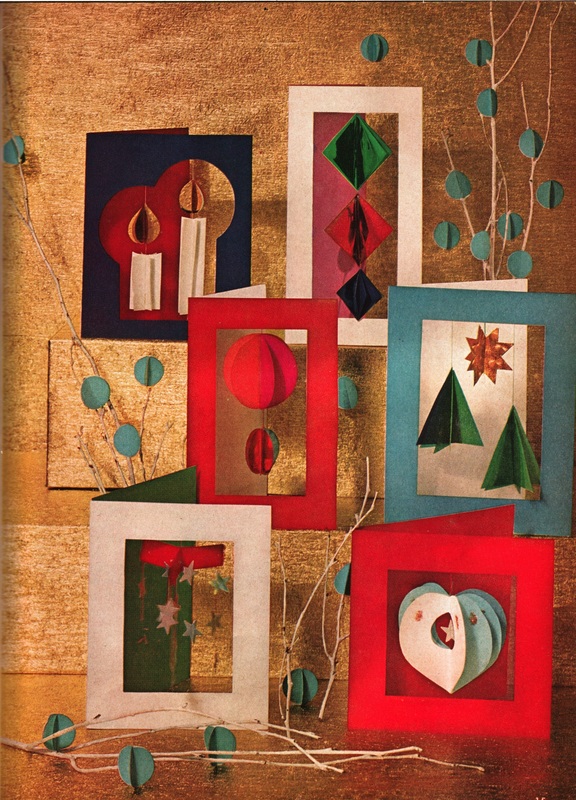 And, the directions, which I believe you can enlarge by clicking on 'em.
Hope you get inspired to try one or two of these, with or without kids!
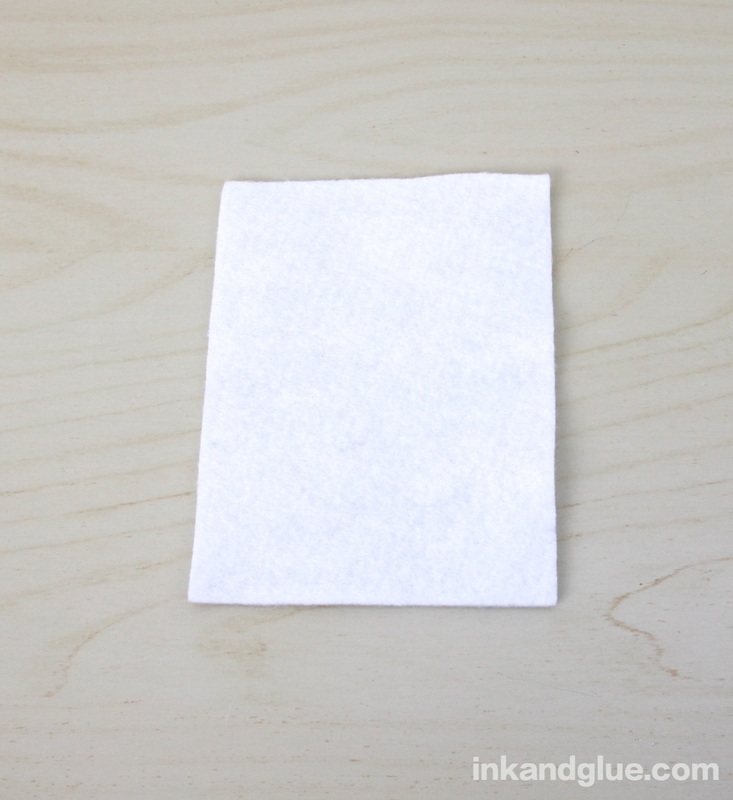
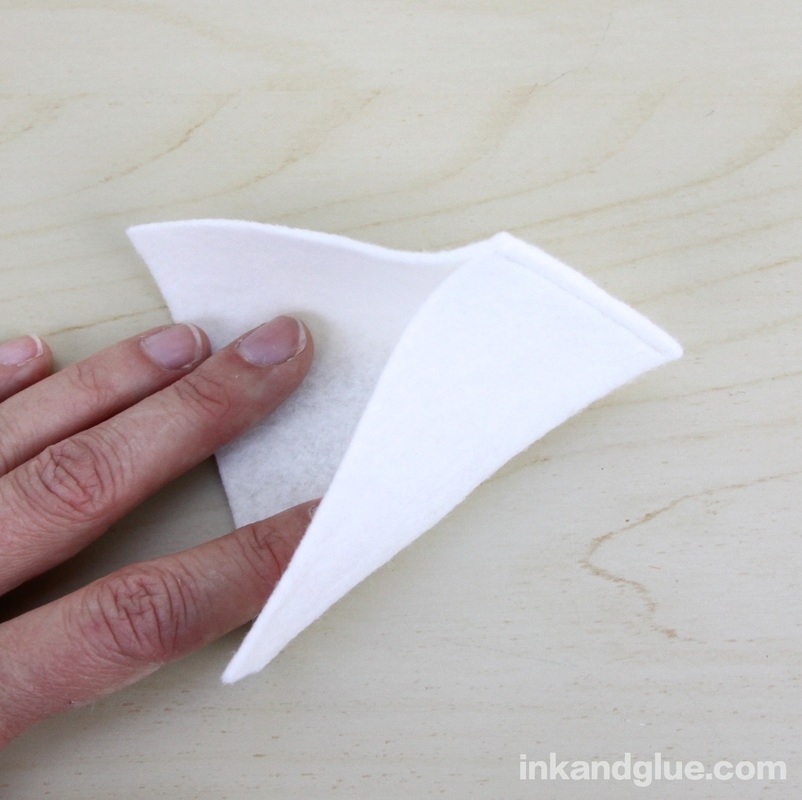
xo 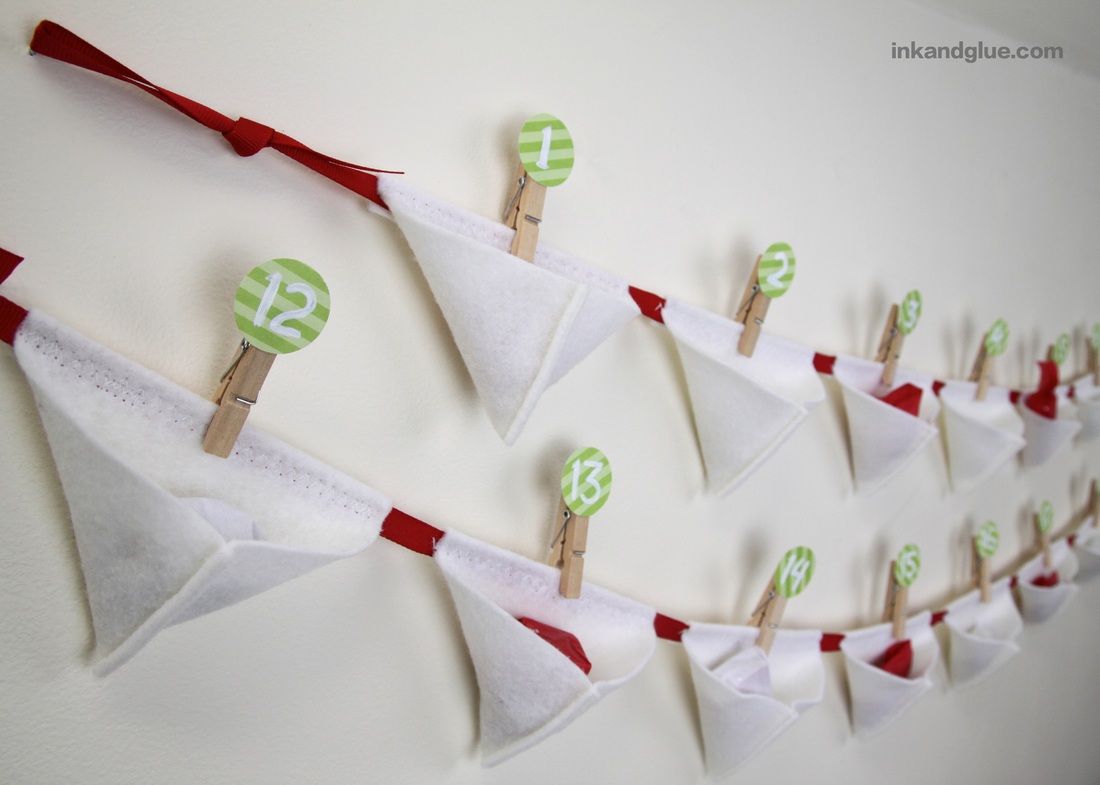 I truly love giving gifts. Advent calendars are extra fun for me because I can fill them with whatever silly, cute things I think the recipient would like; no wish-lists need to be checked, no relatives will be conferred with to make sure we didn't both get a kid the same thing. Everything given is tiny and cheap and purely for fun. This advent calendar idea is the result of combining a few of my favorite things: wool-blend felt, mini clothespins, garlands, and my new circle punch. Though it takes a couple of hours to create, you can use it year after year. If you be sure to use colors other than just red and green, and switch out the clothespinned numbers for letters, you can even use it for a birthday or other celebration. Here's how it's made. Start by cutting 24 rectangles (mine are 3.5 by 4.5 inches) out of felt. I used a rotary cutter and a quilting ruler, but it's not difficult to use scissors, especially if you make a paper template to follow (so you don't need to mark the felt).  Next, take a rectangle and fold it in half, long-ways. Pin it, then sew one side closed, with the seam as close to the edge as you can comfortably go.
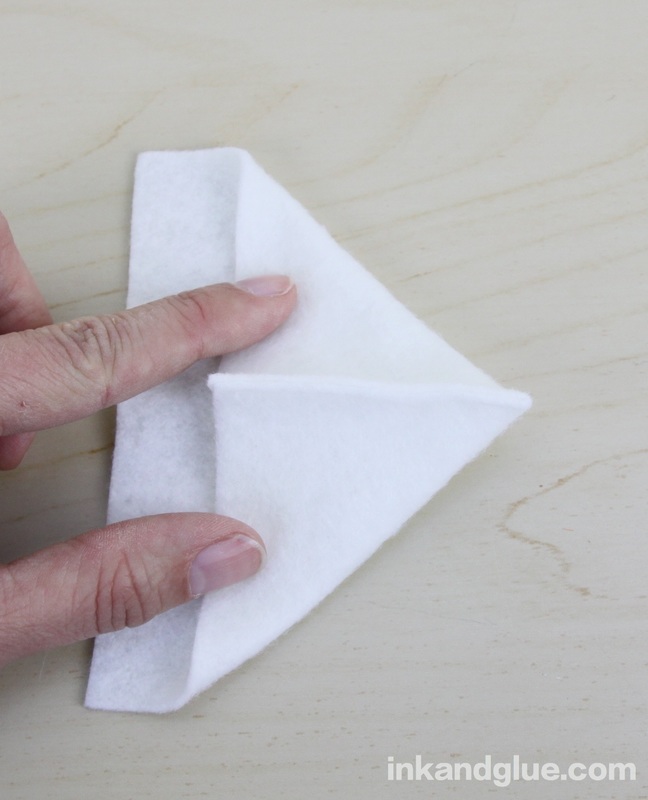
Once all 24 of the pieces are sewn on one end, you'll be attaching them to a length of grosgrain ribbon. Open up a pocket like so:
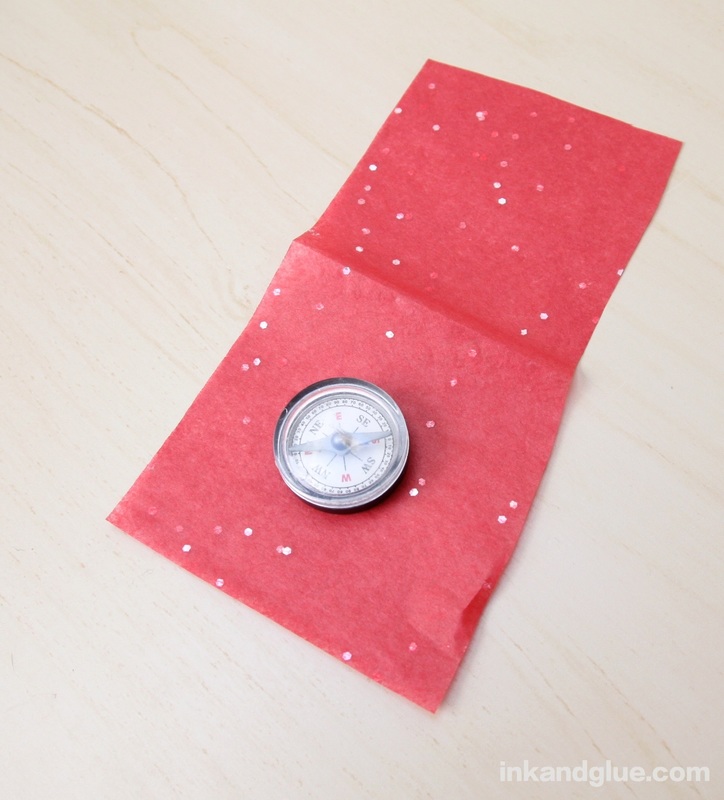
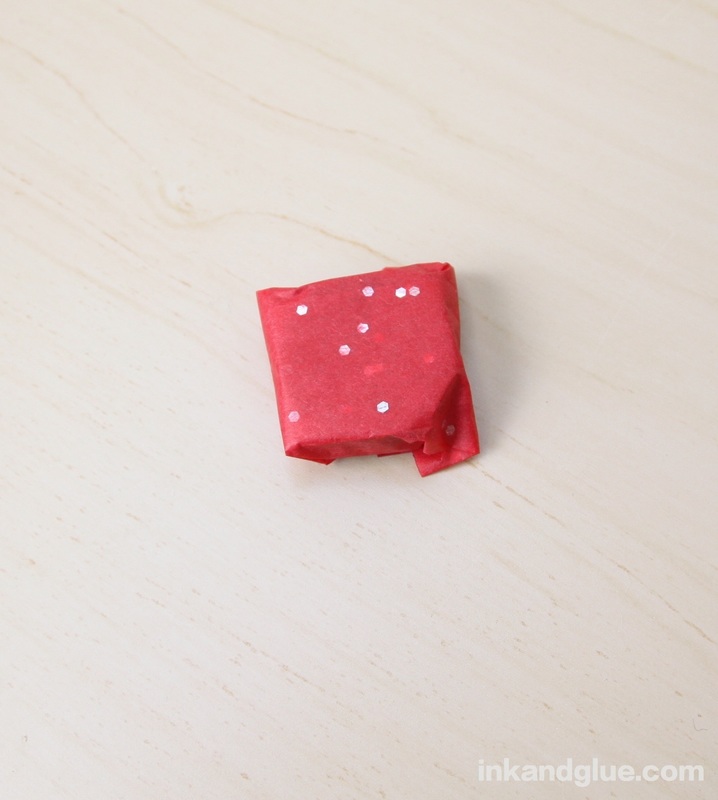
At this point, plot out where on your walls you'll be hanging your advent. How wide of a space do you have to work with? Divvy up the pockets among two, three, or four separate lengths of ribbon, accordingly. About a foot from the end of a ribbon piece, fold the long, straight edge of the pocket over the ribbon, encasing it. Pin it in place. Use a zig-zag stitch to secure the felt to the ribbon.  Add another pocket about an inch from the first, and repeat with the pinning and the sewing. I ended up pinning and then sewing three or four pockets at a time. 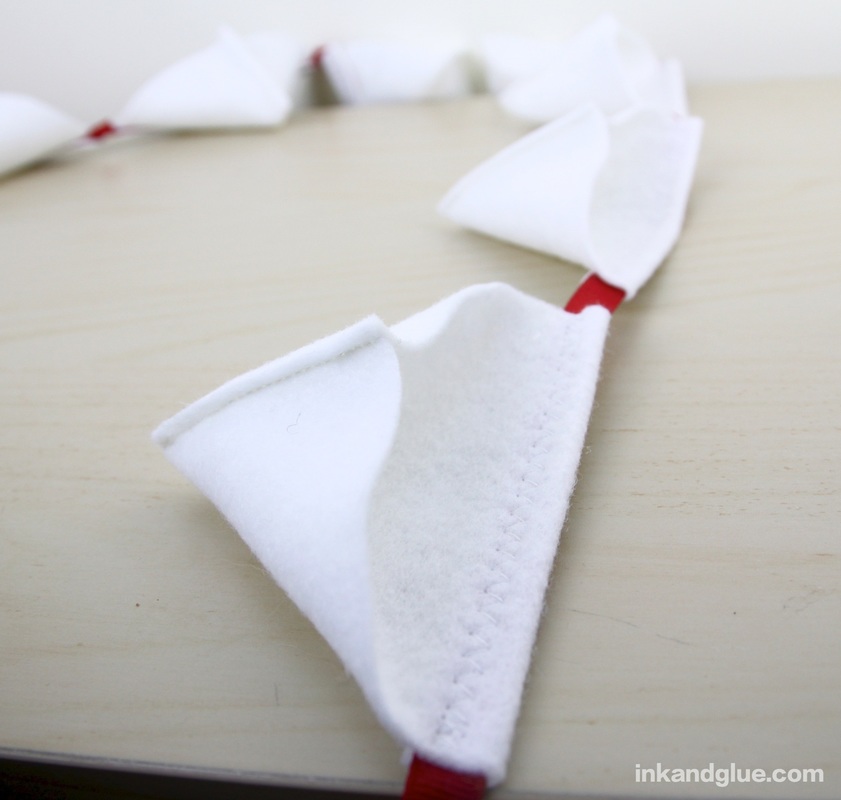 Make the numbers 1 through 24 any way you like. I used a one-inch hole punch to make disks from some green scrapbooking paper, and I painted on the numbers with white acrylic paint. Glue your numbers, however you depict them, to mini wood clothespins. [Note: link goes to Amazon; I get a few cents if you make a purchase after clicking. The items I've linked to are the exact things I used.]  Tie simple loops on each end of the ribbons, and hang them from nails on the wall. Attach the clothespins to the tops of the pockets. 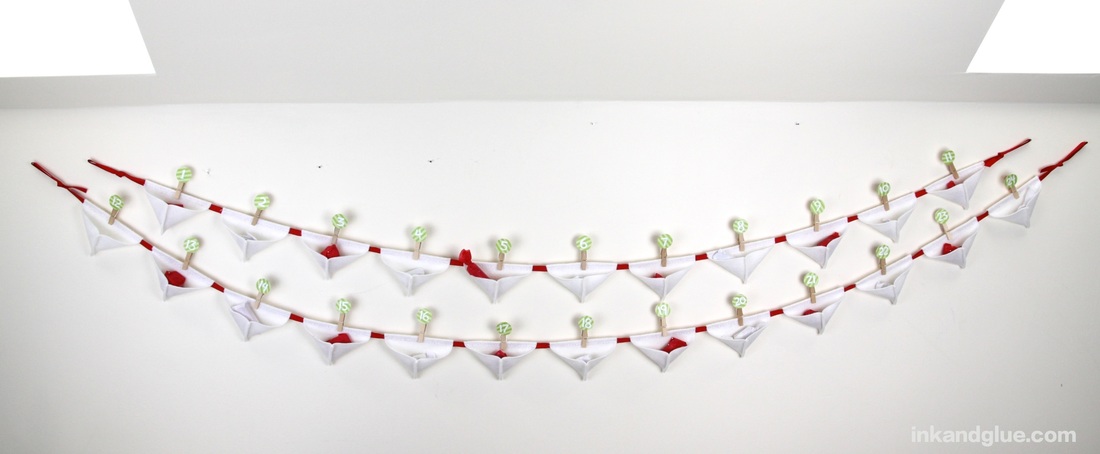 I wrapped a bunch of tiny and inexpensive toys and candies with glitter-infused white and red tissue paper. If you don't want to give more stuff, you can always just write on slips of paper notes of admiration, or jokes, or coupons for favors ("with this coupon, you are entitled to choose the toppings for the next pizza ordered"). I recommend a combo of notes, stuff, and candy, just to keep your kids on their toes.
Happy holiday planning! 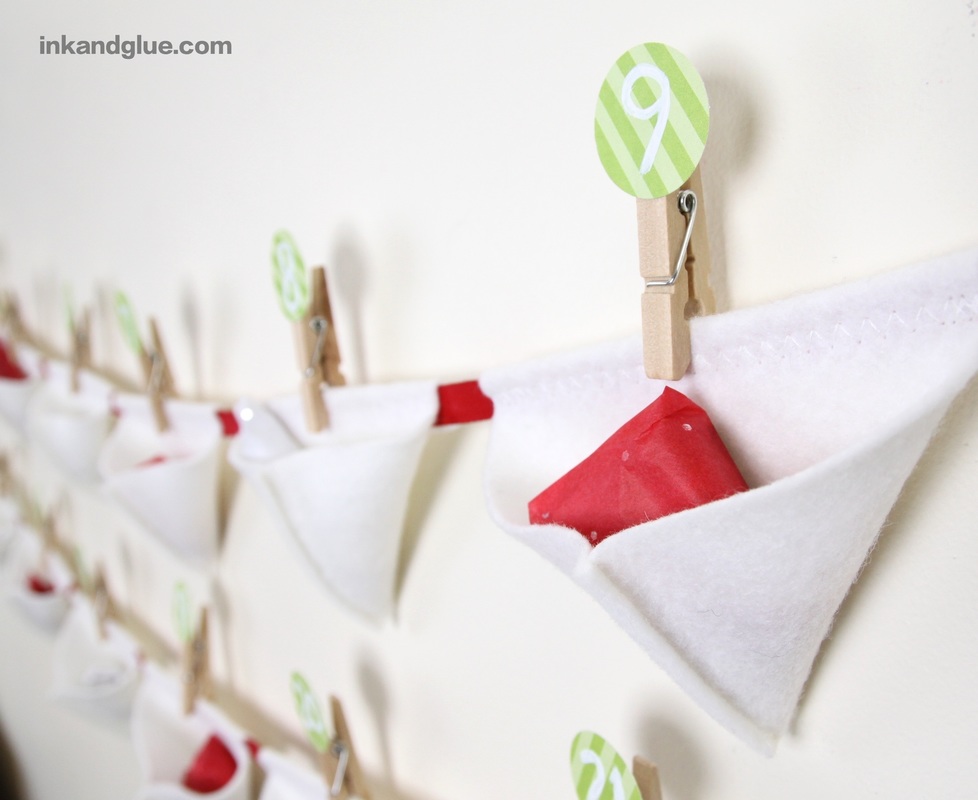 xo.
I am lucky to know some very fabulous and creative people. One of them is my friend Anya, who somehow found time between parenting her son and working as a jeweler's assistant to make this elaborate advent calendar two years ago. It uses a 25-nook typesetter's drawer (sometimes called a printer's tray) as its structure. Each space is covered by a paper square, stamped with a number, and attached to the tray by a tiny glue dot. I like the non-traditional colors and motifs, which give it a happy, playful vibe.  Each day, a new square is removed, and a tiny scene revealed. Here's December first: 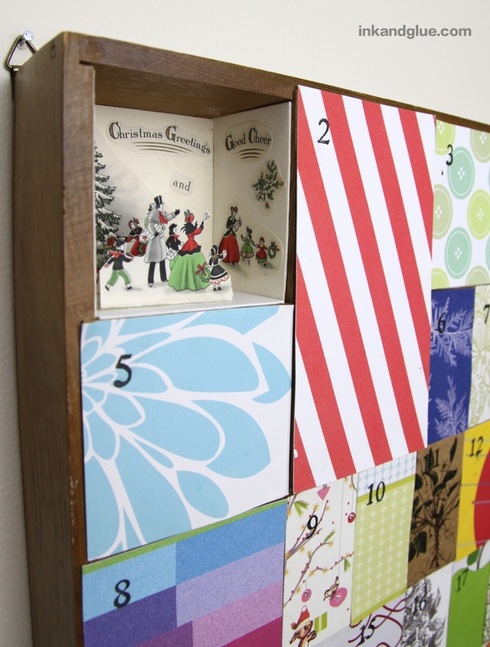 Anya used cut out illustrations from vintage books and cards, along with dollhouse miniatures and other toys she's collected. Many of the scenes have nods to her family's special interests or stories . Anya's favorite bird is the chickadee, who shows up in December third.:  I particularly like the use of a section of wool sweater as a snowy mountain, here: 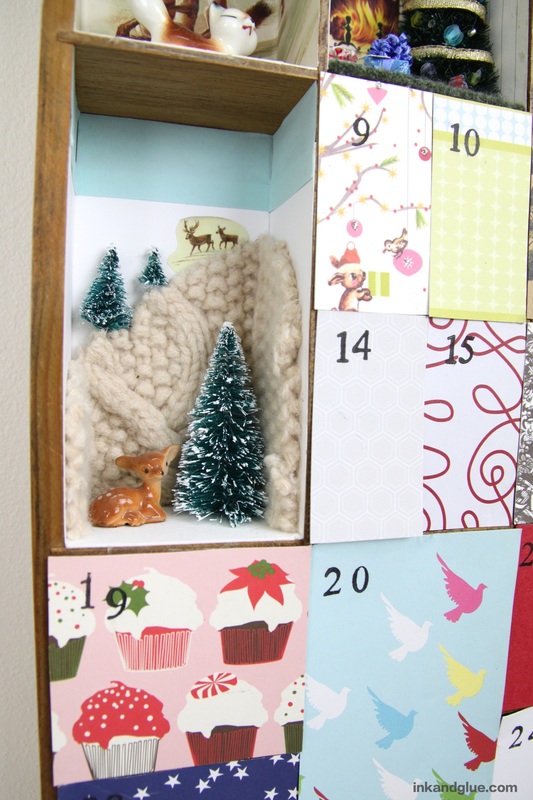 I also like this 8-pack of the teeniest of rooms. 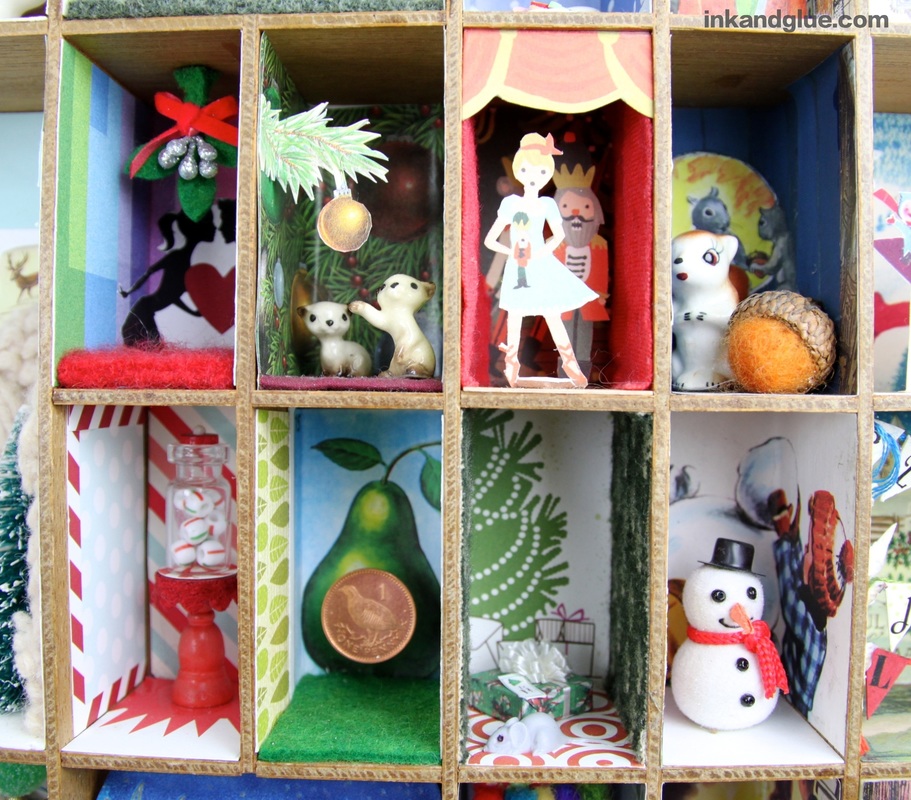 And here, I love the miniature lights framing the house, the milk and cookies left for Santa on a toothpick-legged table, and the stocking, which is an exact replica of her son's full-sized one. 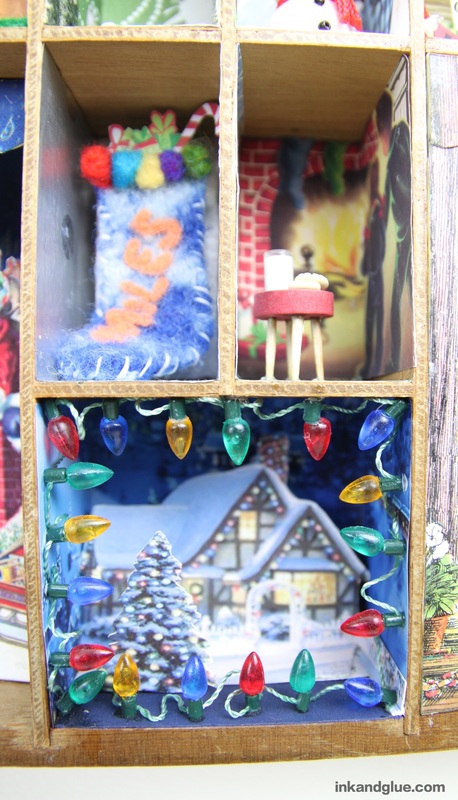 I just adore the whole thing, especially how obviously full of love it is. Which is what the holidays are all about. 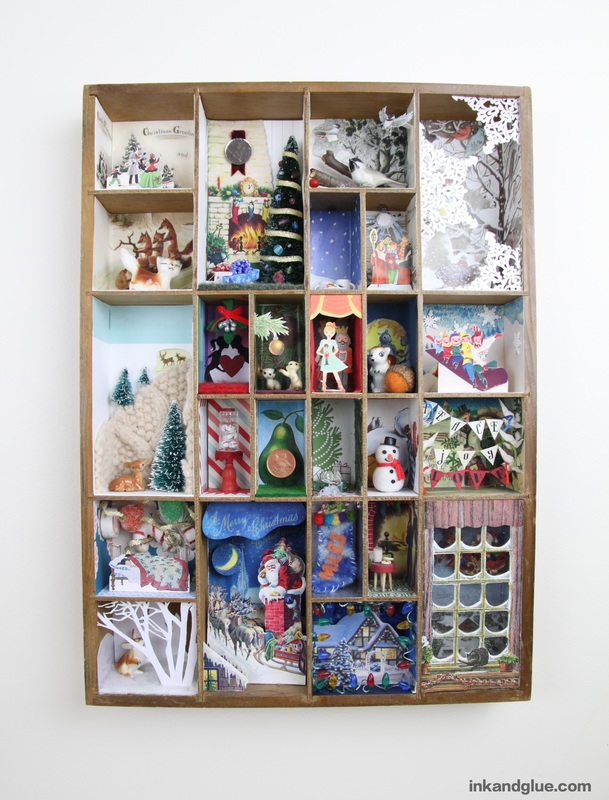 If you are now feeling super inspired to make one for your own family, do a web search for "printers tray" or "typesetter tray" and see what you can find. From what I've seen, eBay has much better prices than Etsy, though Etsy is where Anya found hers; they may have a nicer selection than the 'Bay.
Of course, if you don't want to spend a bunch, you can always build your own multi-cubby display out of paint sticks! Happy sugarplum dreams... xo |
Categories
All
Archives
March 2017
AuthorI'm Debbie Way, an artist and writer who enjoys making things. |


 RSS Feed