|
Because you simply can't have enough Patterns for Better Living. Here are some more gems from the handicrafts section of this 1966 catalog of DIY plans.  I did not know that decoupage was an "ancient art." Also, I am totally into the string art designs, especially the owl and the sun. Those tissue boxes, however... Let's just move on. 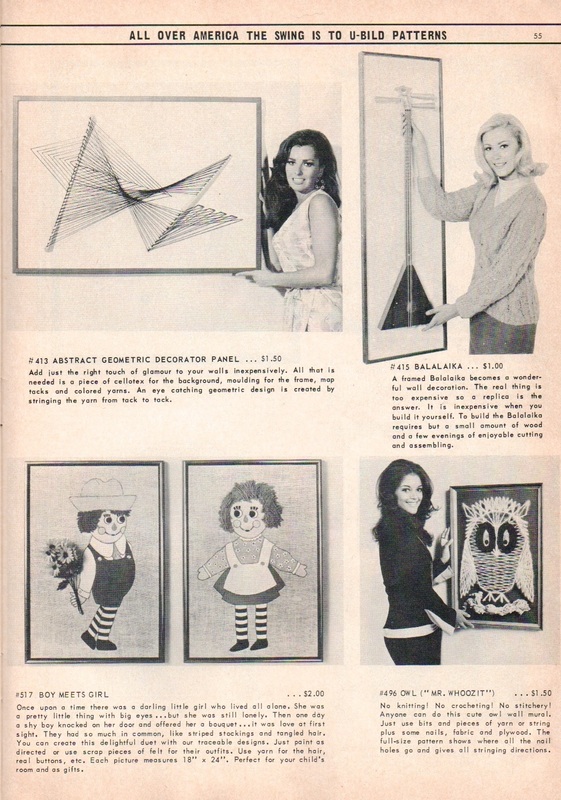 Yarn art! And a replica balalaika!These women are so happy and glamorous! 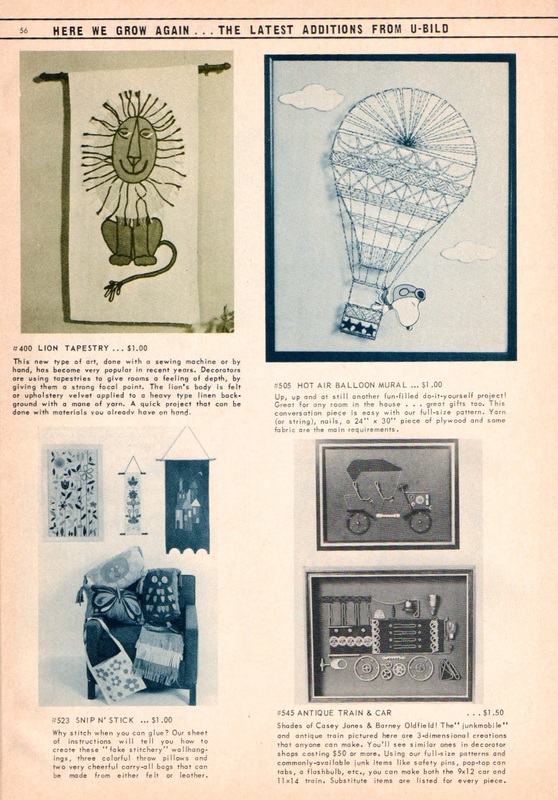 OK, these four I actually like. The "antique train & car" is especially ripe for appropriating for modern use. There are some anachronistic materials issues (pop-top can tabs), but the general idea — assembling flattish junk to make a machine or vehicle — is a fun one. 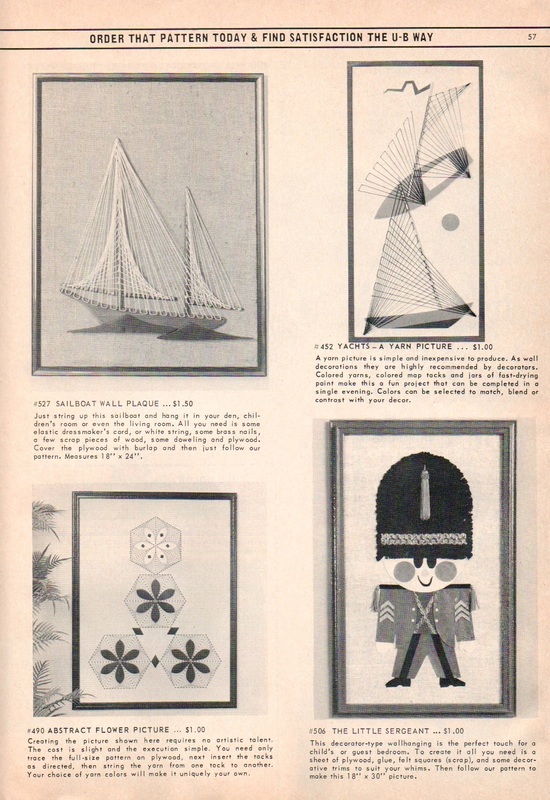 I do like the two sailboat projects. And if you haven't been reading these closely, notice the skyline promo copy at the top of each page. They're quite charming. Also charming? The four bespectacled fellows who own and operate U-Bild:  I want these guys to be my grandpas.
xo! It was definitely hot enough to swim on Saturday, so I took Franklin down to the off-leash park and threw a stick for him. He will wade, but not swim, unless he has an incentive. This trio of shots show him returning with his stick, then doing some shoreline stick assessing, and then some proud stick carrying. 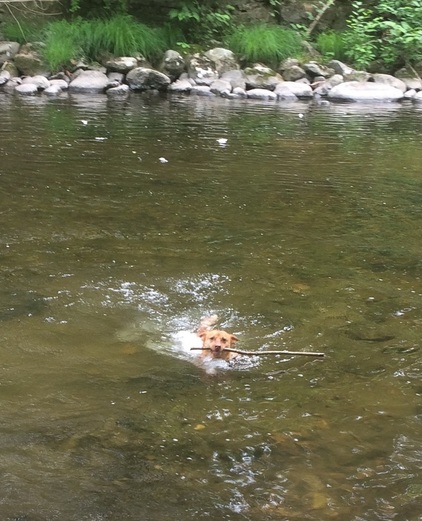 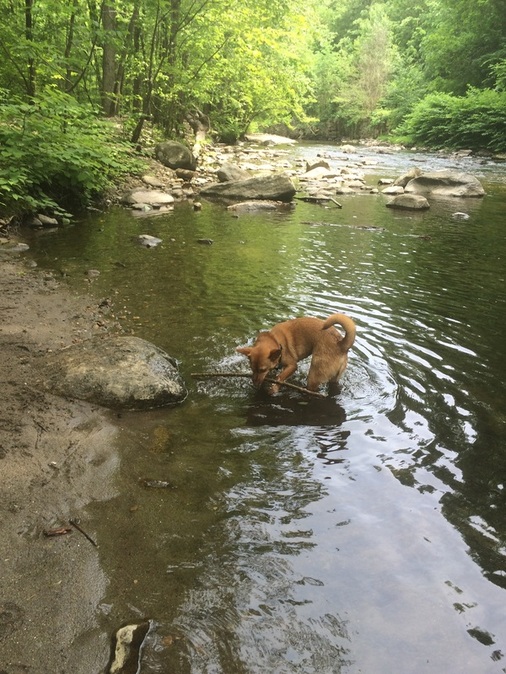 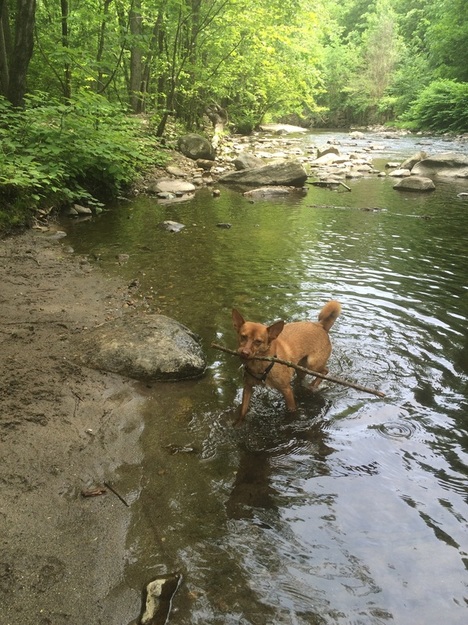 xo!
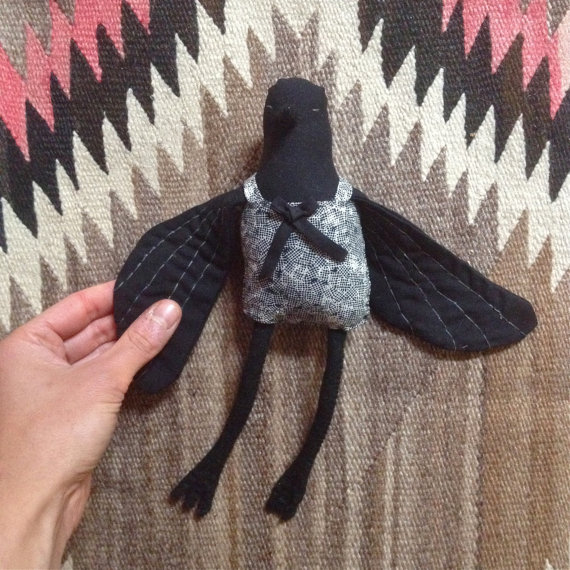
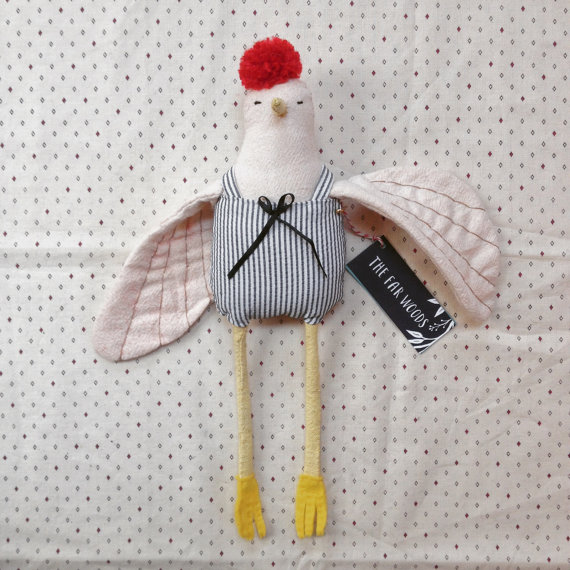
The Far Woods creates printed materials and fabric sculptures with a particularly Pacific Northwest feel. 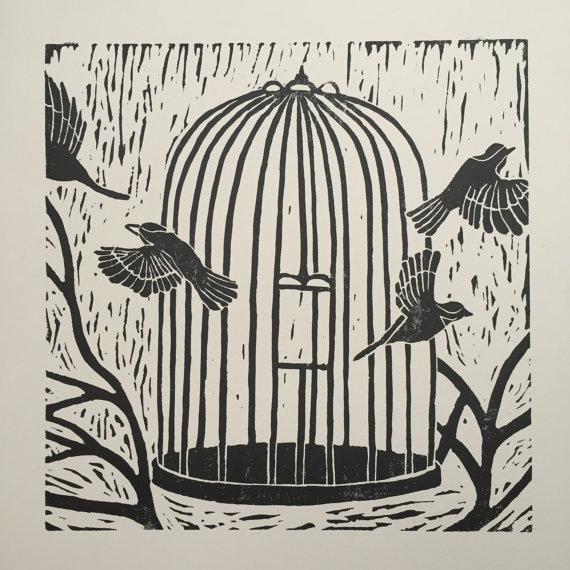 This linocut print above, called Freedom, is a mere $30. Too steep? Try Heart of a Deer, for $10 (click on each image to go to the Etsy page for more info/to purchase):  What first drew me to The Far Woods, however, were their stuffed bird dolls. They are lovely and charming and unique. 
There are other prints, journals, totes, a magical mobile, and more. Go travel to The Far Woods yourself to see!
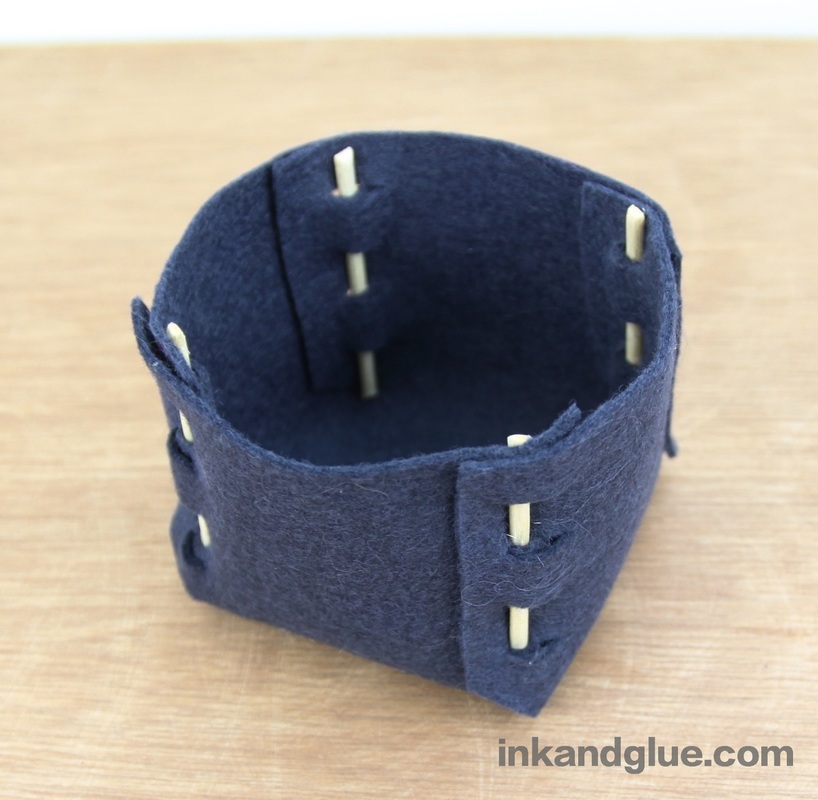
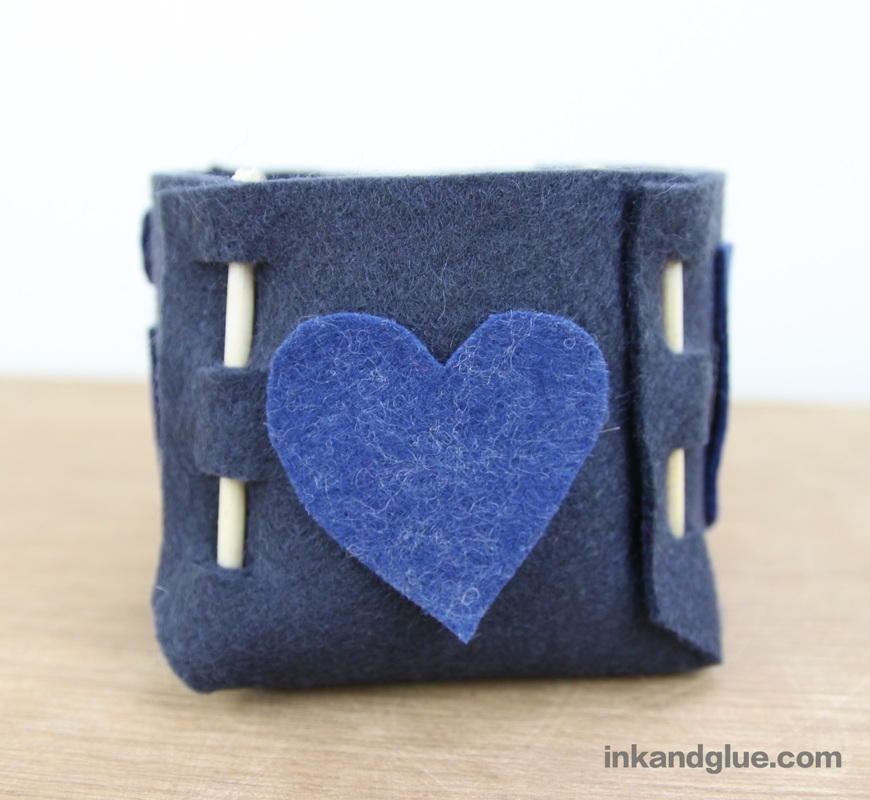
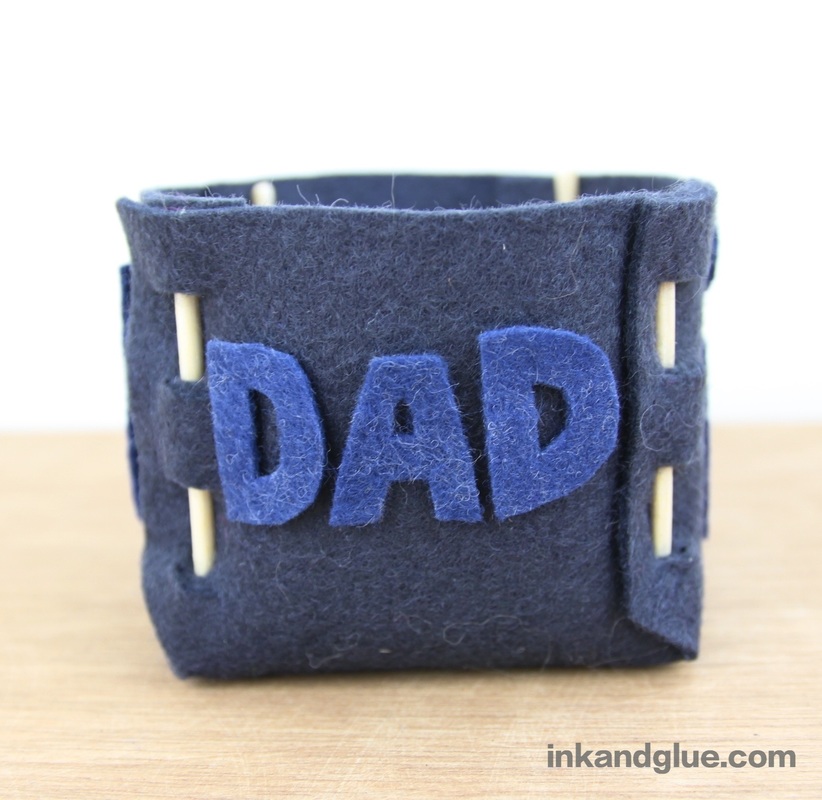
xo Do you want to live better? Just, you know, have your whole "living" trip be improved? Time to take up a hobby, with the help of U-Bild Enterprise's 1966 catalog.  In this catalog you'll find 88 pages chock full of patterns and plans — mostly for woodworking projects, but also some for paint-by-number wall murals, string art, leather goods, and other crafts. Many of the accompanying photos are populated by models in period costume. 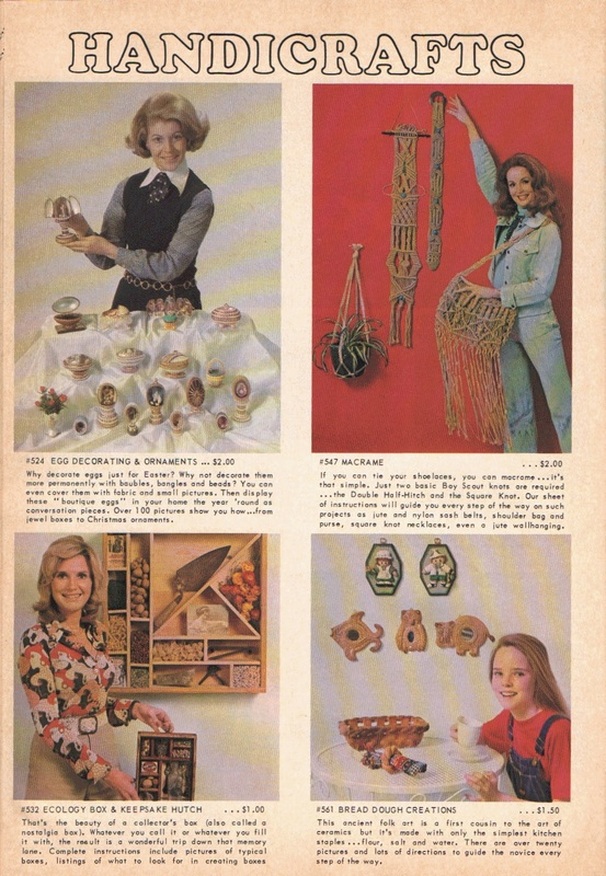 $1.50 for a salt dough recipe and $2.00 for advice on putting a terrarium together feels a little steep to me, but who am I to judge? 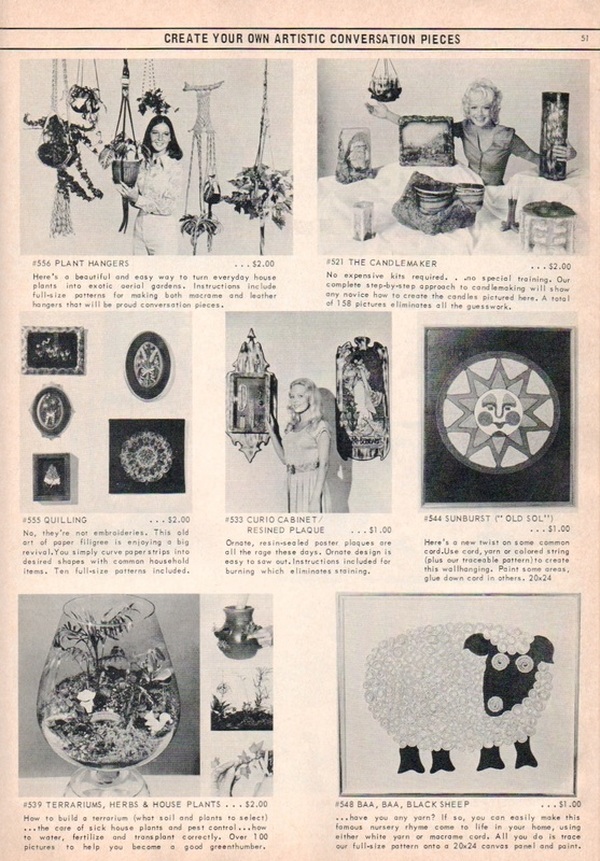 I am a fan of the headline copy on the top of every page. Also, from below: "These are the days when leather is again riding high in the saddle."  Here's the back of the catalog, but that's not to say you've seen the last of U-Bild... More will be shared, soon! xo 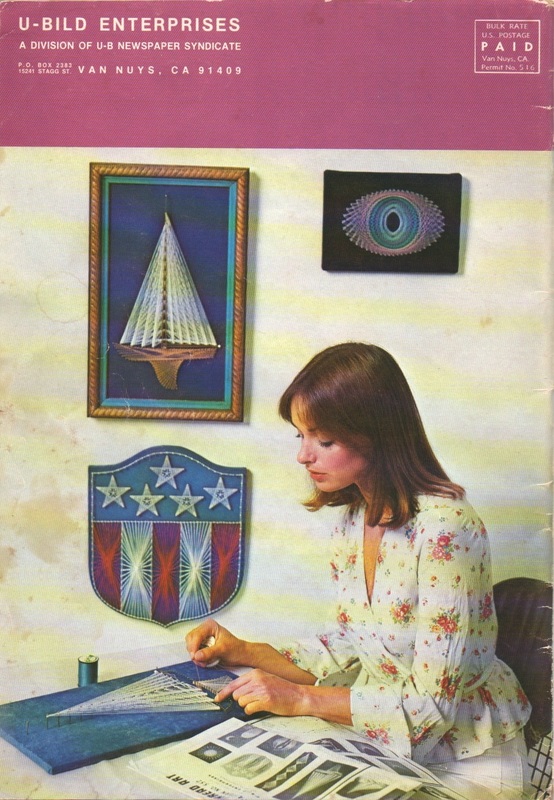 It always seemed weird to me to give my dad something golf-related (he doesn't play), or sports-related (he has no interest) or even tie-related (he wore a tie to work, but shed it happily as soon as he returned home) for Father's Day. Here's an idea for something that's actually useful and appropriate for pretty much everyone: a small, collapsable, travel-ready box he can use to hold keys, pocket change, iPhone chargers, etc. It's fairly easy to make, and there's no sewing — not even a little!
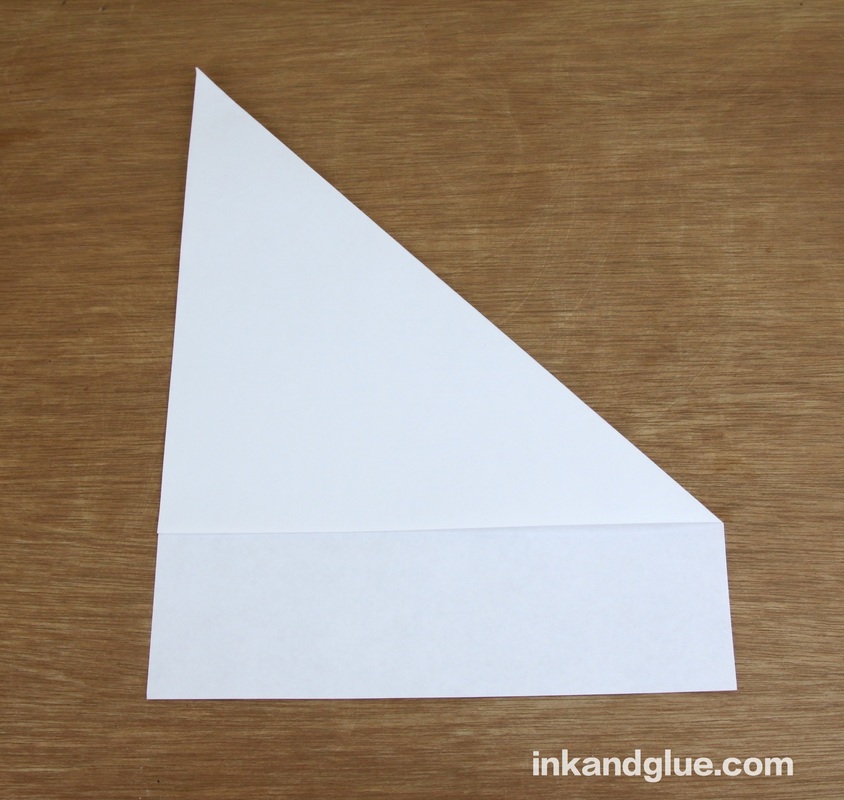
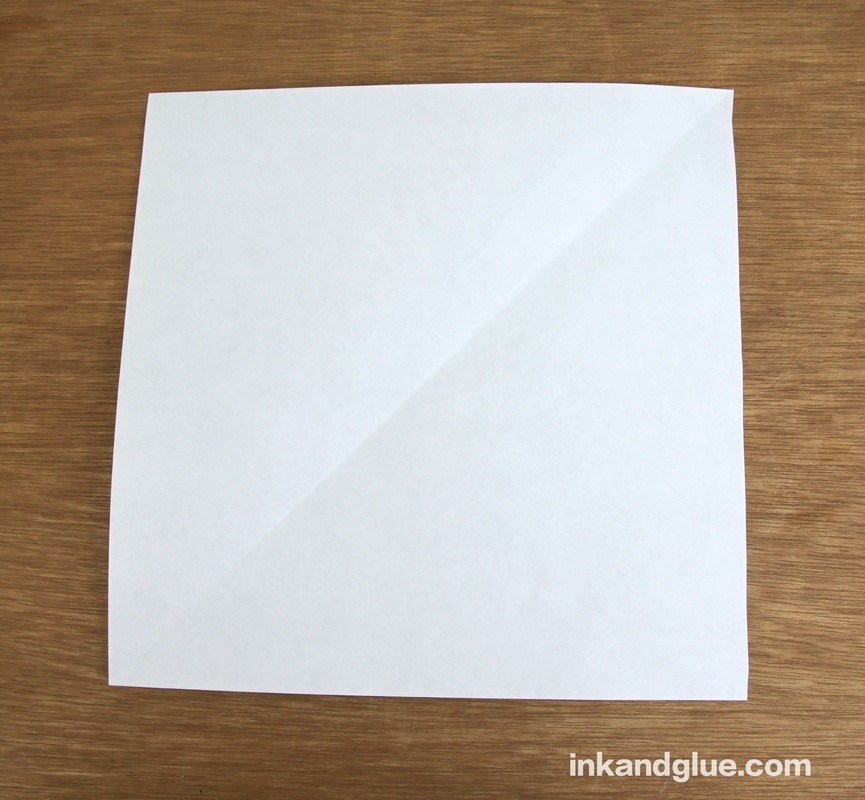
To make one, you'll want to make a template first. Besides being a handy pattern for cutting out the shape, it'll help you see how it all comes together. Do the "cut a square" trick on a regular-sized sheet of copy paper. You know, where you fold one corner to the side, aligning the edges? Then you cut off the skinny rectangle at the end? If I am the first person to teach you this trick, welcome to your new, much easier life.
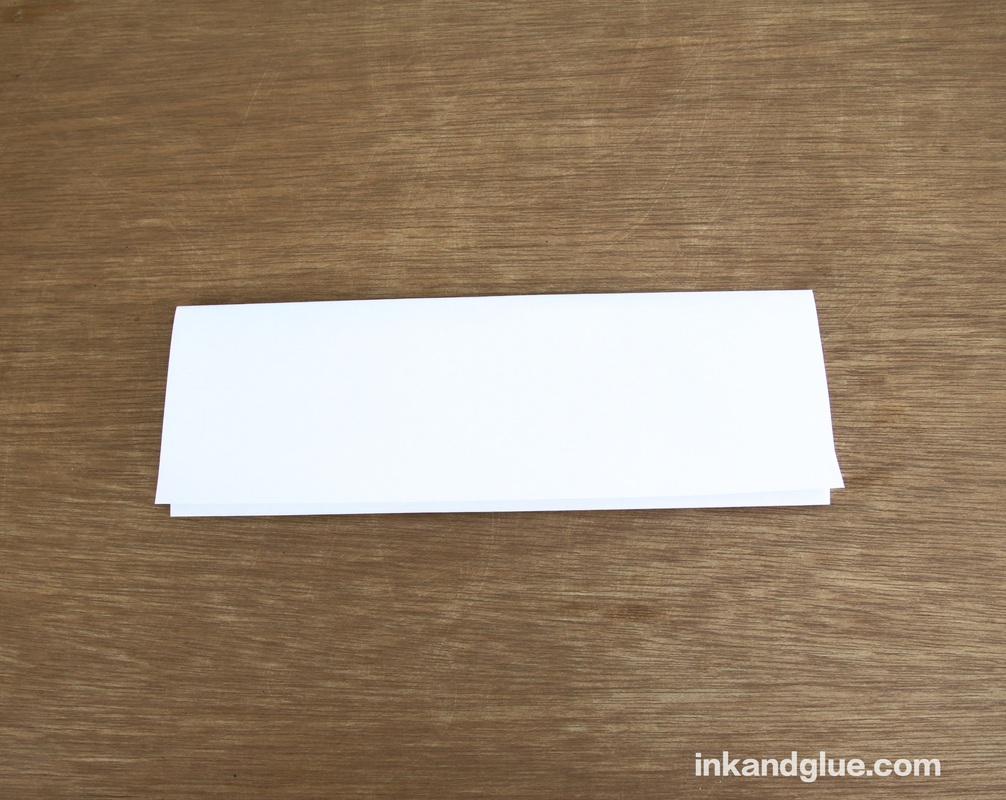
Now fold the square into thirds, like you would a fancy letter. Unfold it.
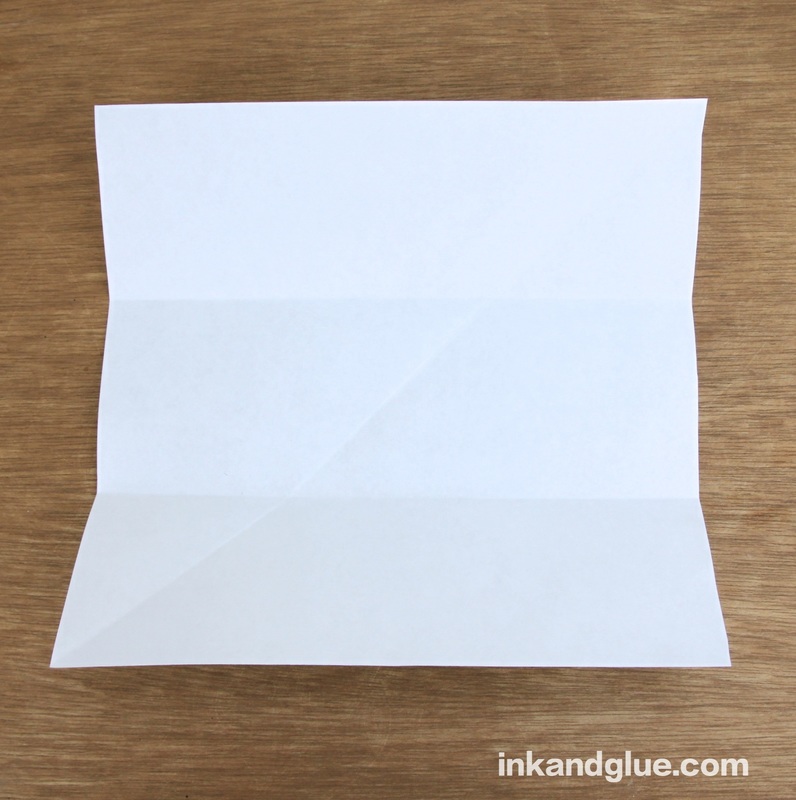
Turn the square 90 degrees, fold it into thirds again, and unfold. Voila, you have marked a grid of nine equally-sized squares on your paper! 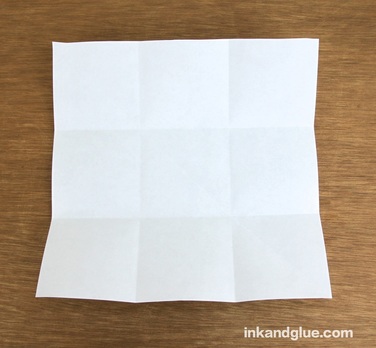
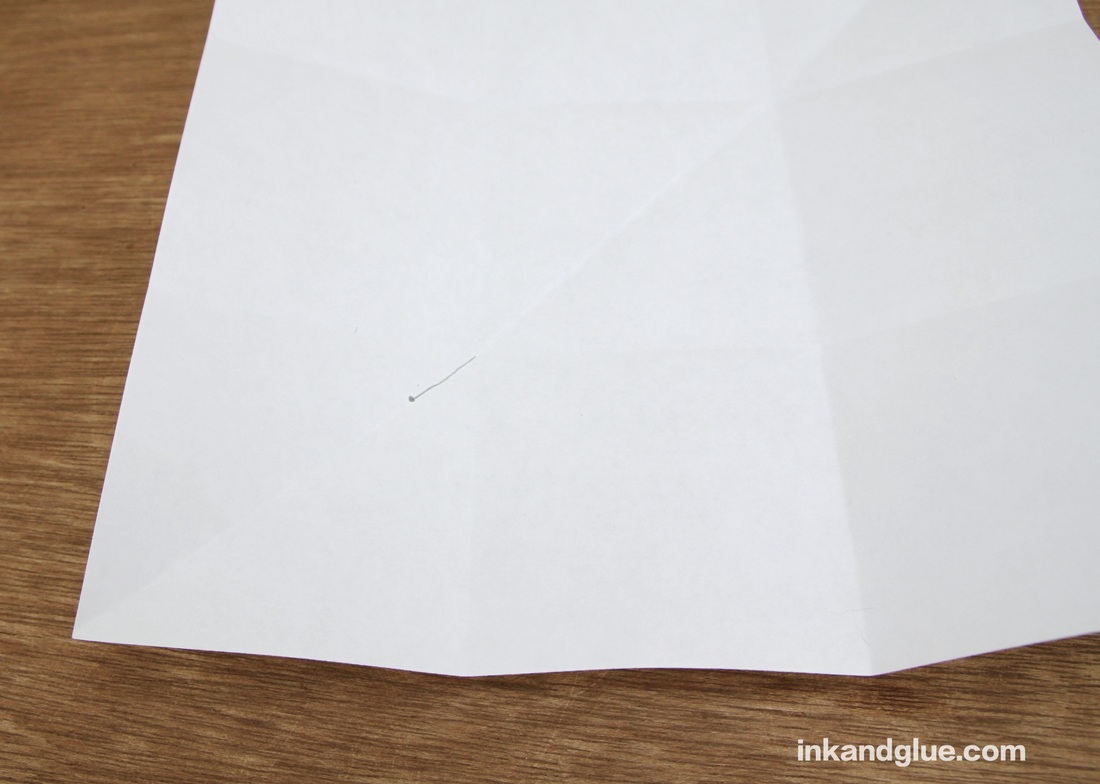
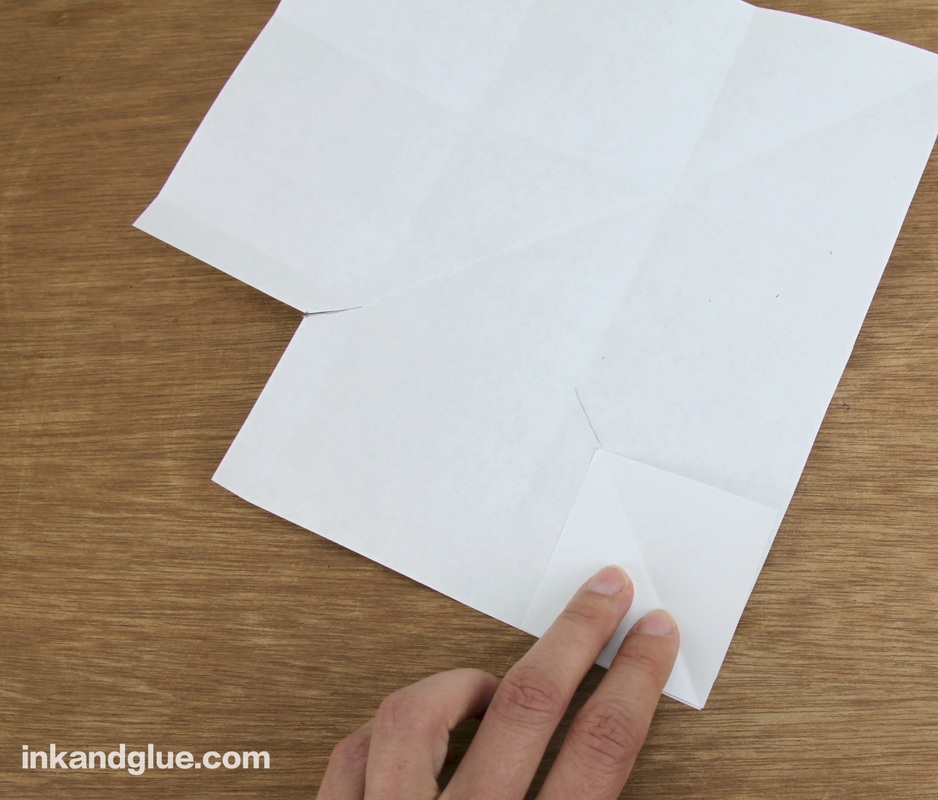
Use that line as the new corner for the square you're gonna cut out. If you want to get precise, use a ruler to draw lines parallel to the square folds (ignore the diagonal fold), from the dot at the end of the line you just drew out to the edge of the paper. Cut along the line you drew, too. 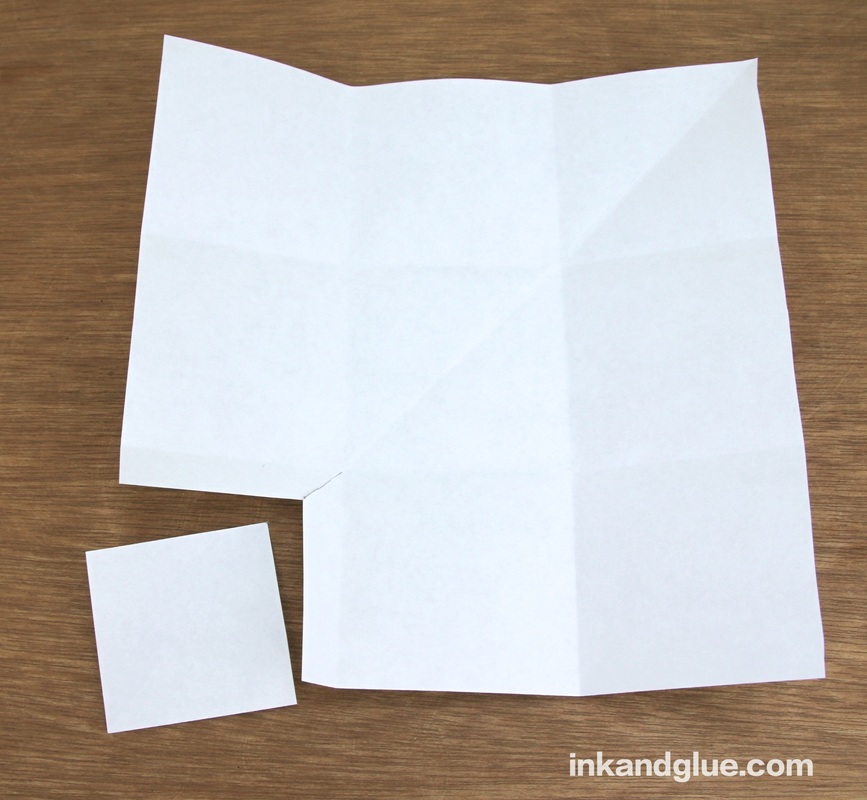 You can now use the square you just cut out as a guide or template to cut out the squares from the other three corners. Don't forget to make the diagonal snip to each inner corner.
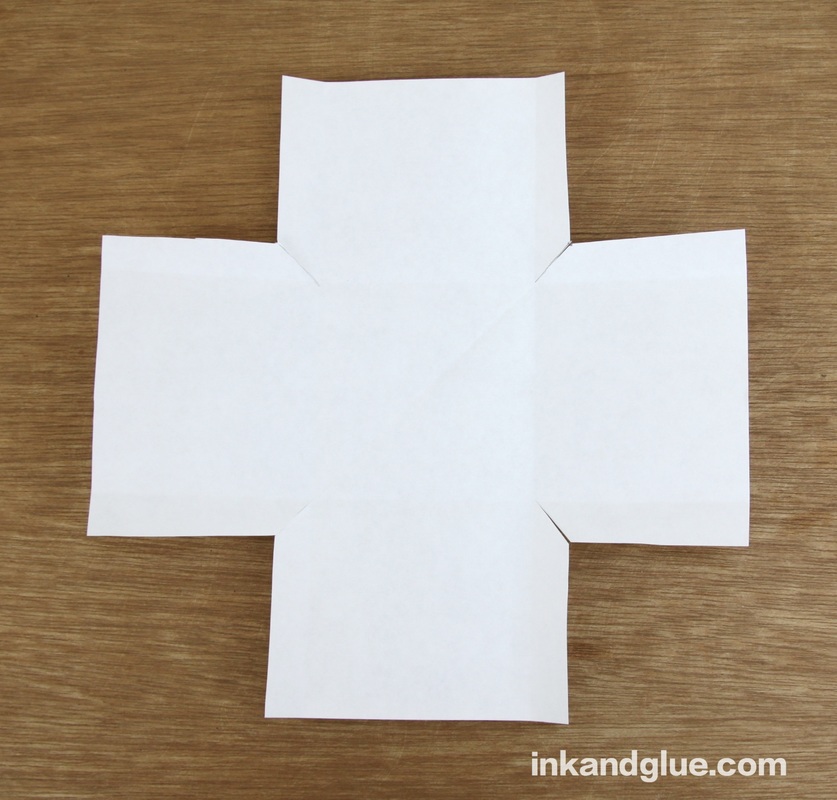
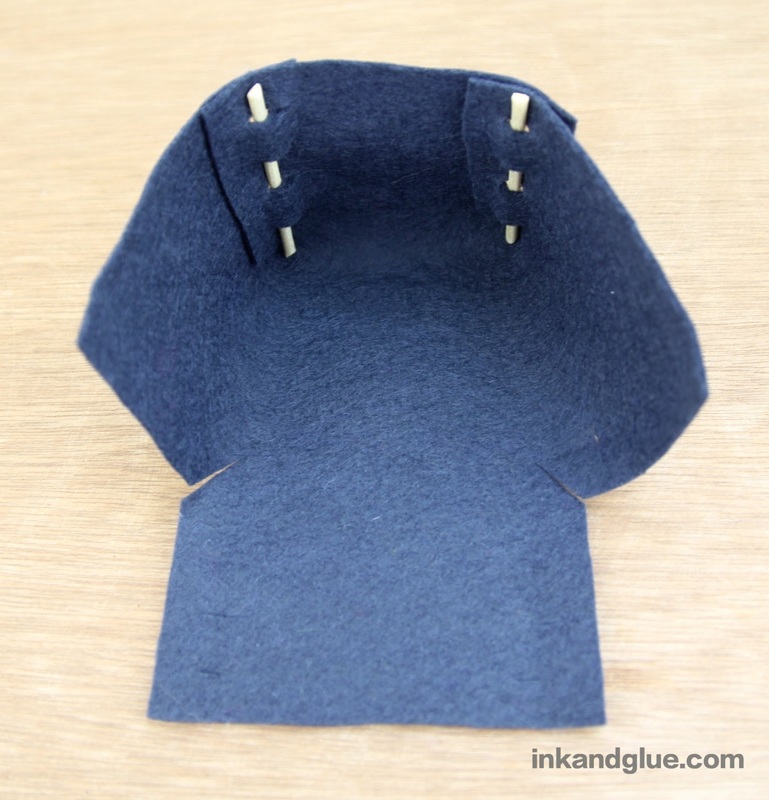
That's your template-slash-pattern! Lay it on top of a nice piece of felt; I strongly recommend a wool-blend felt, which you can get at any major fabric store, nowadays. It's possible even craft stores have nicer felt for sale, but I admit that I haven't looked recently. 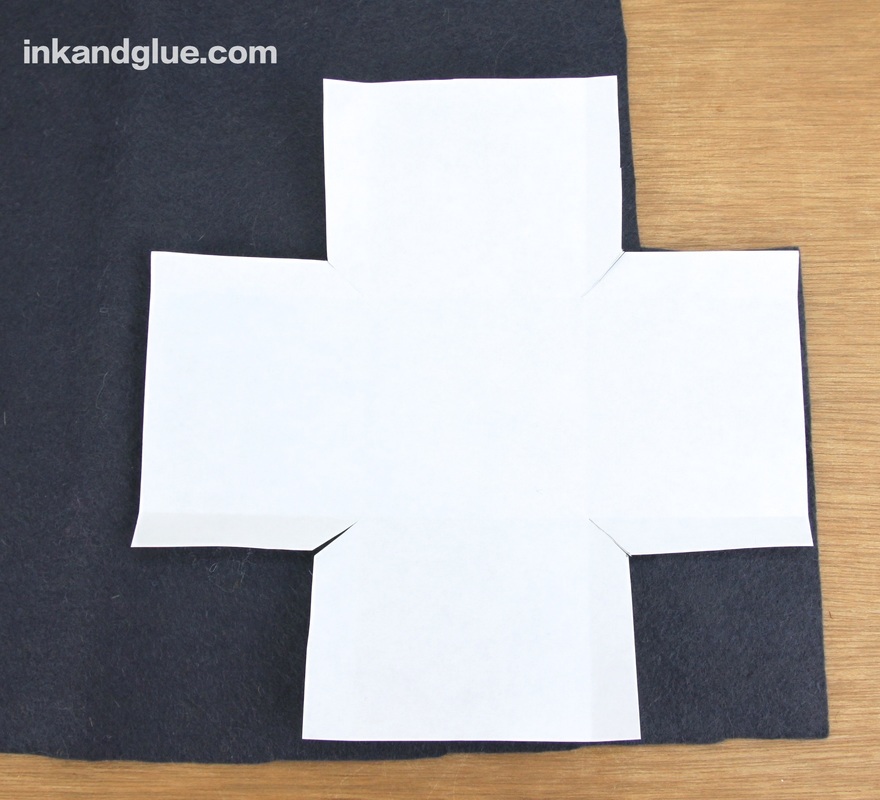 Pin the paper to the felt, and cut out the shape, including the corner slits. 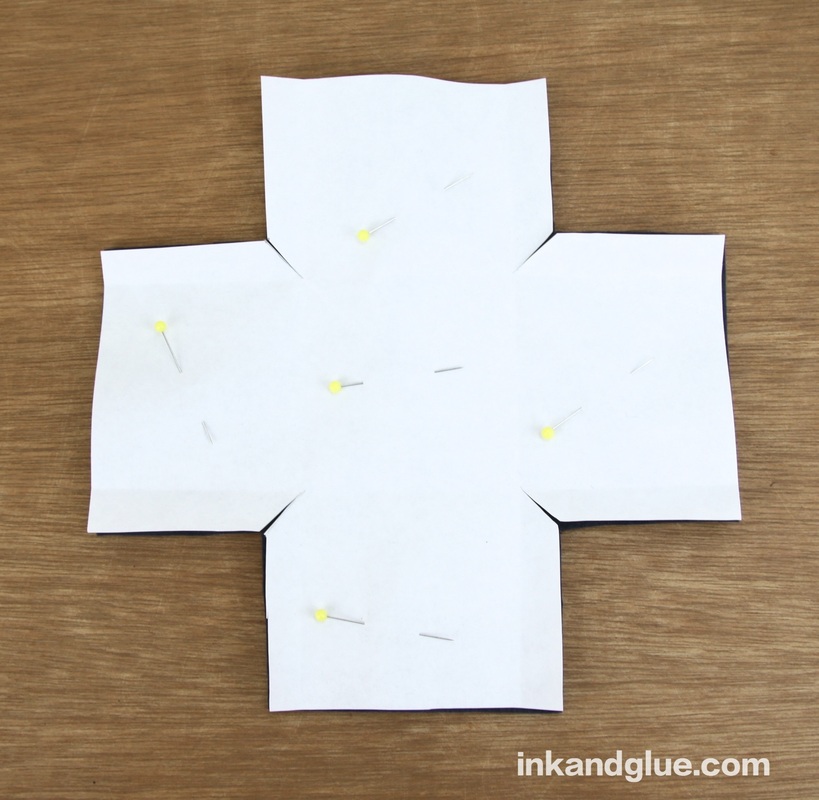 OK, this is the only part that's a bit tricky to explain: You're going to be making a guide for cutting slits along each edge of the four walls of the felt box you're making. On the paper pattern, fold one of the tabs you cut, and draw four (or so) lines along the fold. See here: 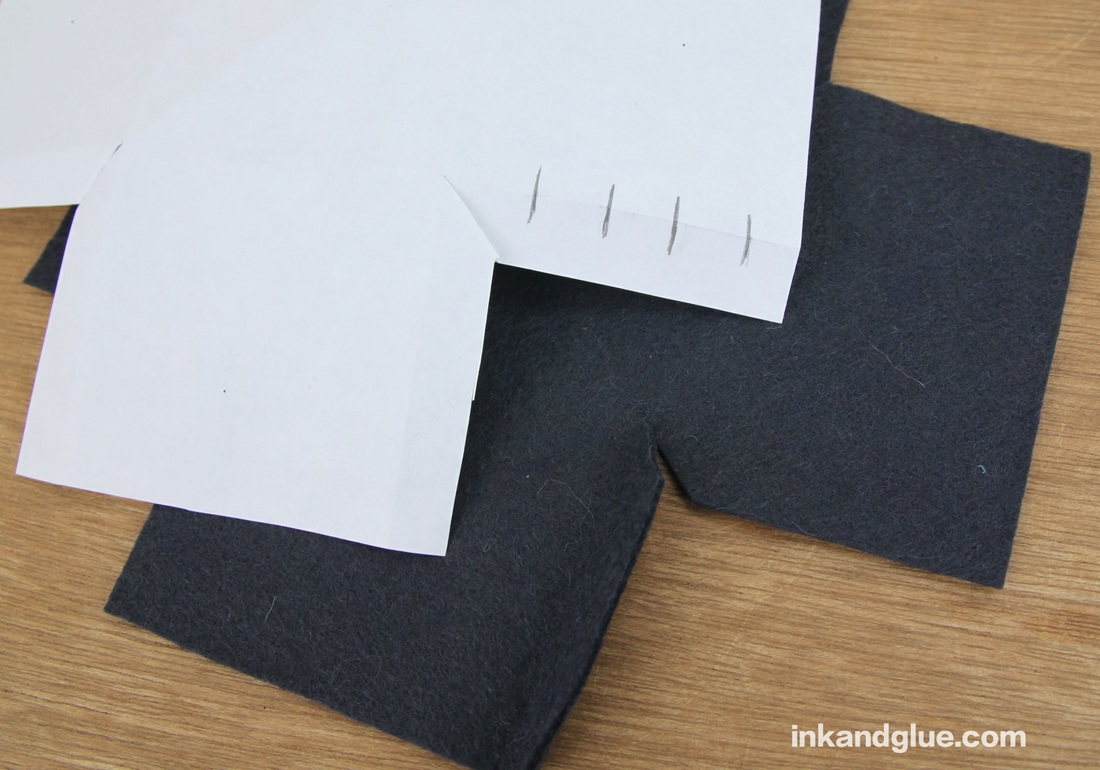 Fold the paper tab back, and fold its felt counterpart. Align the paper on top of the felt, and hold them with one hand while you snip slits in the folded felt. Don't cut all the way through the tab! Just make a half- or third-inch long slit. Use fabric scissors and this'll be a piece of cake. 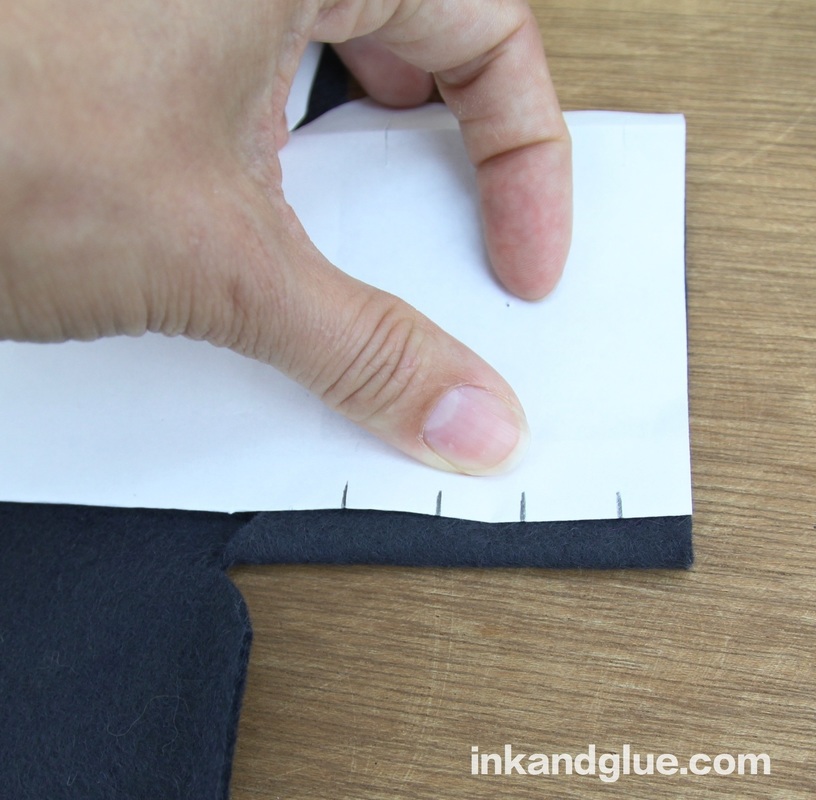 Here's what it will look like with all of the corner edges be-slitted. 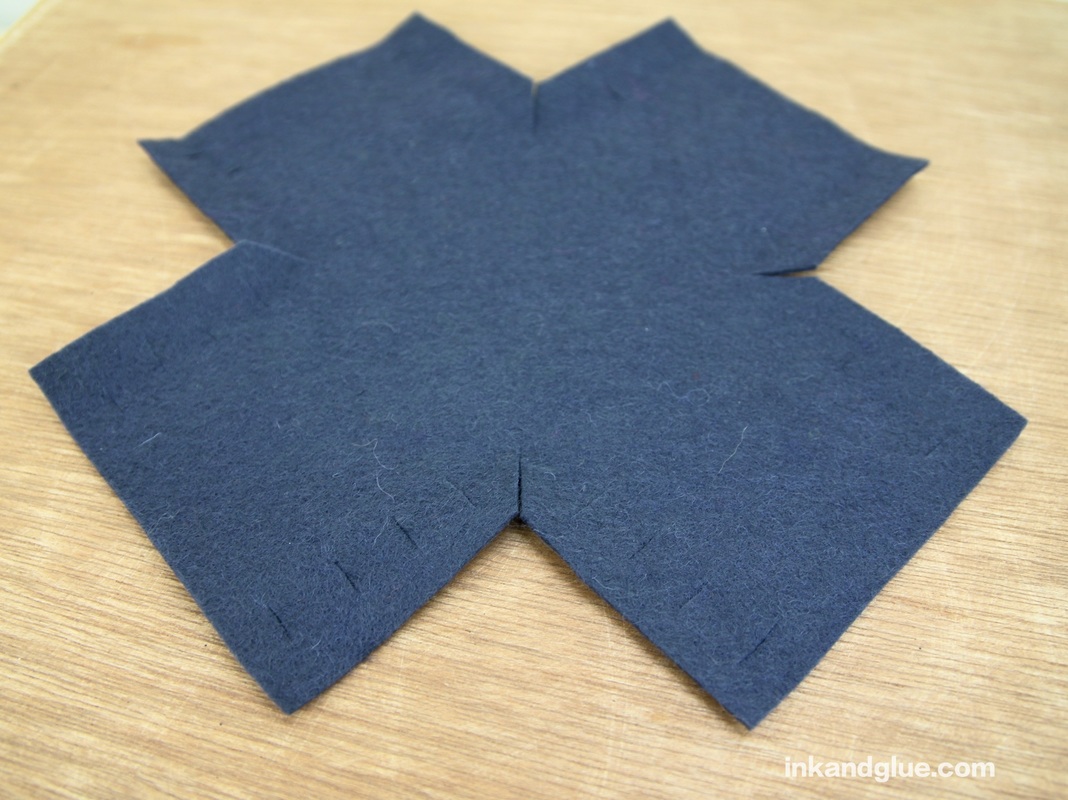 For the posts that make it all come together, I used a skinny dowel — a bamboo skewer will work ok, too, but watch out for splintering. I cut mine into four equal lengths (each a little over two and a half inches) with a wire cutter. 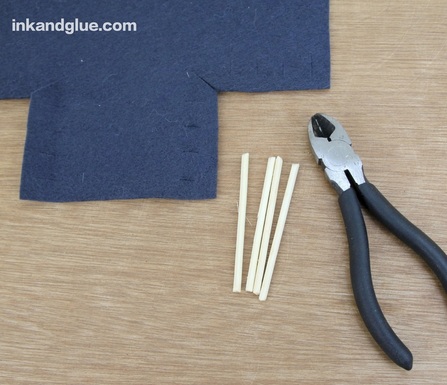 Fold up and overlap the neighboring edges of one corner, aligning the slits. Weave a post through the slits in both felt layers. I wove mine so the bottom of the post is inside, because I think it looks neater. 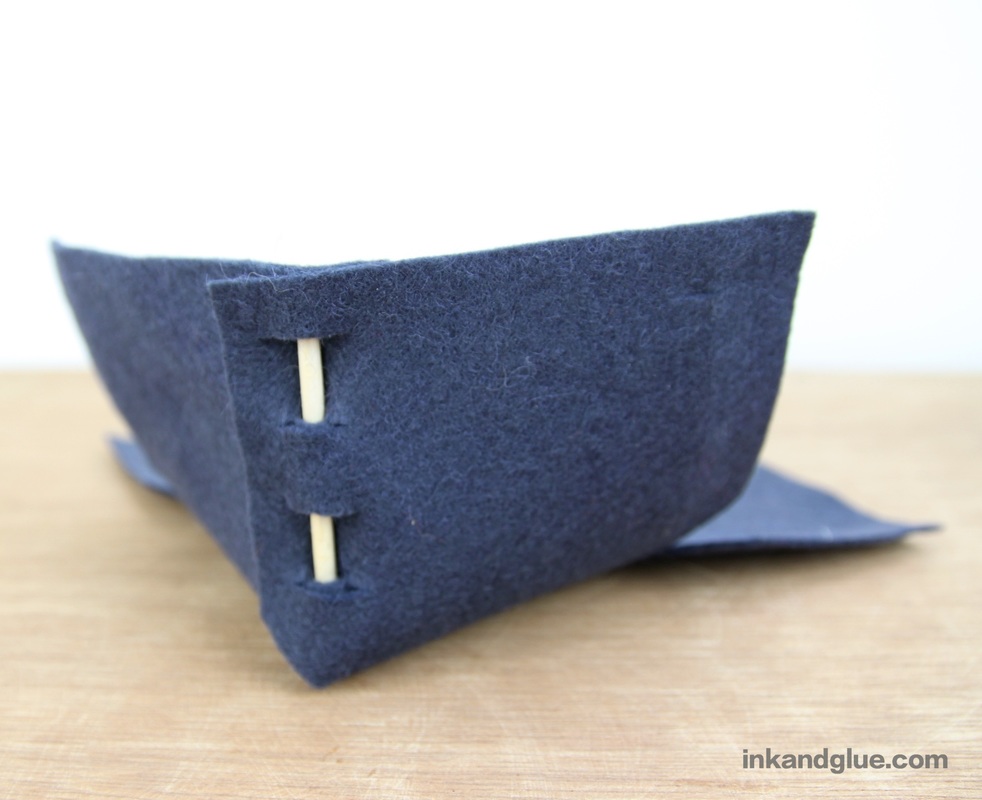 Here's a top view:  Do the same with a second corner and post. Here's an exterior and interior view:
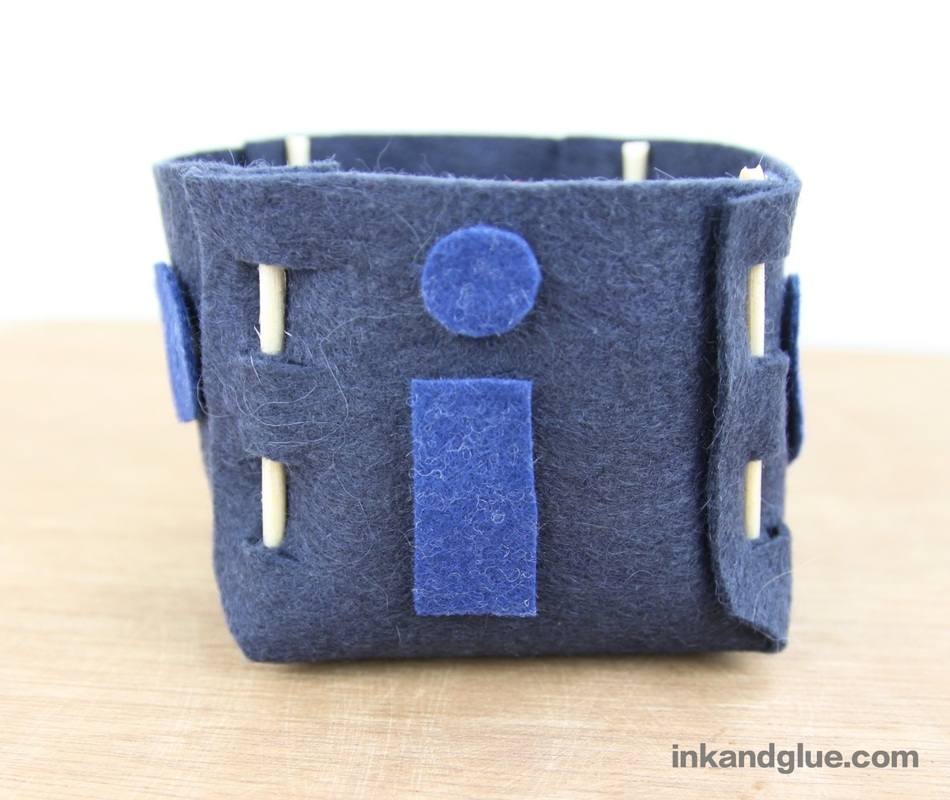
And naturally, do the other two corners as well. And you're done! 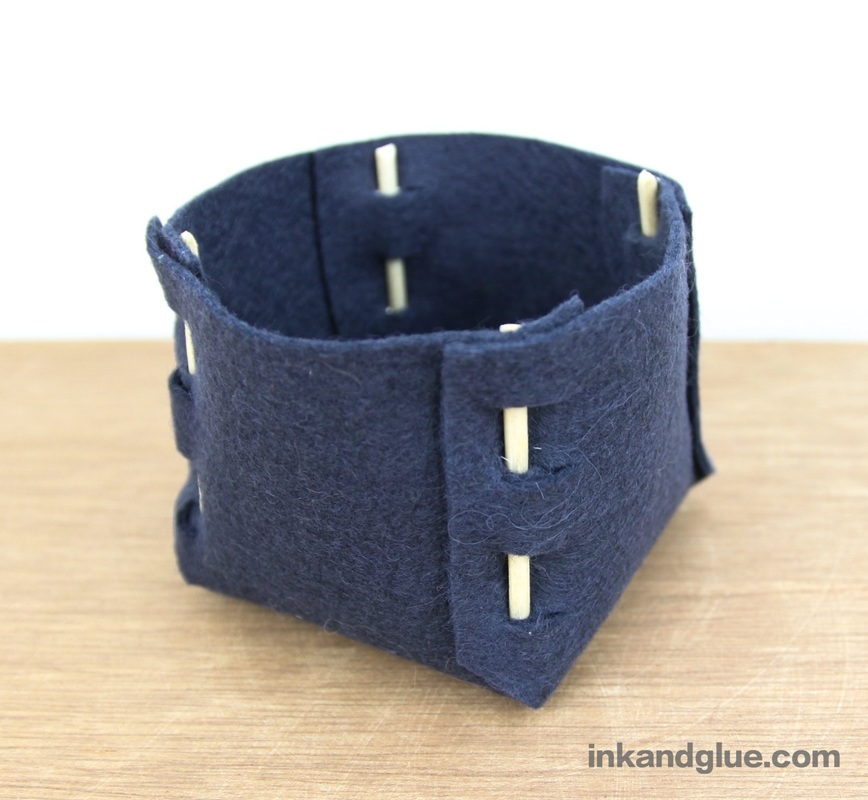 Add extra cuteness by embellishing the sides, either with dimensional fabric paint (the kind in those squeezy tubes), or cut out felt letters and shapes and glue them to the sides. Here's my take:
This is, of course, fully collapsable: Just slide out the posts, and the box goes flat. Sweet!
xo Remember my recent "i love vintage" with the Wire Art book excerpt? It was about making art with metal wire screening or mesh. Artist Lanny Bergner has taken that idea to a whole 'nother, entirely professional level. (Click on each image to go to its source site.) 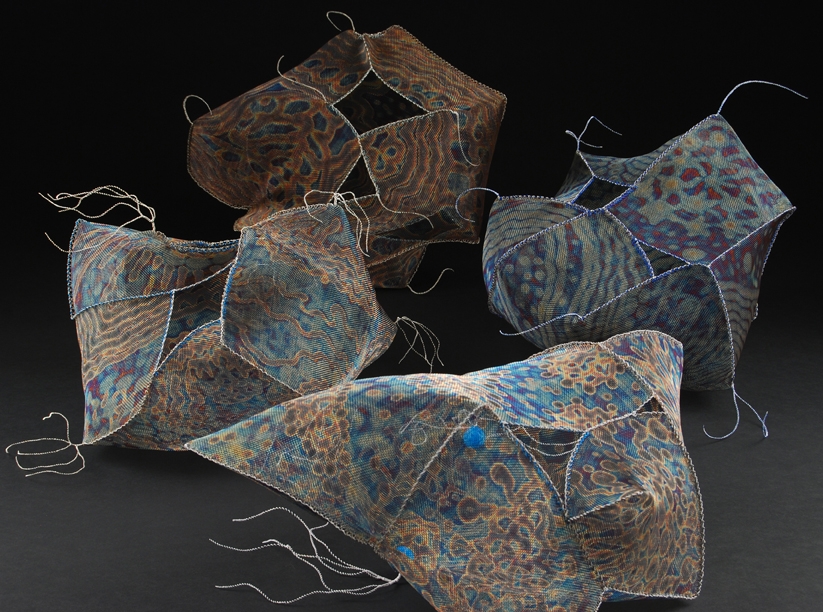 He uses mesh made of various metals (stainless steel, bronze), cut and sewn together using wire, linen thread, and more. The color effects you see above are from heating the mesh with a torch. Neat-o.  Sometimes he uses silicone or glass frit (frit is just chunks or powdered glass, usually melted in a kiln) to add color and texture. 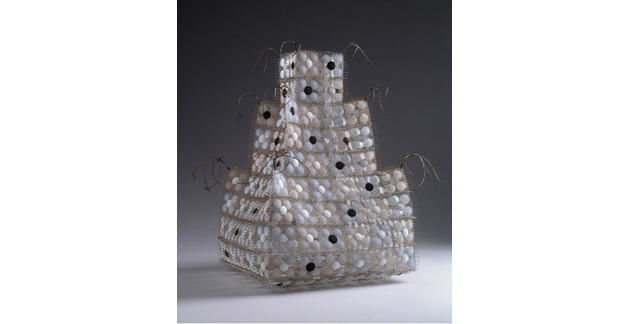 http://www.snyderman-works.com/artists/lanny-bergnerNot all of the pieces are vessels; some are more like quilts, or jewelry. The piece below uses silicone, glass frit, and paper. 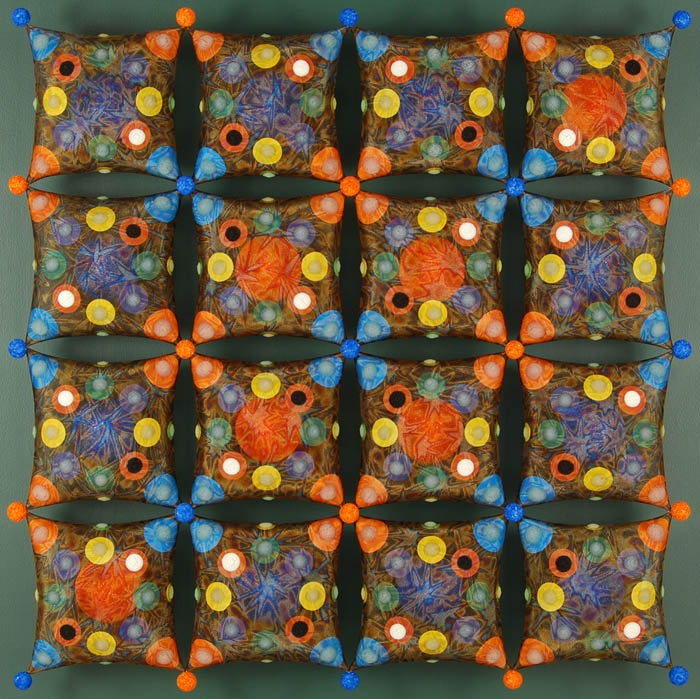 The piece below is made of bronze screen, wire, and glass frit. Like many of his works, they appear inspired by microscopic life forms similar to those found in the How and Why book I posted about yesterday. 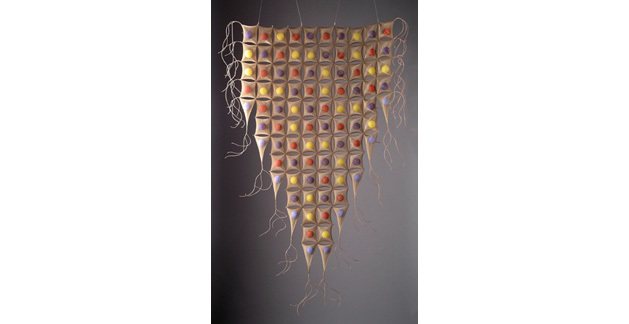 You can find Lanny's work in a bunch of places, but these pieces were all from Mobilia Gallery and Snyderman-Works.
xo! I am a fan of "The How and Why Wonder Book of..."series. They have a consistent illustration style that feels very of-an-era. I dig it. I picked up The Microscope and What You See this past weekend (at a steamroom-esque old barn packed to the gills with books and ephemera). 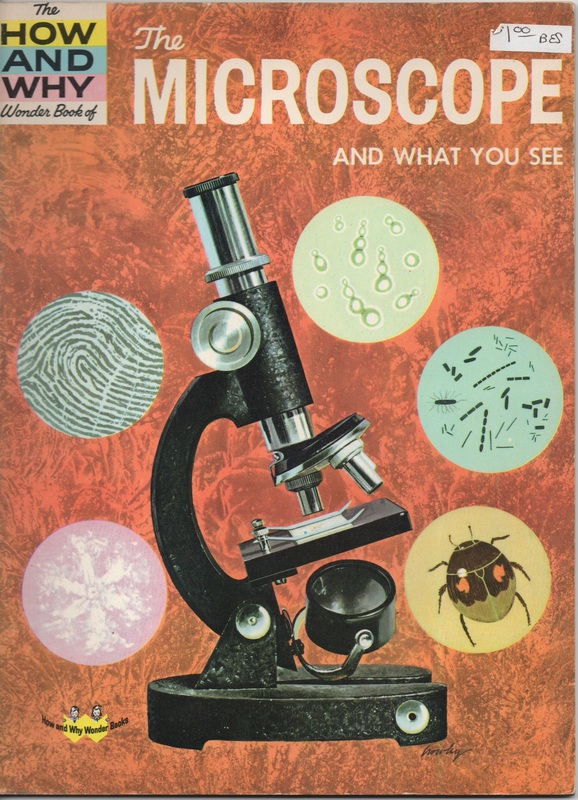 Just look at all of the things you can see/get freaked out about under a microscope! Seriously, though, I want to make a stuffed version of the ostracod. Or the cheese mite. (I'm going to go ahead and remain ignorant about whether or not there are actual mites living in the cheese I consume.) 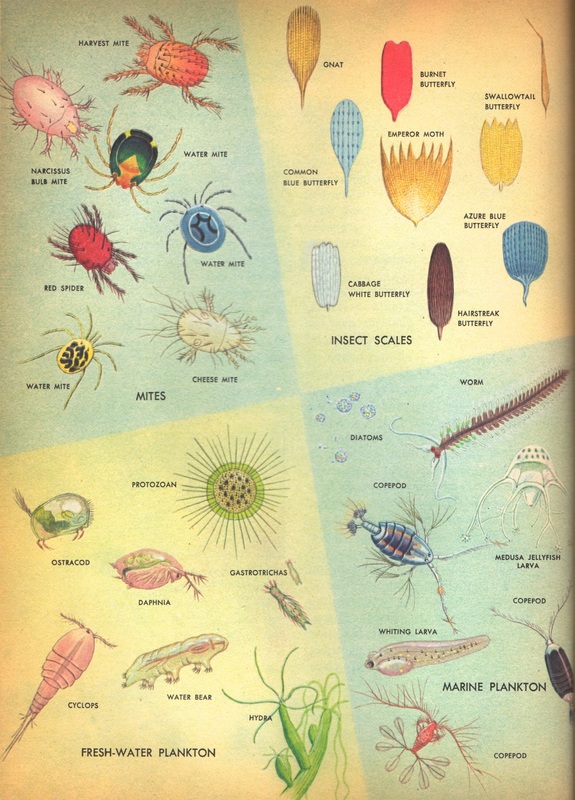 I like this topic — microscopic life — generally, so finding it in a How and Why book is icing on the cake for me. I find the shapes of the creatures inspiring. Any creature-creating kid would find a wealth of material to pull from here. 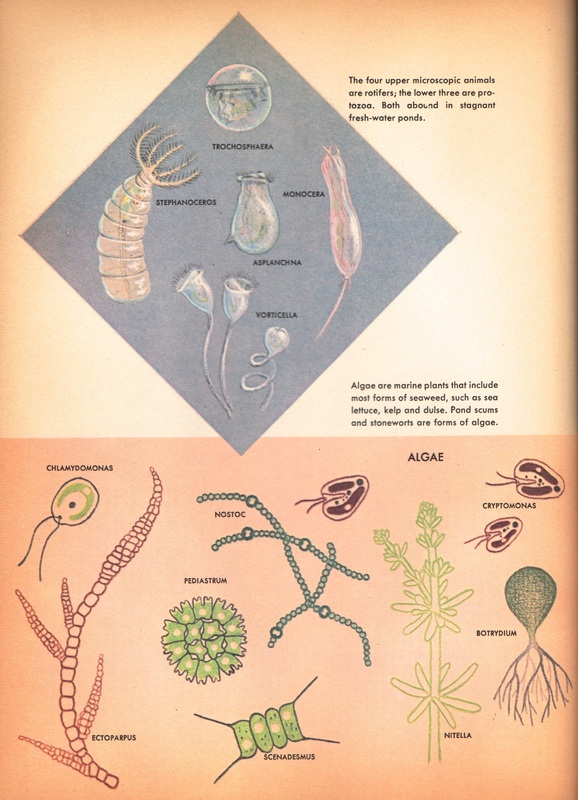 The main illustration below looks like the cover of a mass-market science fiction paperback from the 60s or 70s. So gorgeous. 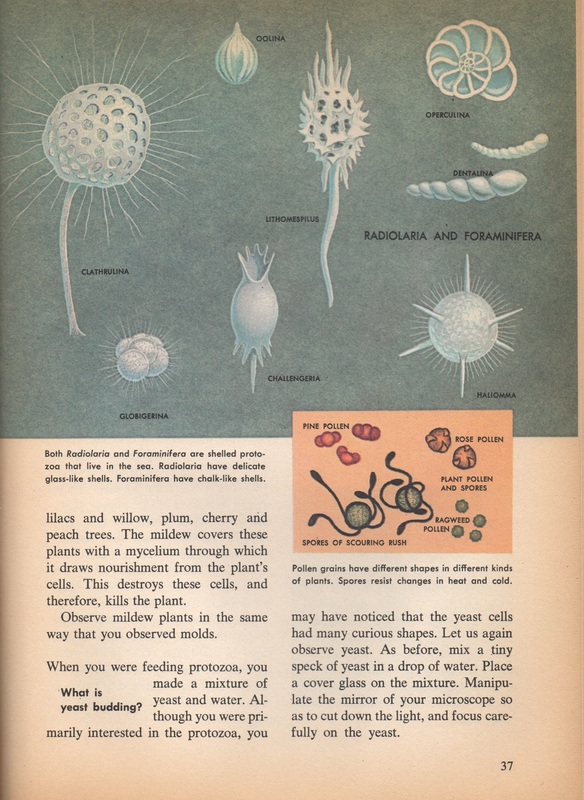 xo!
|
Categories
All
Archives
March 2017
AuthorI'm Debbie Way, an artist and writer who enjoys making things. |


 RSS Feed