|
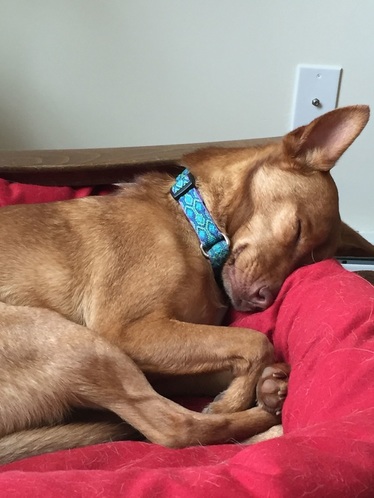
There's a small river way back behind our house, and over the years, many trees have fallen over it. One of them makes a nearly-perfect bridge (for the brave and well-balanced) to the other side, though you have to climb awkwardly over a near-vertical root ball to complete the journey. 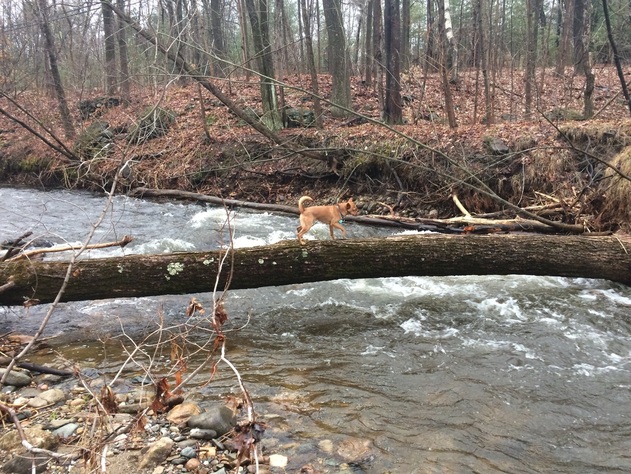 Franklin has not yet made it all the way to dry land on the far side, but he keeps trying... 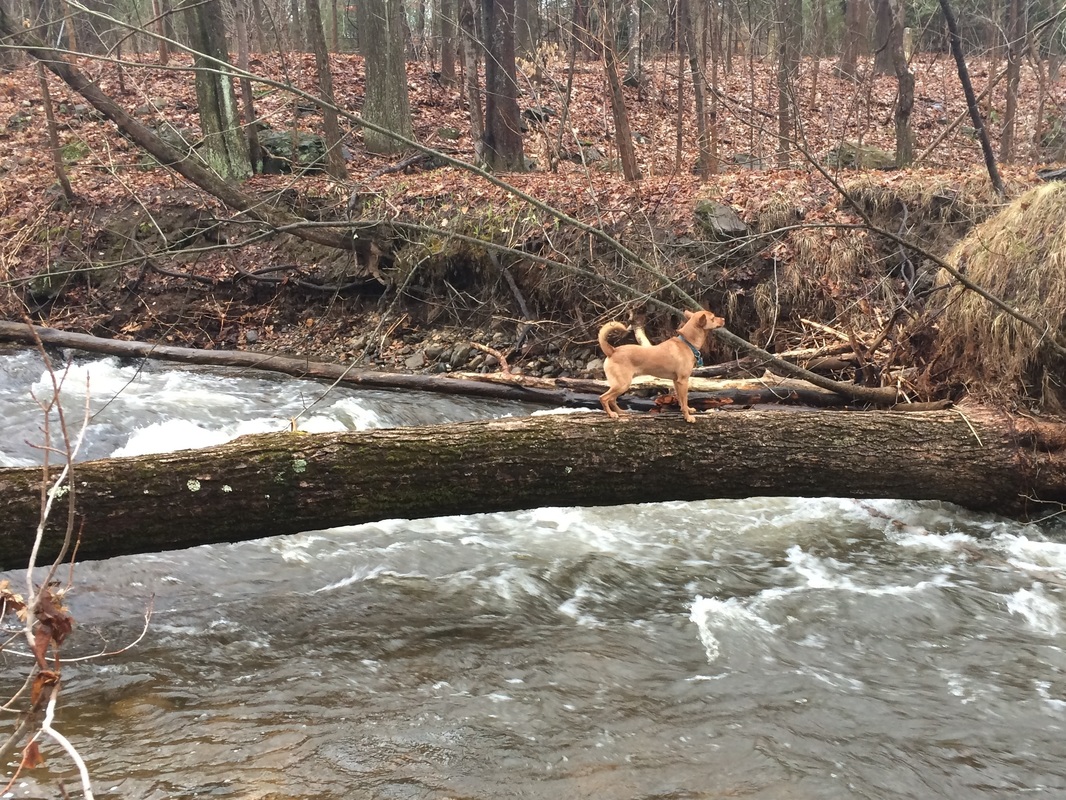 ...and chickening out at the last second, turning around (he hasn't fallen doing this — yet), and running back to home turf. 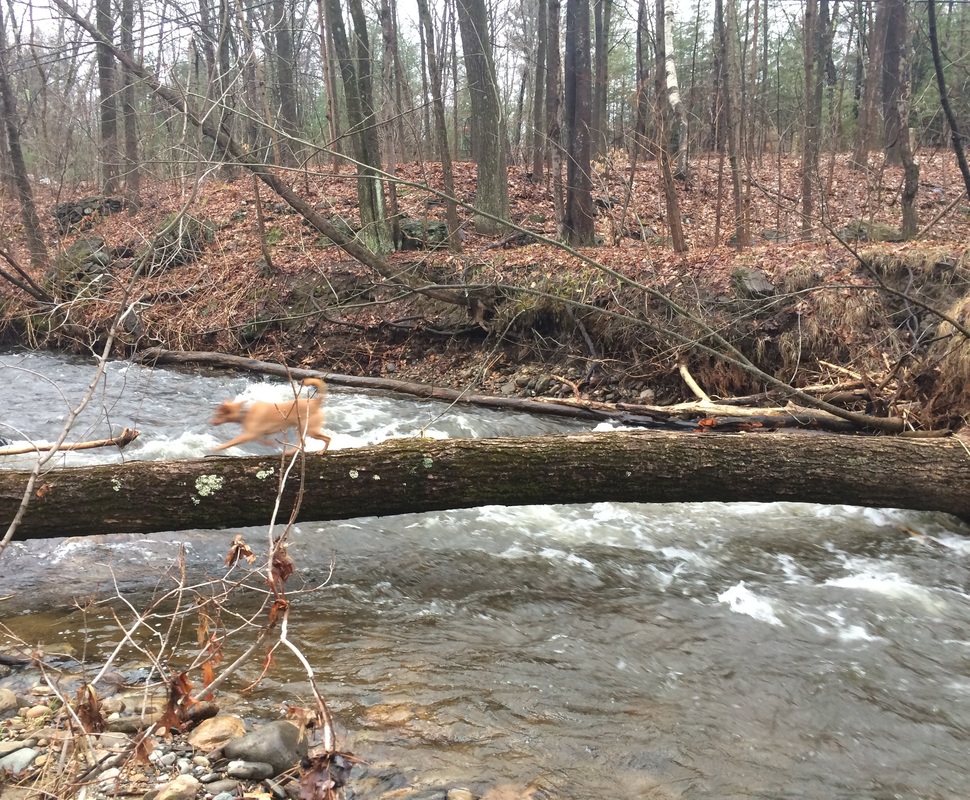 He'll get there someday.
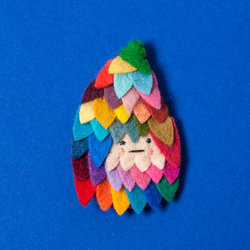
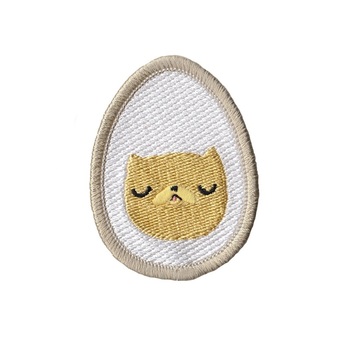
xo Cat Rabbit is an Australian textile artist who (among other artistic endeavors) sells fantastic, one-of-a-kind stuffed creatures that are full of personality. For example, here's Mathlete. (Click on each image to go to that item's shop page.)  Is that elephant in a track suit inspired by The Royal Tenenbaums? Yes, yes it is. 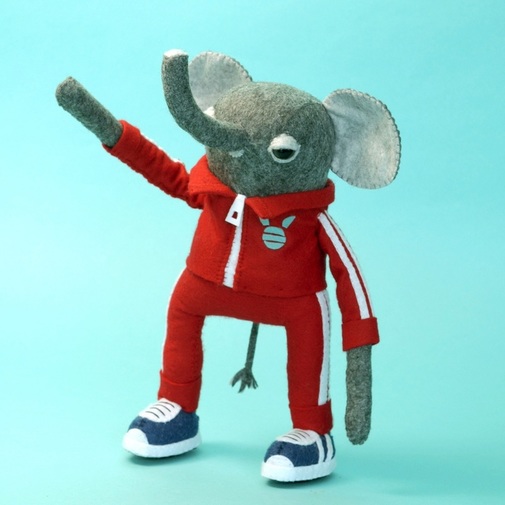 Cat Rabbit also sells brooches, prints, and other tertiary products that fit into her creative world. I am especially fond of this feathered brooch and this kitten egg patch.
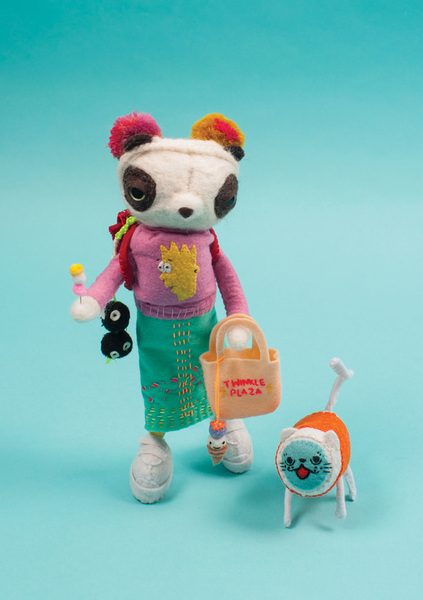
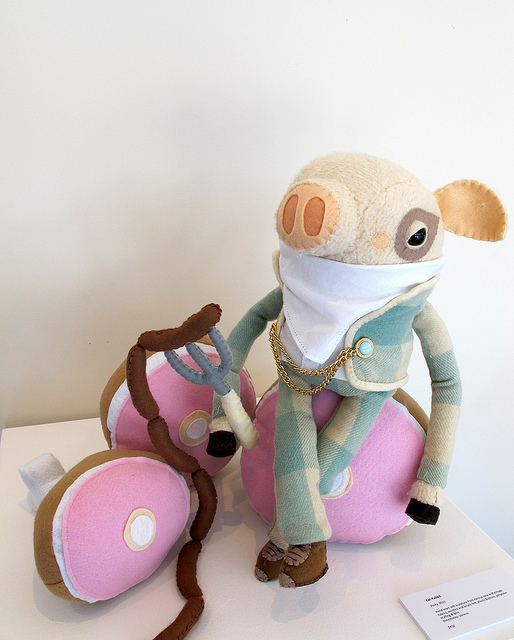
Cat Rabbit has made many creatures over the years, and most aren't available on her shop. But you can still see them on her menagerie page. Here's a taste:
 There's even more to see on Cat Rabbit's blog, where you can read about her latest pursuits and her collaboration with Isobel Knowles, Soft Stories. I guess this became a "have you met?" as well as an "i love stuff." "Have you met this person whose stuff I love?" might be too long to be its own category, so I'll just double-up for this one.
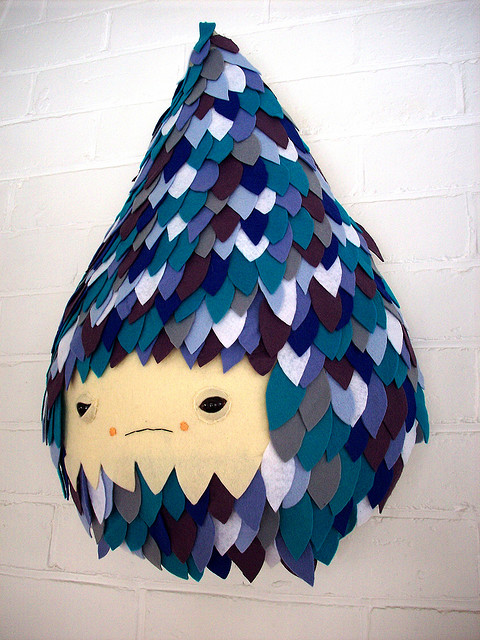
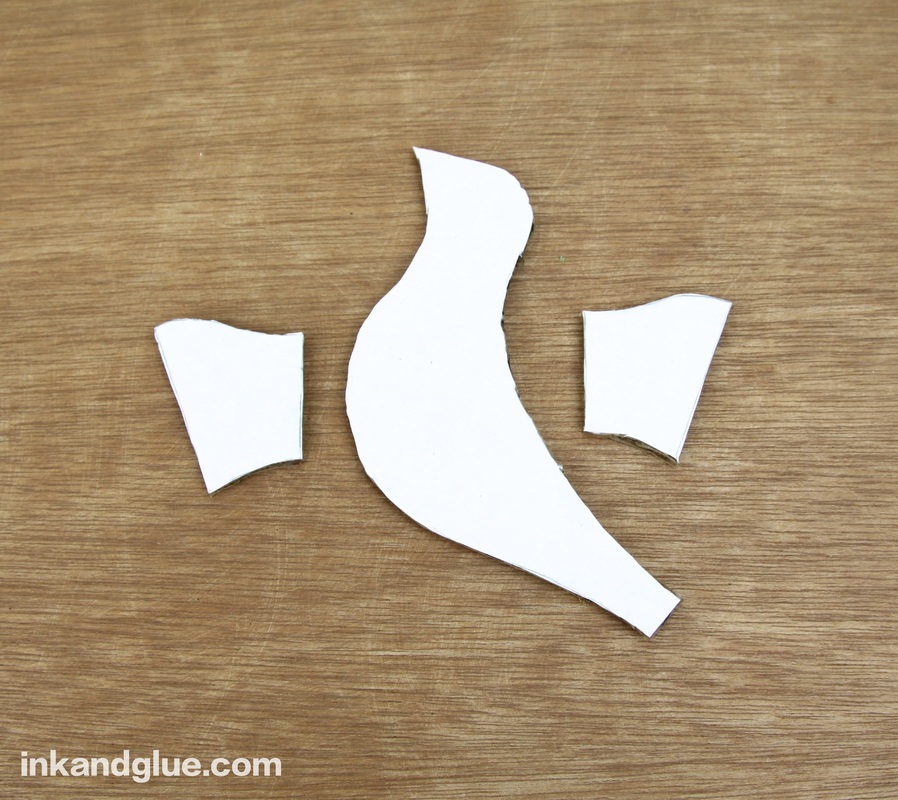
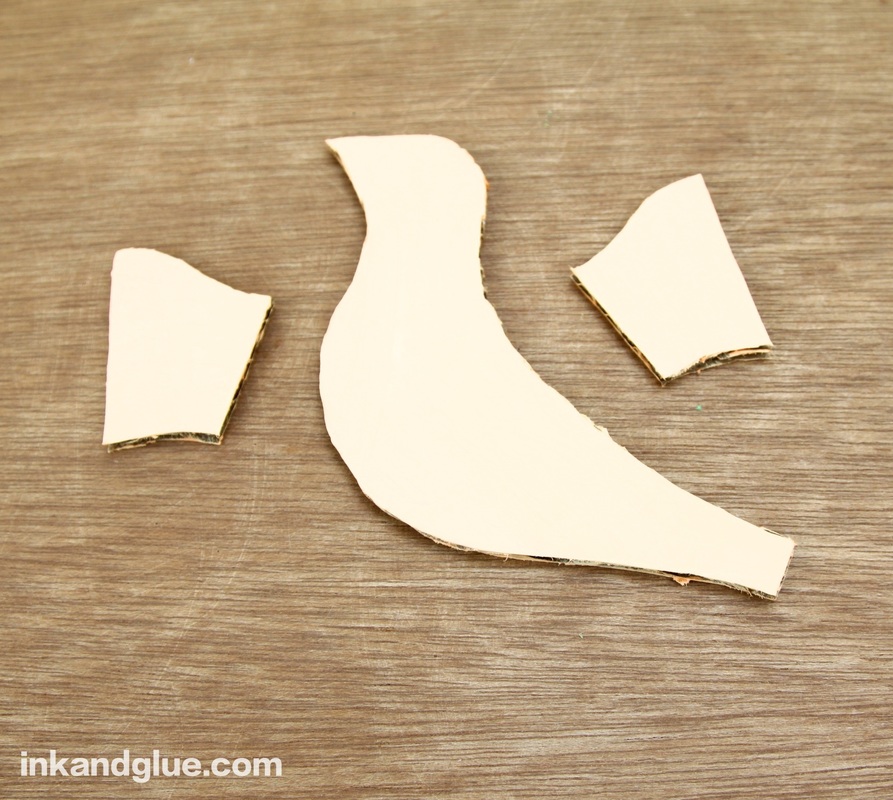
xo! 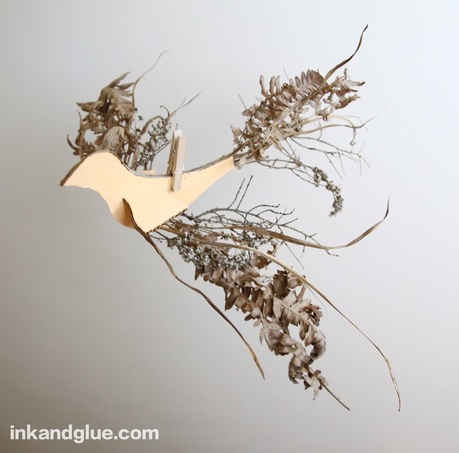 I'm in the middle of doing some spring cleaning in the garden. A few things are growing already — some lettuce and arugula I planted back in March, plenty of daffodils are in bloom — but mostly the work involves clearing out the dead matter that dried out over the winter. I like to incorporate natural materials in my projects, and since the bird action around here has been heating up lately (so many conversations, so much drama!), I put two and two together. A grown-up or skilled child should do the cardboard cutting and the gluing, but everything else is super kid-friendly. To make this simple project even easier, I've provided a template of the three pieces you need to cut from corrugated cardboard, along with directions for aligning the grooves/corrugations of the cardboard with each shape. Download that template here:
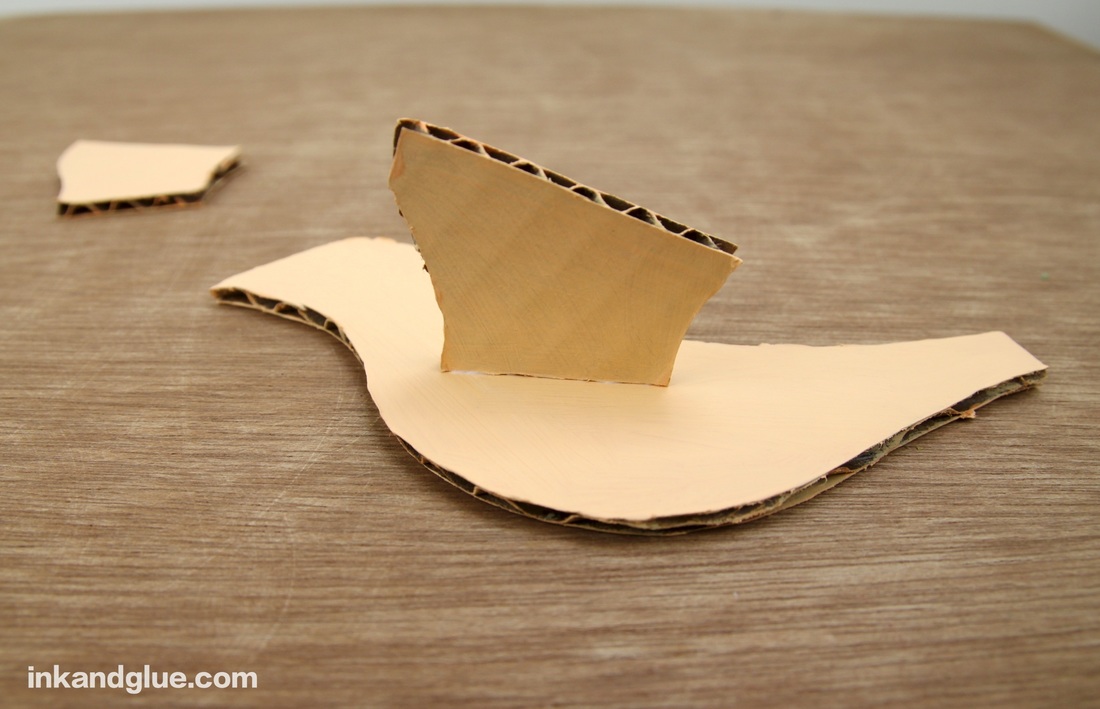
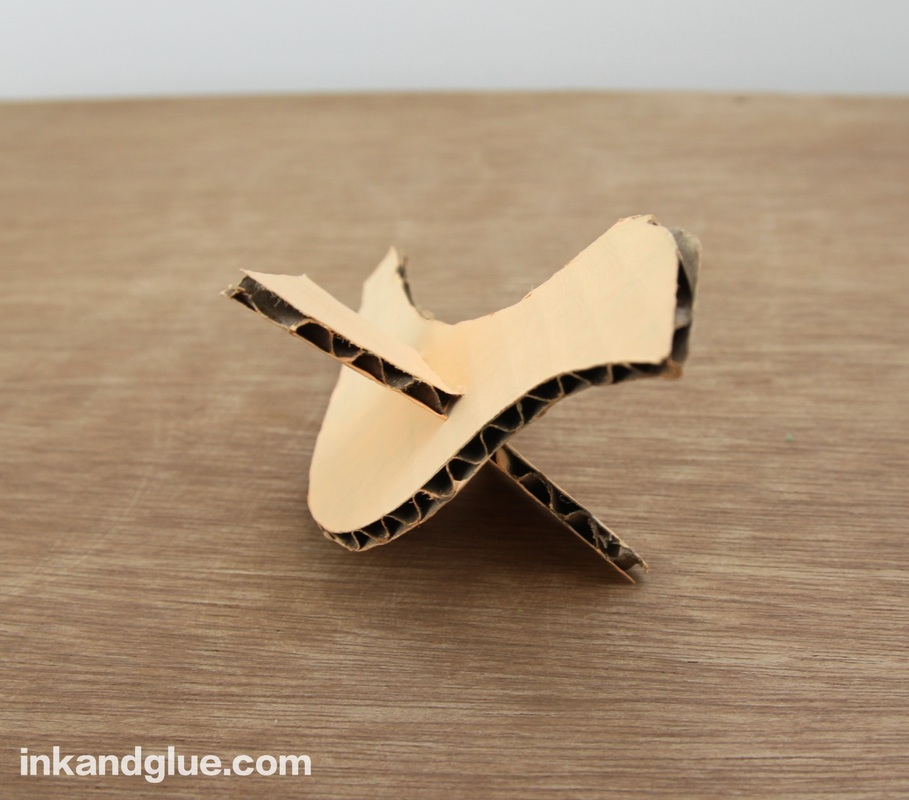
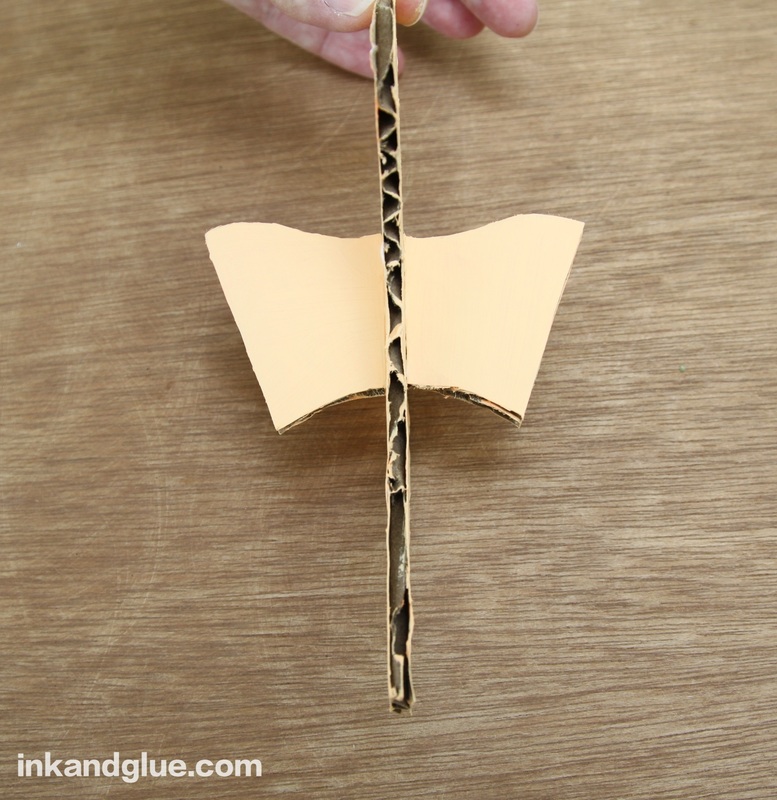
This is what the three pieces will look like. I painted mine, though you can barely tell in this photo (at right).
Glue the short edges of the two small shapes — the winglets — to the body of the bird. Try to get them both in the same spot on either side, or your bird might be unbalanced later.
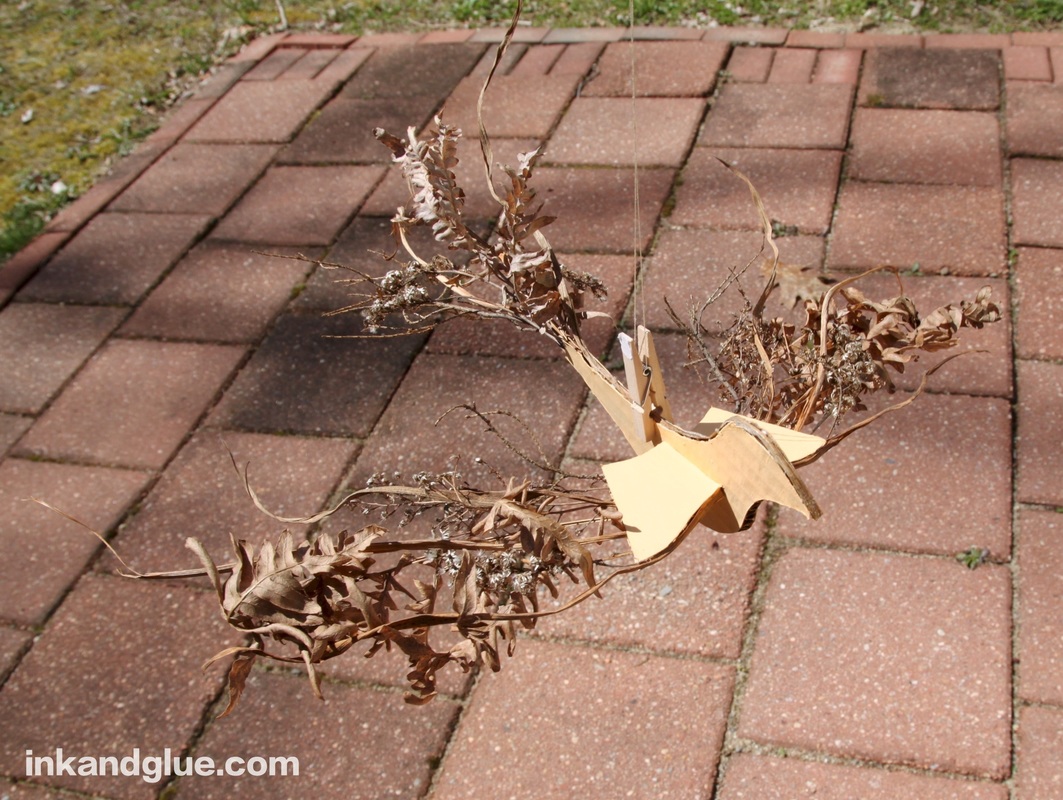
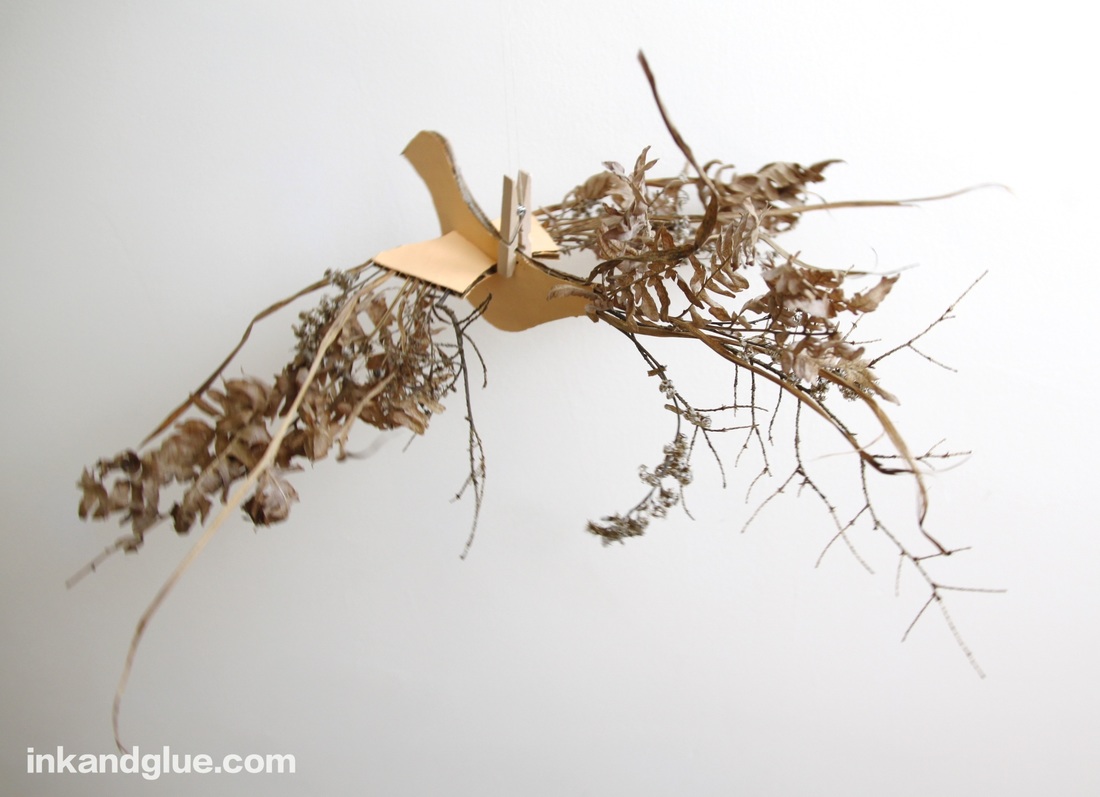
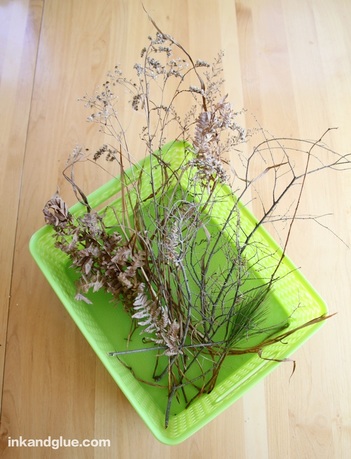 While that glue dries, go outside and take a walk. Collect dry pieces of ornamental grass, twigs, wildflowers, fern stalks, weeds — as long as the stem-ish part of whatever it is can fit inside of a corrugation tube in your cardboard, you're good. Use utility scissors (i.e. not the nice ones you save for paper or fabric) to trim the pieces and slip them into the corrugations of the winglets and the little tail. If they look right, slip them out, dip the ends in tacky glue, and replace. This part was really fun. The natural items I found were pretty curvy, and it was engrossing work to arrange the pieces in fanciful wing and tail shapes . 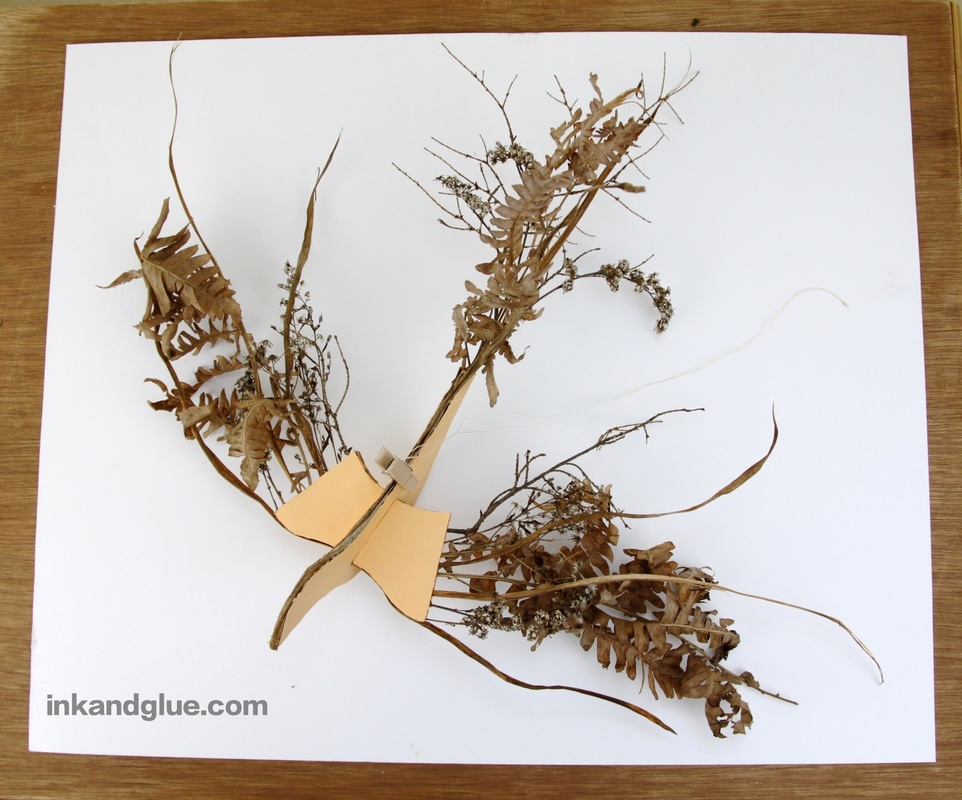 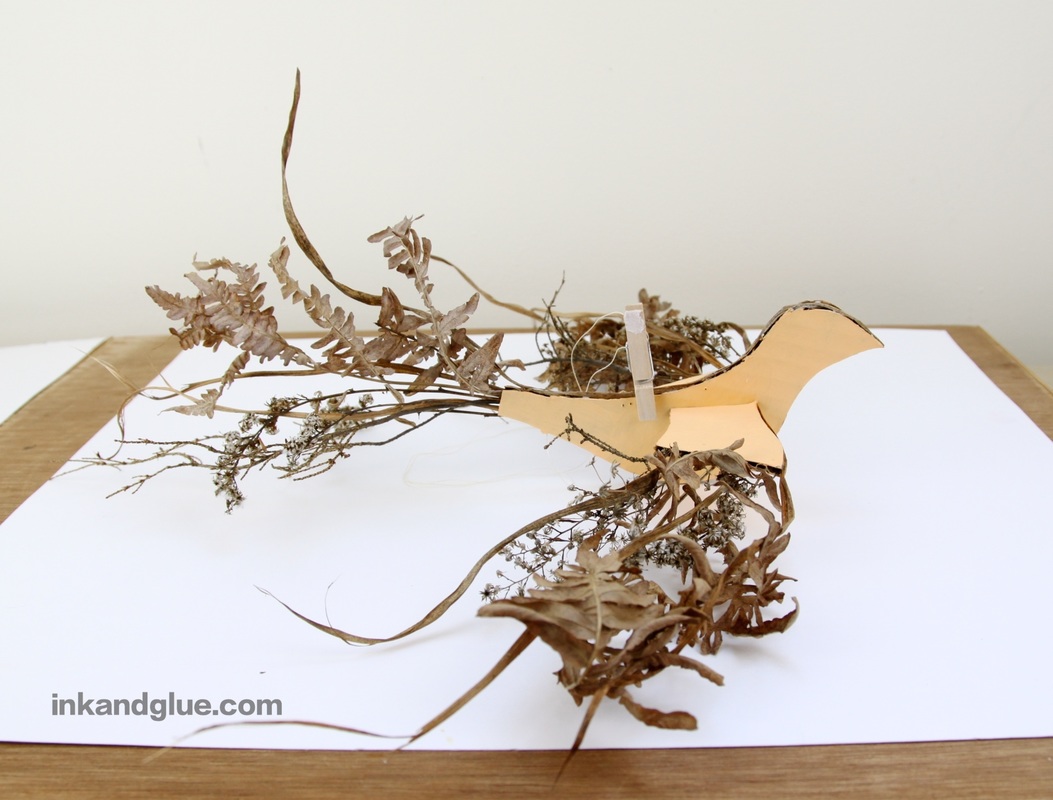 To hang the bird, clip the back with a small clothespin. At first, I tried threading string through a hole in the back, but I couldn't get the balance just right (see the little holes?) and the bird kept dive-bombing the ground or zooming upwards when I wanted a gentle floating. With a clip, you can readjust as needed.
 If this earth-mama project isn't quite your kids' bag, I have some ideas in mind for making a colorful version of this au naturale bird... Stay tuned!
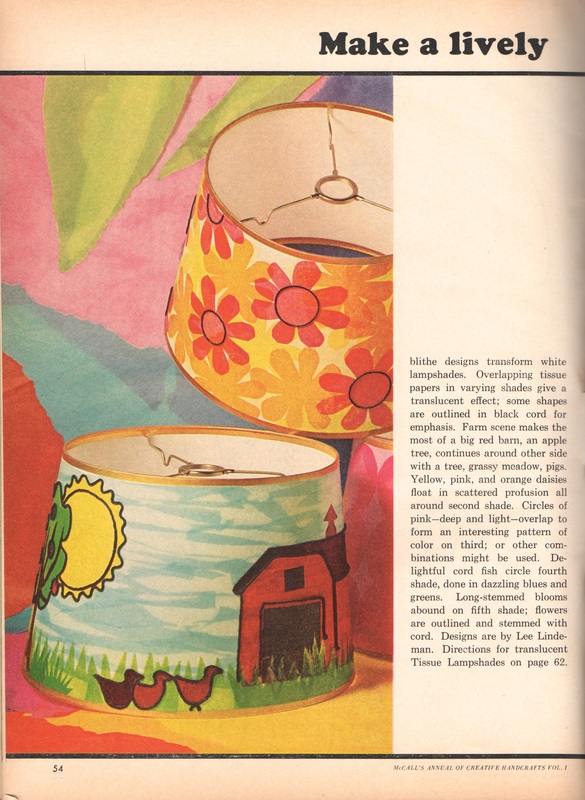
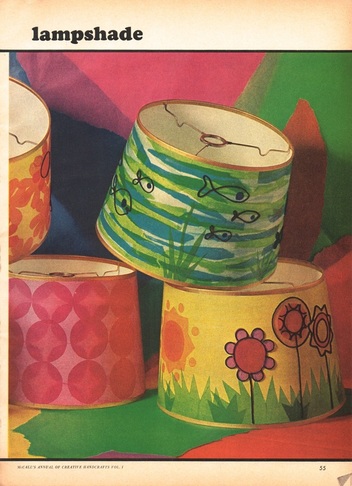
xo and happy spring. I'm working on a craft that's not quite ready yet, so in the meantime, here's another blast from crafting's past (that looks like it could be from 2016): paper-collage lampshades. I love that these are called "blithe designs." All you need is tissue paper, watered-down Elmer's glue, and black cord. Oh, and a lampshade.
Need more instructions and templates? I bet you don't, but here they are anyway, just in case!  More craftiness tomorrow...
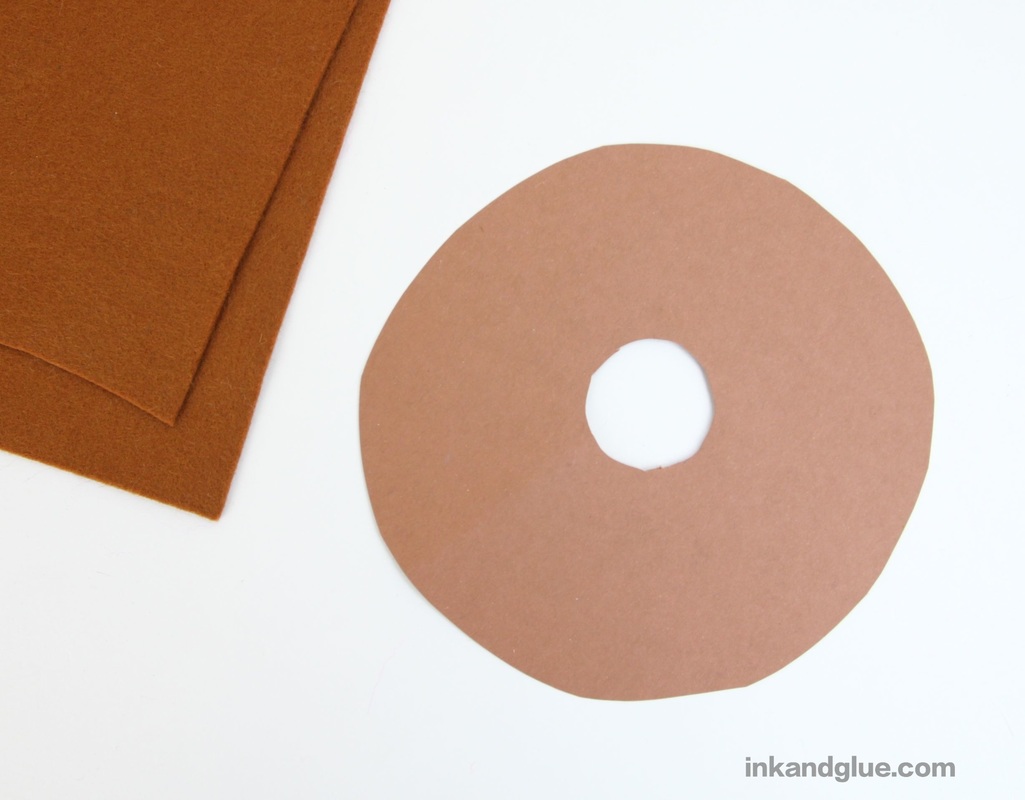
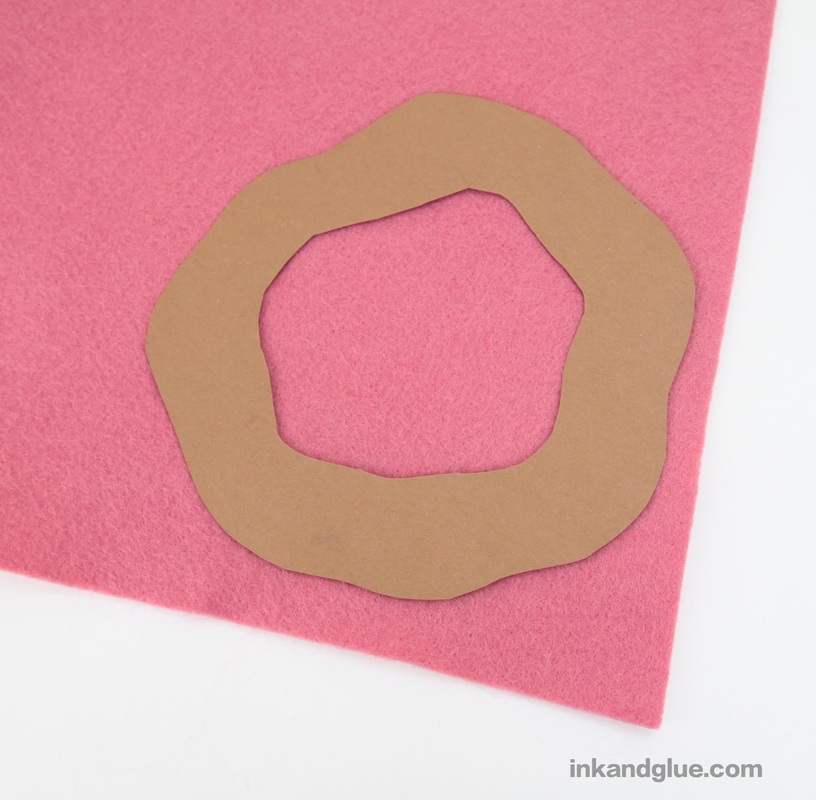
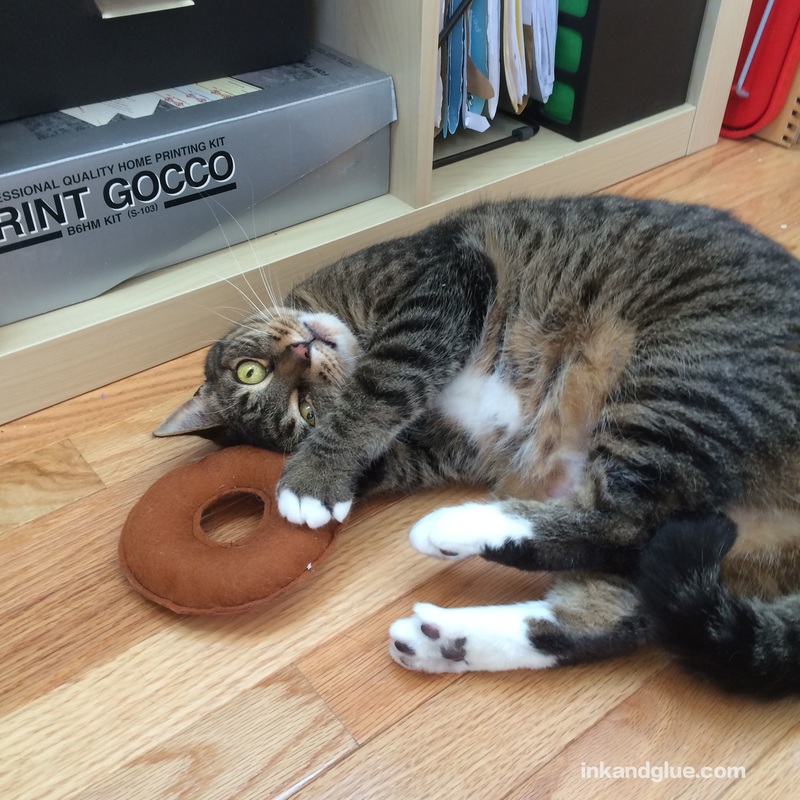
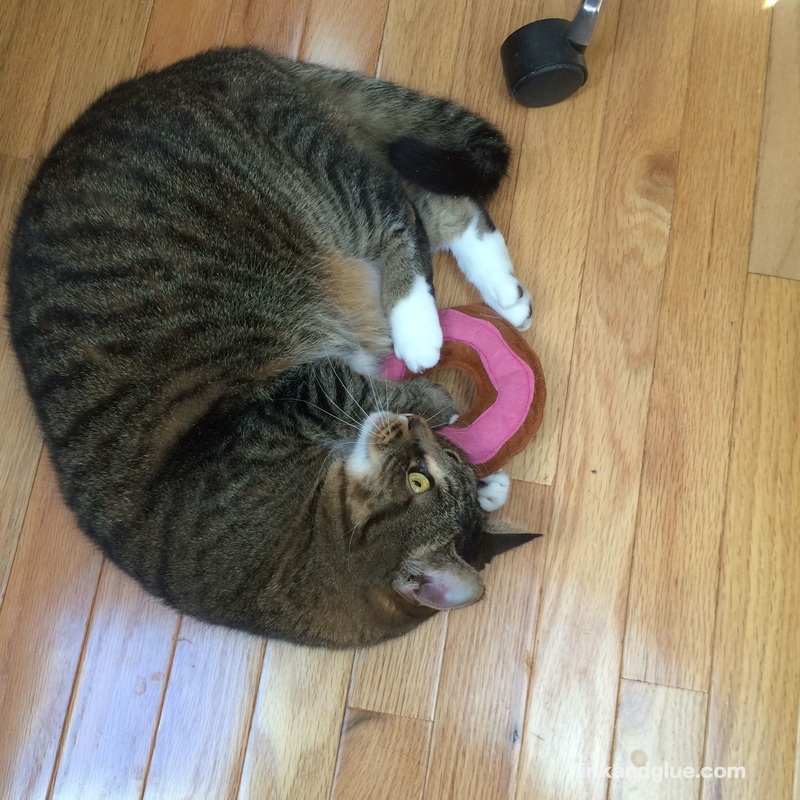
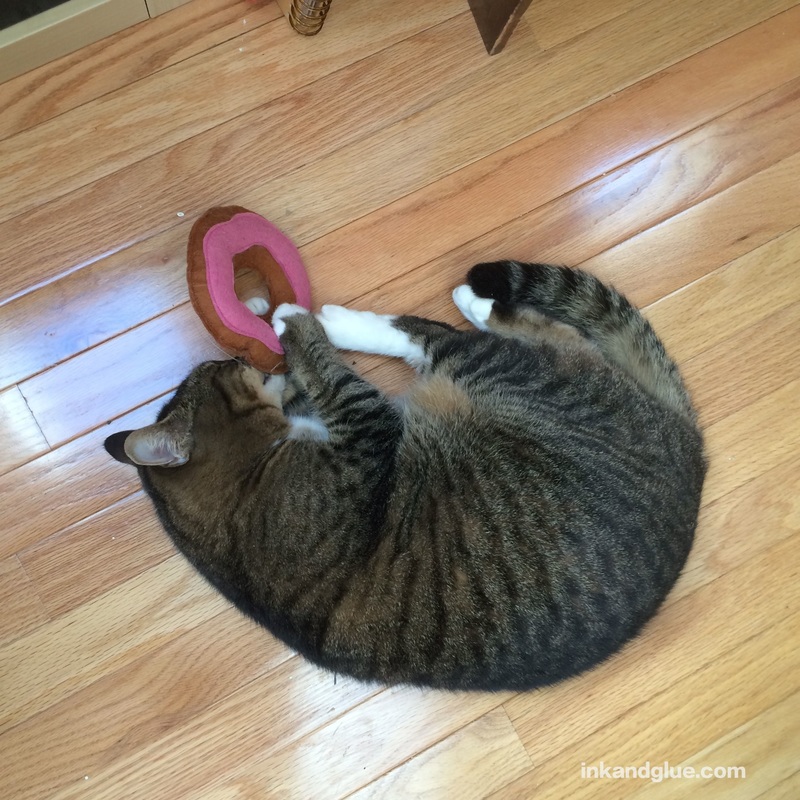
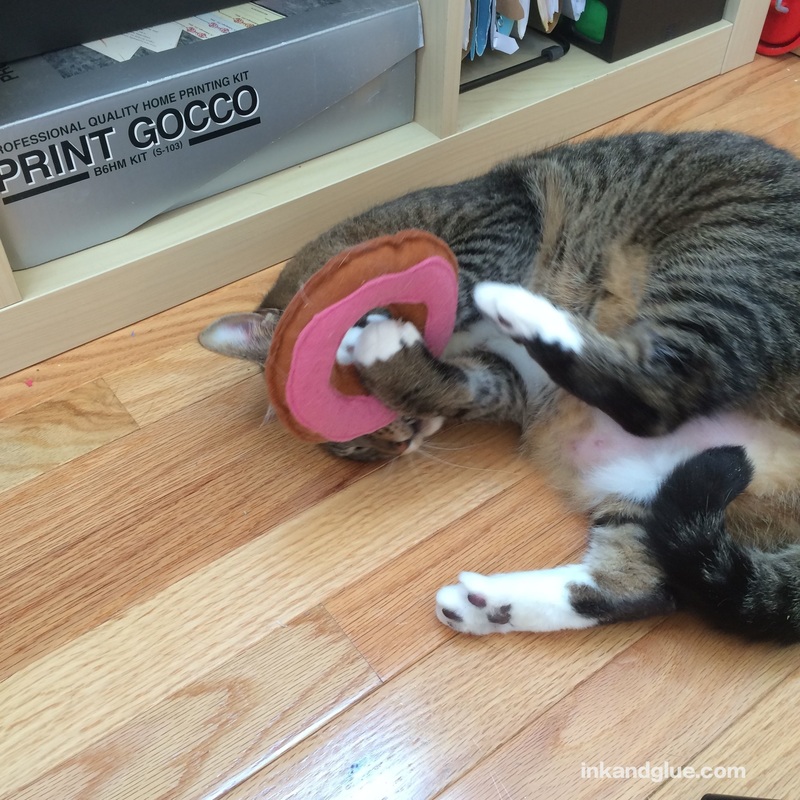
xo! I know I talk about my dog, Franklin, a lot on here, but I also have two middle-aged lady cats. The dog and the cats do not like each other, so they mostly keep to their own spaces. Franklin is a dog, so I can go on hikes with him all the time; the cats have literally never been outside in their lives. So, I provide what better zoos call "enrichment," i.e. toys. Enter this felt donut I whipped up. 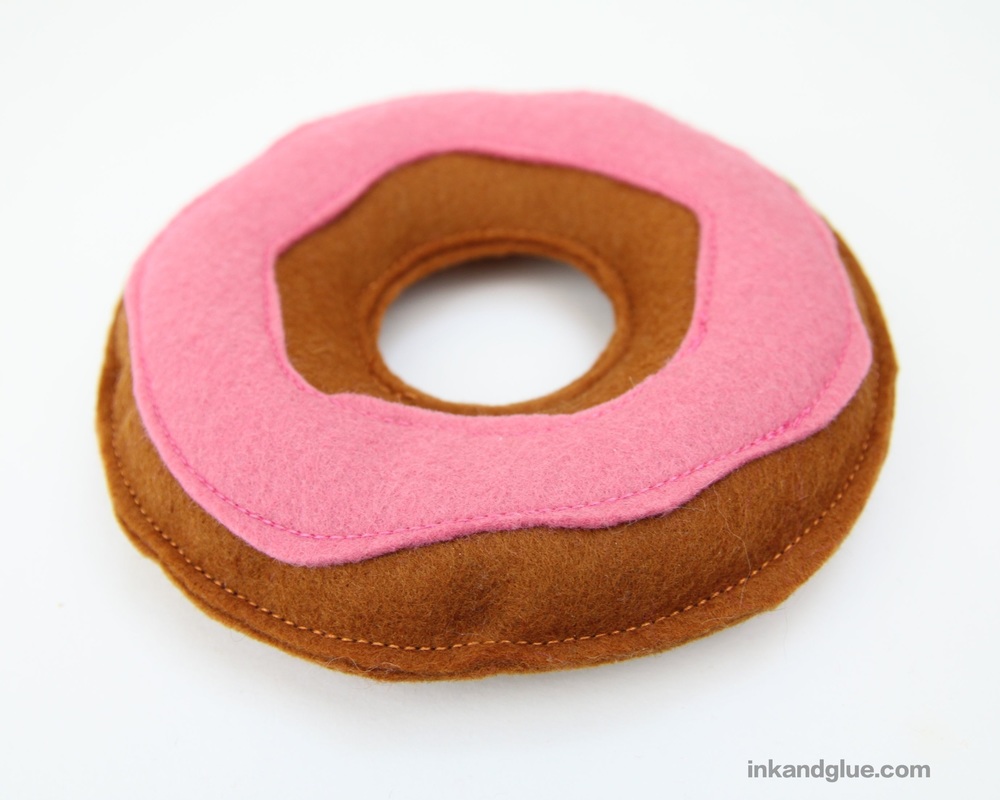 Now, I sewed this on my machine, but you (or a child) could definitely hand-sew this. There aren't any tricky inside-out seams. And it's a cat toy; the cat won't care if the stitches aren't perfectly tiny and even. I'd recommend just gluing the frosting on, instead of sewing it on, to save even more time. Either hand-sewing or machine, here's how you make one. Or, skip down to the bottom to see the toy in action with my cat Hambone. First draw and cut out a donut (more properly a "doughnut," but that seems archaic, so I'm sticking with donut; I apologize, copy editors) from a sheet of scrap paper. Place this template on top of two layers of brown felt, and cut around the outer circle. Because these won't be exact, symmetrical shapes, mark a point on the same spot on each circle, so you can match them up again later. I used a pin, but later I switched to a white chalk pencil.
Here's the chalk line match-up idea: 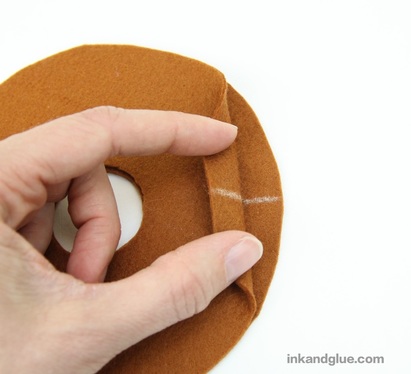 Use a chalk pencil and the template to trace the inner circle onto the felt. Keeping both felt circles together (pin them, if you'd like), fold them in half and cut out the circle. 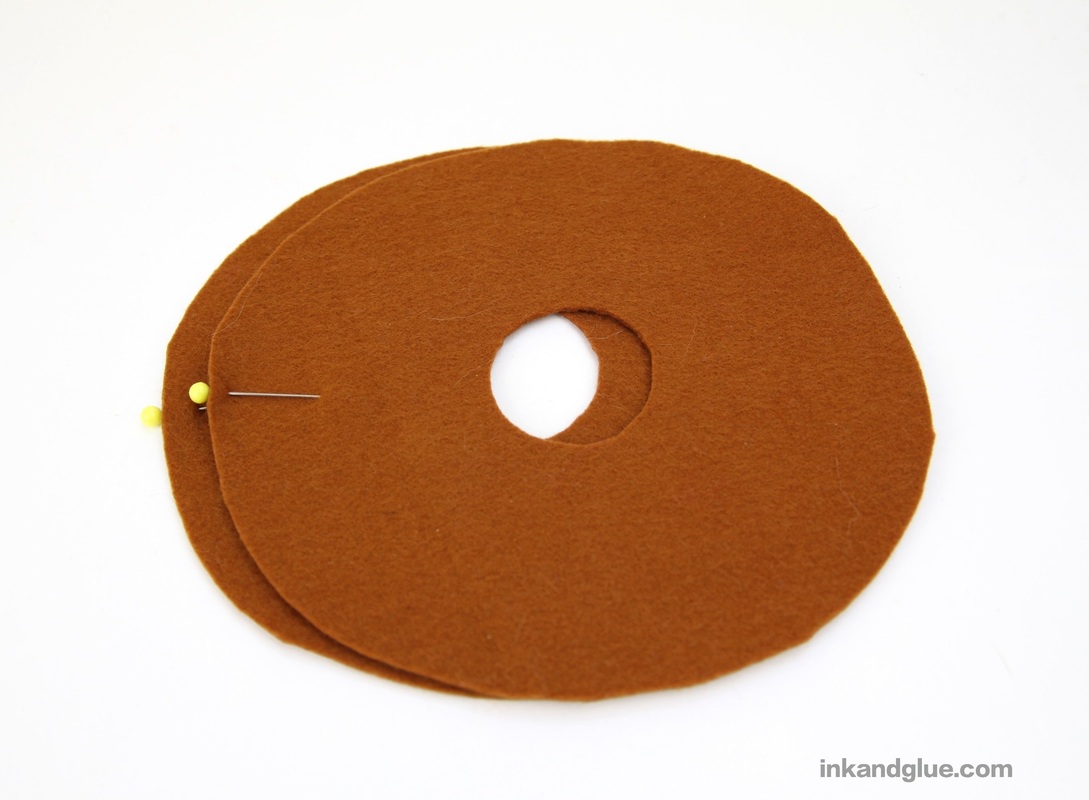 Now, draw a squiggly frosting circle on the paper template and cut that out. Use the shape to cut out the pink felt frosting overlay.
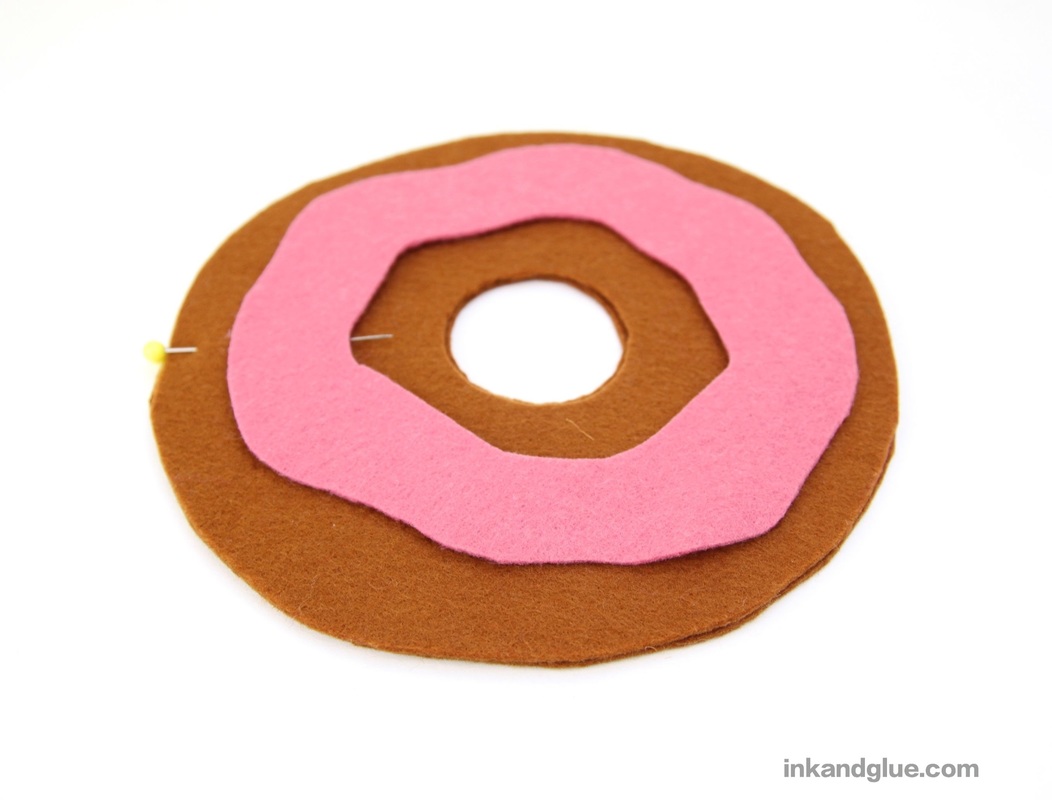
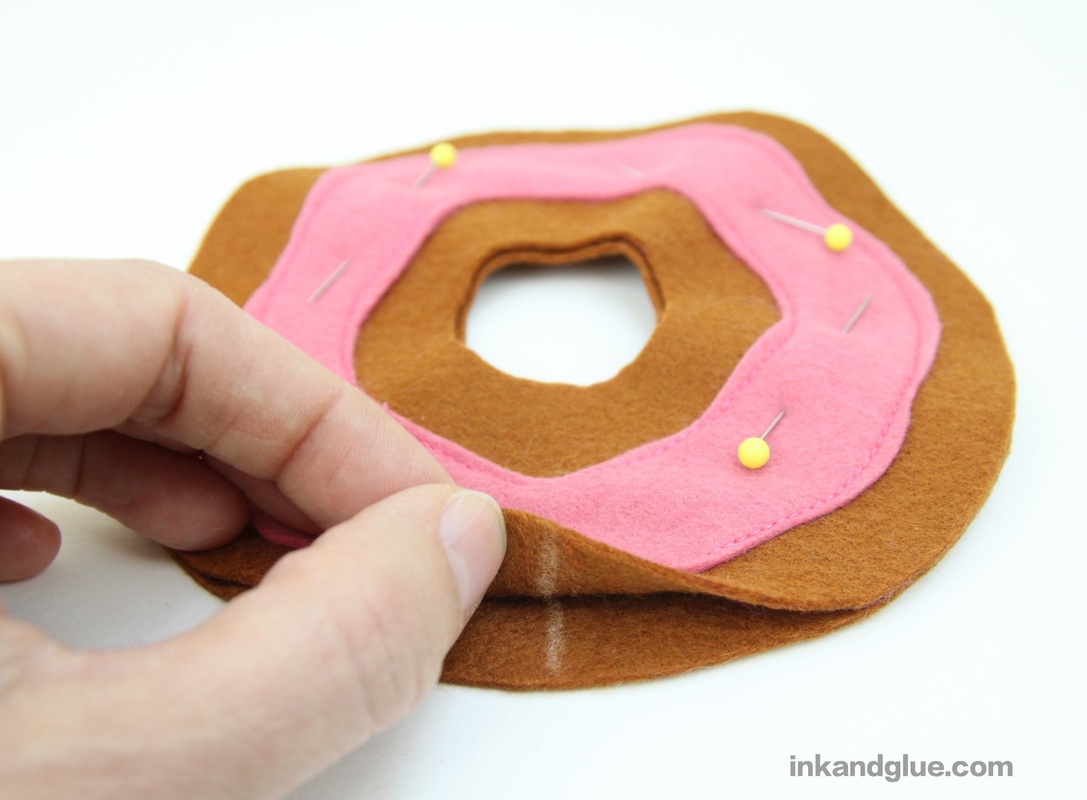
Attach the frosting to just one of the brown felt circles, either by sewing it on, or using hot glue.  Now, match up your two halves again, and pin them together. Sew the inside seam of the donut first, then sew about 2/3 around the outside.
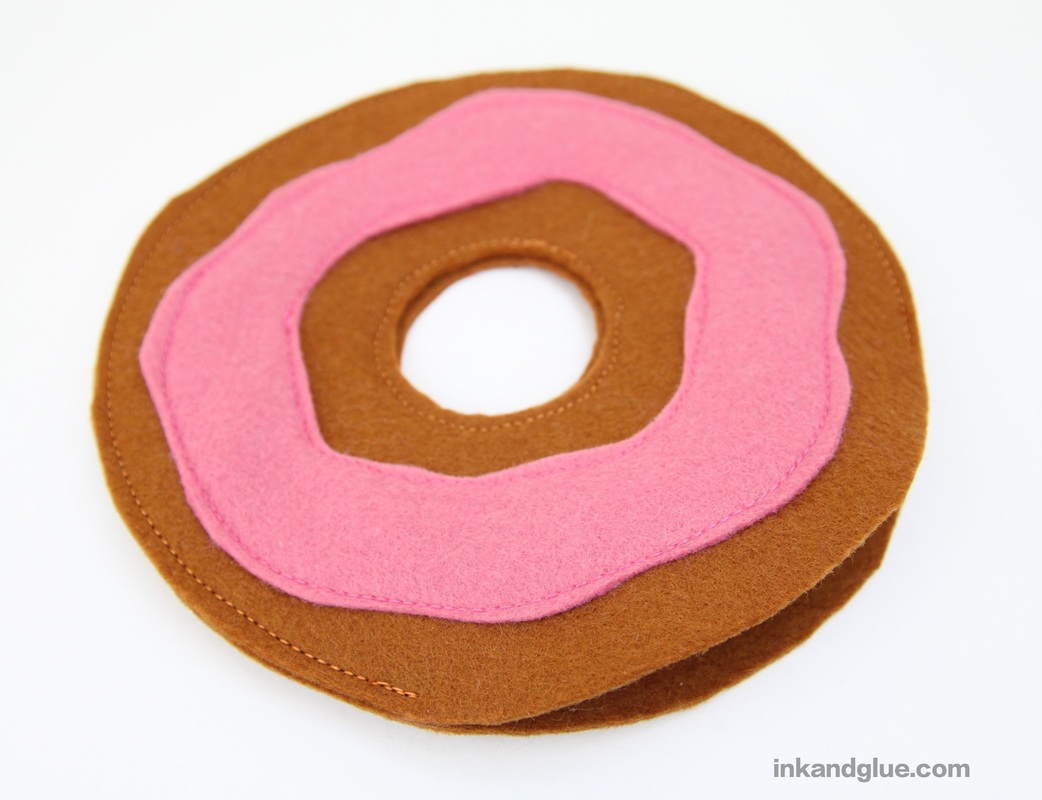
It's time to stuff the donut! I sprinkled catnip on the tufts of fluff as I pushed it inside. Press it into place around the unsewn quadrant, too. 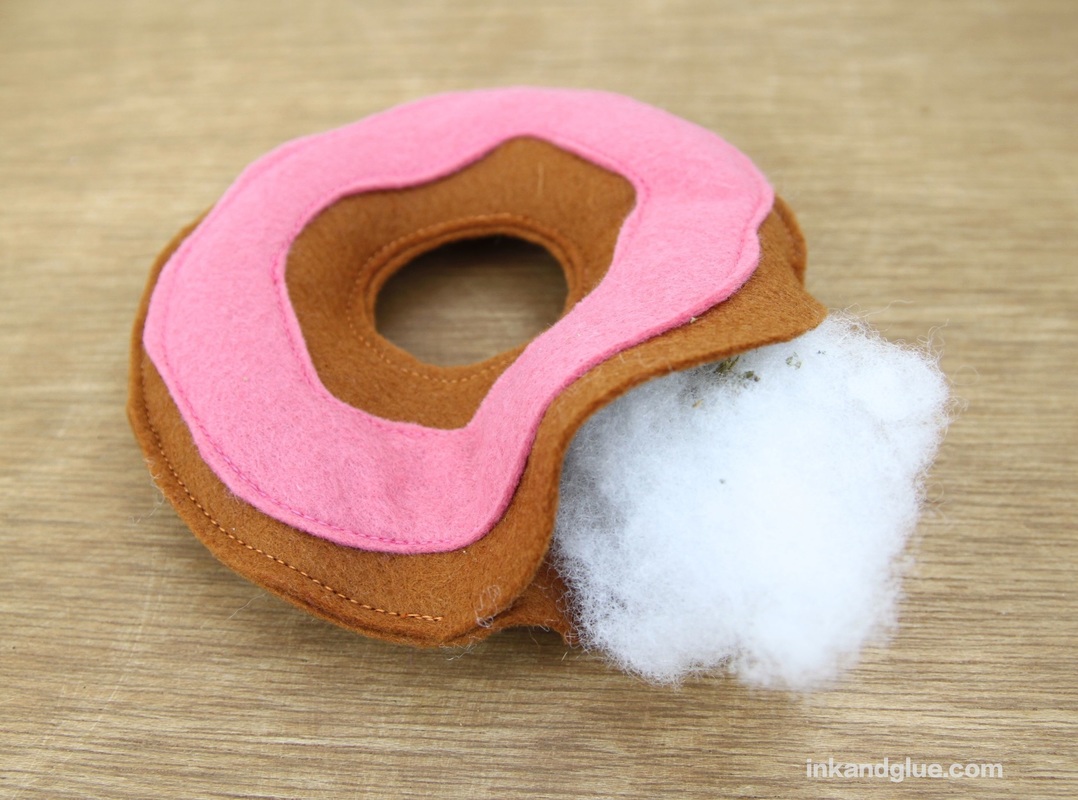 Pin the remaining open area closed, and sew it shut. Done! 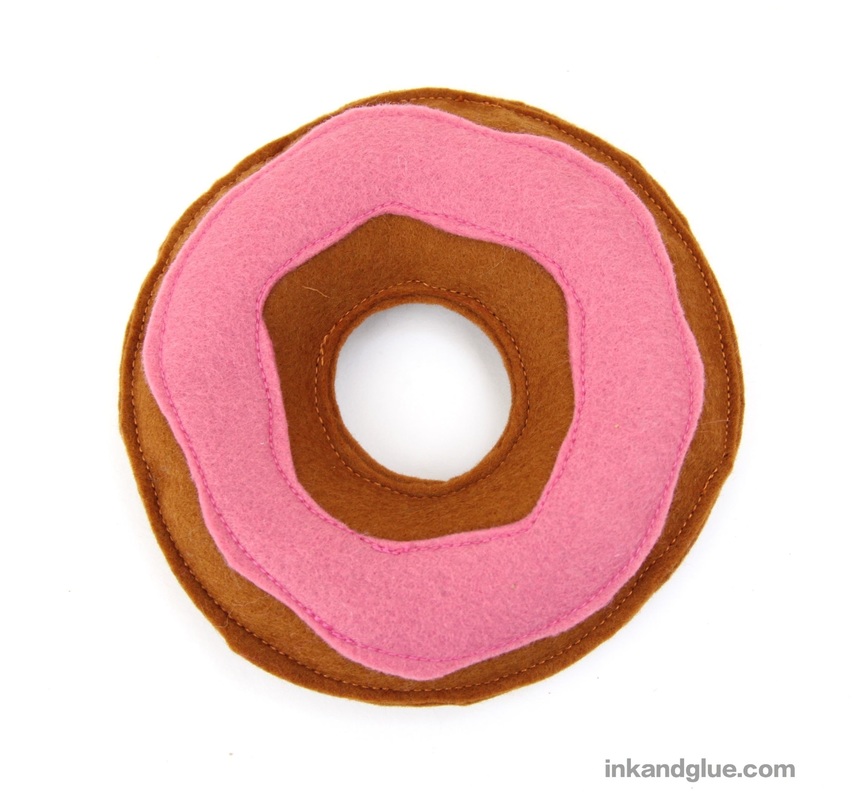 Do cats like it? Oh yes they do!
(thanks to Hambone for her modeling help.)
xo! ...that solve all of your string-management problems! Thank you, 1966. These houses use lots of burlap in many colors. Burlap was a "thing," or at least craft stores attempted to make it be a "thing," a year or two ago. As a result, it's fairly easy to find colored burlap.  The bases of the houses are empty detergent bottles. If one wanted to, one could call this an Earth Day craft, because it utilizes material that might otherwise get thrown away (assuming your local recycling center doesn't accept this type of plastic). But whatever, I think they're adorable.  Need patterns for the house details? I've got you covered. 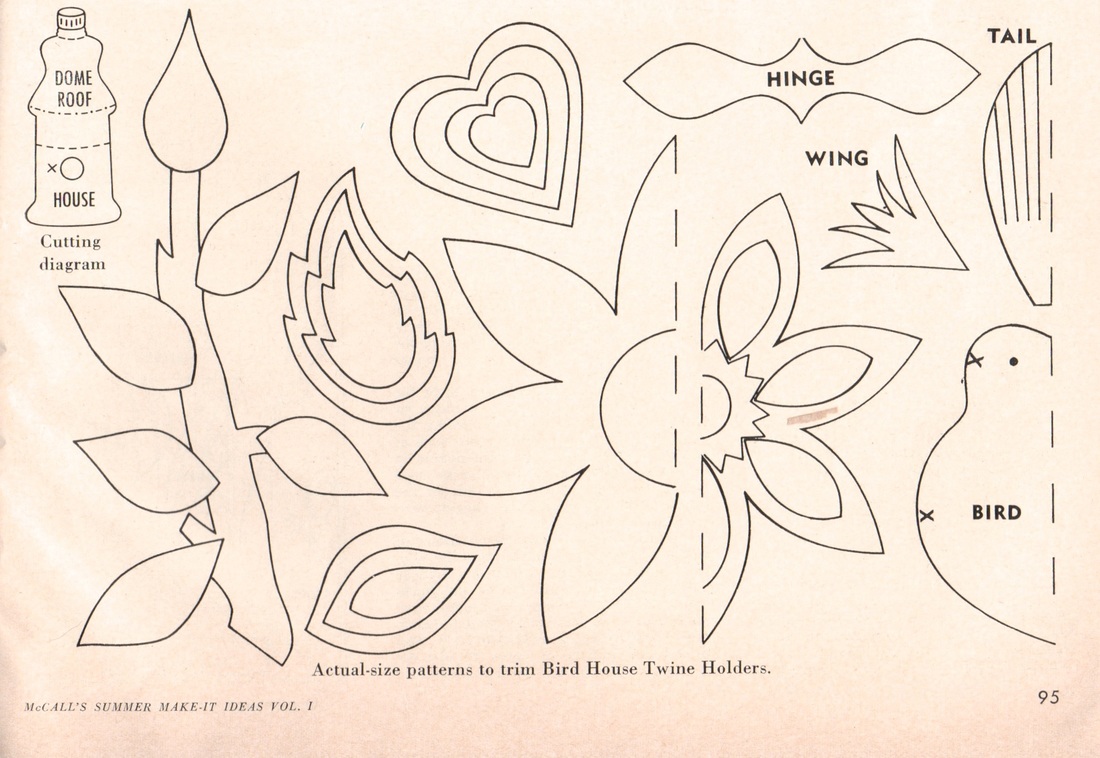 Of course if you aren't constantly reaching for string and have no need for a dedicated holder, these could just be decorative. Or add a larger door, and it becomes a dollhouse for a Littlest Pet Shop or Shopkins or Calico Critters or whatever small creature your child is currently in love with.
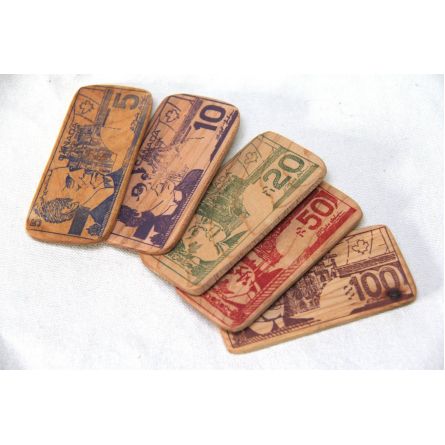
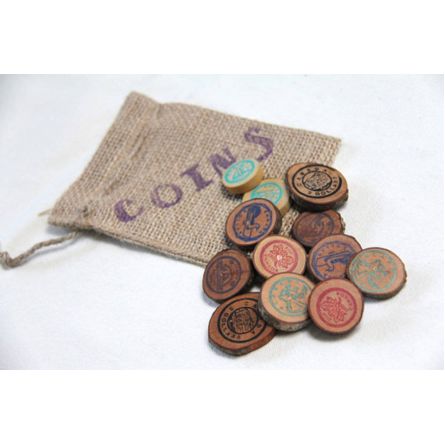
xo! The Woodlot is the company name used by a family that lives in Ontario. They make things from the wood they find on walks in their 125-acre property. And because they are such huge fans of the forest, they strive to let the beauty of the wood itself be the focus of their products. I especially love their toy cars, which are simply a half-round (or thereabouts) of a log. You can count the rings! 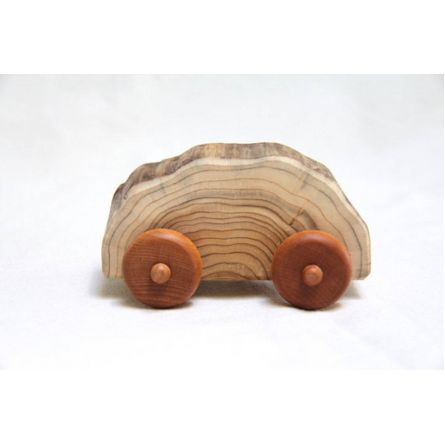 All of their items are finished with a natural beeswax polish. And get this, these cars are a mere $10 each. 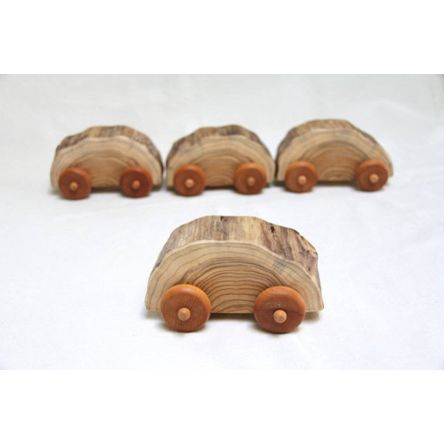 They also sell wooden money — Canadian, of course.
My little guy found the perfect perch at my parents' house: the back of a sofa. It's the best place to catch the rays from the skylight. 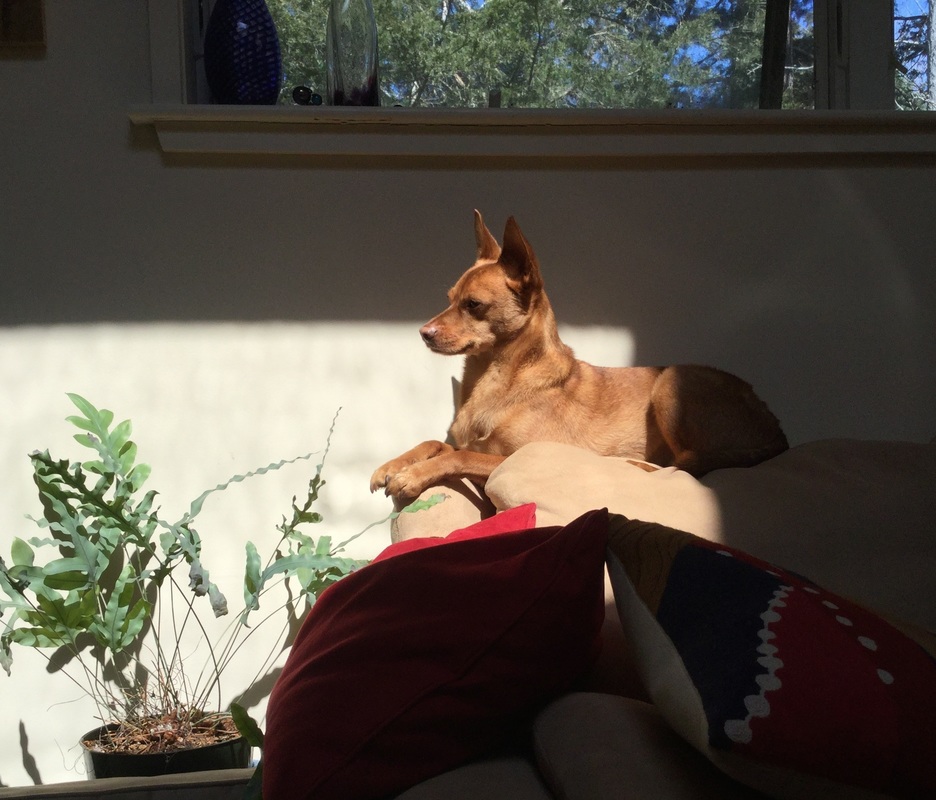 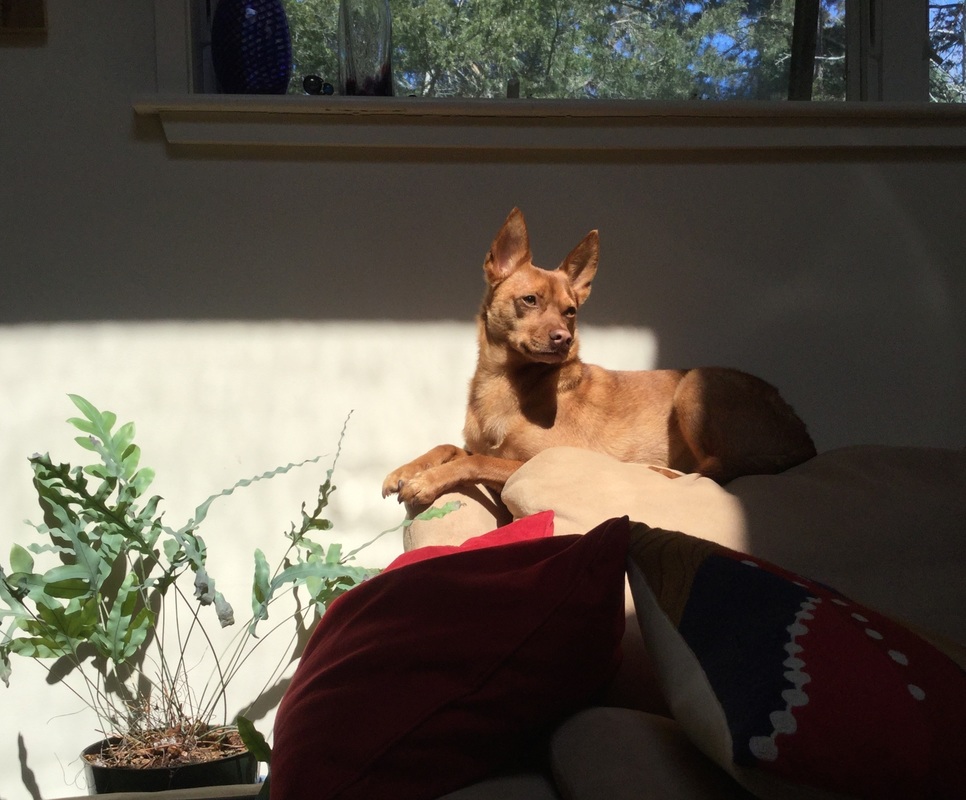 Photographs by my niece Tallulah!
xo |
Categories
All
Archives
March 2017
AuthorI'm Debbie Way, an artist and writer who enjoys making things. |
||||||||||||||||||||||||||


 RSS Feed