|
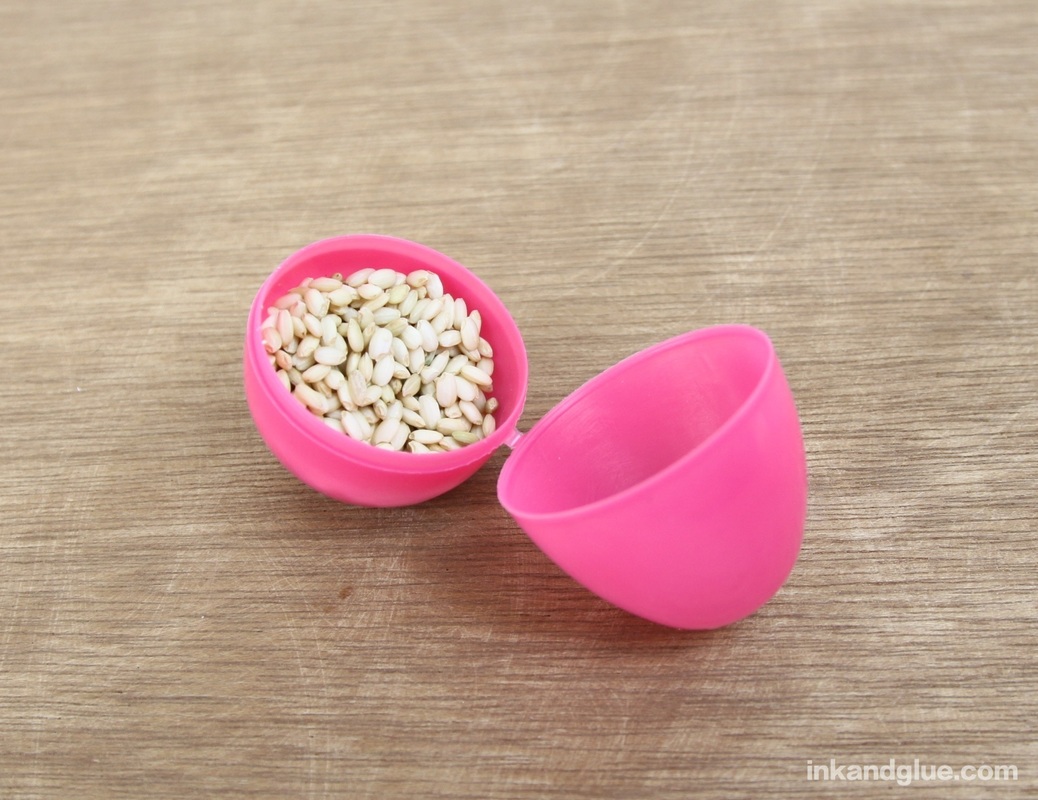
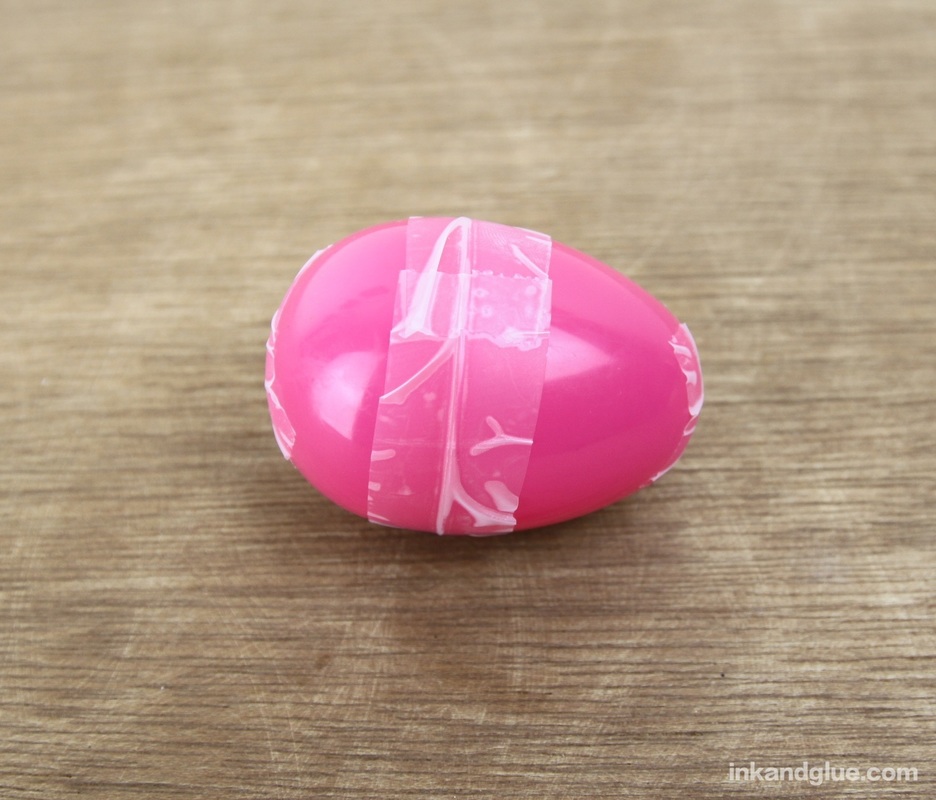
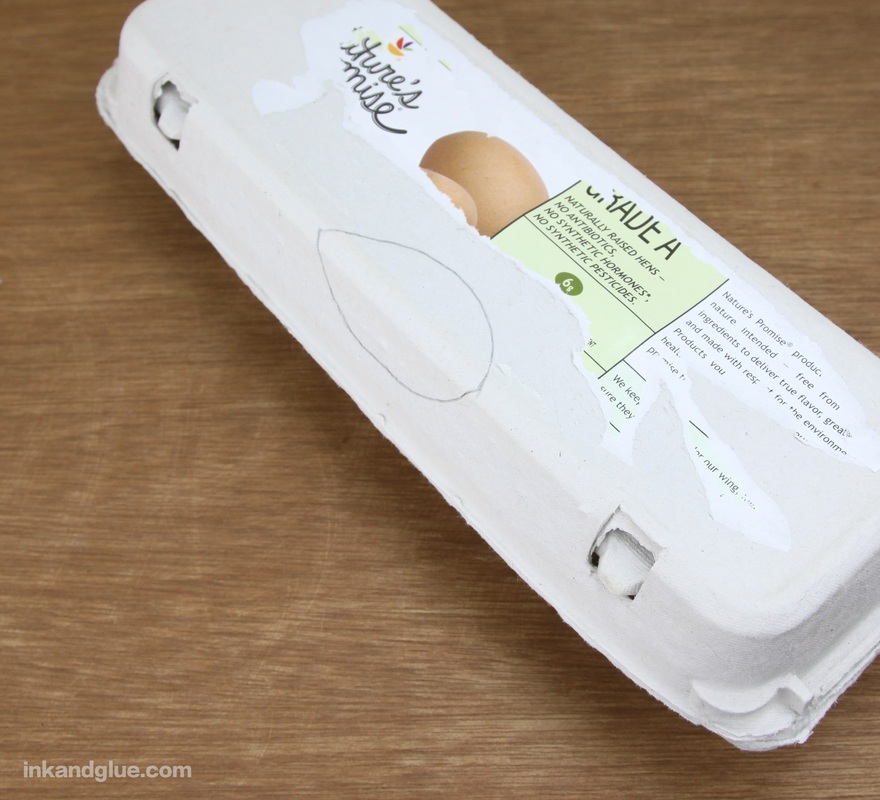
For a product that's so tied to a single holiday, plastic eggs are incredibly versatile. I've seen them made into tiny tea cups, covered in wool roving, used as Jello molds, and transformed into fireflies. I mixed two ideas together and turned a couple of eggs into hand percussion instruments that happen to look like cute spring animals. 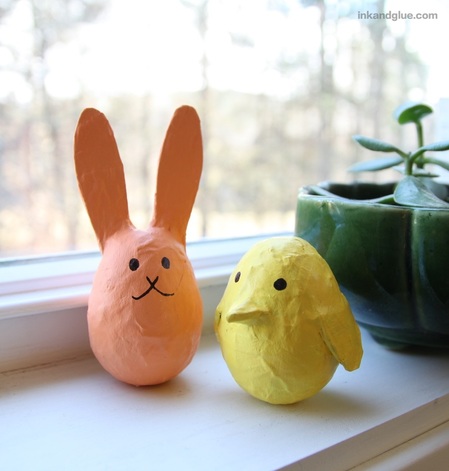 These sound just like the plastic egg shakers you can buy at music stores, but these are both cheaper and cuter. Win-win!
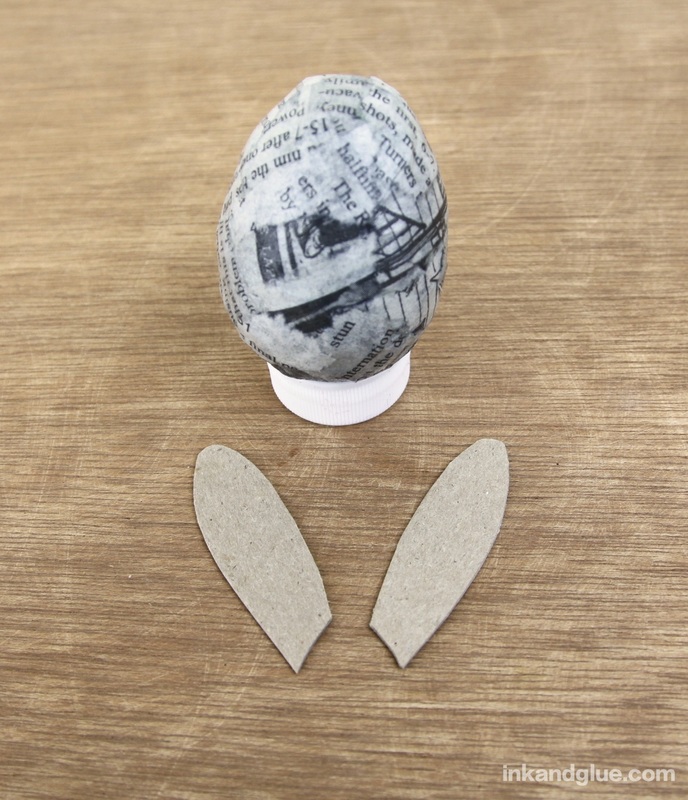
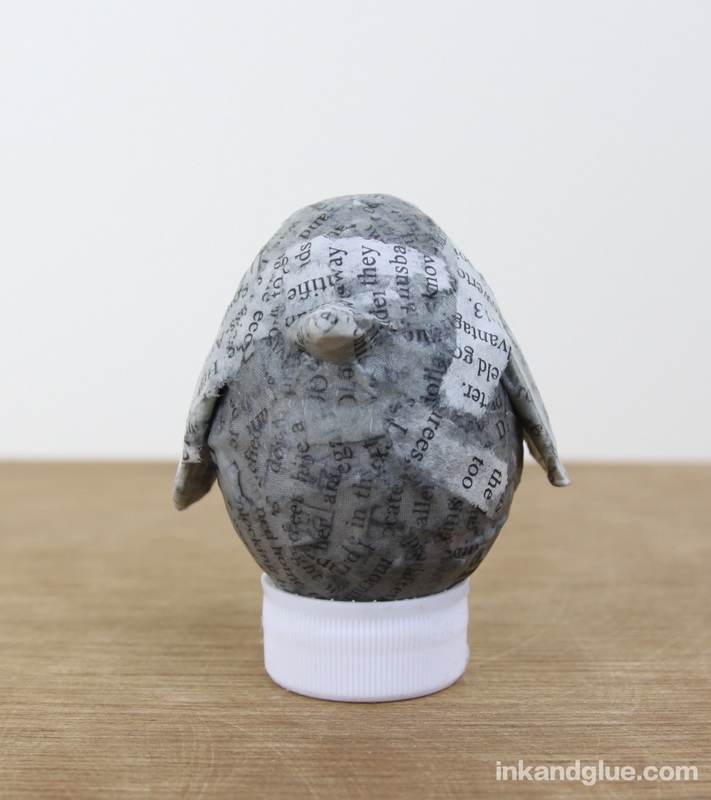
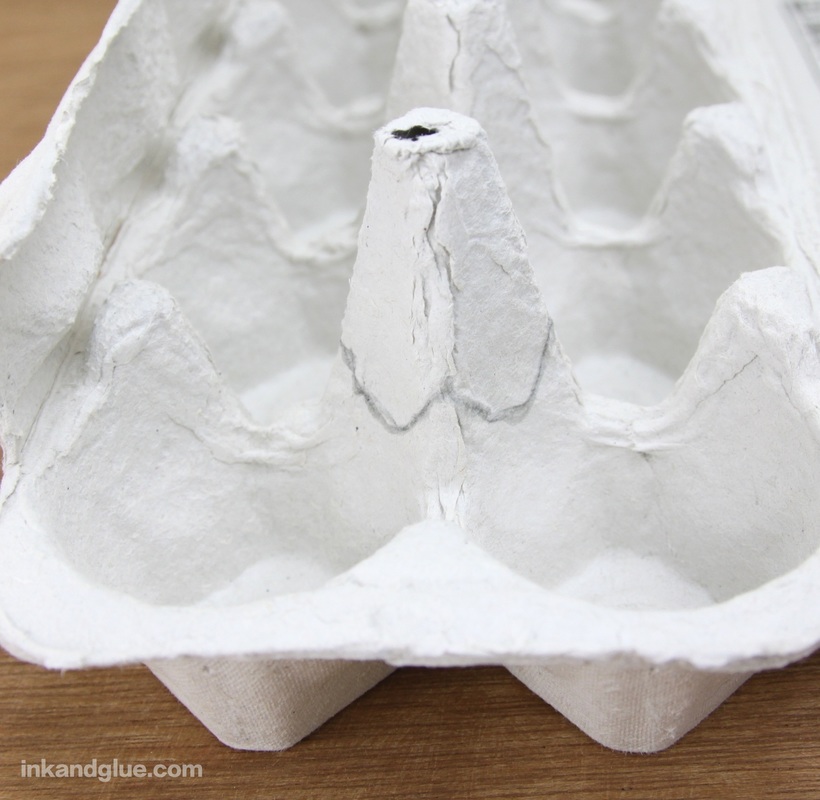
Now the fun, messy part: Papier mache! You can use the traditional water and flour mix, but I used my favorite stuff, powdered wallpaper adhesive. (Note: That link goes to Amazon, and I get a few cents if you buy the product after clicking. This is the exact product I use.) It's super strong and, as a result, you don't have to have as many layers of paper. 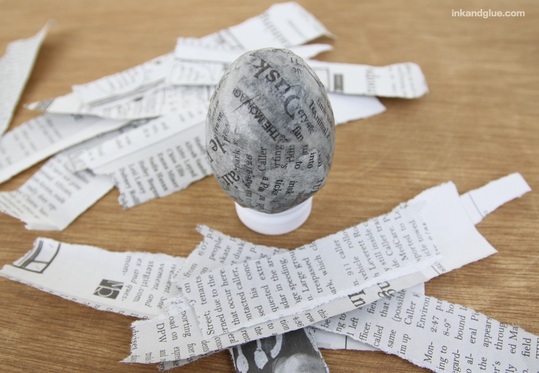 After you've covered the egg with a few overlapping layers of gooped-up newspaper, add any three-dimensional features. I cut ears, wings, and a beak from cereal box cardboard, and attached them using small strips of papier mache. The ears were a pain in the butt to keep in place, to be honest. Next time, I'd let the egg dry, then hot-glue on the cardboard ears, and then cover them with papier mache.
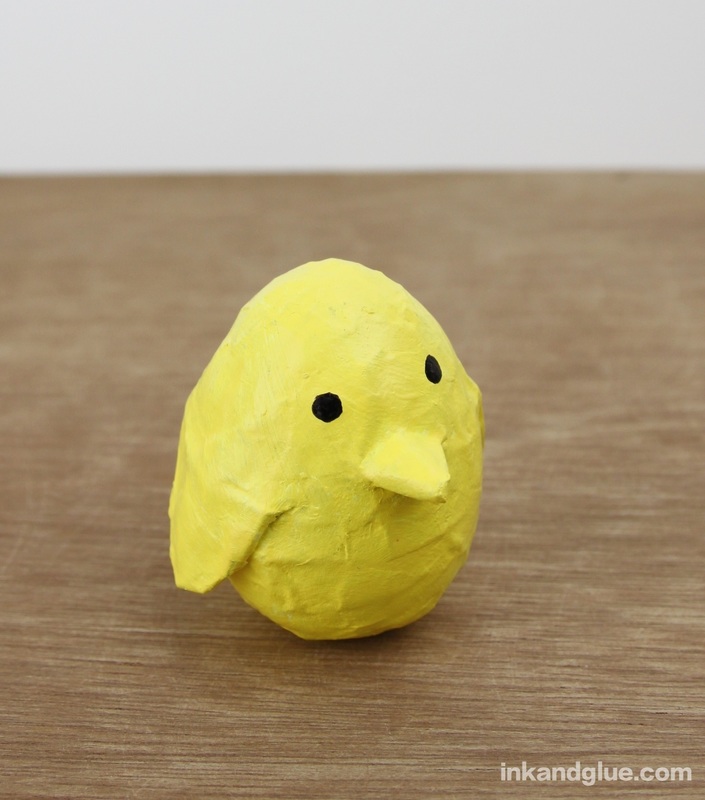
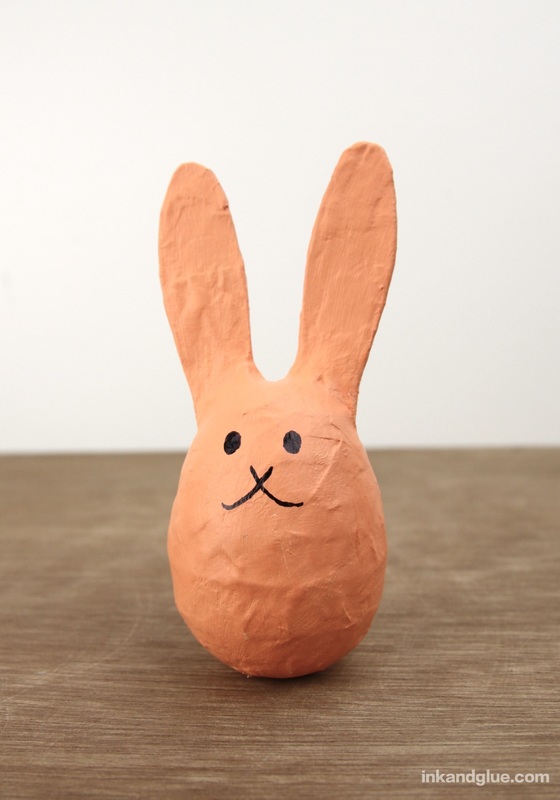
Let the paper dry completely. For me, during clammy, wet weather, this took almost 24 hours. Now, paint! I covered both bunny and chick with white acrylic craft paint first, and after that dried, added a coat of color. Once that paint is dry, add some facial features with a marker. Done!
Once dry, these guys are sturdy. Shake them to the rhythm of your favorite song. Their sound adds a kind of jazzy, Latin flavor. It's fun!
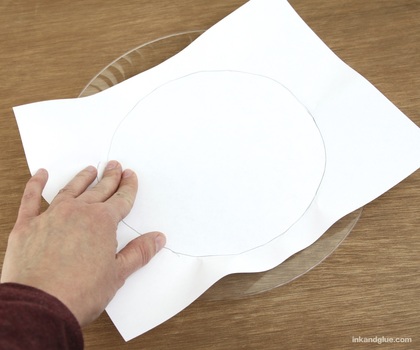
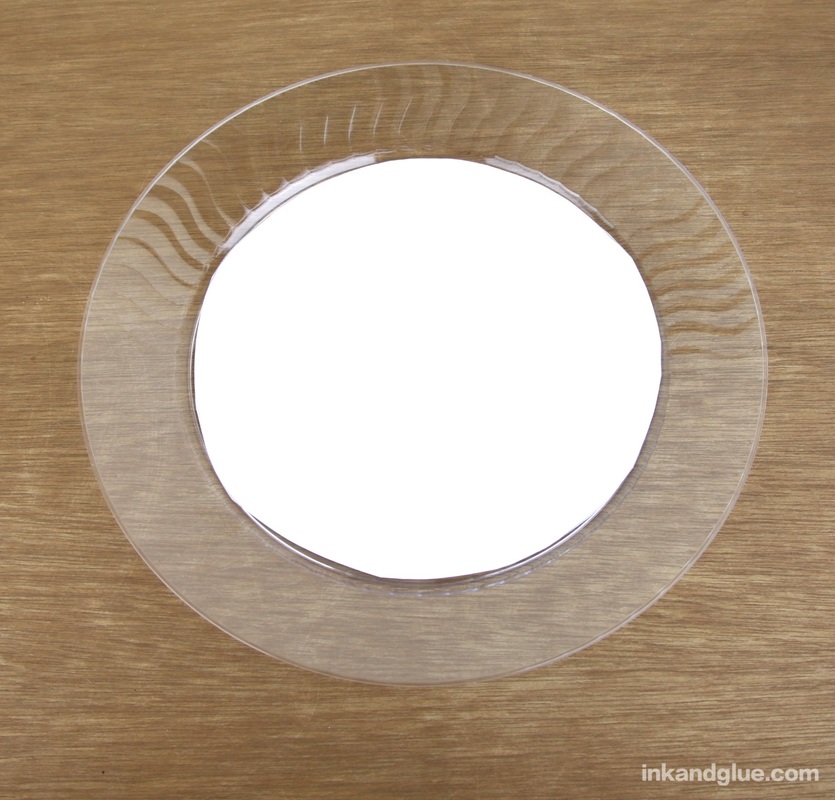
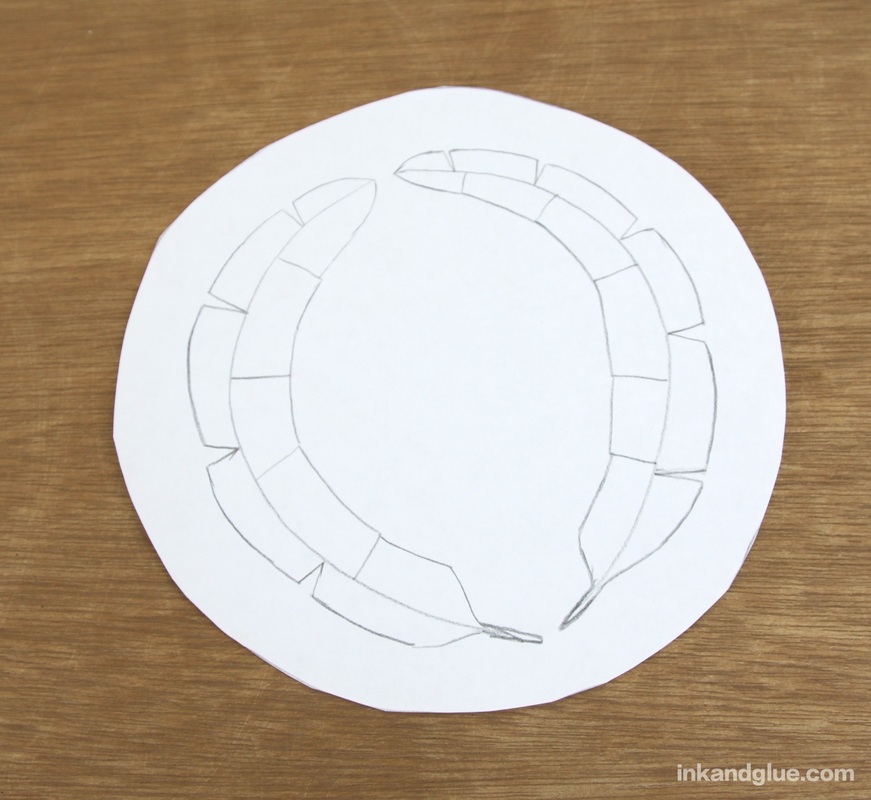
xo 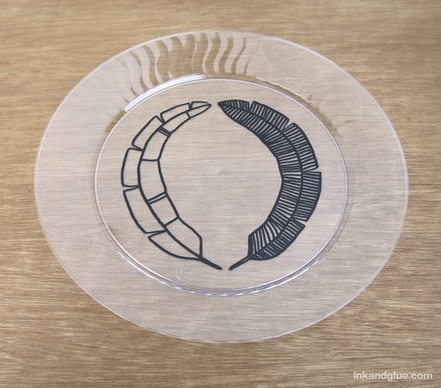 I'm working on a craft project idea for a client, and the work has led me to play around with oil-based Sharpie markers. I've only bought a black fine point, so far; if you buy a whole set, you're halfway to having a great party craft for middle-school-aged kids (and up!). The other half you'll need is a package of "crystal" Chinet plates. (I got a package of 8 plates at my local supermarket for under $4; link is for reference.) The trick to keeping this project food-safe is to only use the marker on the bottom of the plate. You could freehand a drawing, but I think it's smarter to work out your design on paper first. Create a paper template by using your fingers to rub and crease a sheet of plain copy paper onto the interior circle of the plate. Trace this interior depression with a pencil, then cut out the circle.
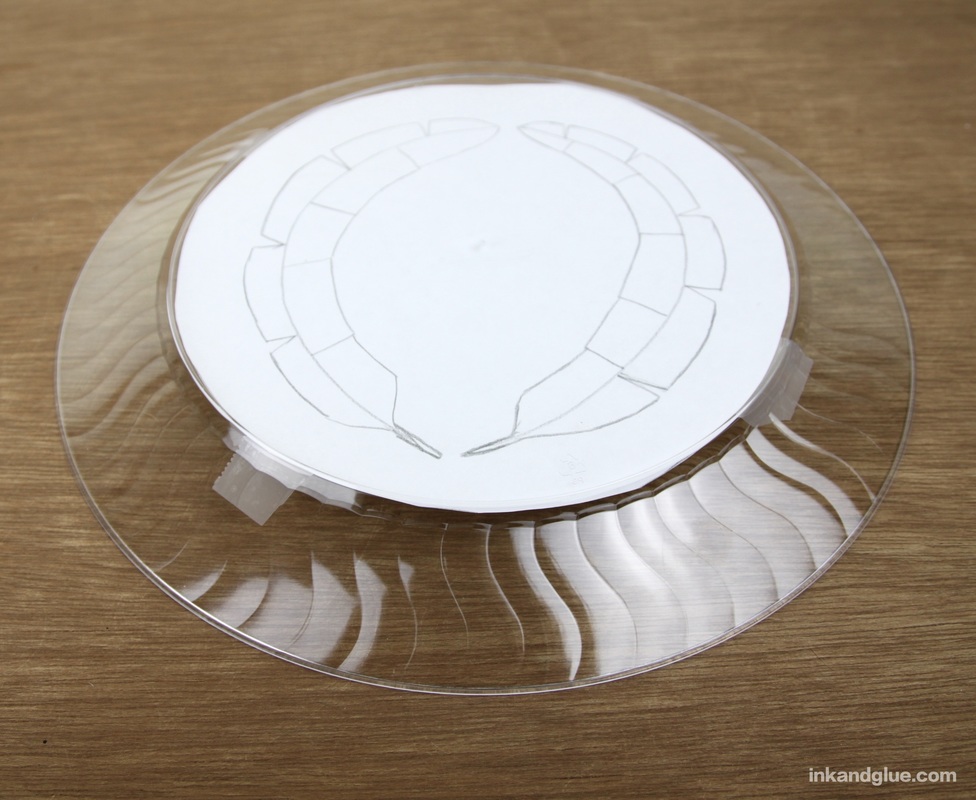
Here's what the plate looks like with the paper still taped onto the plate's front. 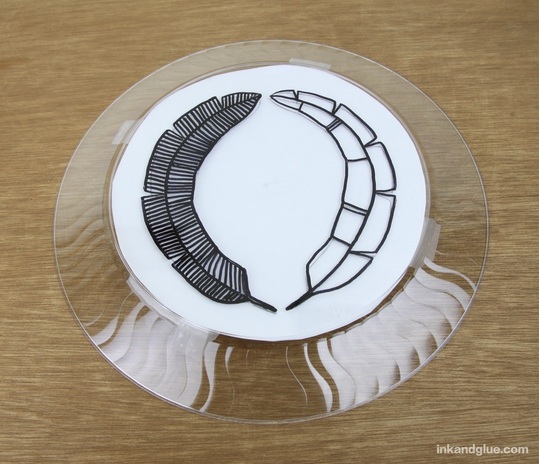 After the ink dries completely (I waited a few hours, to be extra cautious), you can hand-wash the plate with dish soap, and the ink will stay on! I wouldn't put this in the dishwasher, however; treat it gently, and it should last a long while.
Have fun! xo This cook book from 1960 is the perfect "i love vintage" entry for 3/14, aka Pi Day! The recipes include so much shortening, you guys. And lots of raw eggs in frostings. And "enriched flour," which, is that even a thing anymore? 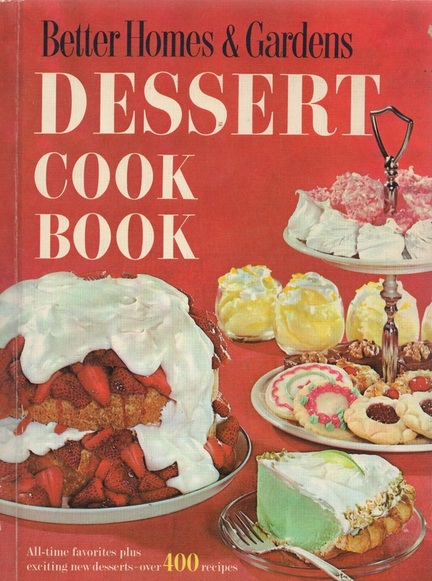 Unfortunately, there's no close-up photo of the luridly-green lime pie shown on the cover. But there is a pic of a nice-looking apple pie which has been defiled with "cheese cornucopias:" rolled-up slices of what appears to be American cheese, held in their cone shapes with clove "pegs." Urp. 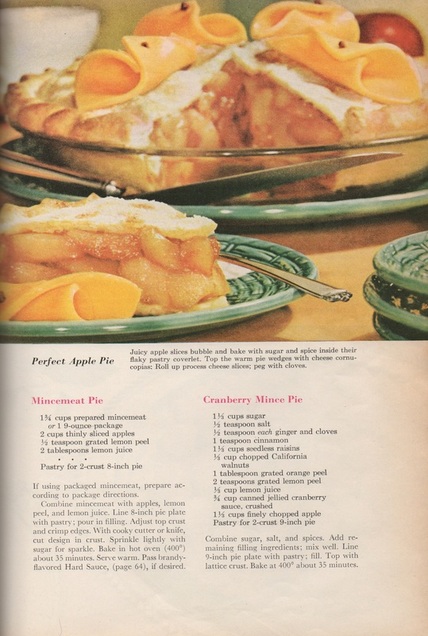 I include the following page as an entry for my imaginary "most iconic image of a cherry pie" contest. 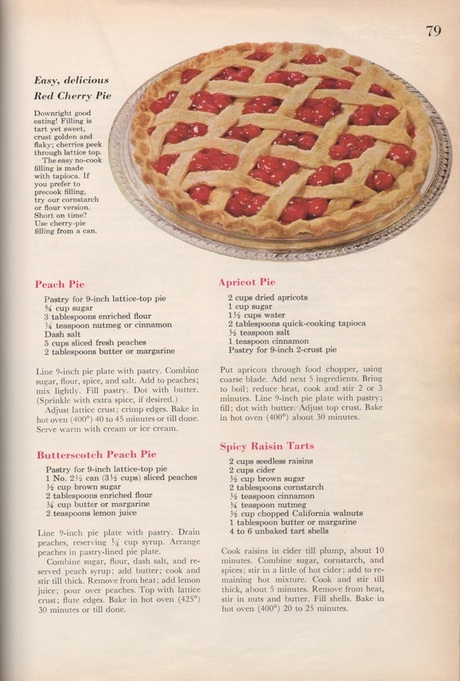 Pecan pie was a family favorite when I was growing up. My grandmother grew up in Louisiana. To honor her memory I try to remember to pronounce "pecan" with the "can" rhyming with "car," not with"man." It tickles me that they angled the serving spade just so in order to reflect the pink flower that's been cropped out of the frame.  And this is 1960, so there is a lot of canned fruit showing up all over the place. I admit that I am a fan of chilled cling peaches in juice (not syrup). The recipe (not shown) for this Peach Parfait Pie calls for a No. 2 1/2 can. (What? Here. Thank you, Google.) The rest of the recipe involves gelatin and vanilla ice cream. 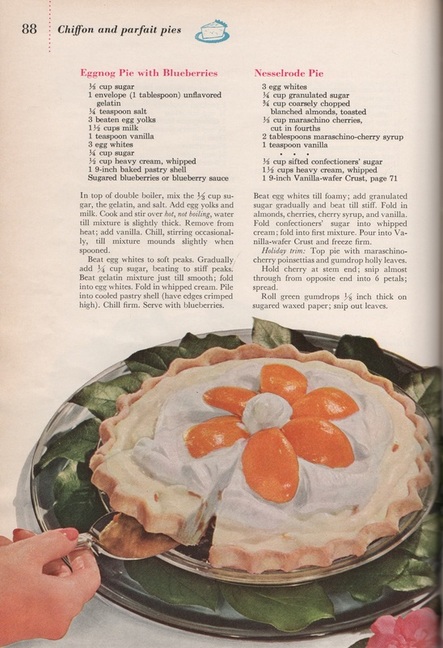 And finally, a non-pie dessert that I felt compelled to share on account of its accompanying mums with cut-out paper facial features stuck on them. Also, note the chopped walnut and candy corn garnish. This is a Spice Layer Cake with Date-Nut Filling and Brown-sugar Frosting, if you're curious. Go-with: Hot Cider, back when cider was filtered so completely it may as well have been plain ol' apple juice. 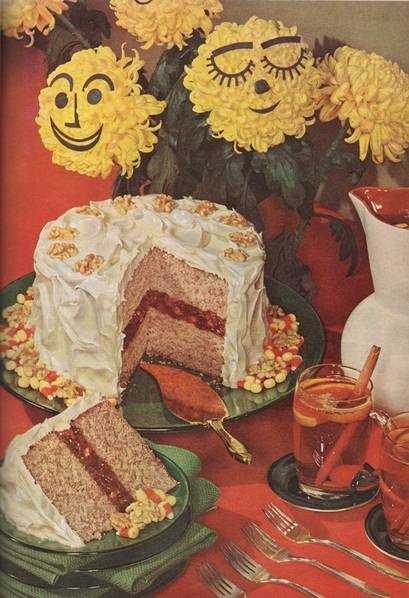 Happy Pi Day! I hope you get to enjoy a slice.
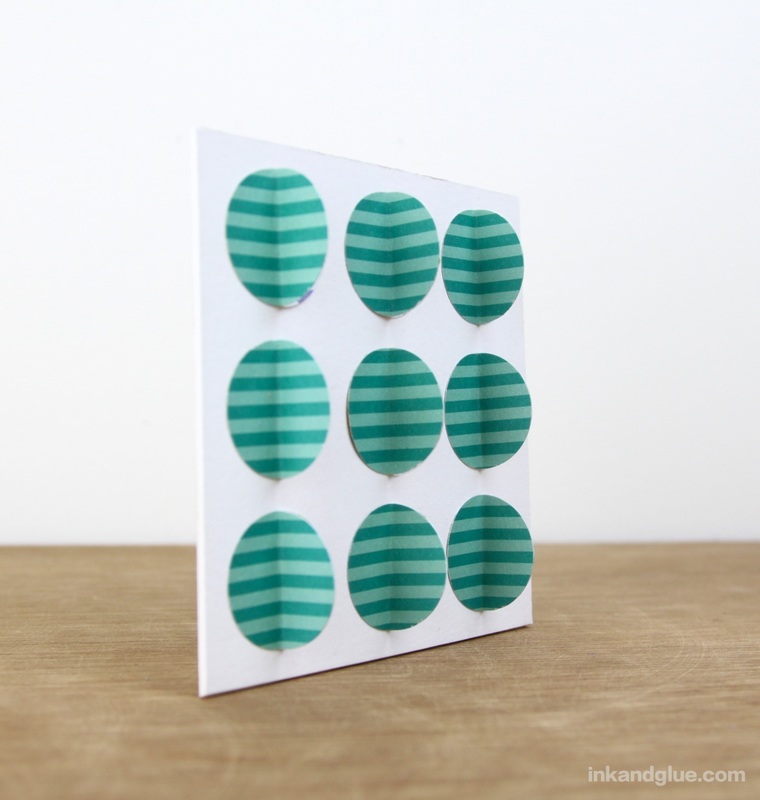
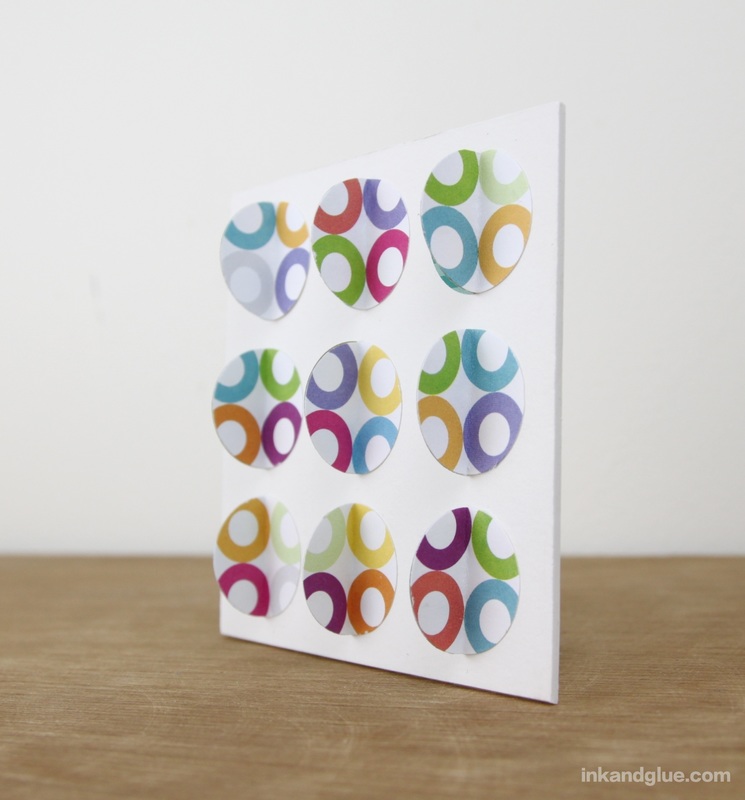
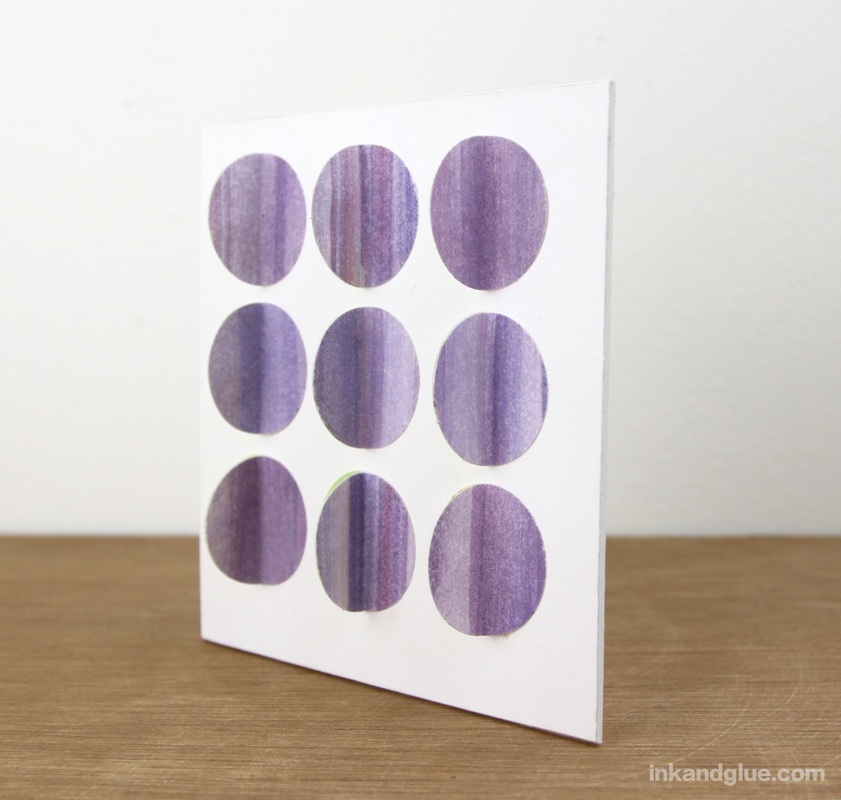
xo Remember the lenticular birthday card I posted a week or so ago? This art project is something of a take on that idea. 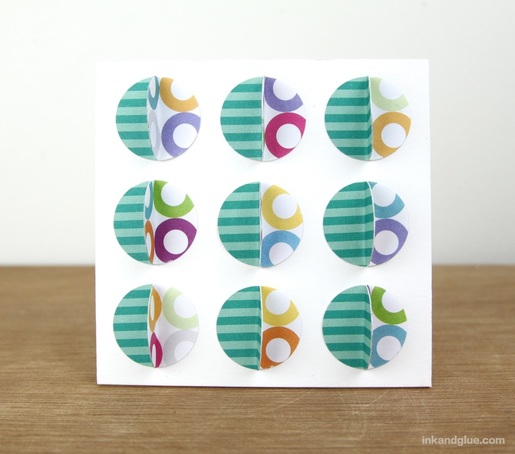 Looking at it straight on, you can see each circle is half one pattern, half another. Turn to see it at an angle, however, and the second pattern is erased from view.
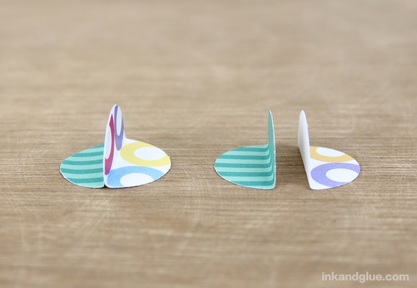
This artwork is easy to create and make it your own way. I started by using a 1-inch hole punch to cut nine dots from two sheets of complimentary patterned papers. Don't have a punch? You can trace a quarter and cut out the circles with scissors instead, but I'd recommend stacking the two pieces of paper and cutting through both sheets at once to get an exact fit; just be sure to keep each pair together as you proceed. I also cut a square from a scrap piece of mat board I got from my local art supply store; any sturdy board will do, such as poster board or regular ol' cardboard. 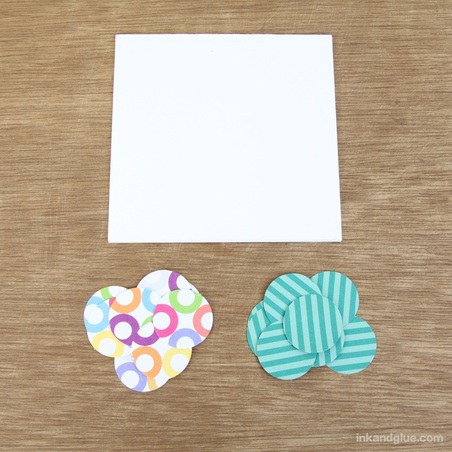 Fold each circle in half, with the printed/colored side on the inside of the fold. 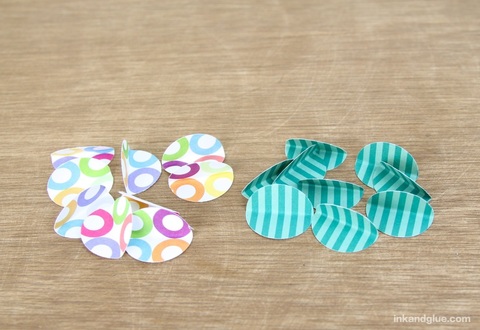
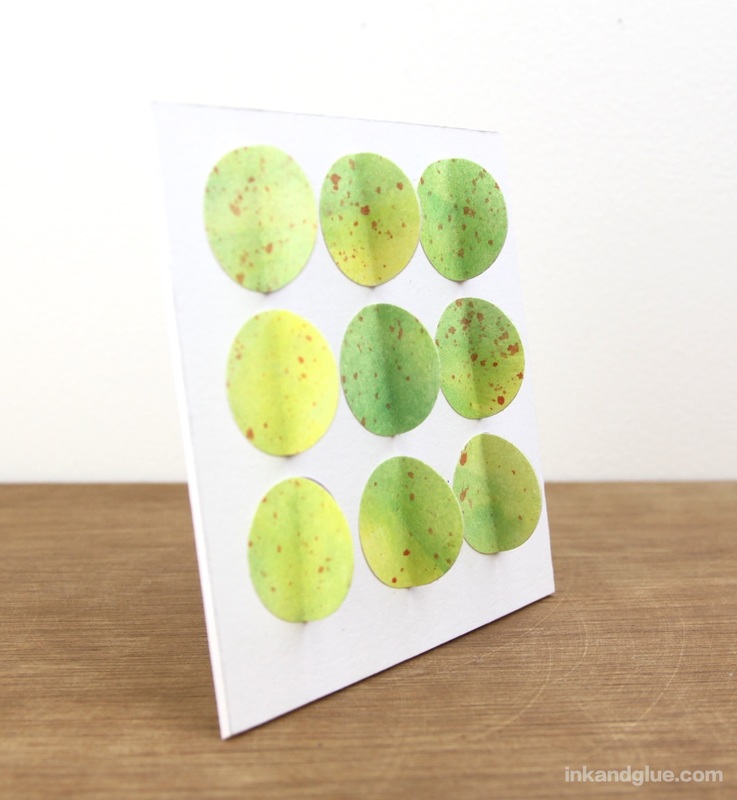
Once you have nine of these conjoined pairs, glue them in a grid to your board. I just eyeballed it, but if precision is important to you, use a pencil to lightly draw three straight, vertical lines spaced evenly on the board, and line up the dots' center folds with the lines. Erase the pencil marks. Done! I redid this project using scraps of drawing paper on which I'd painted some watercolor washes and splatters. I really like using handmade decorated paper for projects. Without meaning to, I ended up with a pastel Easter vibe. 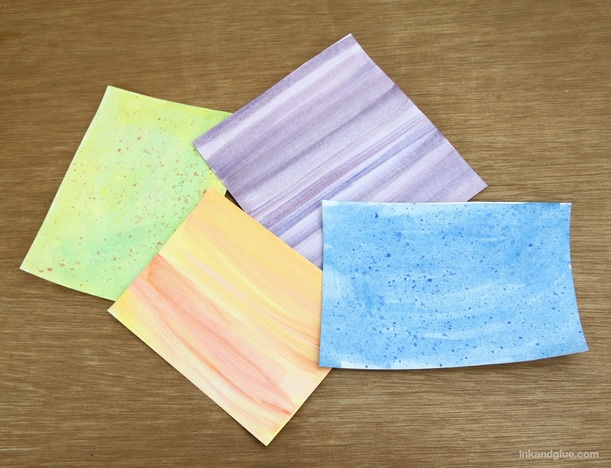 Here's how it turned out. Even though the dots' paper is lighter weight than the scrapbooking paper I used above, there's no warping or floppiness. Cool. 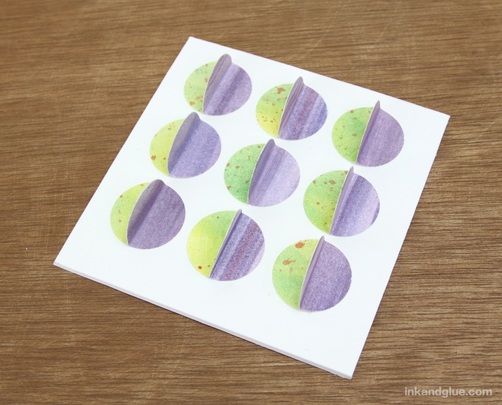
Have fun!
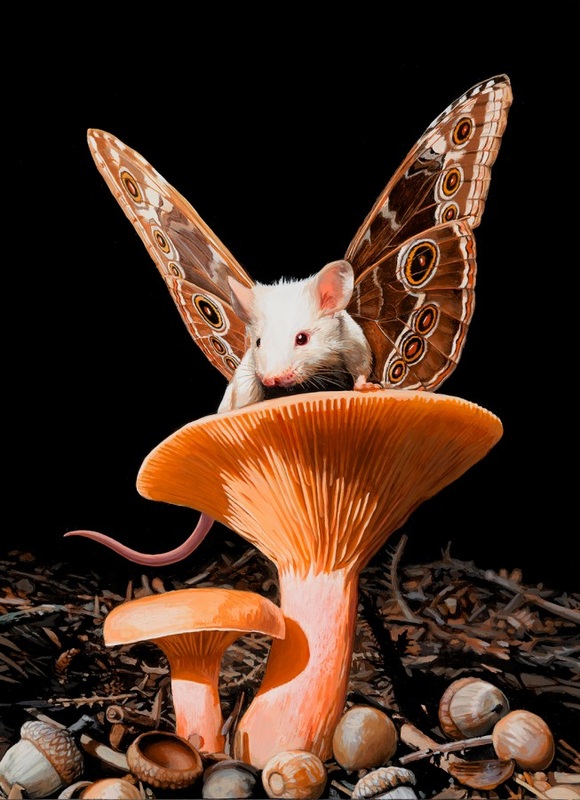
xo Have you met Lisa Ericson? She's an illustrator and an artist who does a variety of work, including a children's book with her sister. For this short post, however, I wanted to share her mouserfly paintings. Like many kids, I loved drawing hybrid animals (such as giraffe-fish and rhino-cats); Lisa takes the concept to a fine-arts level. 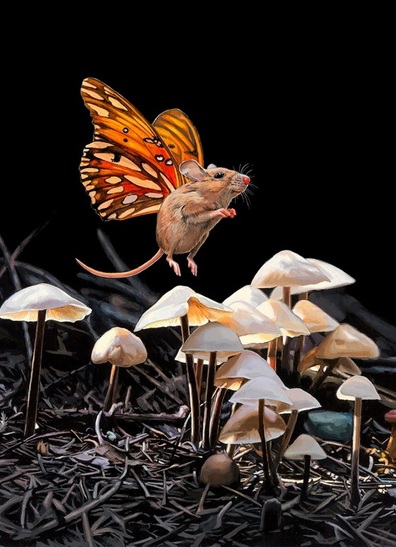 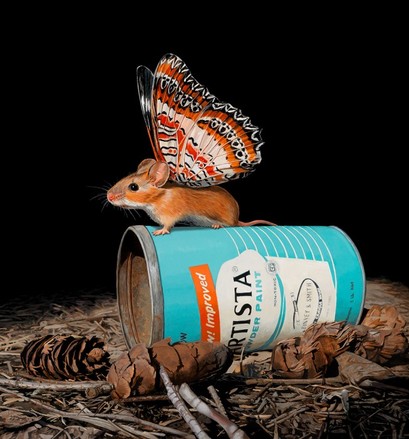
xo!
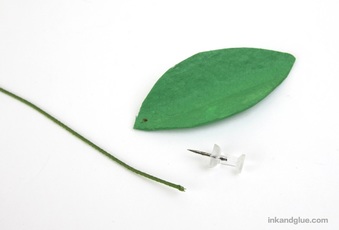
Spring is in the air, but it's not exactly in the garden yet. So, I took matters into my own hands and made my own colorful bouquet of flowers from an egg carton. 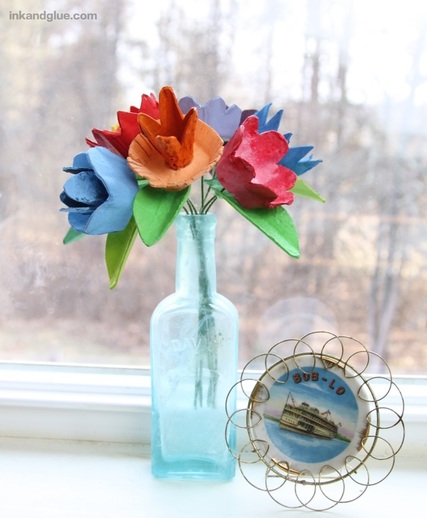 At first, I was going to glue the blossoms to something -- a piece of cardboard? A tin can? -- and have it be either a thing to hang on the wall, or a pseudo Easter basket. But in the end I went with a straight-forward, and more versatile, bouquet of stemmed flowers. Start with a cardboard egg carton. I used a combo of a craft knife and scissors to do all of my cutting. Cut leaves from the bent edges of the lid, as shown below. The flowers are obviously the cups of the carton; cut them out roughly from the carton, then shape the petals. Cut a few of the sticky-uppy posts for flower centers, too.
Play around with different shapes and configurations of petals. Here's what I ended up with. 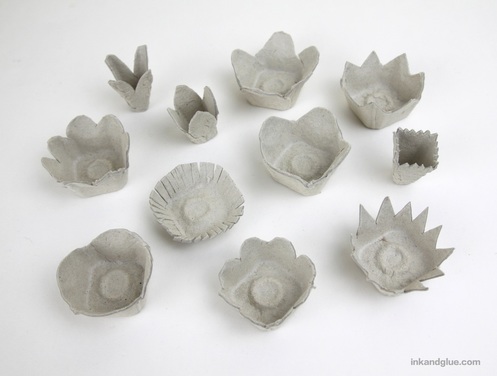 And now, you get to paint! Fun. I used acrylic, and for most colors I only needed one coat. 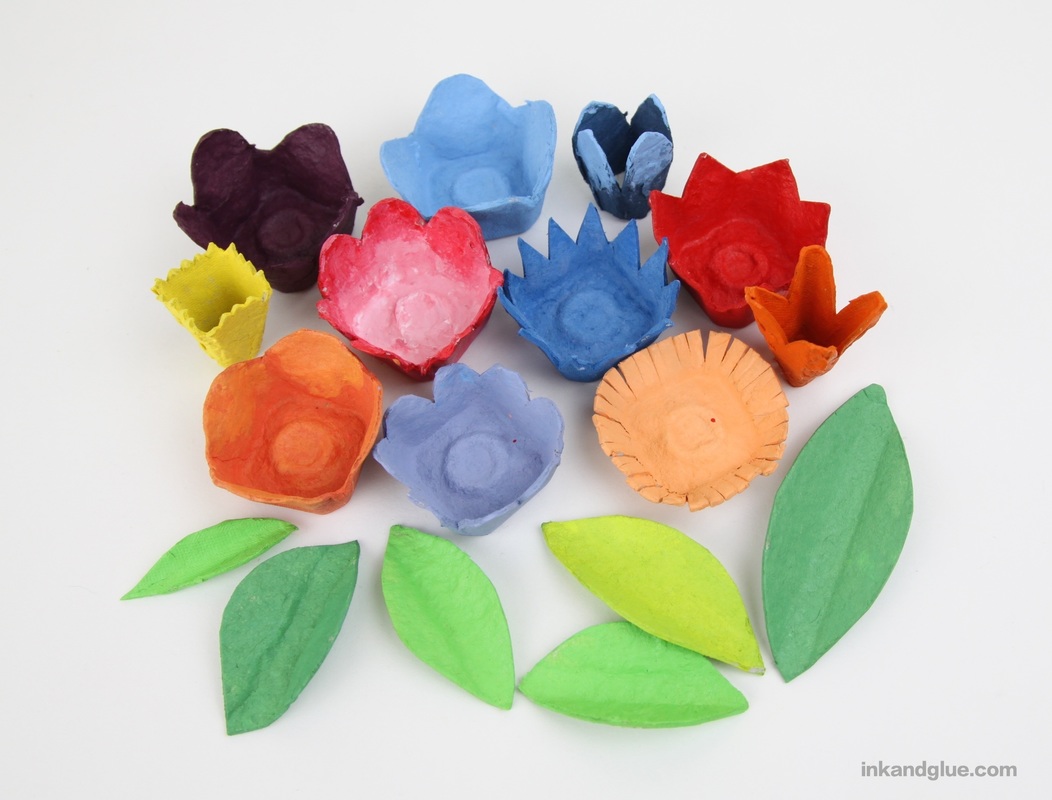
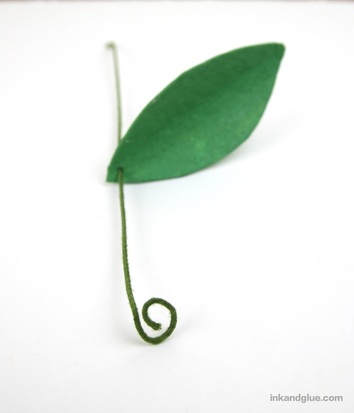
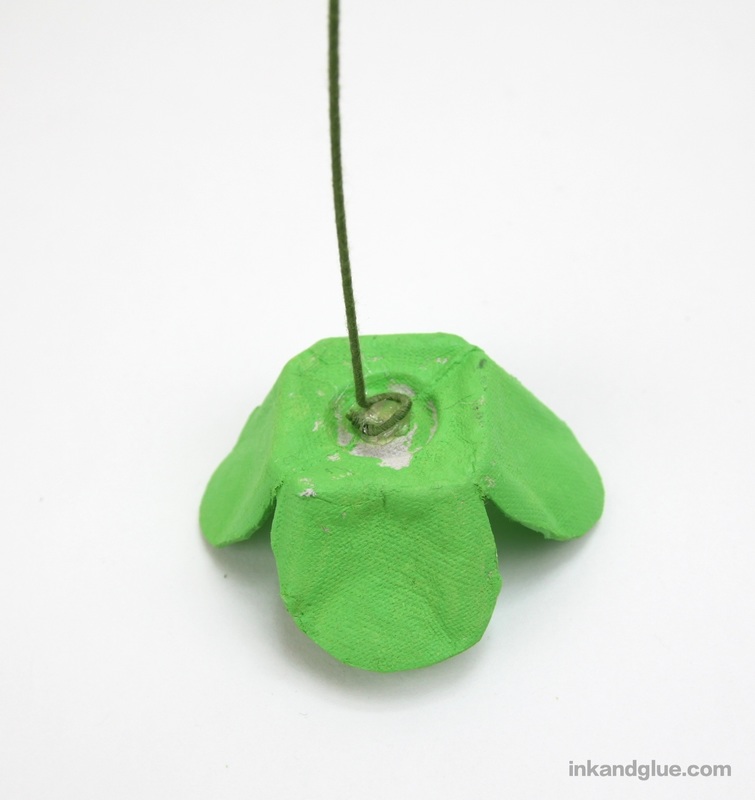
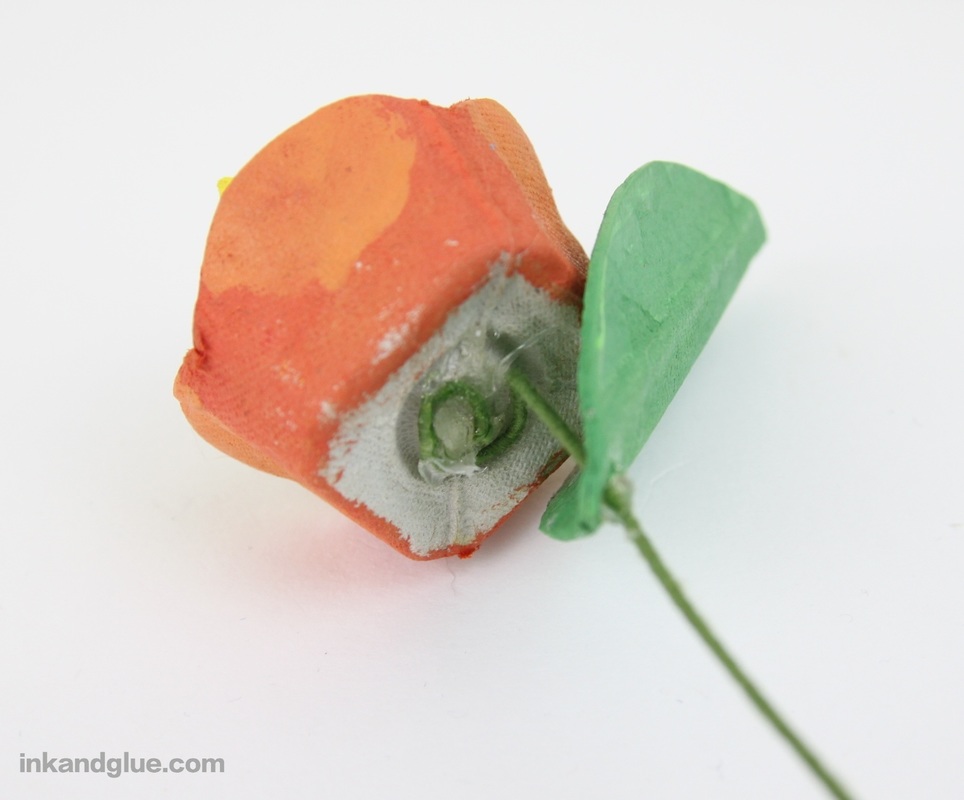
Now it's time to put everything together. I decided to try hot glue again, after a long absence. I have Problems with hot glue, problems that often end up with burned fingers and rubbery spiderweb strands all over the place. Not this time, I told myself. I am a pro, I affirmed. Smash-cut to me with two burn-blisters on my left hand, and stringy hot glue bits everywhere. Sigh. Yes, hot glue dries fast, but it just isn't as easy and safe as tacky glue. Anyway, here's how I made the flowers with hot glue. Substitute tacky for hot glue as you prefer; you'll just need to hold things longer (or lay them in place as the glue sets). First glue any inner blossom (made with an upright post from the carton) to its outer counterpart. Turn the flower over, dab a blob of glue on the middle of the flat part, and press the circle end of the wire into the glue, like you're an old-timey cowboy branding a horse. Hold as the glue sets. Slide a leaf onto the stem wire, and dab glue around and in the hole to secure it in place. All of this will be hidden so it's ok if it looks a bit messy.
Once all of your flowers are stemmed, and the glue is dry, gather them up into one hand to make a bouquet. Arrange them as you like, then wrap the stems together with tape. 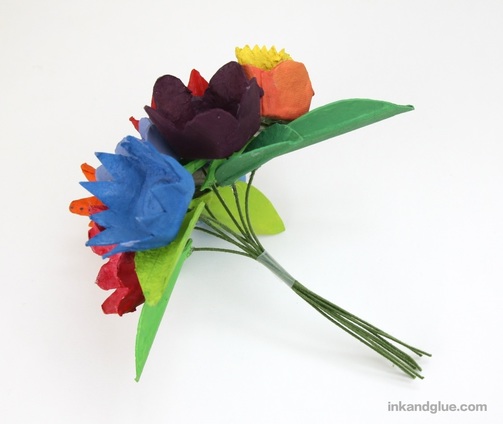 Put them in a vase of your choosing. I like using an old glass bottle for small bouquets. 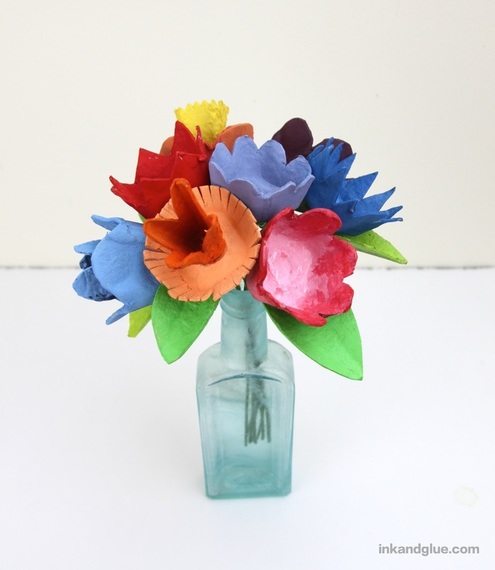 Turn this into a St. Patrick's Day project by adding a four-leafed clover. You could make all of the stems shamrocks instead of flowers, if you want to go all-in. 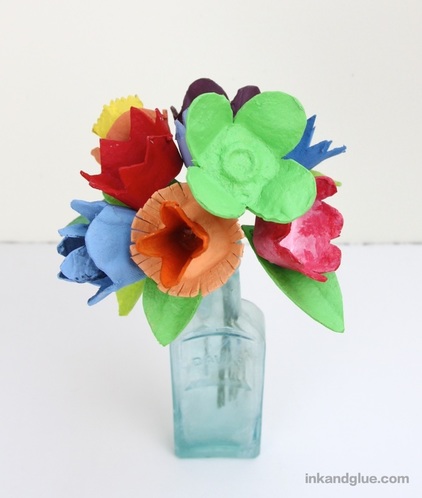 Happy almost-spring!
xo My local library had a big book sale this past weekend, and I scored big. One of my finds is a Golden Nature Guide about sea shells. 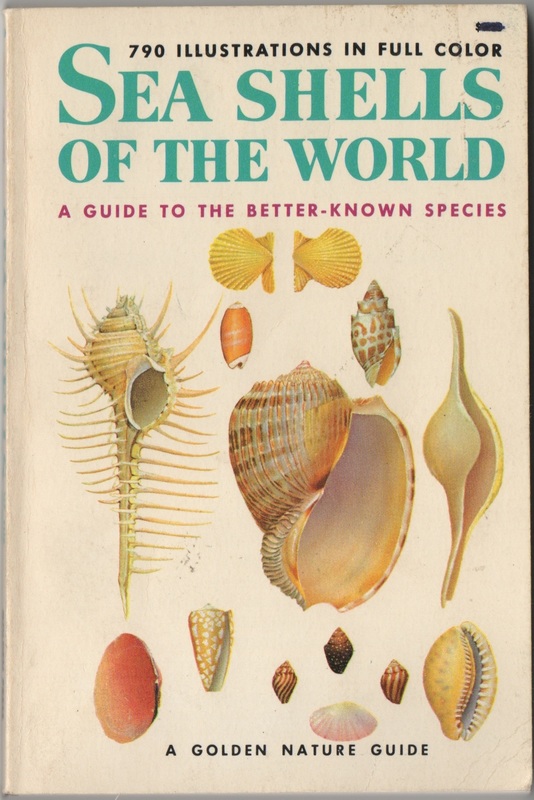 I see Golden Guides frequently in used book stores and tag sales. Usually, they're soft-cover and pocket-sized at 4 by 6 inches, though I have a 6 by 8 inch hardcover that says it has "Library Binding." I own GGs about Weather (1987), Zoology (1958), Stars (two editions, 1956 and 1975), and Botany (1970). All of the ones I've seen are illustrated in a very distinctive style. I consider it "mid-century" but I don't have the language to explain why. Having the entire book illustrated does give it a pleasingly cohesive feel. Though Golden Guides are still being printed today by St. Martin's Press with updated, photographic cover images, the insides appear to share the old illustration style. 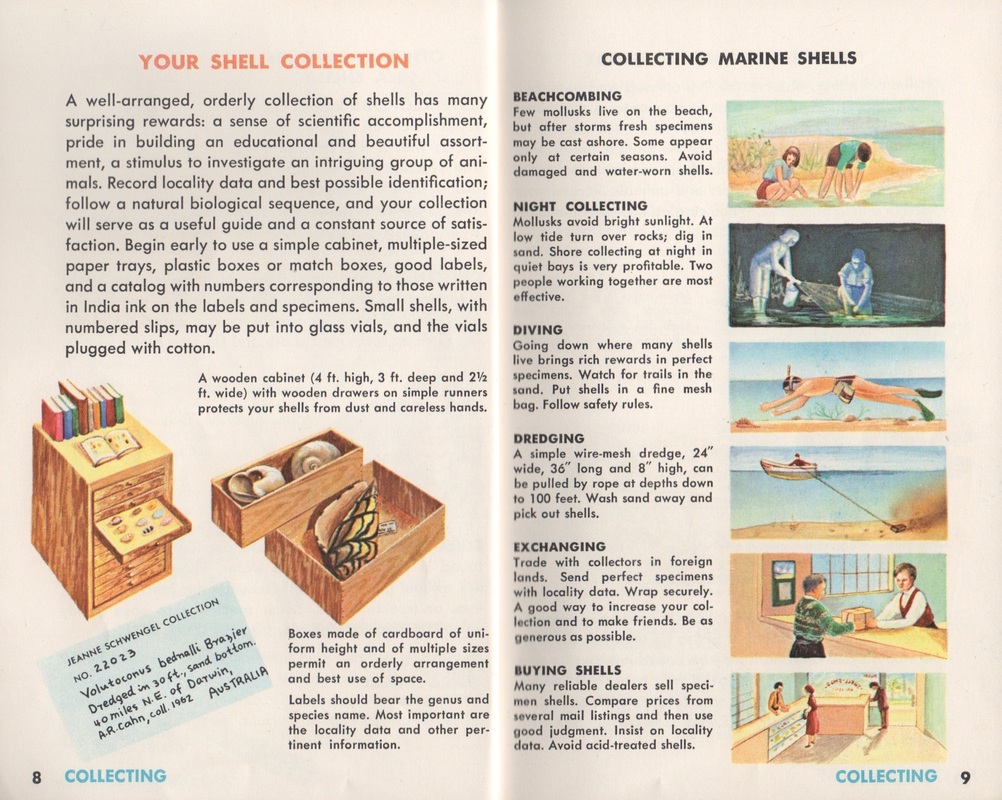 Any depictions of humans and their belongings will tend to date a book, but so will references to ordering things via "mail listings." Sea Shells of the World was printed in 1962, but there's a gift inscription ("To Christine from Linda") dated 11/2/68. I assume Linda was about to head to a tropical beach. 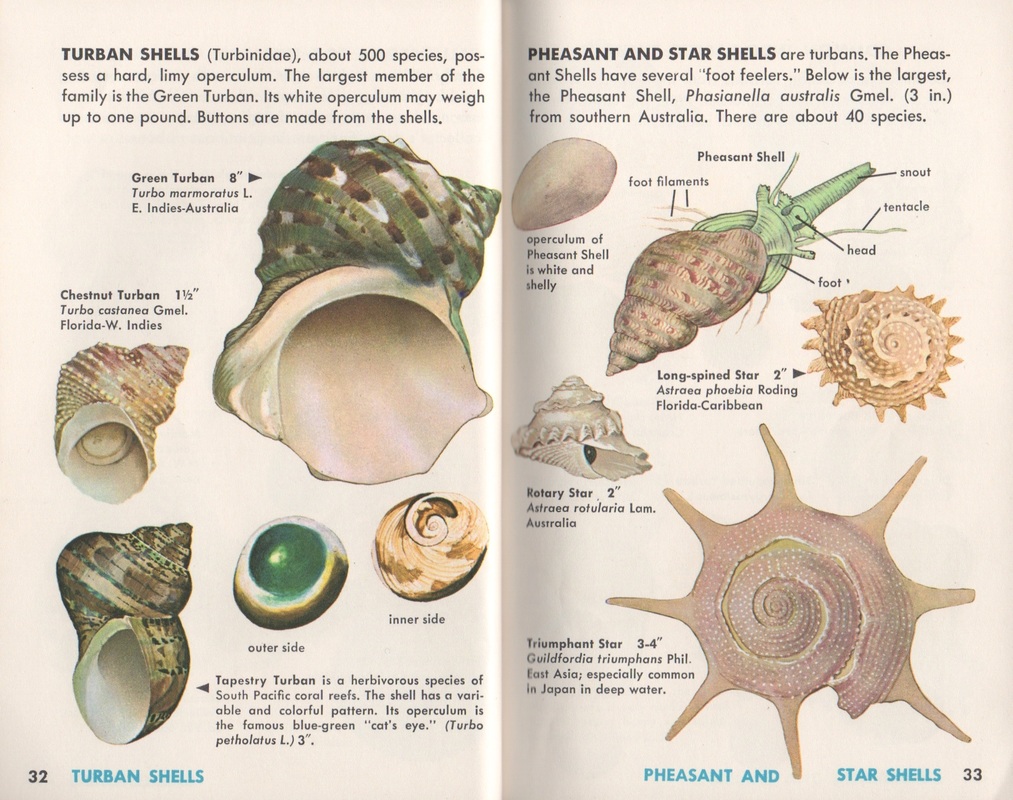 I used to cut up these books and use the images in collages, but I've grown too fond of them to do that now. I have actually used them as guides, to find the name of a moth, or a type of cloud. 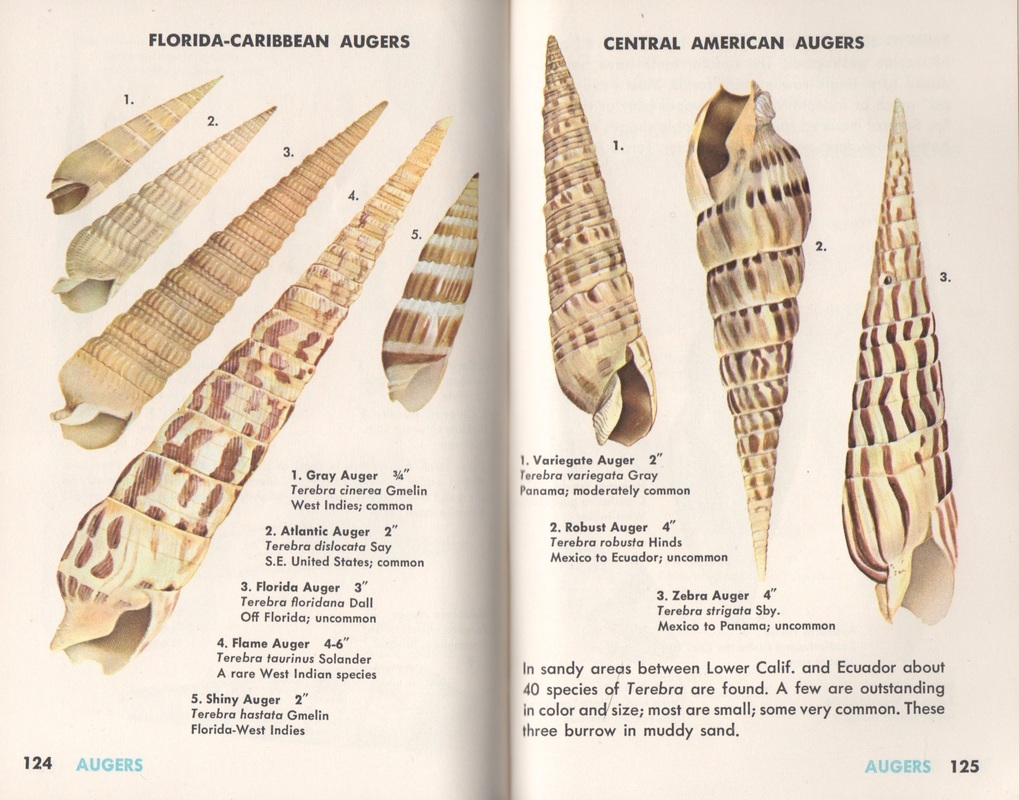 I'm not exactly a collector; I'm picky about which ones I'll buy. Most of all, they have to not smell musty, and they need to be cheap (they are seriously abundant, so no need to spend more than $2-3 on one). Sea Shells was in a "fill a bag for $3" haul. 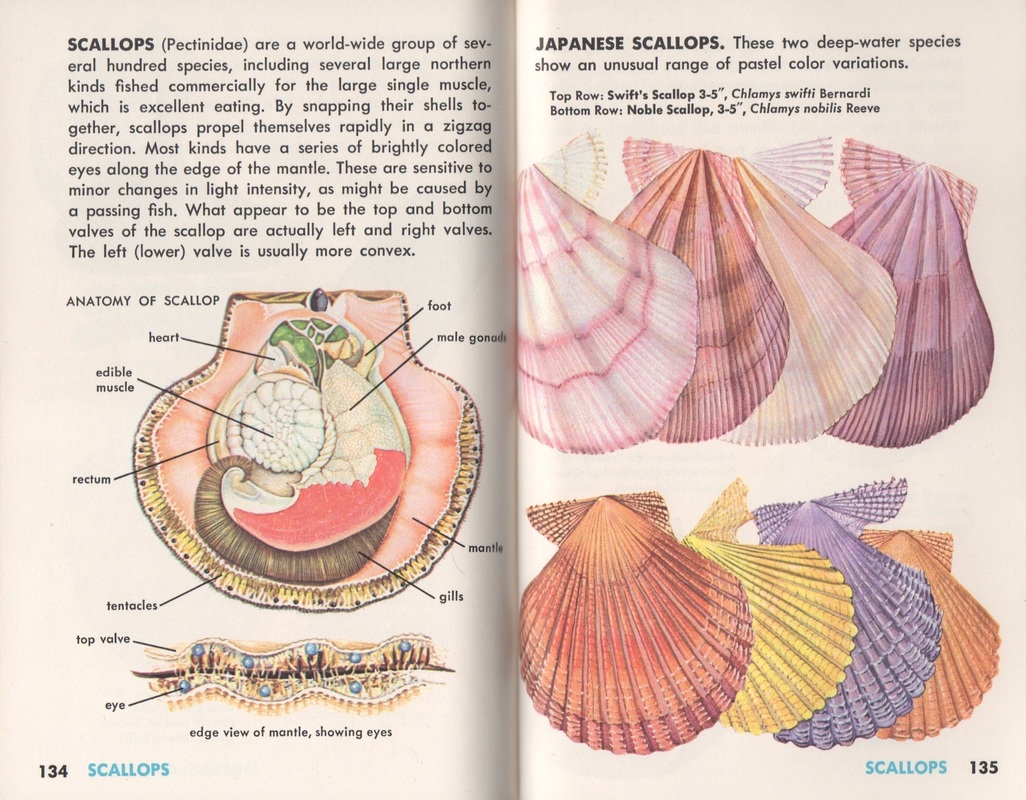 Have you come across a Golden Guide?
xo 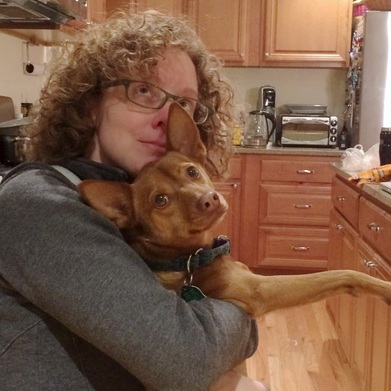 I wouldn't say Franklin likes being held, but he will sometimes tolerate it. I consider these forced snuggles as his payment to me for all of the food and shelter and health care I give him.
This watercolor art activity is a belated entry for the Tinkersketch prompt of 'polka dots.' 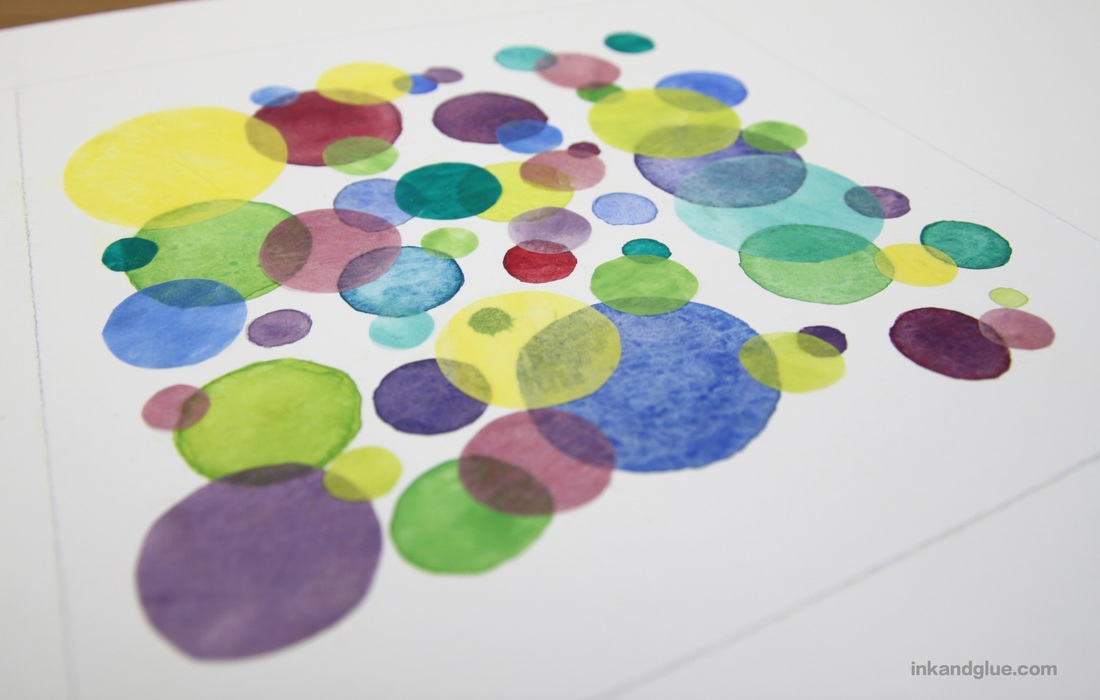 I started by making watercolor circles on a piece of watercolor paper. The largest dot is about an inch and a half wide.  I wanted to add overlapping, transparent dots to this base. I tried some experiments with tissue paper, but it just wasn't transparent enough. So, I painted some dots onto tracing paper. The watery paint warped the paper, making the pigment gather in the valleys of the dots. Kind of interesting, but not what I was looking for. So I added some larger swaths of paint, using a fairly dry brush. 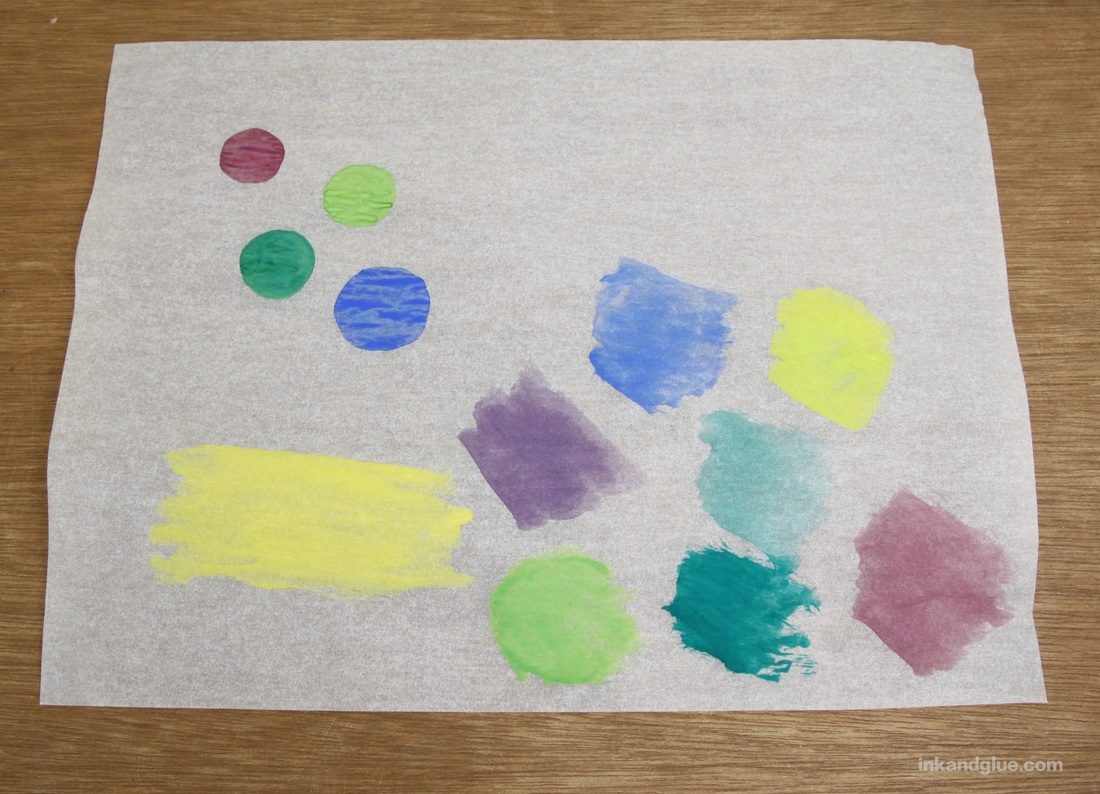 After the paper was dry, I cut out the dots. You can see how ridged they are, below; I ended up not using them at all. 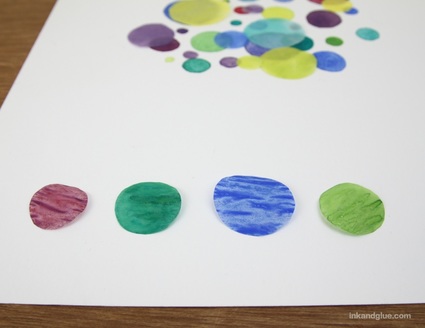 Then I cut circles from the flat fields of paint. Much better!  I arranged the dots on top of my dotted watercolor-paper background, and once they looked "right" to me, I picked up each one, brushed the back with matte Mod Podge, and smoothed it in place. Do not try to brush Mod Podge on top; since this is watercolor paint, you'll just smear color all over the place. 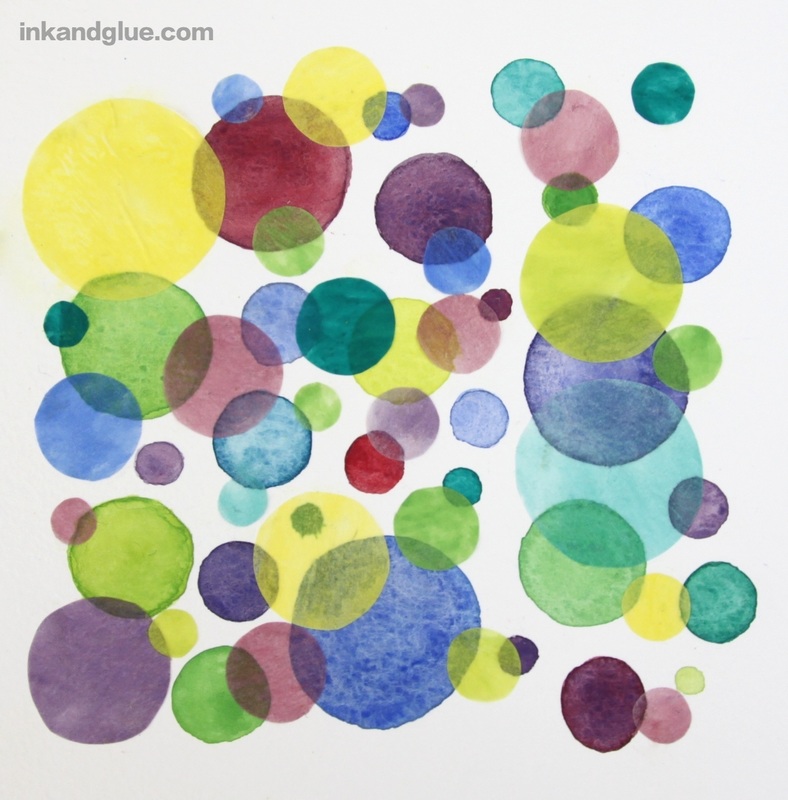 I like the results. I could have kept adding more layers, even. I had been trying to limit my color palette, but it seems to be hard for me to keep from straying to other sections of the color wheel!
xo I went looking for Easter-ish content in my vintage McCall's magazines, and found this collection of party table decorations. I rather like the pasta place cards and the bunnies made from actual eggs (duck and chicken, to get two different sizes). The six standing animals have bodies made of what they call "plastic zipper boxes," so, good luck finding those. Not a huge fan of the seashell-head couple on the top left, but I do like being reminded that once upon a time, any vacation or trip that required an airplane or ocean liner was rare enough that it was cause for celebration. 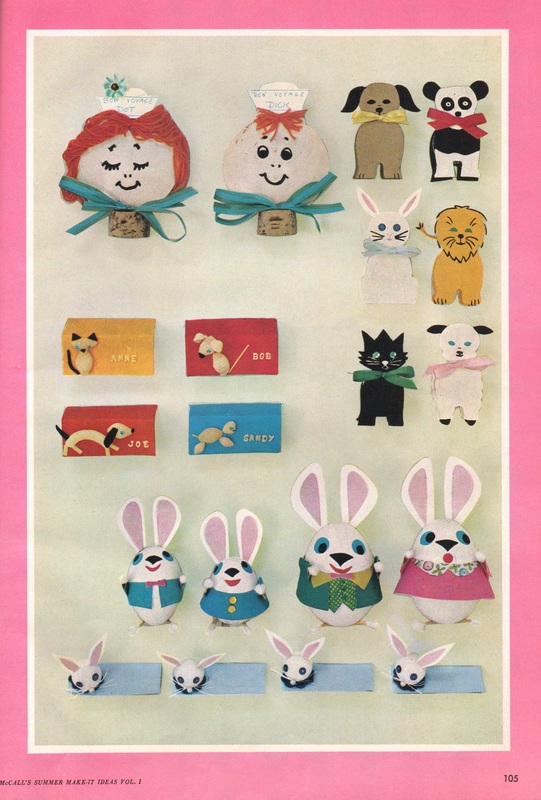 As always, for the truly committed, here are the directions. There's also a helpful (?) side-view of a plastic zipper box cat. 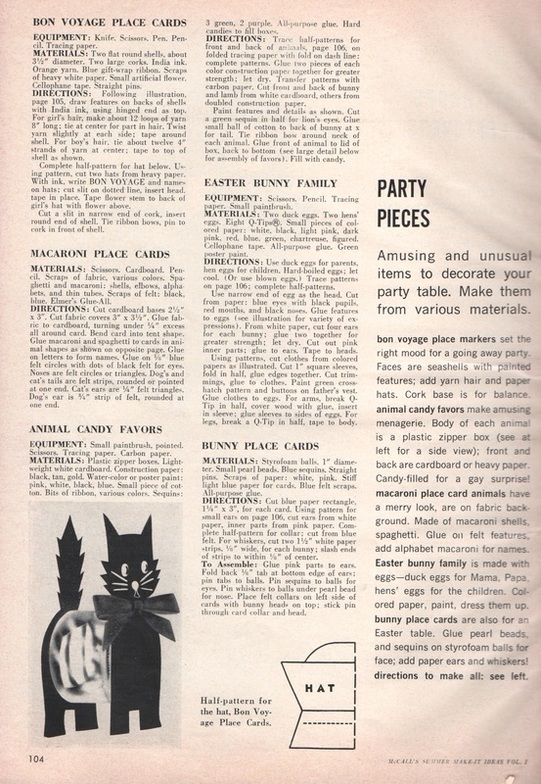 xo!
|
Categories
All
Archives
March 2017
AuthorI'm Debbie Way, an artist and writer who enjoys making things. |


 RSS Feed